
Trophy Mountain & Wells Gray Park
For information about the history and natural environment of Wells Gray Park (including detailed hiking descriptions), the following book is highly recommended: Exploring Wells Gray Park, 7th Edition, 2023 by Roland Neave.
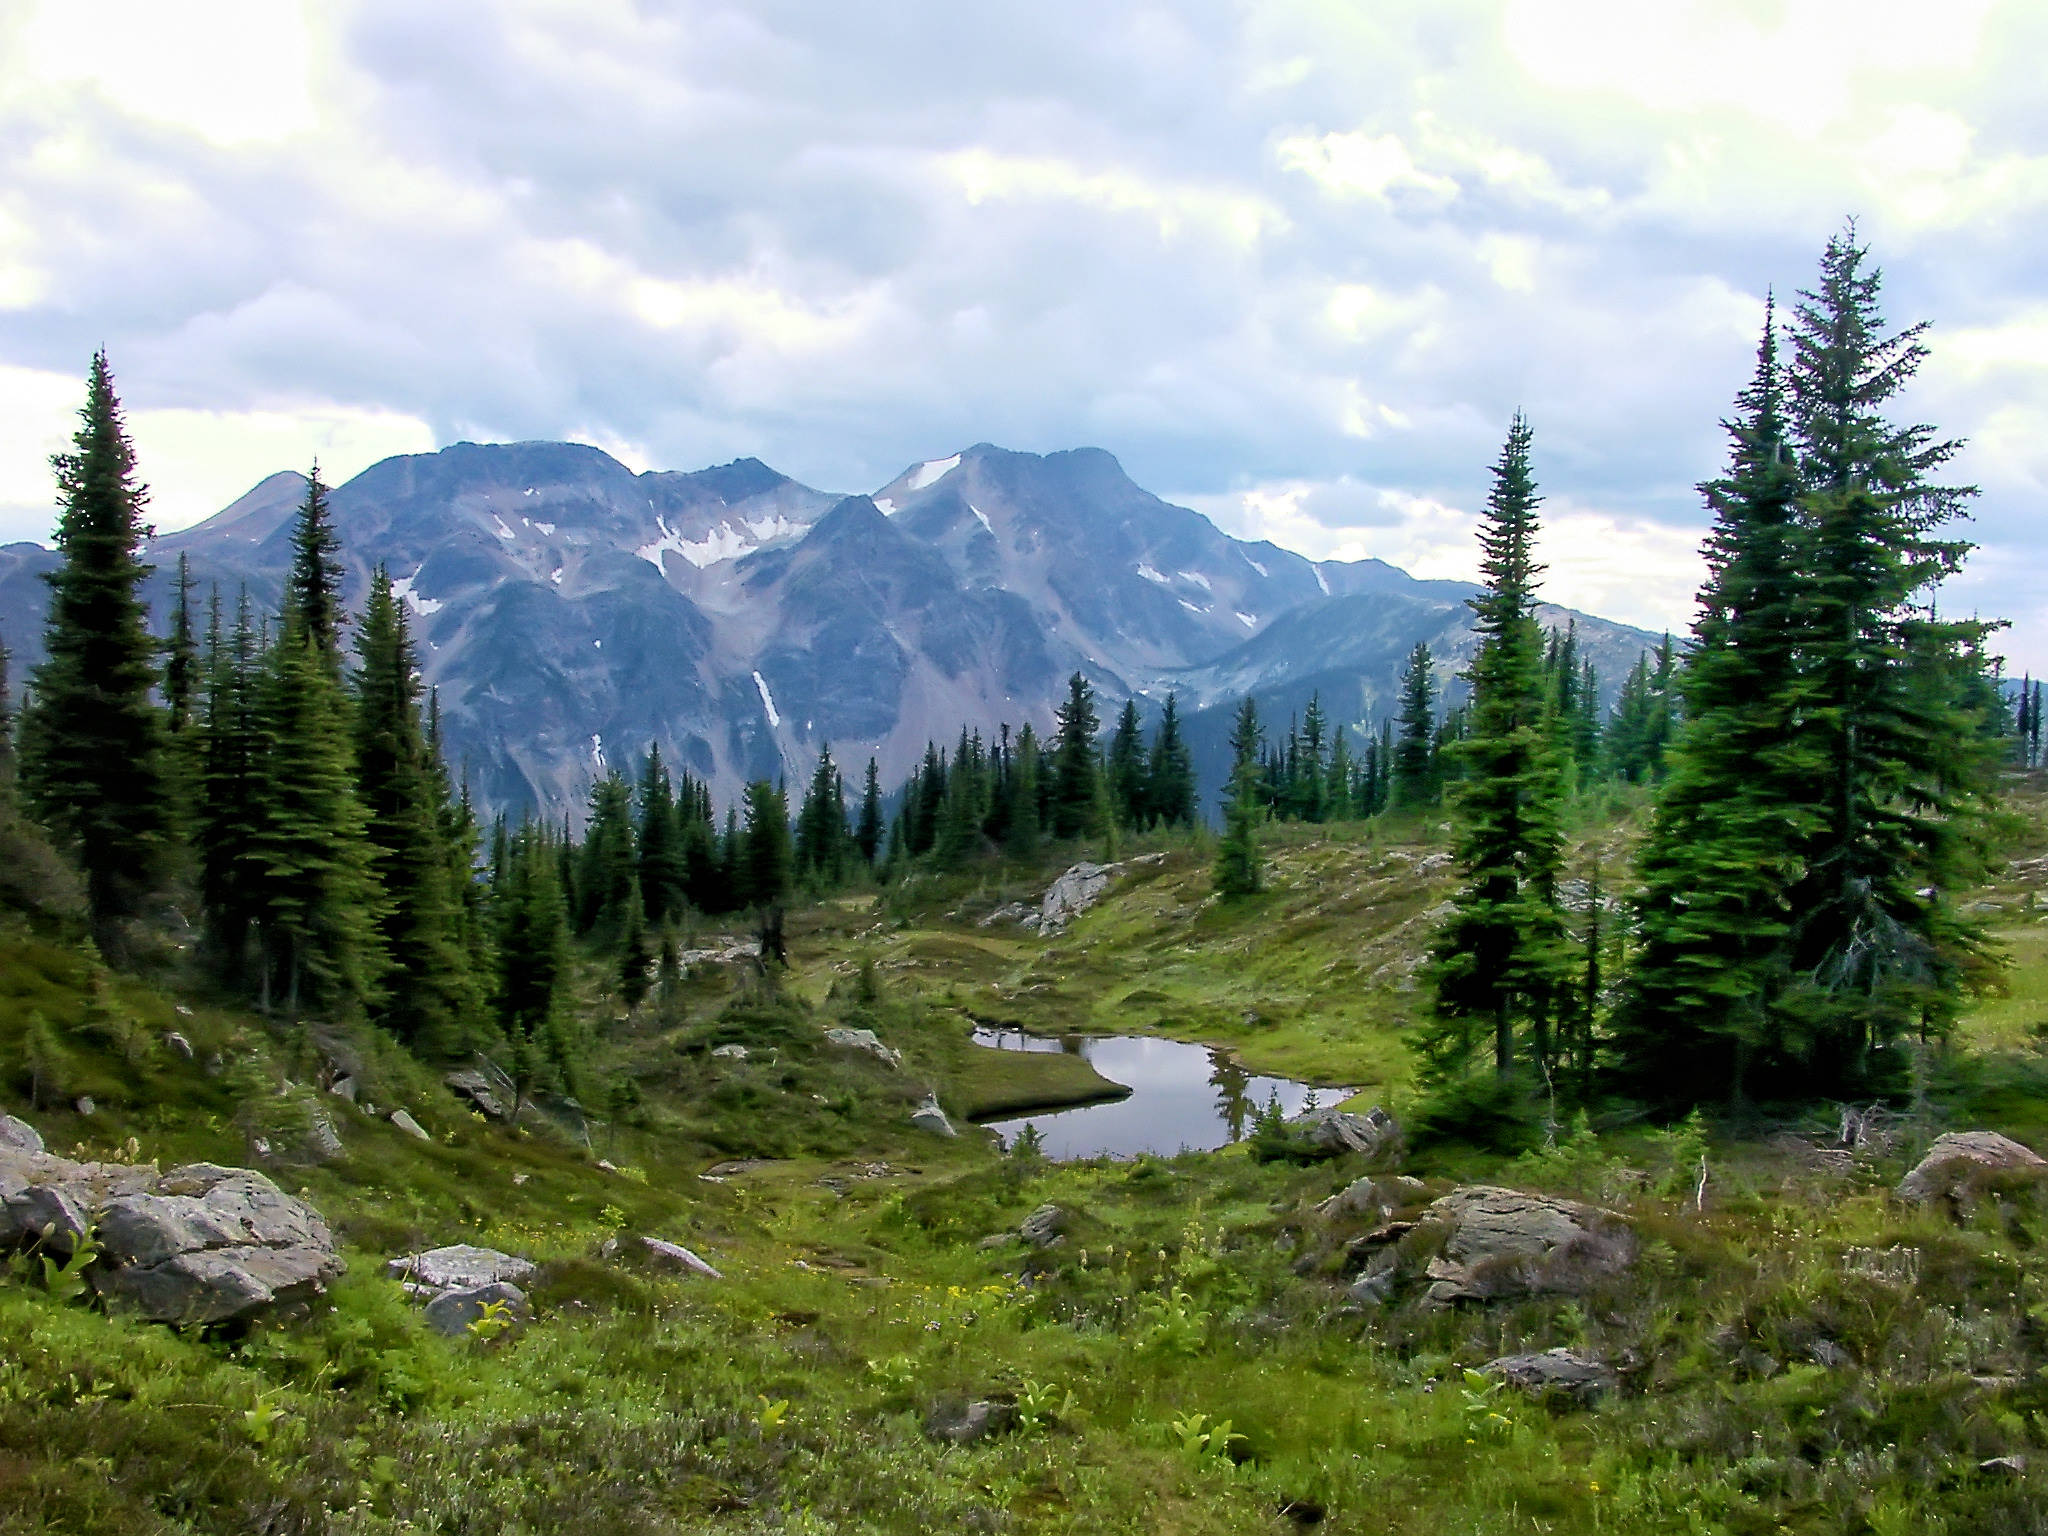
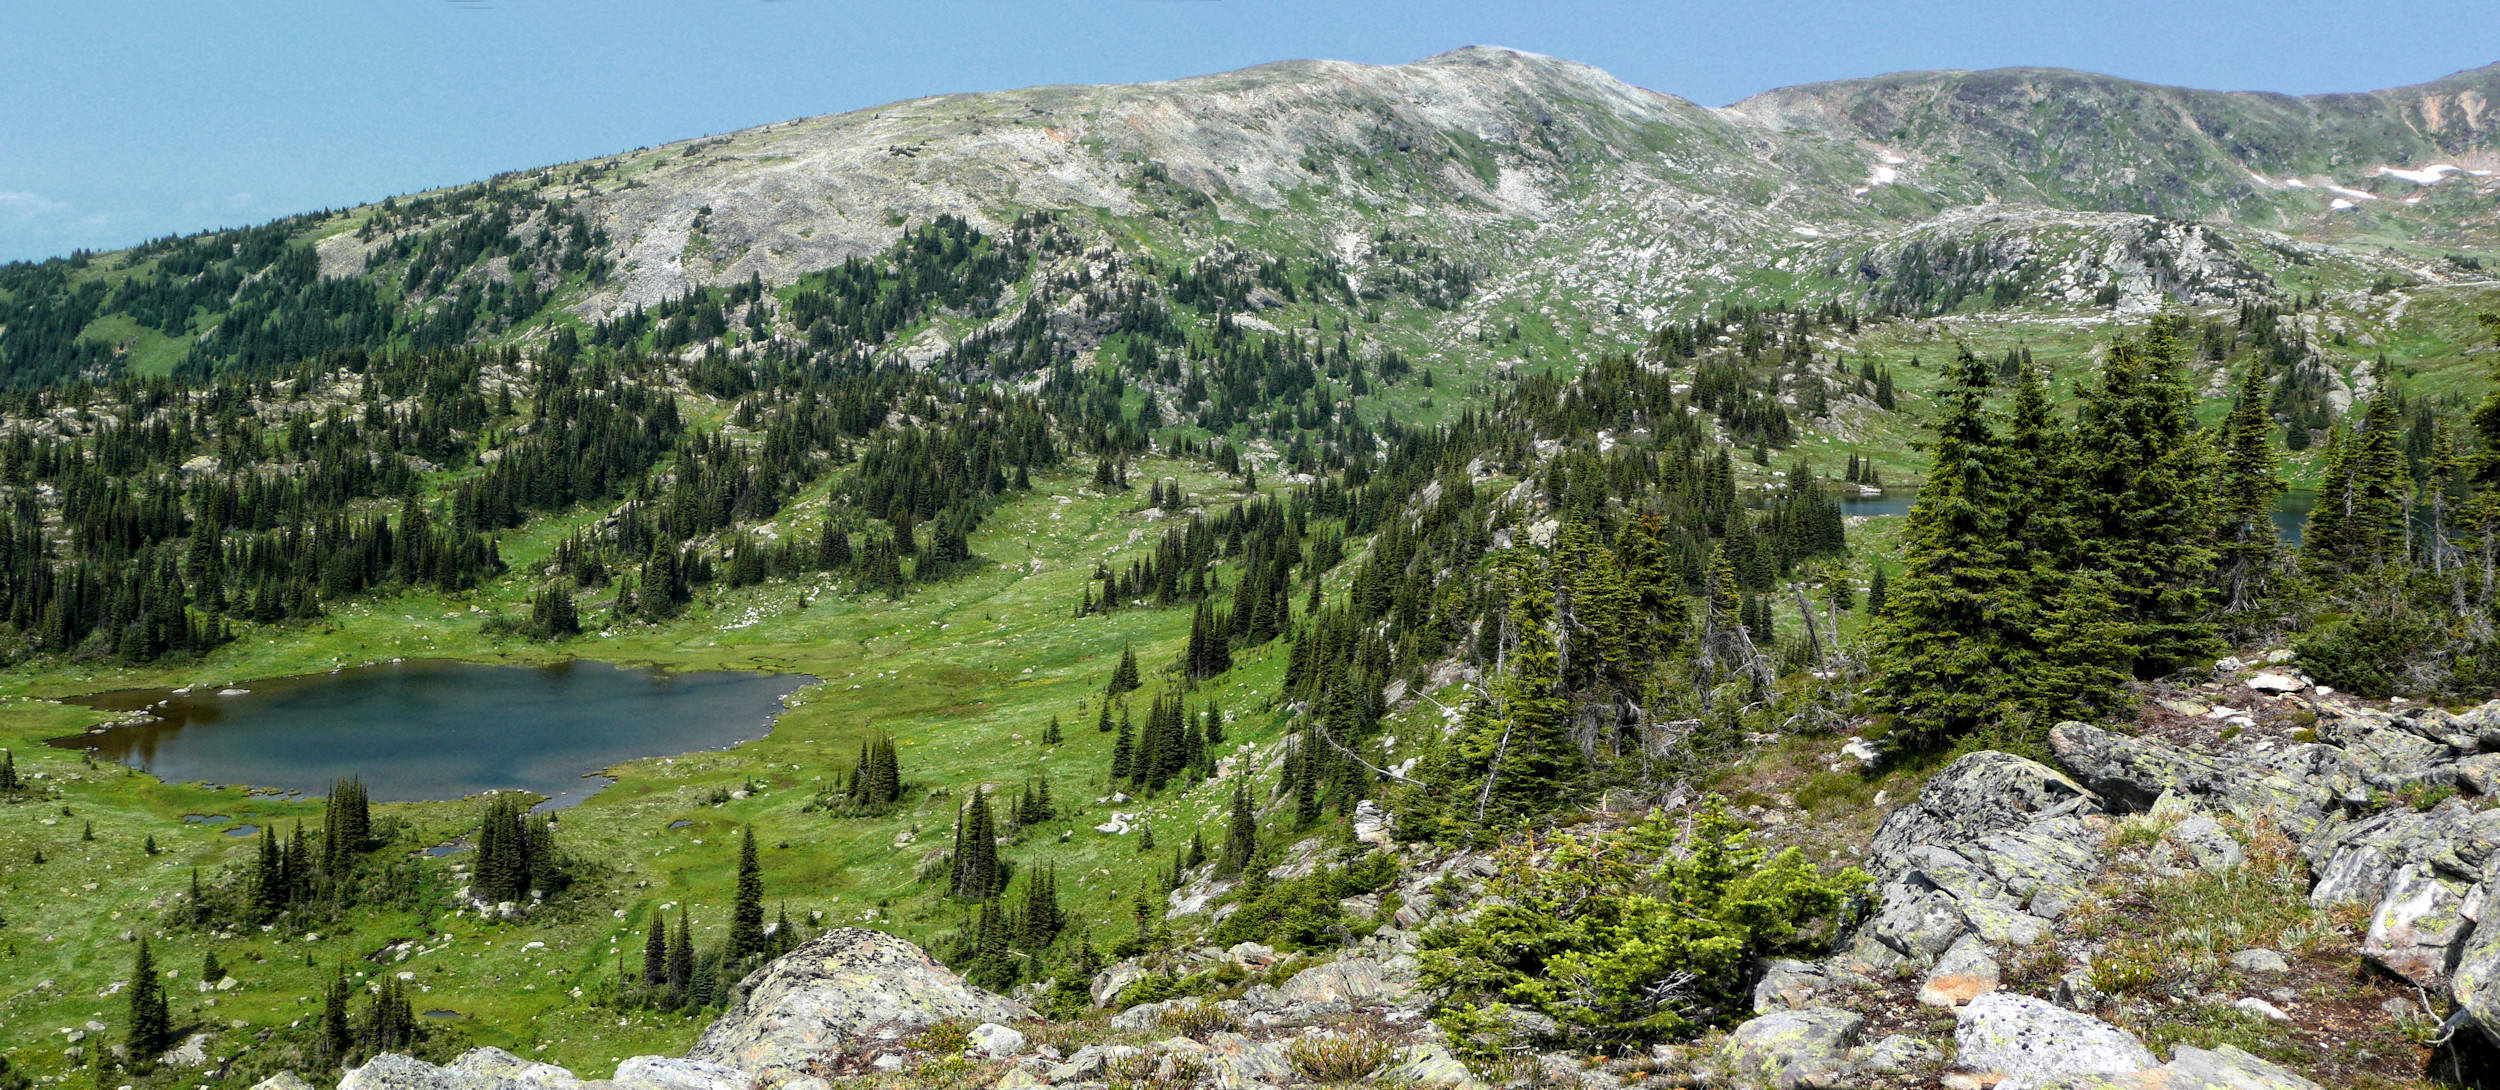
From August 23 to 27, 2009 I am booked on a five day hut-to-hut-hiking tour in the Trophy Mountain Range. Trophy Mountain is located in the southern part of Wells Gray Provincial Park. It consists of a group of nine peaks which are often referred to as "The Trophies". For the highest peak at 2577 meters, some mountaineering experience is recommended. The other peaks and ridges are easier to climb, but some of them are too far away for a day hike. Our group will stay in comfortable mountain cabins and carry just a few necessities in our backpacks. From the huts, we will be able to reach the remoter peaks and the rugged valleys with their picturesque mountain lakes and colorful wildflower meadows between them.
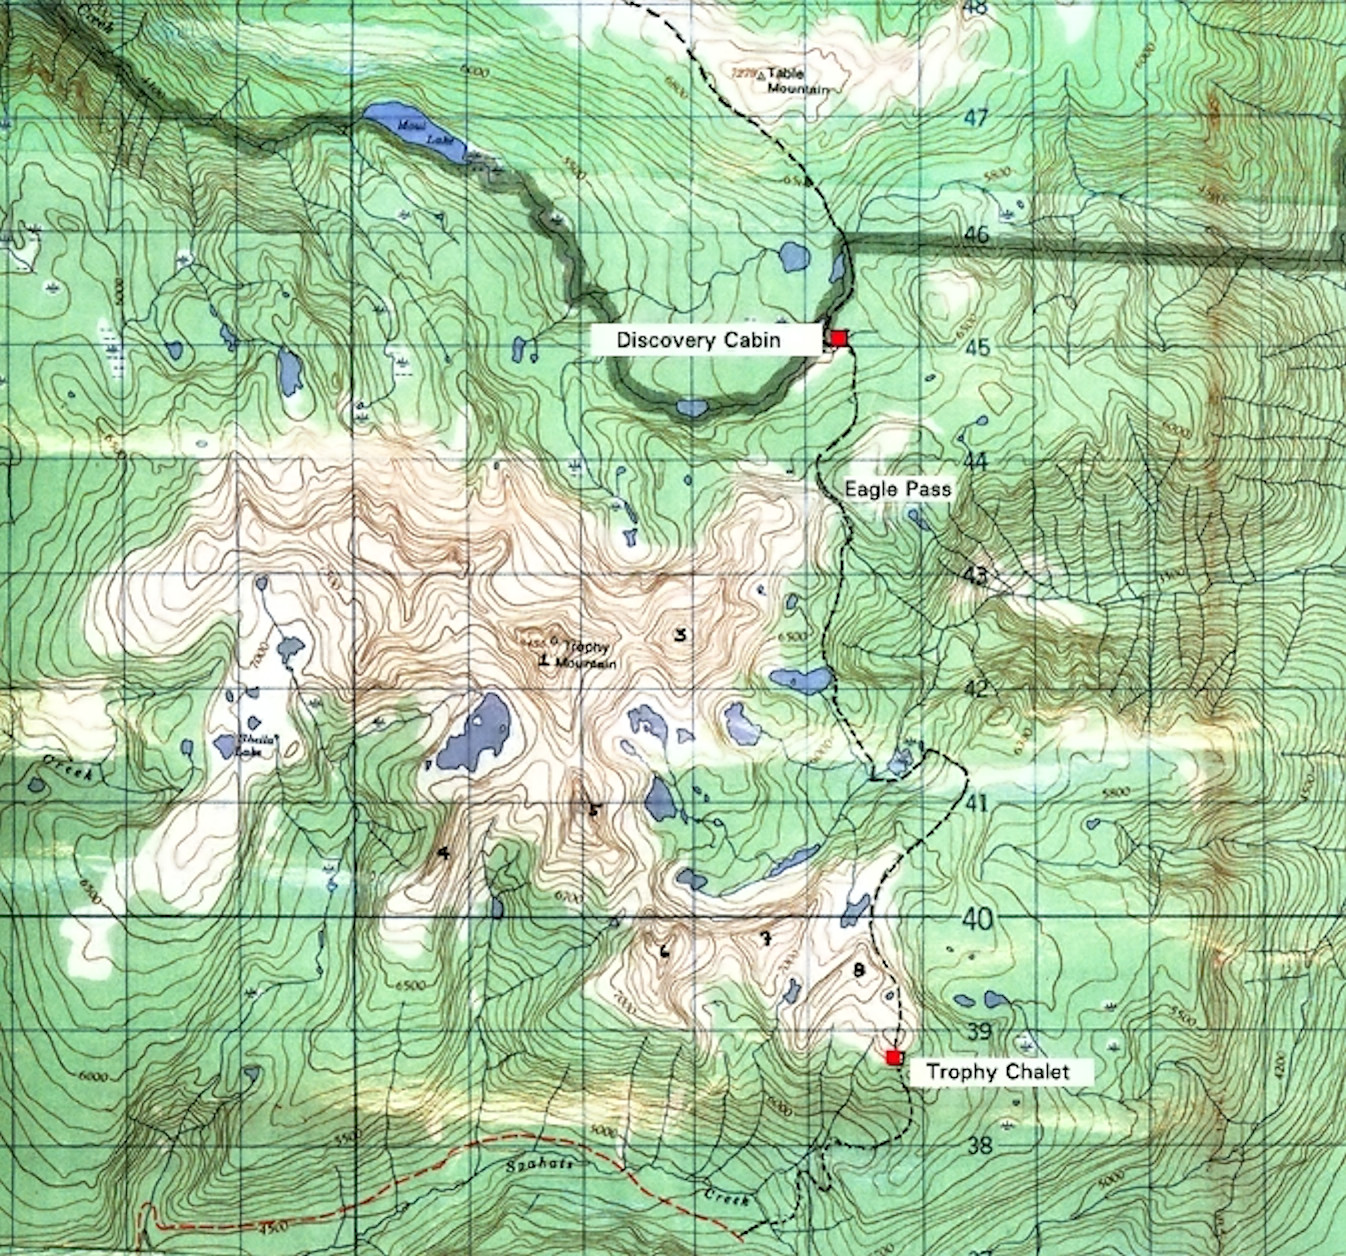
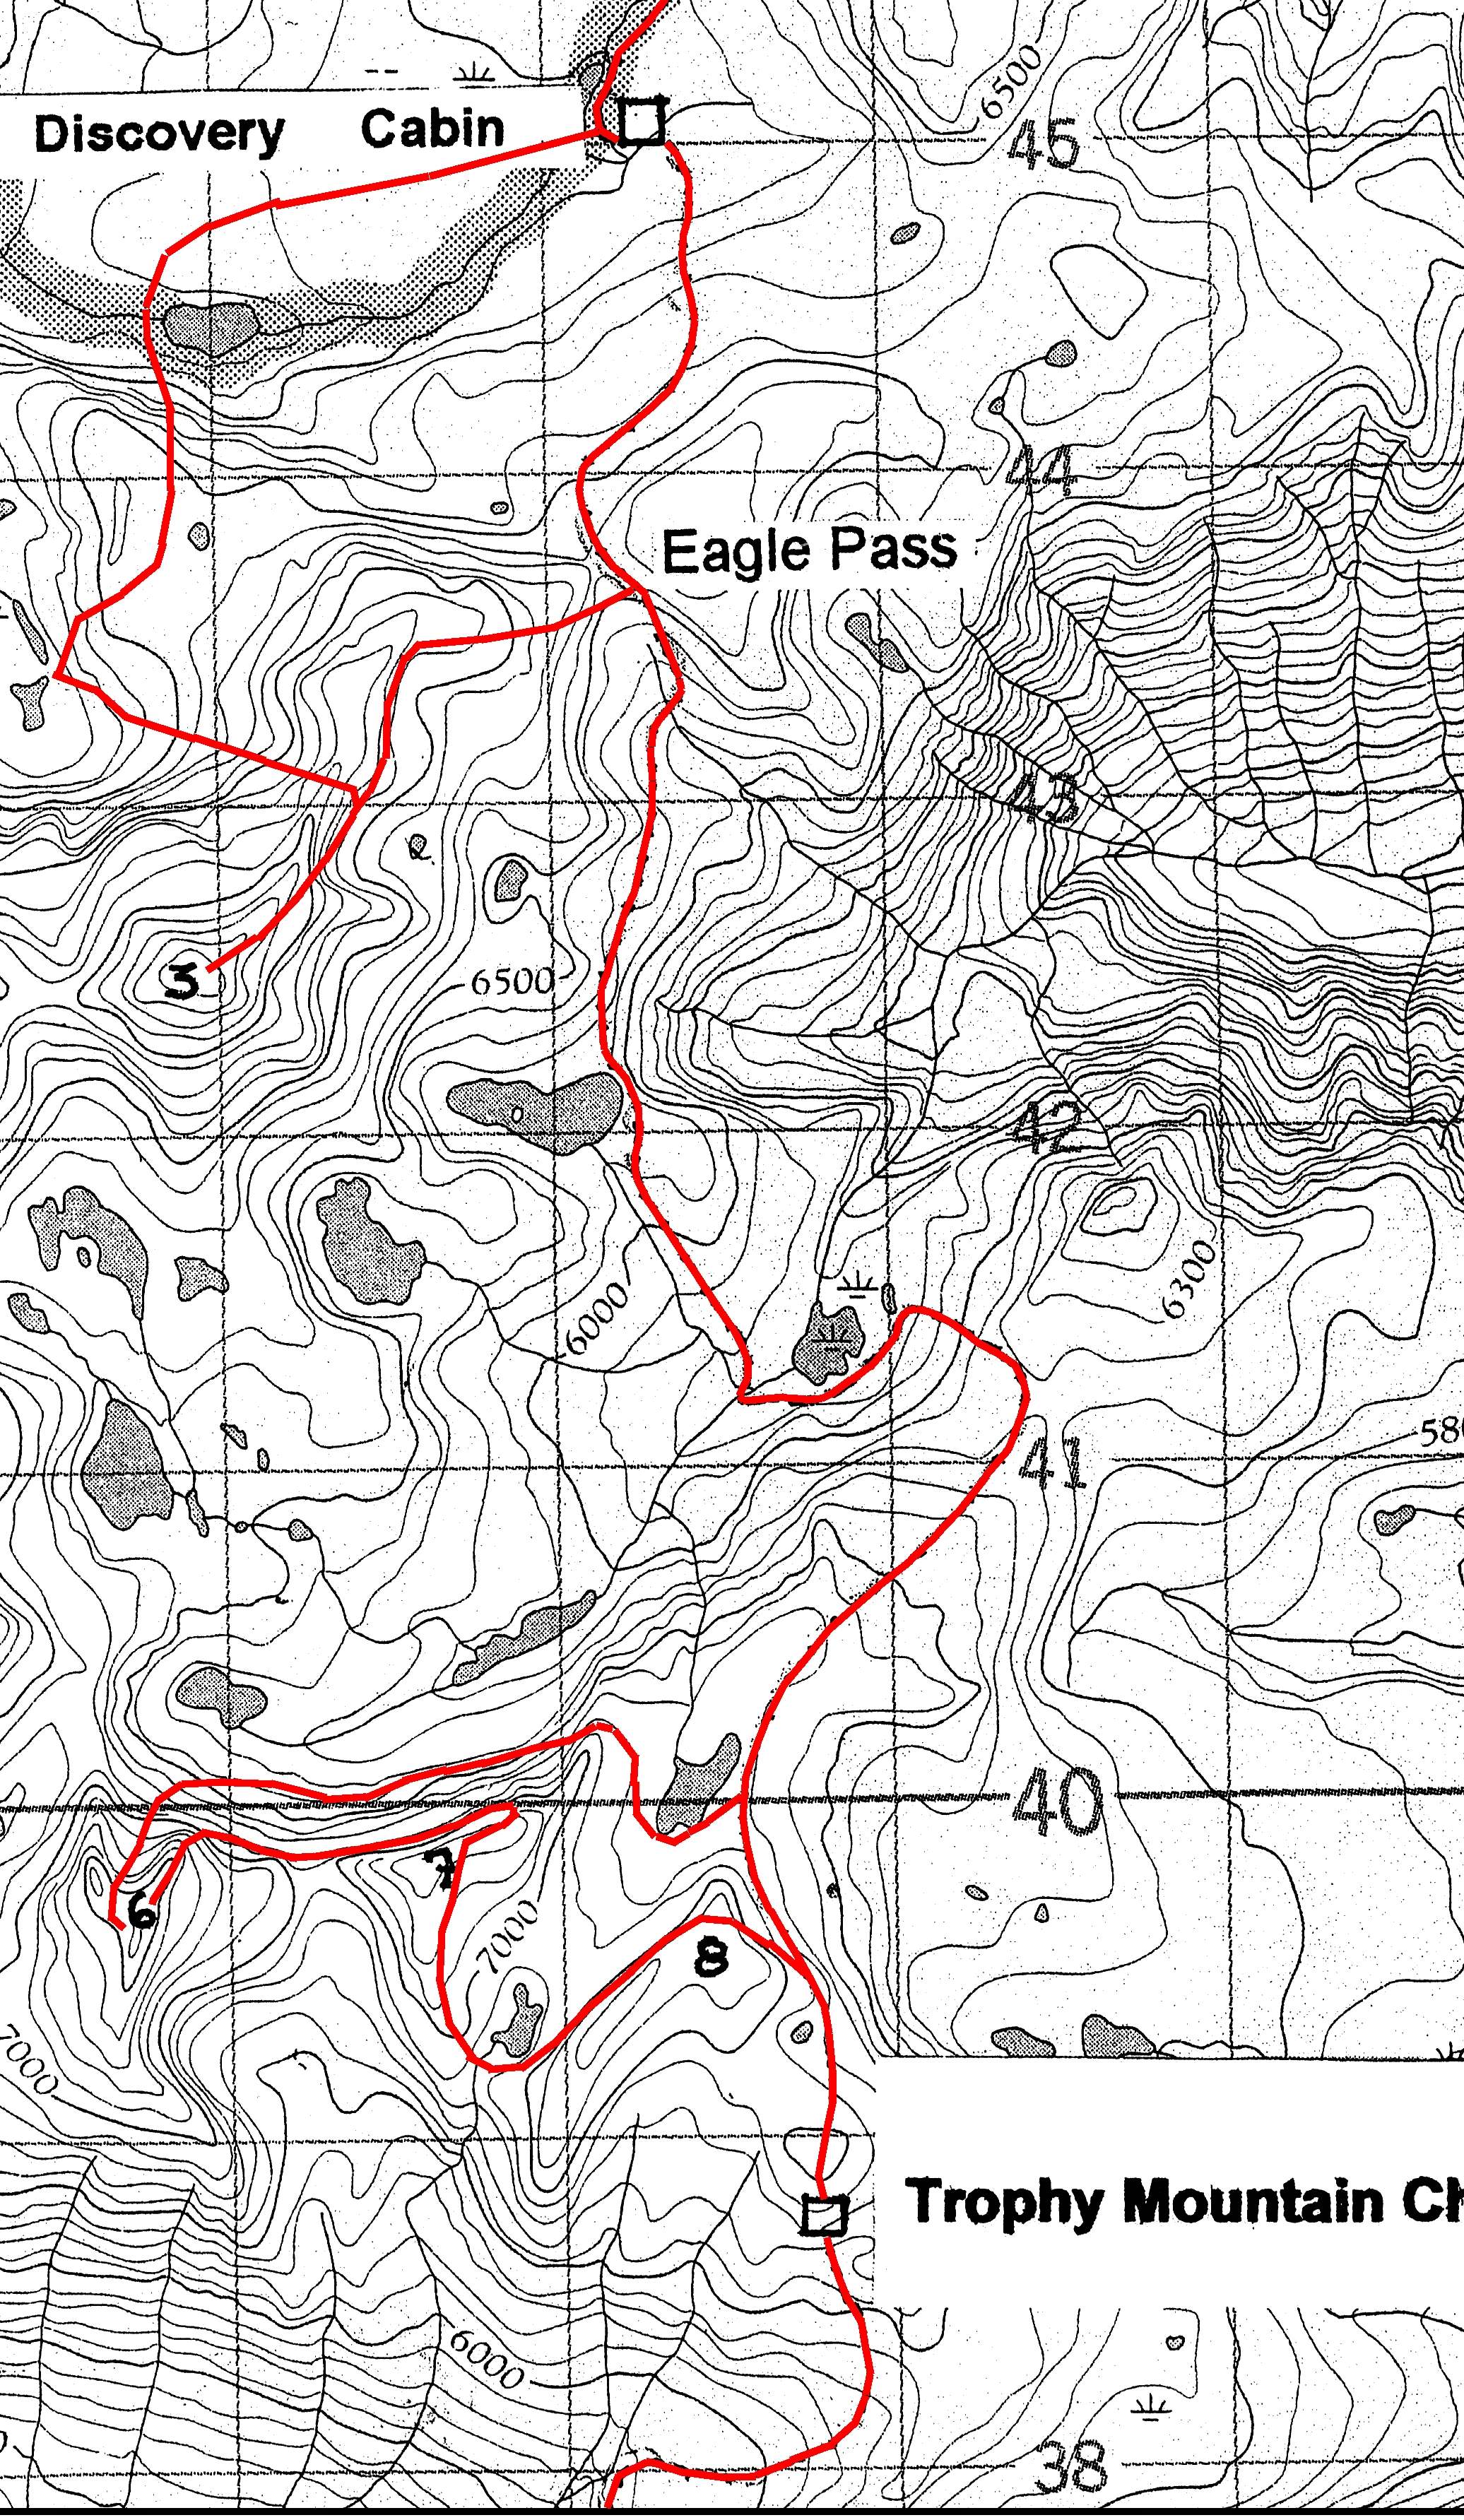
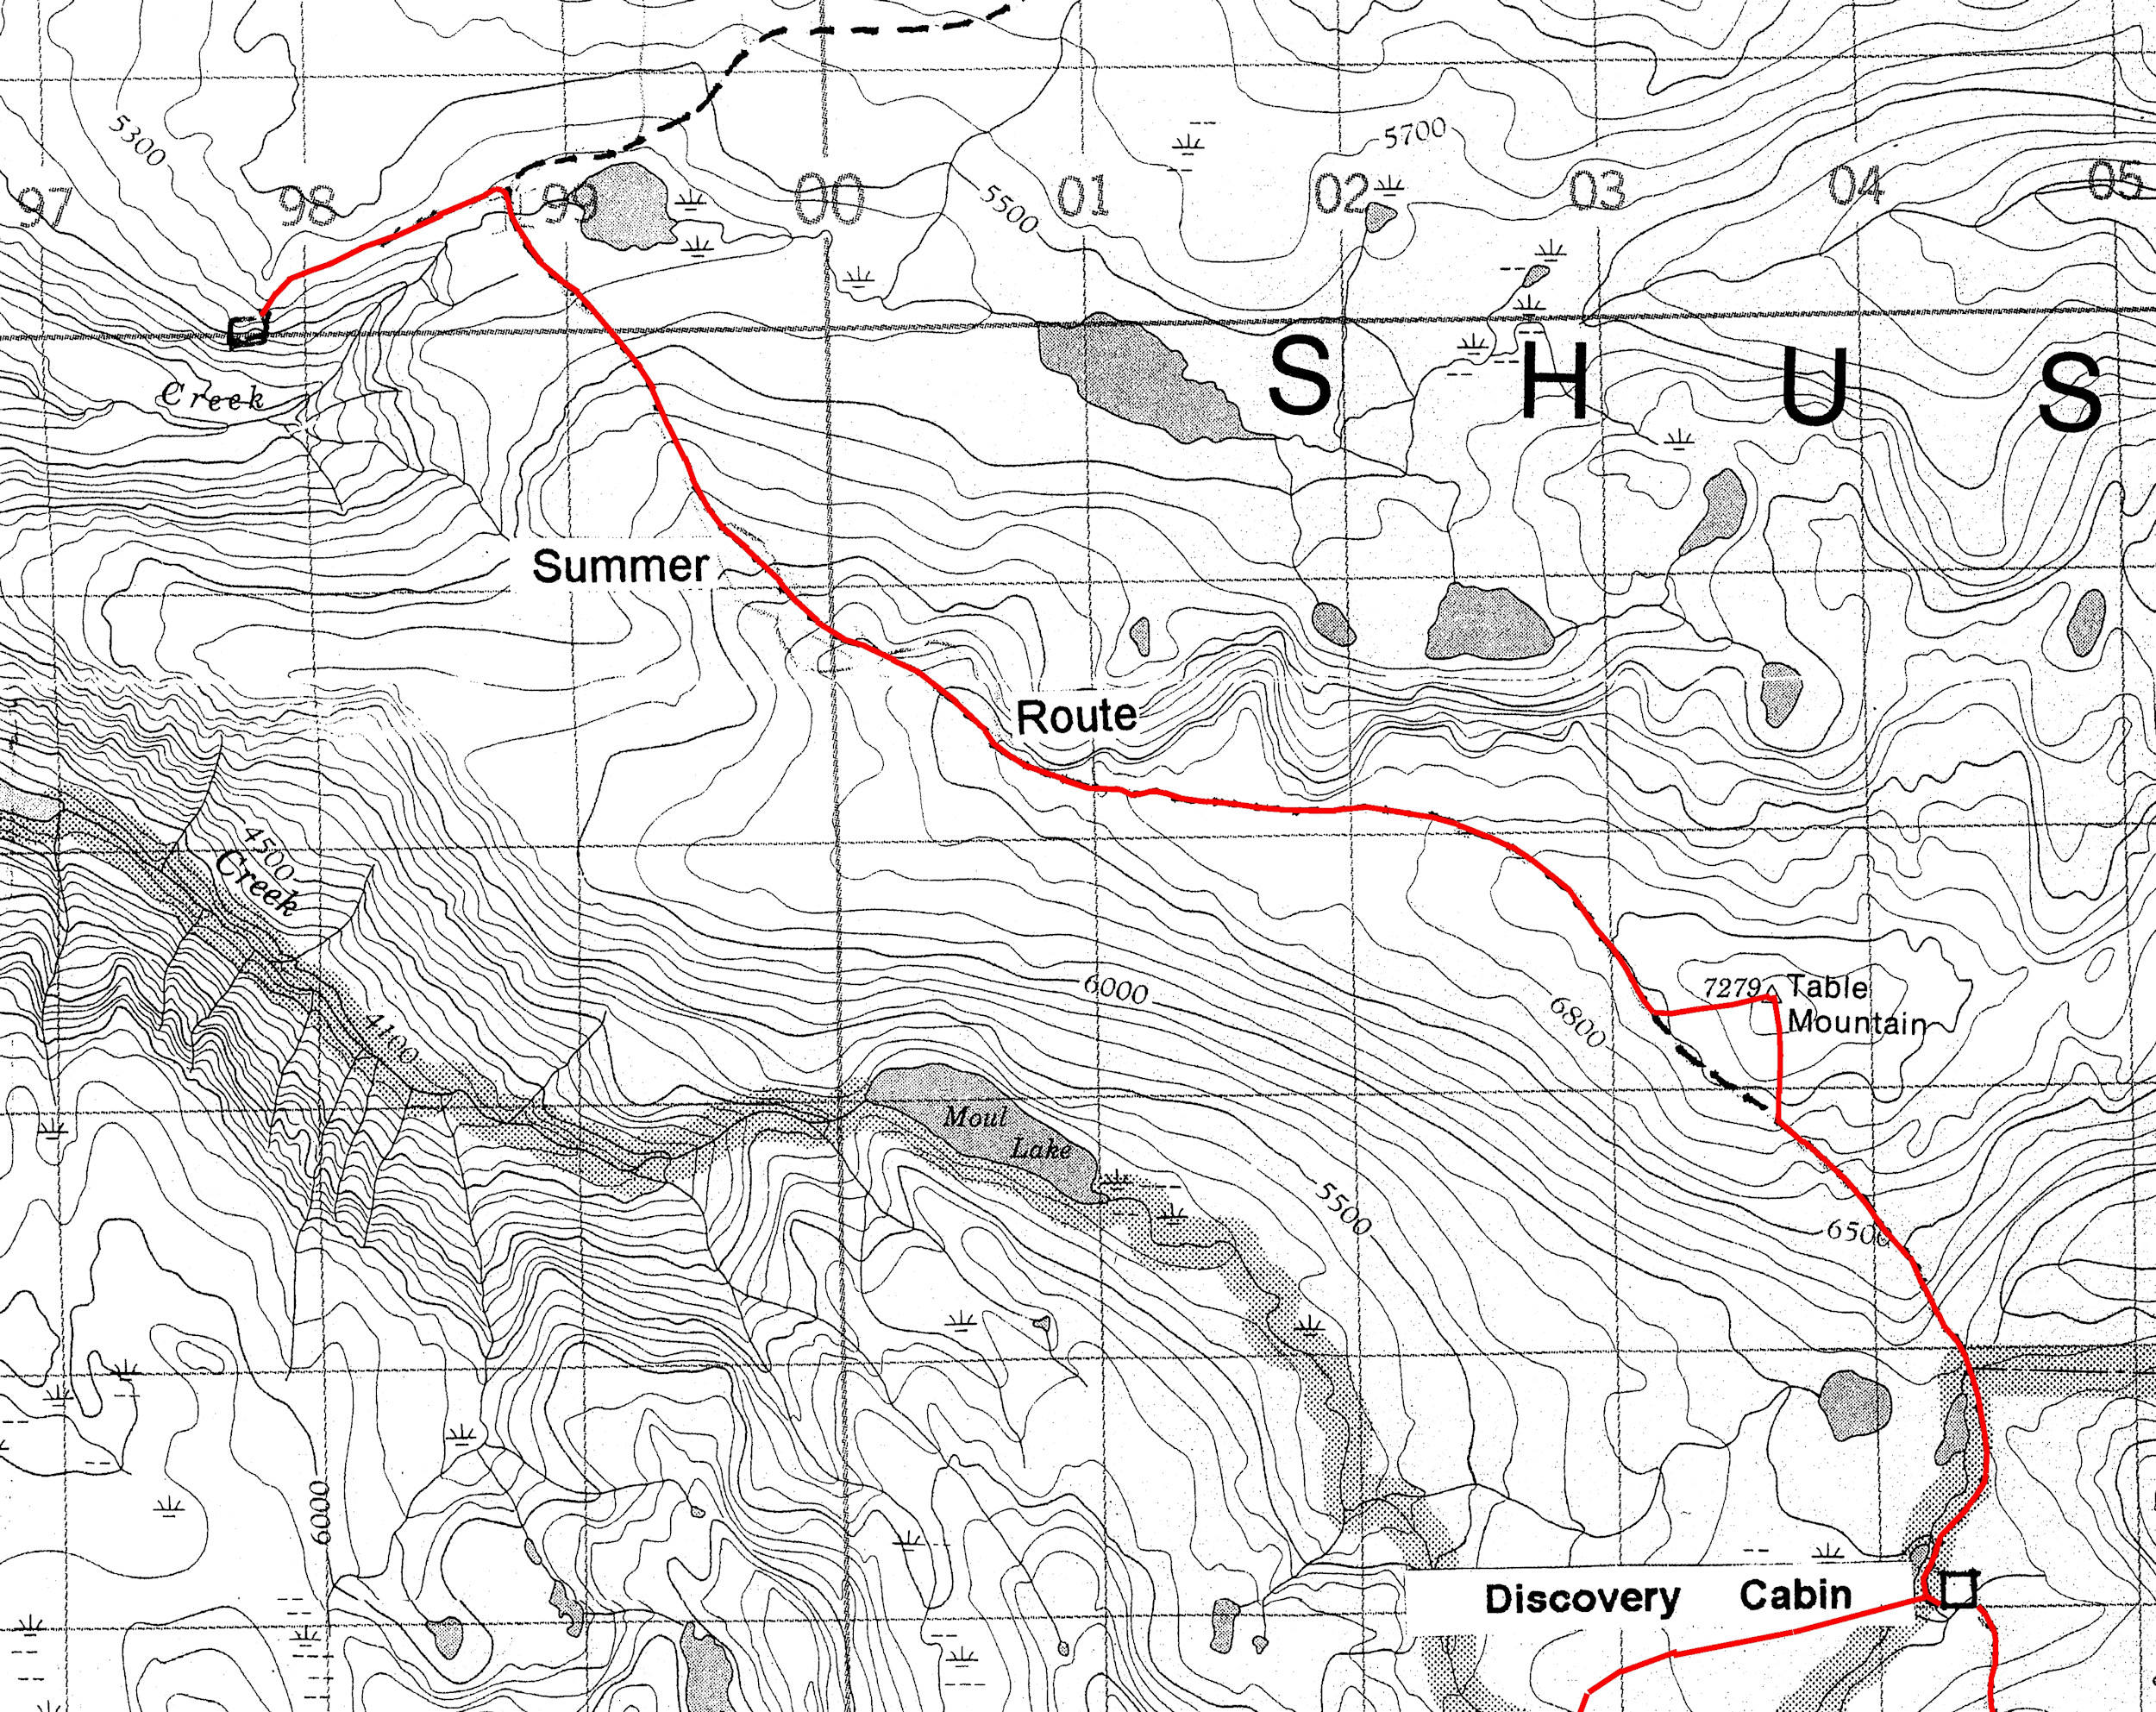
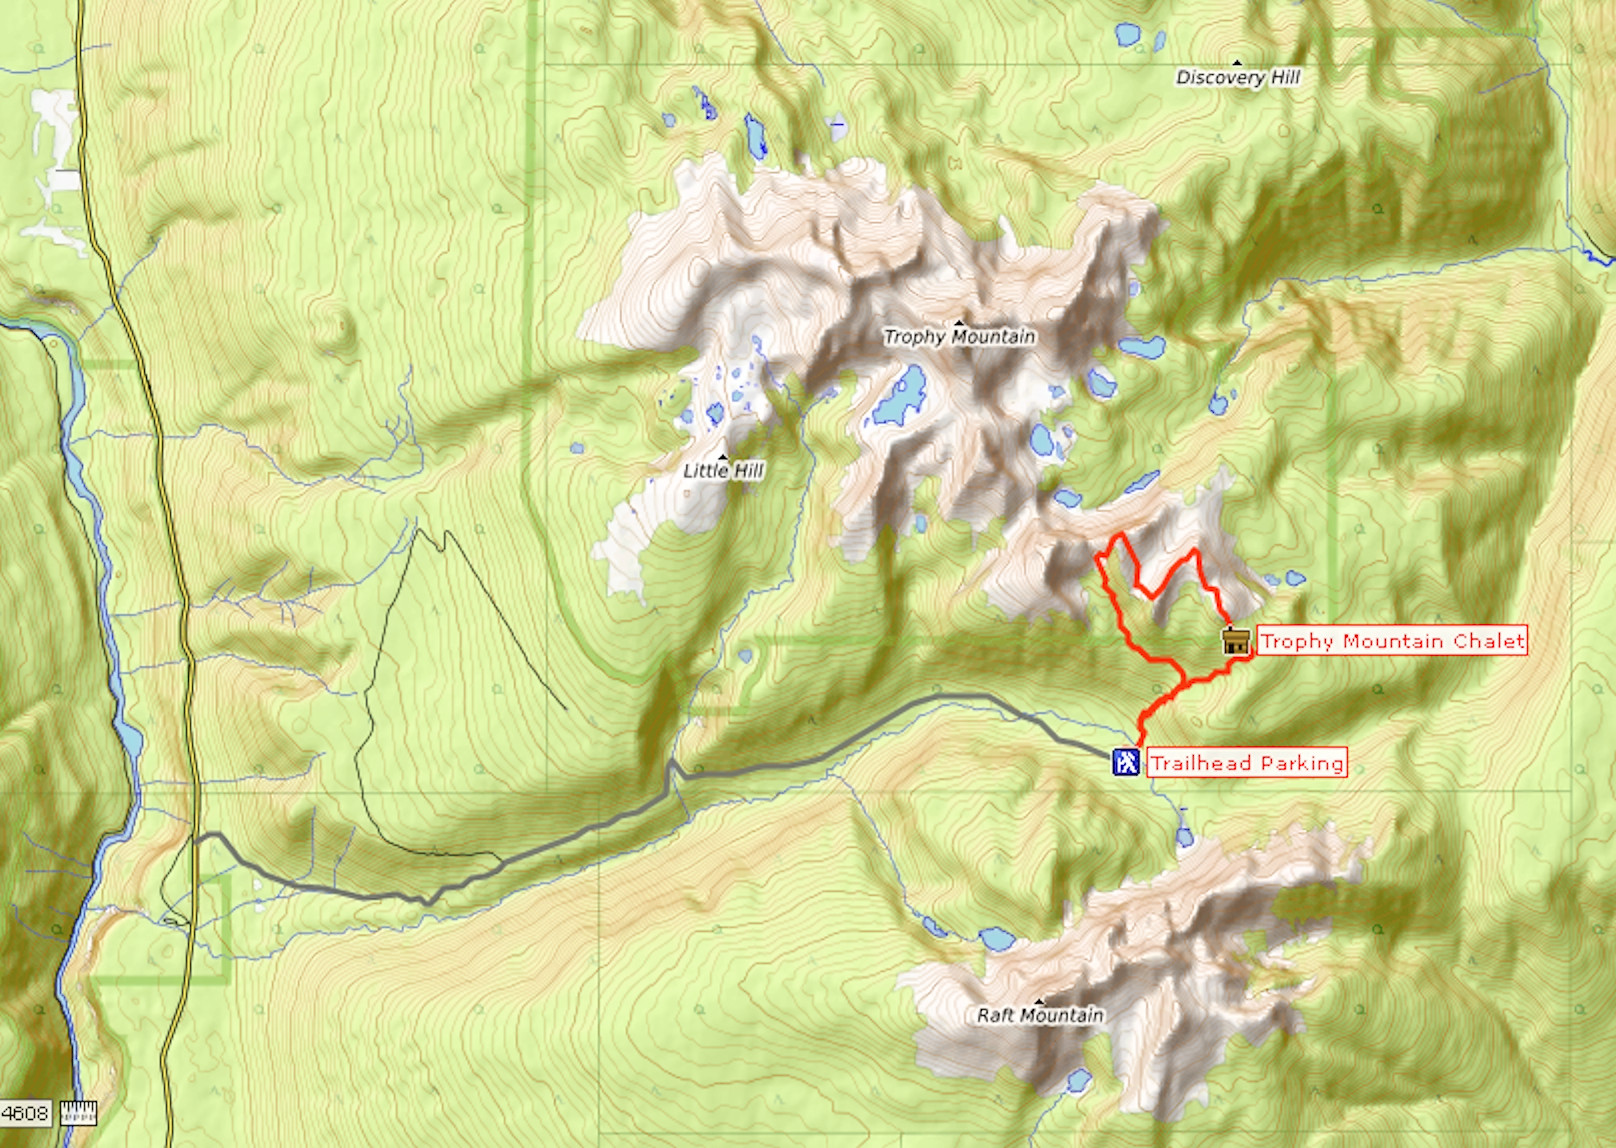
We will start out ascending the eastern slopes of the Trophy Mountain Range and then traverse north through the Valley of the Lakes over Eagle Pass into the remote Moul Valley. We’ll exit the Trophies down their northern flanks with a side trip up Table Mountain. On the way, we’ll spend two nights each at the Trophy Mountain Chalet and the Discovery Cabin.
4 km - 2 ½ Hours - Ascent 523 m
We meet at the offices of our tour operator "Wells Gray Adventures" in Clearwater, the small town at the entrance of Wells Gray Provincial Park. Our group consists of the Dutch couple Hans and Inge, Roa from New Zealand, I and our guide JF (Jean-François), a French Canadian originally from Quebec. A pickup truck takes us to kilometer 12.8 on the very rough Spahats Creek Road. JF distributes some fresh produce to add to our backpacks and after that we begin the steep ascent to the first hut, the Trophy Mountain Chalet.
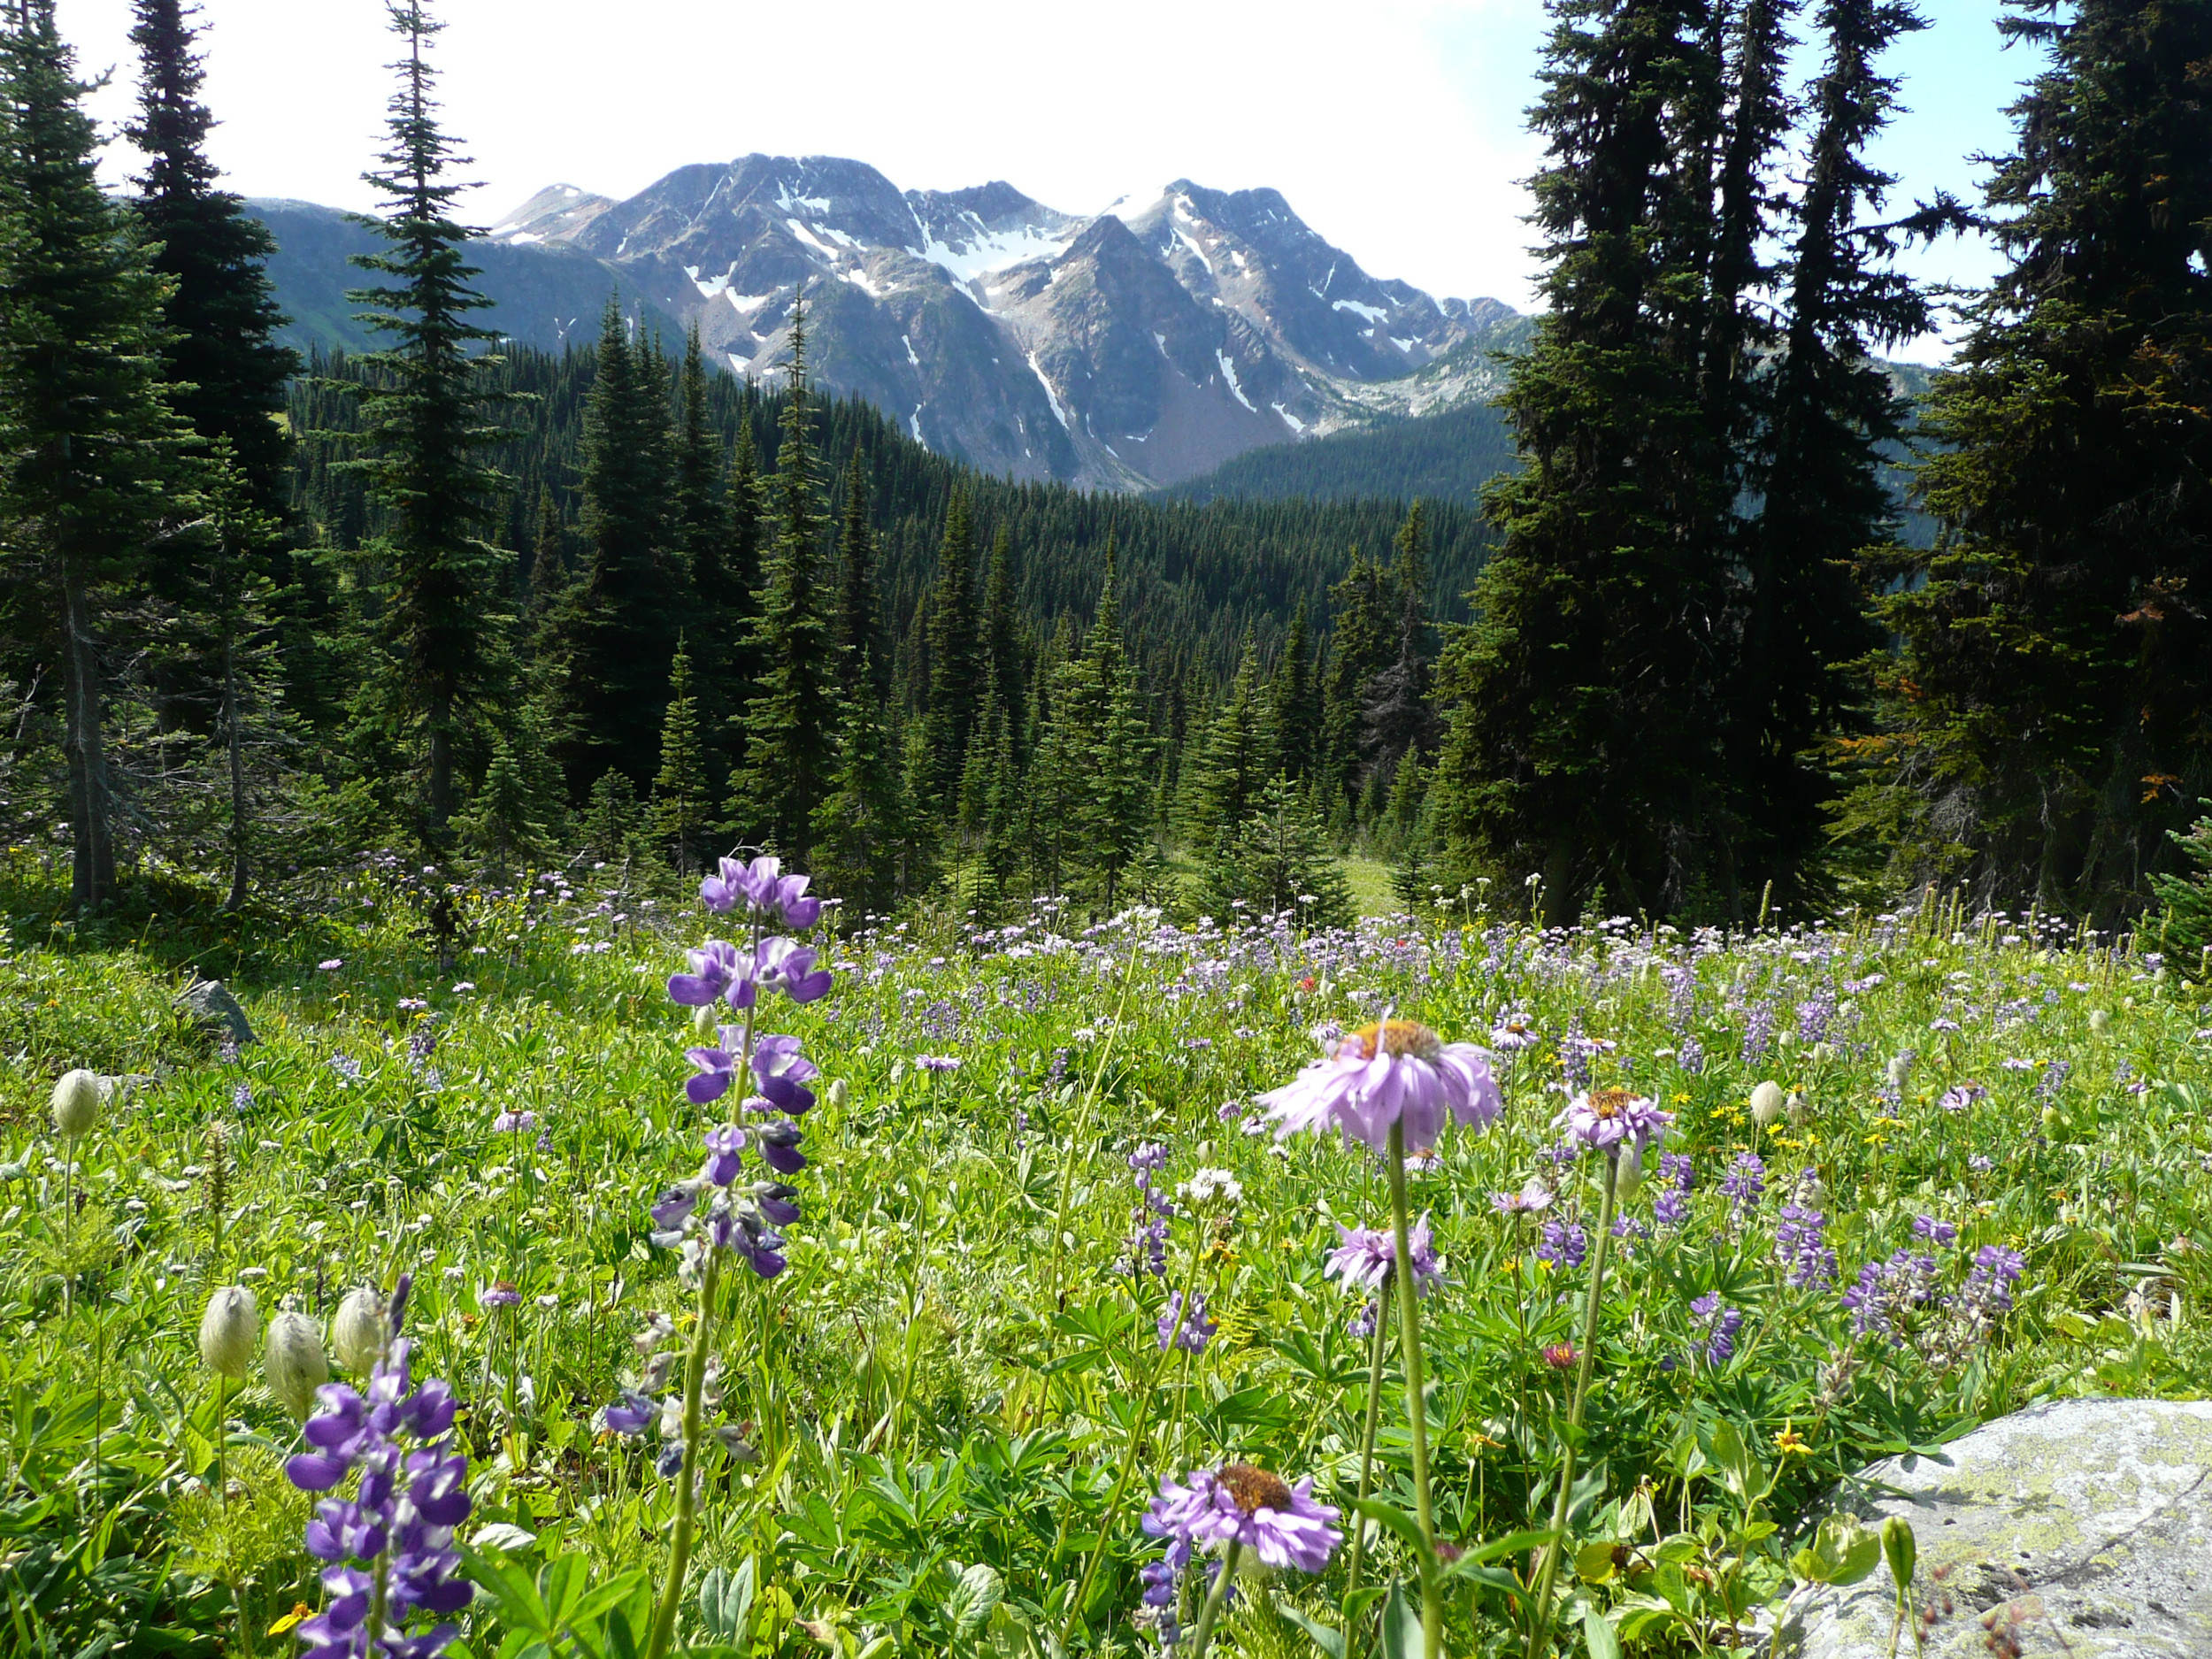
The trail meanders through an old forest of fir and Engelmann spruce. Just ahead of the chalet we reach the treeline and some meadows with late-flowering wildflowers. Behind us tower the five peaks of Raft Mountain, another spectacular mountain range in this area.
Raft Mountain 2450 m
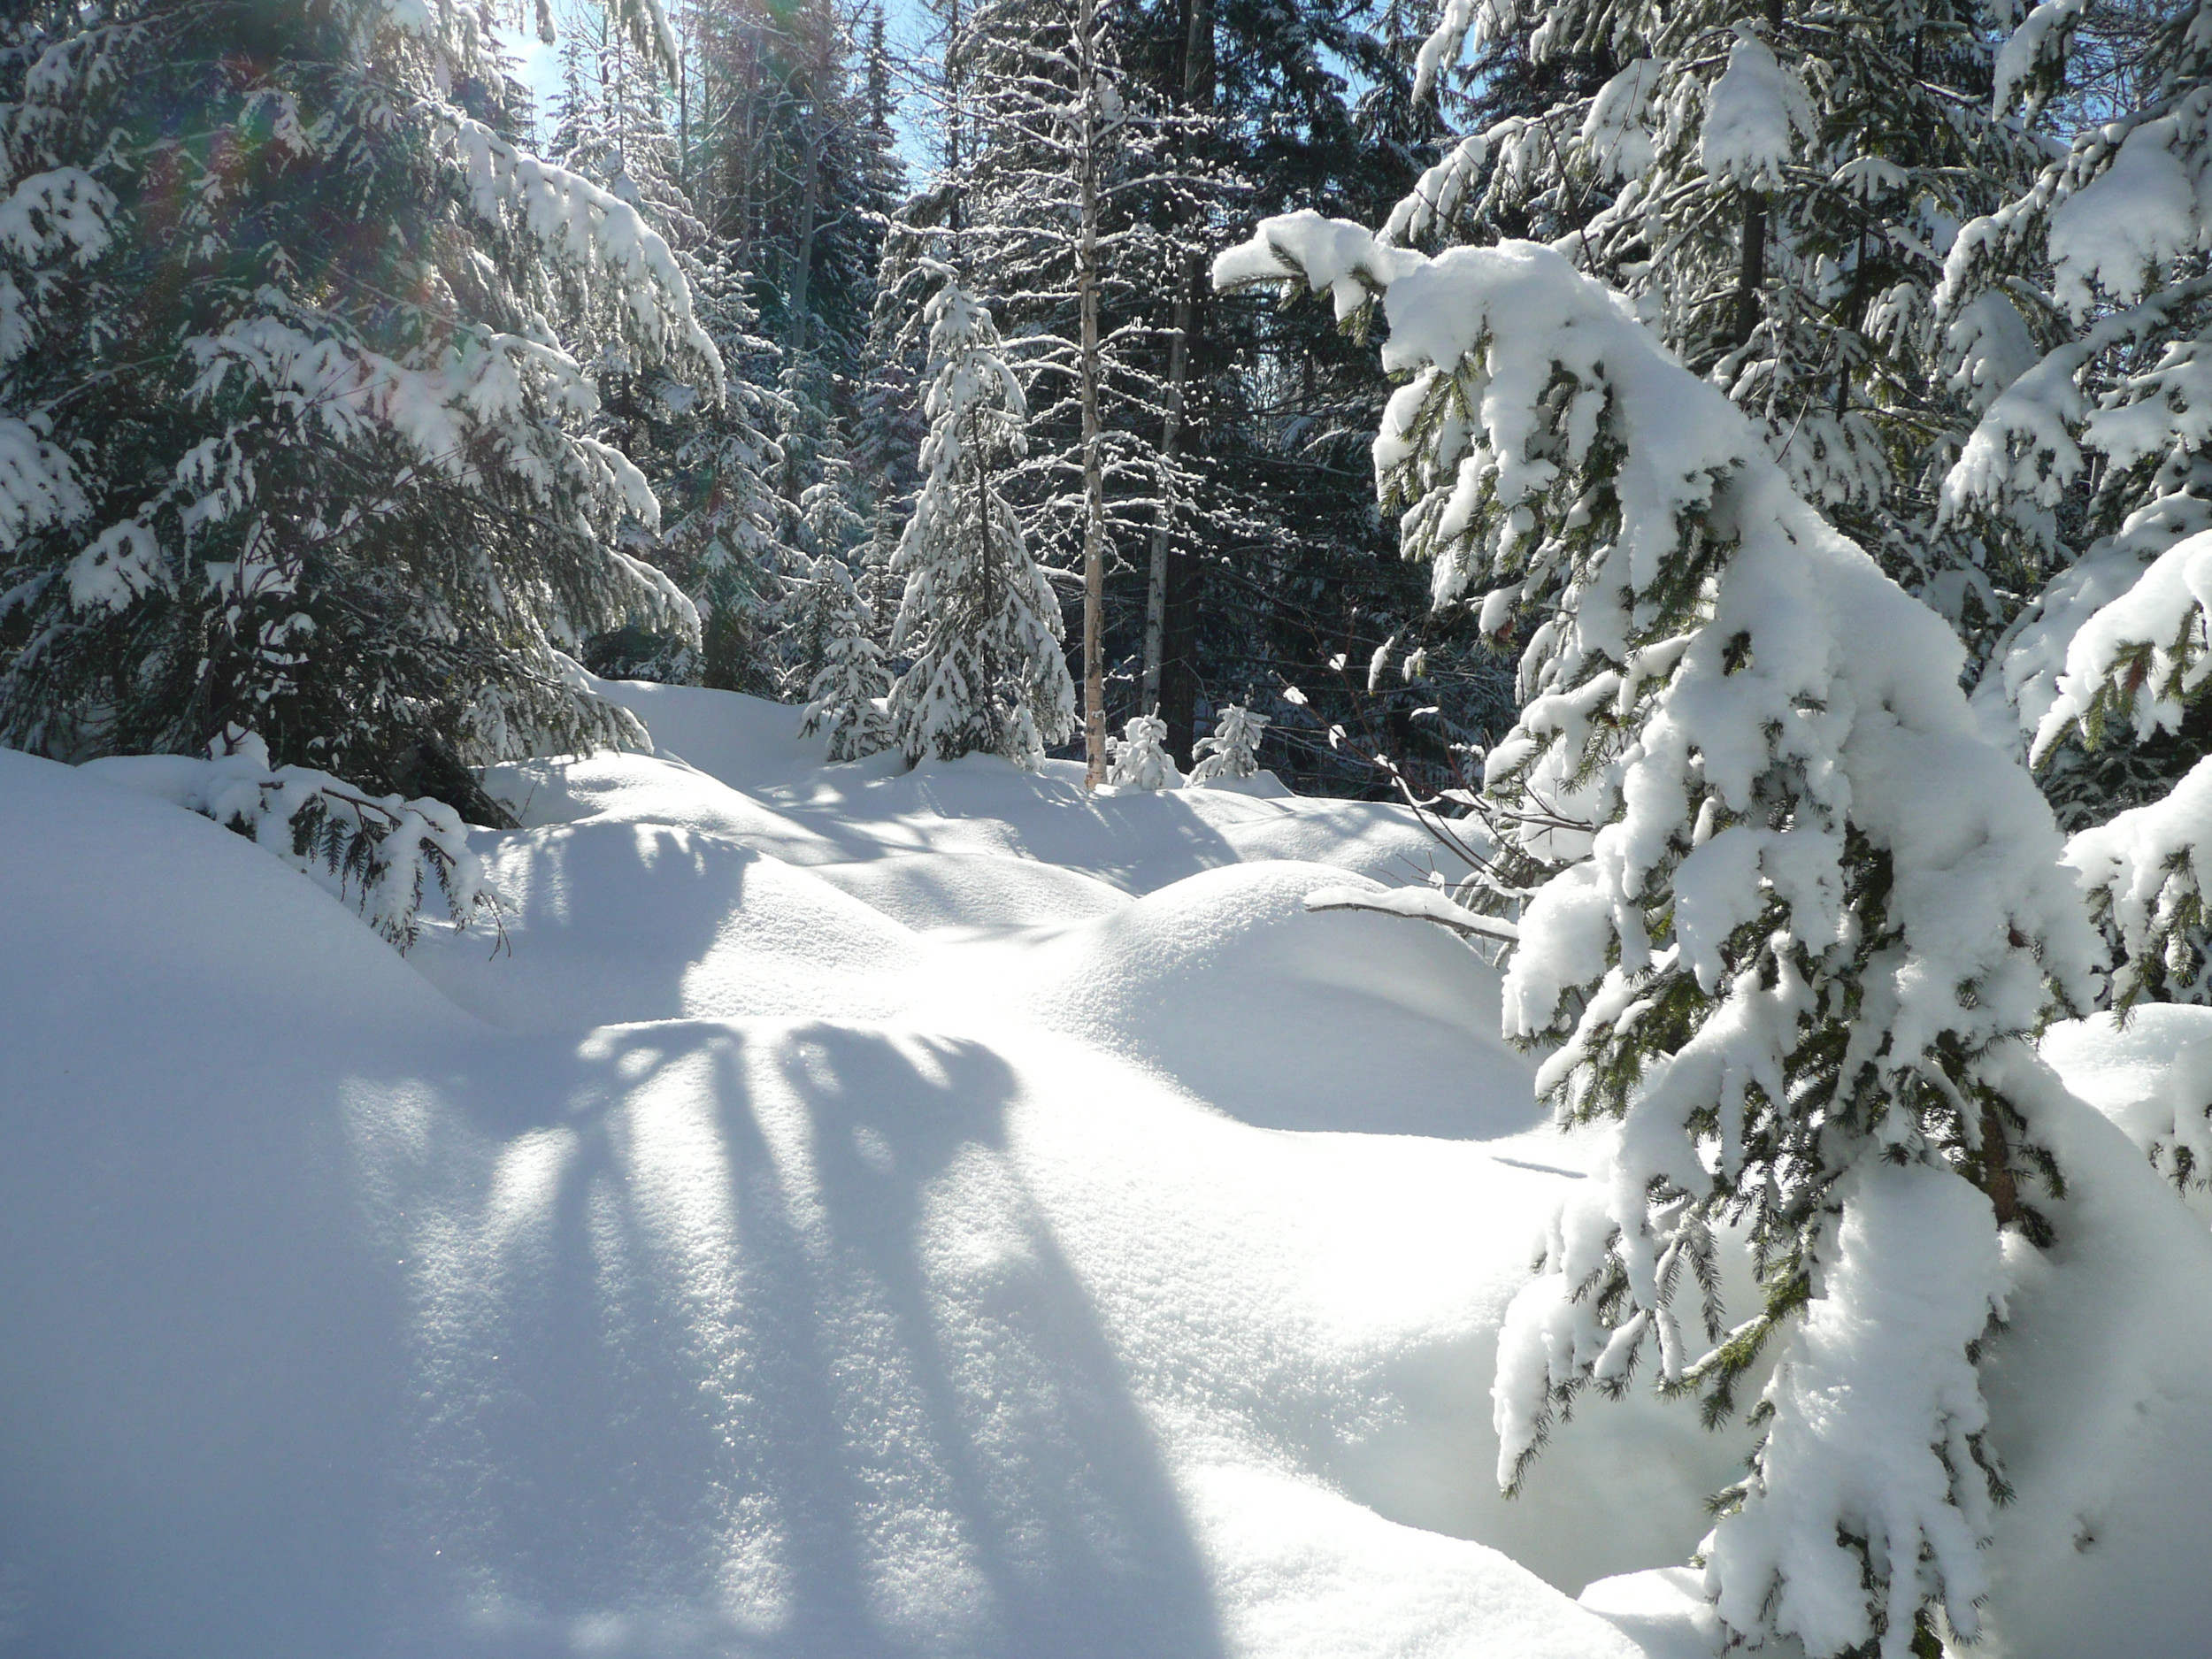
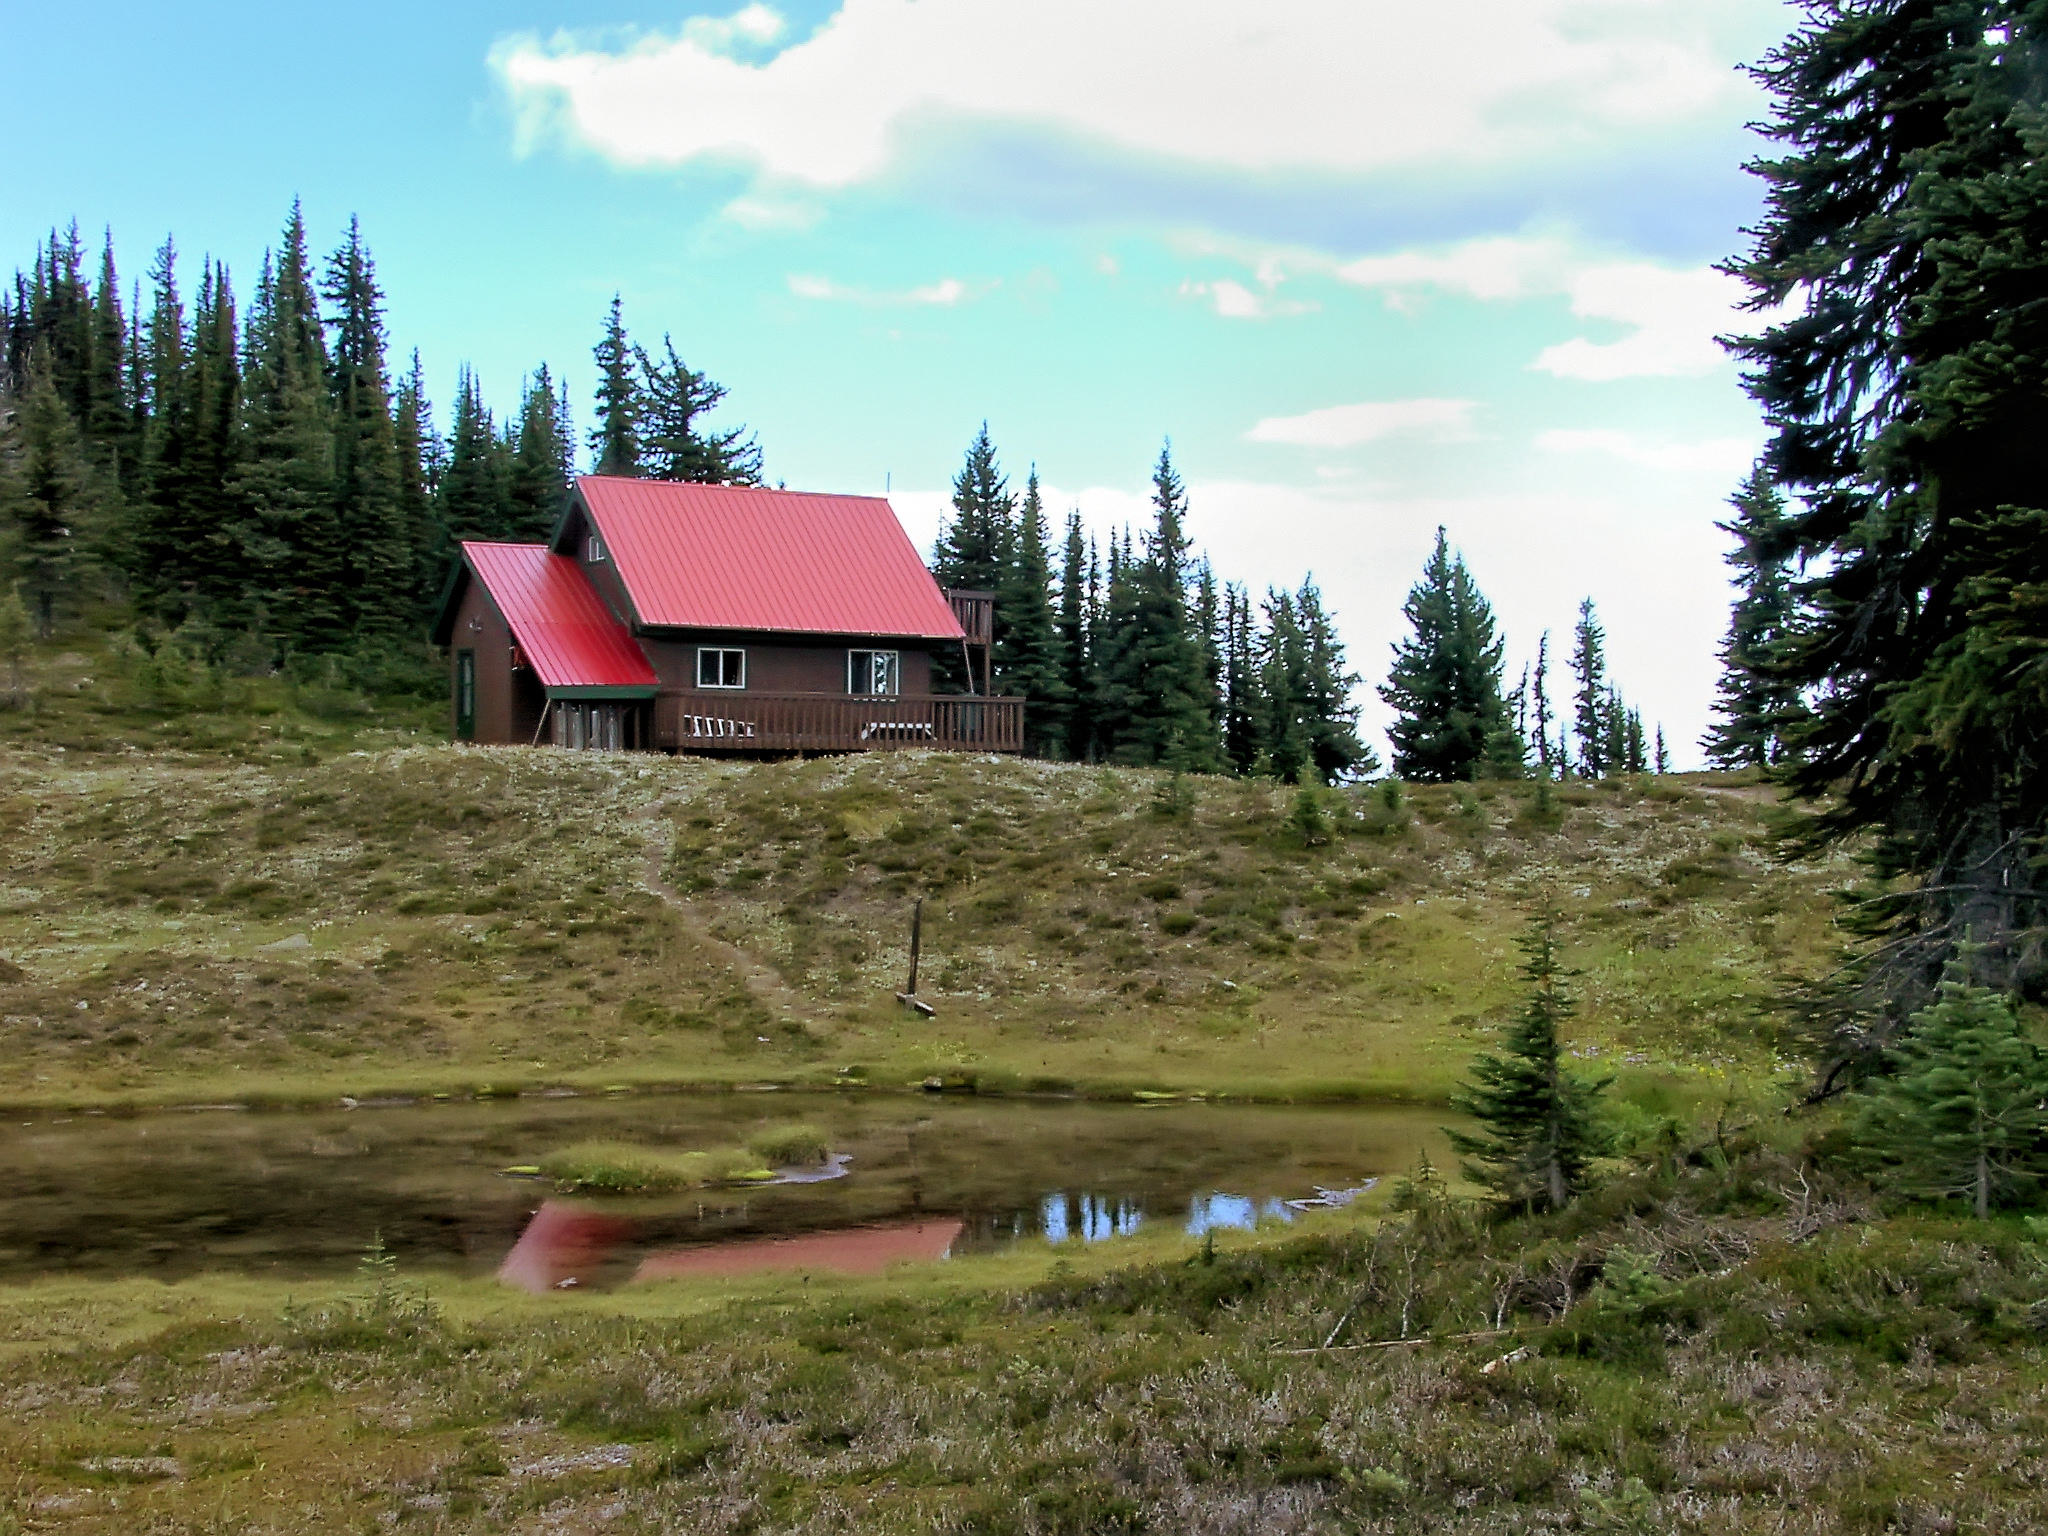
Trophy Mountain Chalet sits at 2153 meters elevation and looks very comfy, both inside and out. Solar power and propane provide the luxury of a fridge, a stove, an oven and lights. Drinking water is carried in from a nearby tarn and run through a filter. There is a compost toilet in a separate building. The long stairs leading up to the cabin and the outhouse make us realize how much snow fall there is in winter.

The sleeping area is in the loft upstairs and is divided into two-person-berths with a mattress, a duvet, pillows, and blanket, so we don’t have to bring sleeping bags. The cabin sleeps 10 to 12 people and as there are only four of us, we each have our own berth with a curtain for additional privacy. We have brought our own pillowcases and sleeping bag liners or sheets.
We eat lunch on the porch while enjoying the fantastic view. Afterwords we ascend Lookout Peak, a viewpoint right behind the chalet. From here we have a first good view of the main peak of Trophy Mountain.
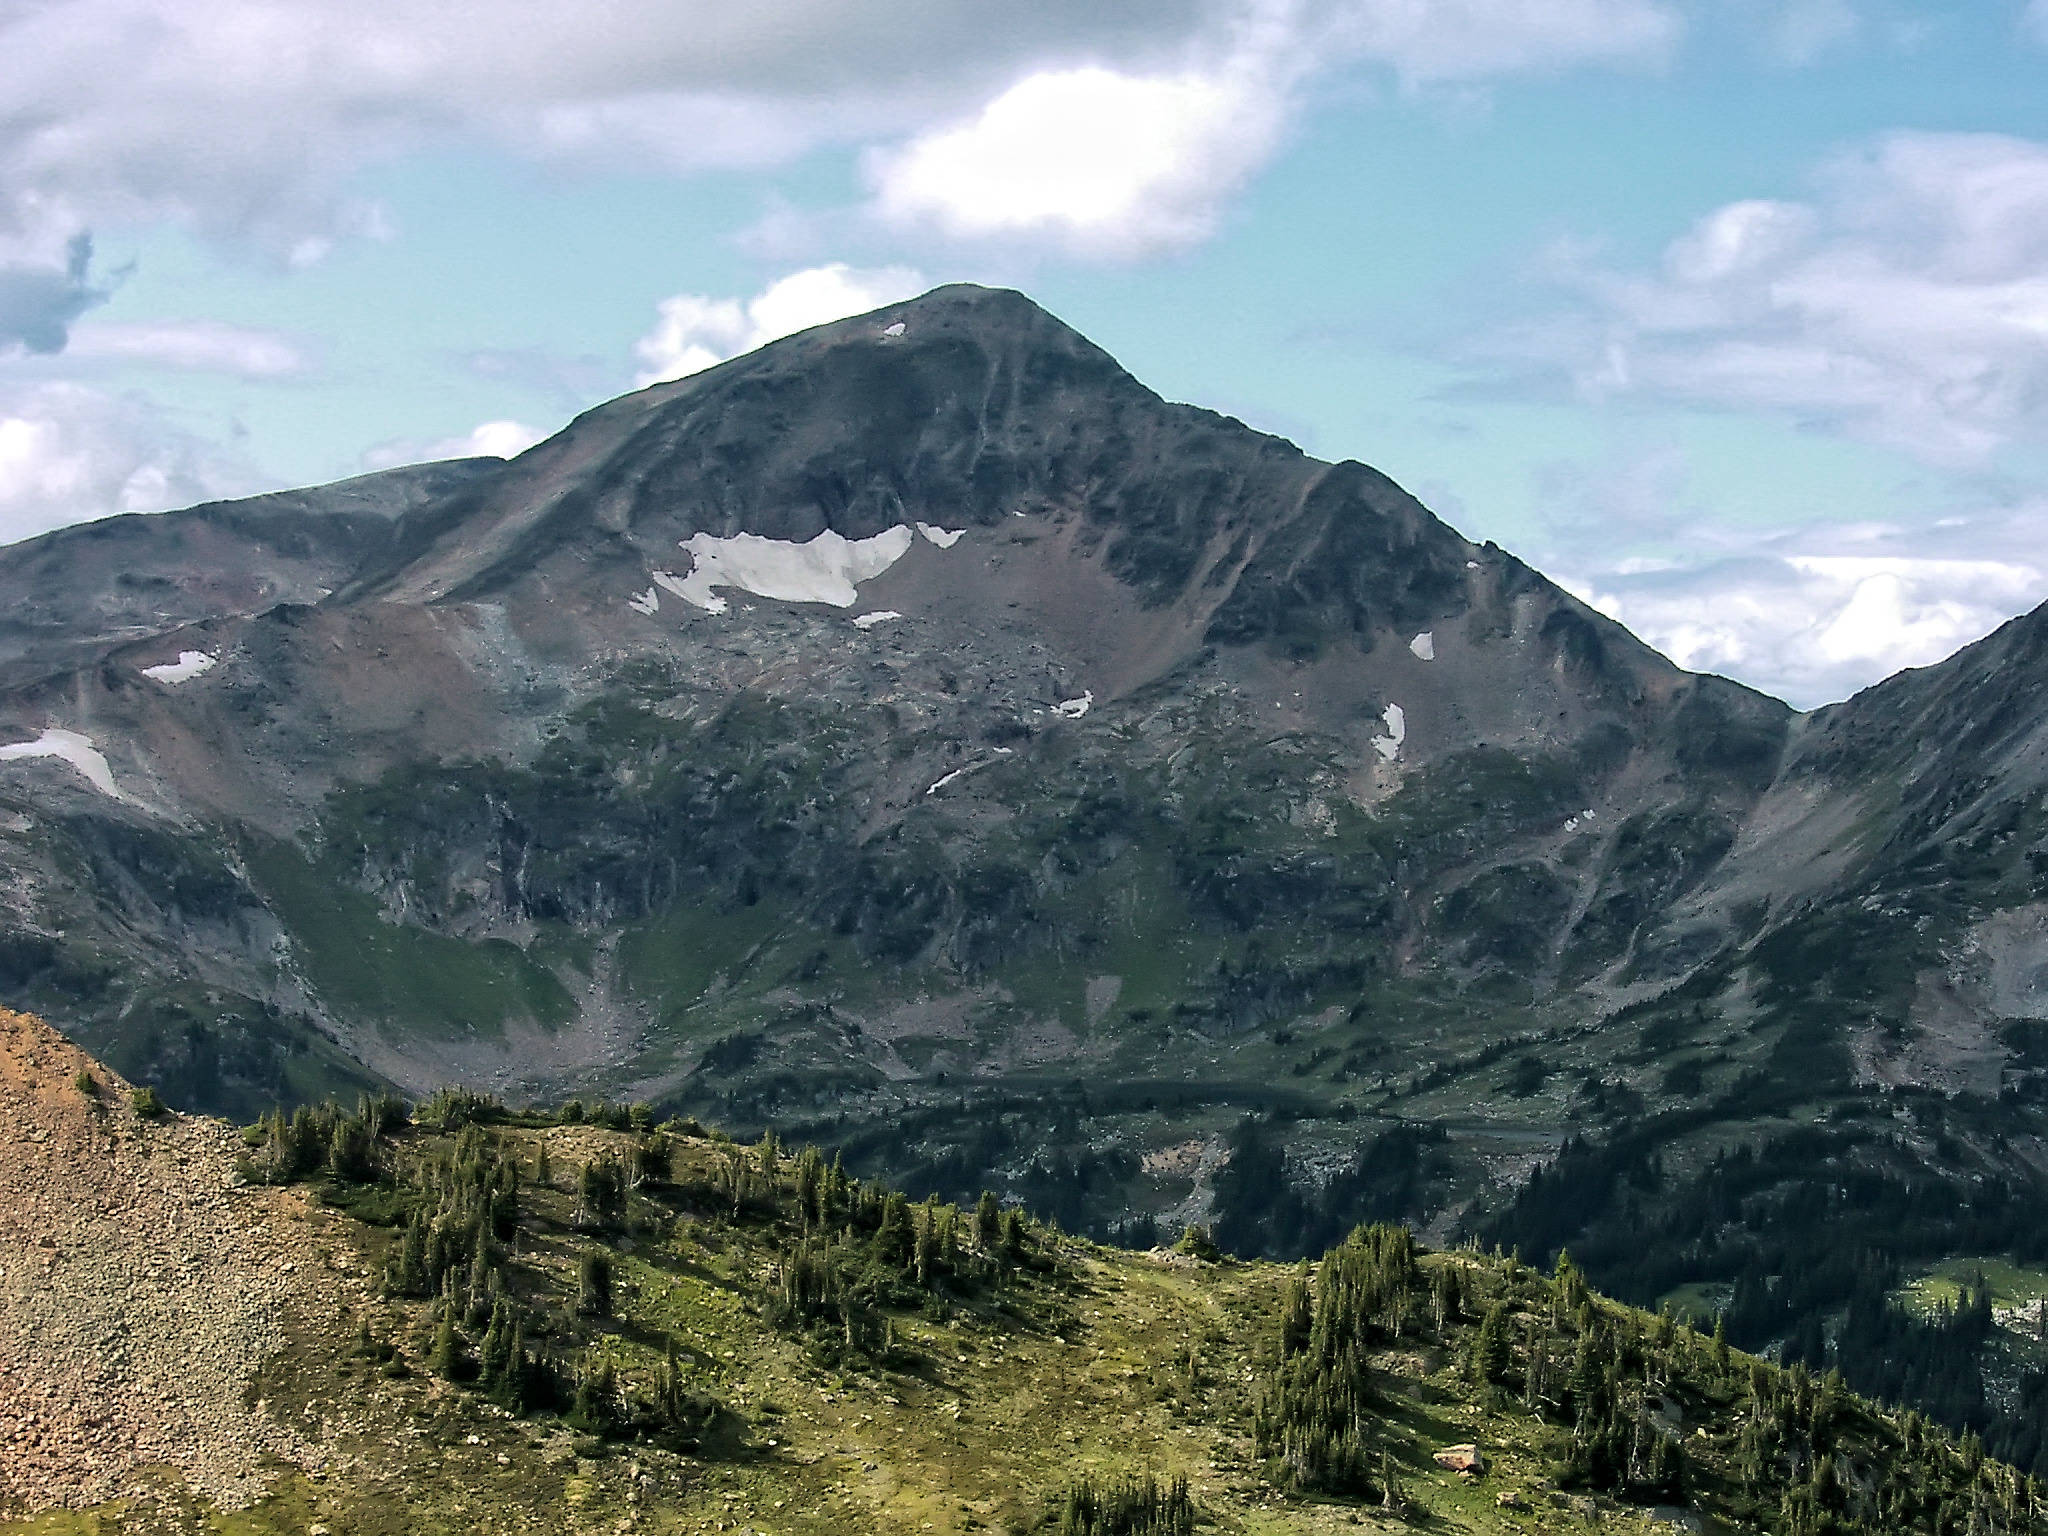
Trophy Mountain 2577 m
On returning, we look down at our home-away-from-home for the next two nights.
Trophy Mountain Chalet
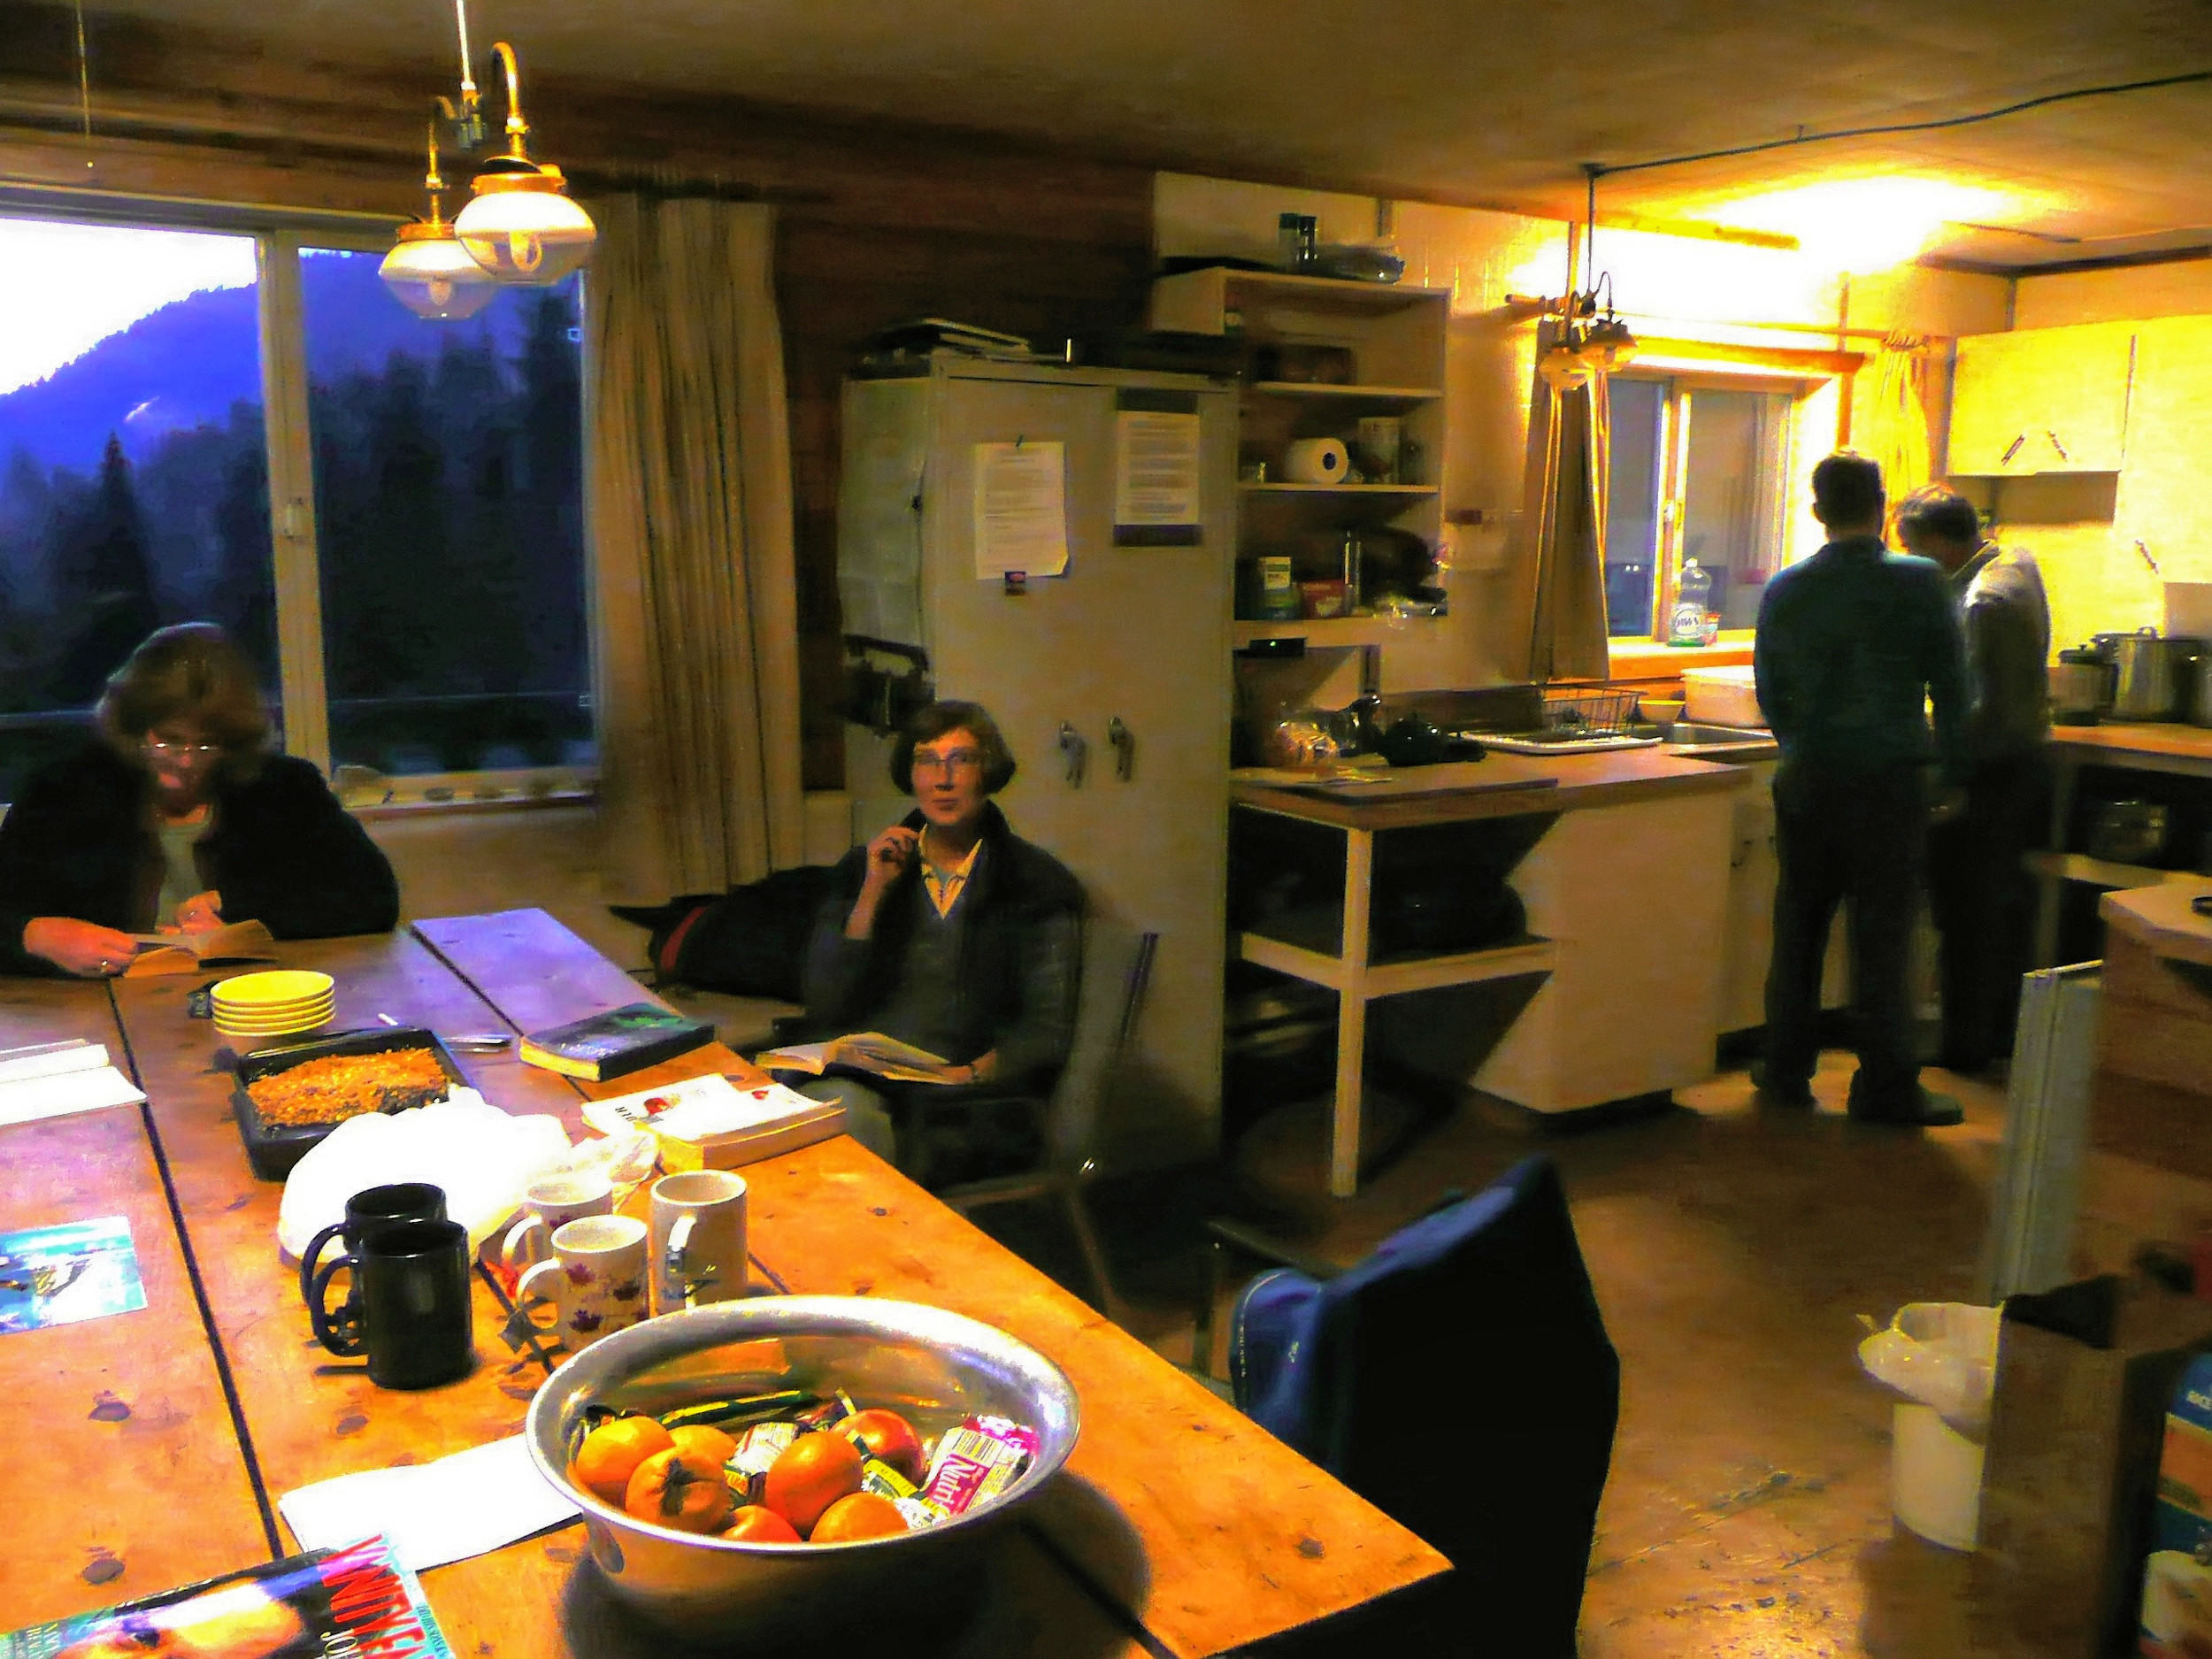
In the late afternoon the temperature drops and we leave the porch to head inside. JF prepares dinner. He accepts some help with prep work and the dishes, but insists that the actual cooking is his responsibility. He feeds us well during the five days. In the beginning there is plenty of fresh produce and meat, for the last two evenings we have to switch to canned food. There is always dessert and even a glass of wine or two.
We spend a nice evening around the dinner table and get to know each other. JF has a lot of stories to tell from his many jobs as a hiking guide during the summer, a skiing guide in winter and a tree planter in between seasons. The combination of good food and fresh mountain air makes us sleepy, and we retire soon to the loft for a good night’s sleep.
Ca. 7 km - 5 Hours incl. lunch - Ascent ca. 250 m
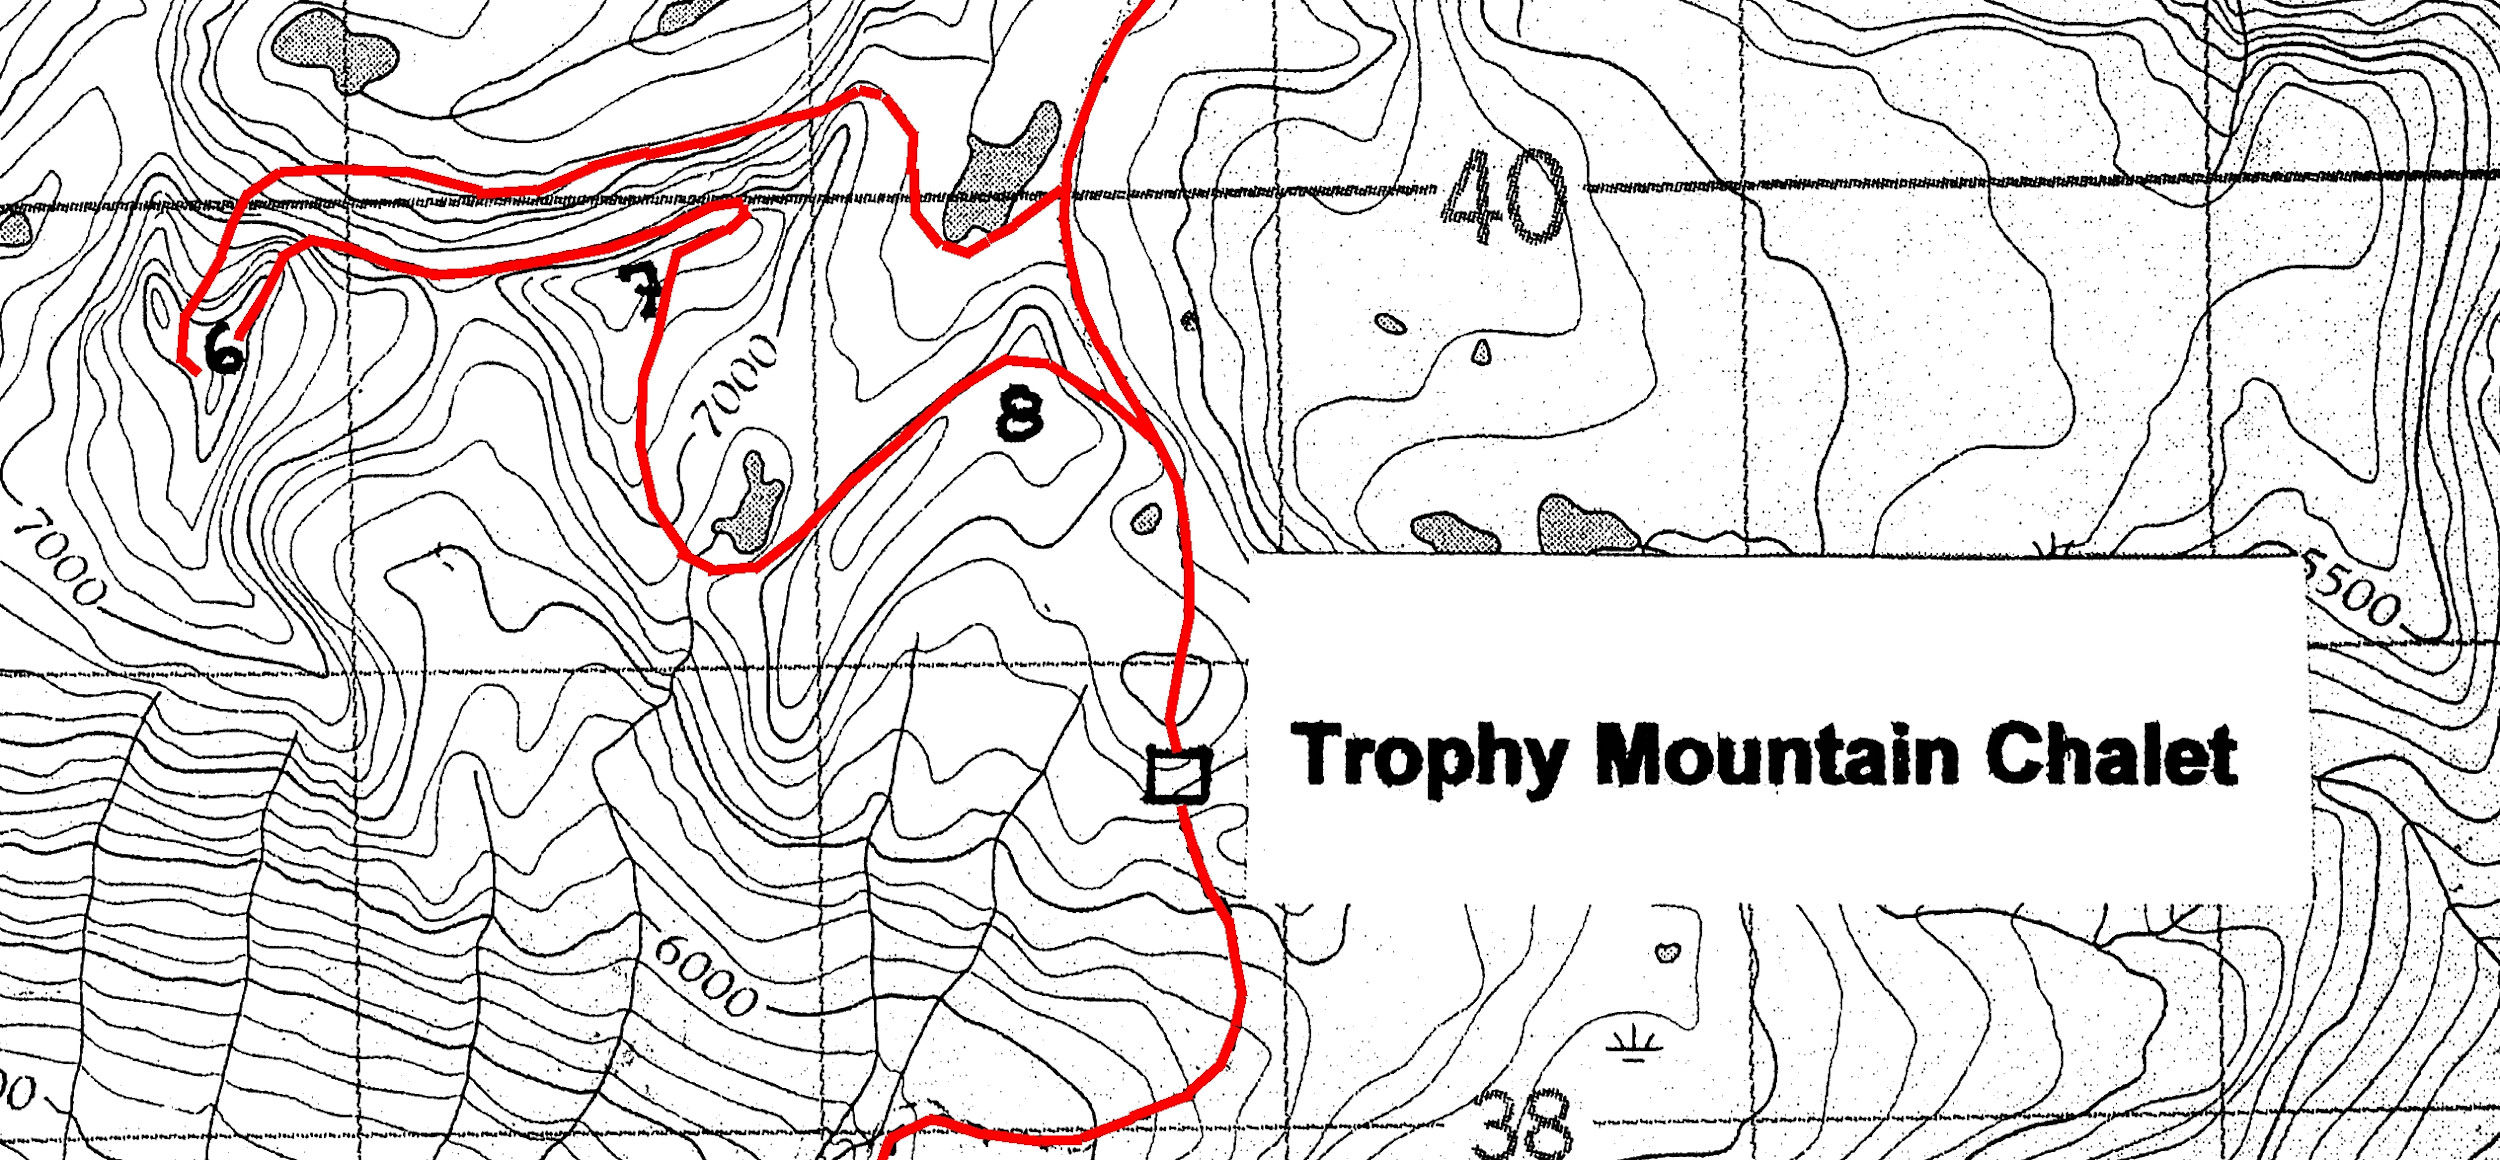
After a hot breakfast of pancakes and bacon, we start a day of exploring the area around the chalet. We climb Trophy peaks #8, #7 and #6 which basically are ridges, not summits. Peak #6 is also called Ptarmigan Peak or Third Ridge. Most names are unofficial and serve only as a reference for the guides and the visitors.
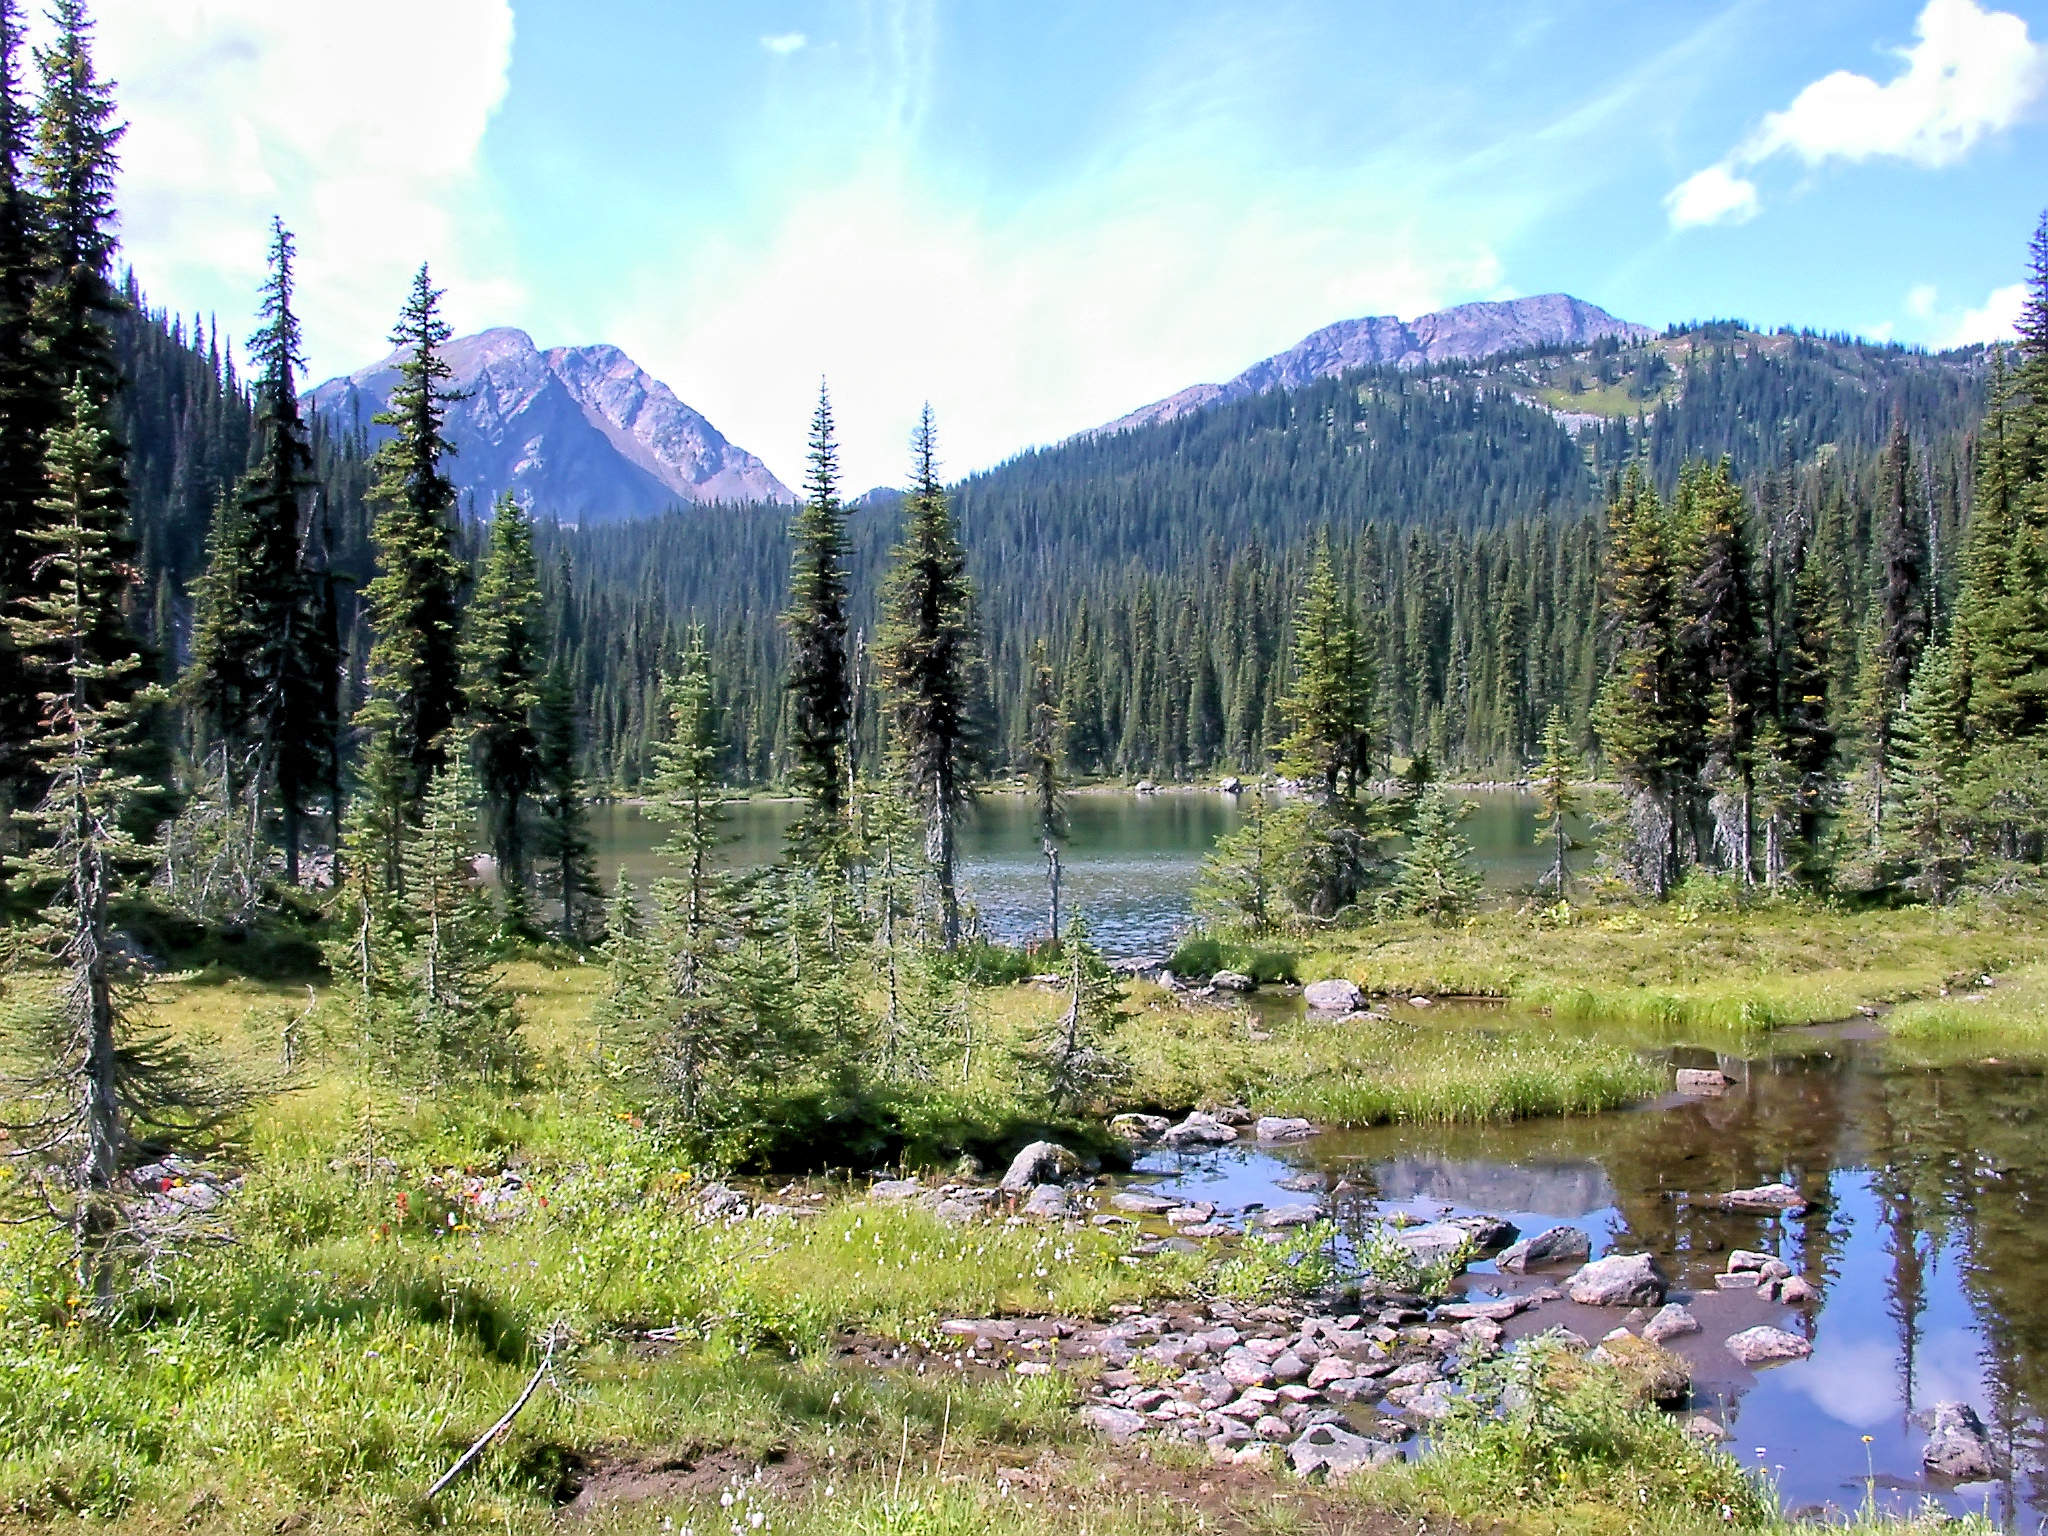
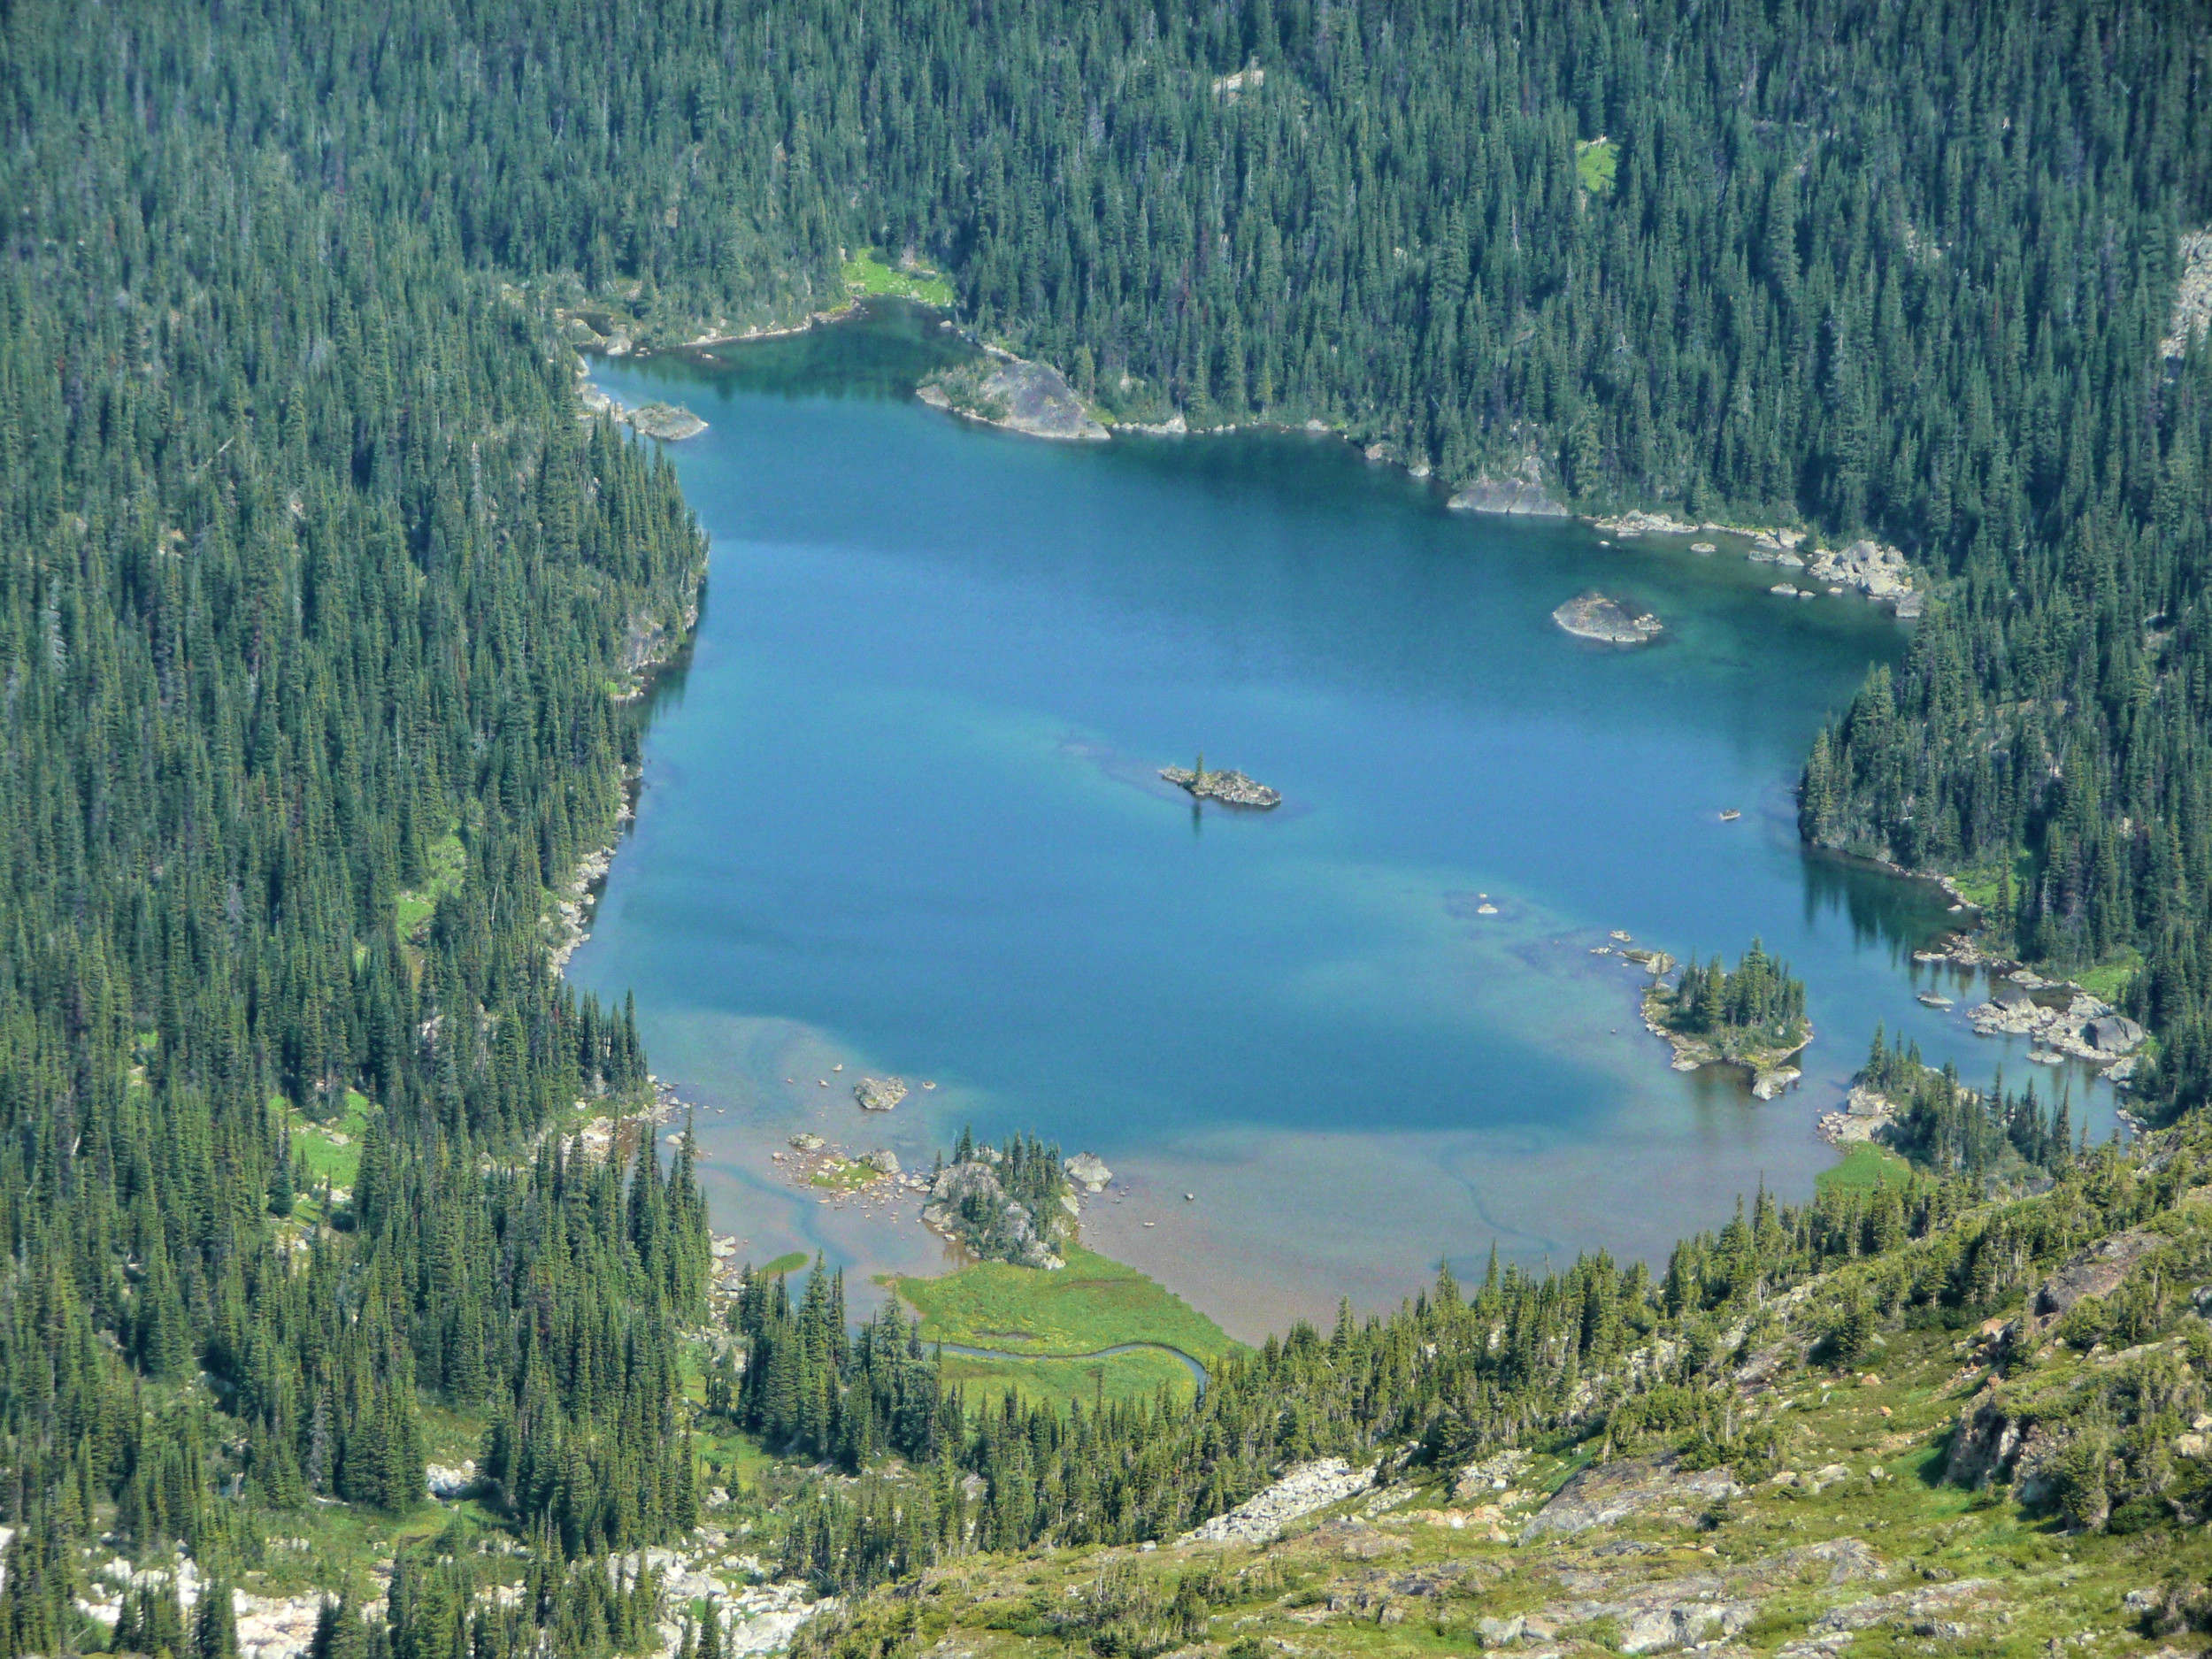
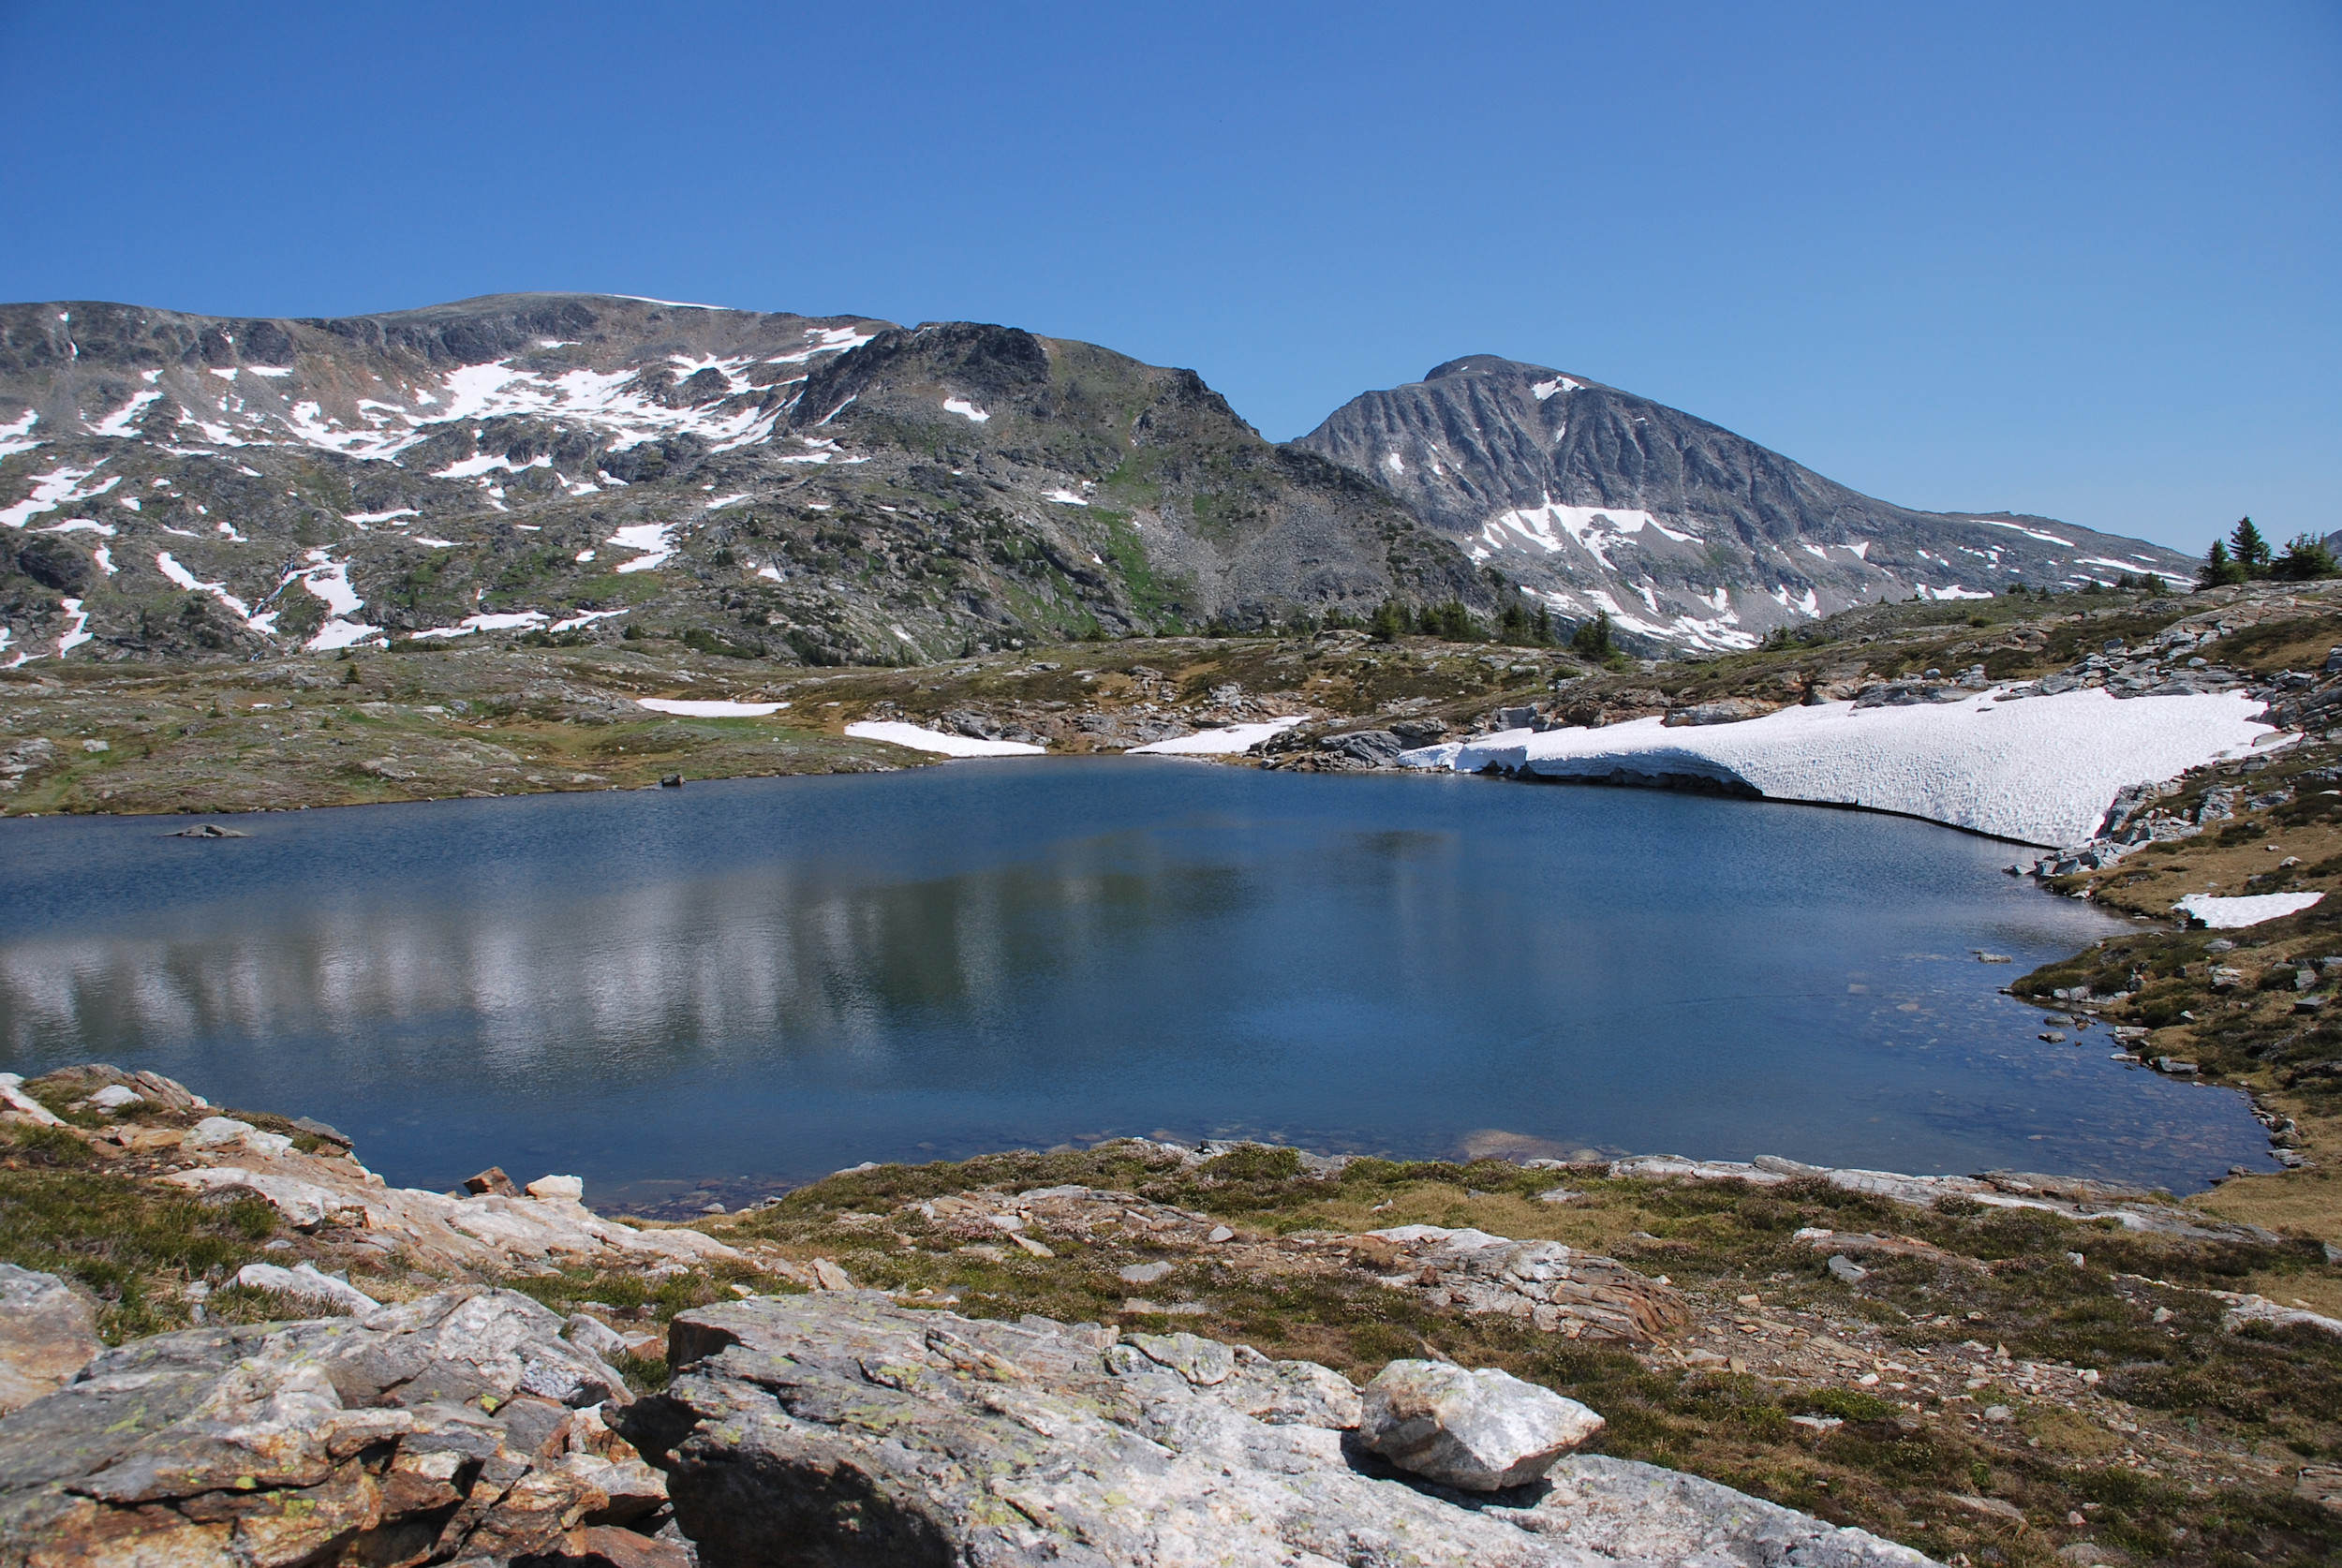
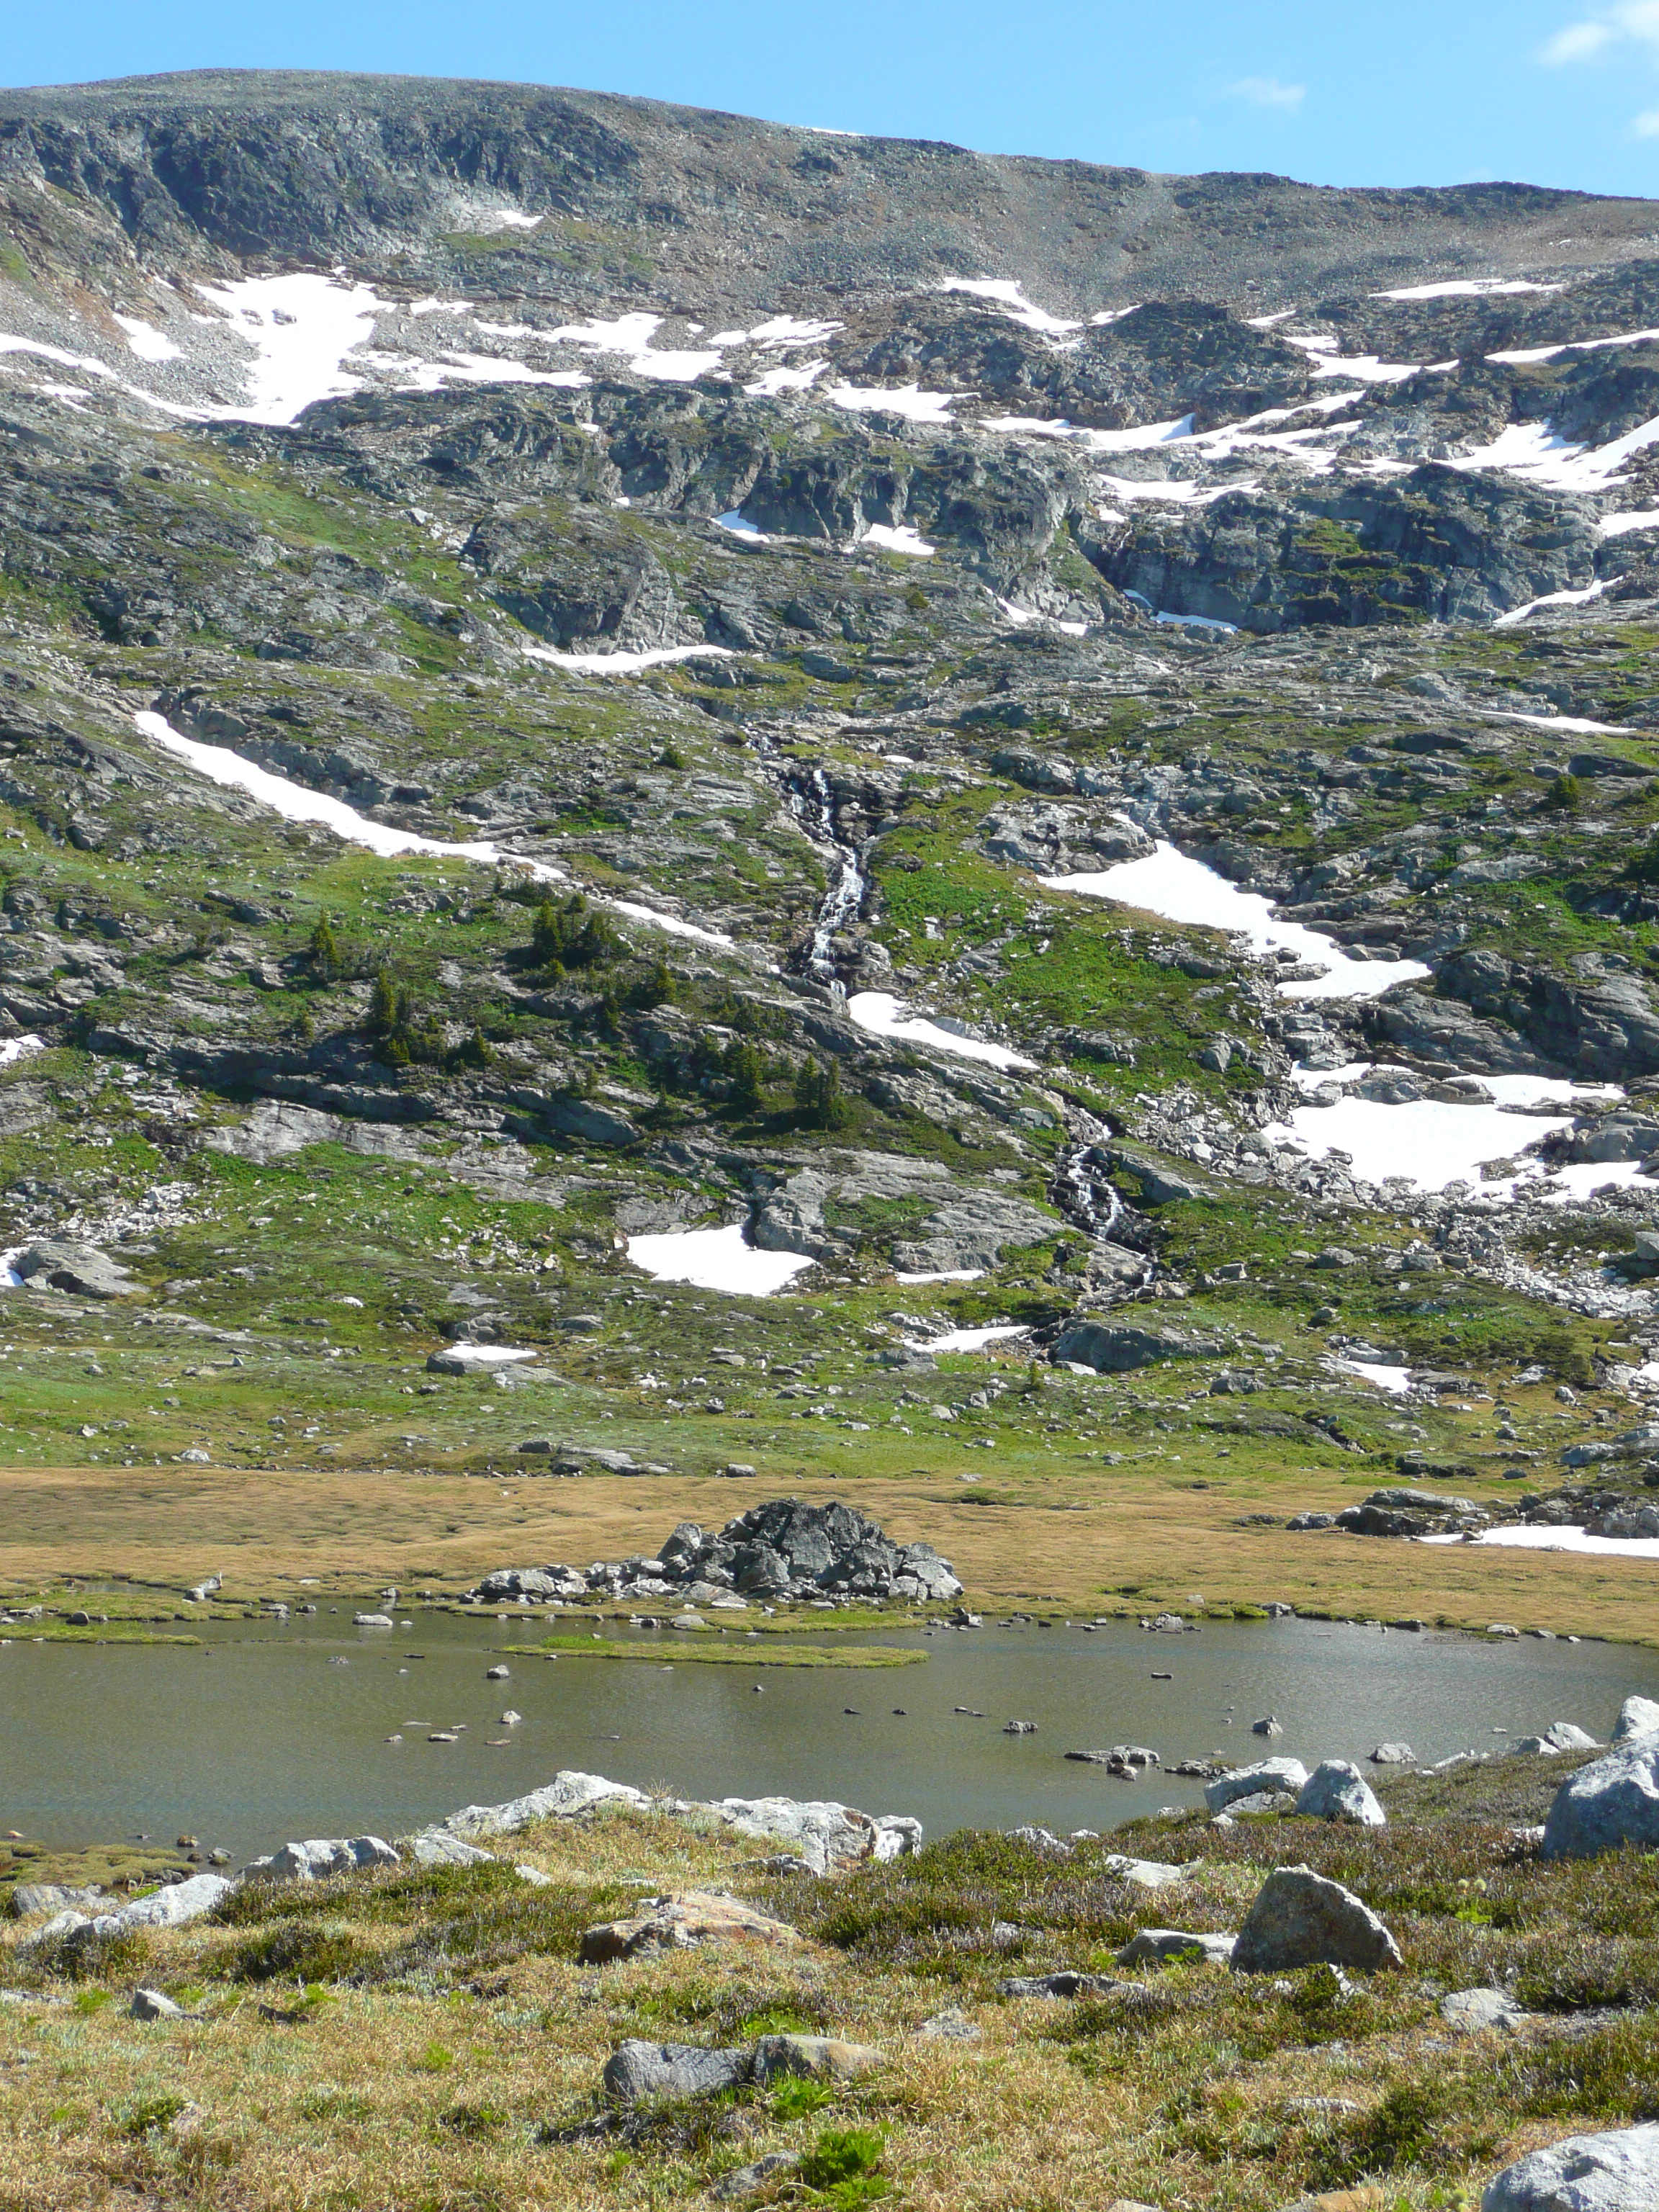
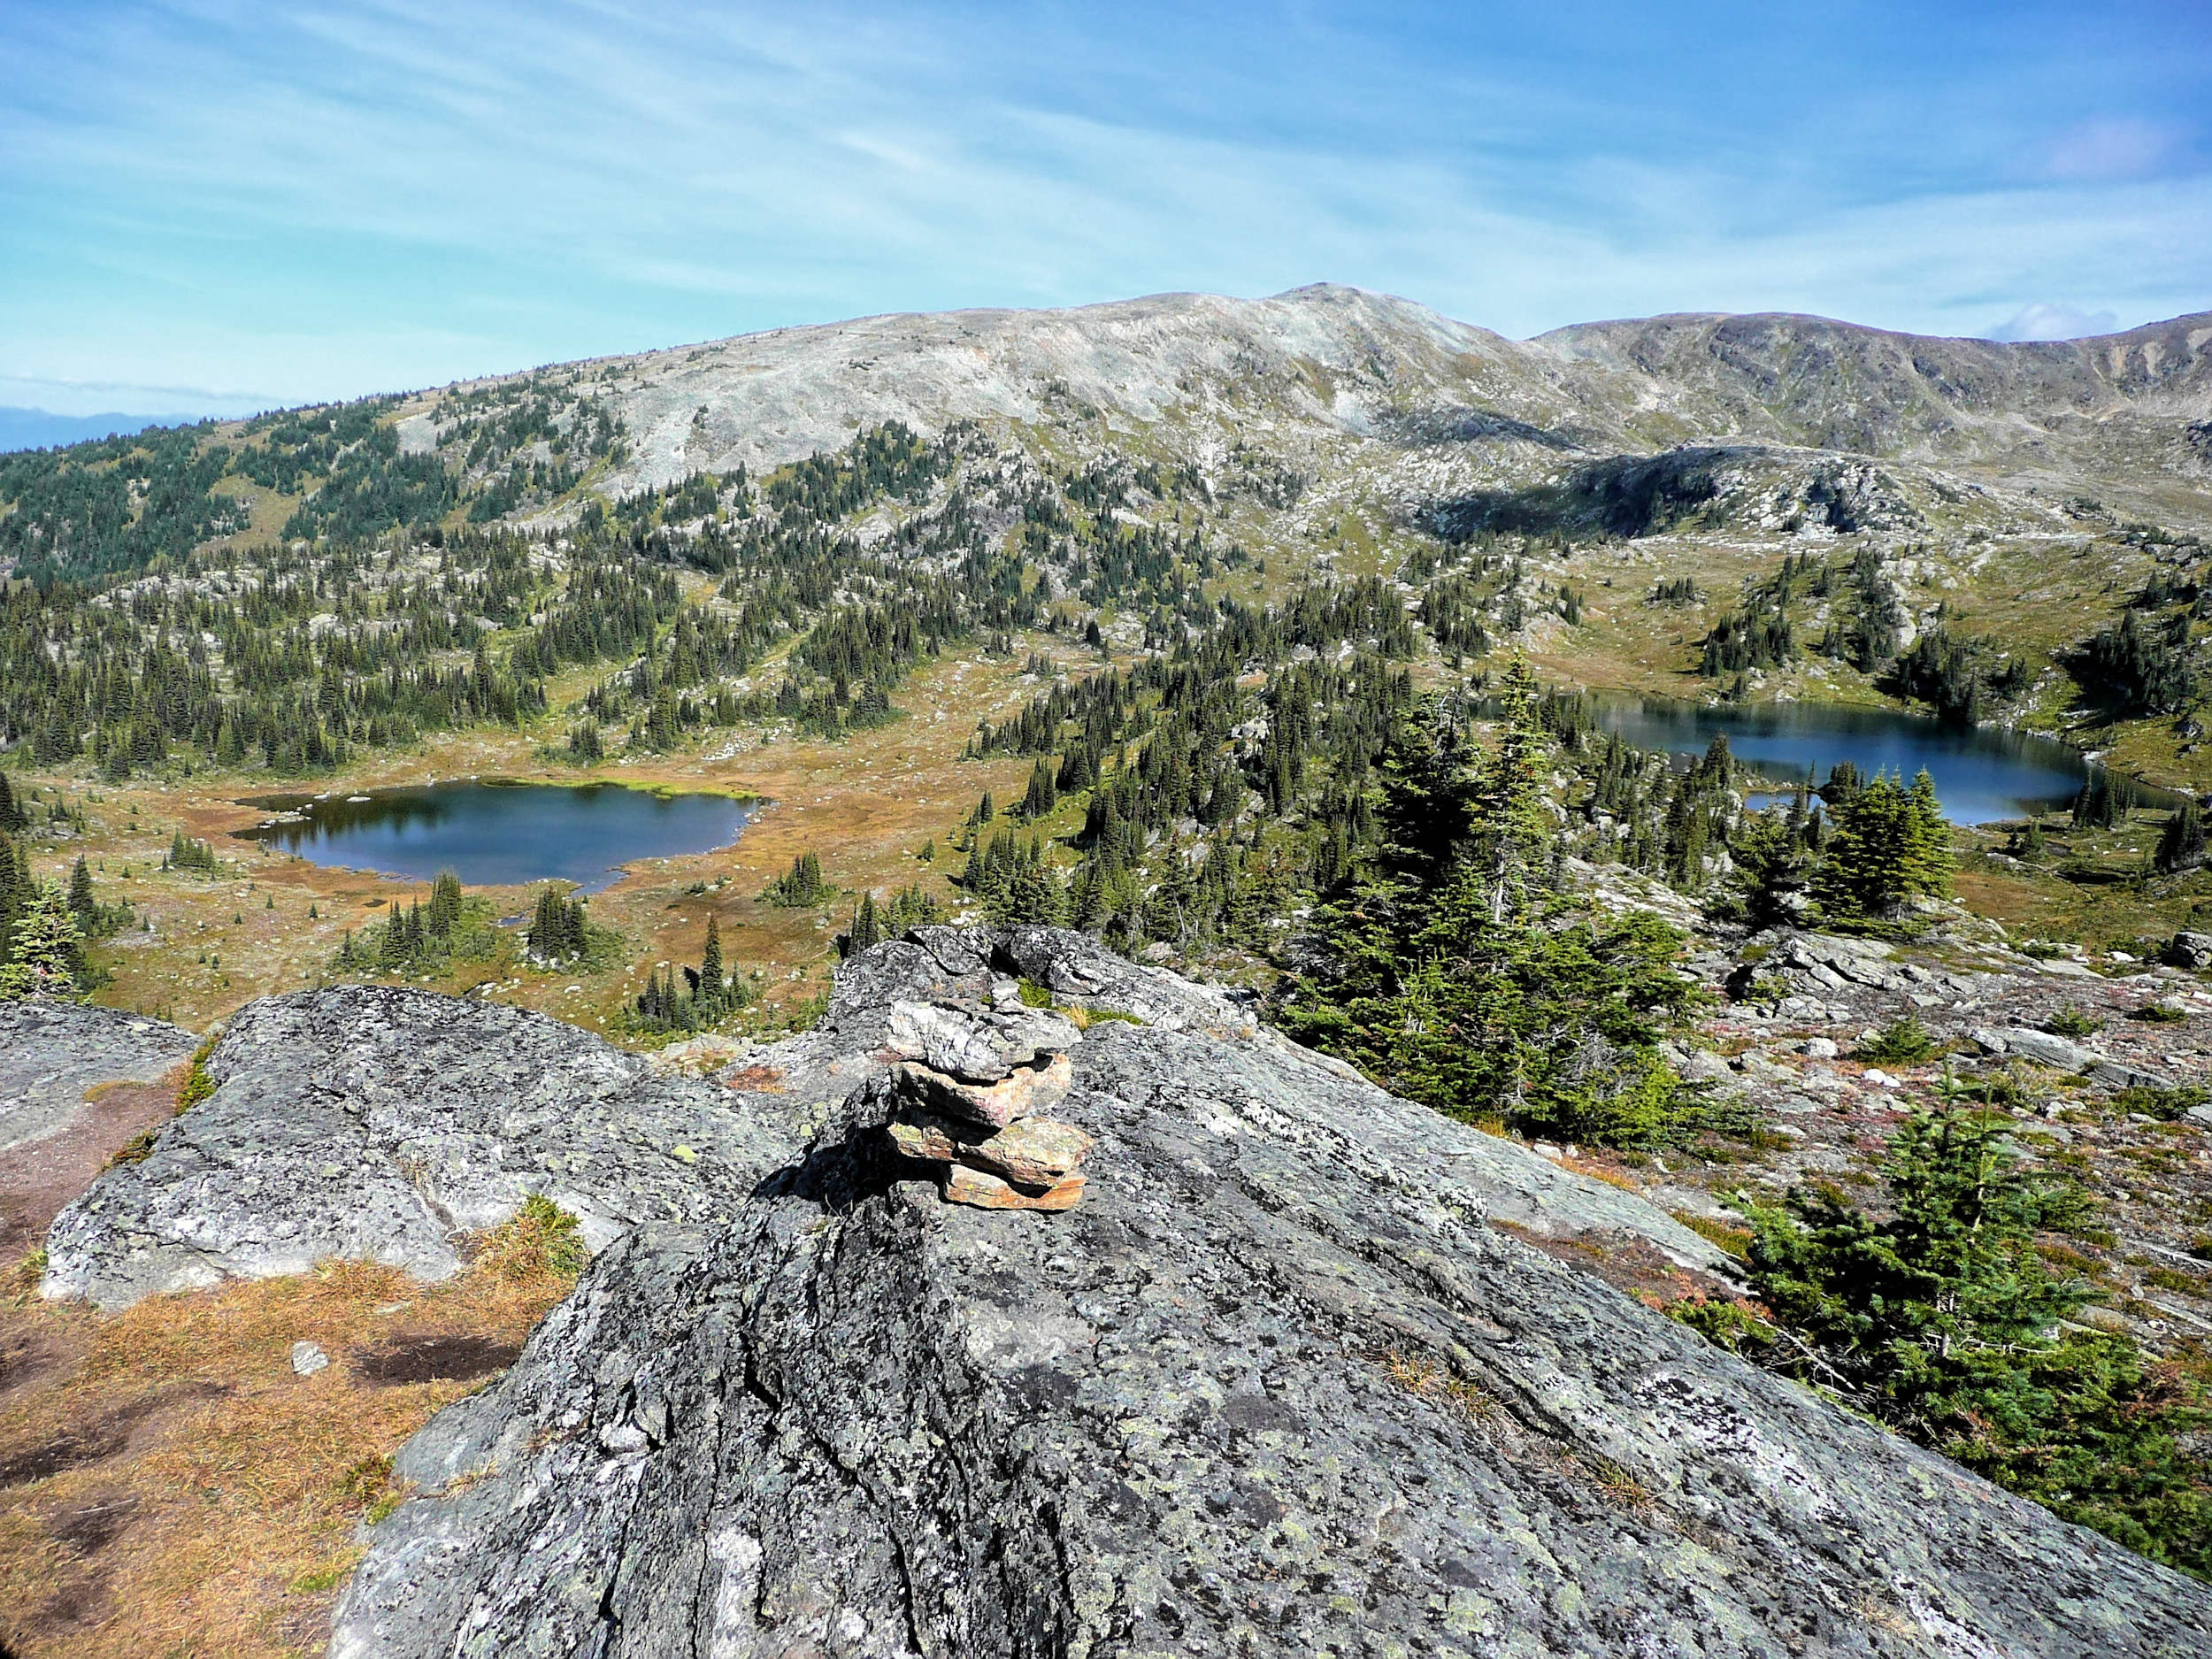
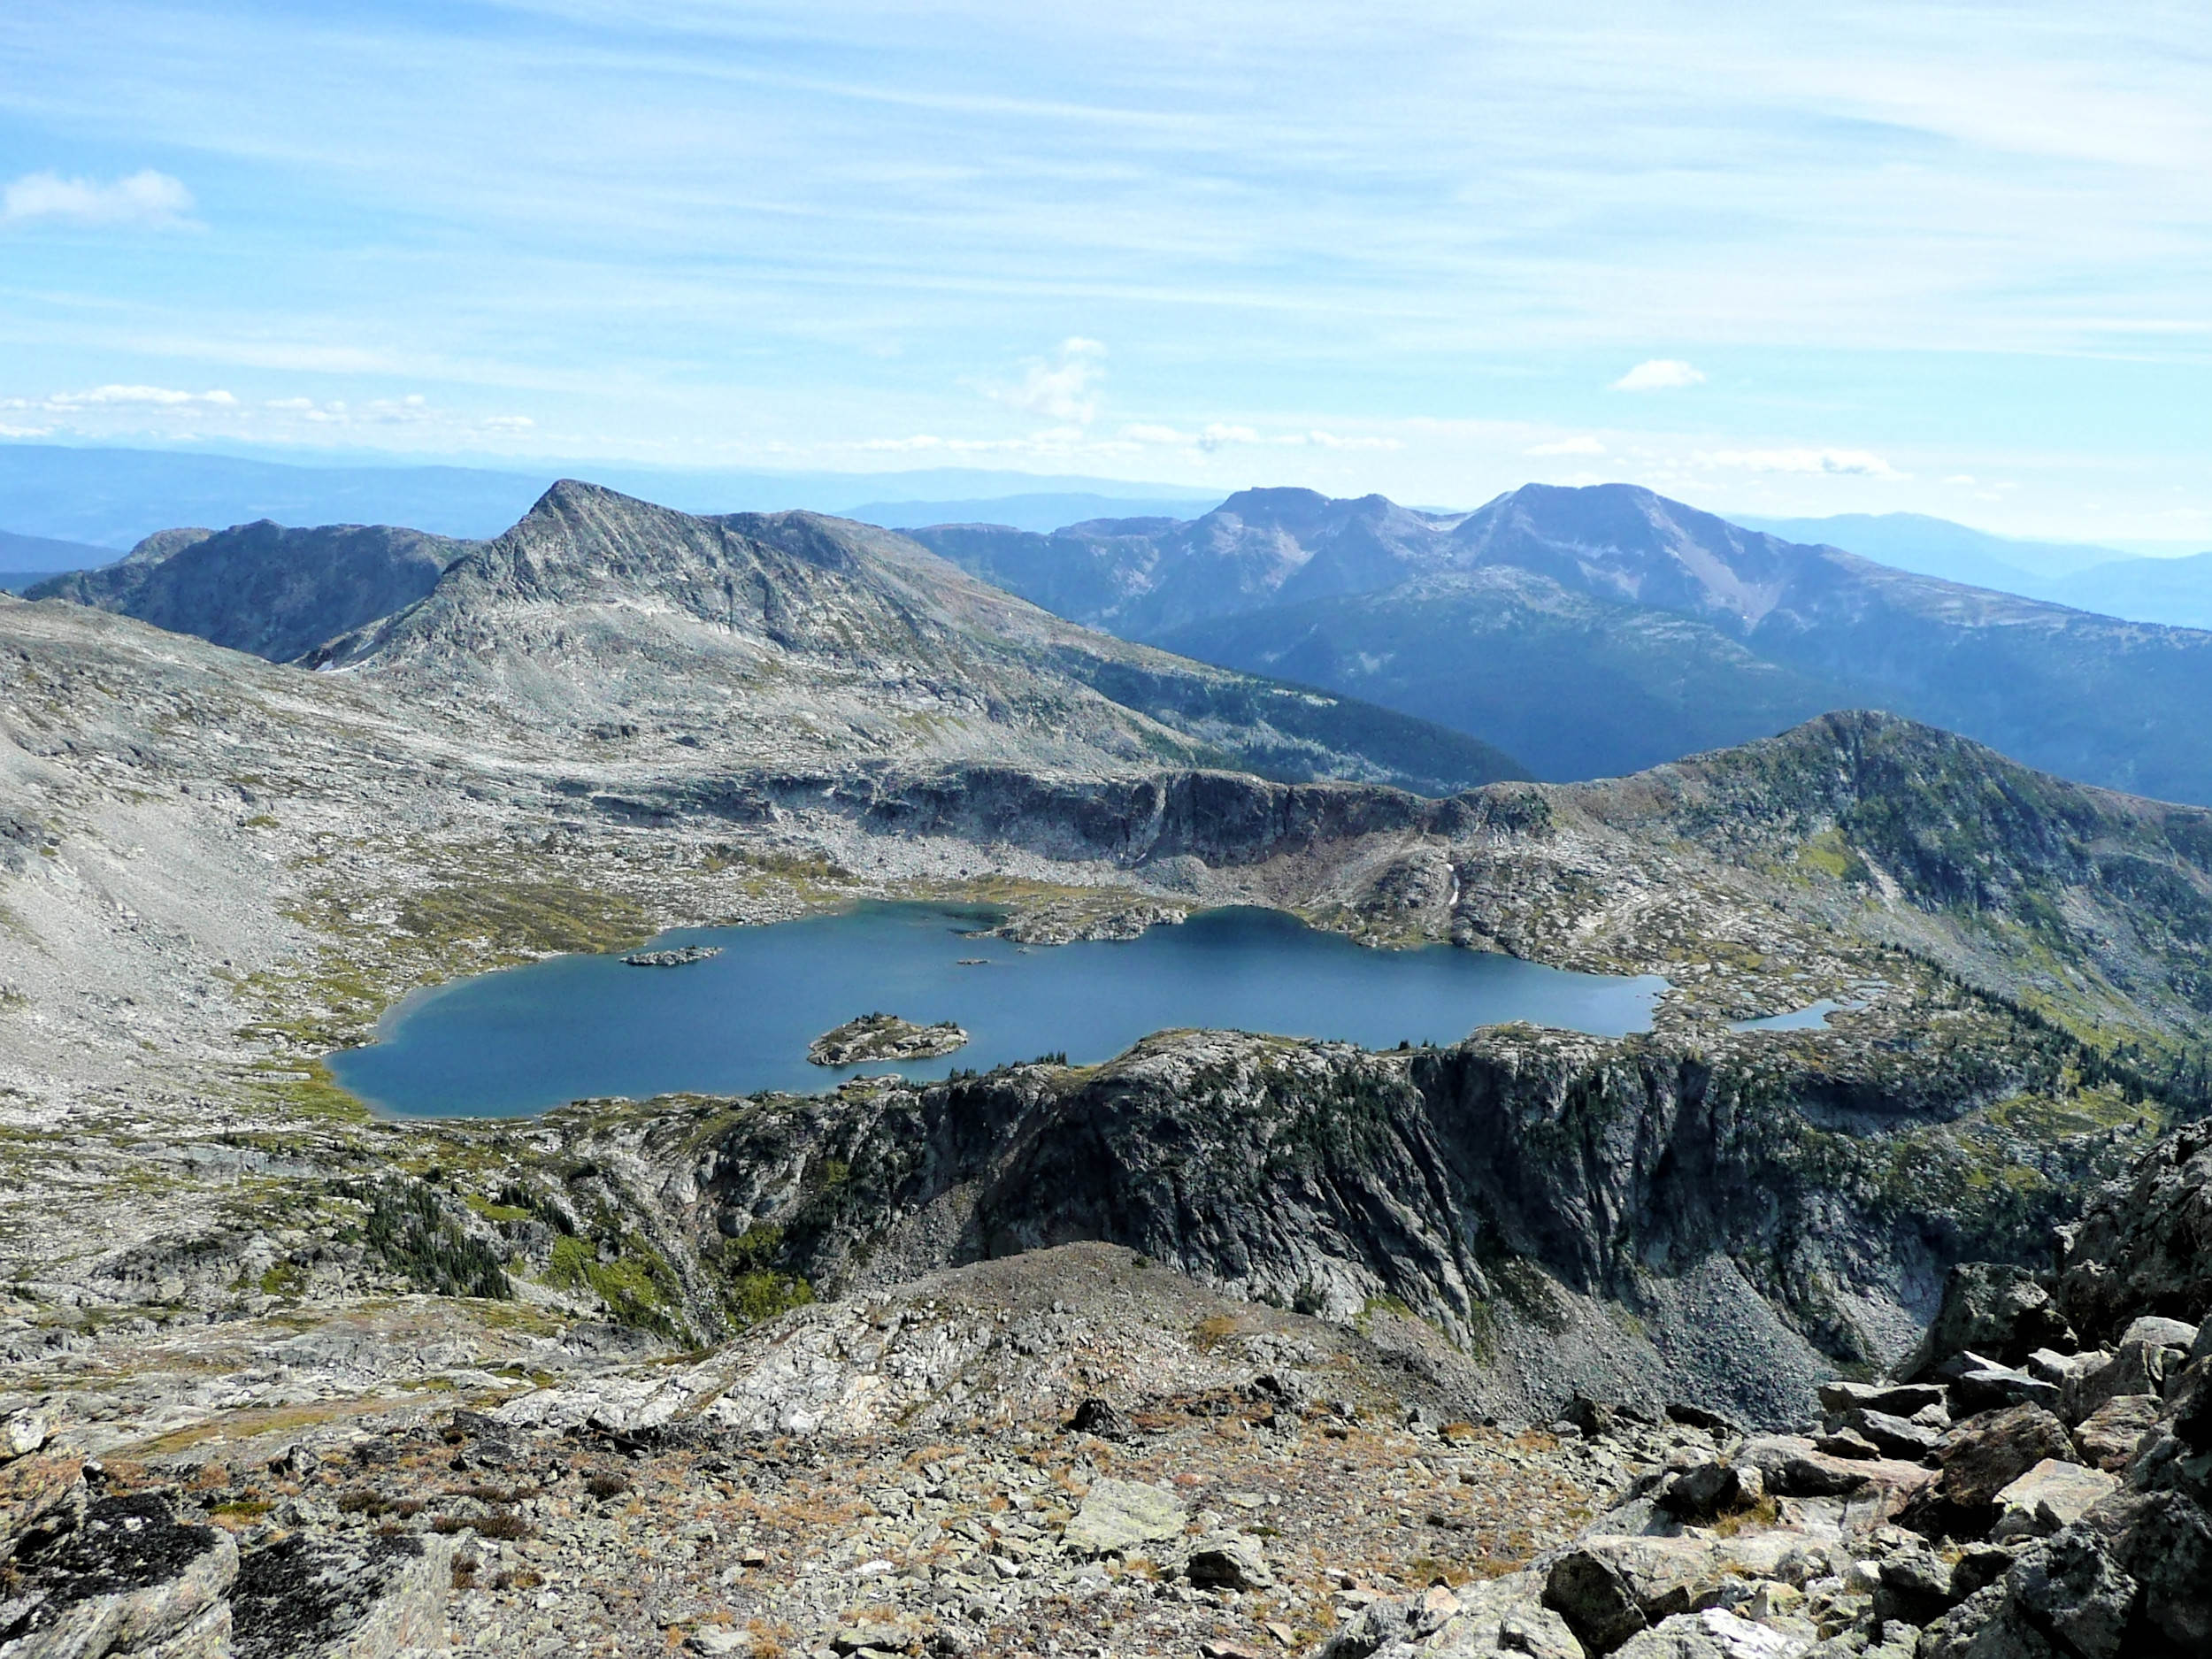
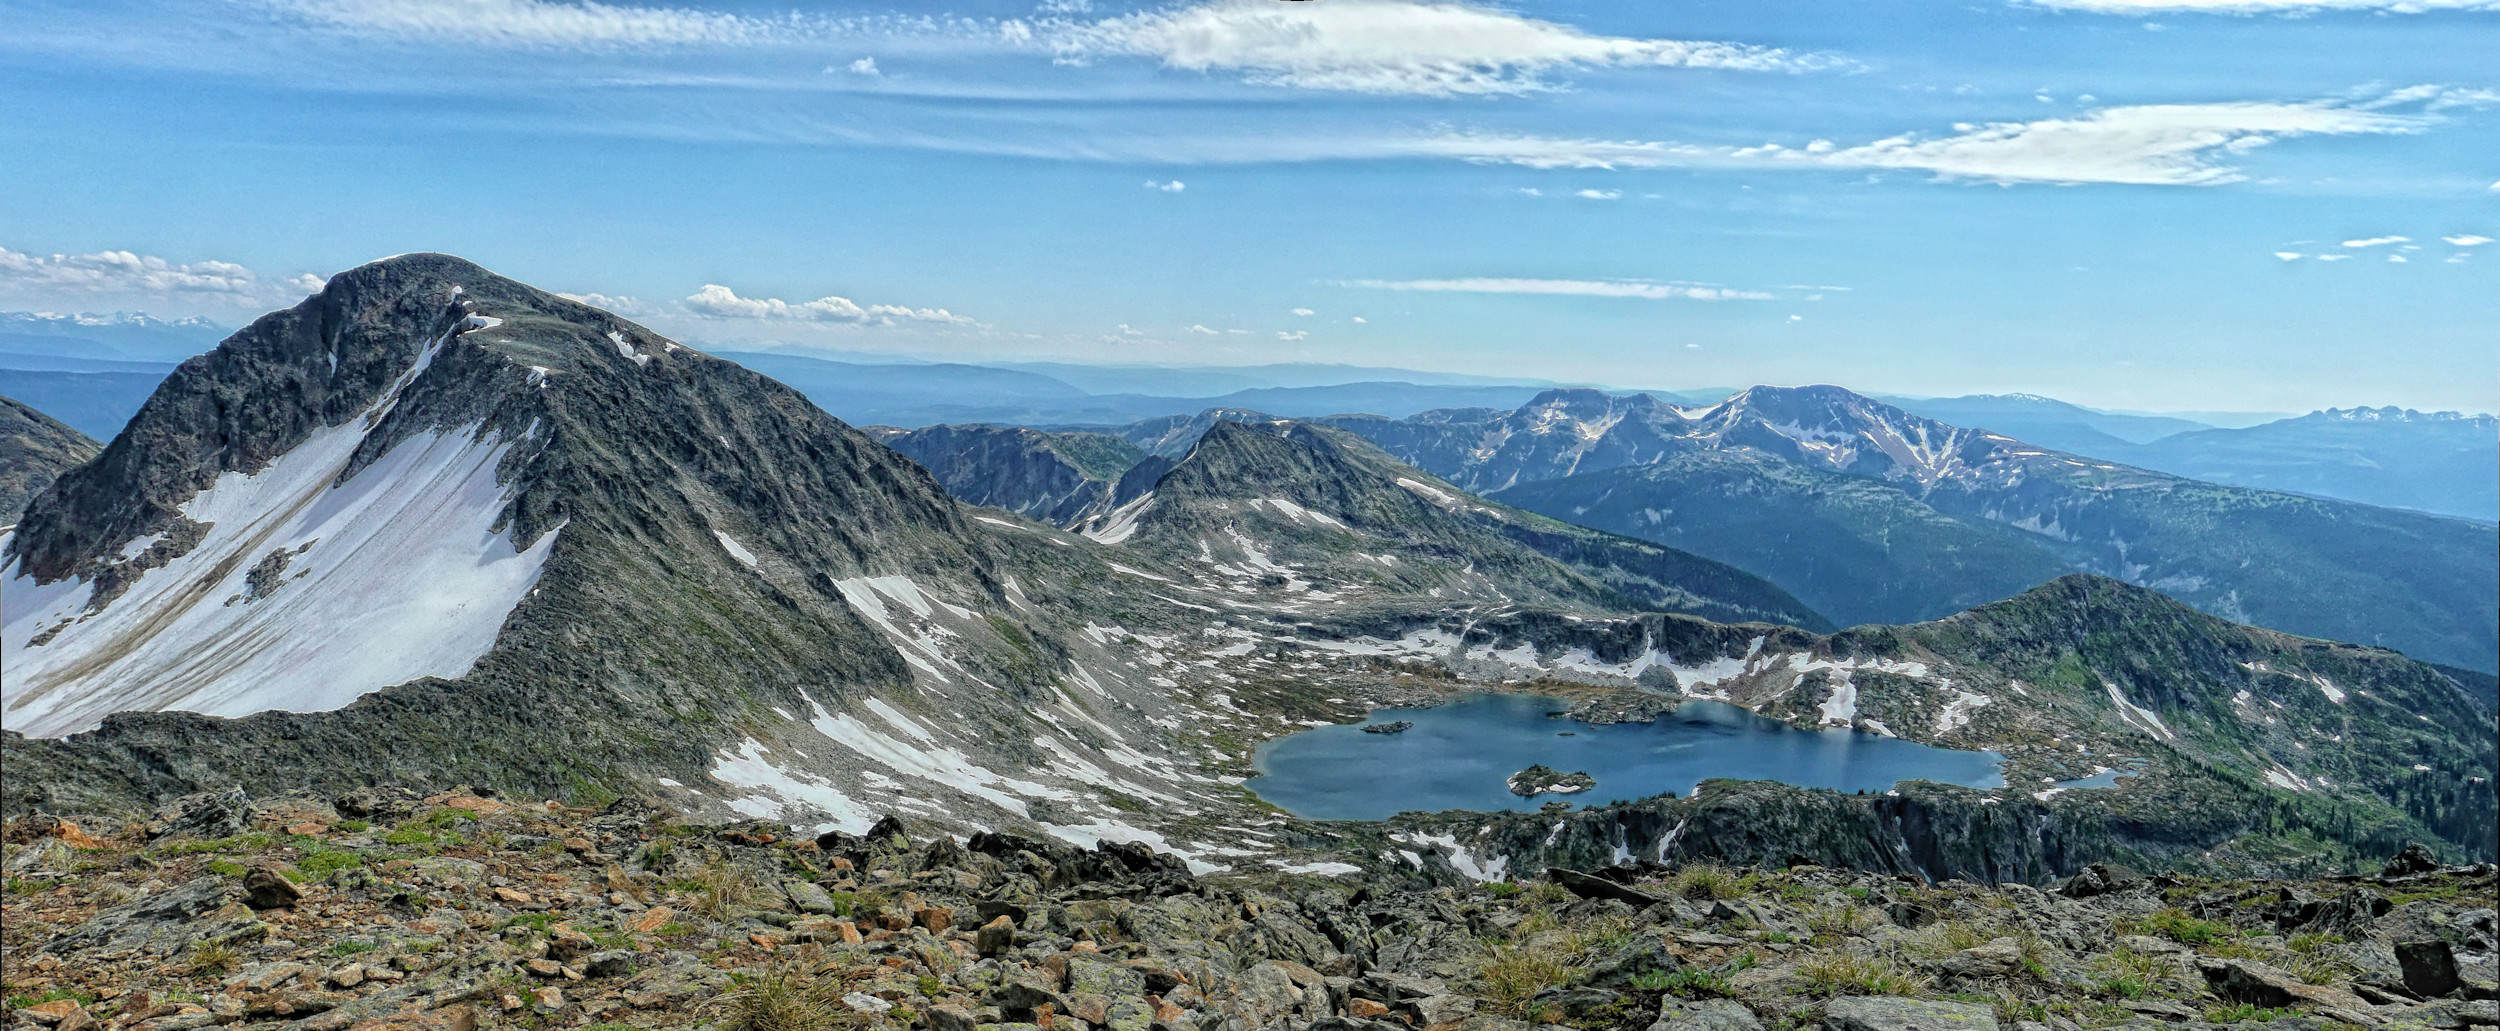
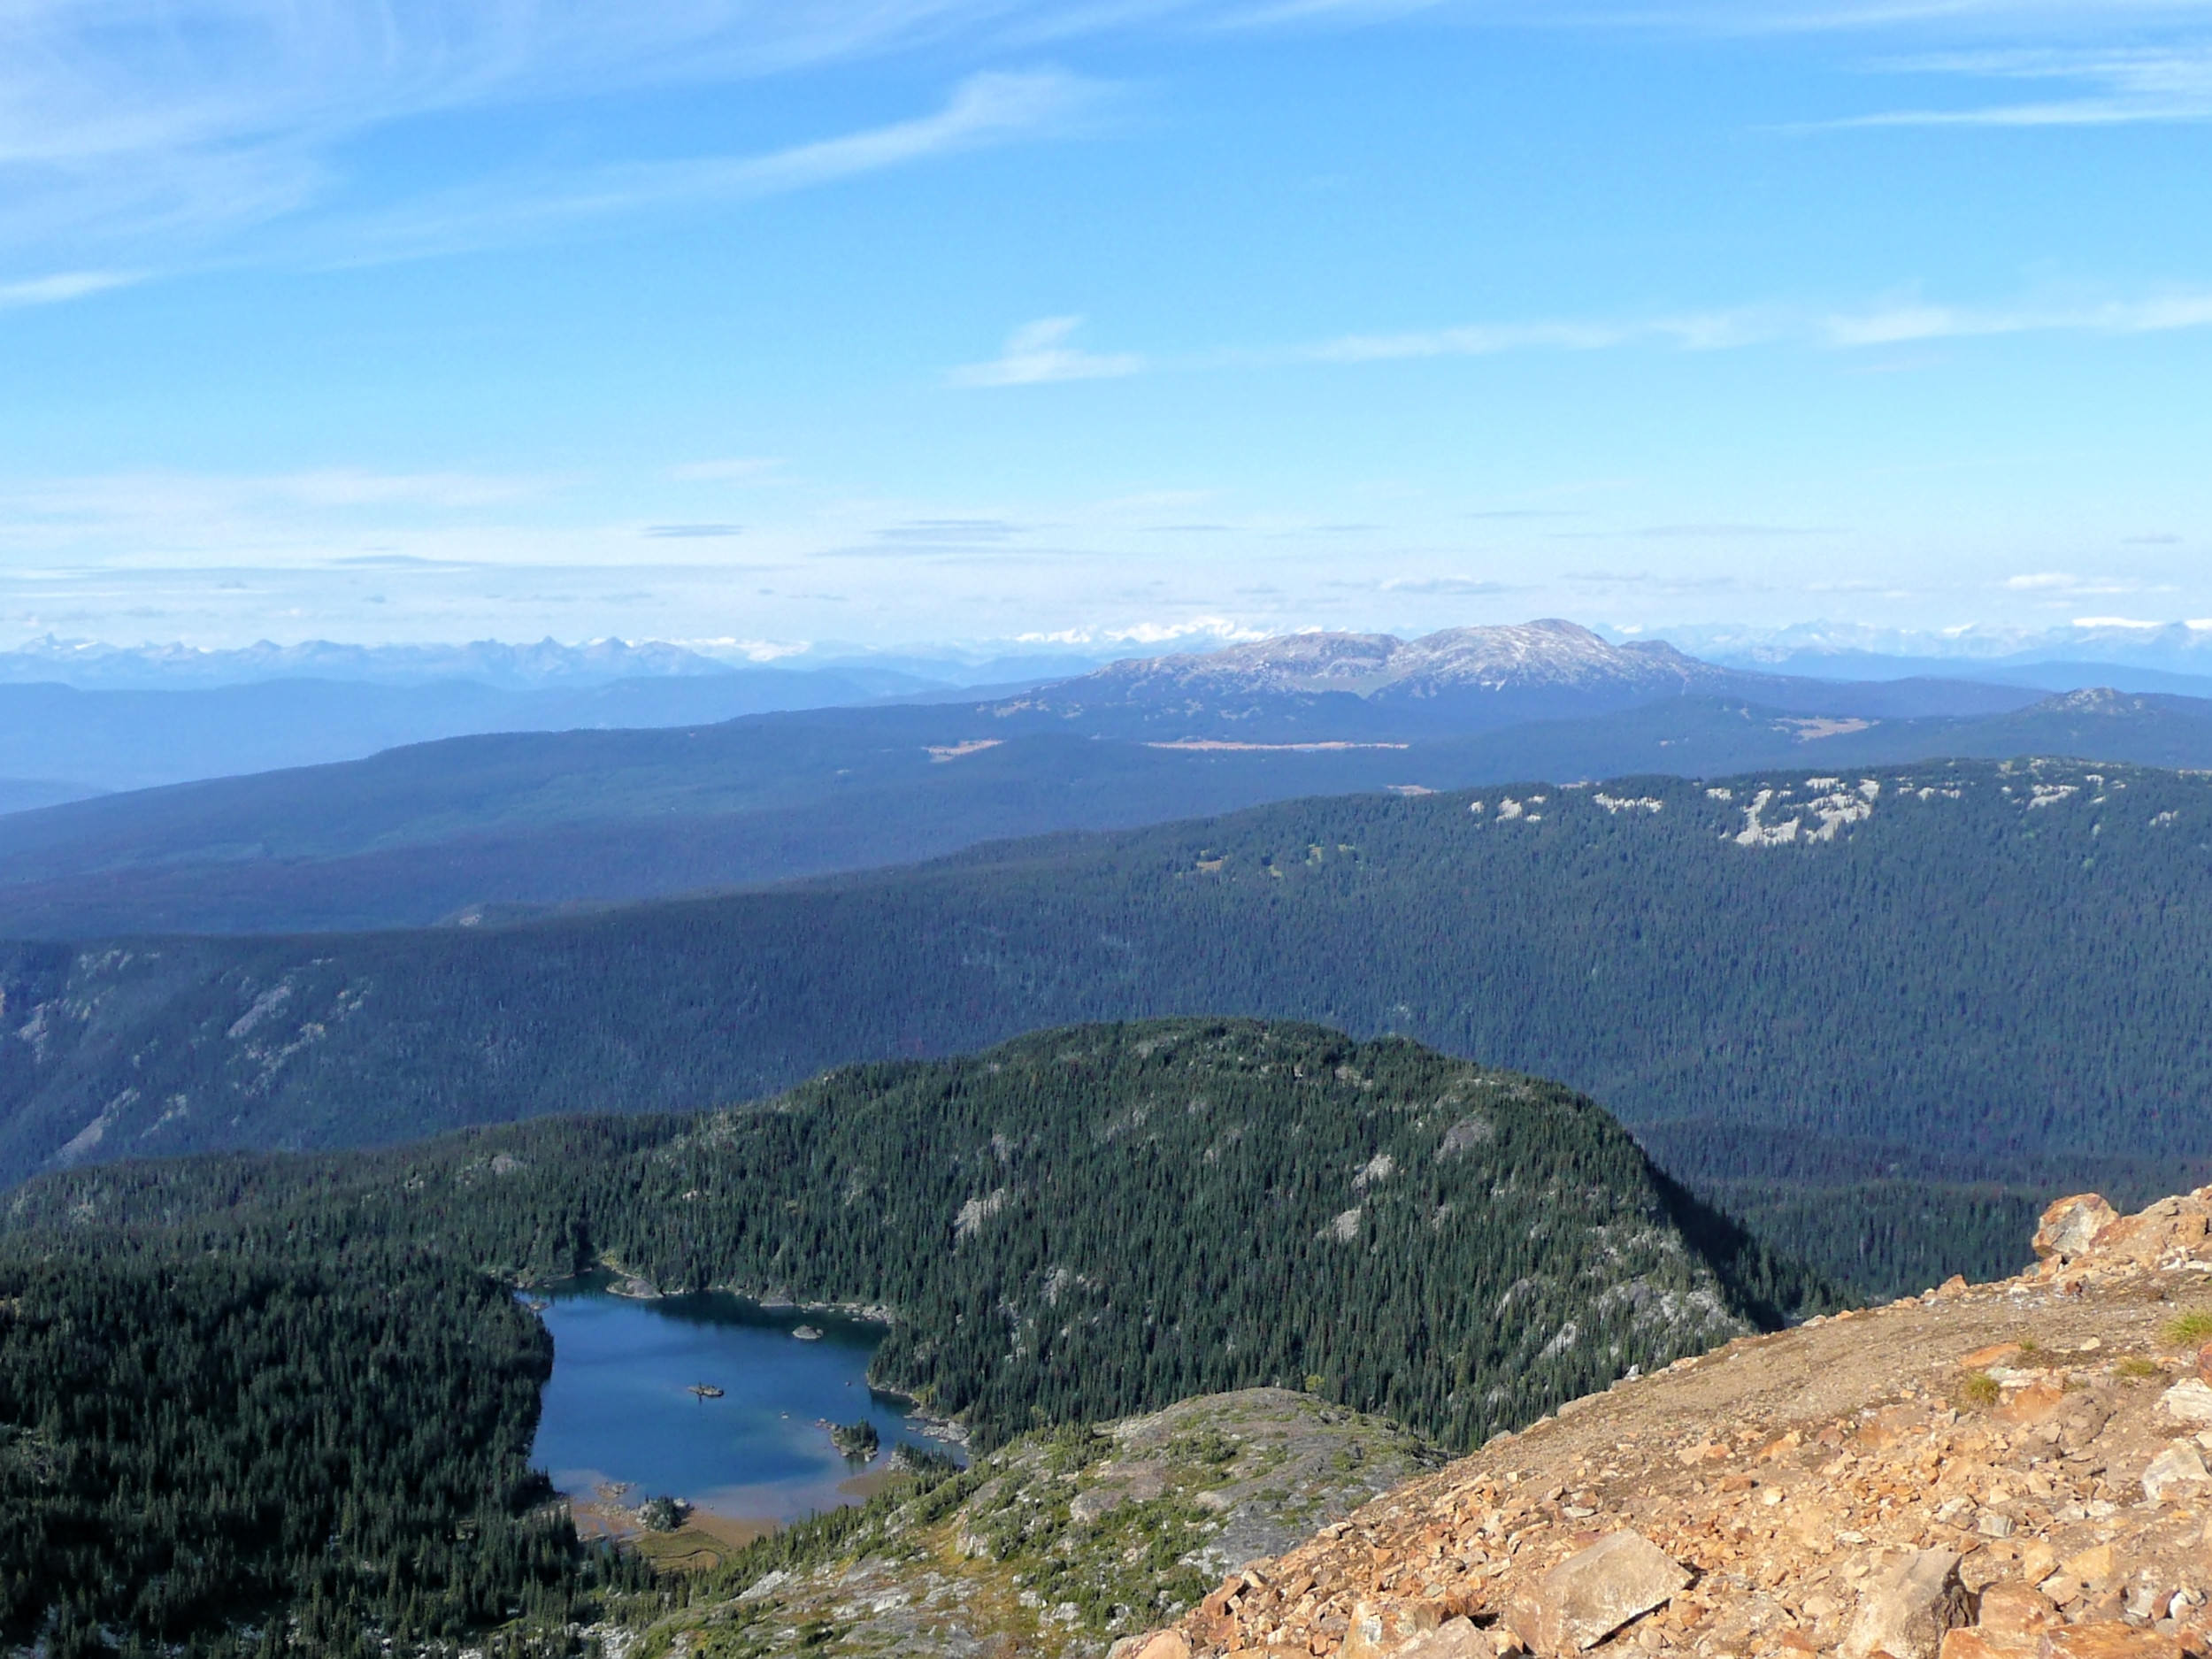
Ptarmigan Peak offers a fantastic view of Trophy Mountain and three tiered lakes in front of it.
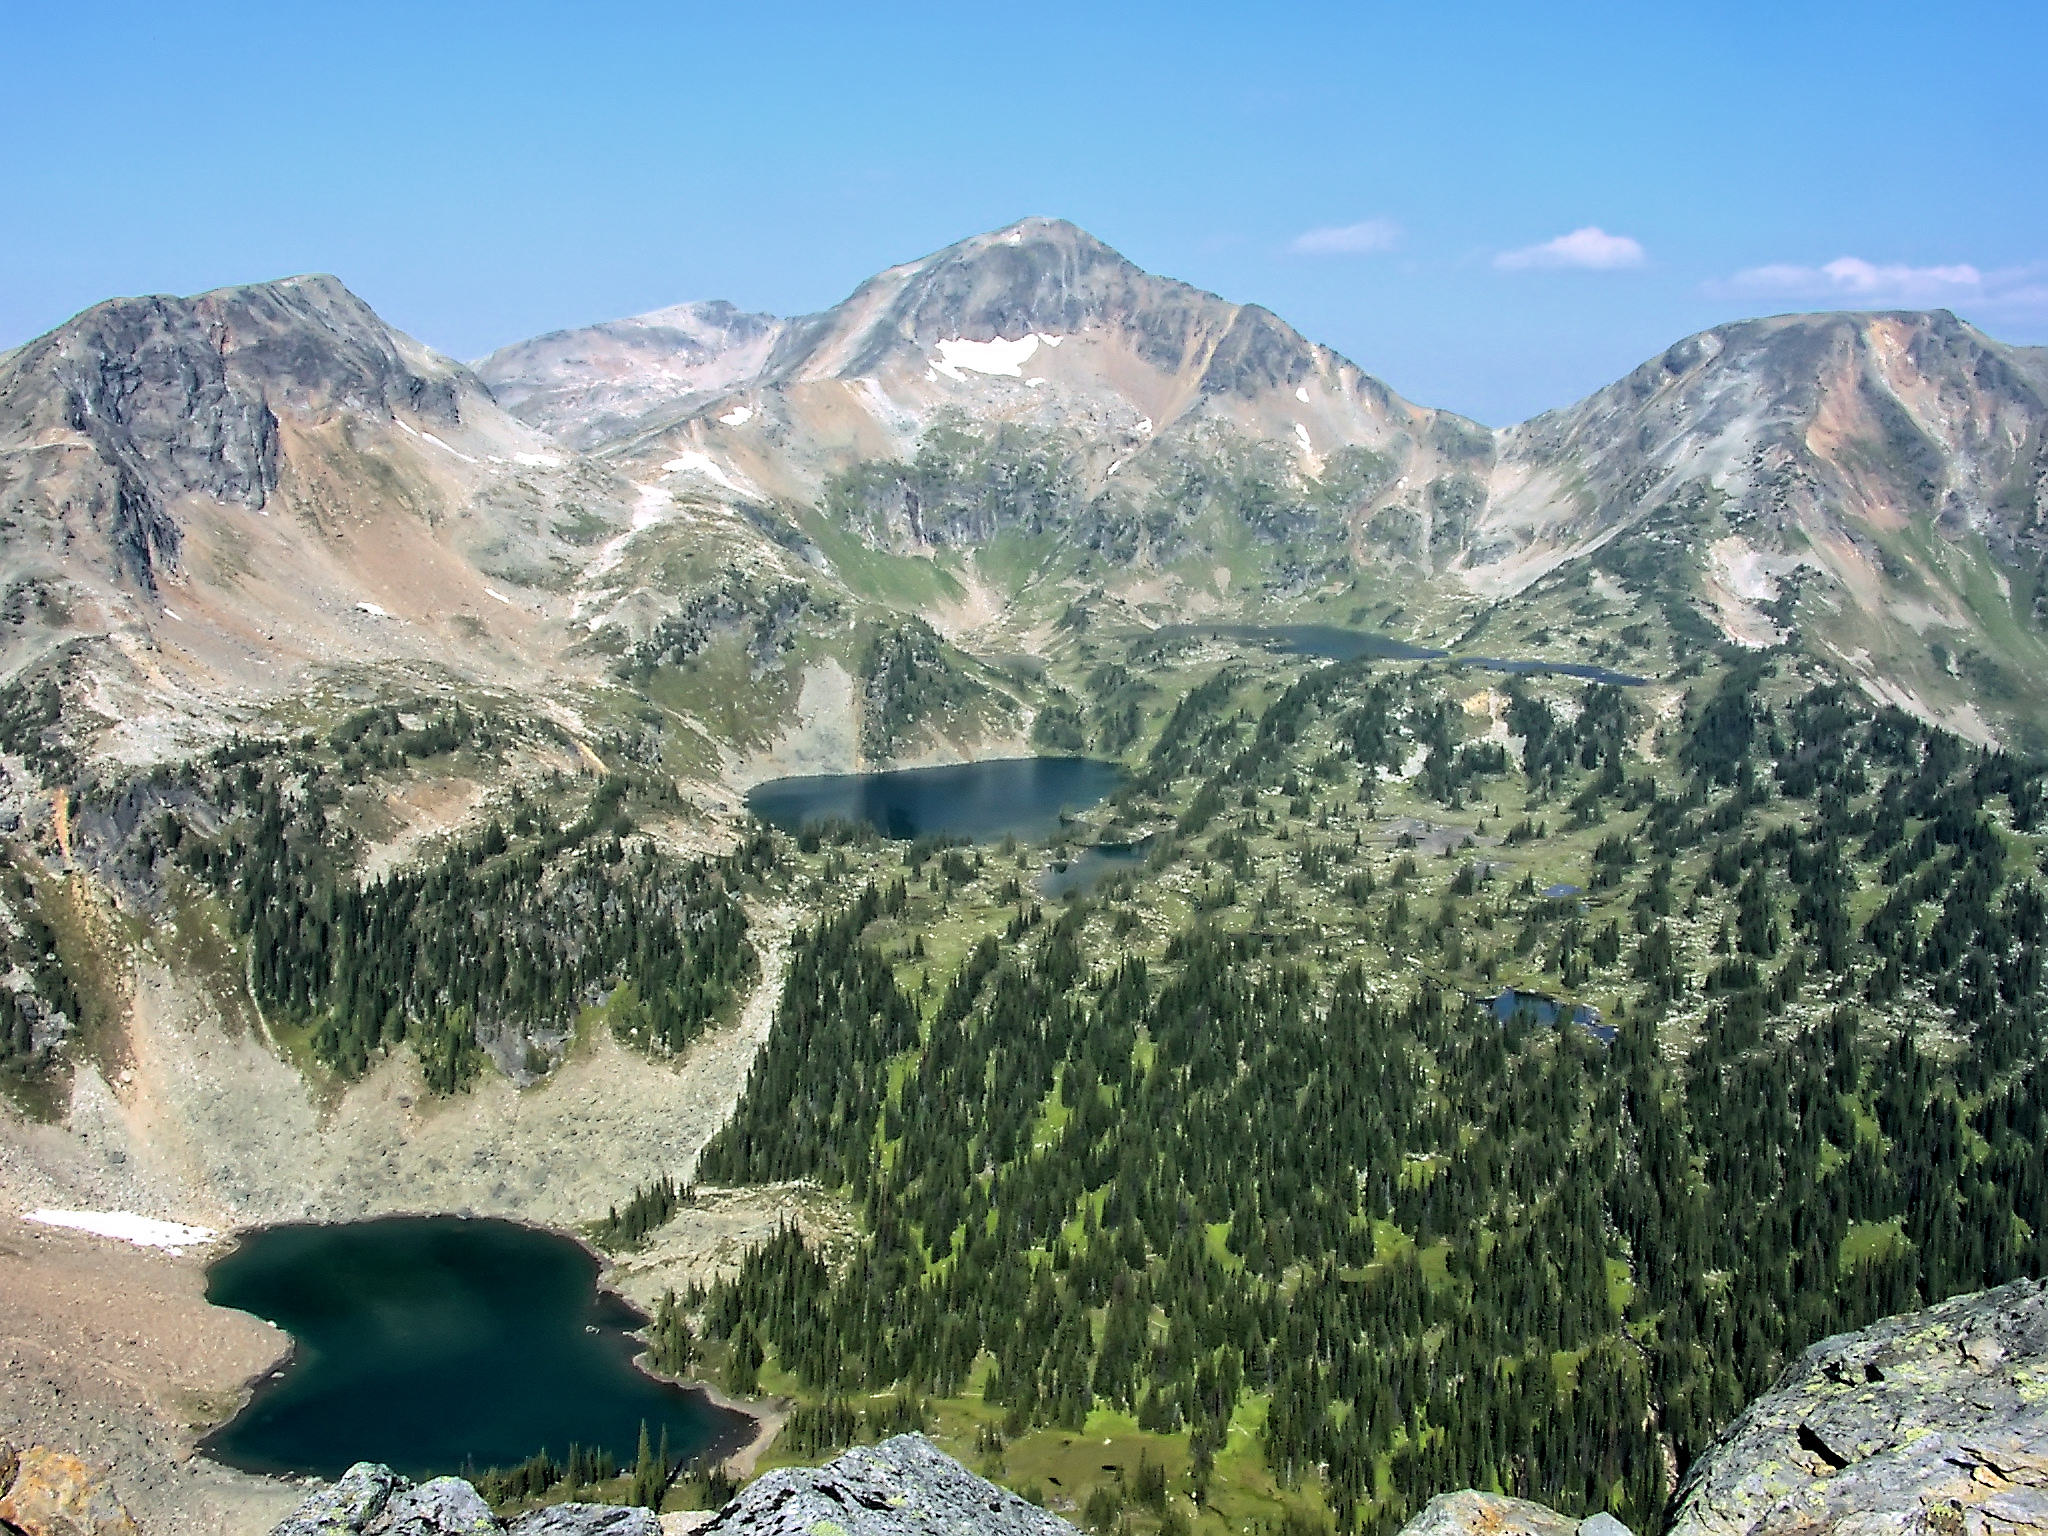
Trophy Lakes
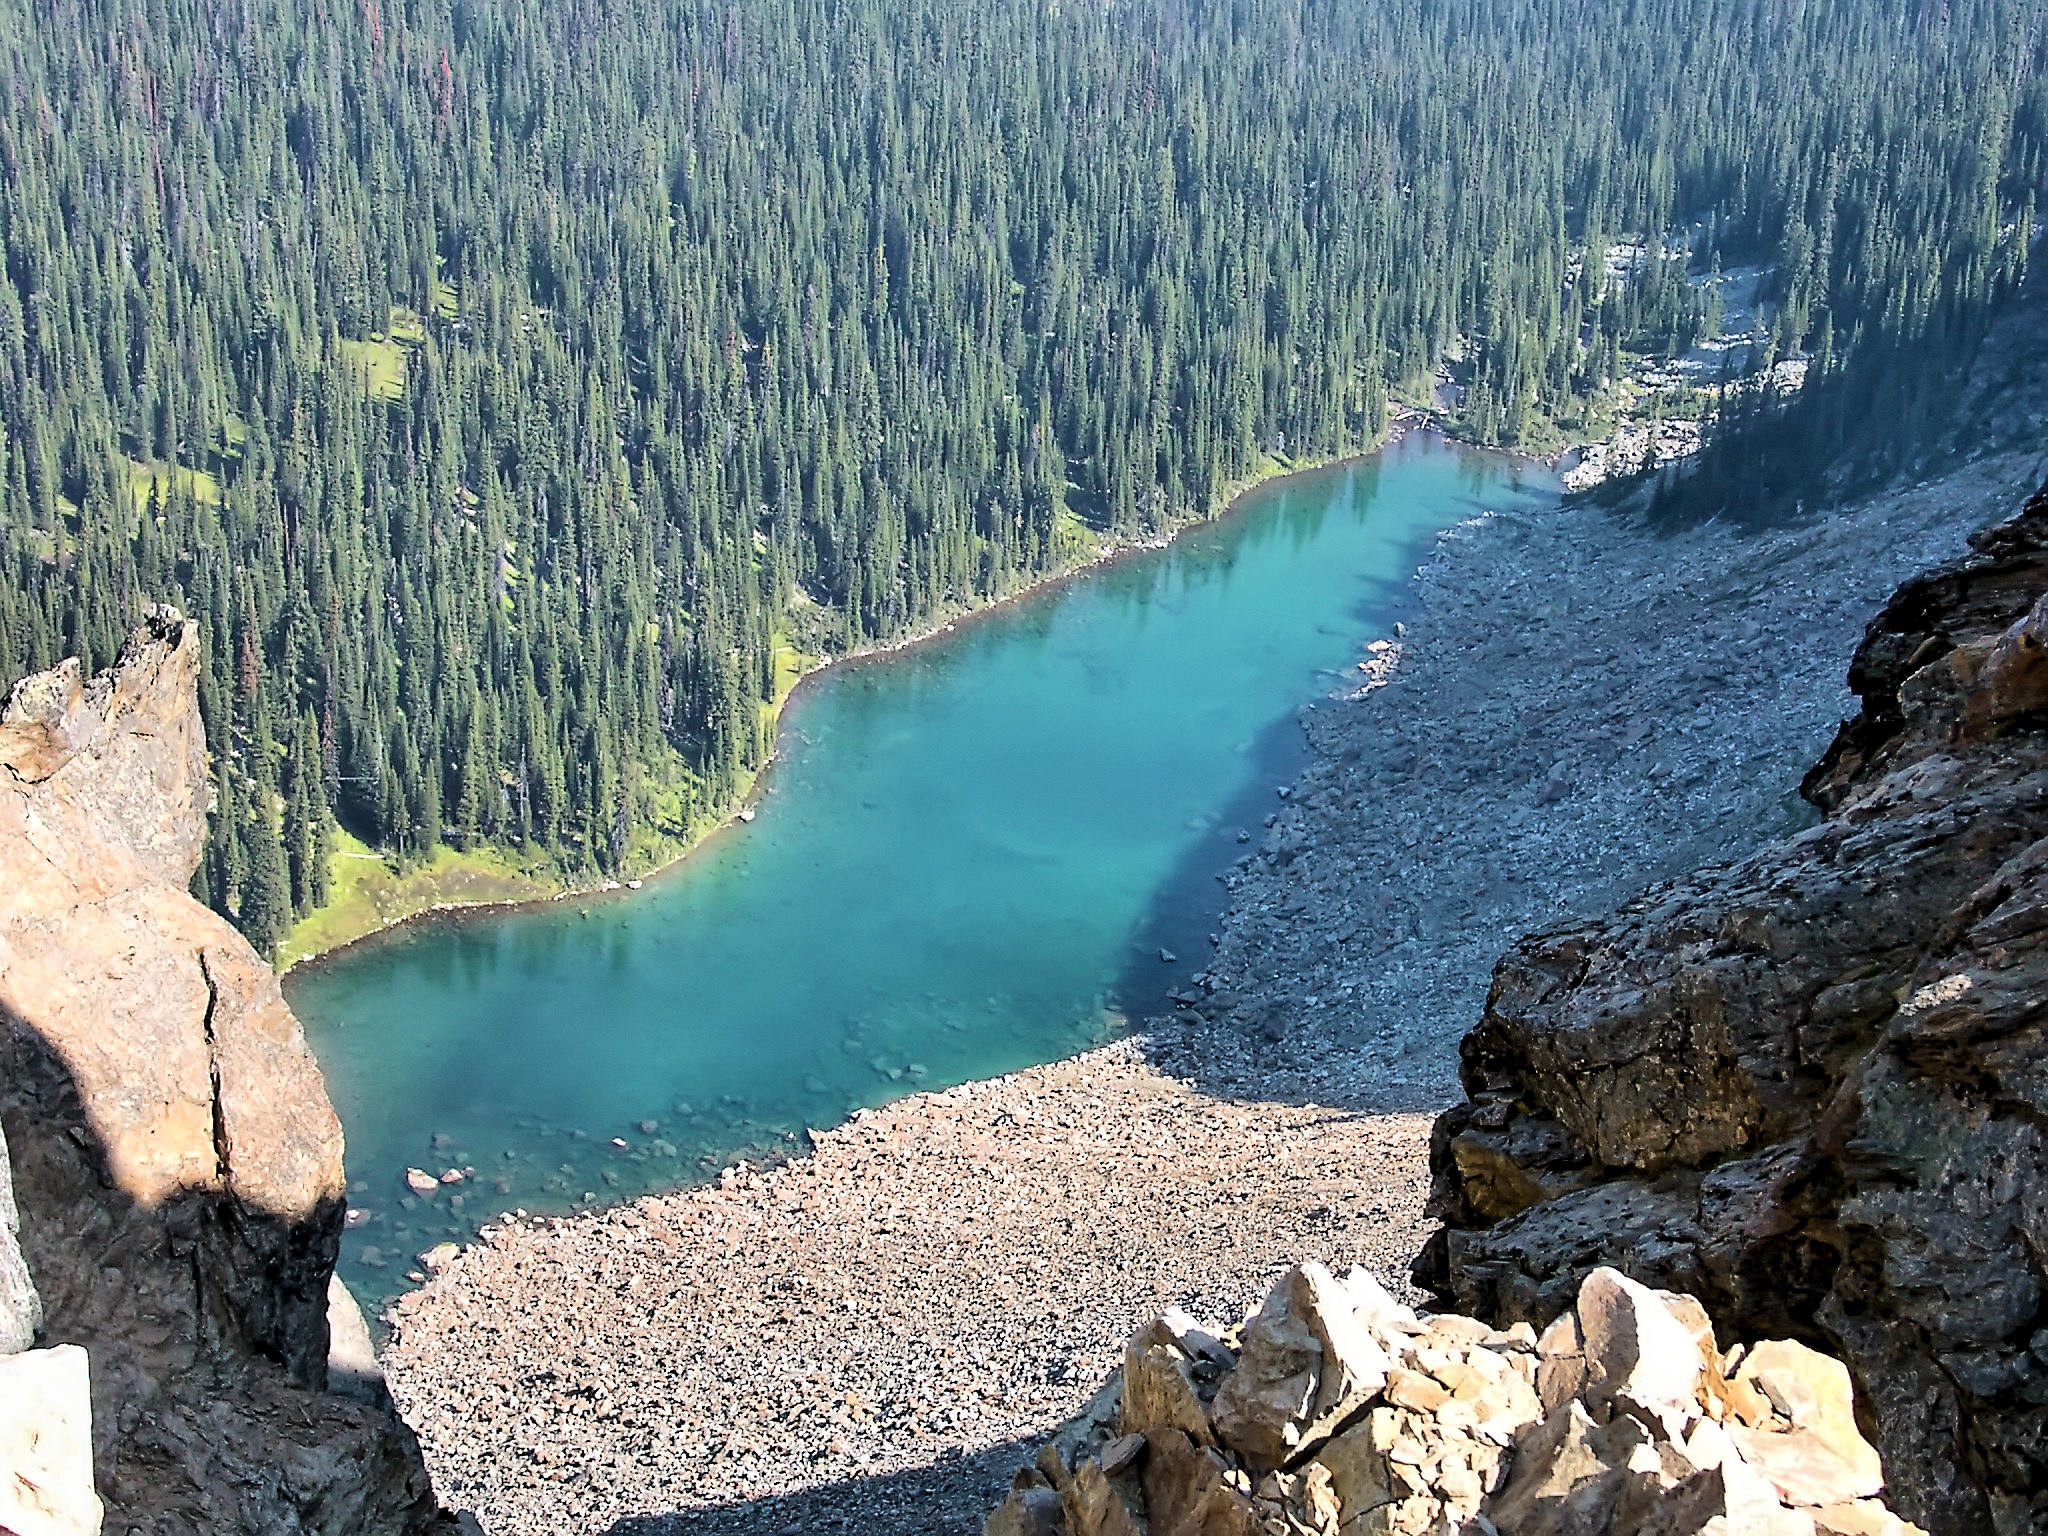
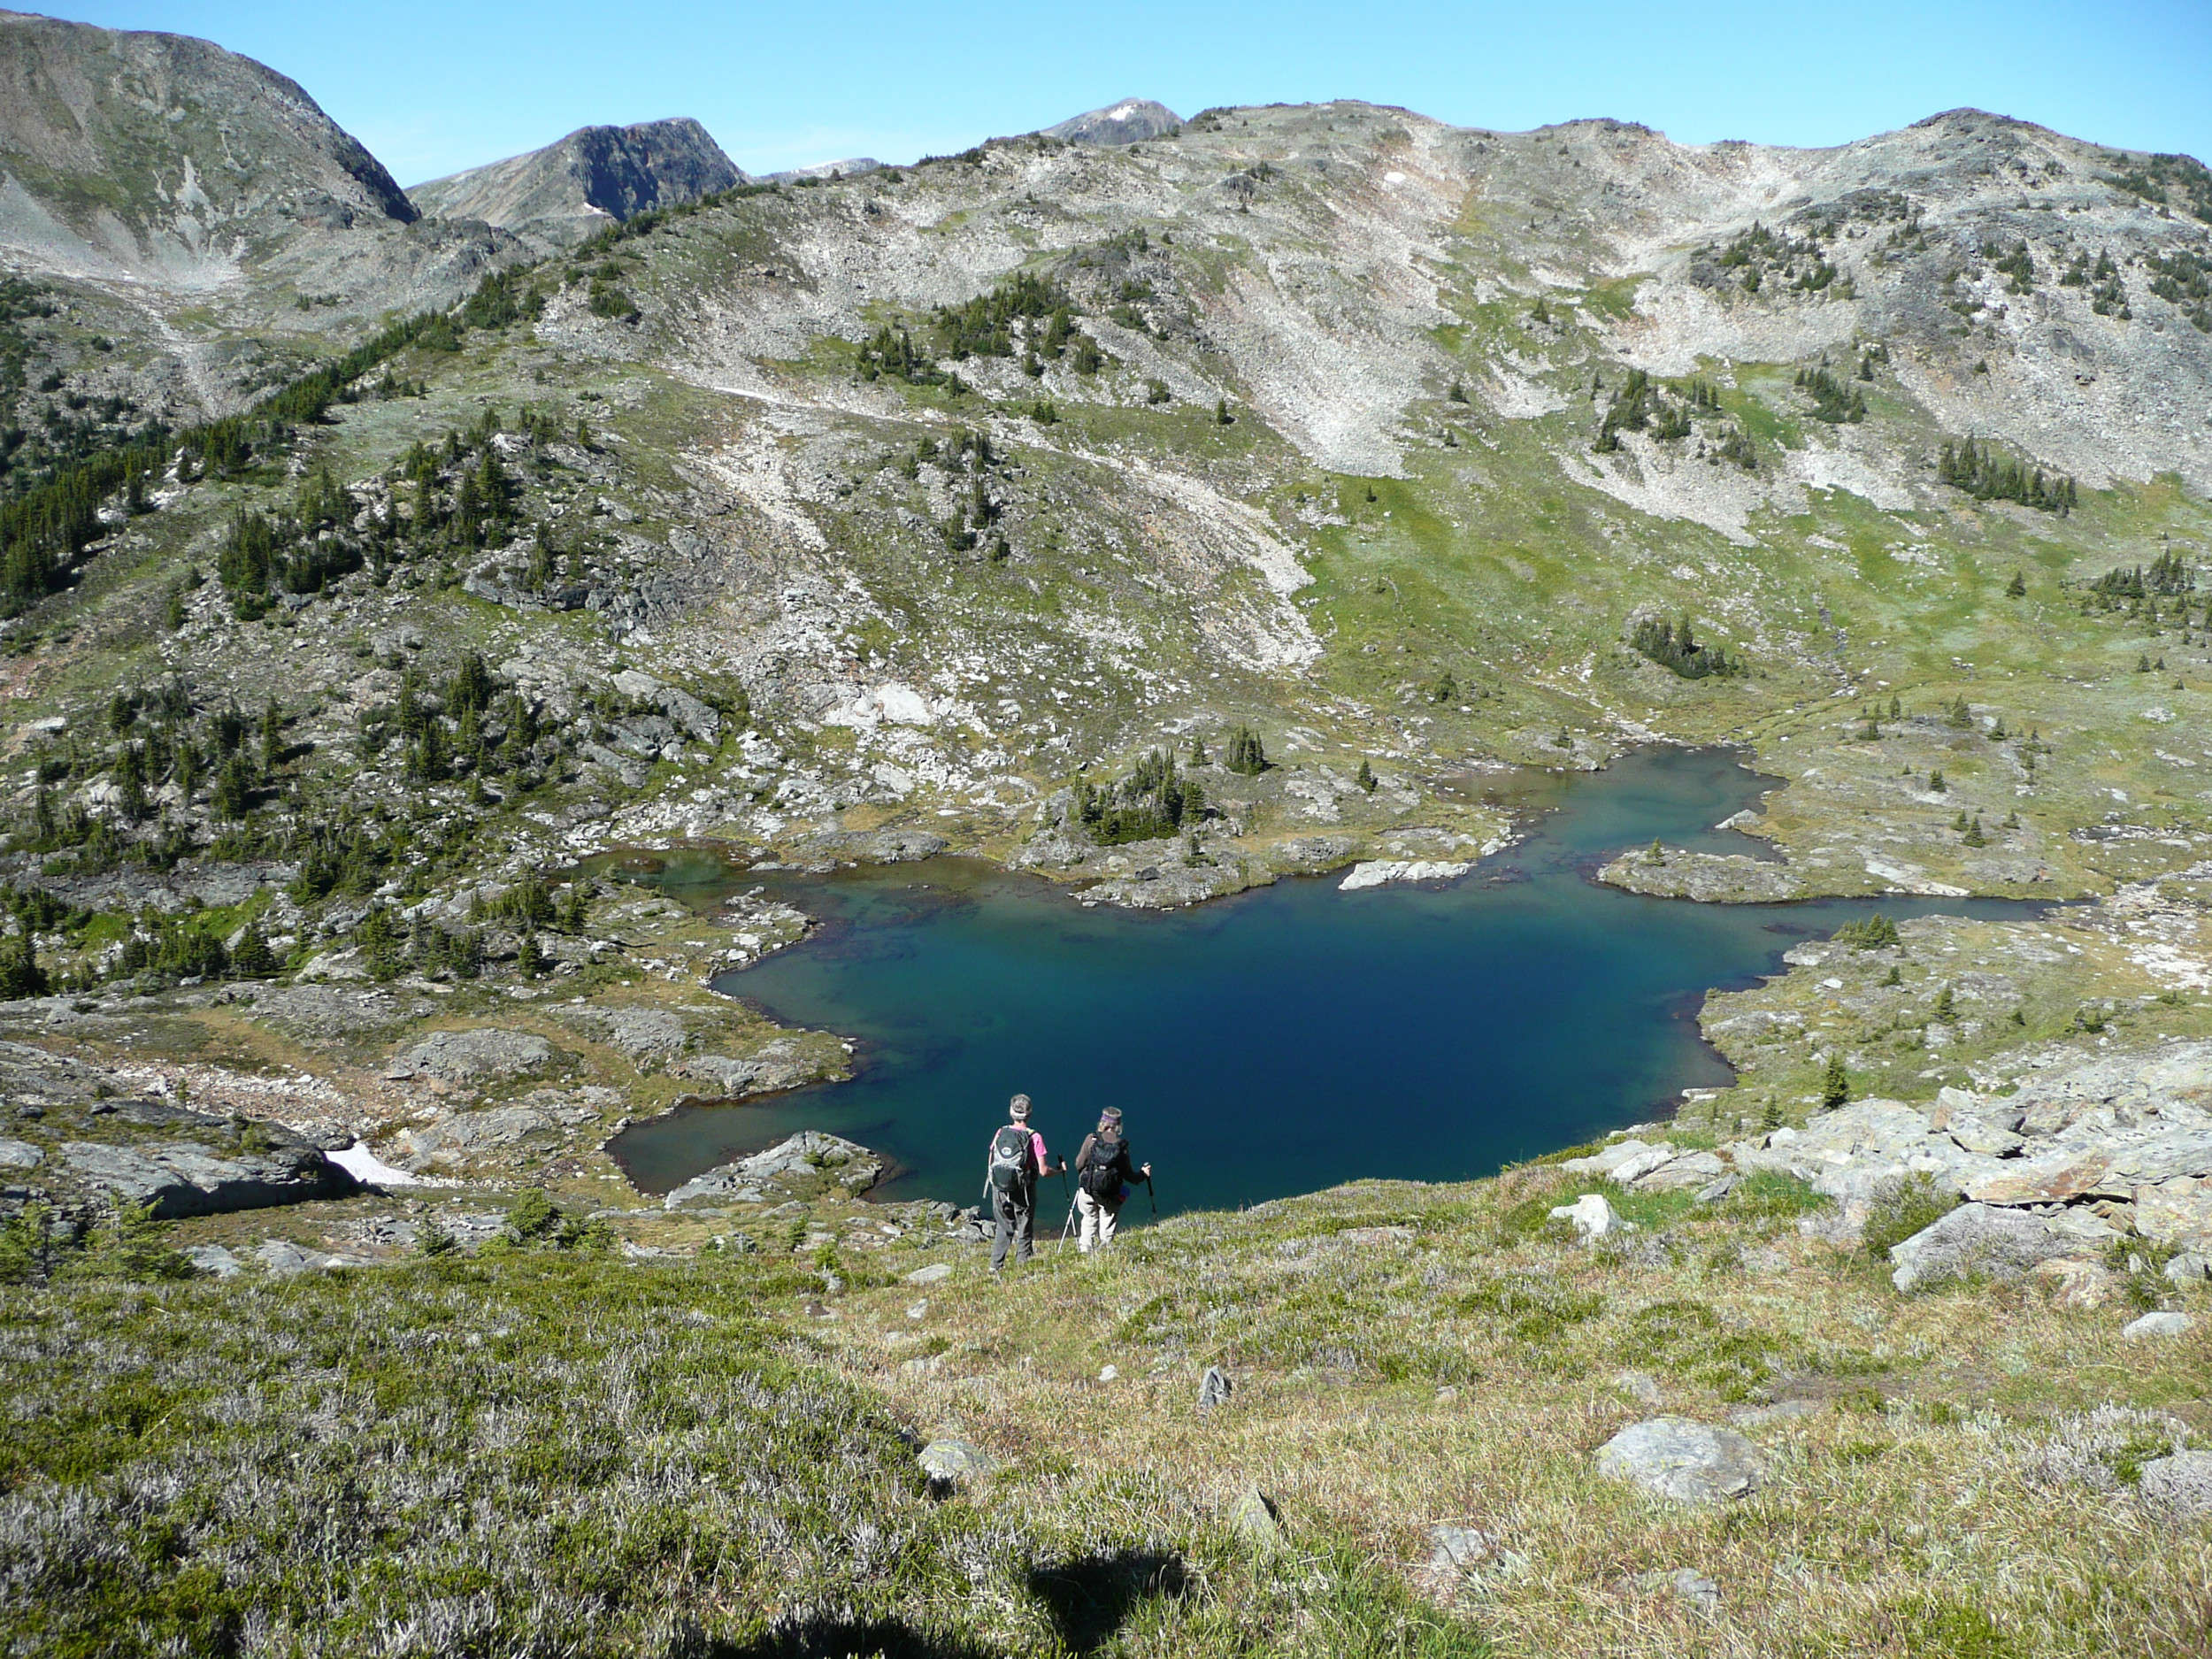
Another unnamed lake lies far below. Over on the other side, we look down at Swim Lake, a big mountain lake surrounded by rocks of all sizes. This is where we are headed.
View from Ptarmigan Peak
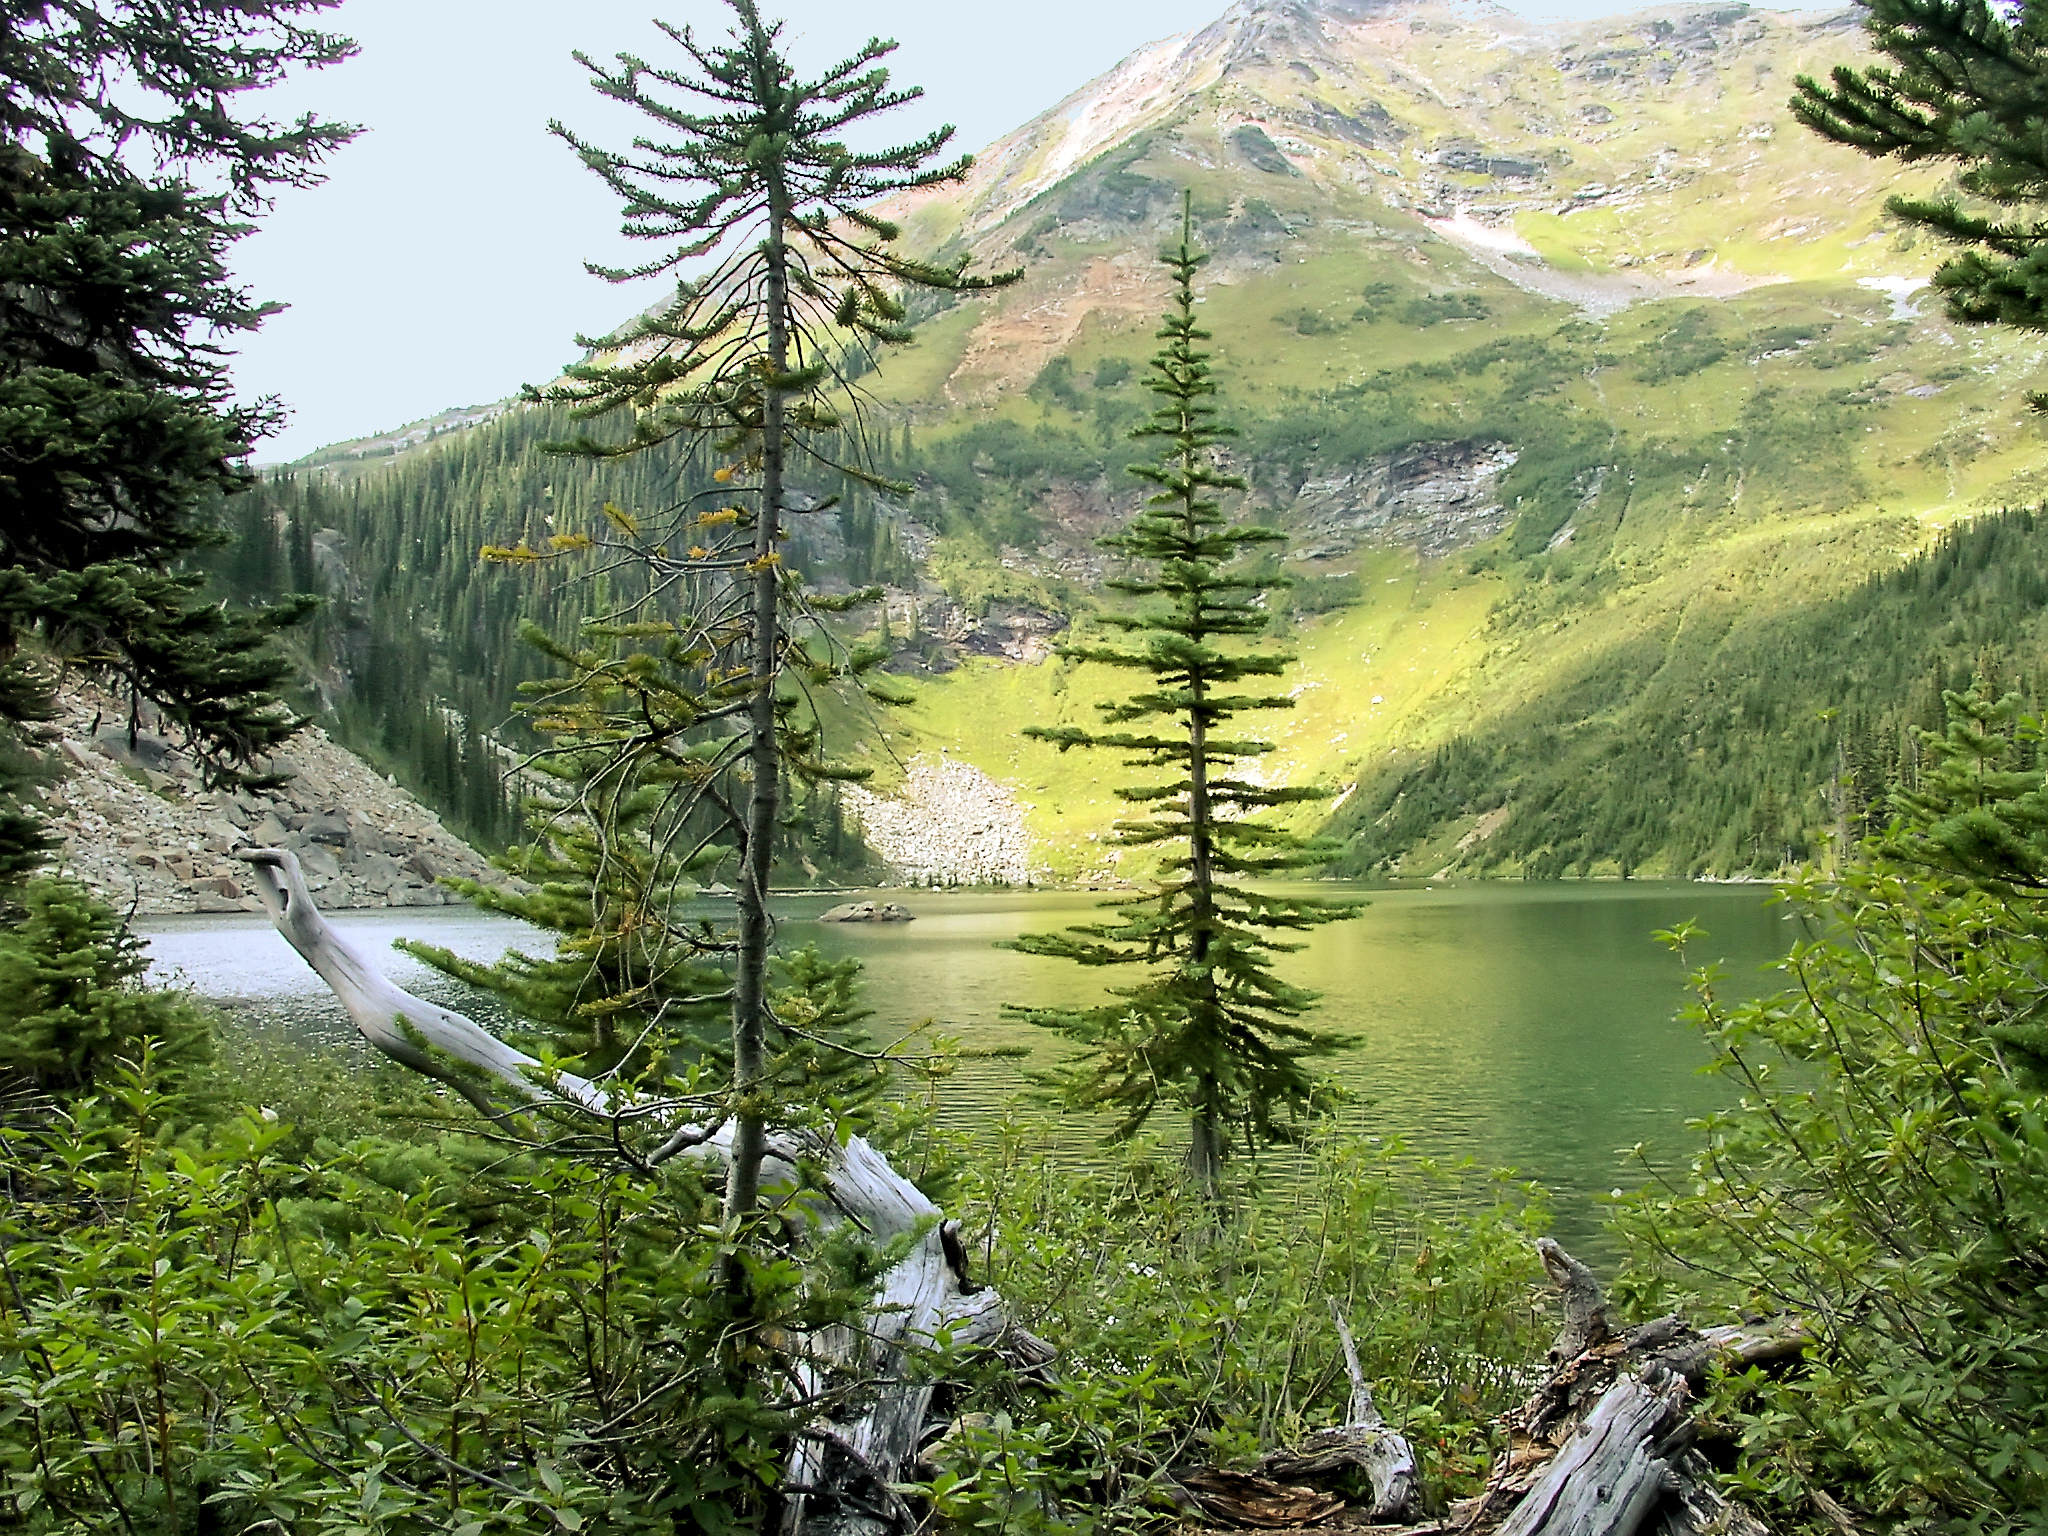
Swim Lake
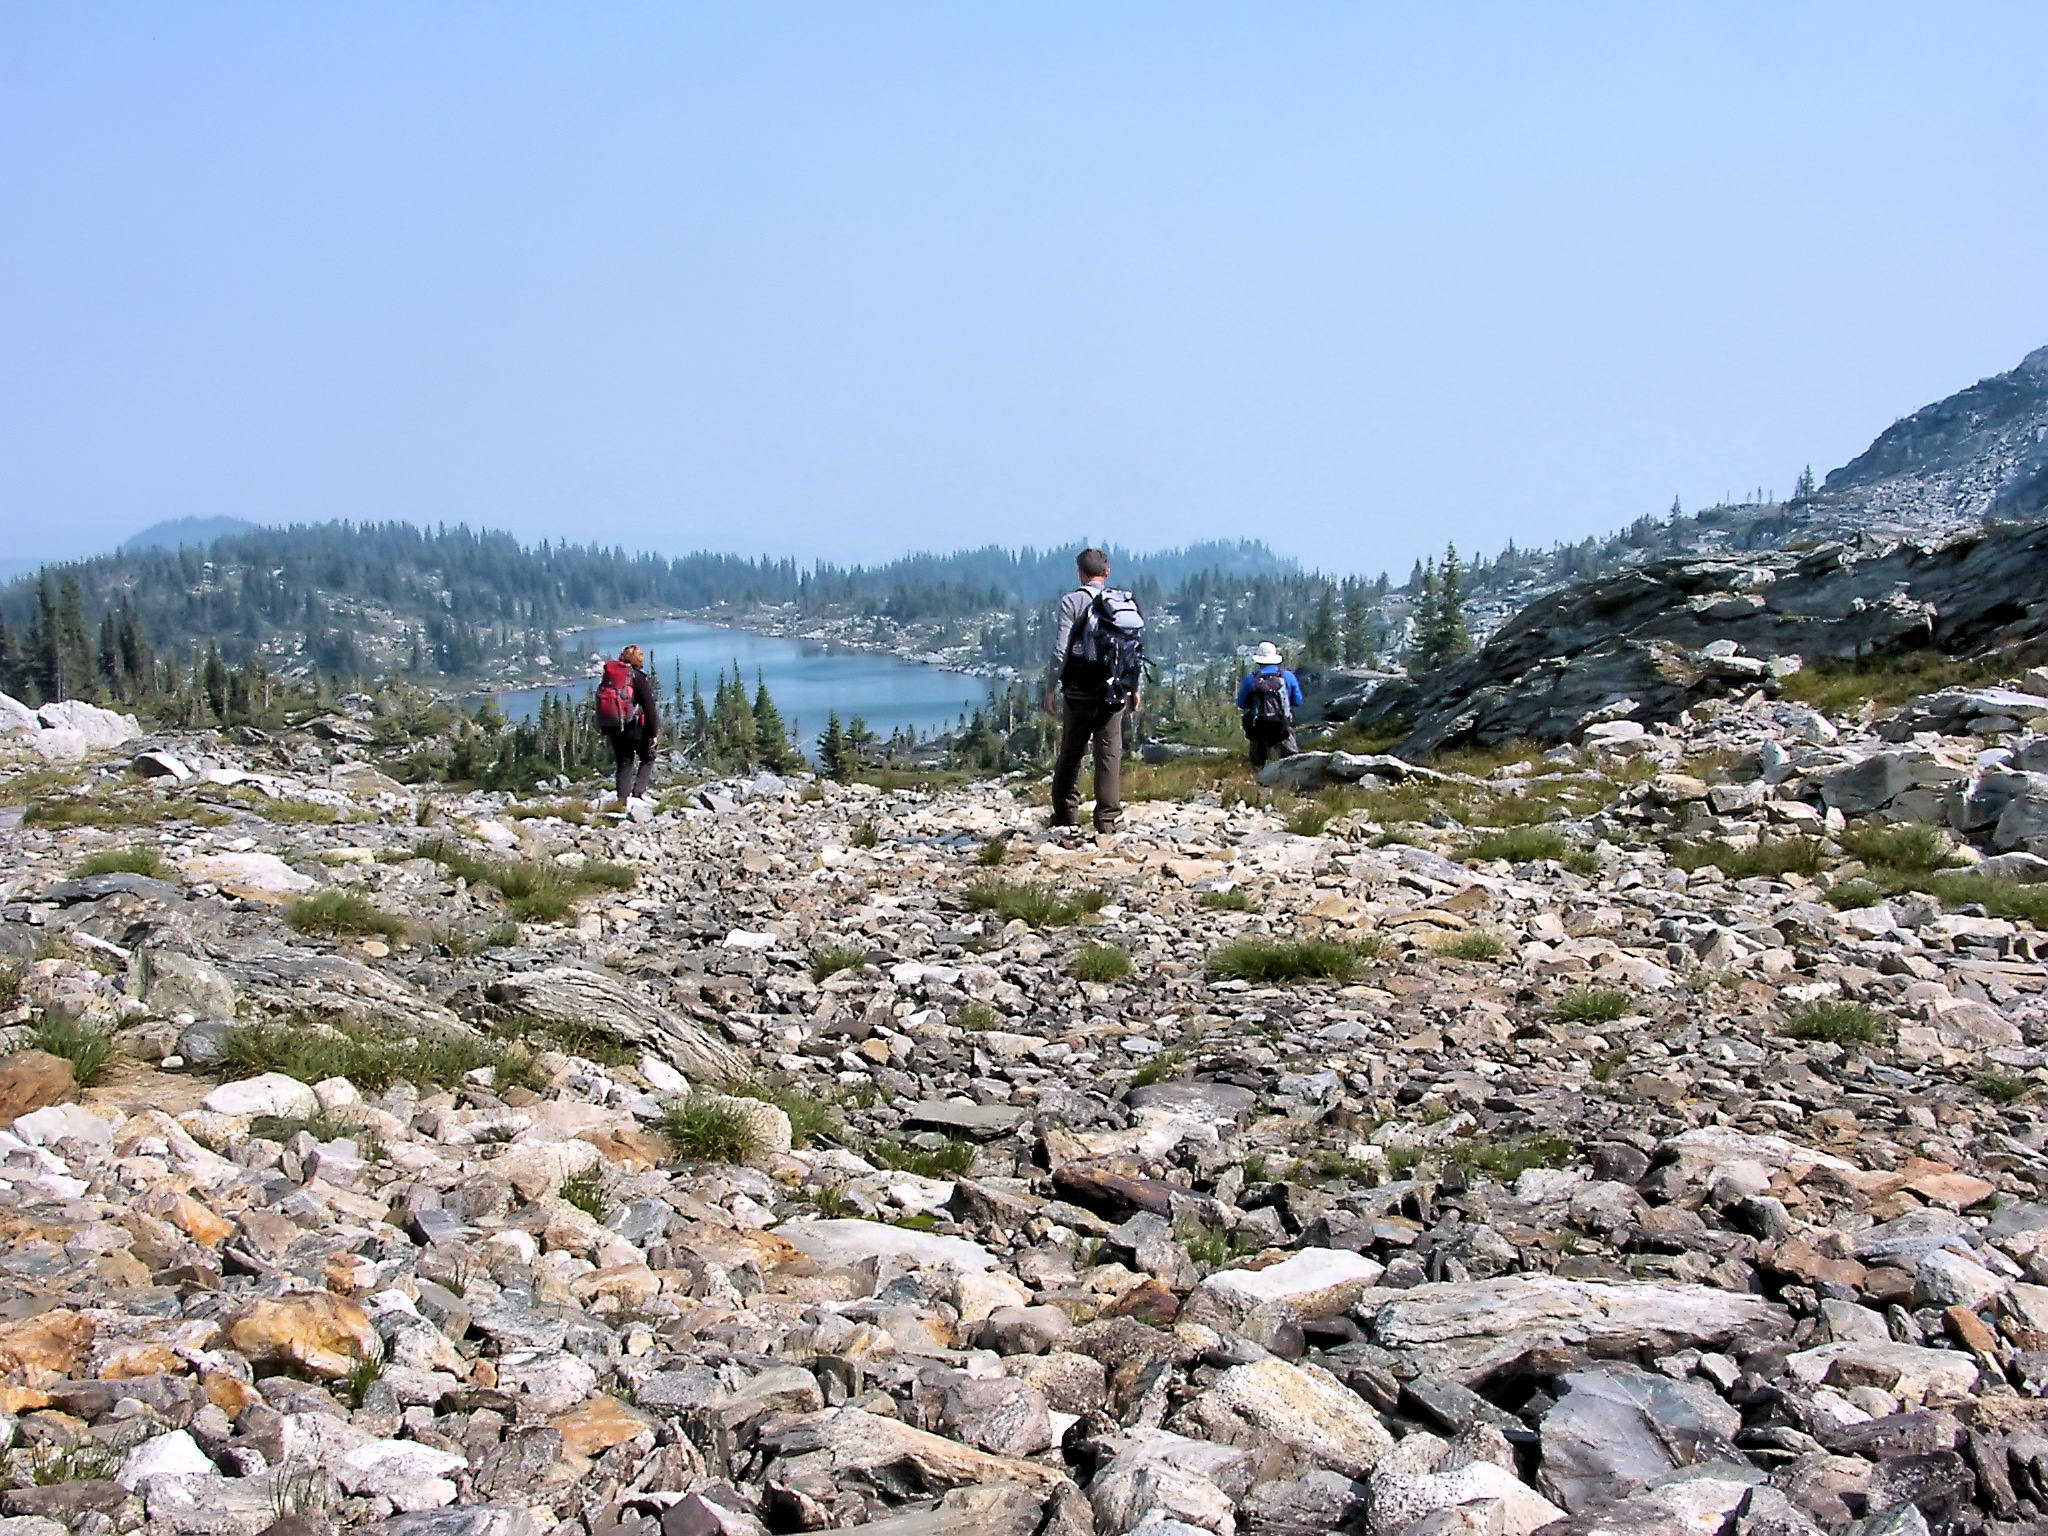
Approaching Swim Lake
Swim Lake obviously got its name, because on hot summer days it invites to a refreshing swim. However on this chilly morning, it fails to entice us to take off our warm jackets. Instead we hold an extended lunch break at its shores. The little peninsula with the firs on it looks particularly pretty.
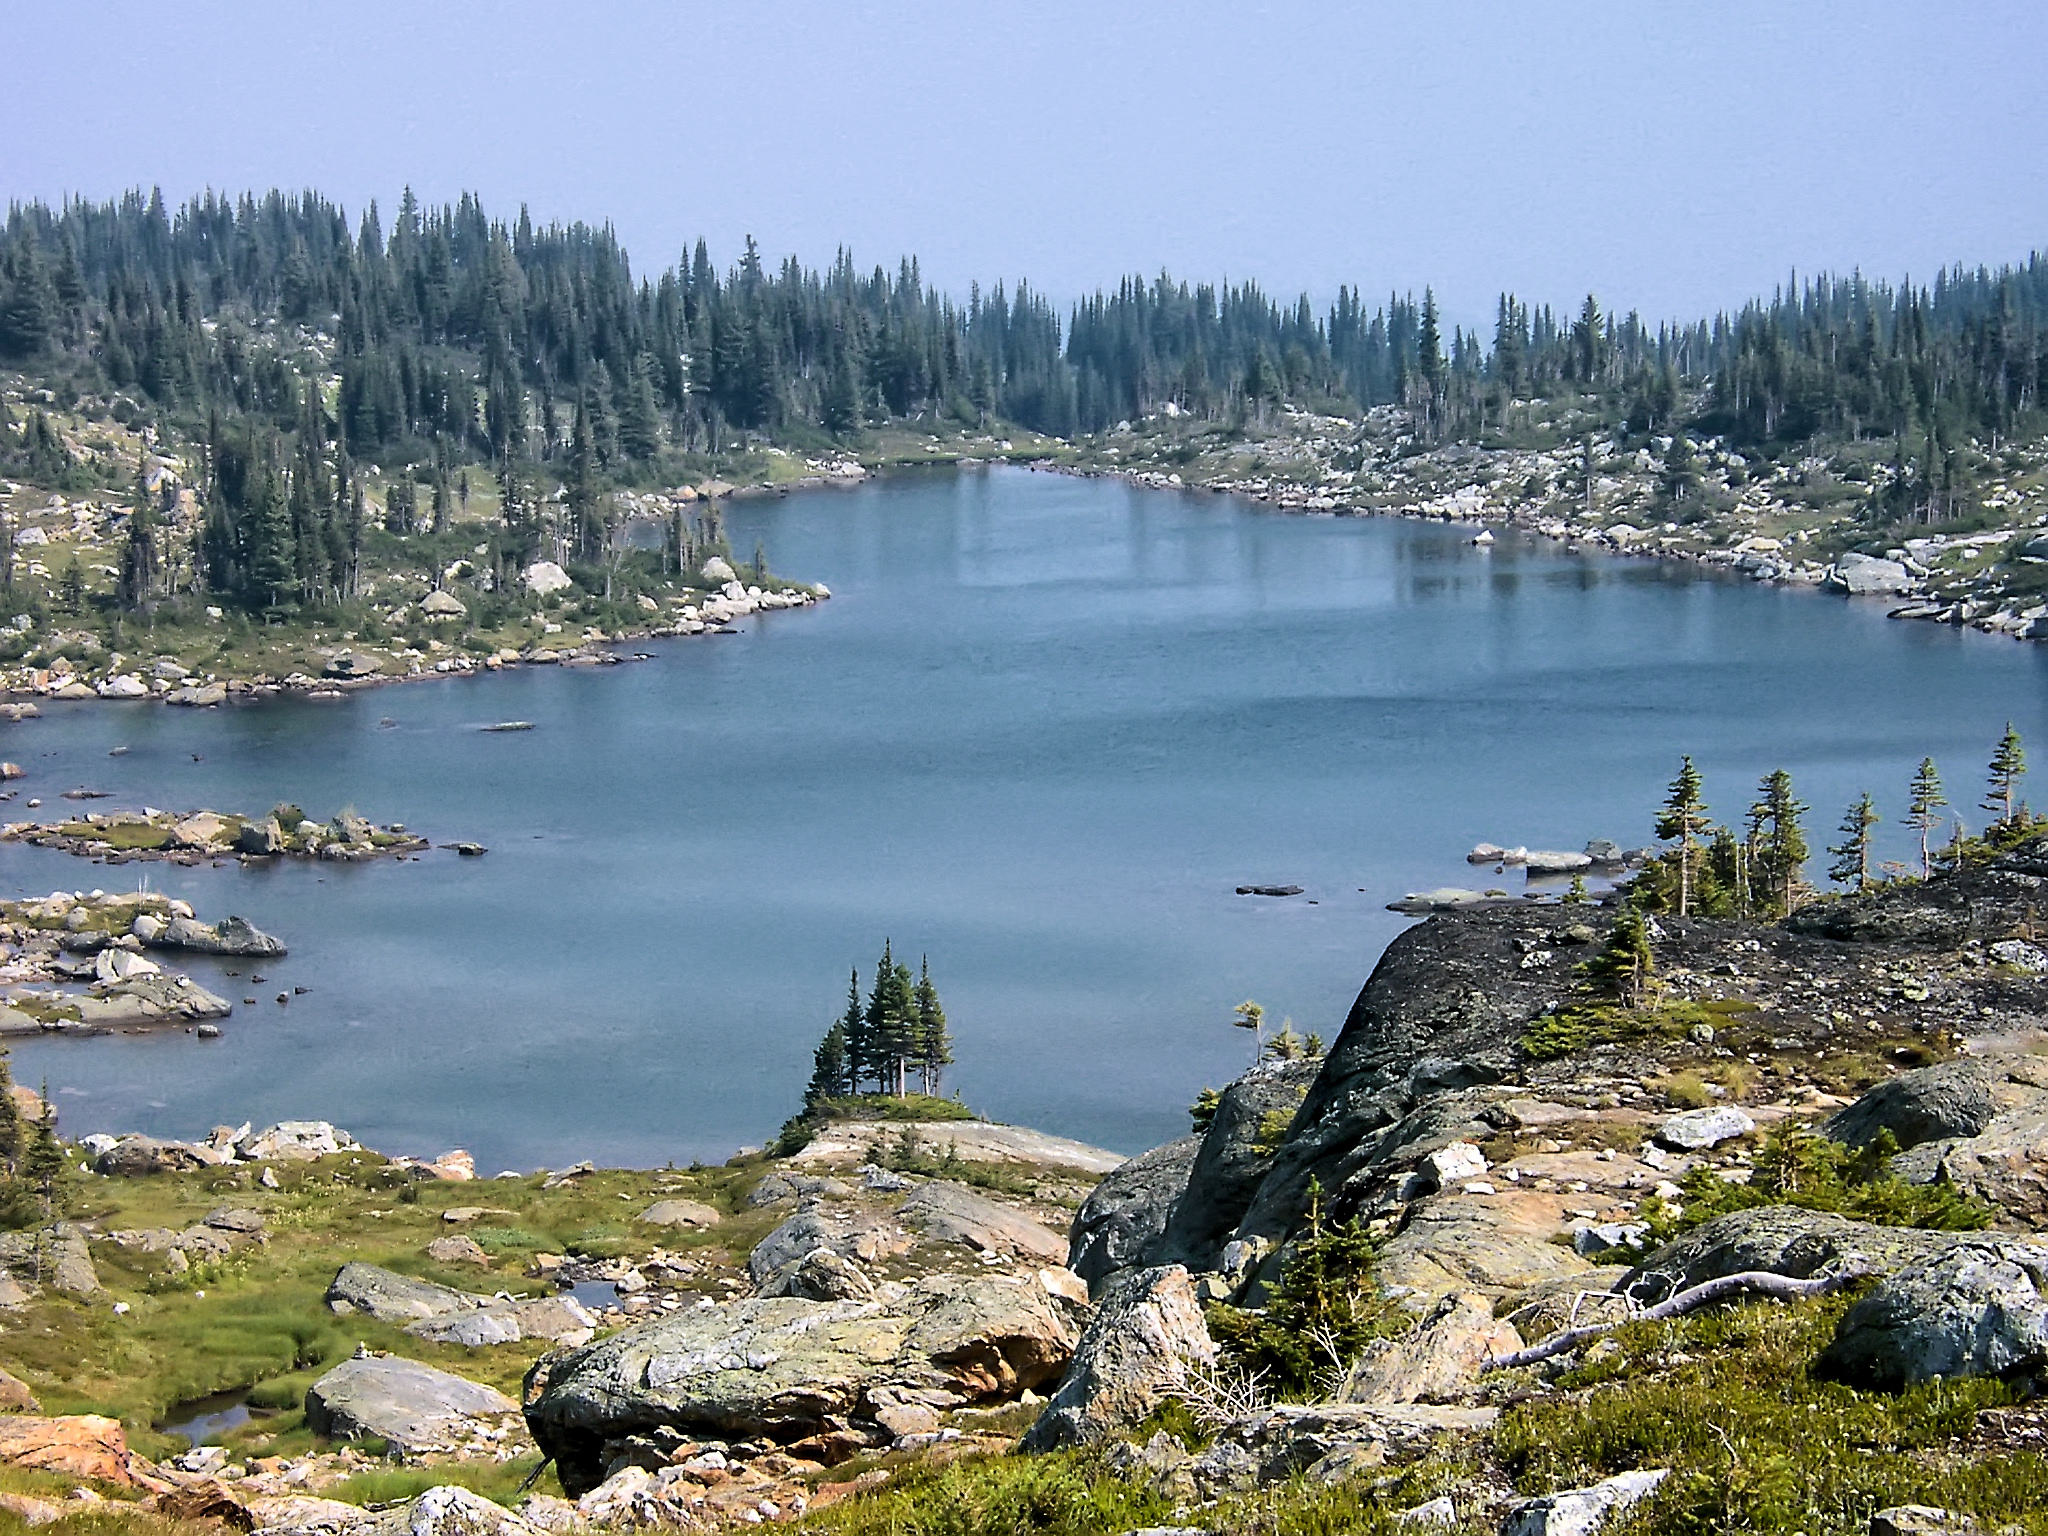
Lunch break at Swim Lake
In the early afternoon, we arrive back at the hut. We are not really tired yet, but tomorrow will be a bigger day. For six to seven hours we will be transferring to the second hut which is about 11 kilometers away and on the other side of Eagle Pass.
11 km - ca. 6 ½ Hours - Ascent 518 m
In the morning we pack up our things and start on our way to the next hut, which is called Discovery Cabin and is located at the bottom of Discovery Hill.
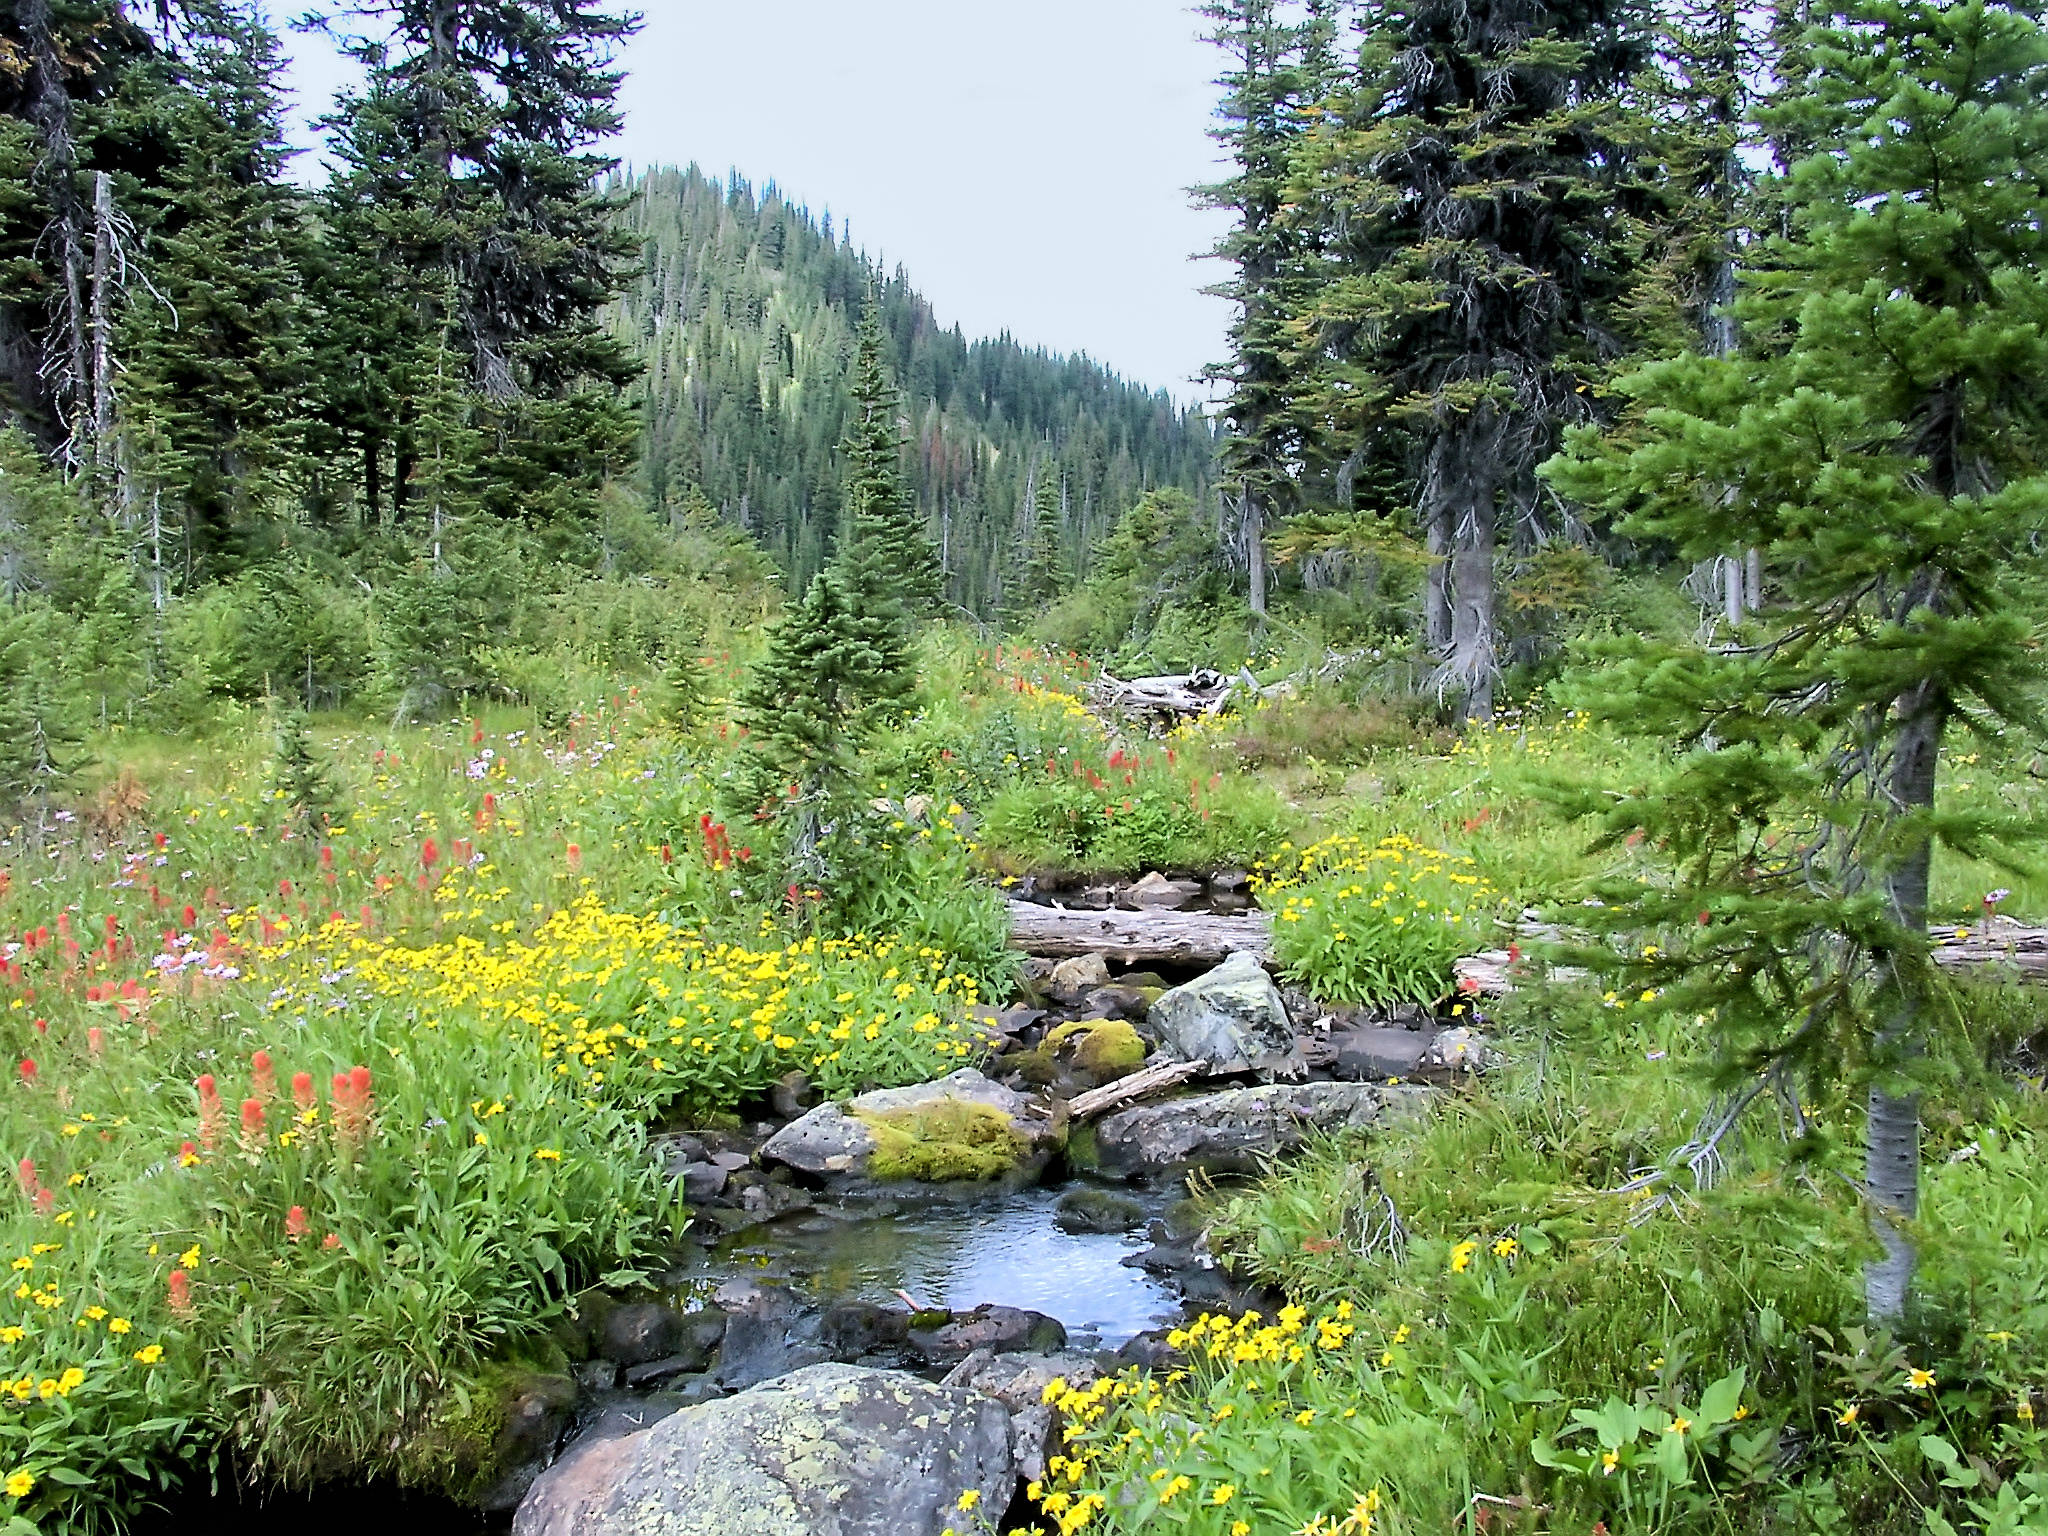
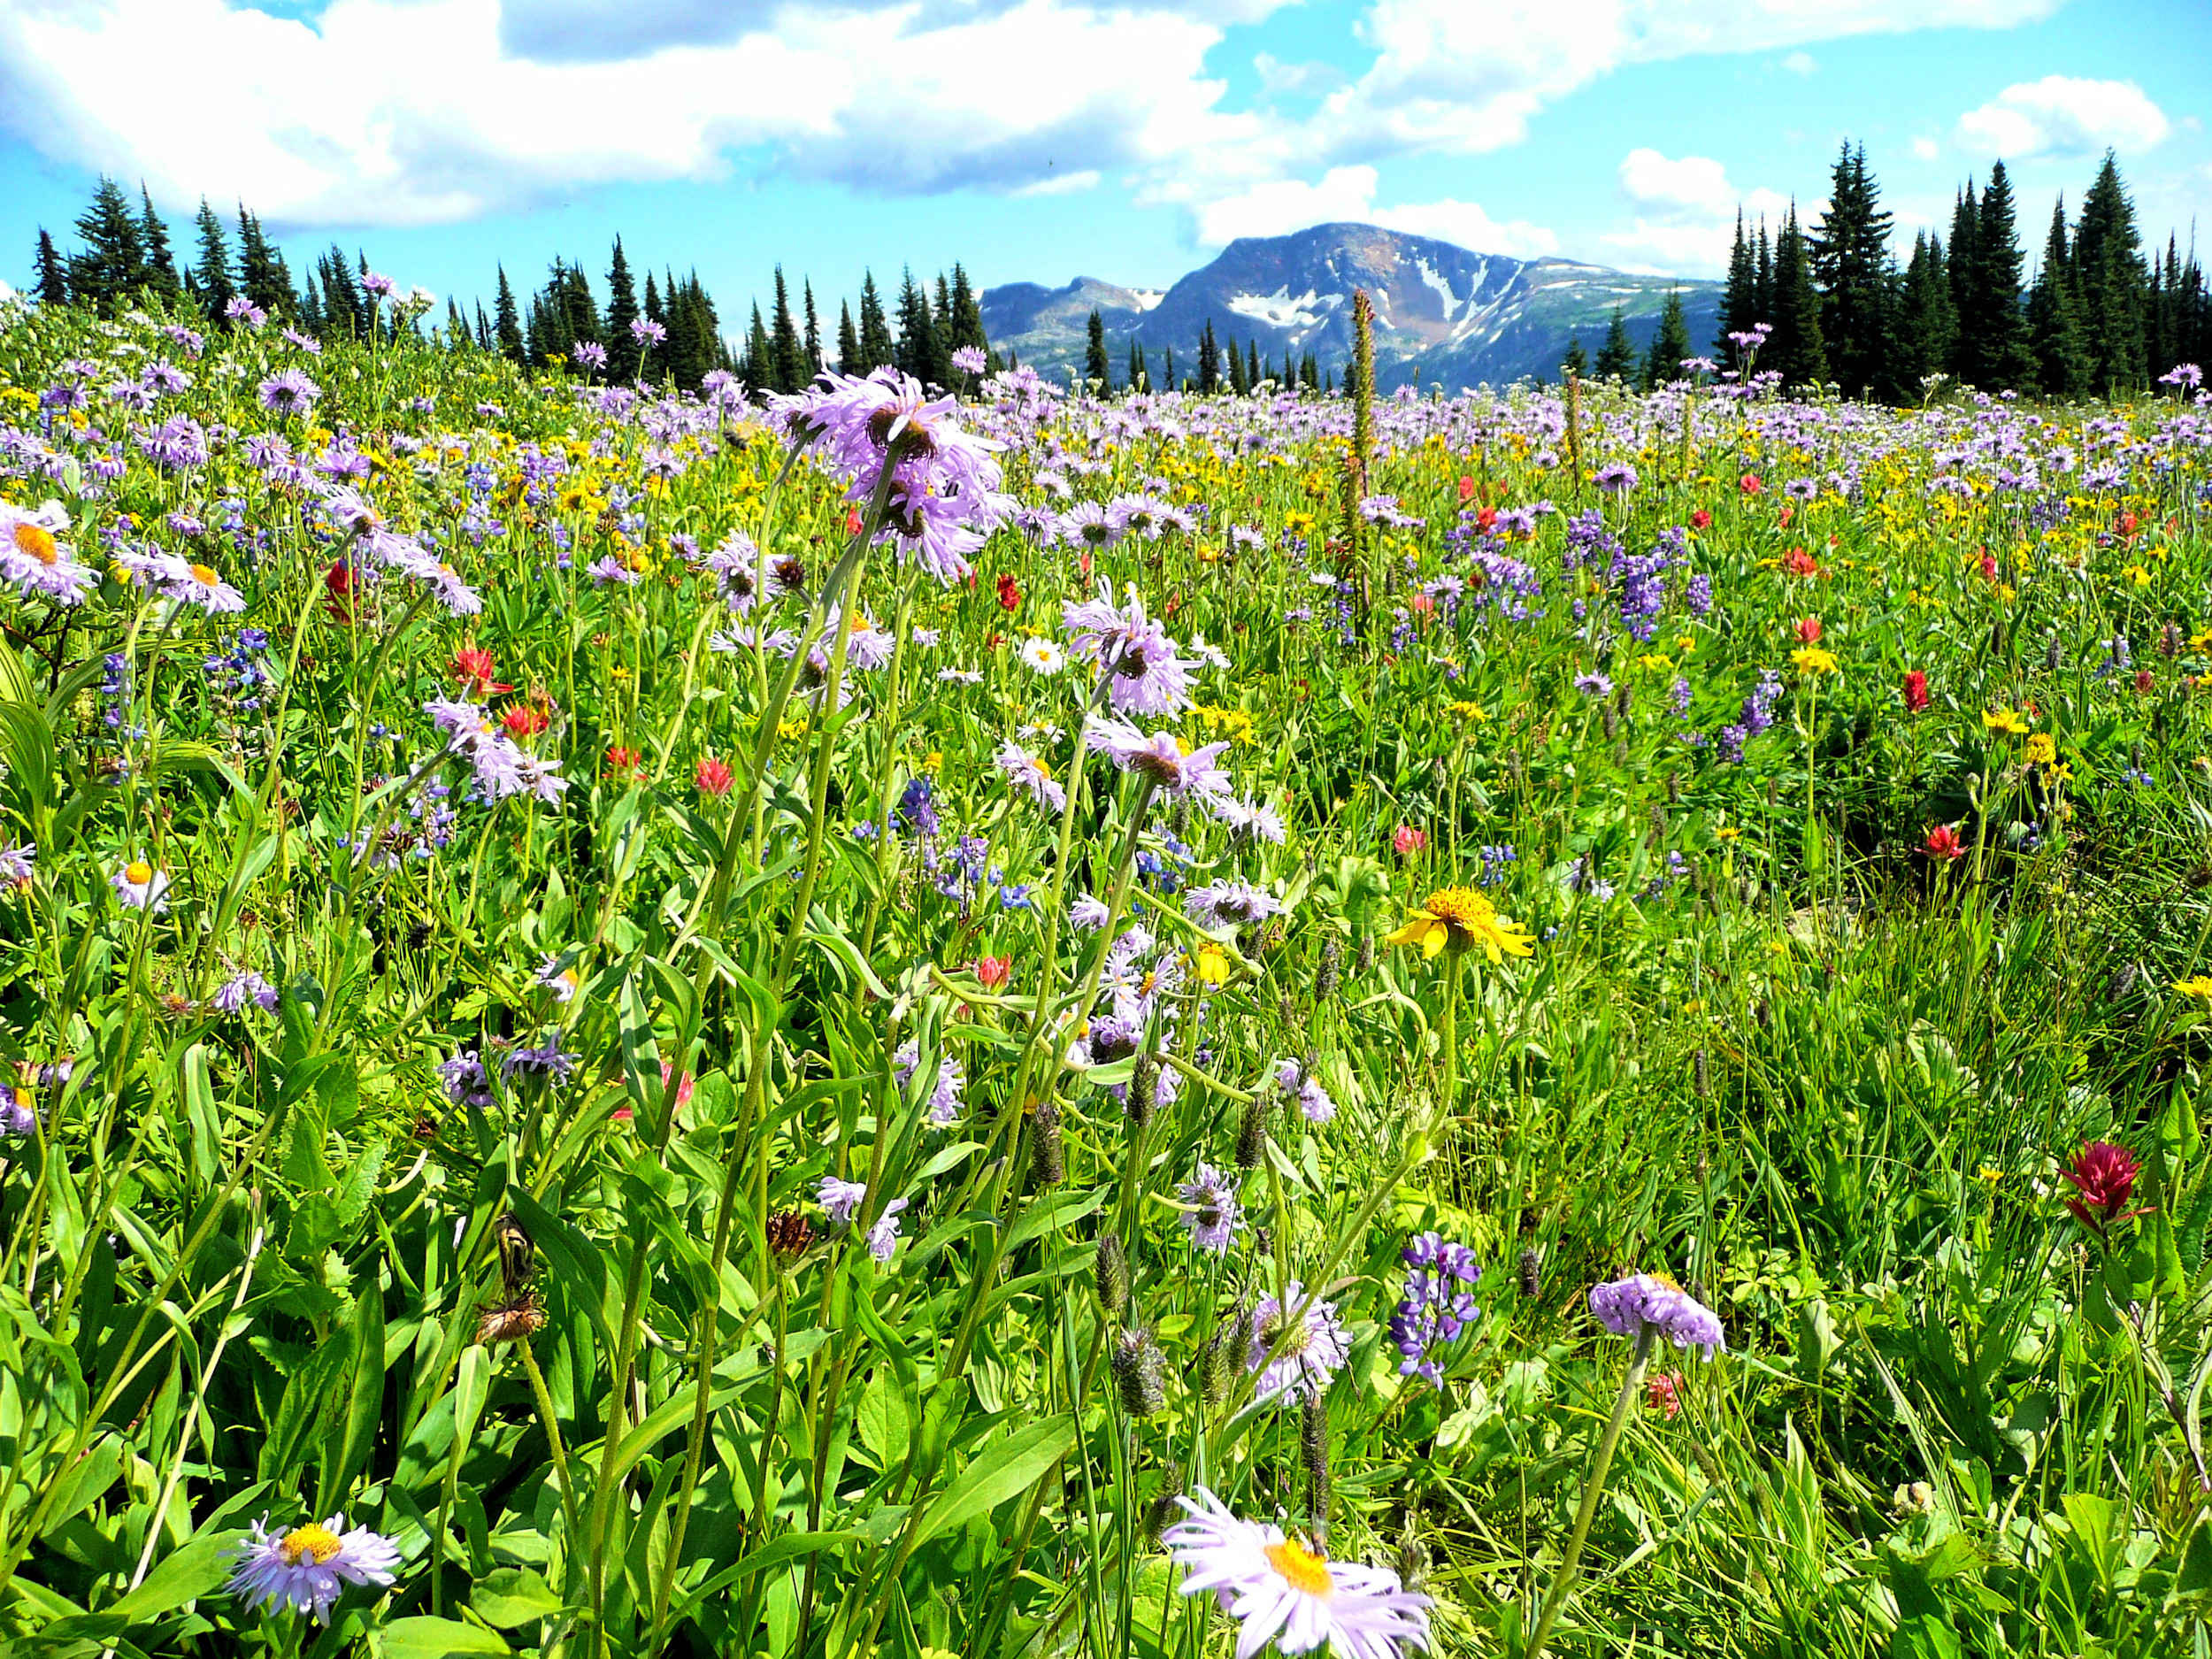
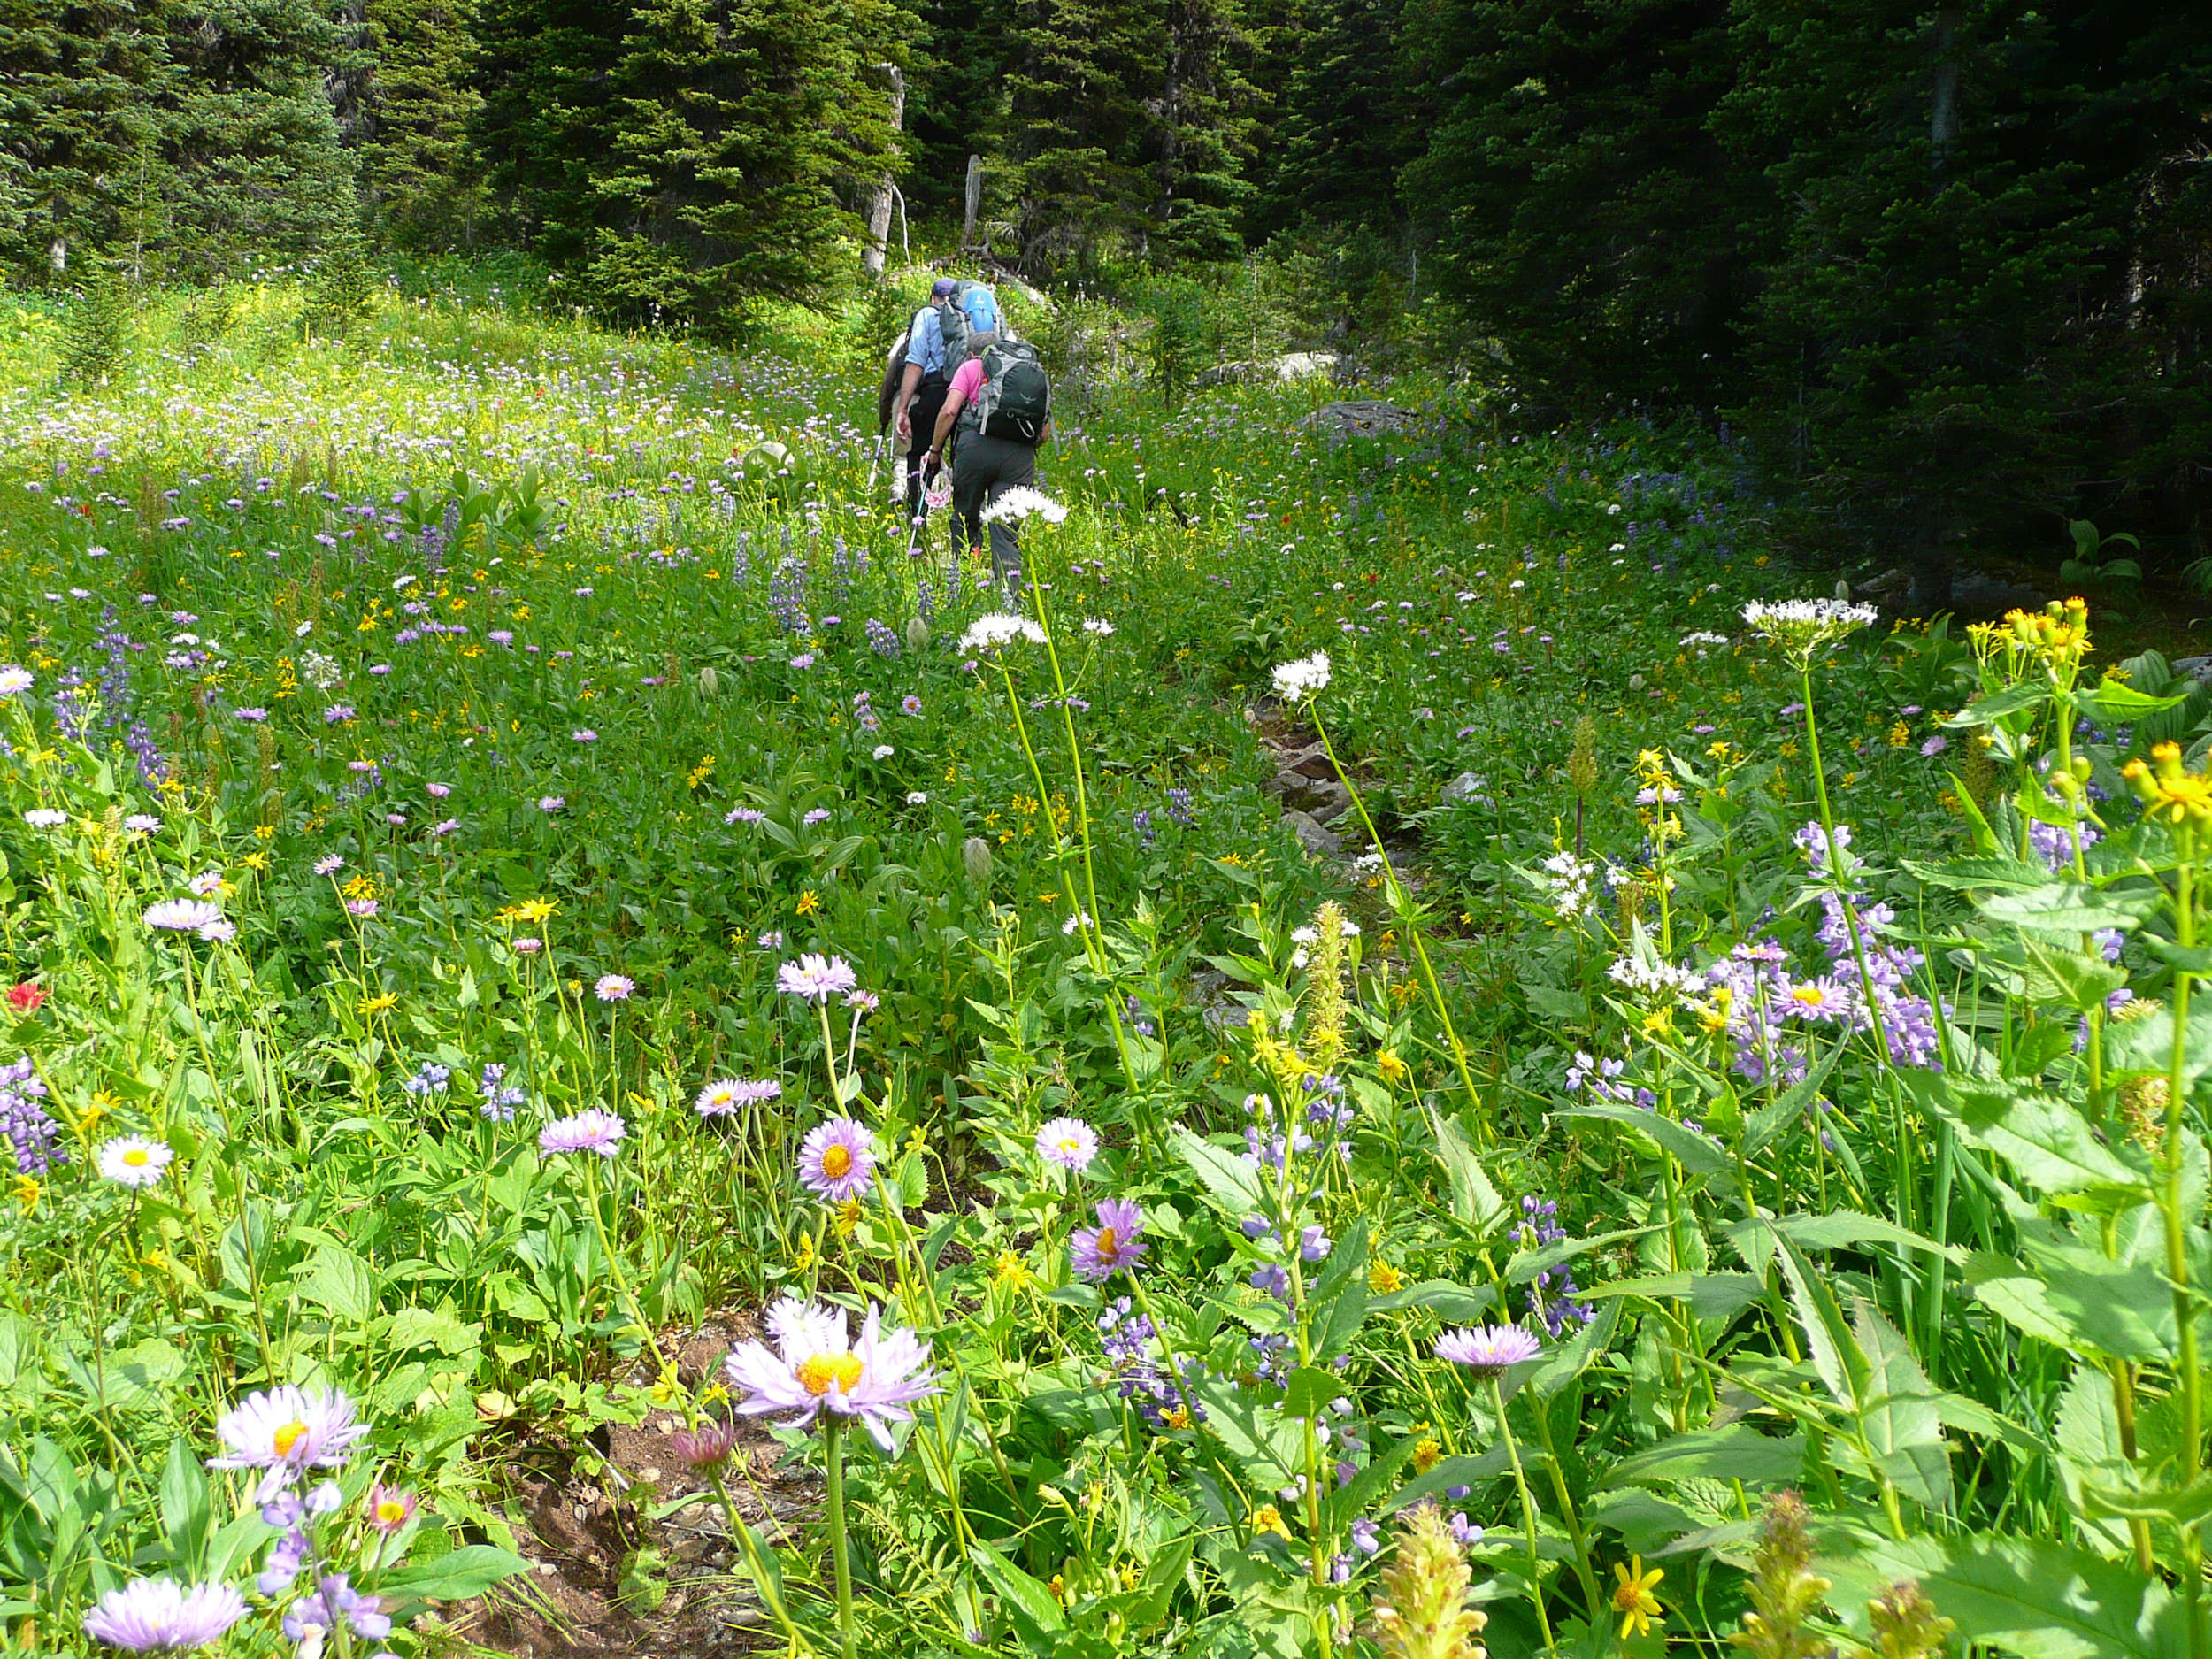
Again we climb up Lookout Peak behind the chalet and from there continue through alpine and rocky terrain. Eventually we start to descend into the Valley of the Lakes and enjoy beautiful wildflowers on the way.
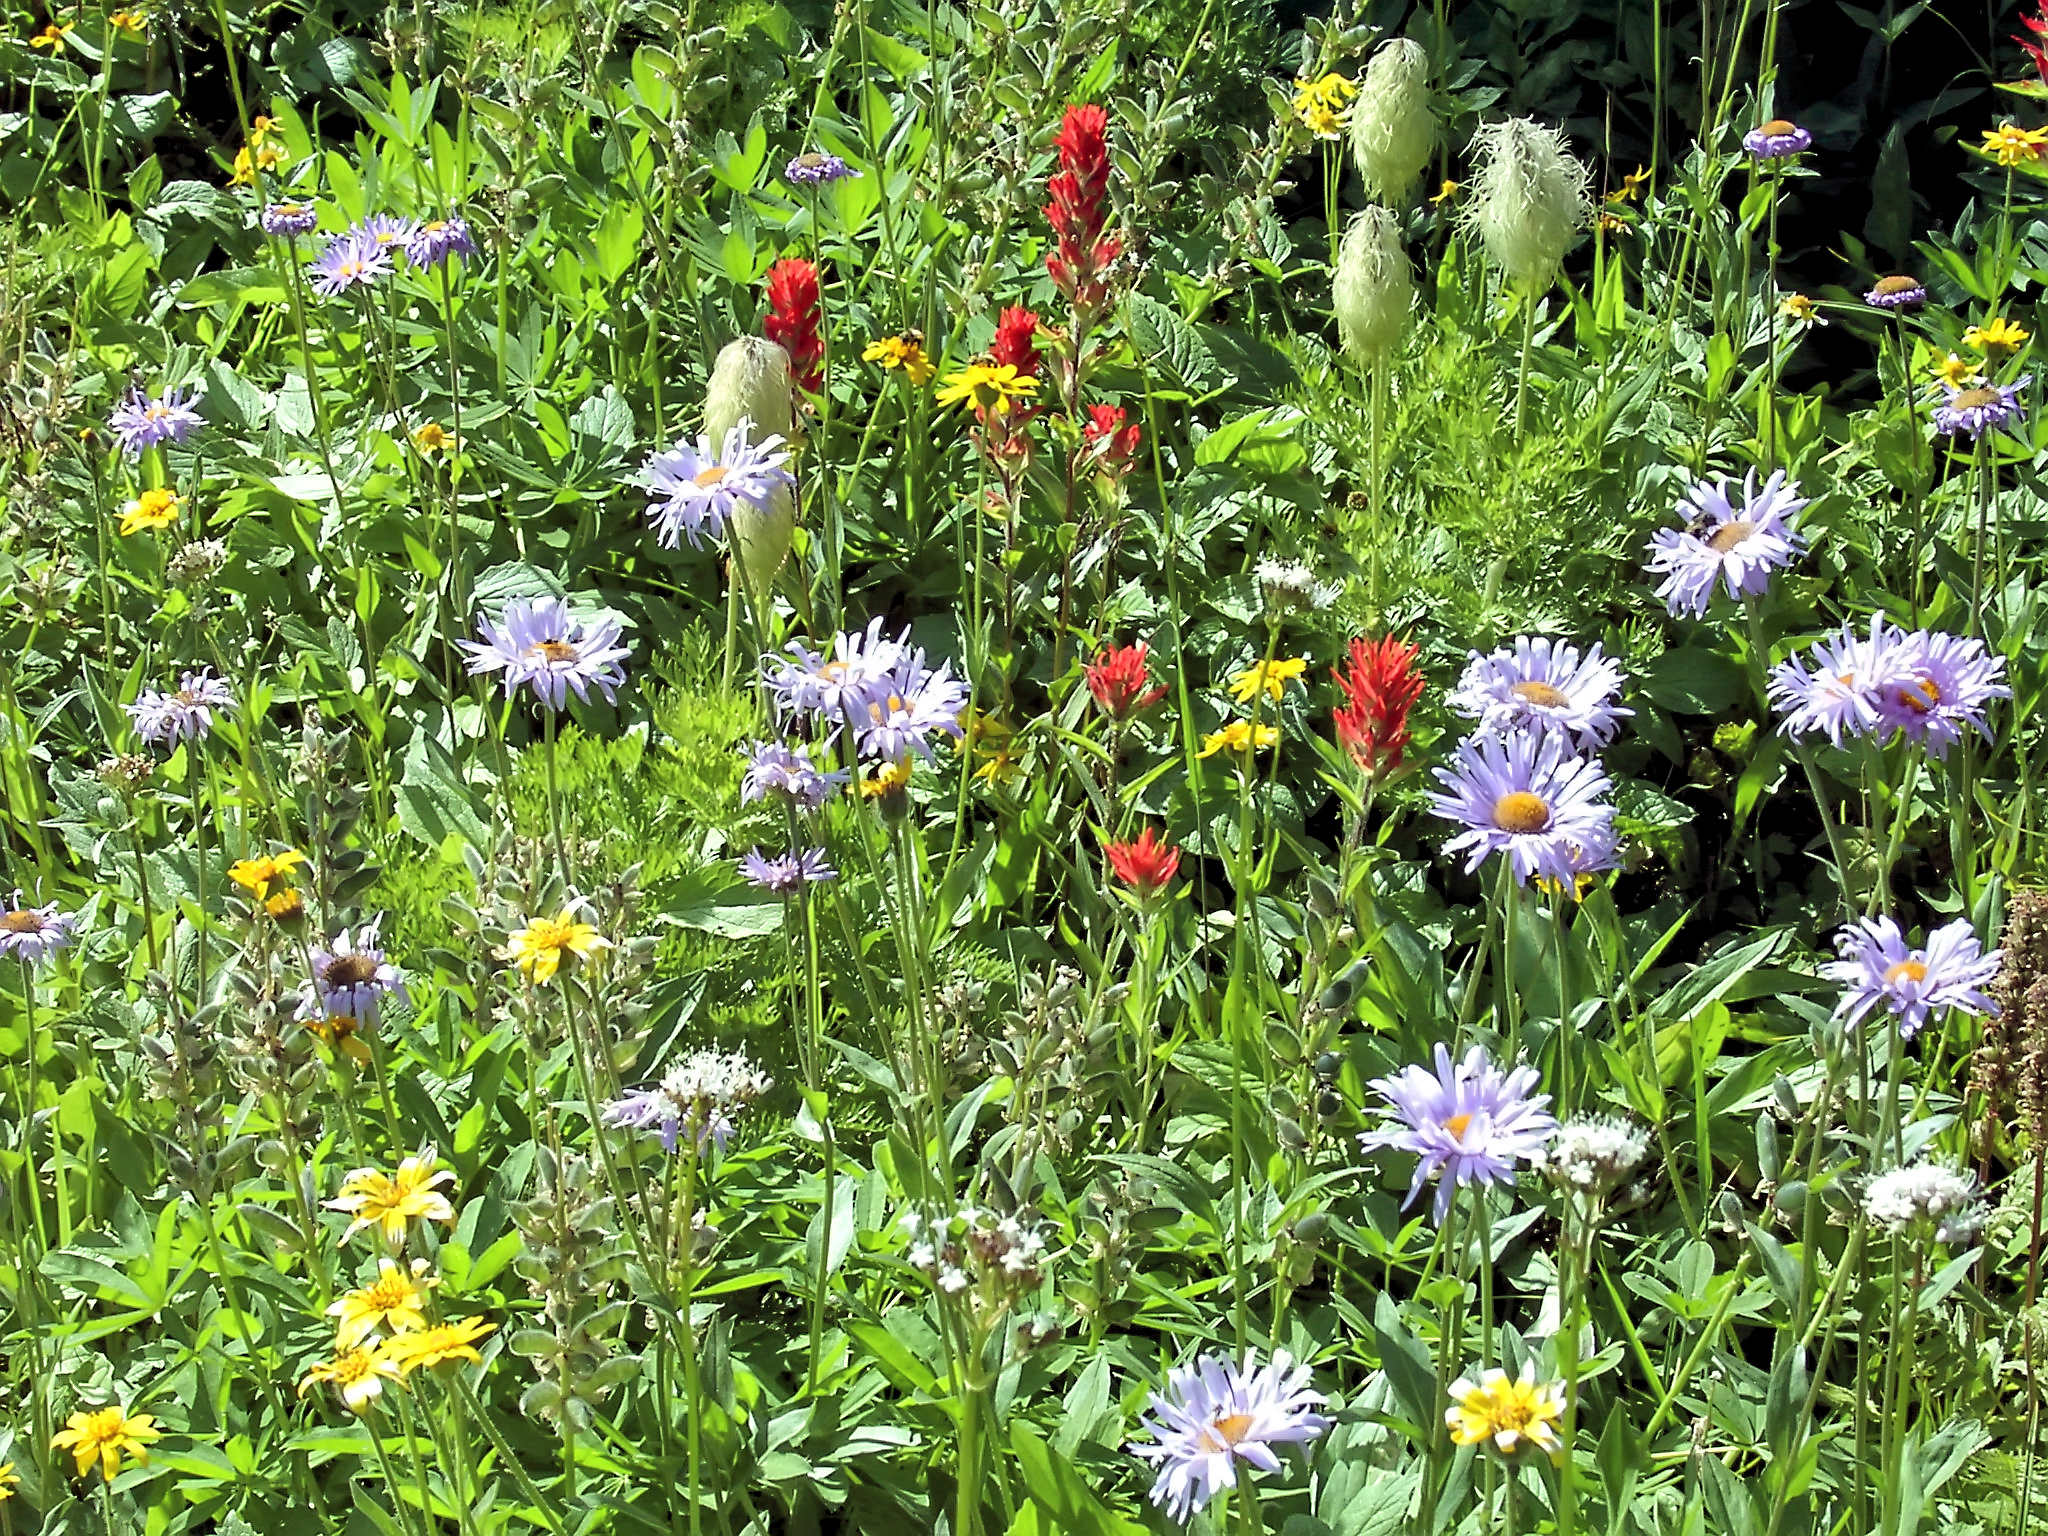
Wildflowers on our way
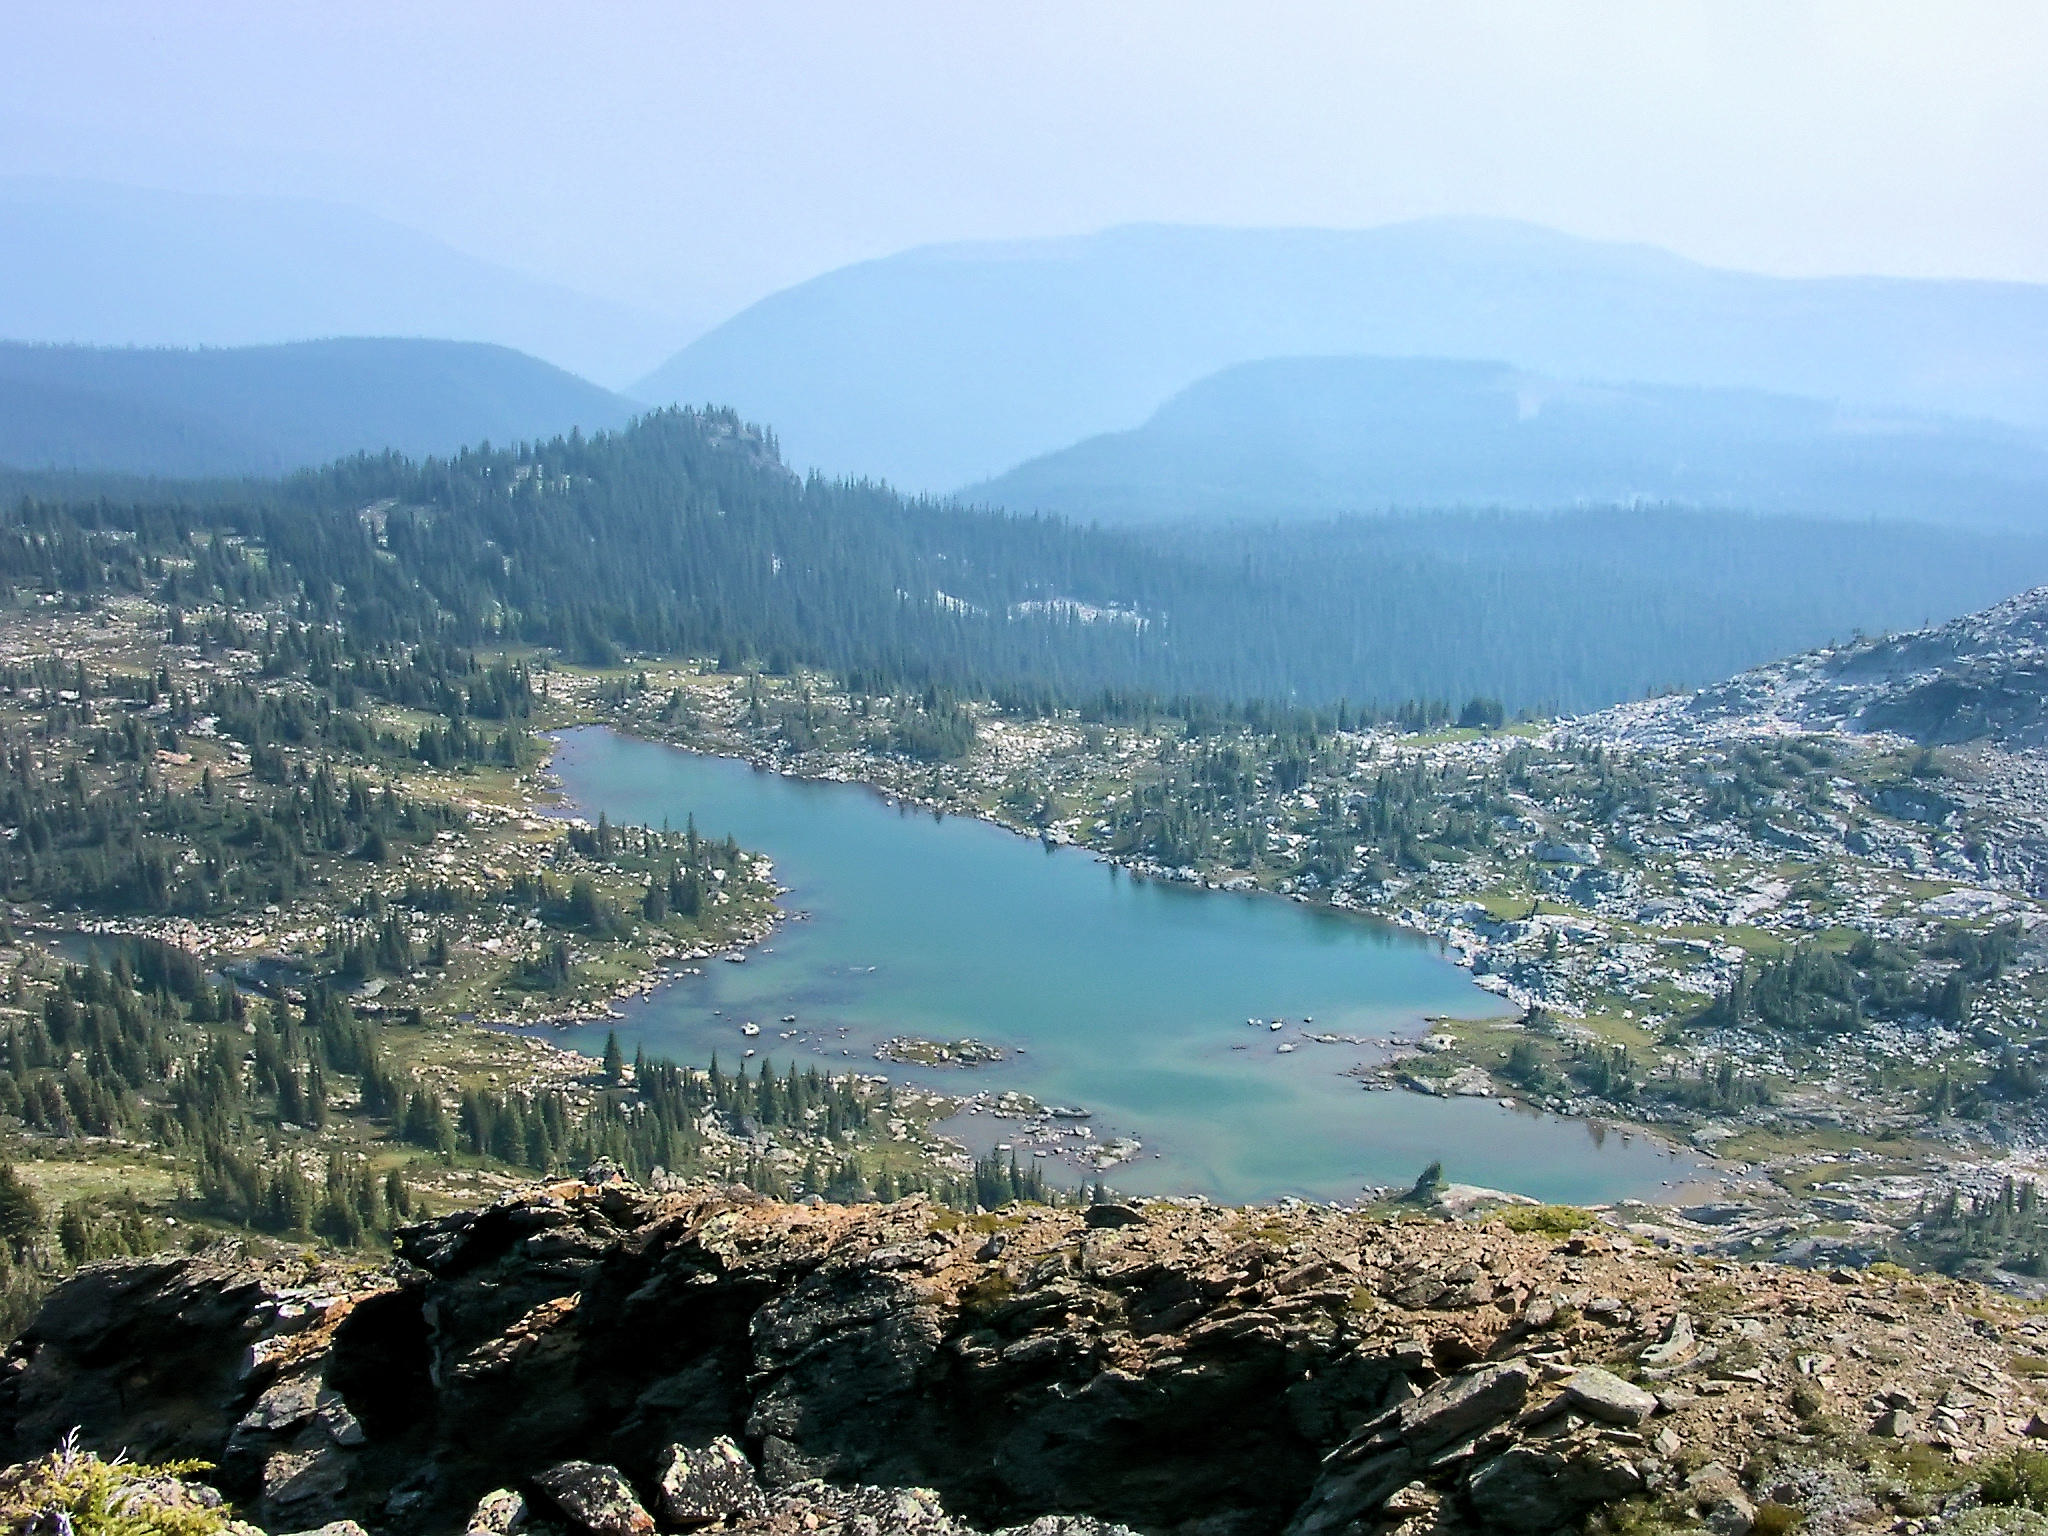
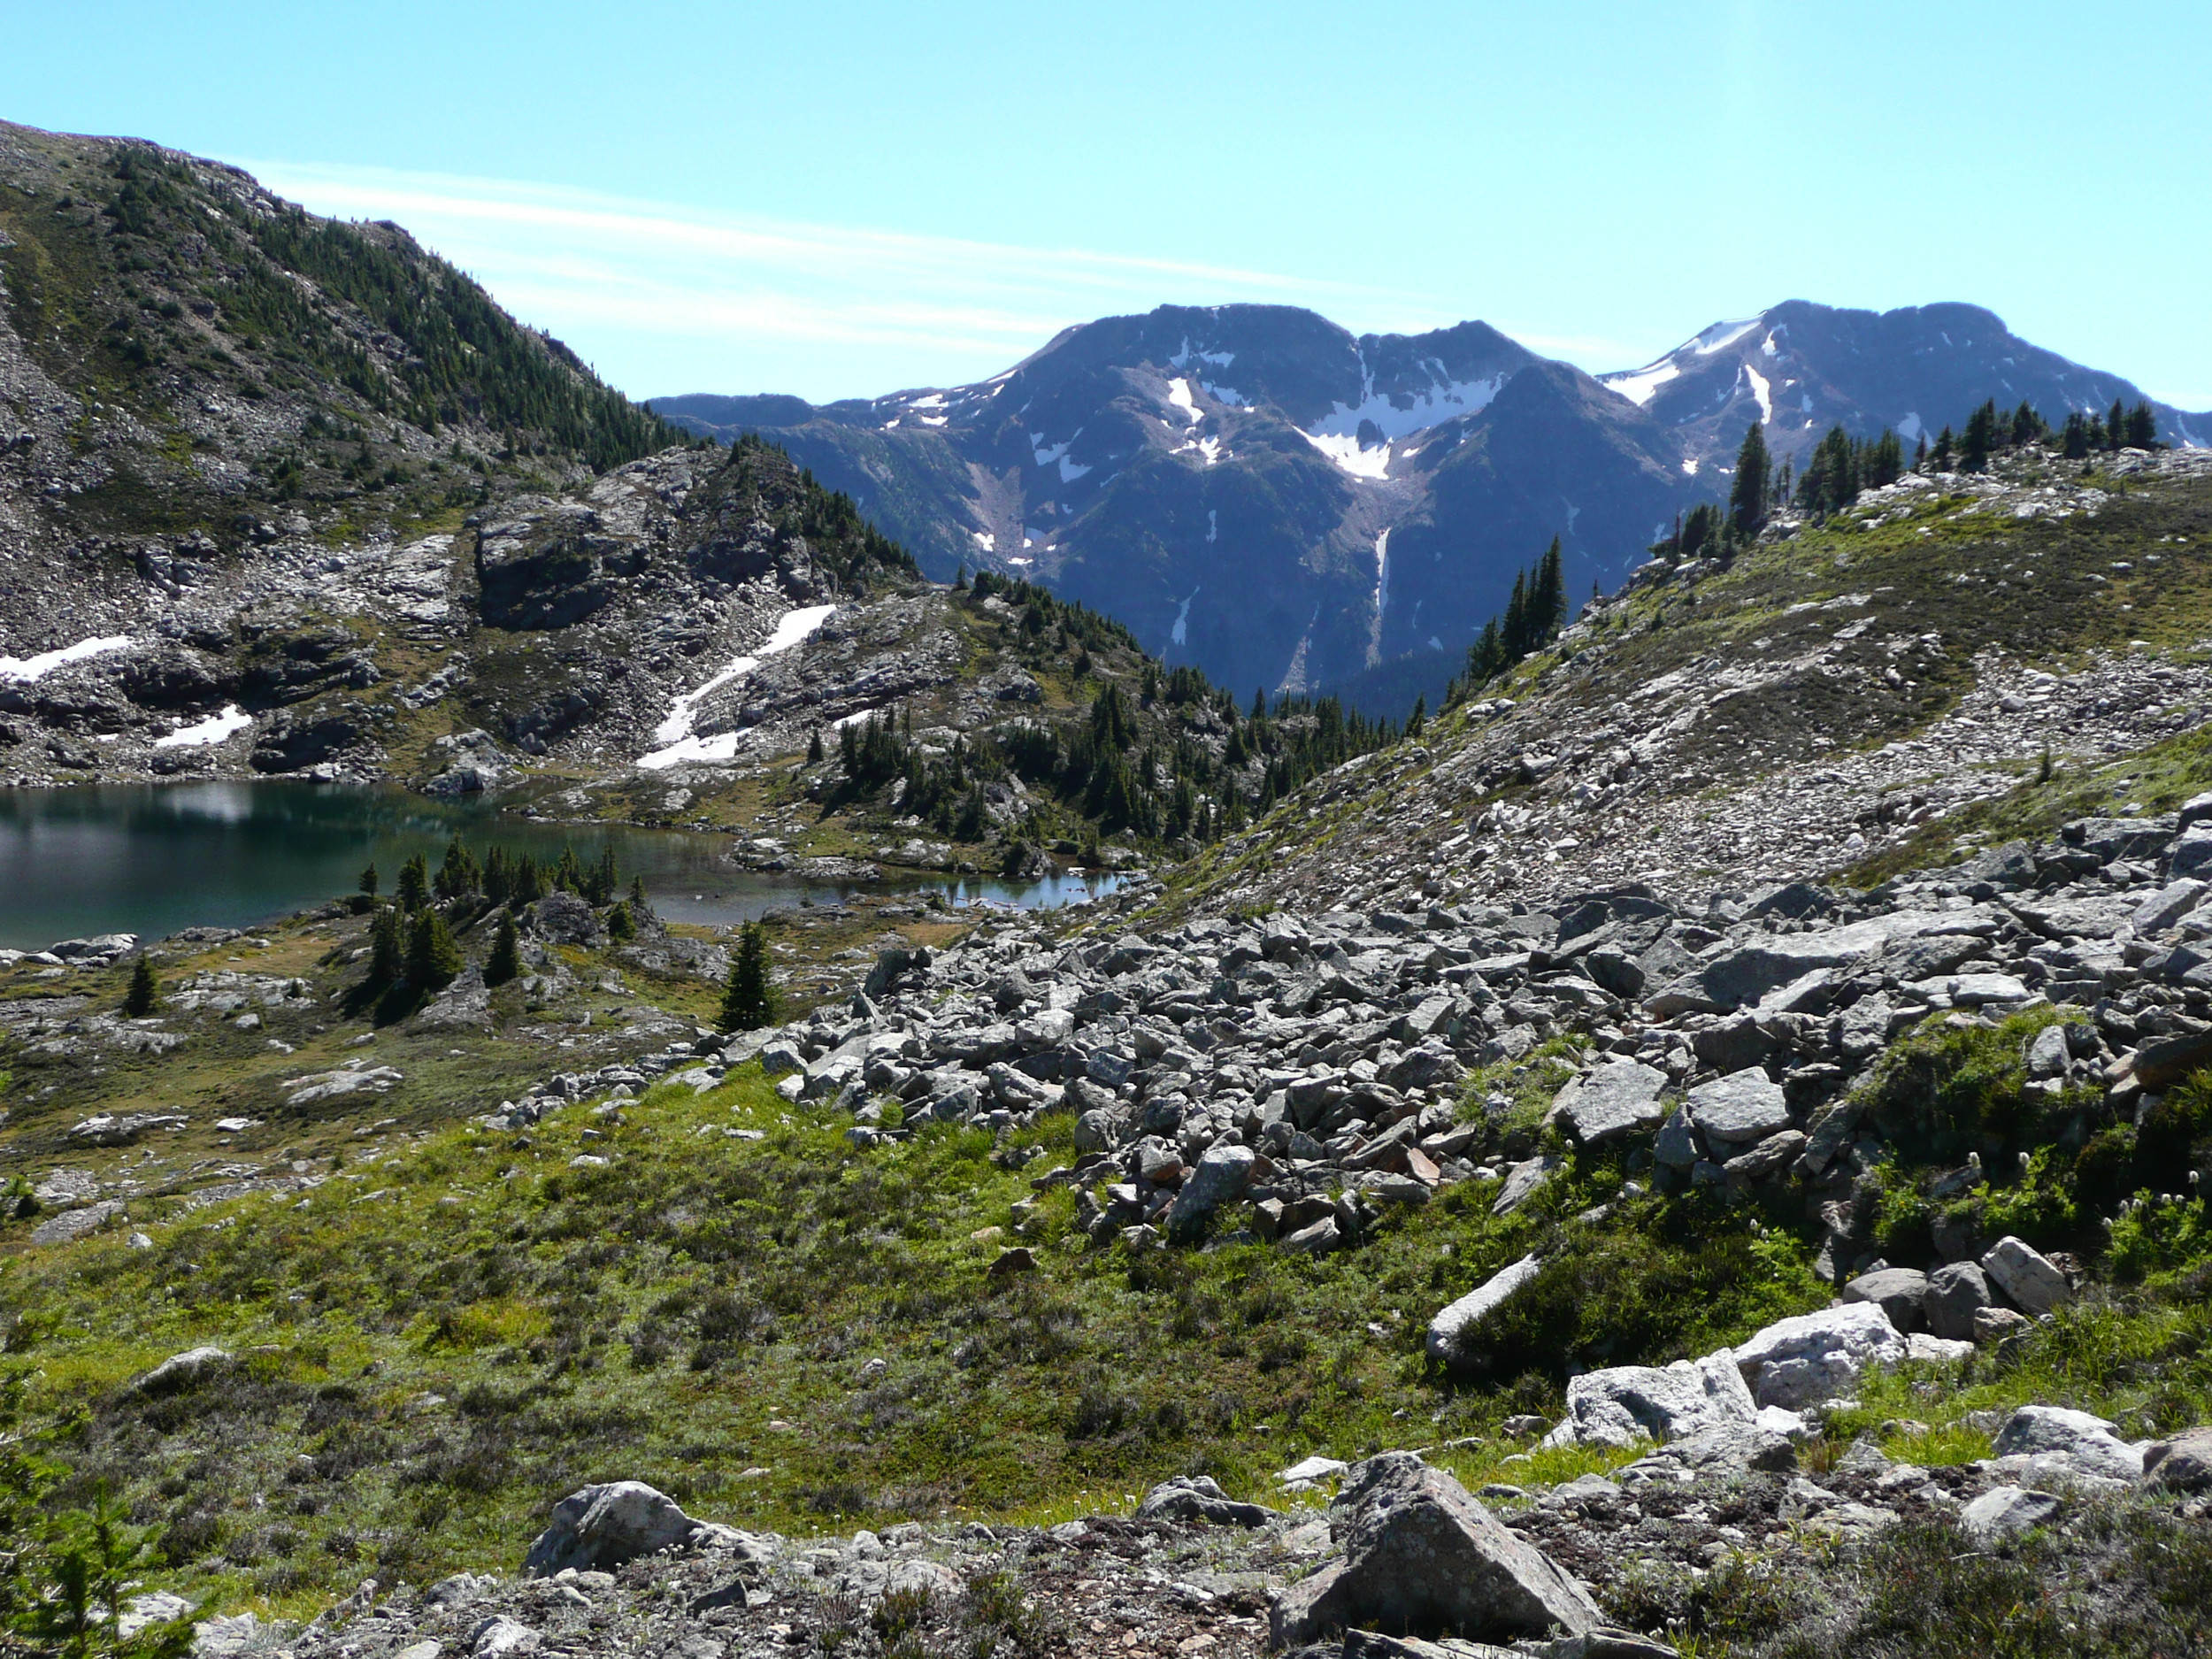
The further we go downhill the denser the trees become. About two hours after we first started out, we reach the bottom of the Valley of the Lakes. We stop for lunch on the shore of one of the lakes.
Valley of the Lakes
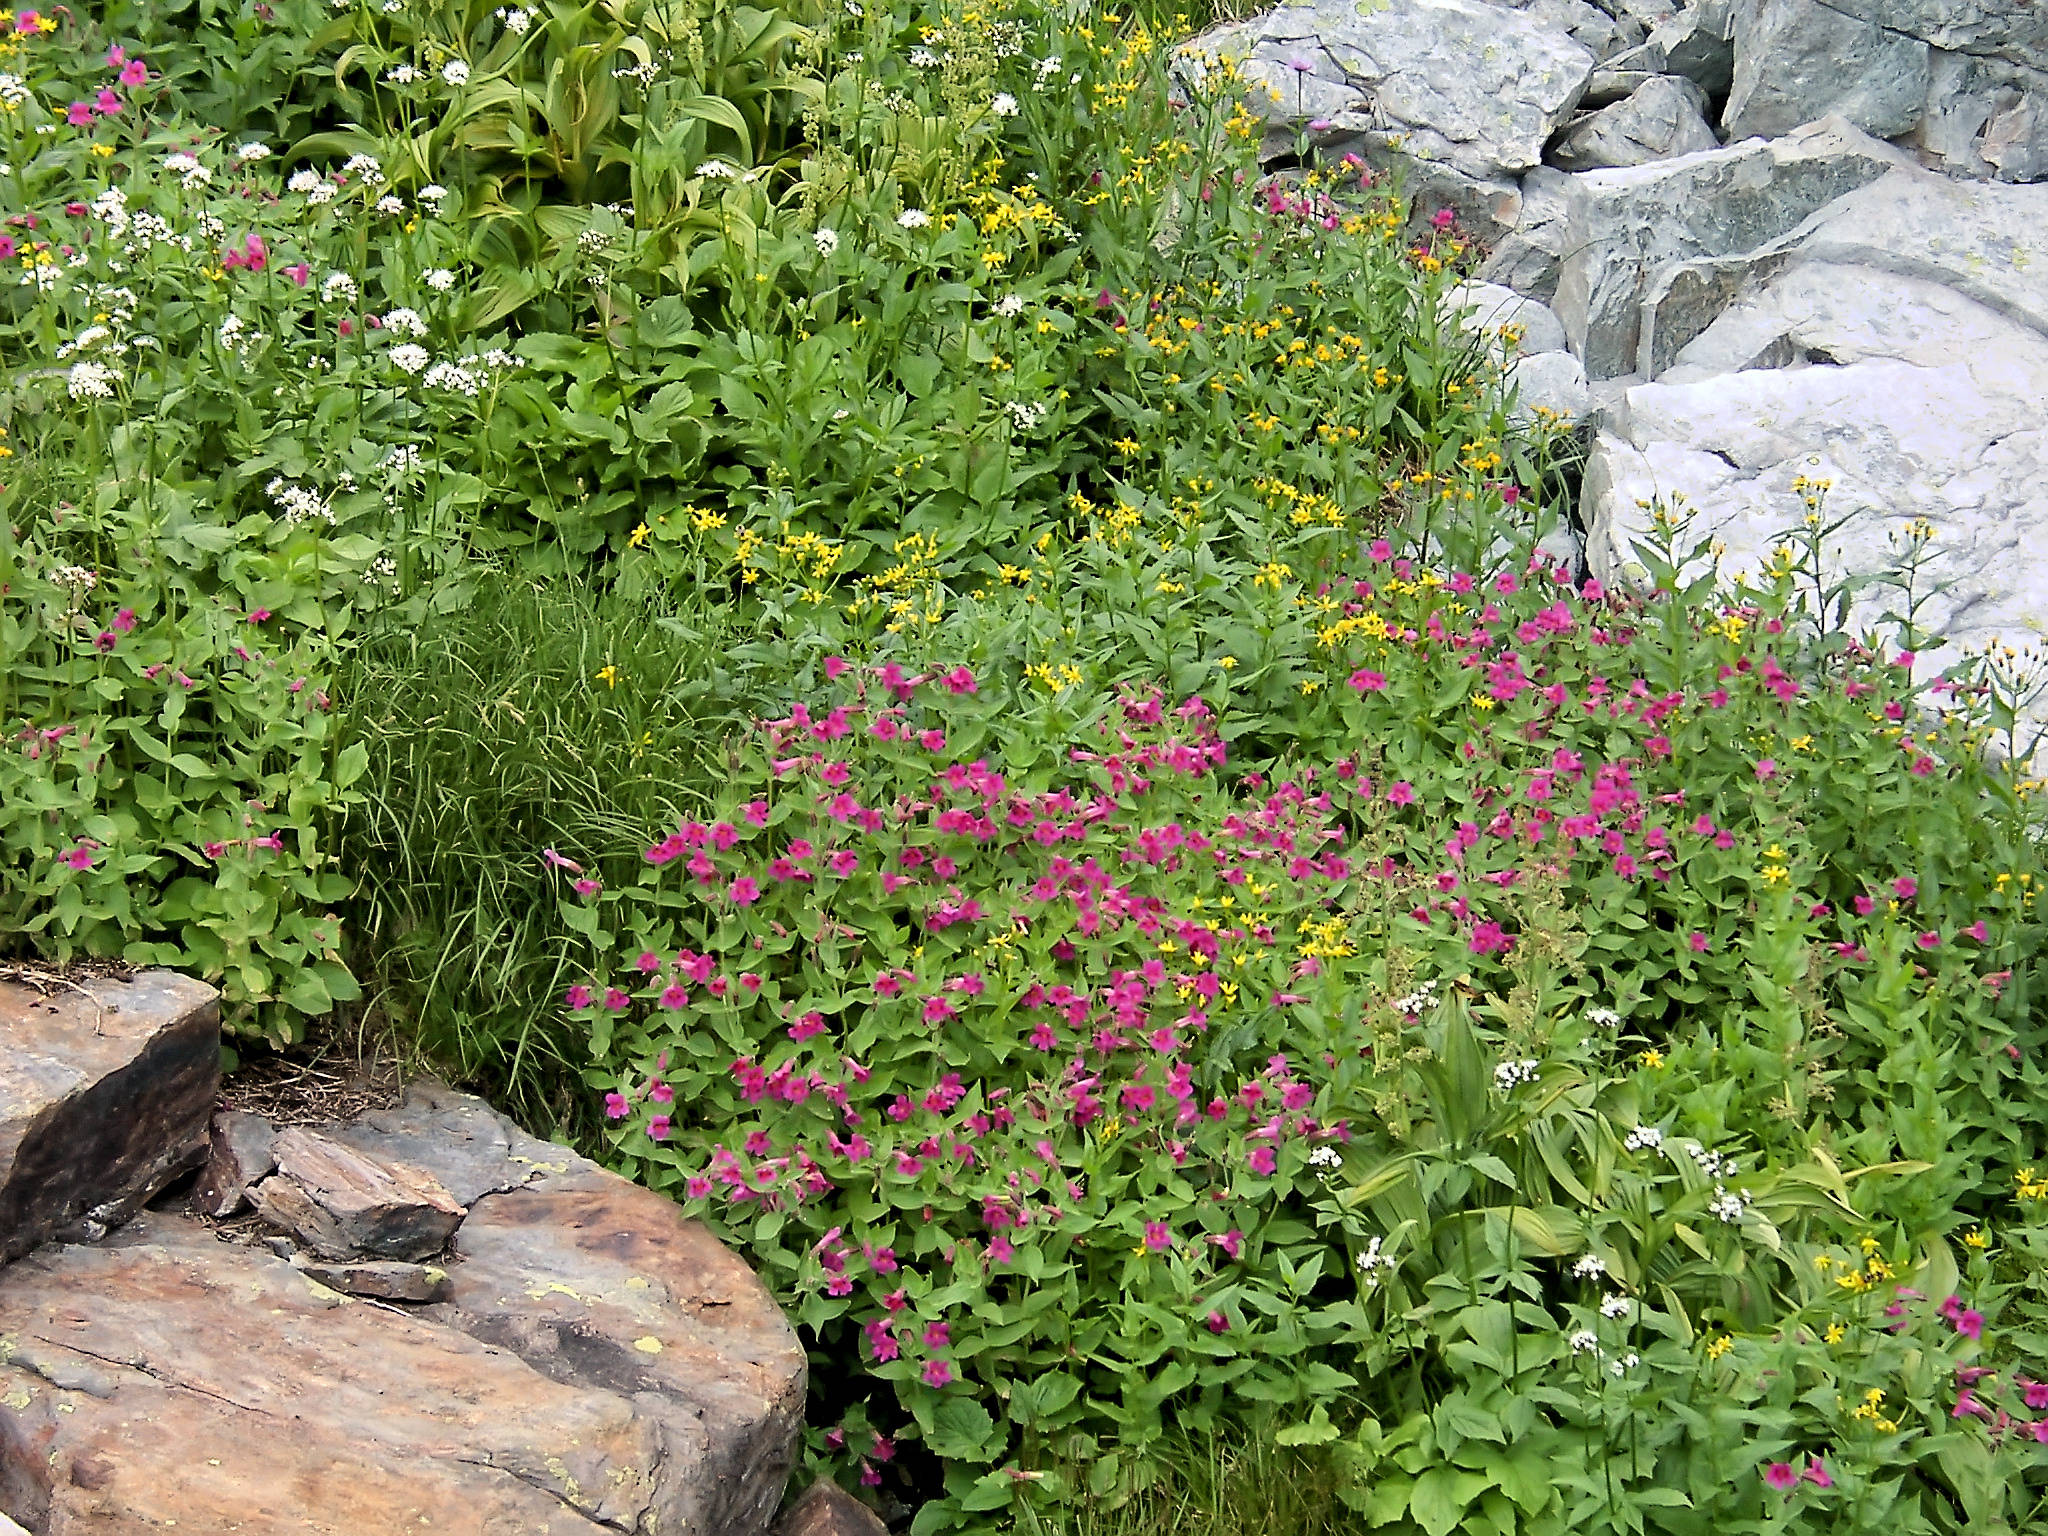
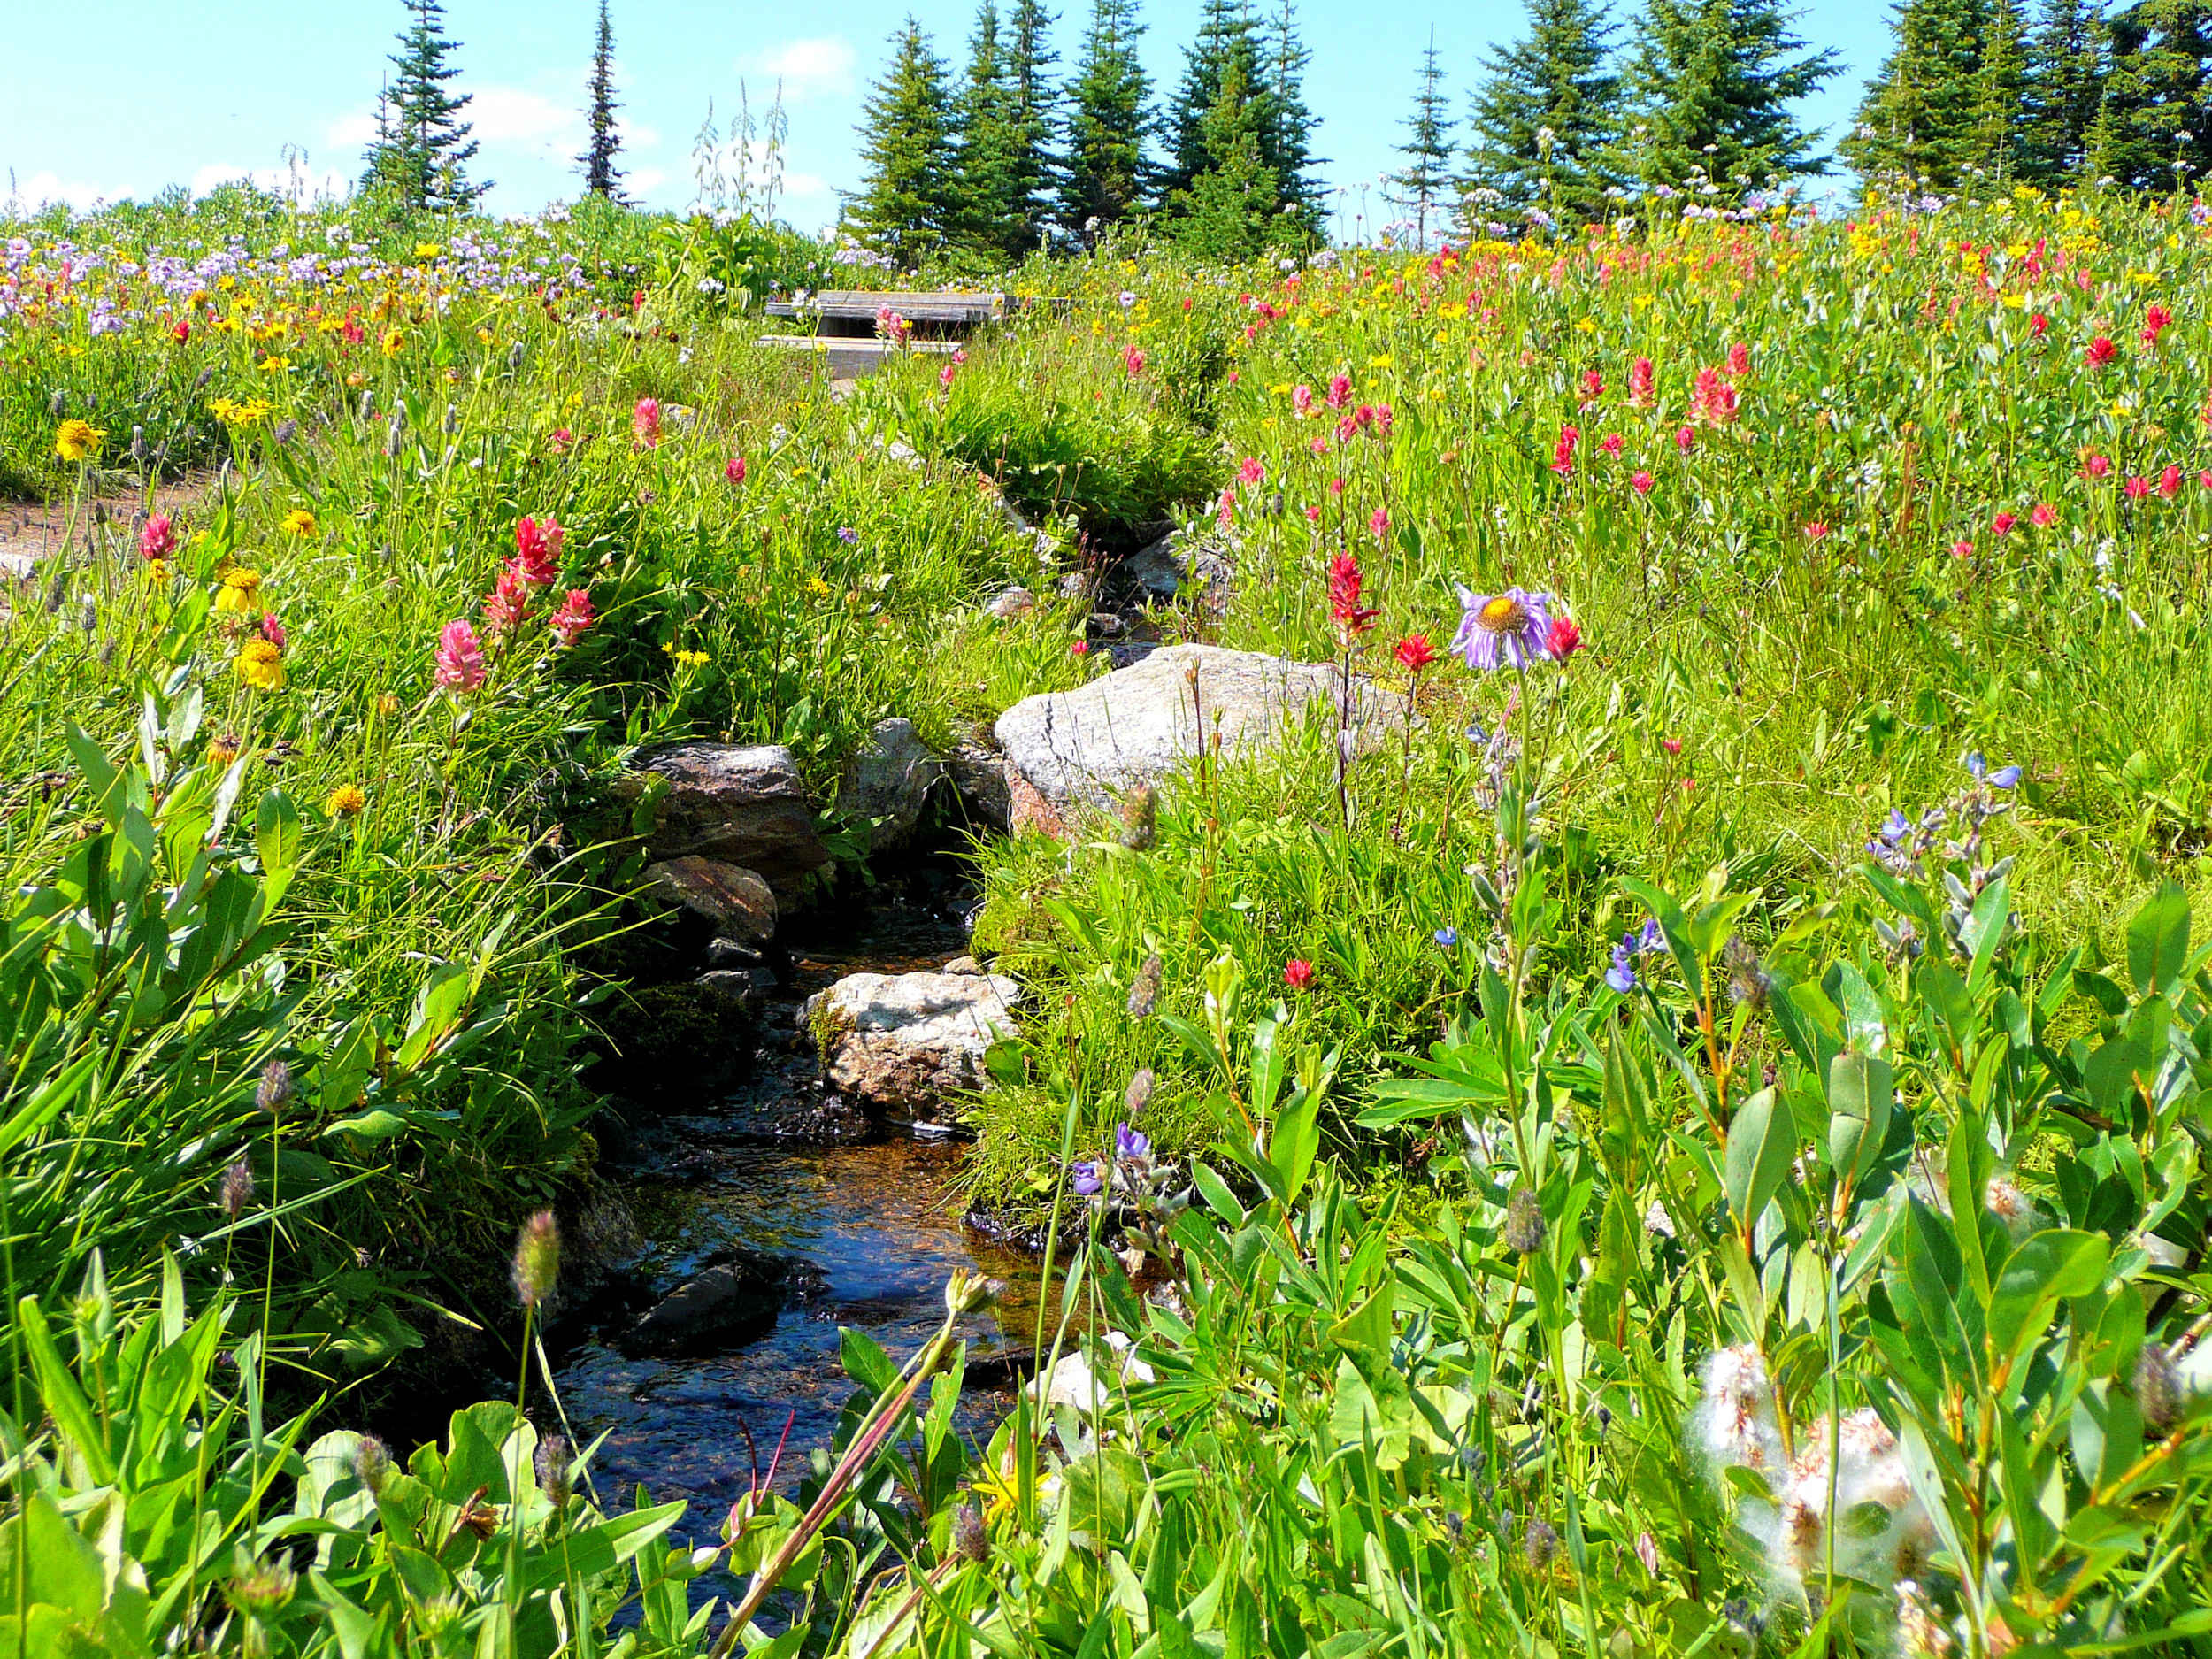
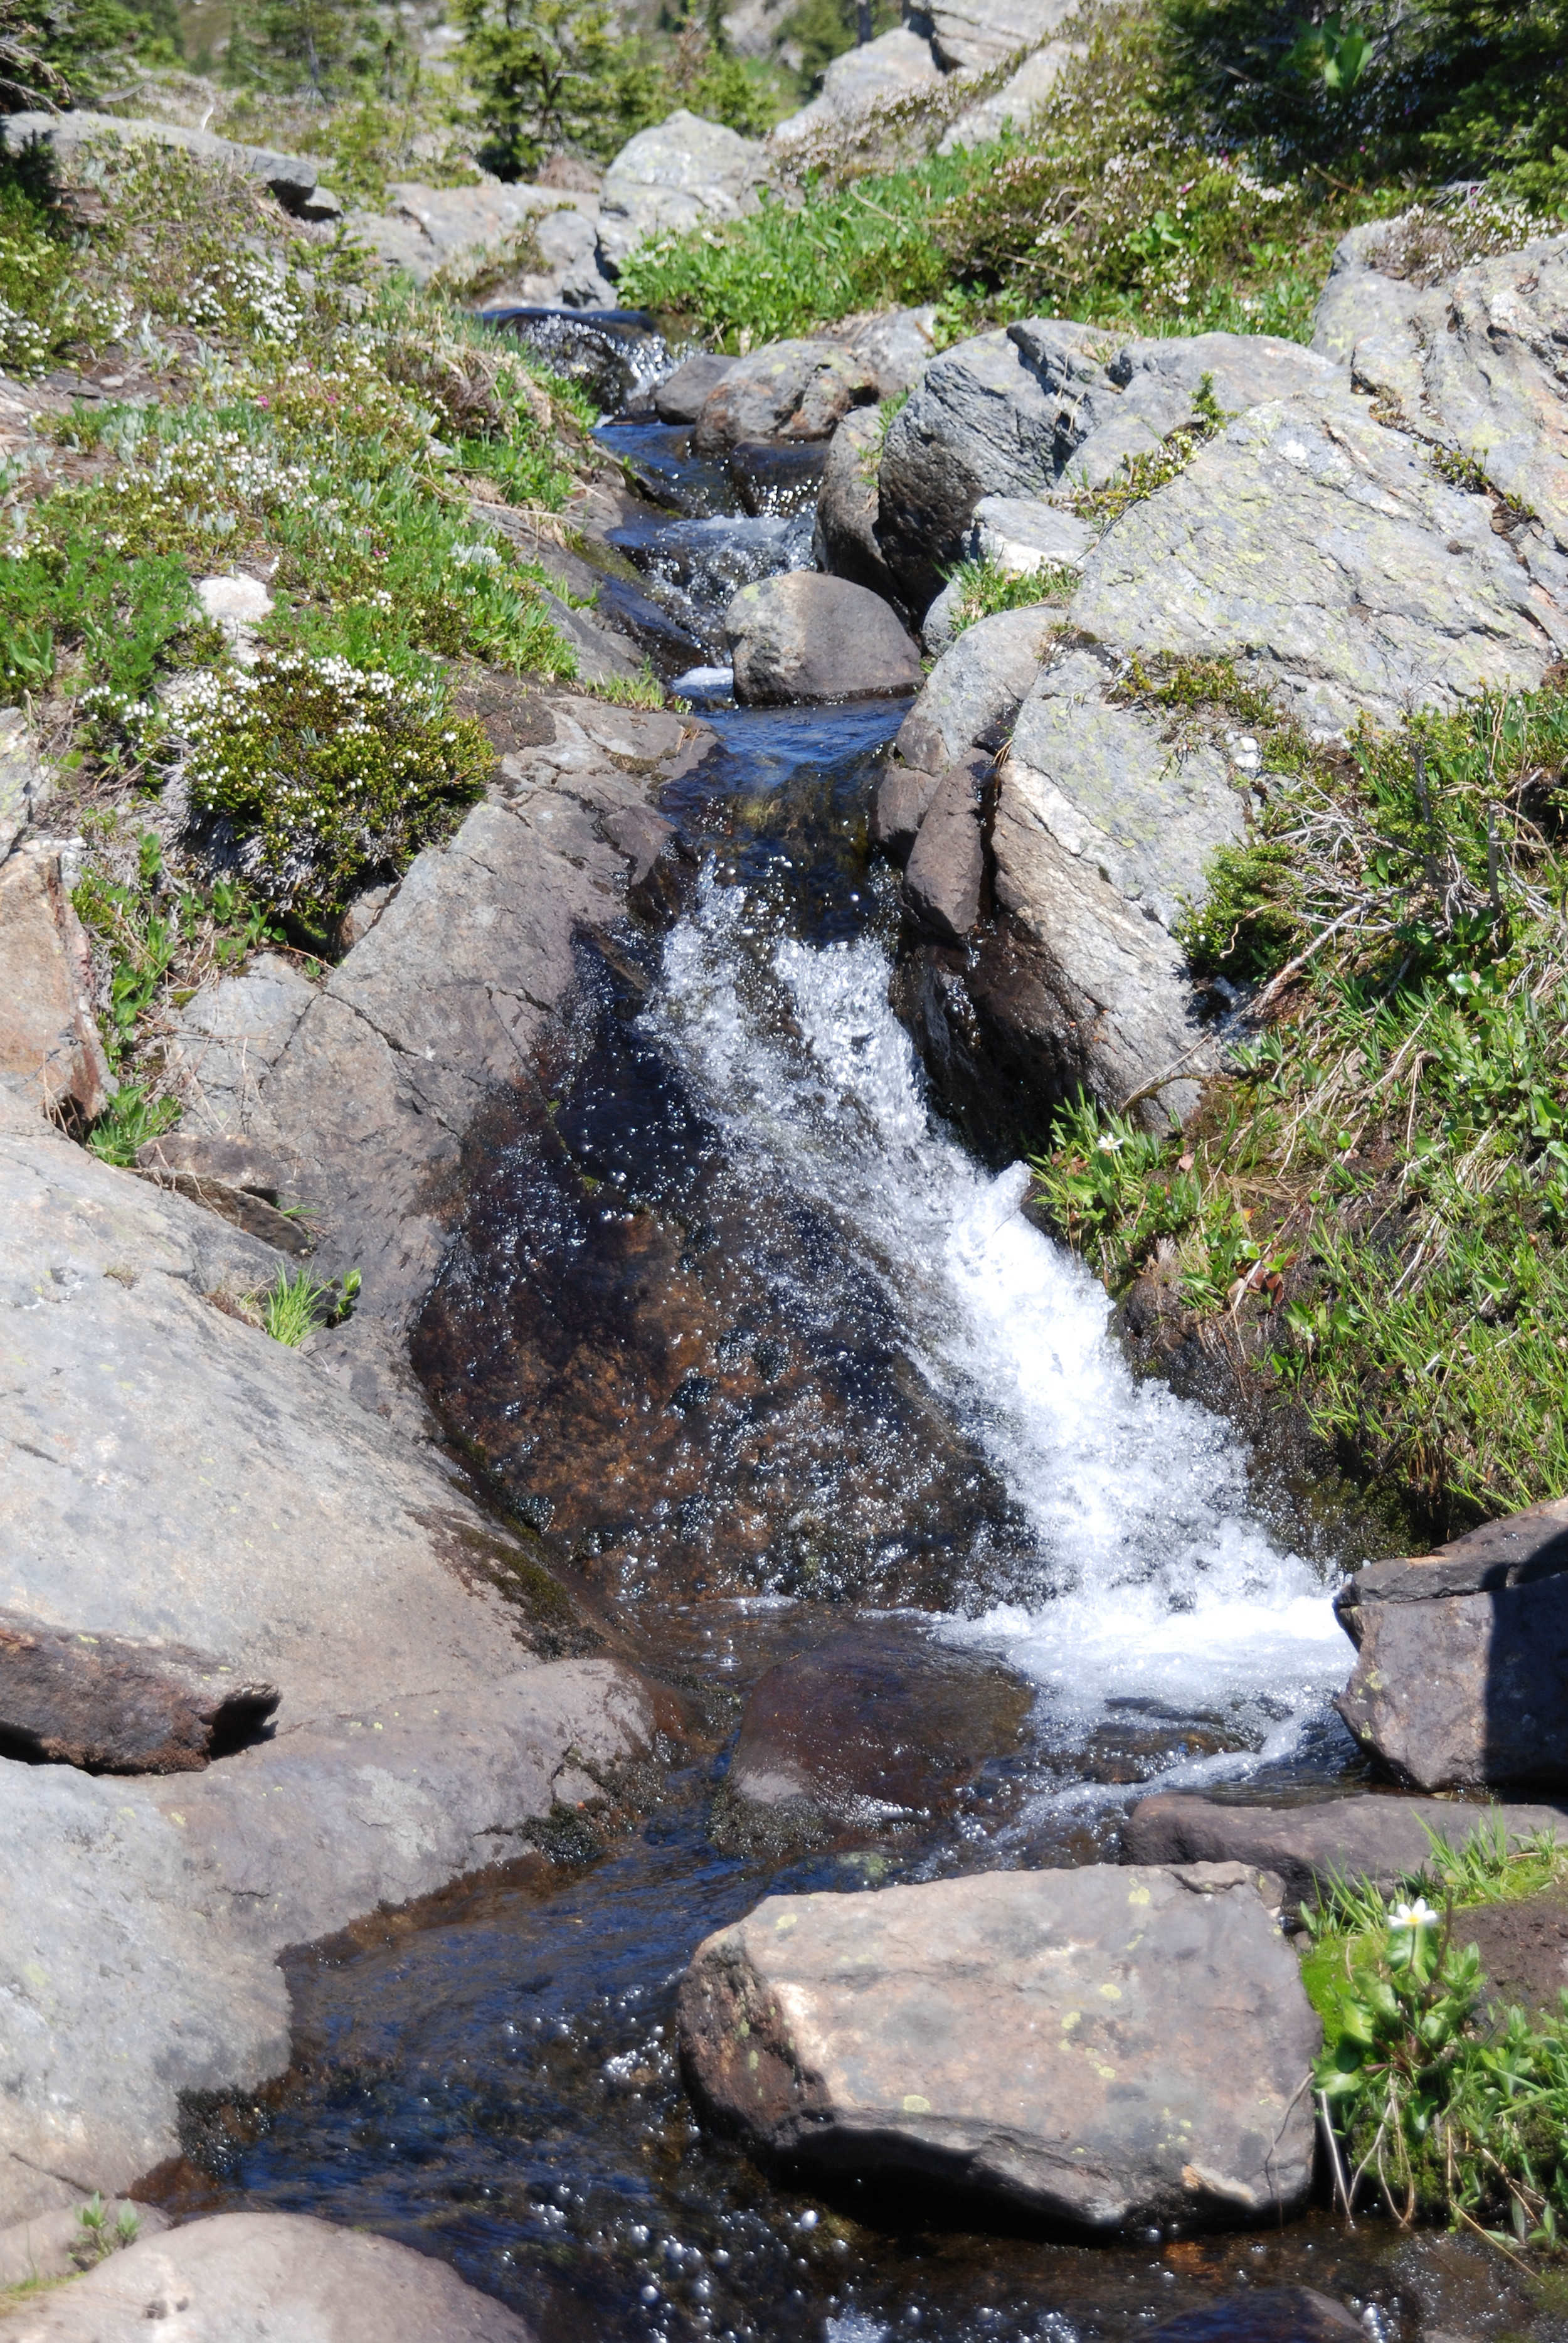
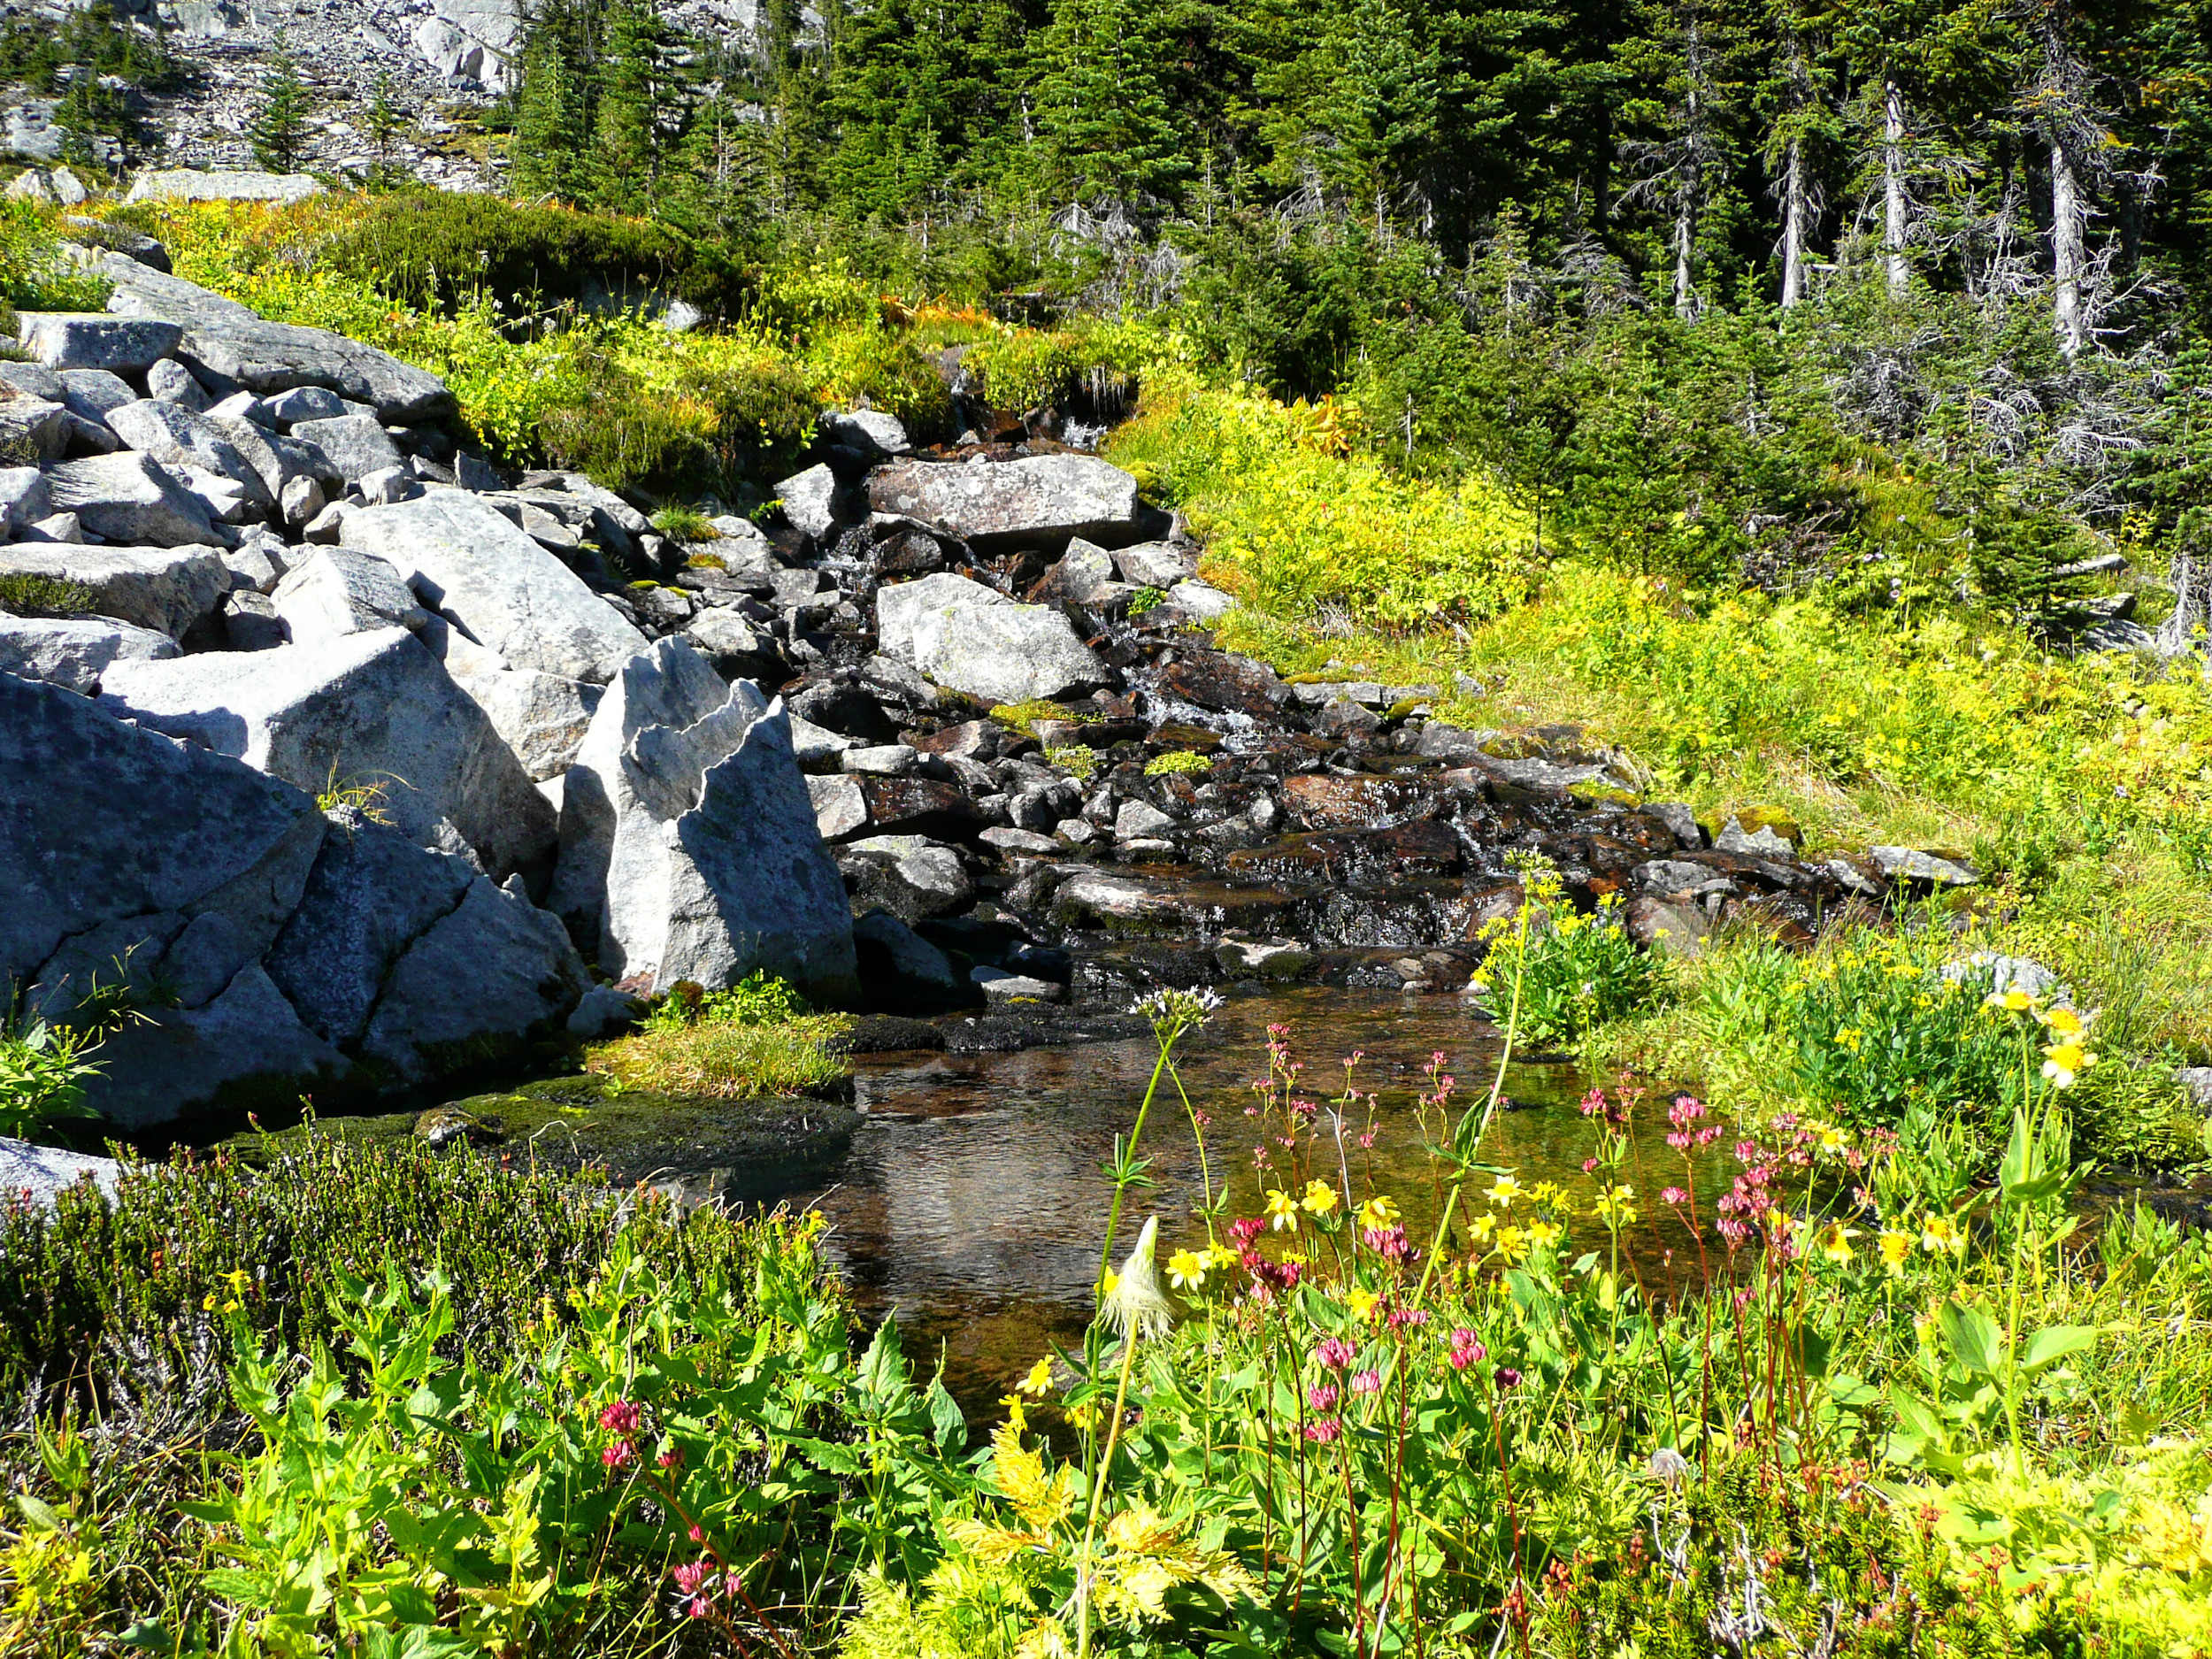
After the break it’s uphill again and we cross some lush flower meadows on our way to Eagle Pass. Little creeks trickle through the rocks and are bordered by flowers: a unique rock garden that Nature has created for us.
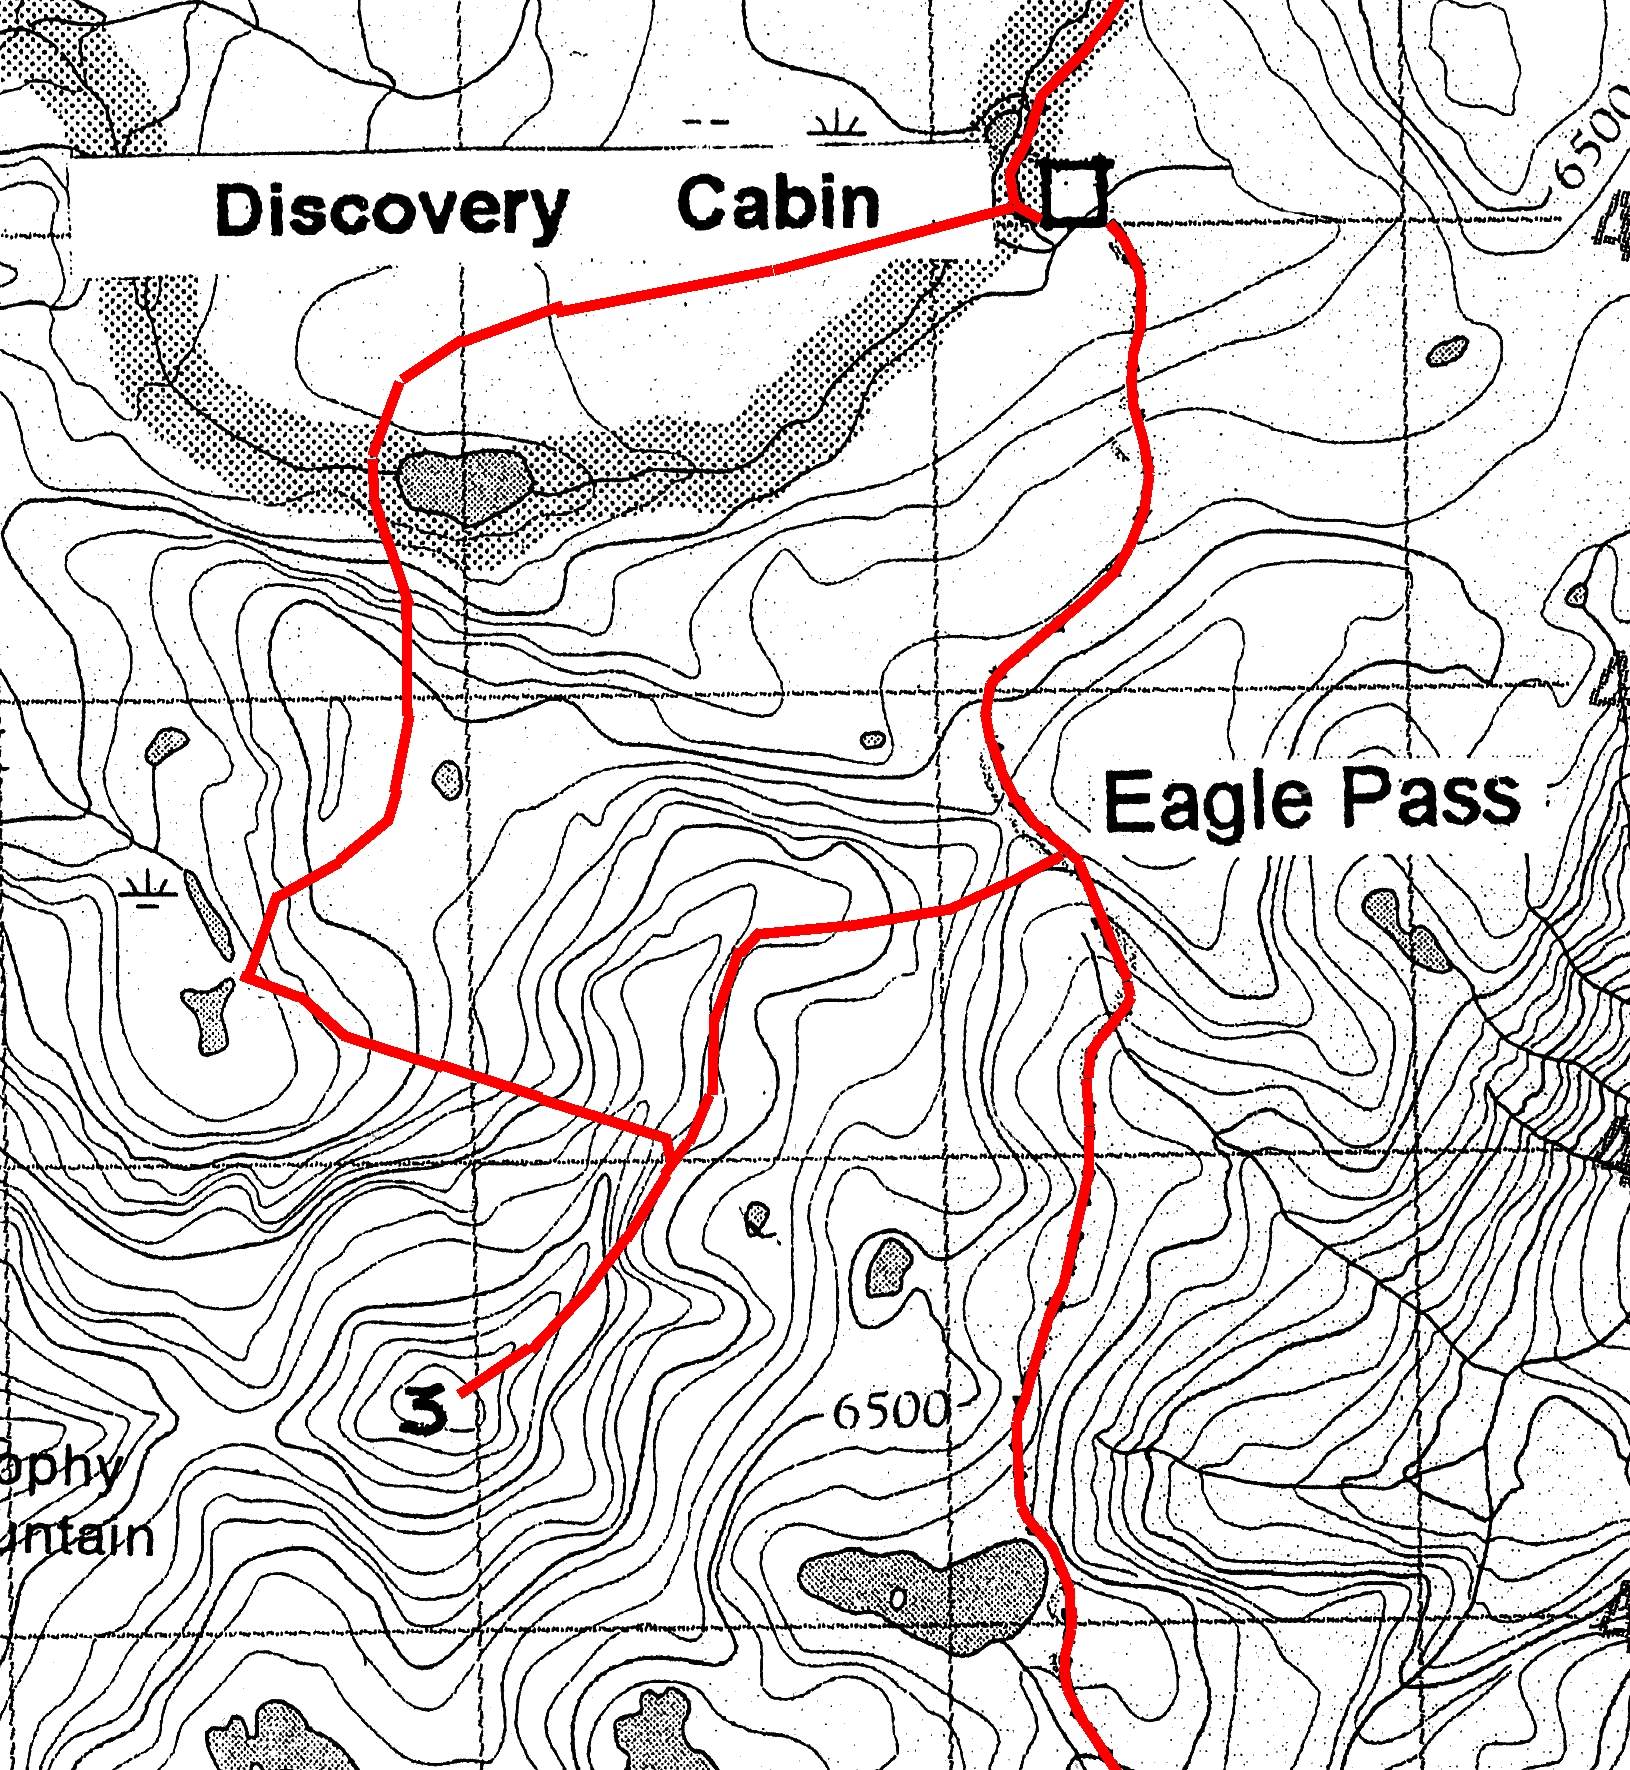
Eagle Pass is at 2061 meters and only 45 minutes away from the Discovery Cabin. Beyond the pass, the trail leads through clearings and marshes. This valley is very remote and almost impossible to reach for day hikers.
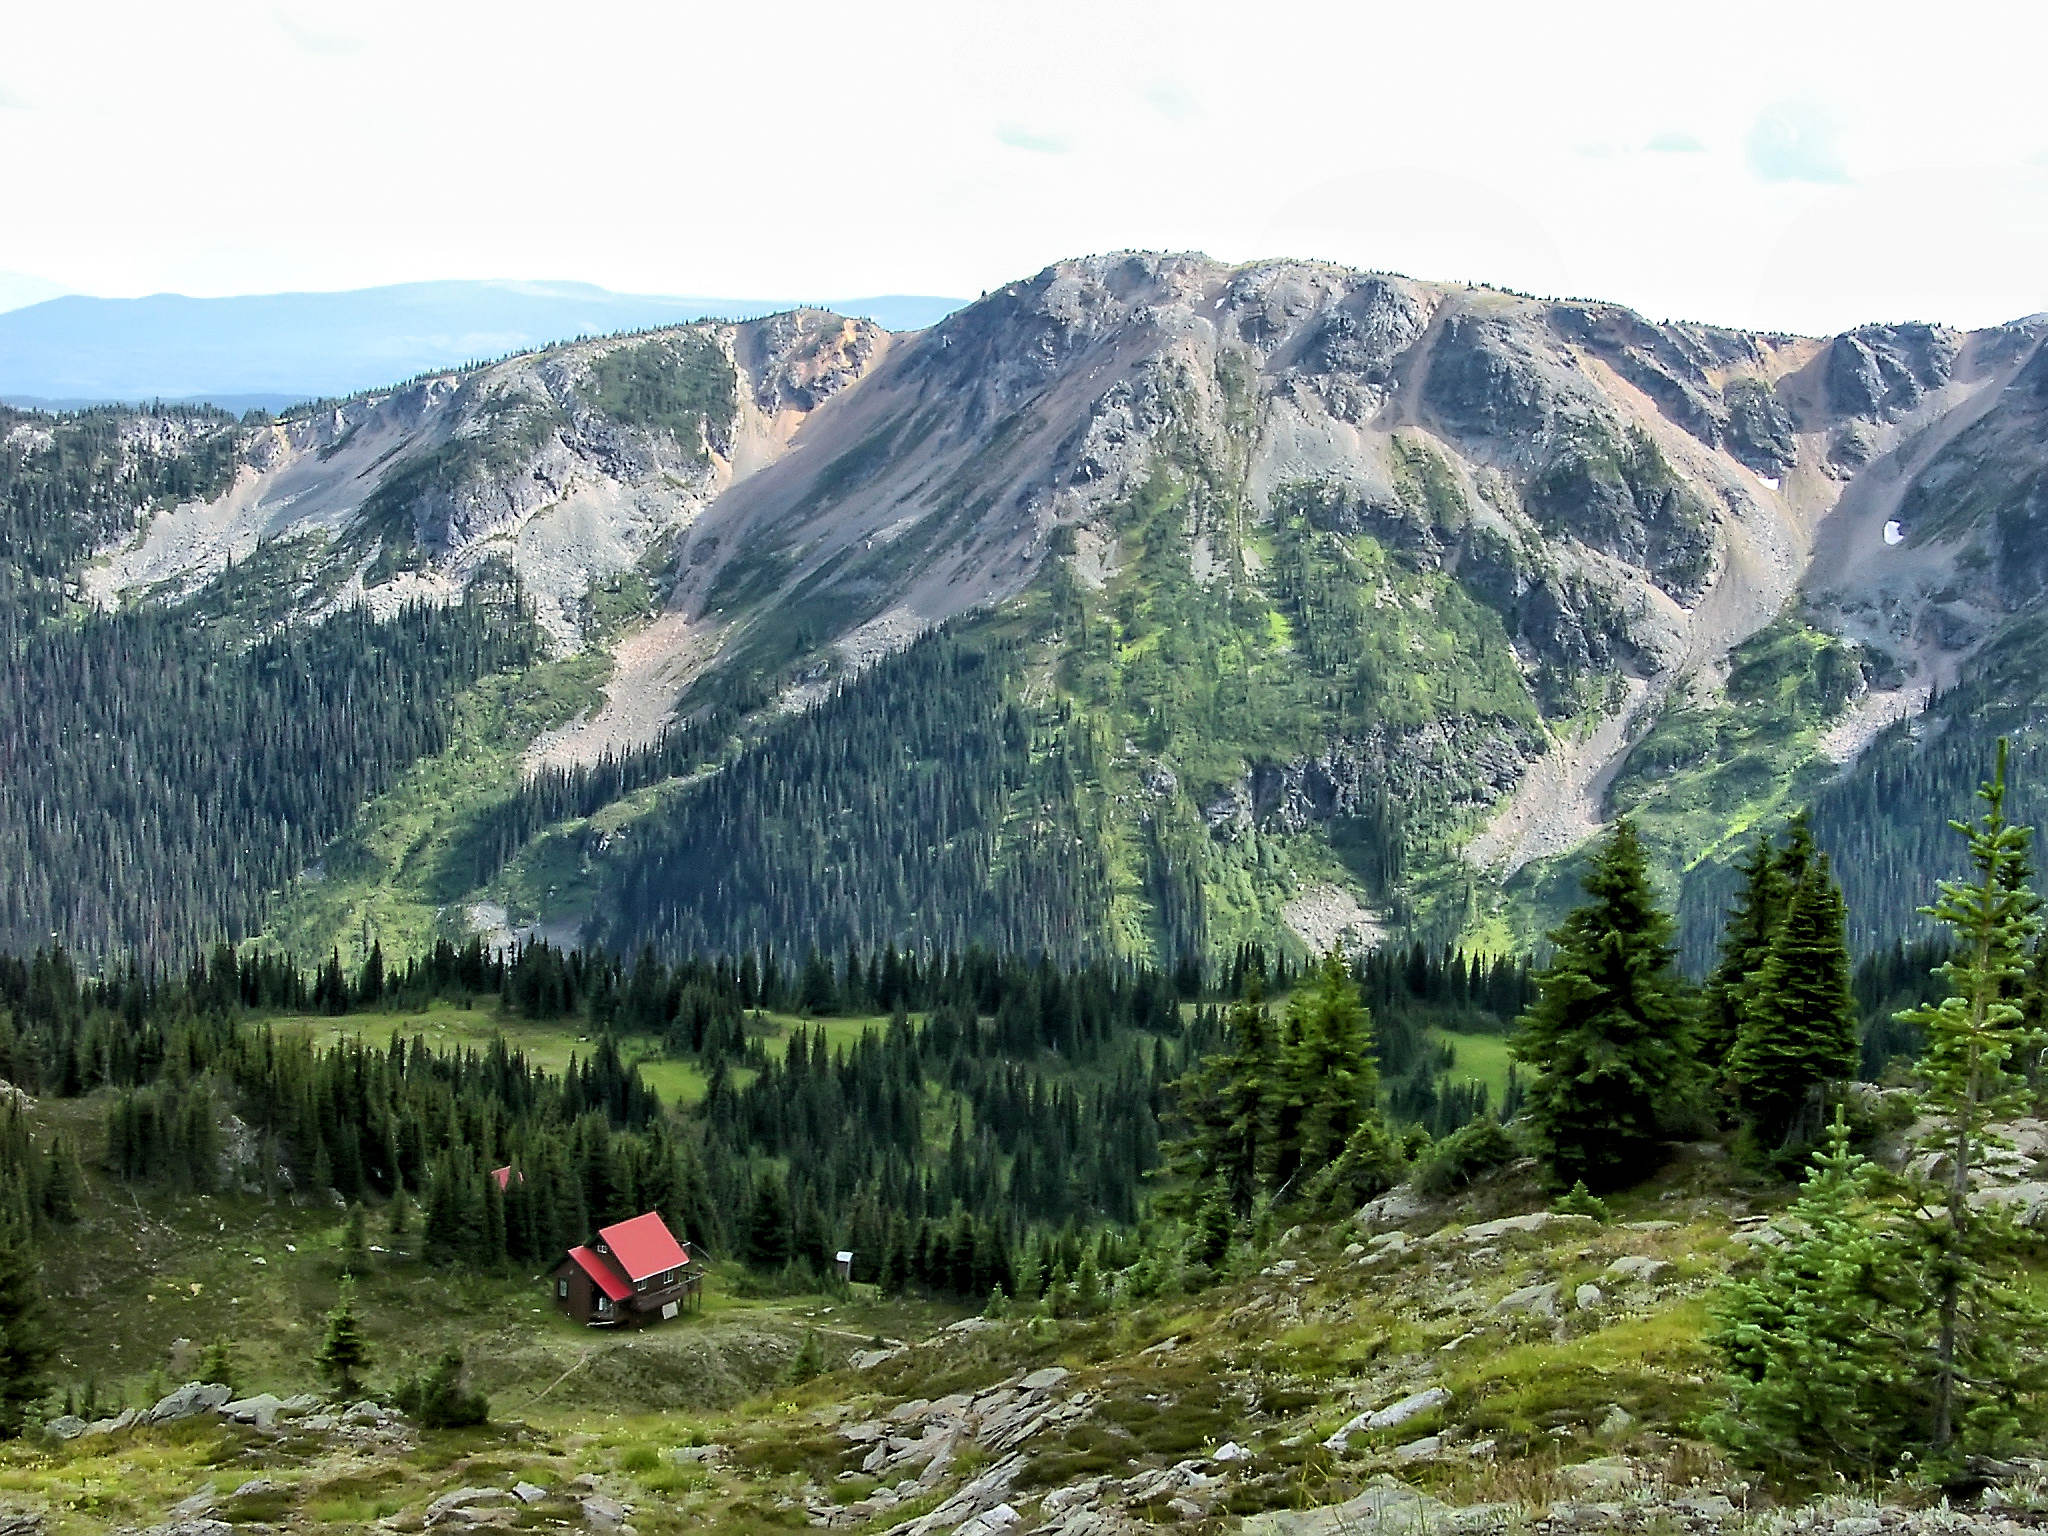
The Discovery Cabin is also very comfortable. Its setup is a little different from the chalet and does not provide the same degree of privacy; unless, of course, you win the draw and sleep in the only private room. We leave it for the Dutch couple and with so few people, sleeping in the open loft poses no hardship at all.
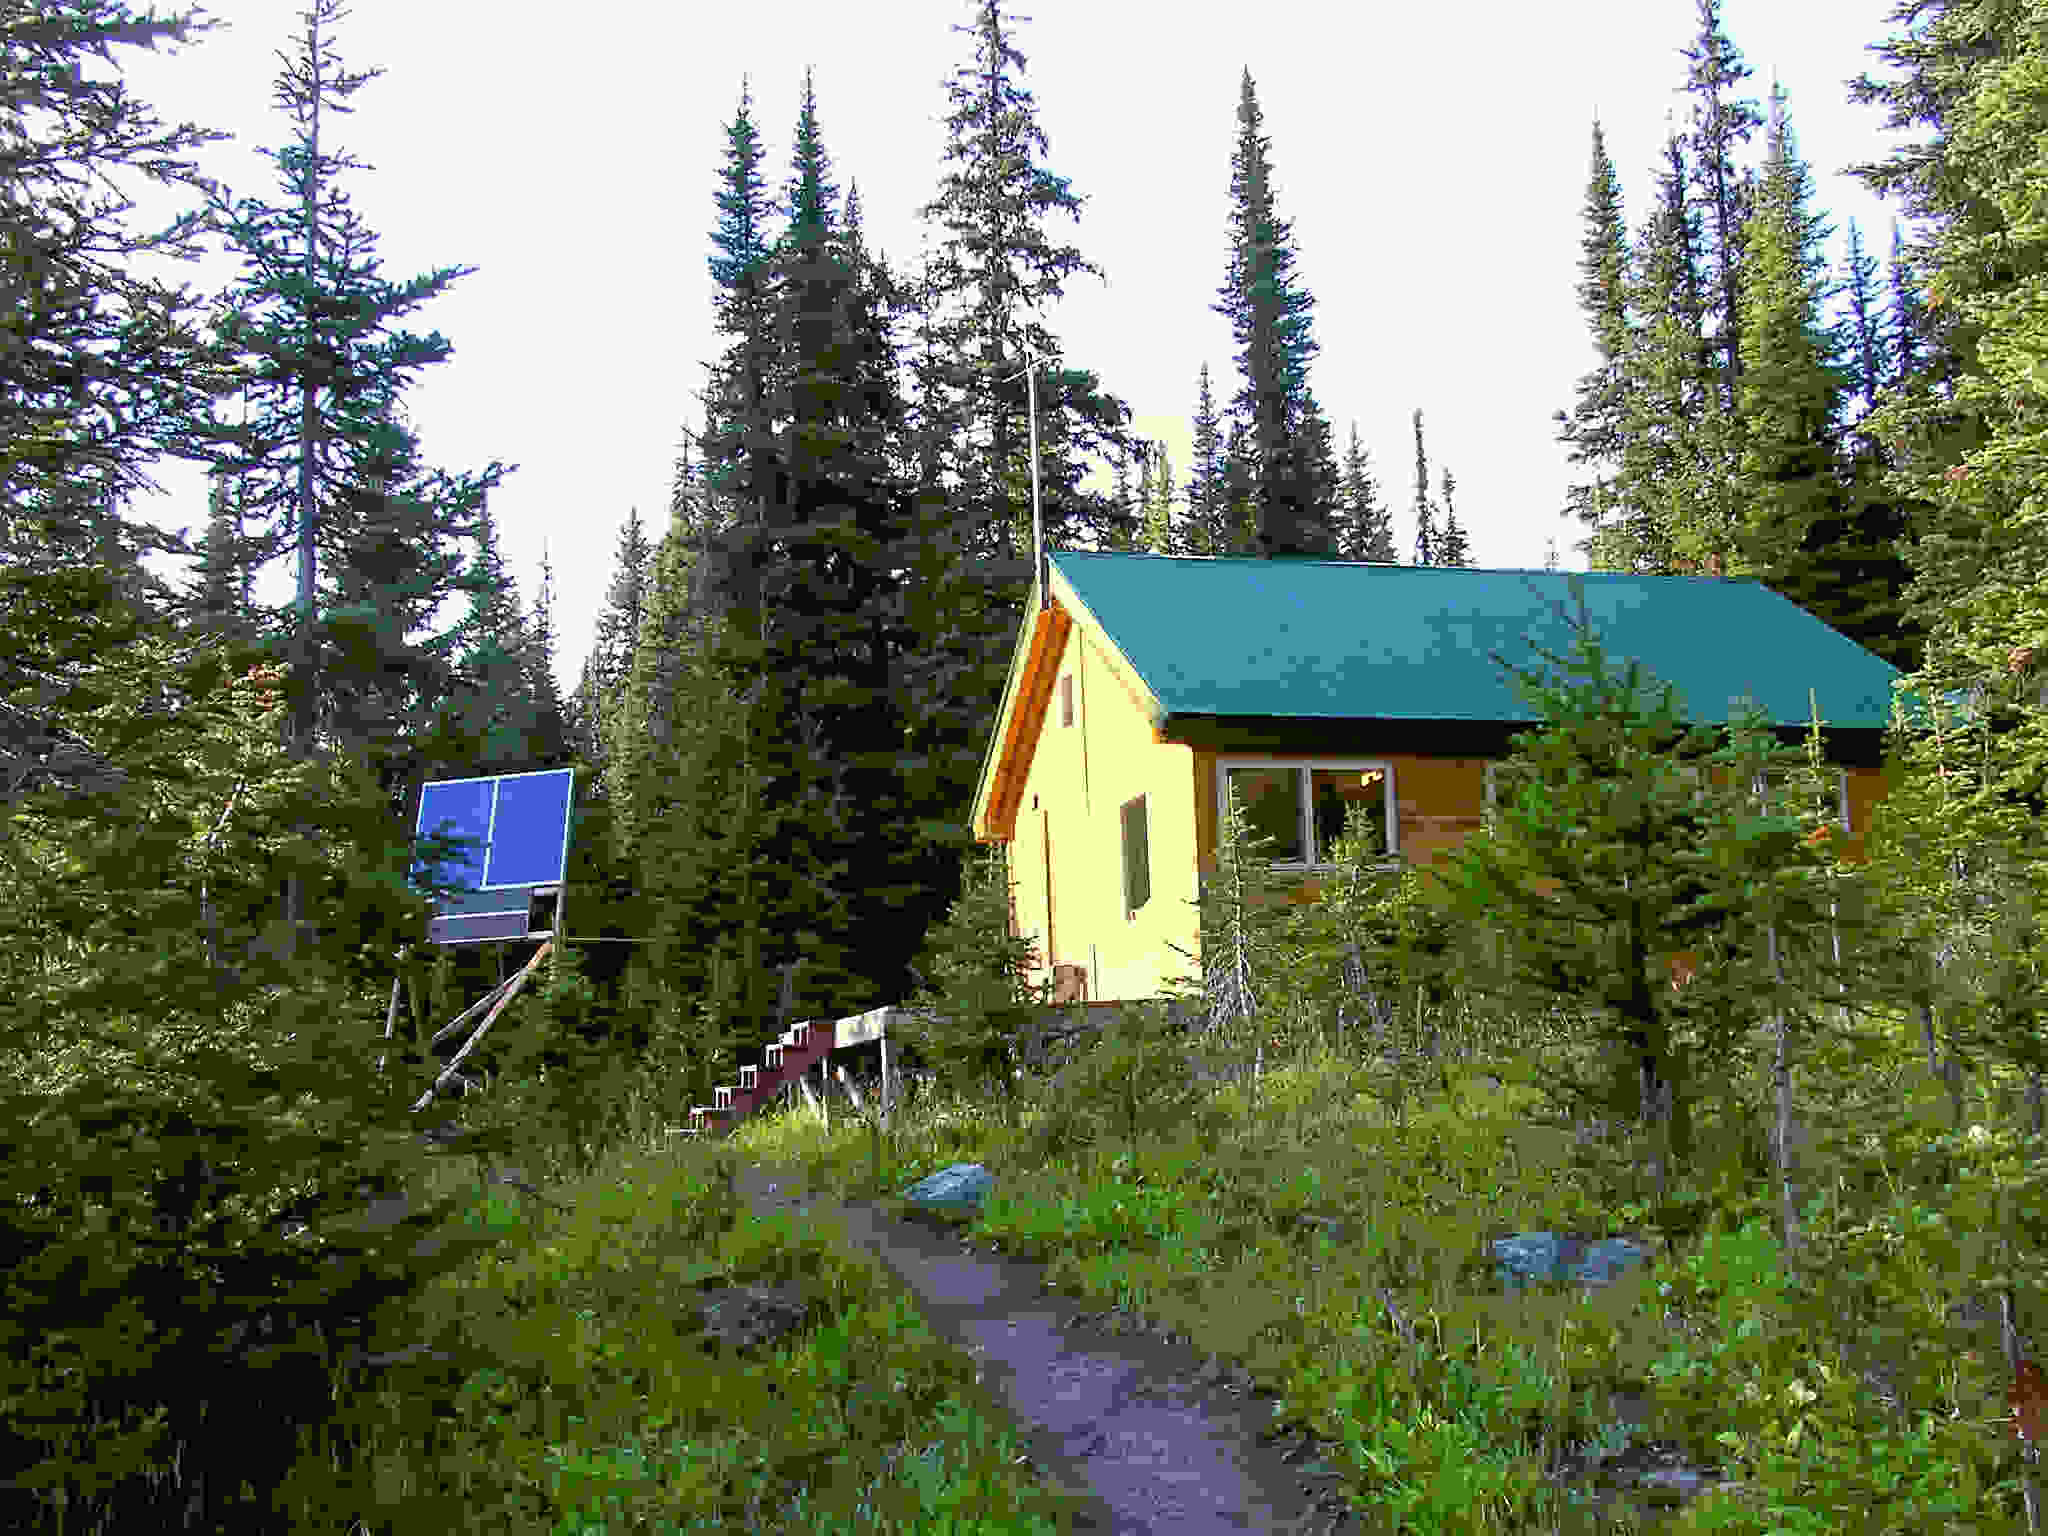
Discovery Cabin
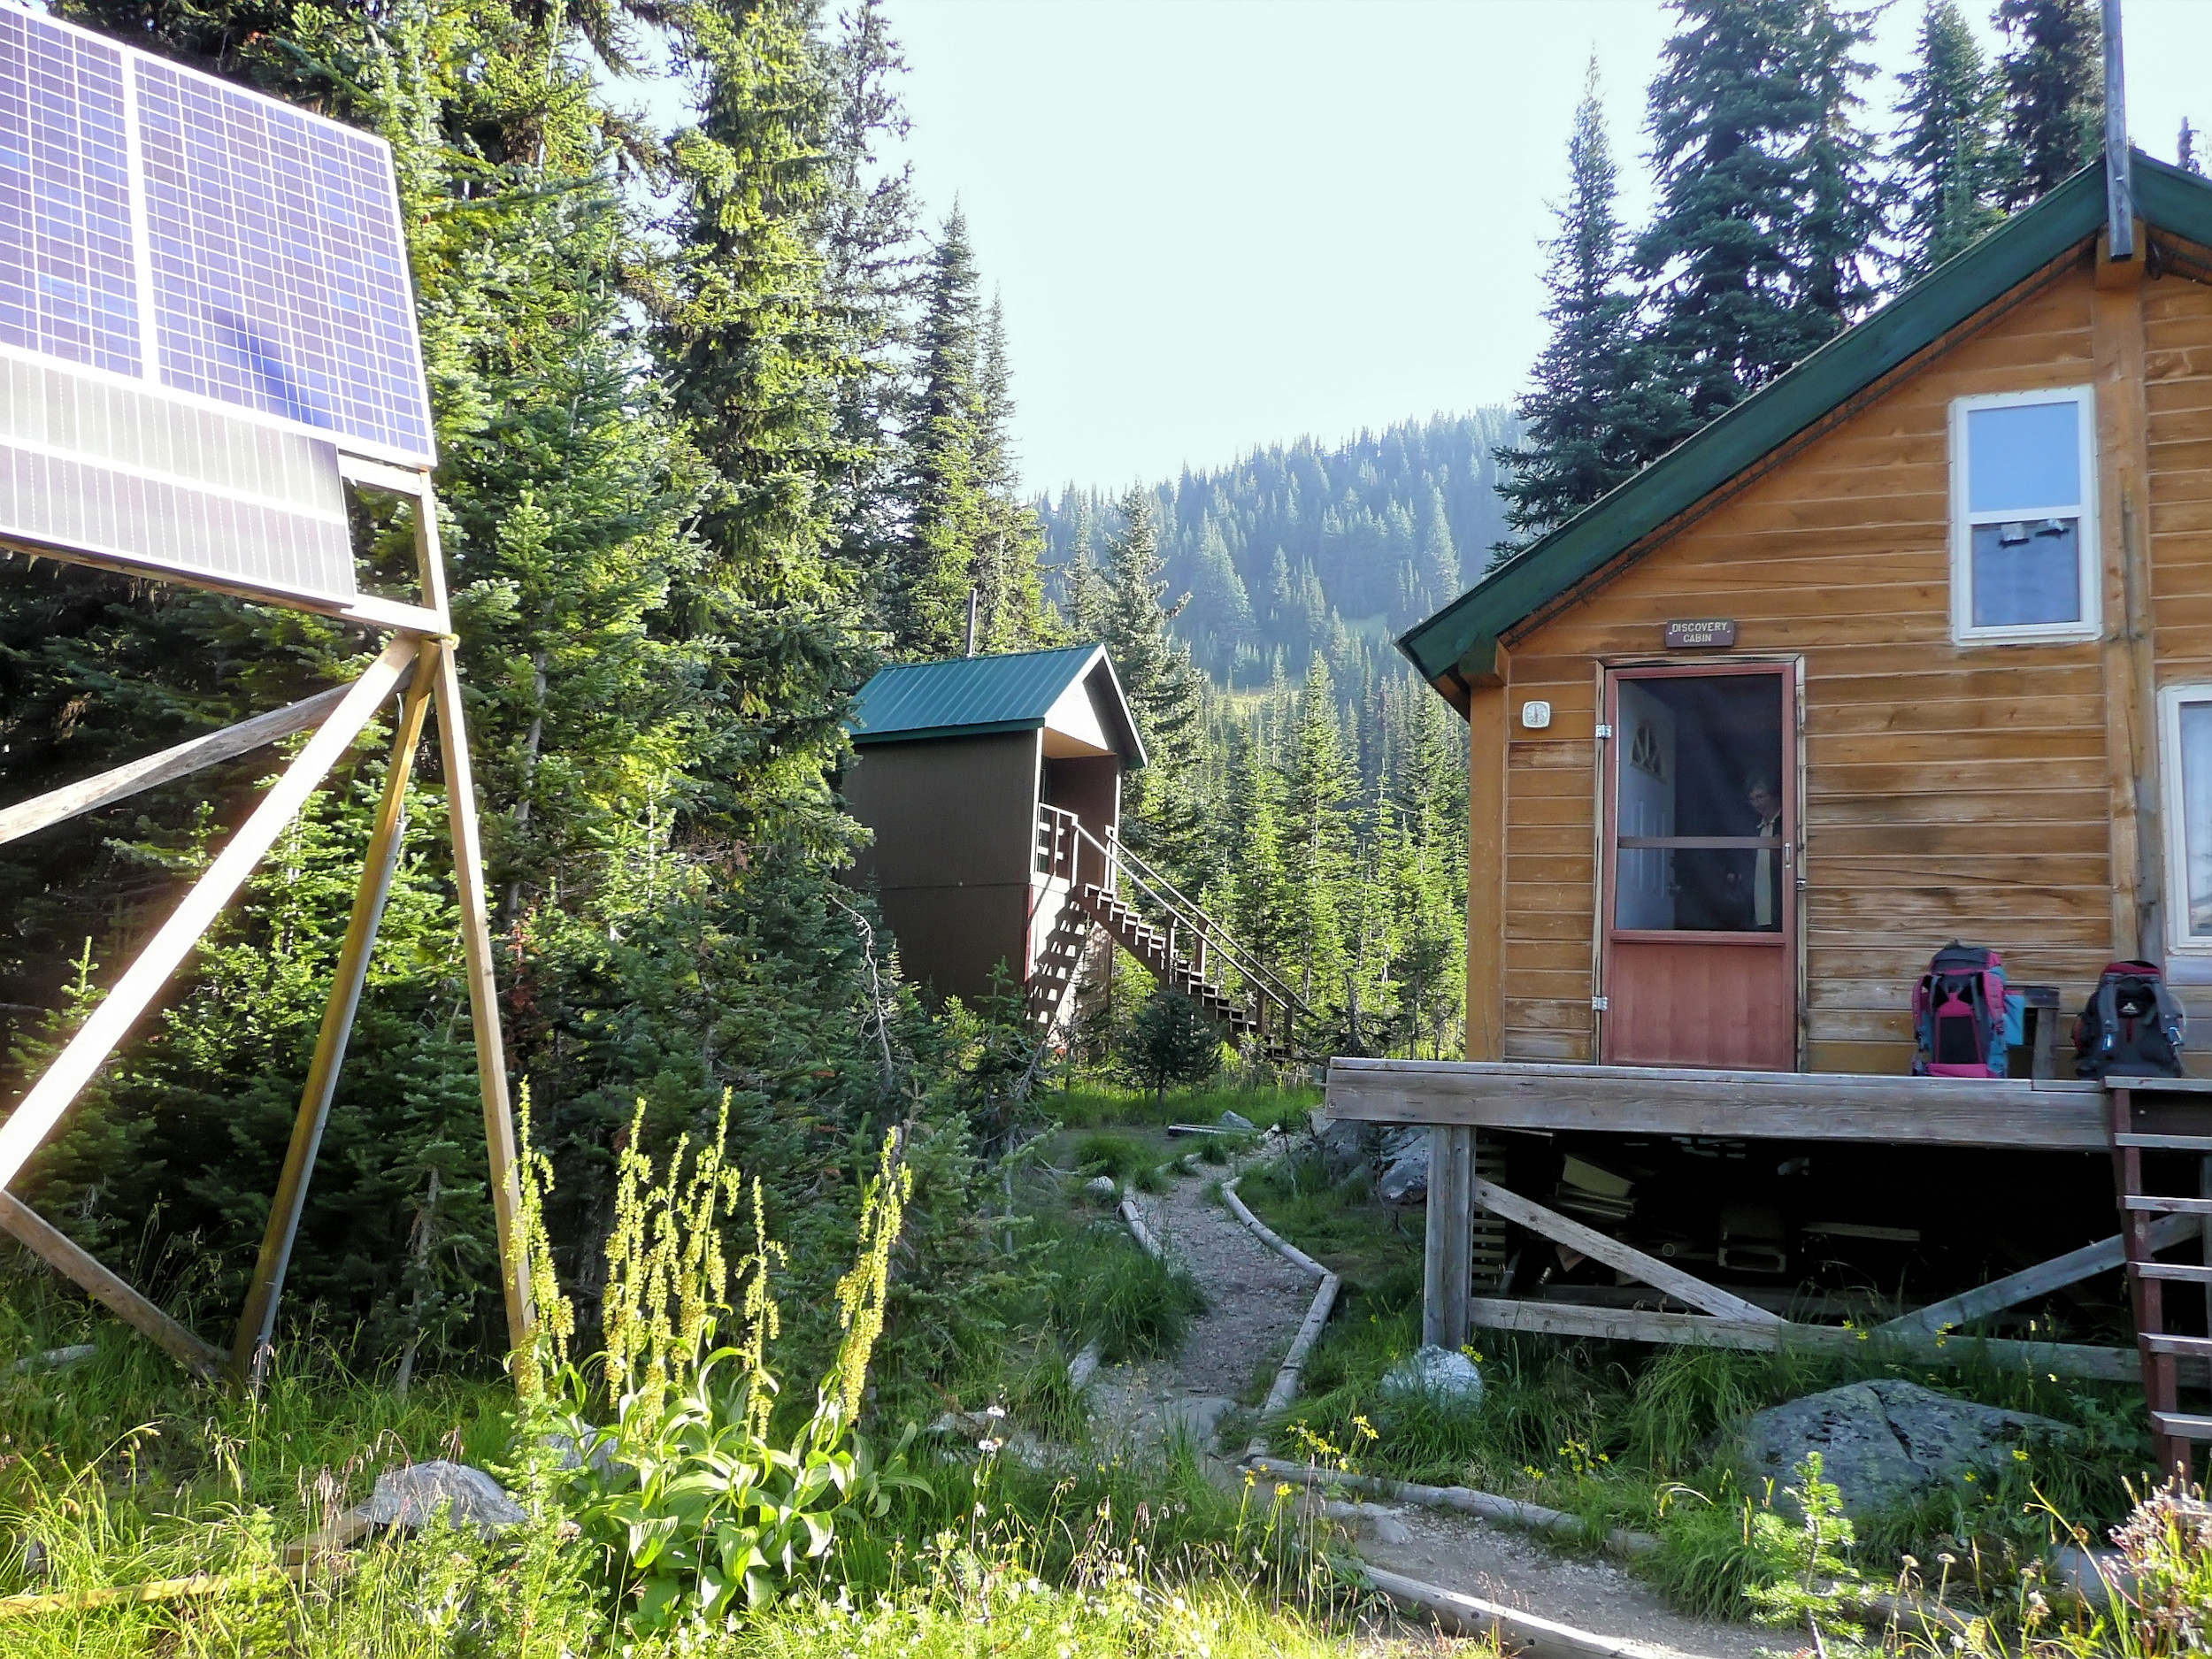
The fridge gives us some grief, because it quit running during the previous trip. We help JF find and solve the problem: a blocked propane line. For the tour operators it is not easy to do repairs or bring in parts, because they always are a long hike away. The use of expensive helicopters is reserved for emergencies only.
They keep some games here on a shelf. We declare that it is Poker Night today and have an extra glass of wine. It doesn’t really matter; when the wine is gone it’s gone.
6 km - ca. 5 Hours - Ascent 300 m
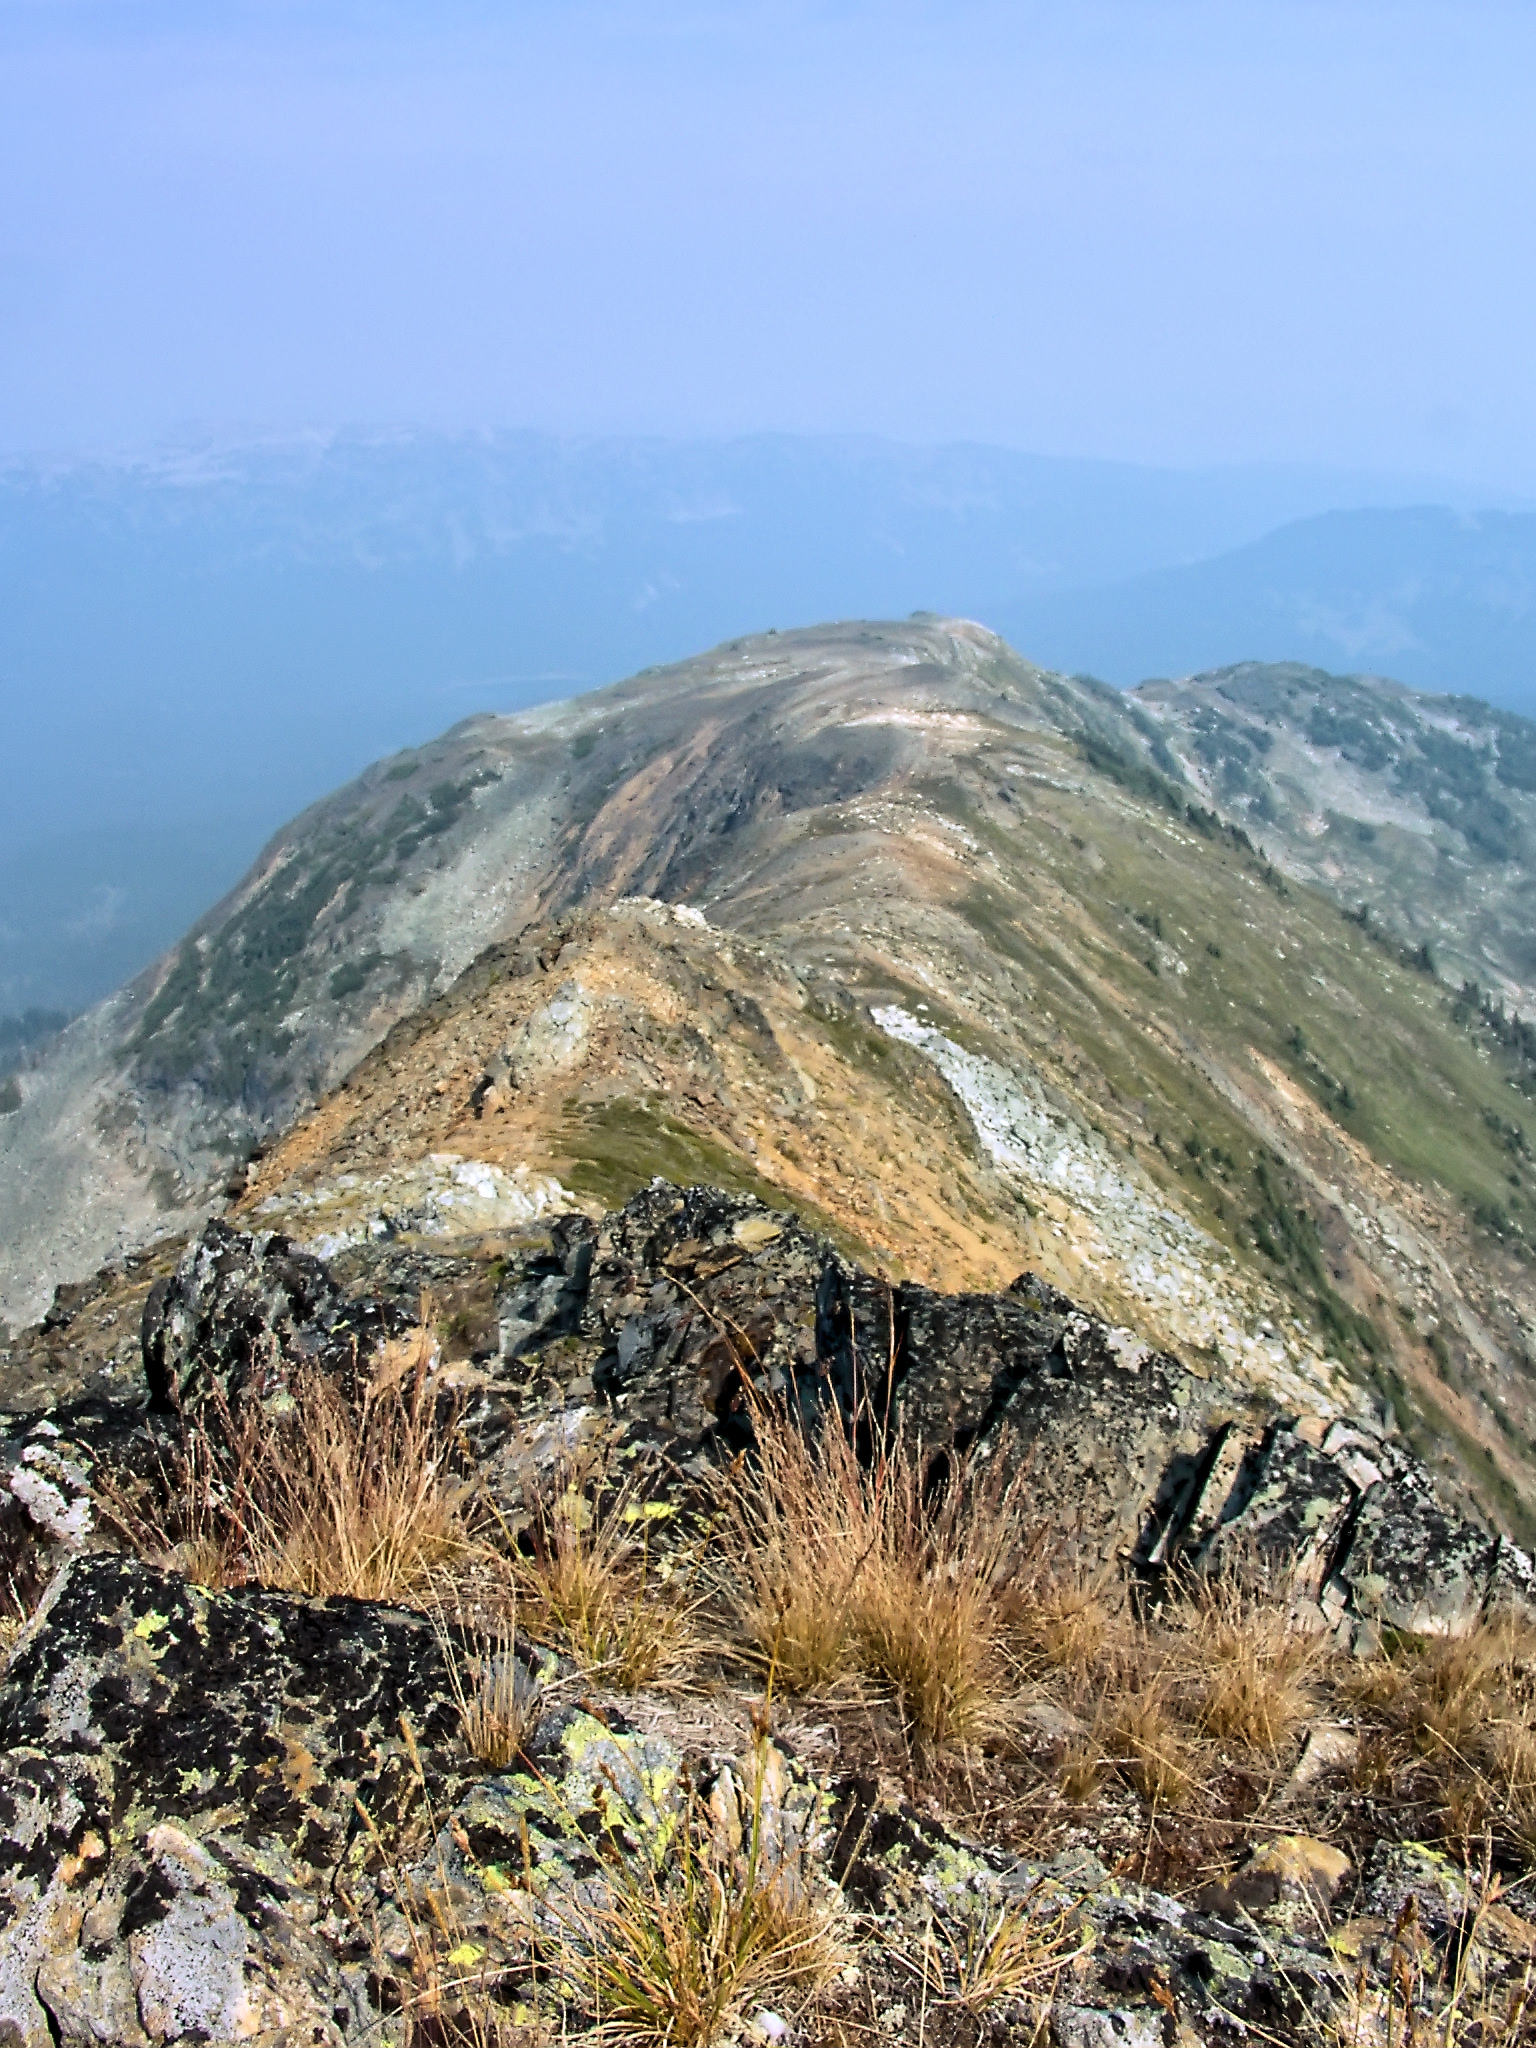
Today the hike up Trophy peak #3, also known as Moul Peak, is on the agenda. We return to Eagle Pass and follow a ridge leading towards the peak.
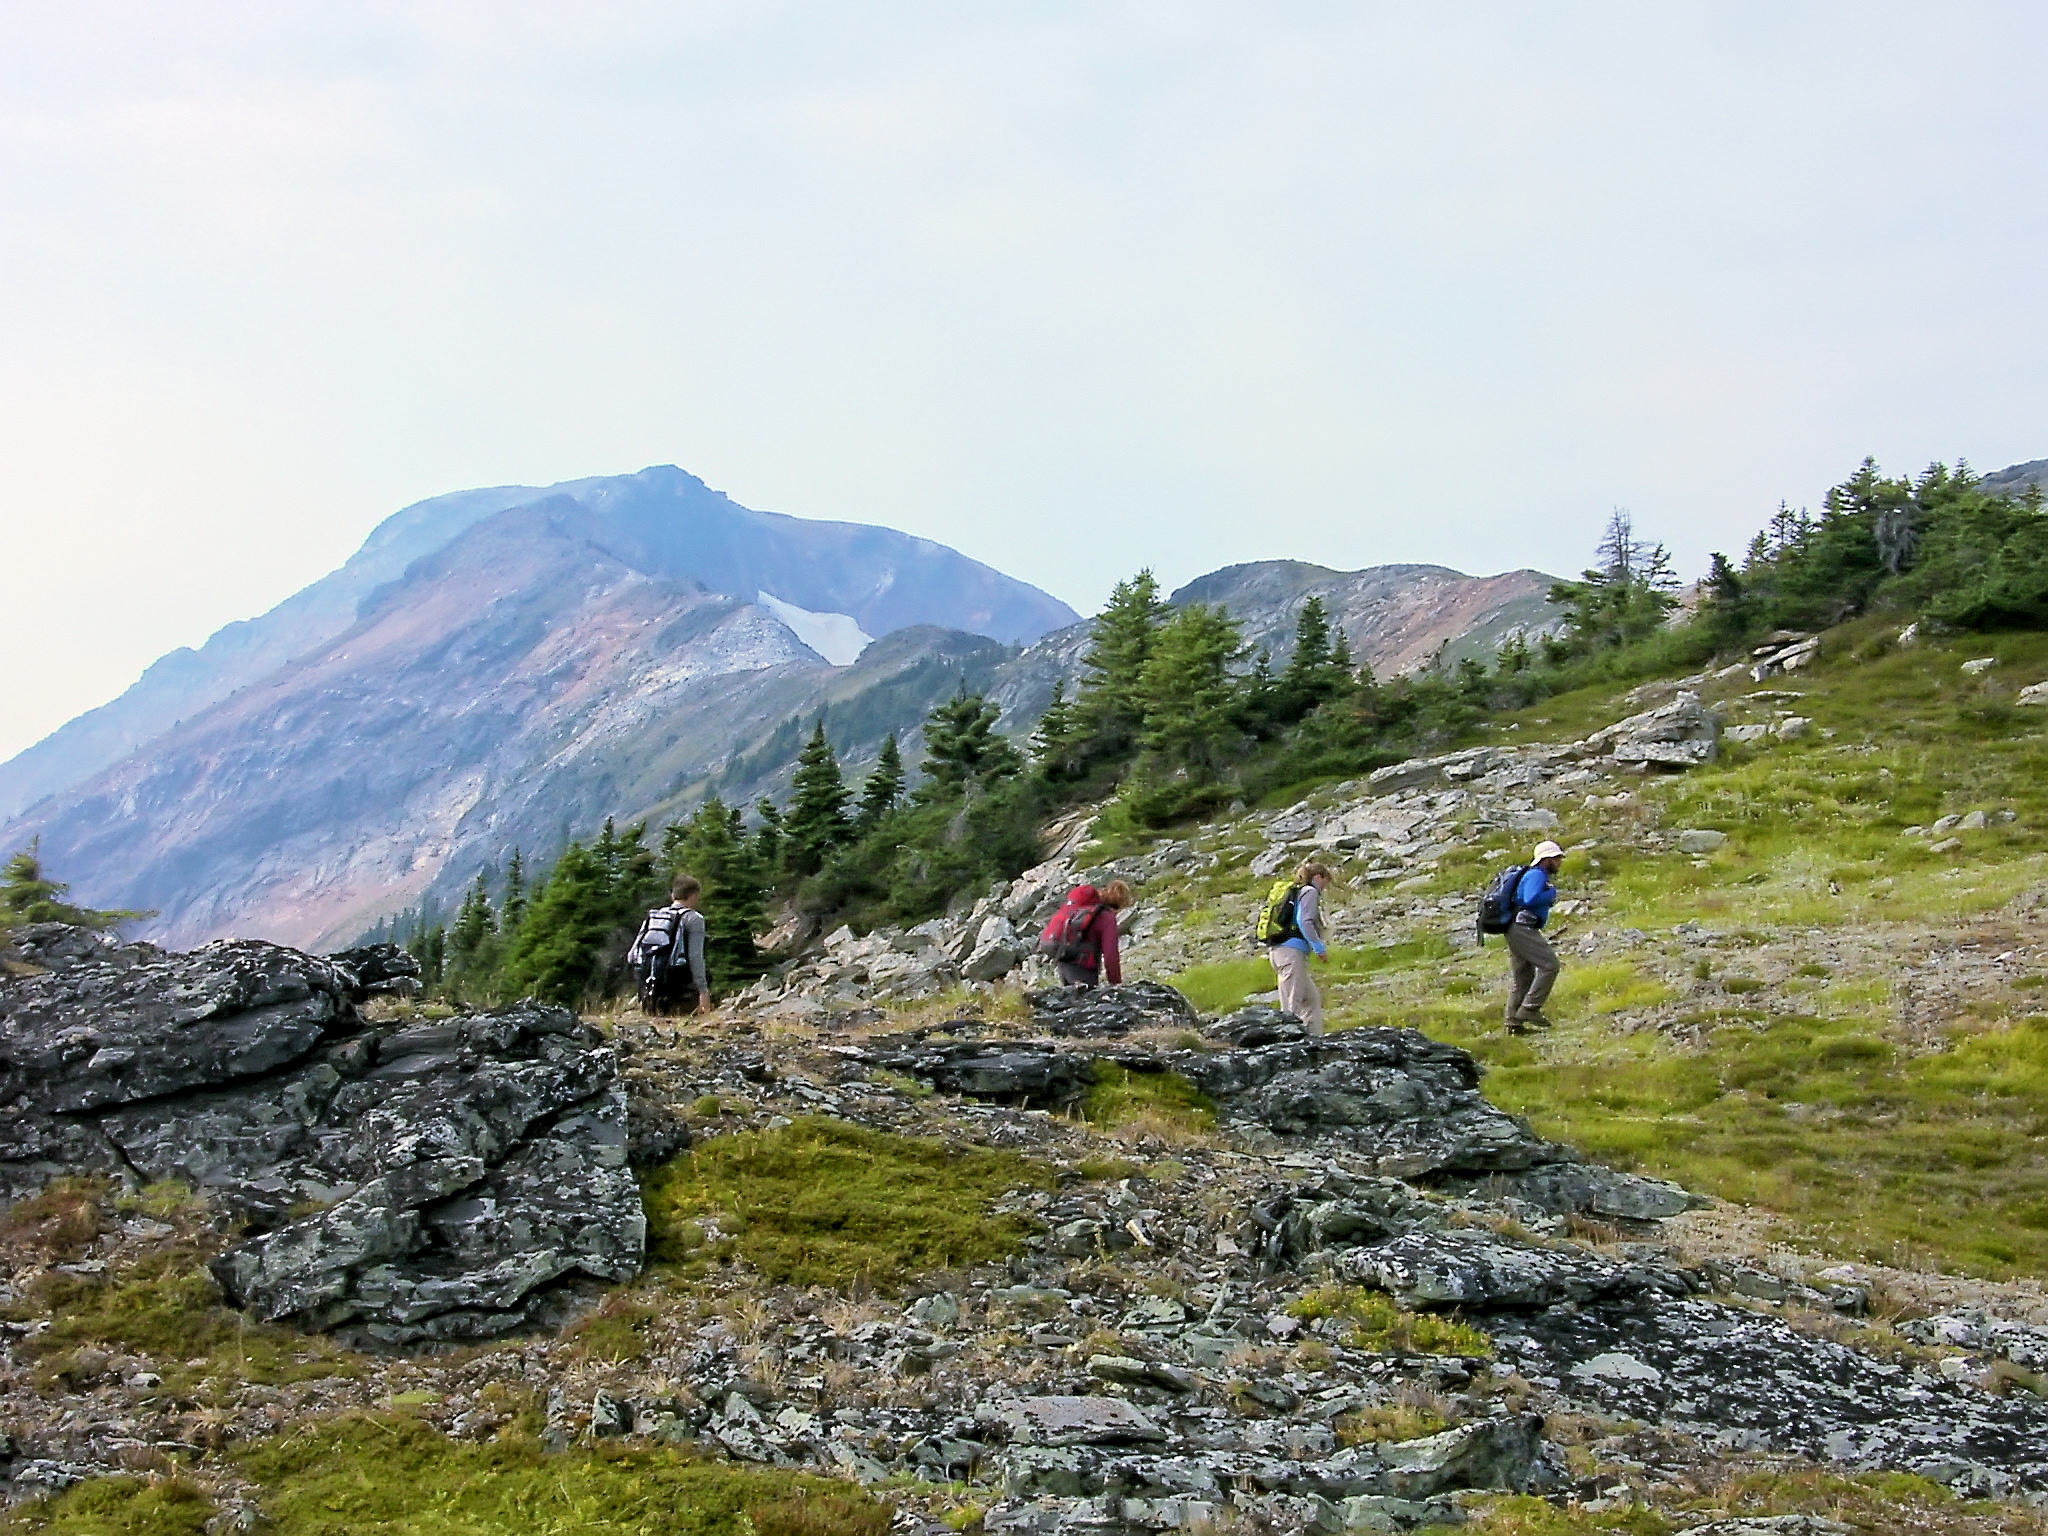
On the way to Trophy #3
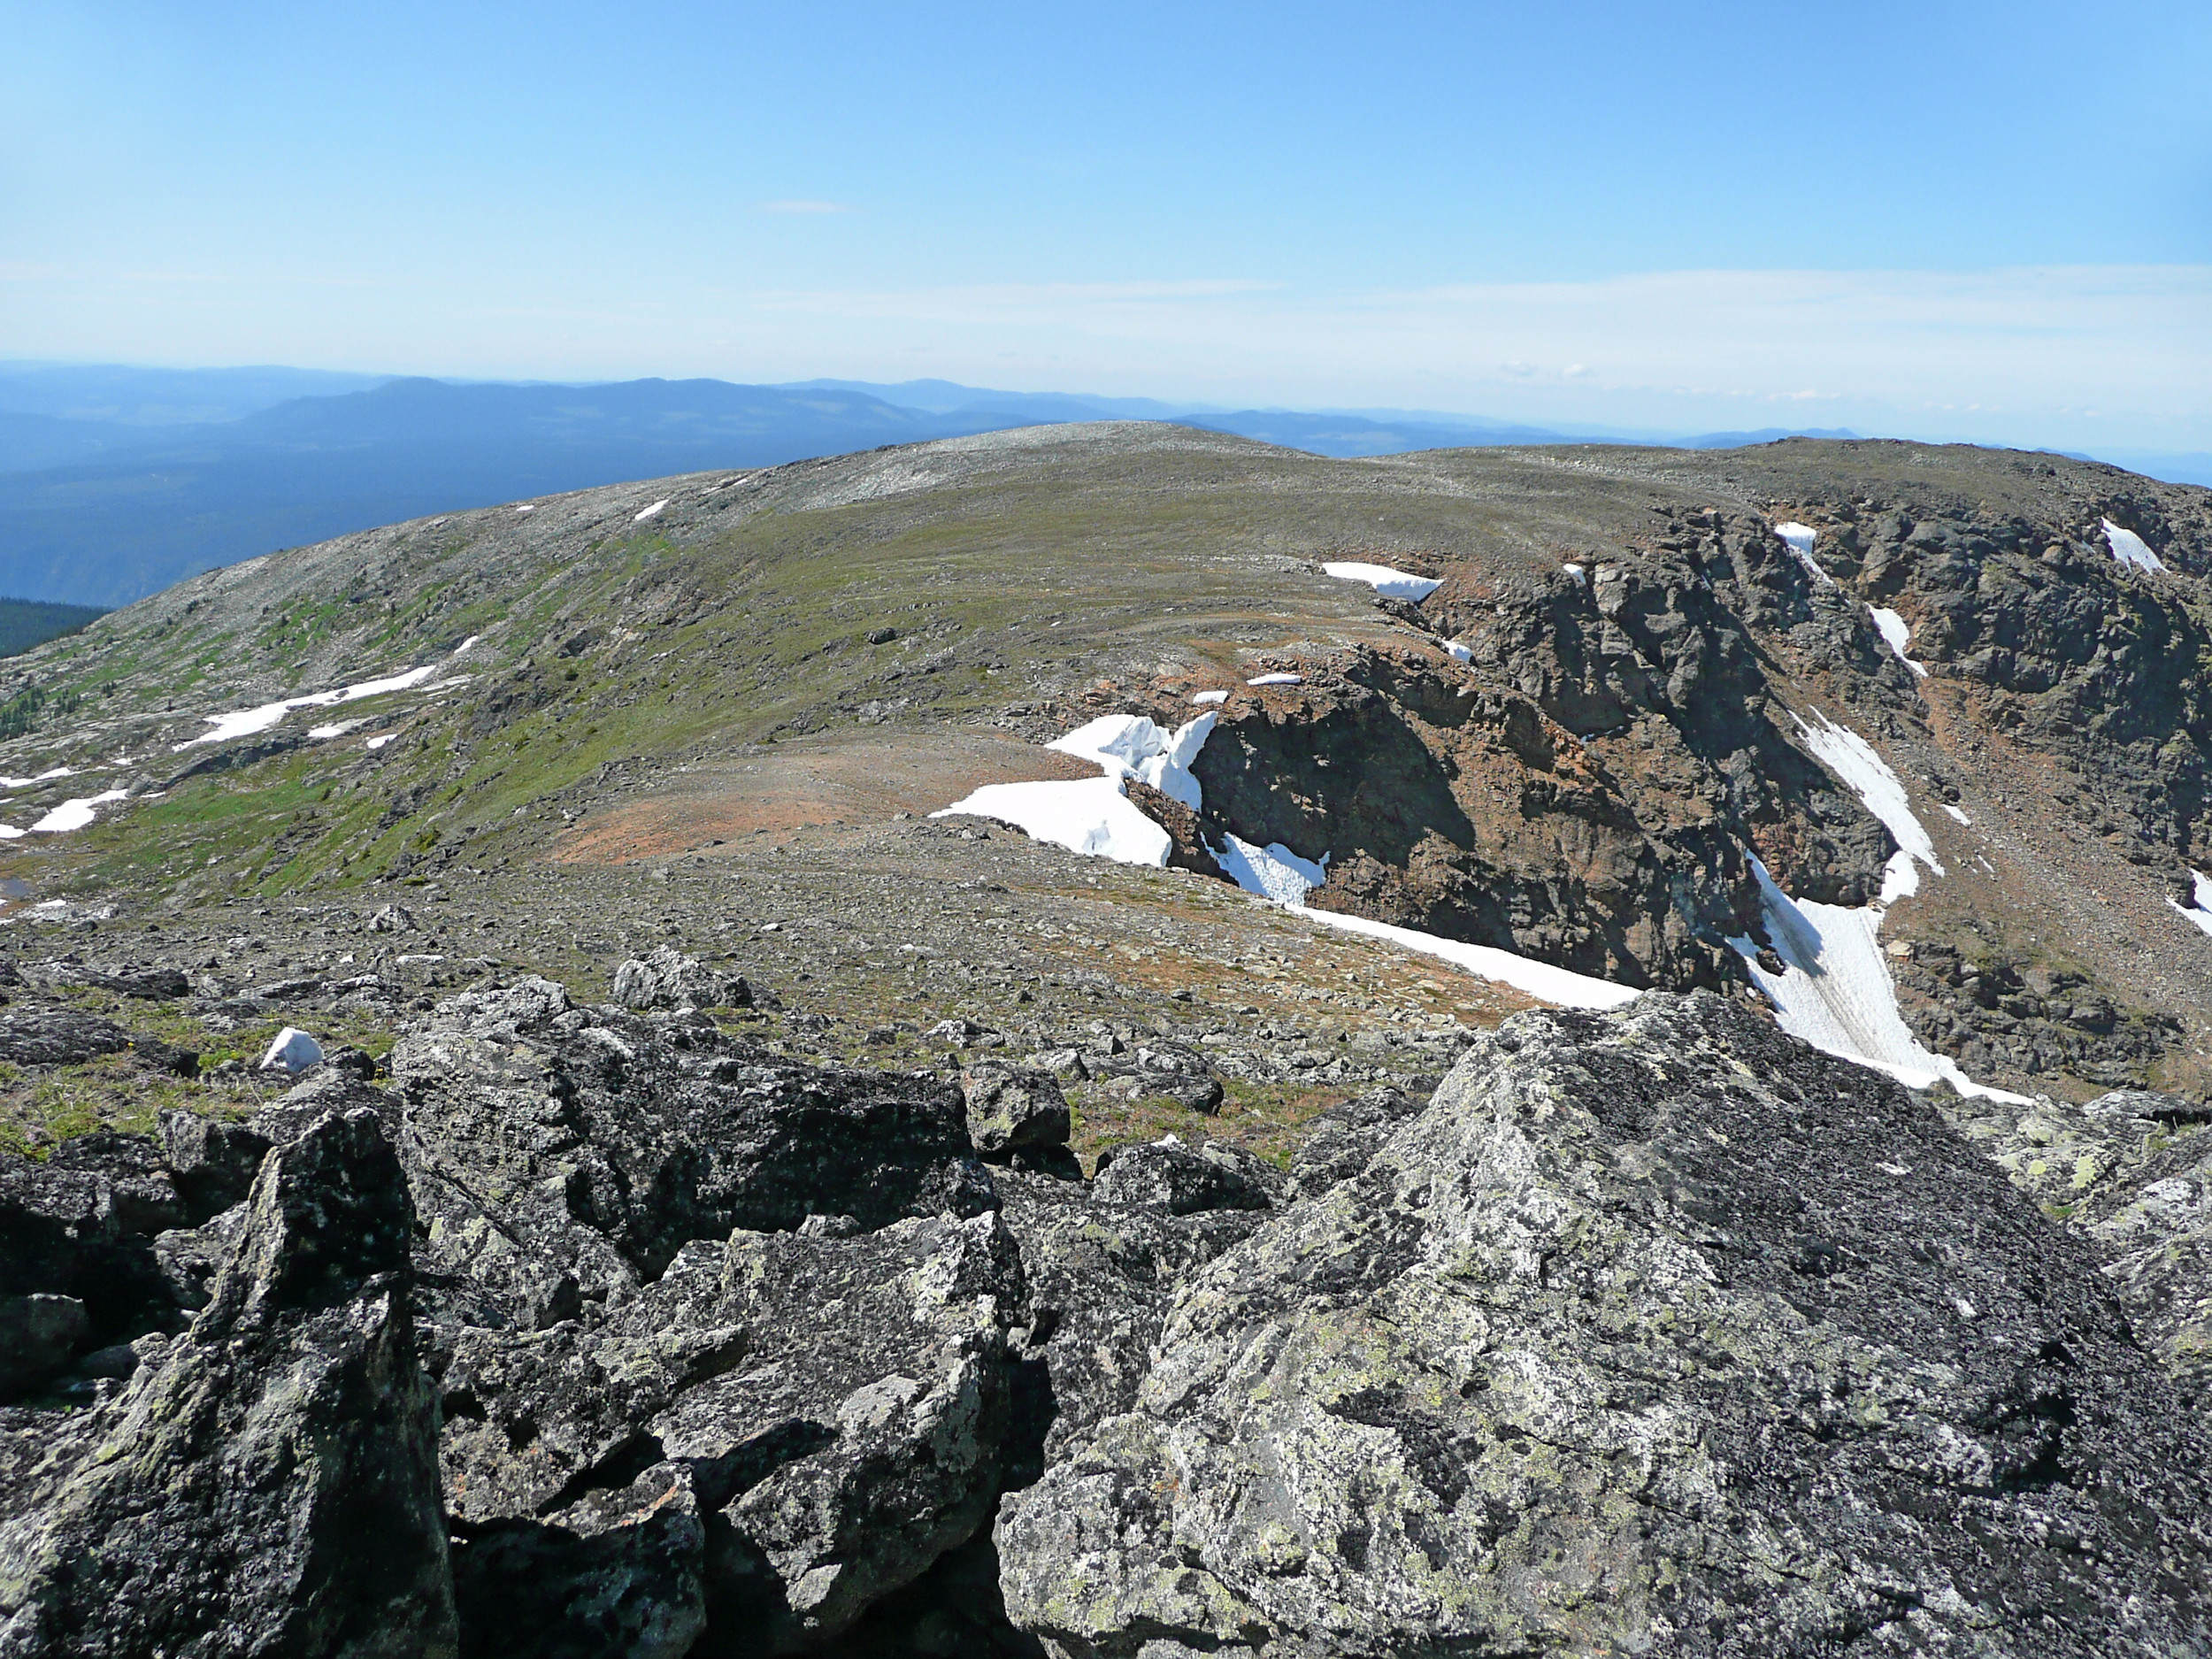
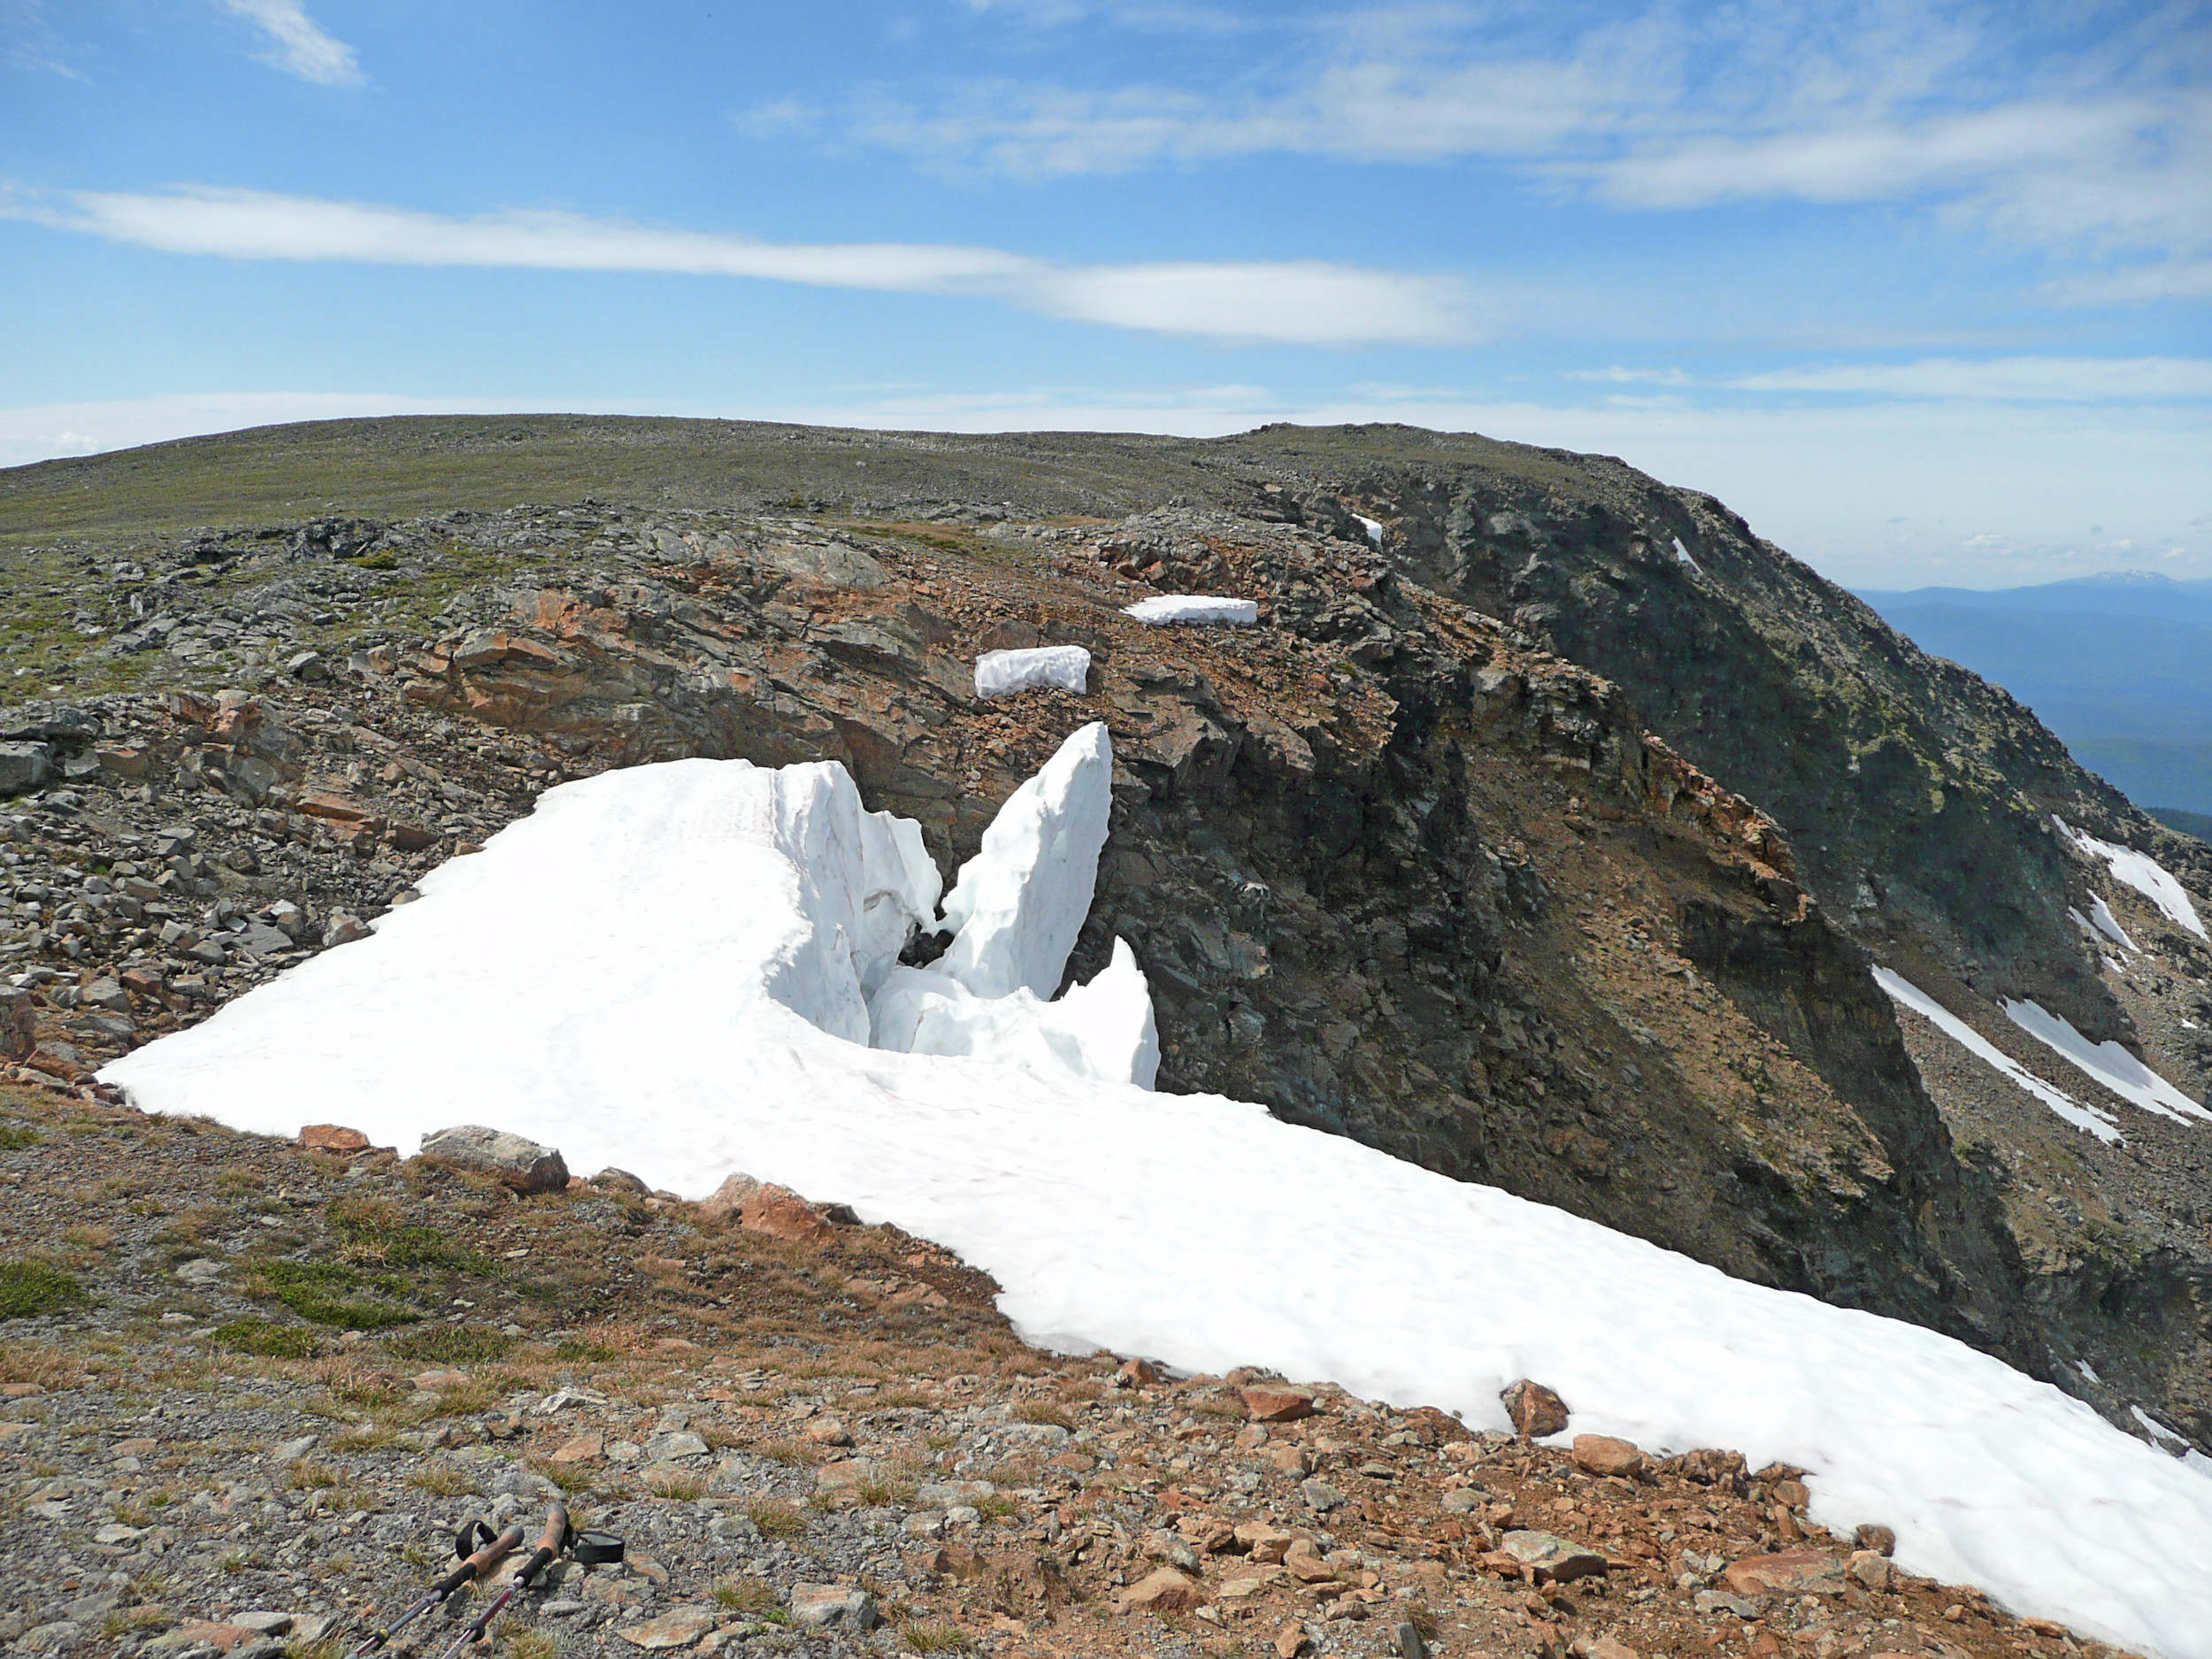
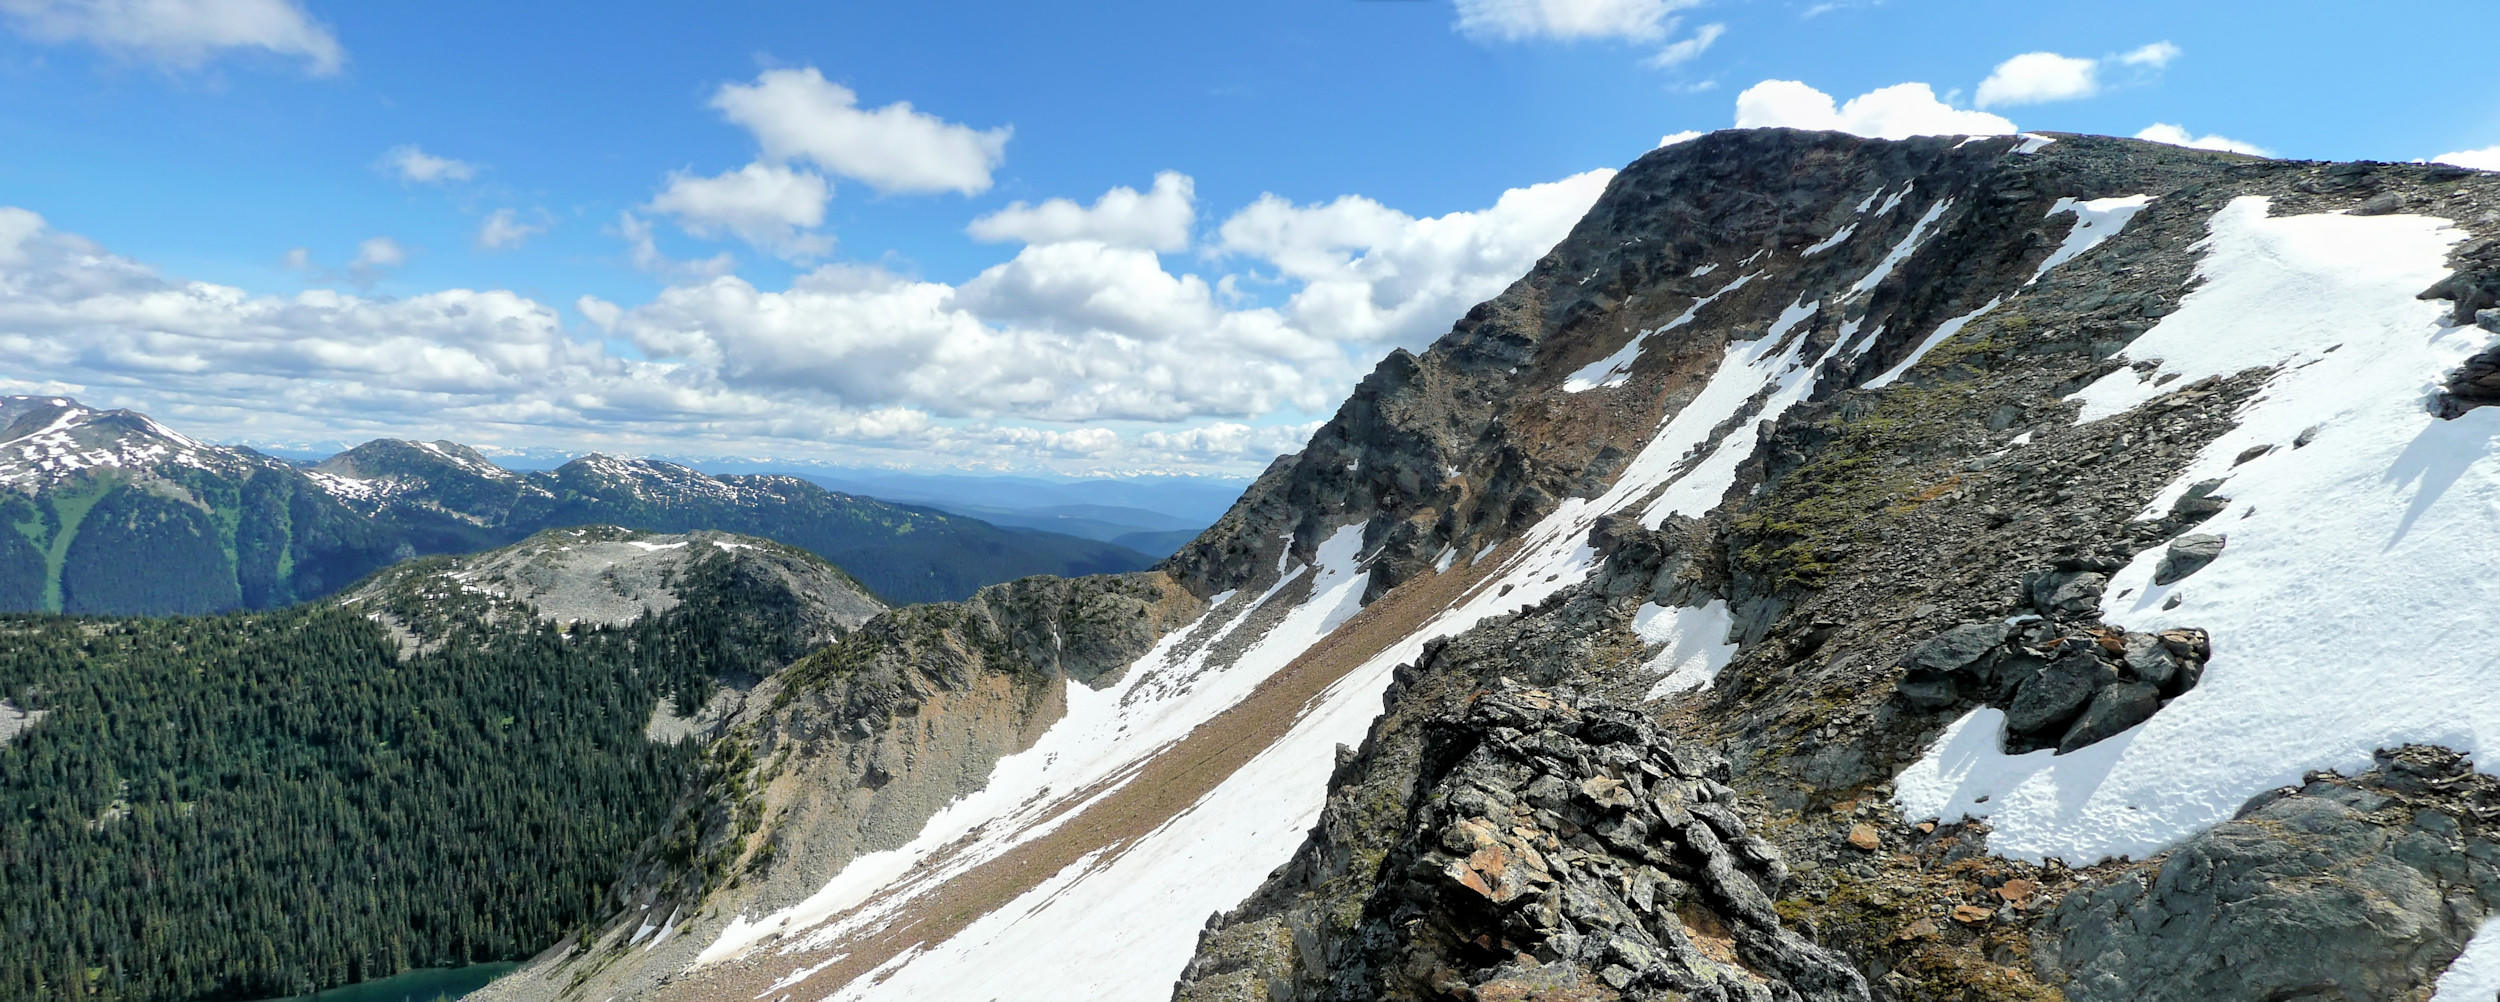
Soon we reach an altitude where there still is snow on the ridge.
Snowy ridge
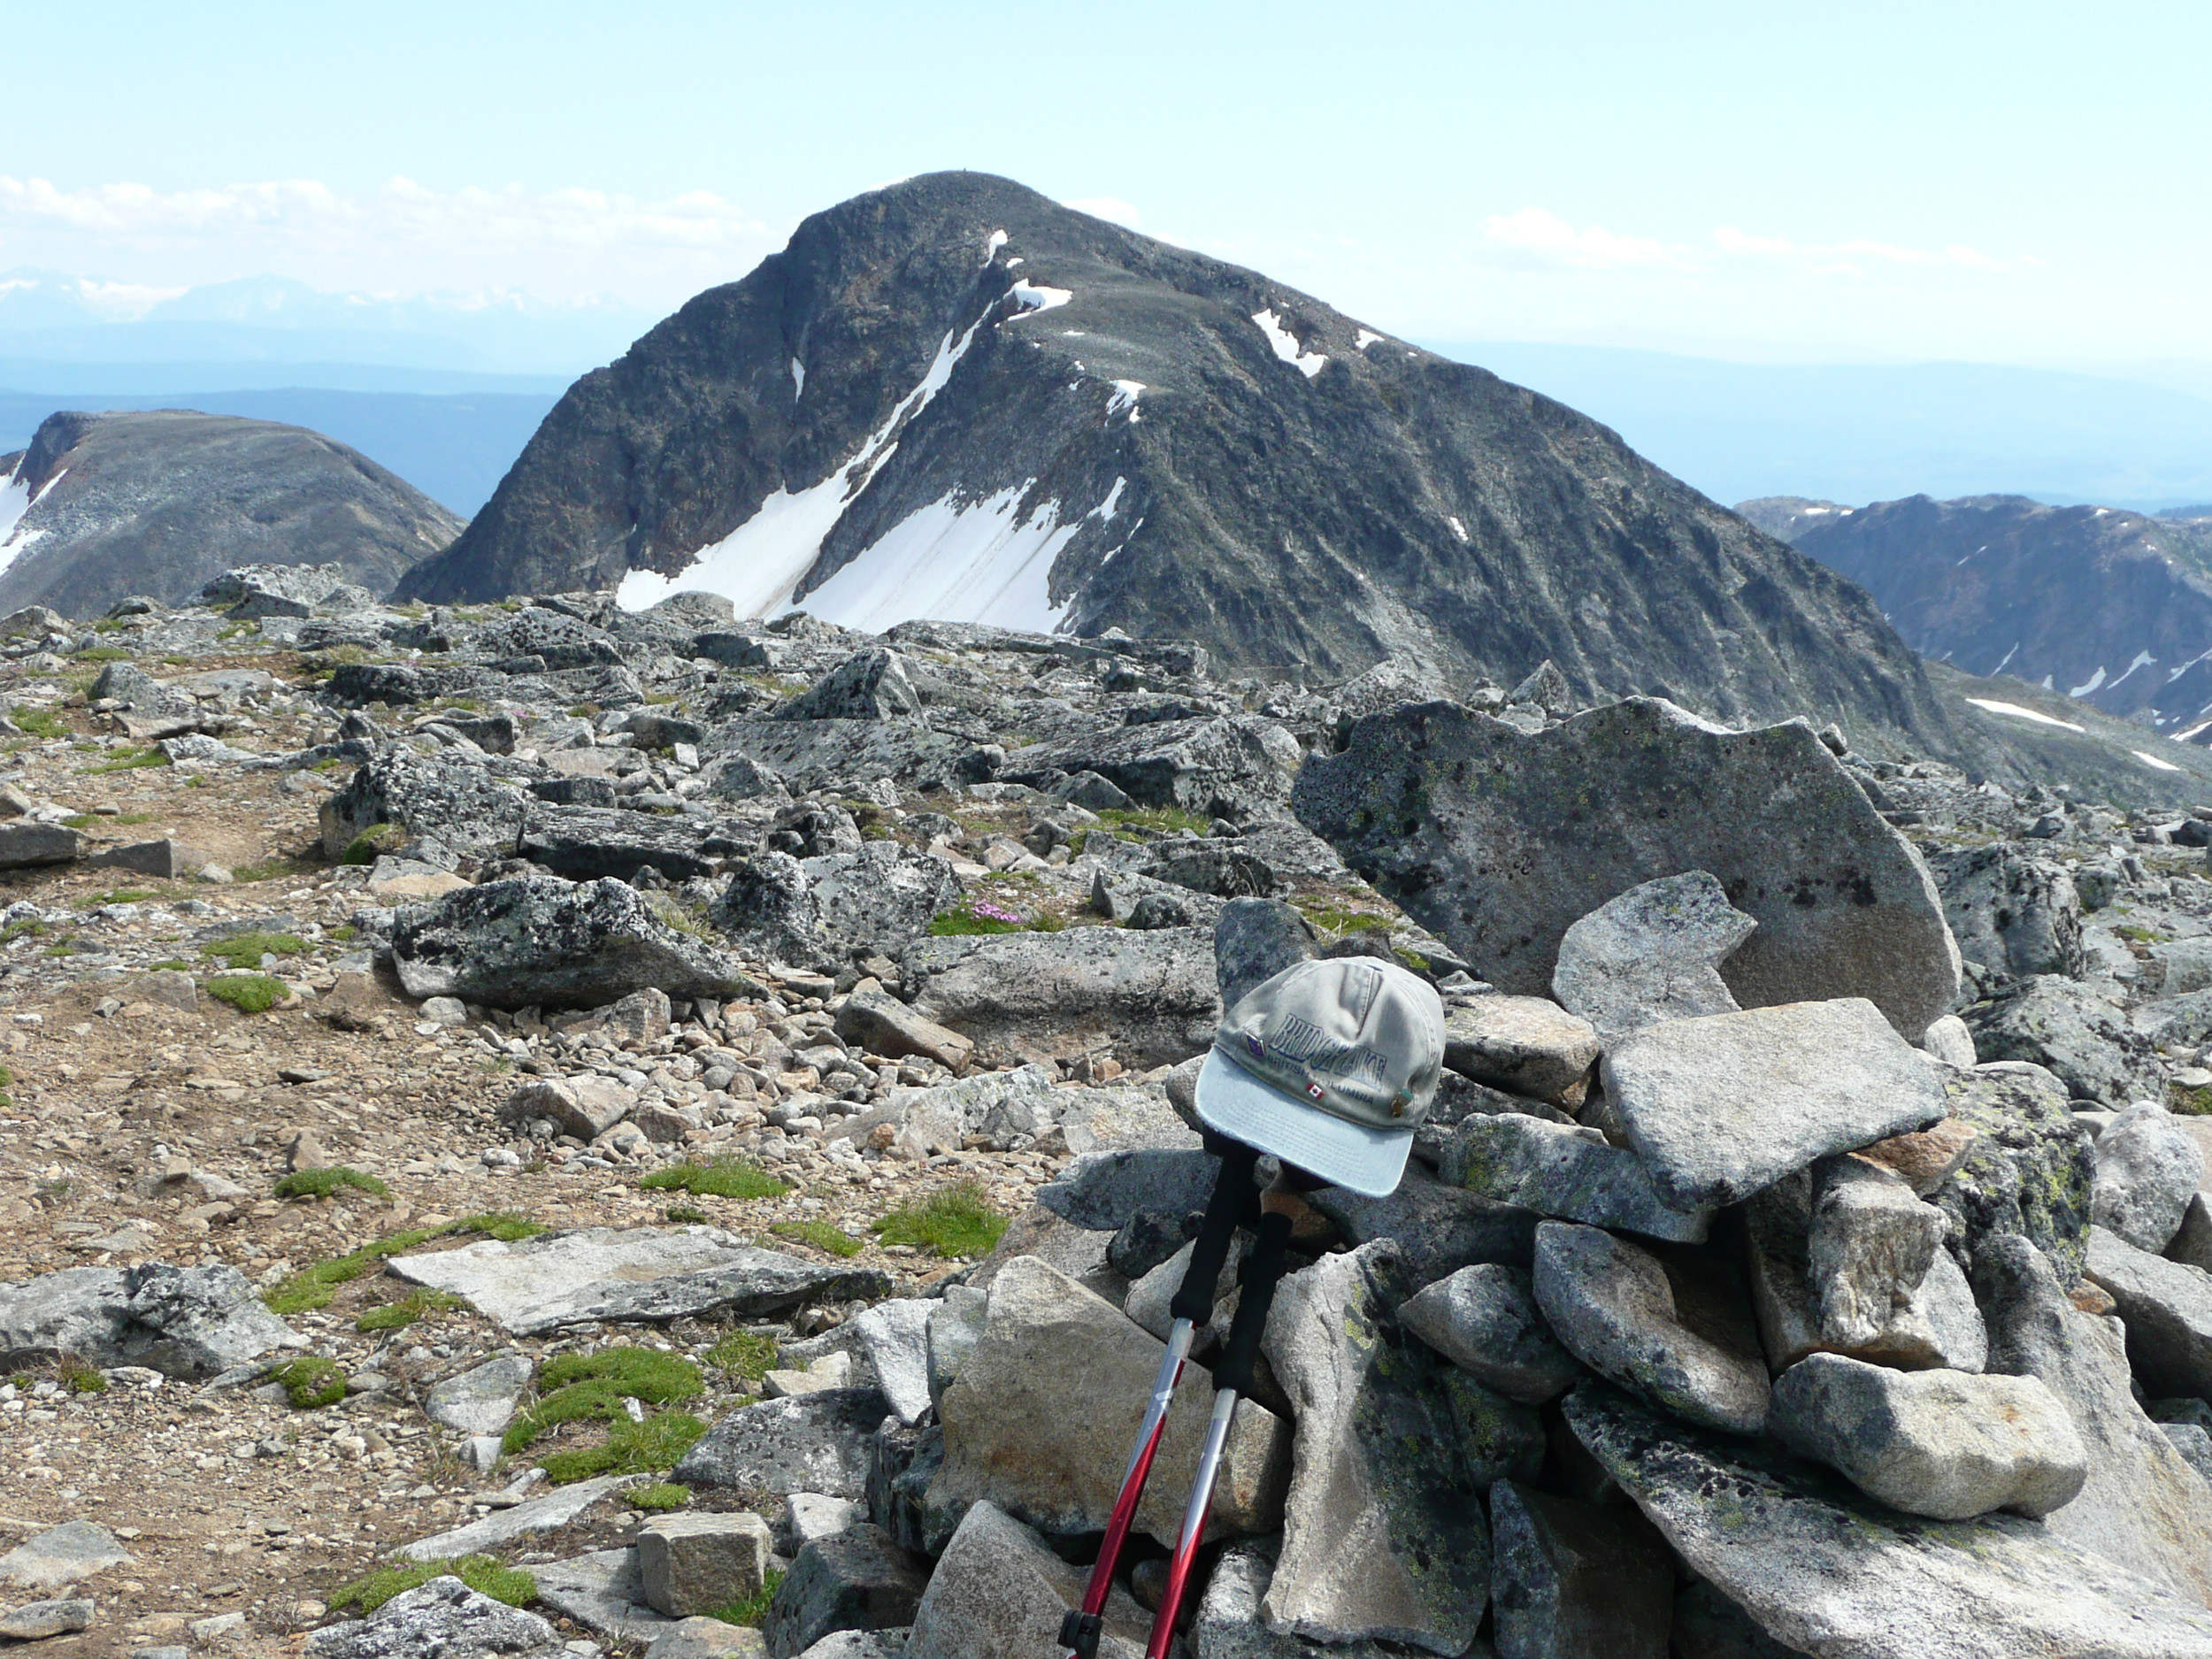
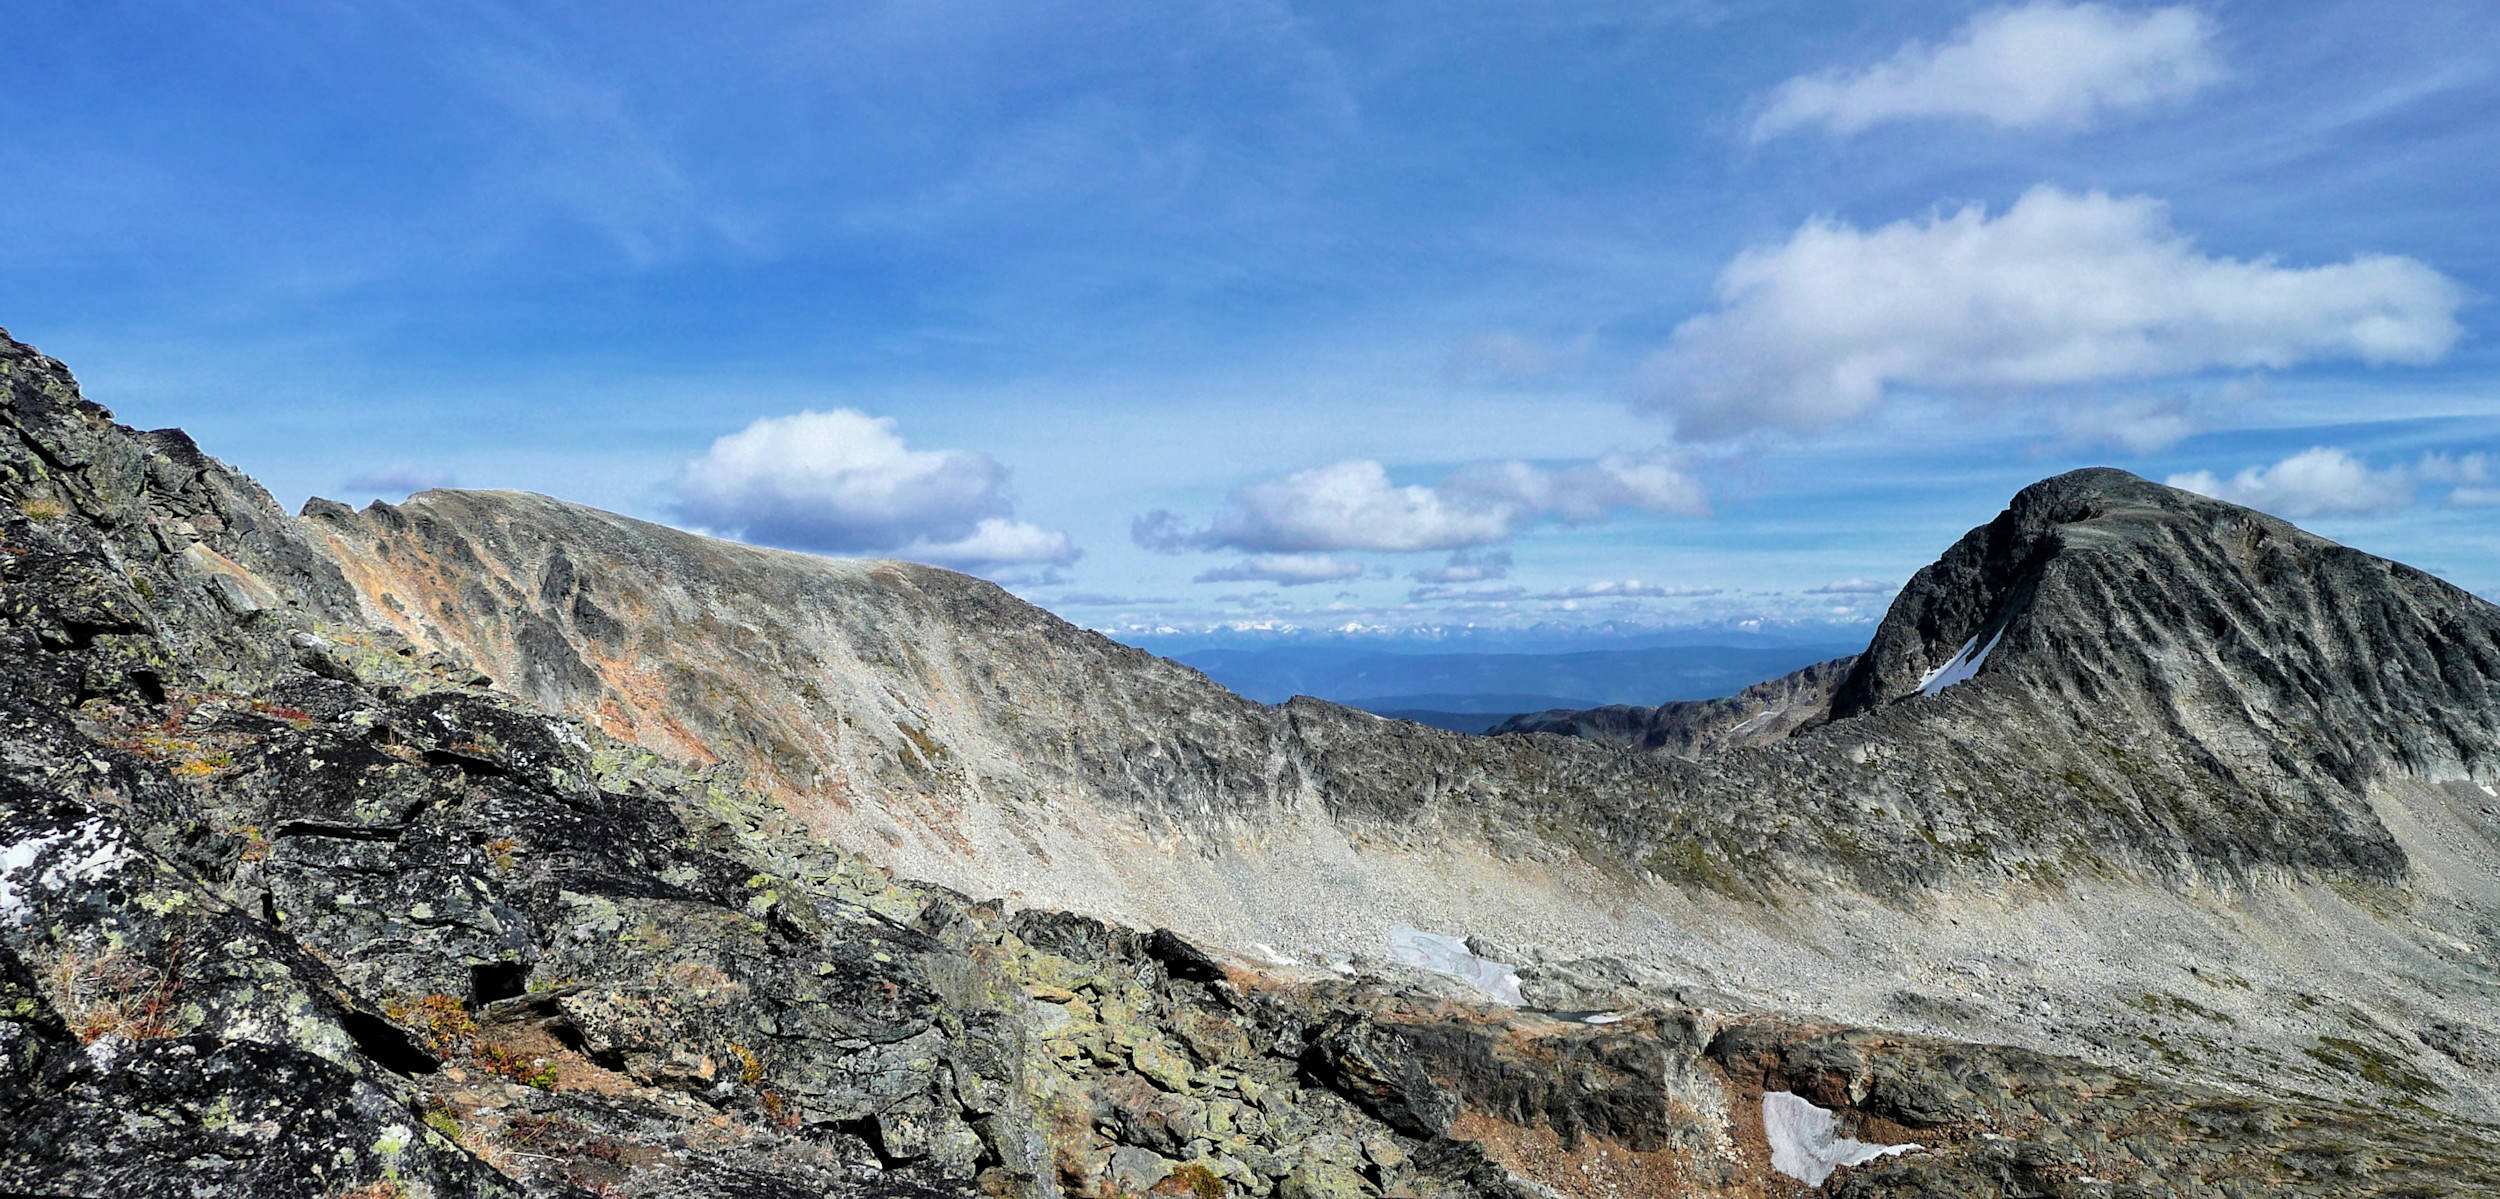
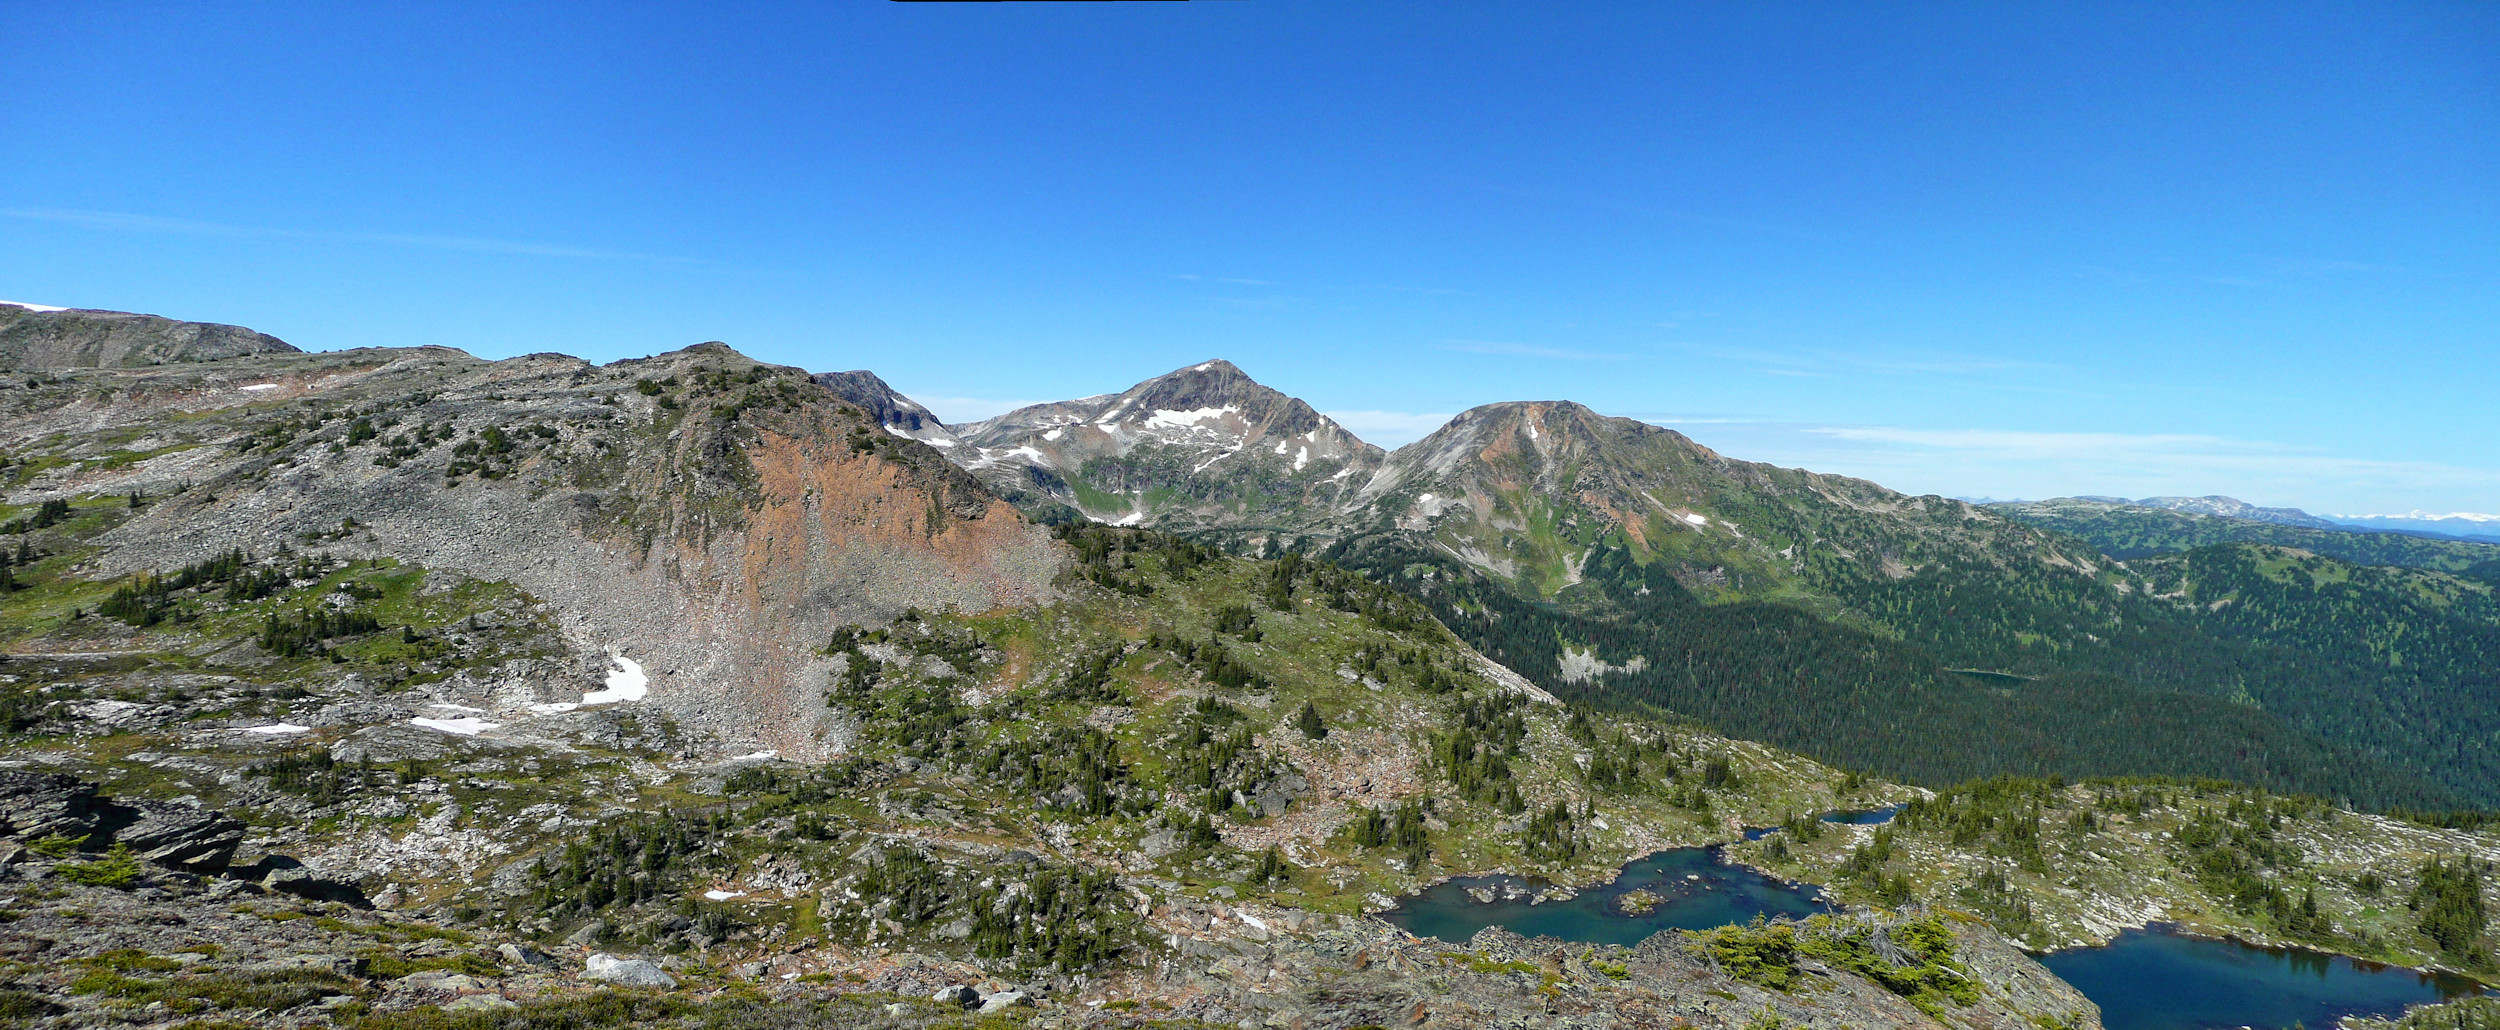
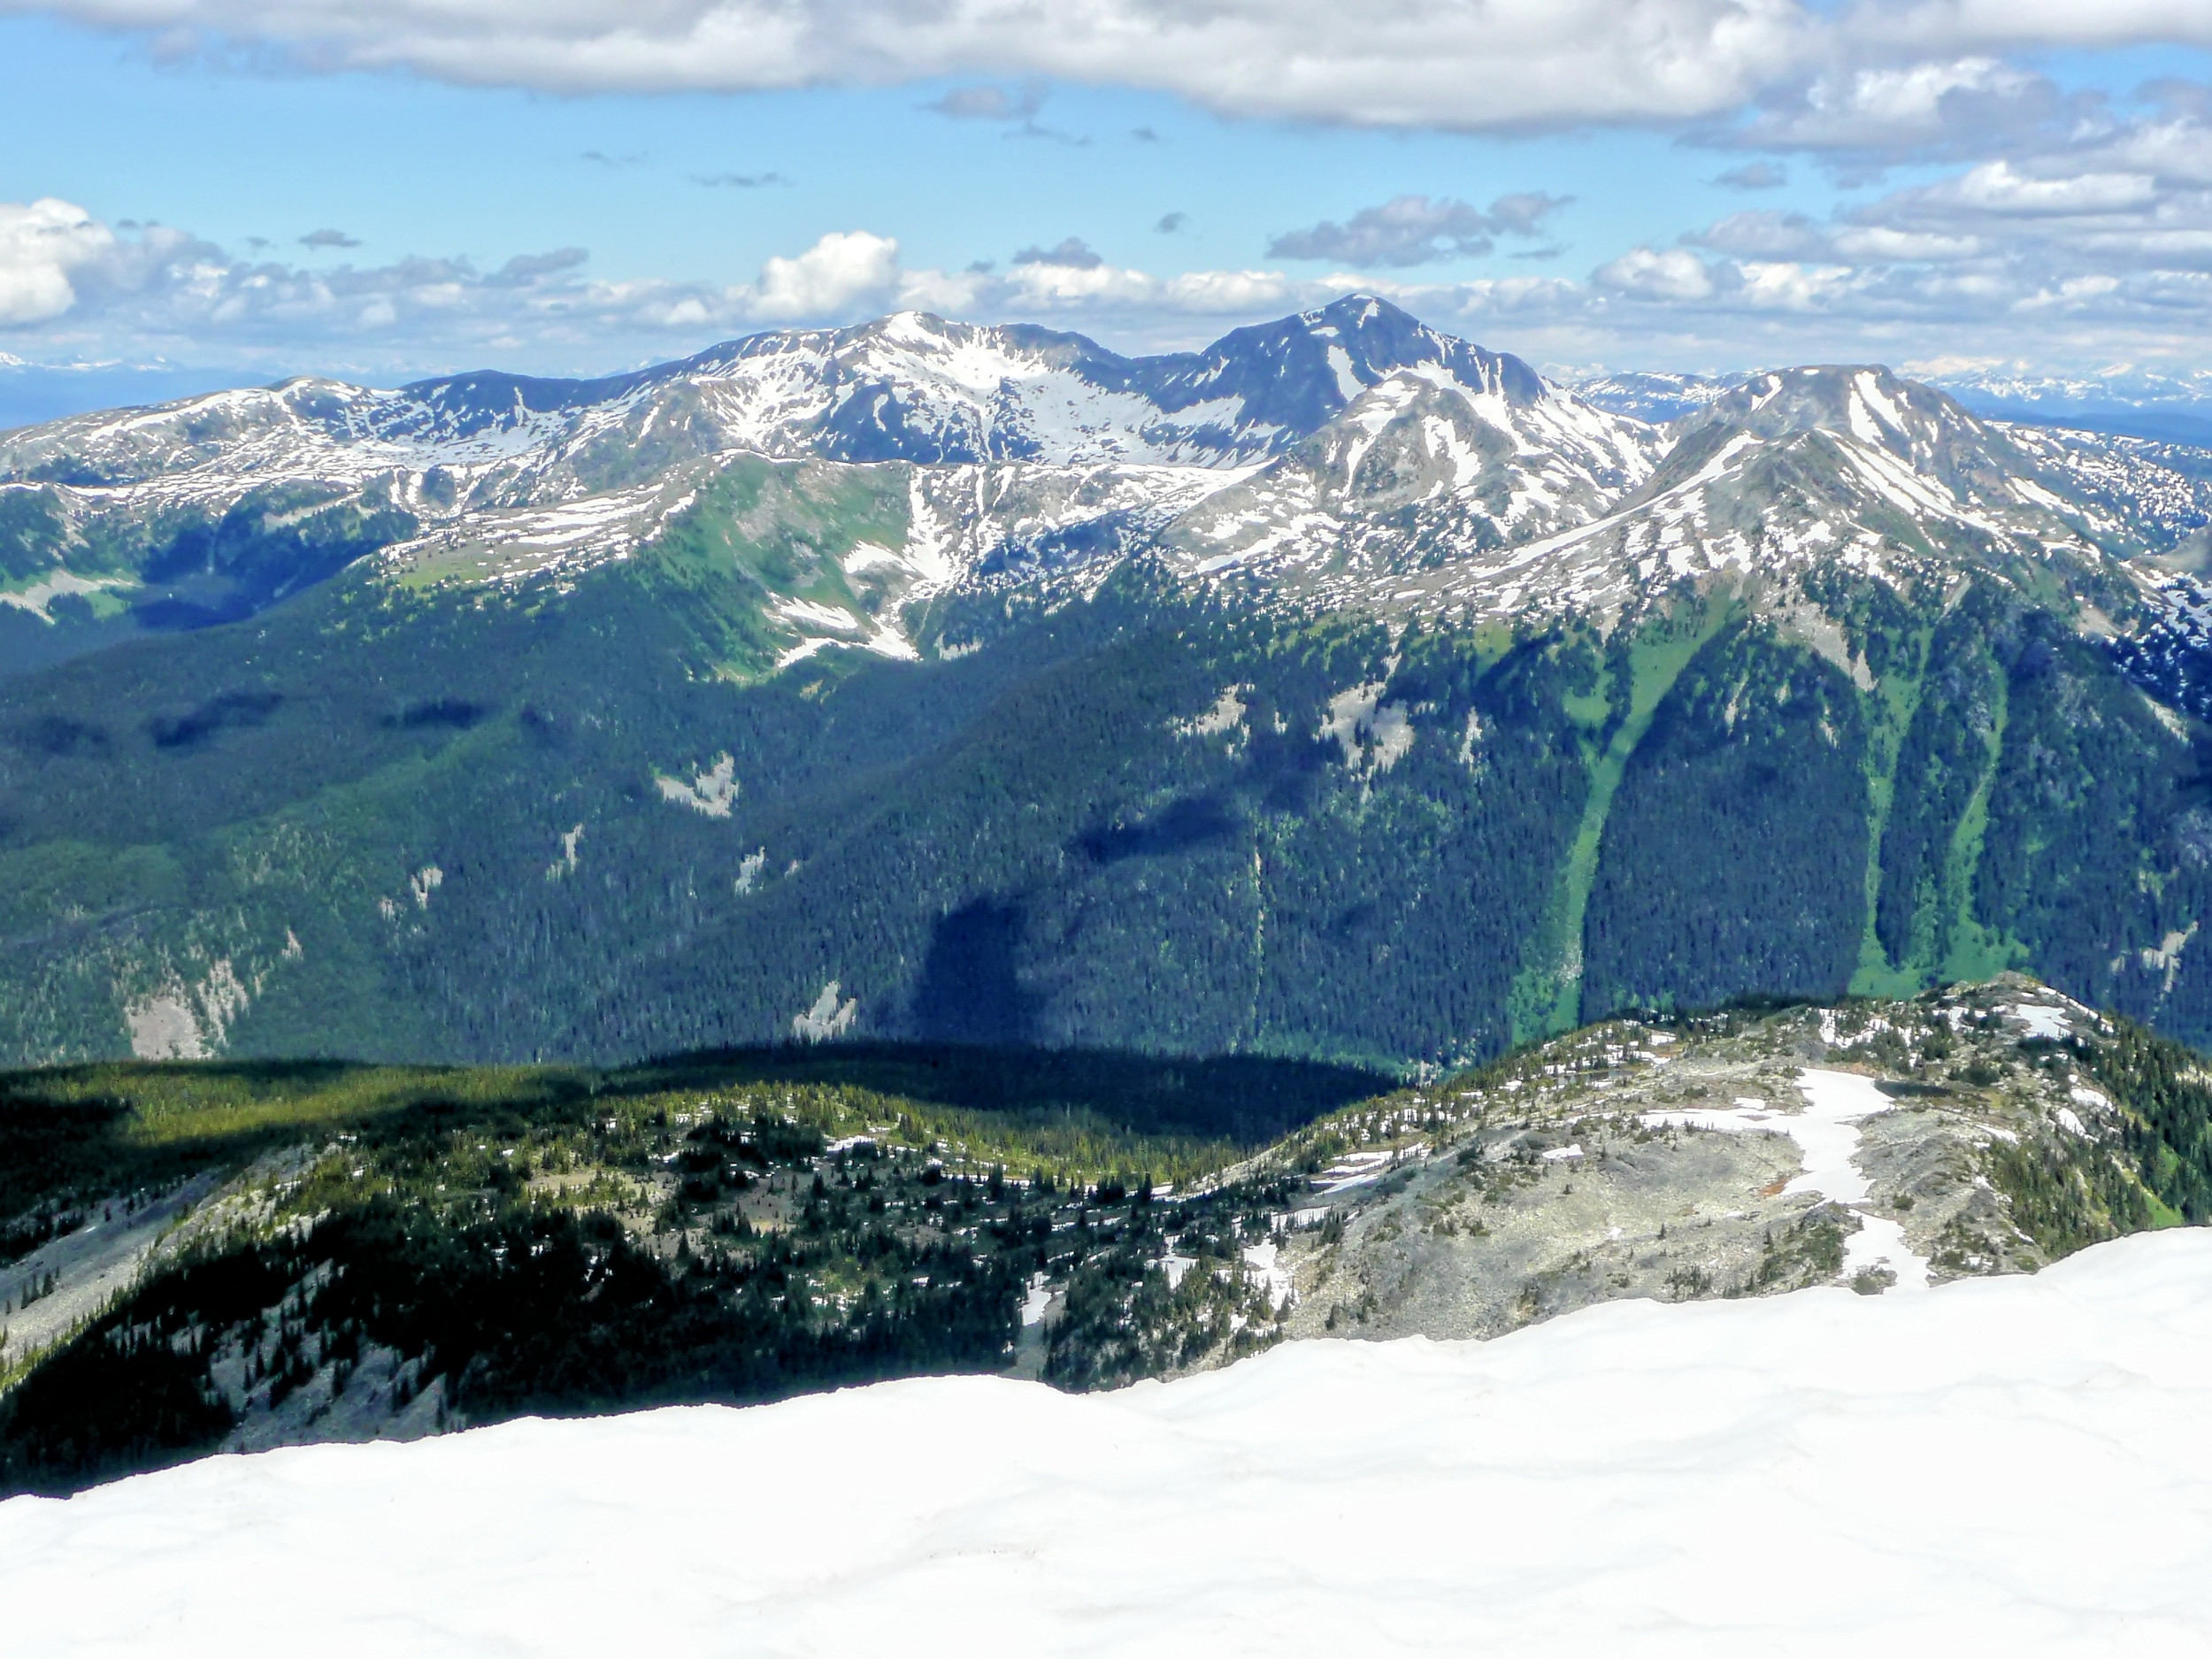
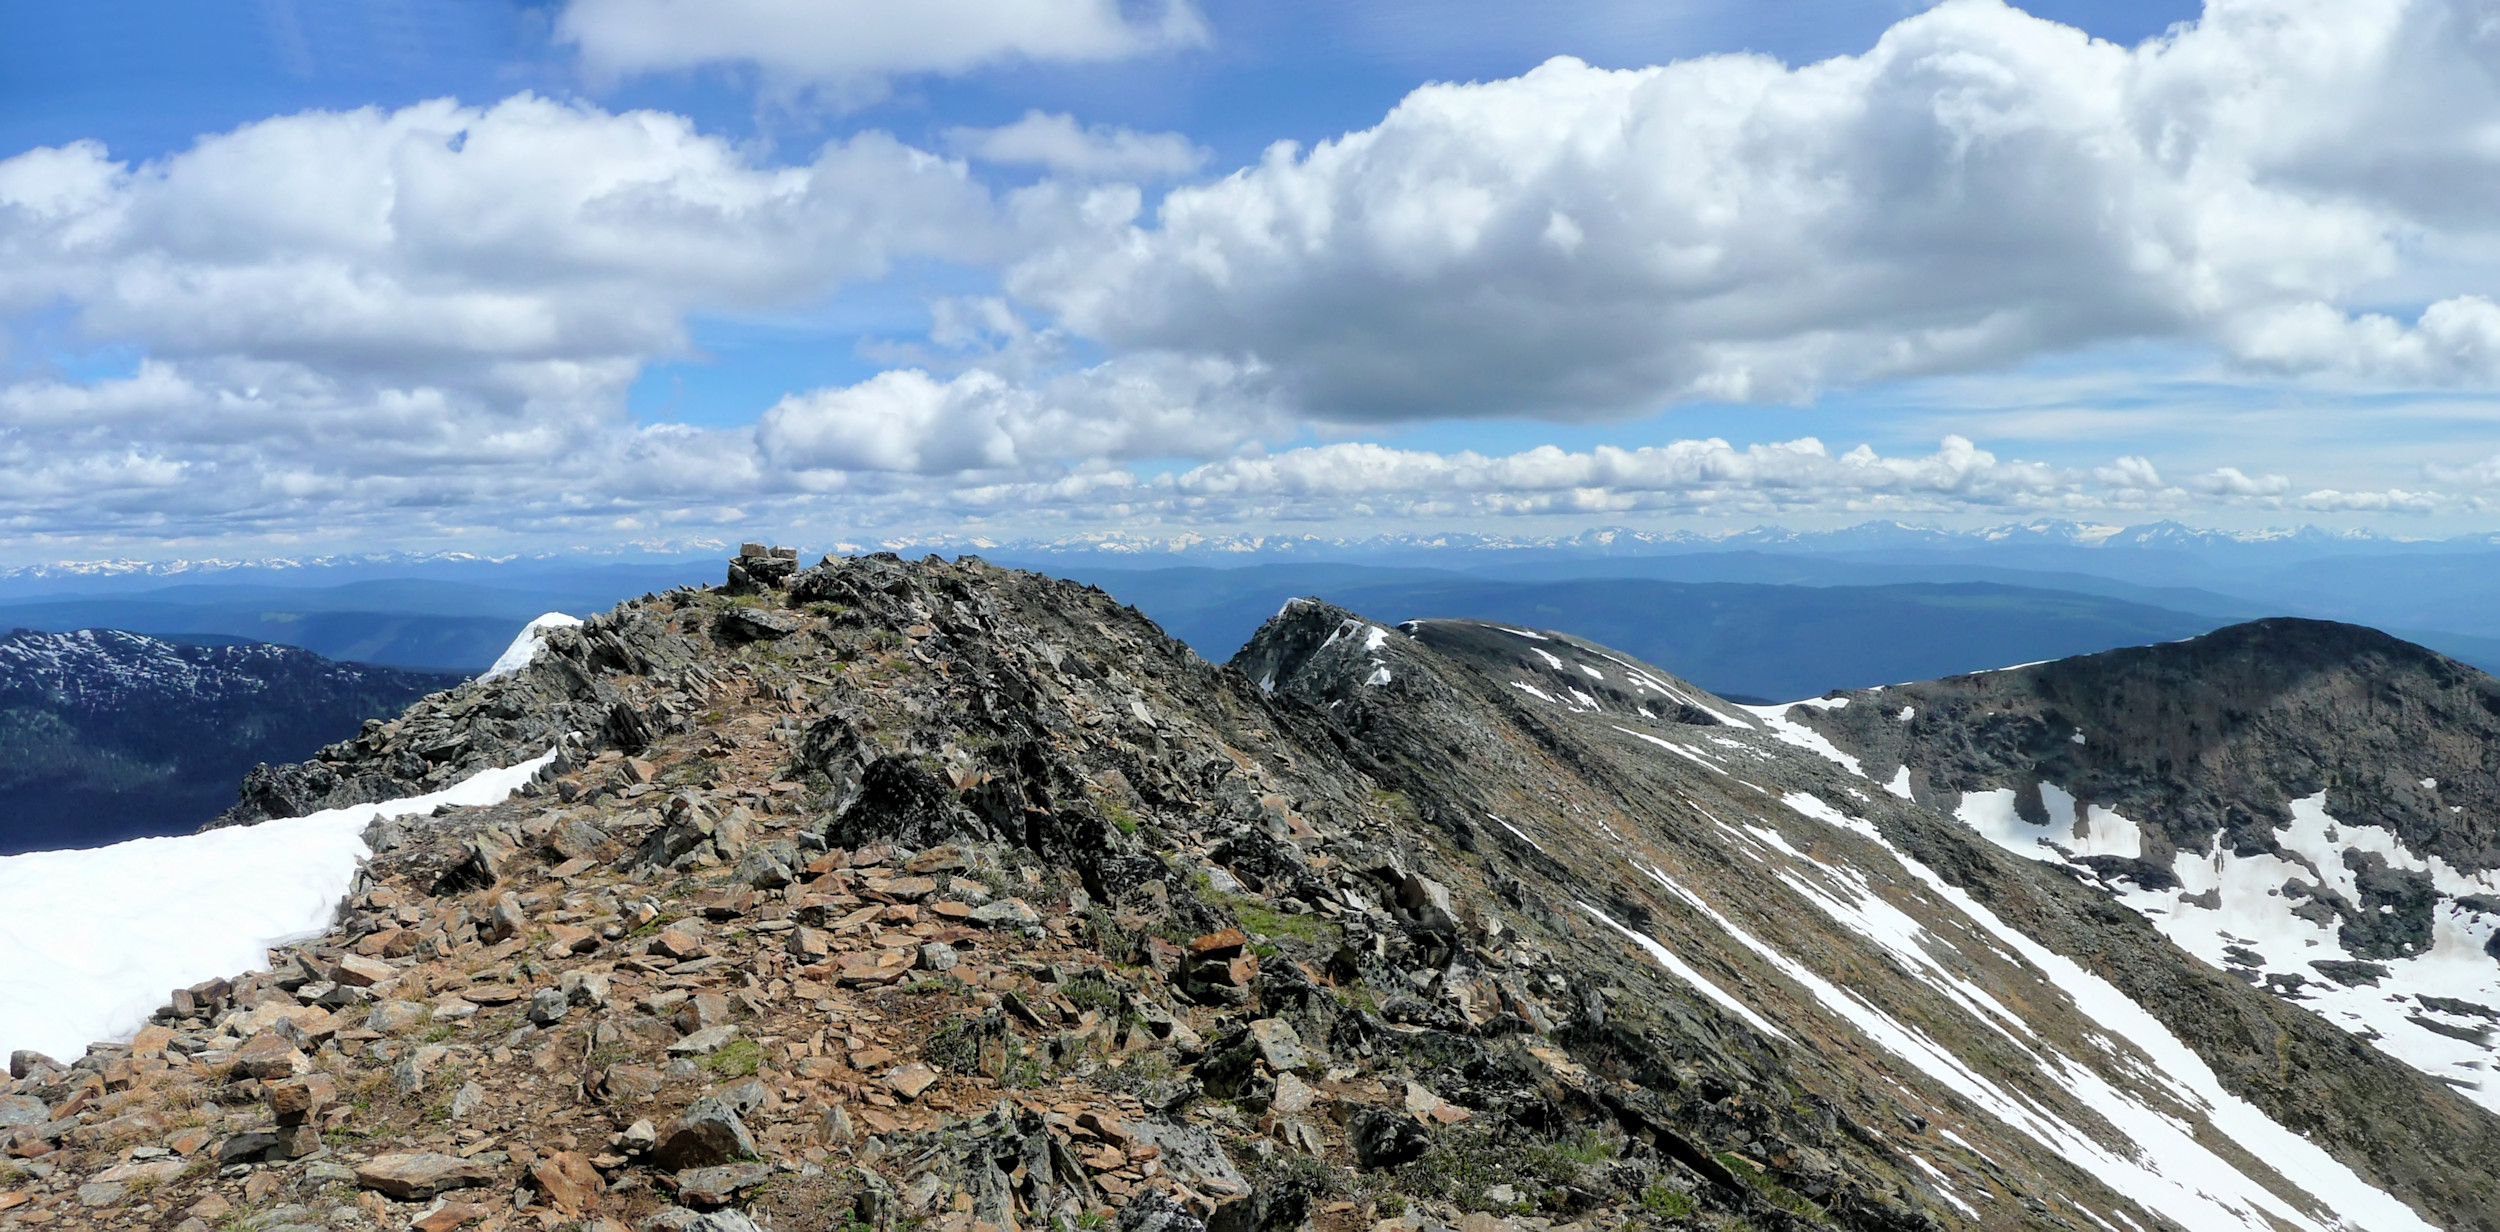
We obtain a view of Trophy Mountain from a new and very different perspective.
Trophy Mountain Panorama
We keep our destination always in sight: Trophy peak #3.
Trophy #3 (Moul Peak)
Rocky outcrops on the ridge (looking back)
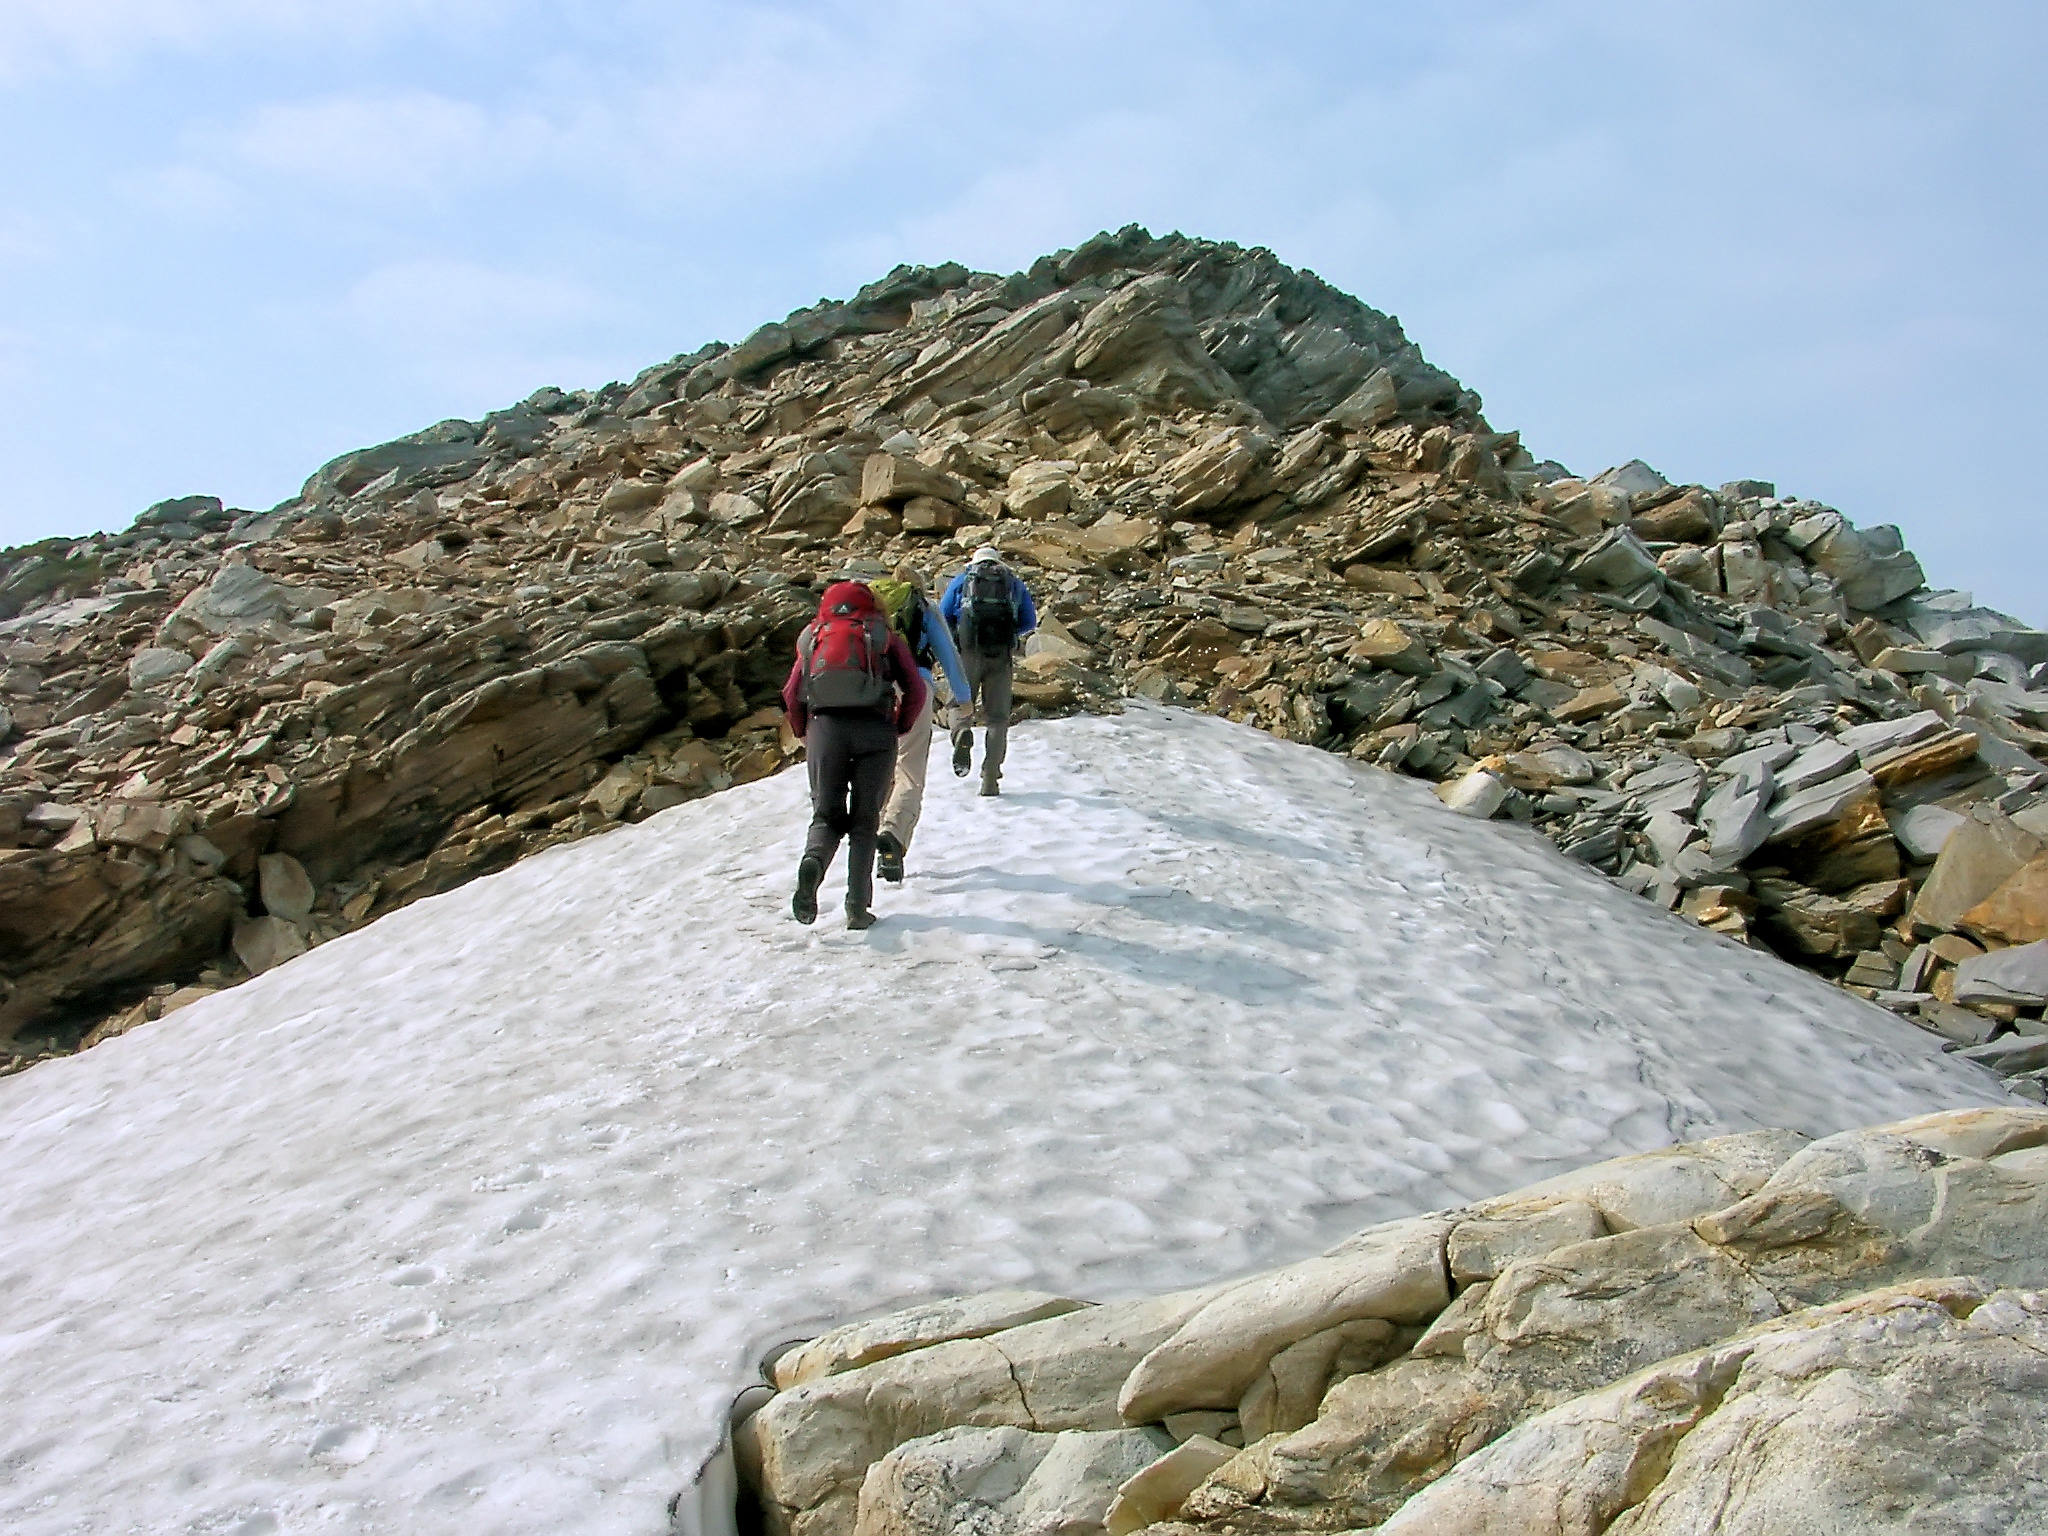
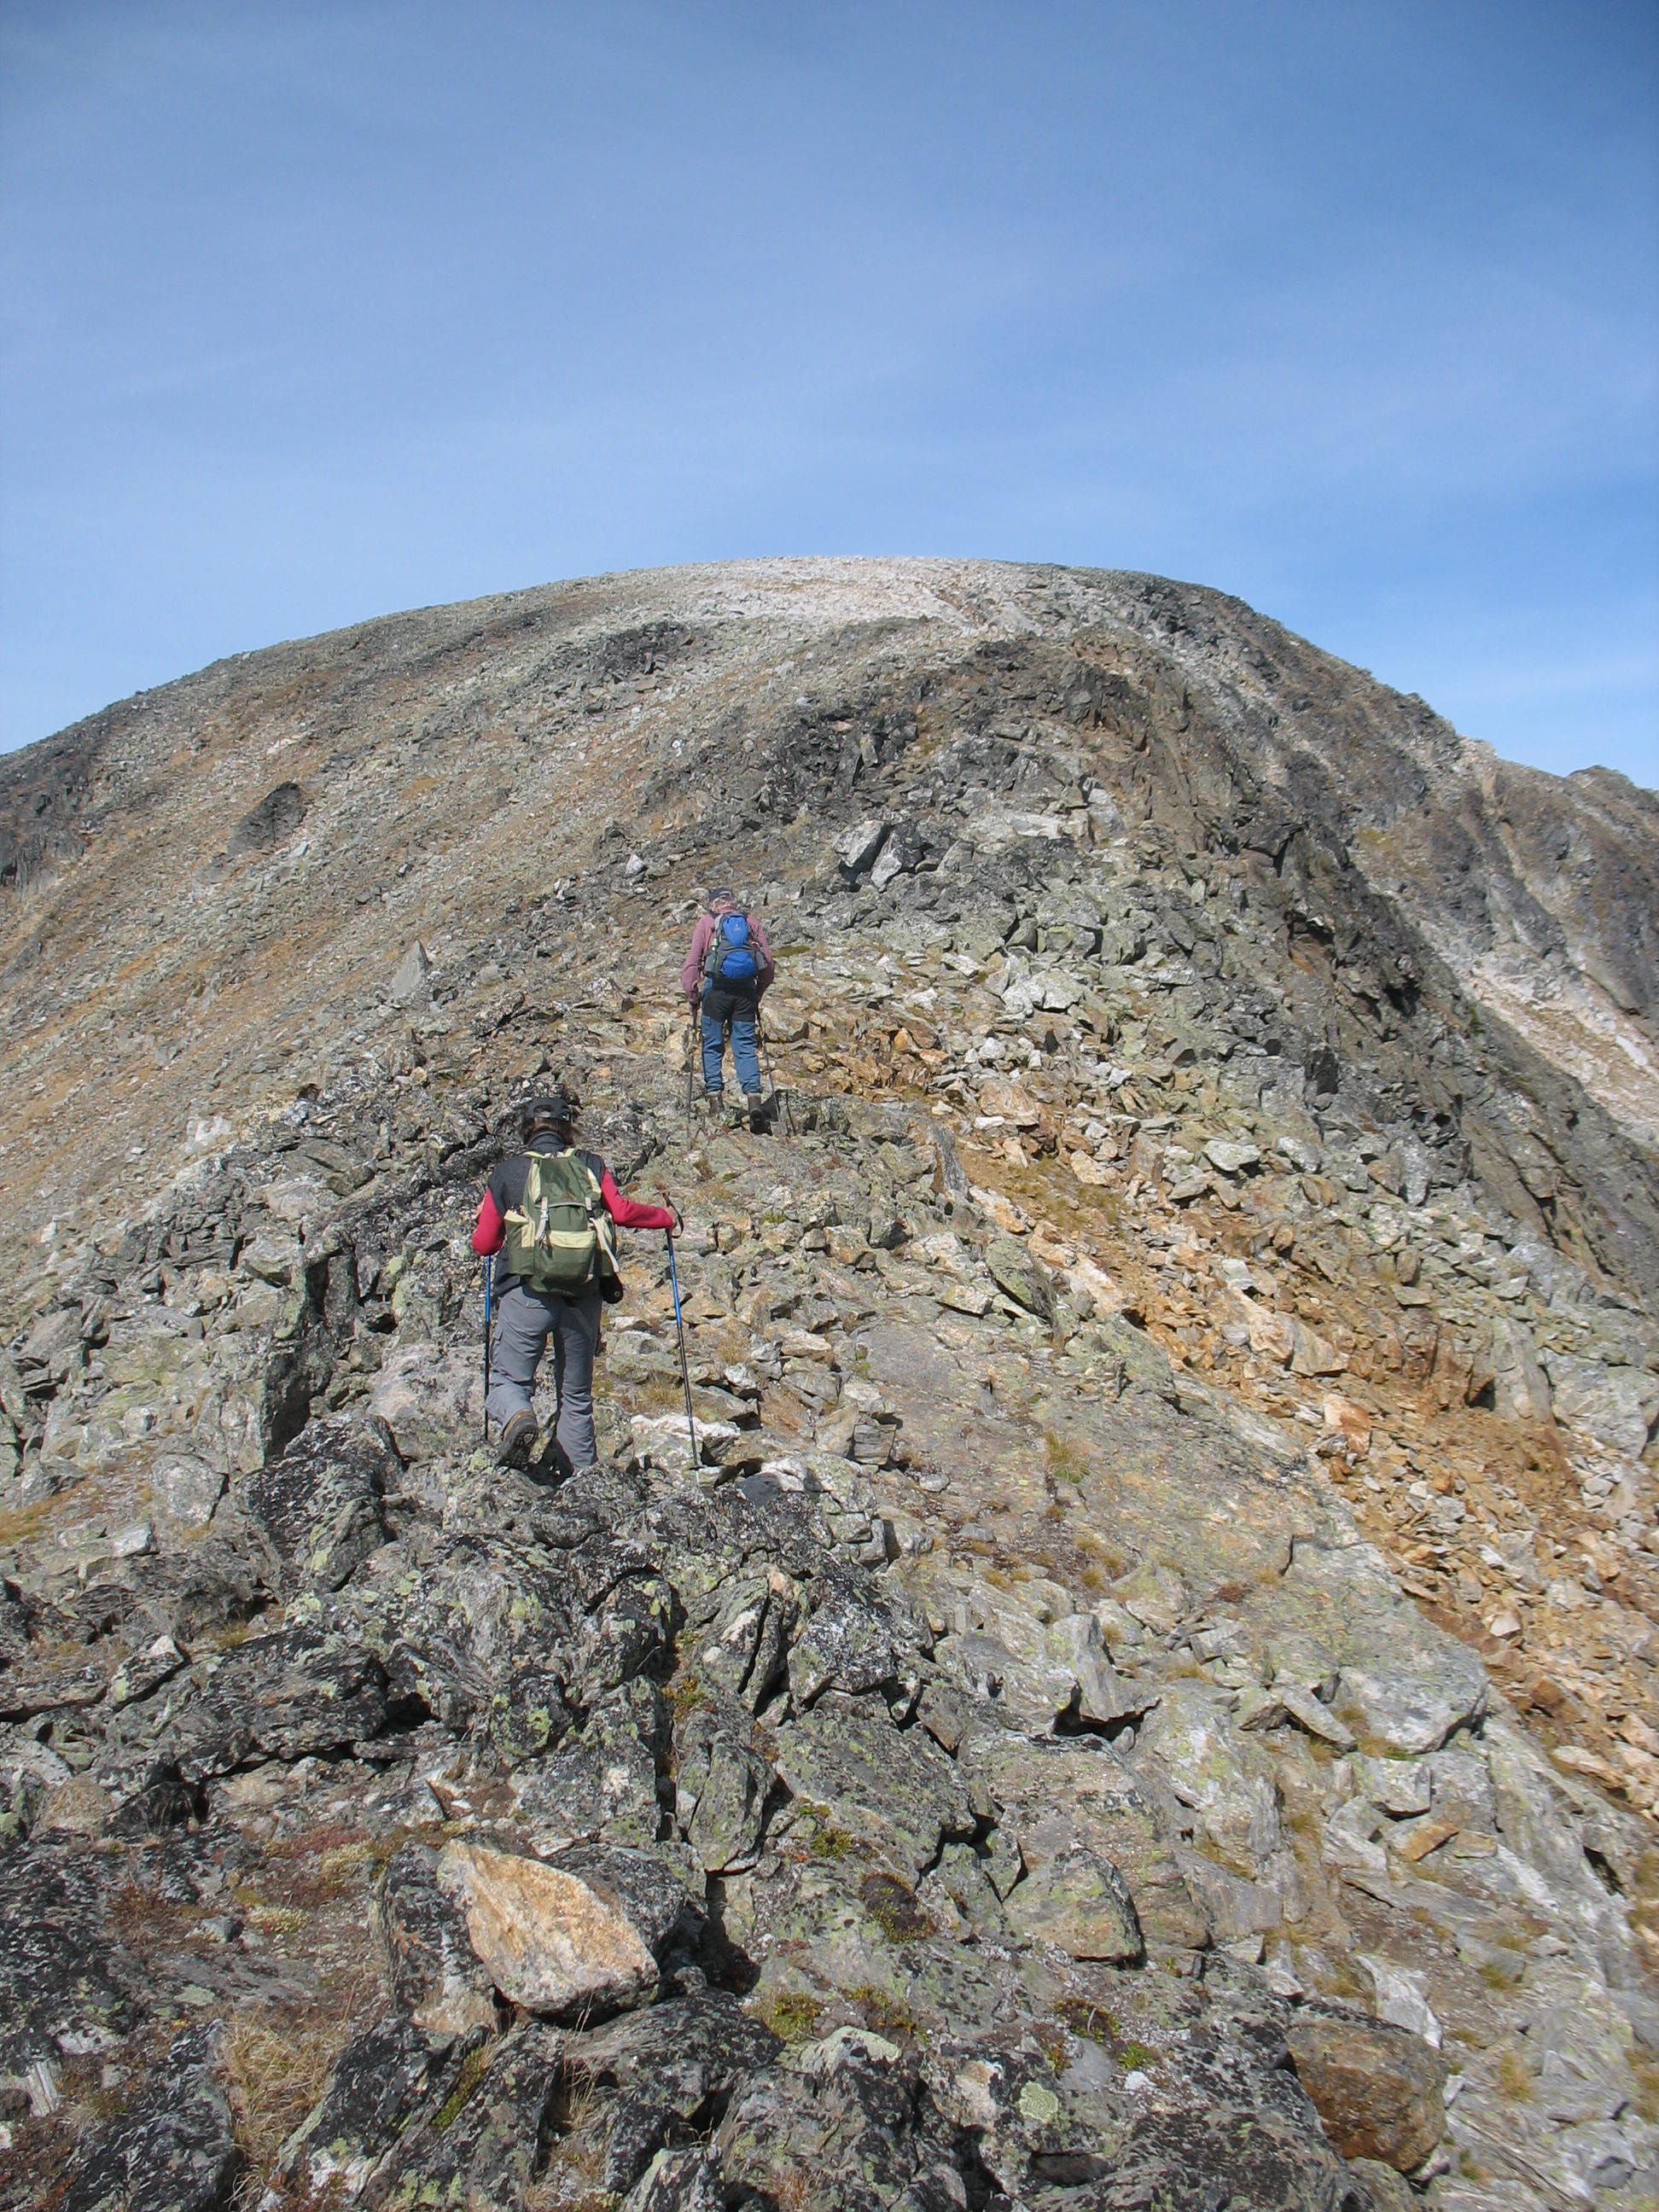
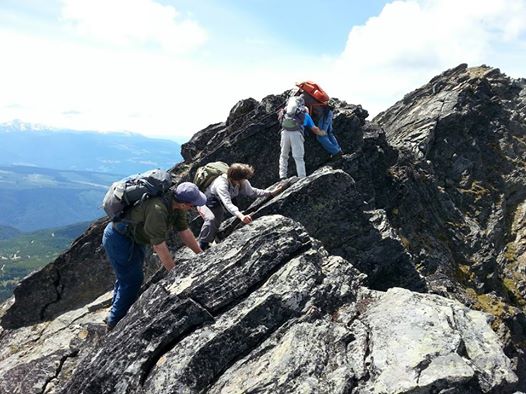
Upon approaching the peak, the ridge becomes quite narrow and we have to climb over some jagged rocky outcrops. JF picks a route that makes me very nervous. There are big drop-offs all around us, while I seem to be unable to find proper foothold on the scree slope. Loose rocks start falling into the void.
I sink to all fours and cling to some boulders, but it still feels as if I am sliding. I am paralyzed and my knees tremble. Nobody else seems to have a problem; just Inge is a bit out of breath from the climb. Obviously I am suffering from a case of acrophobia. With a heavy heart, I decide to stay put and wait until the others return from climbing the peak without me.
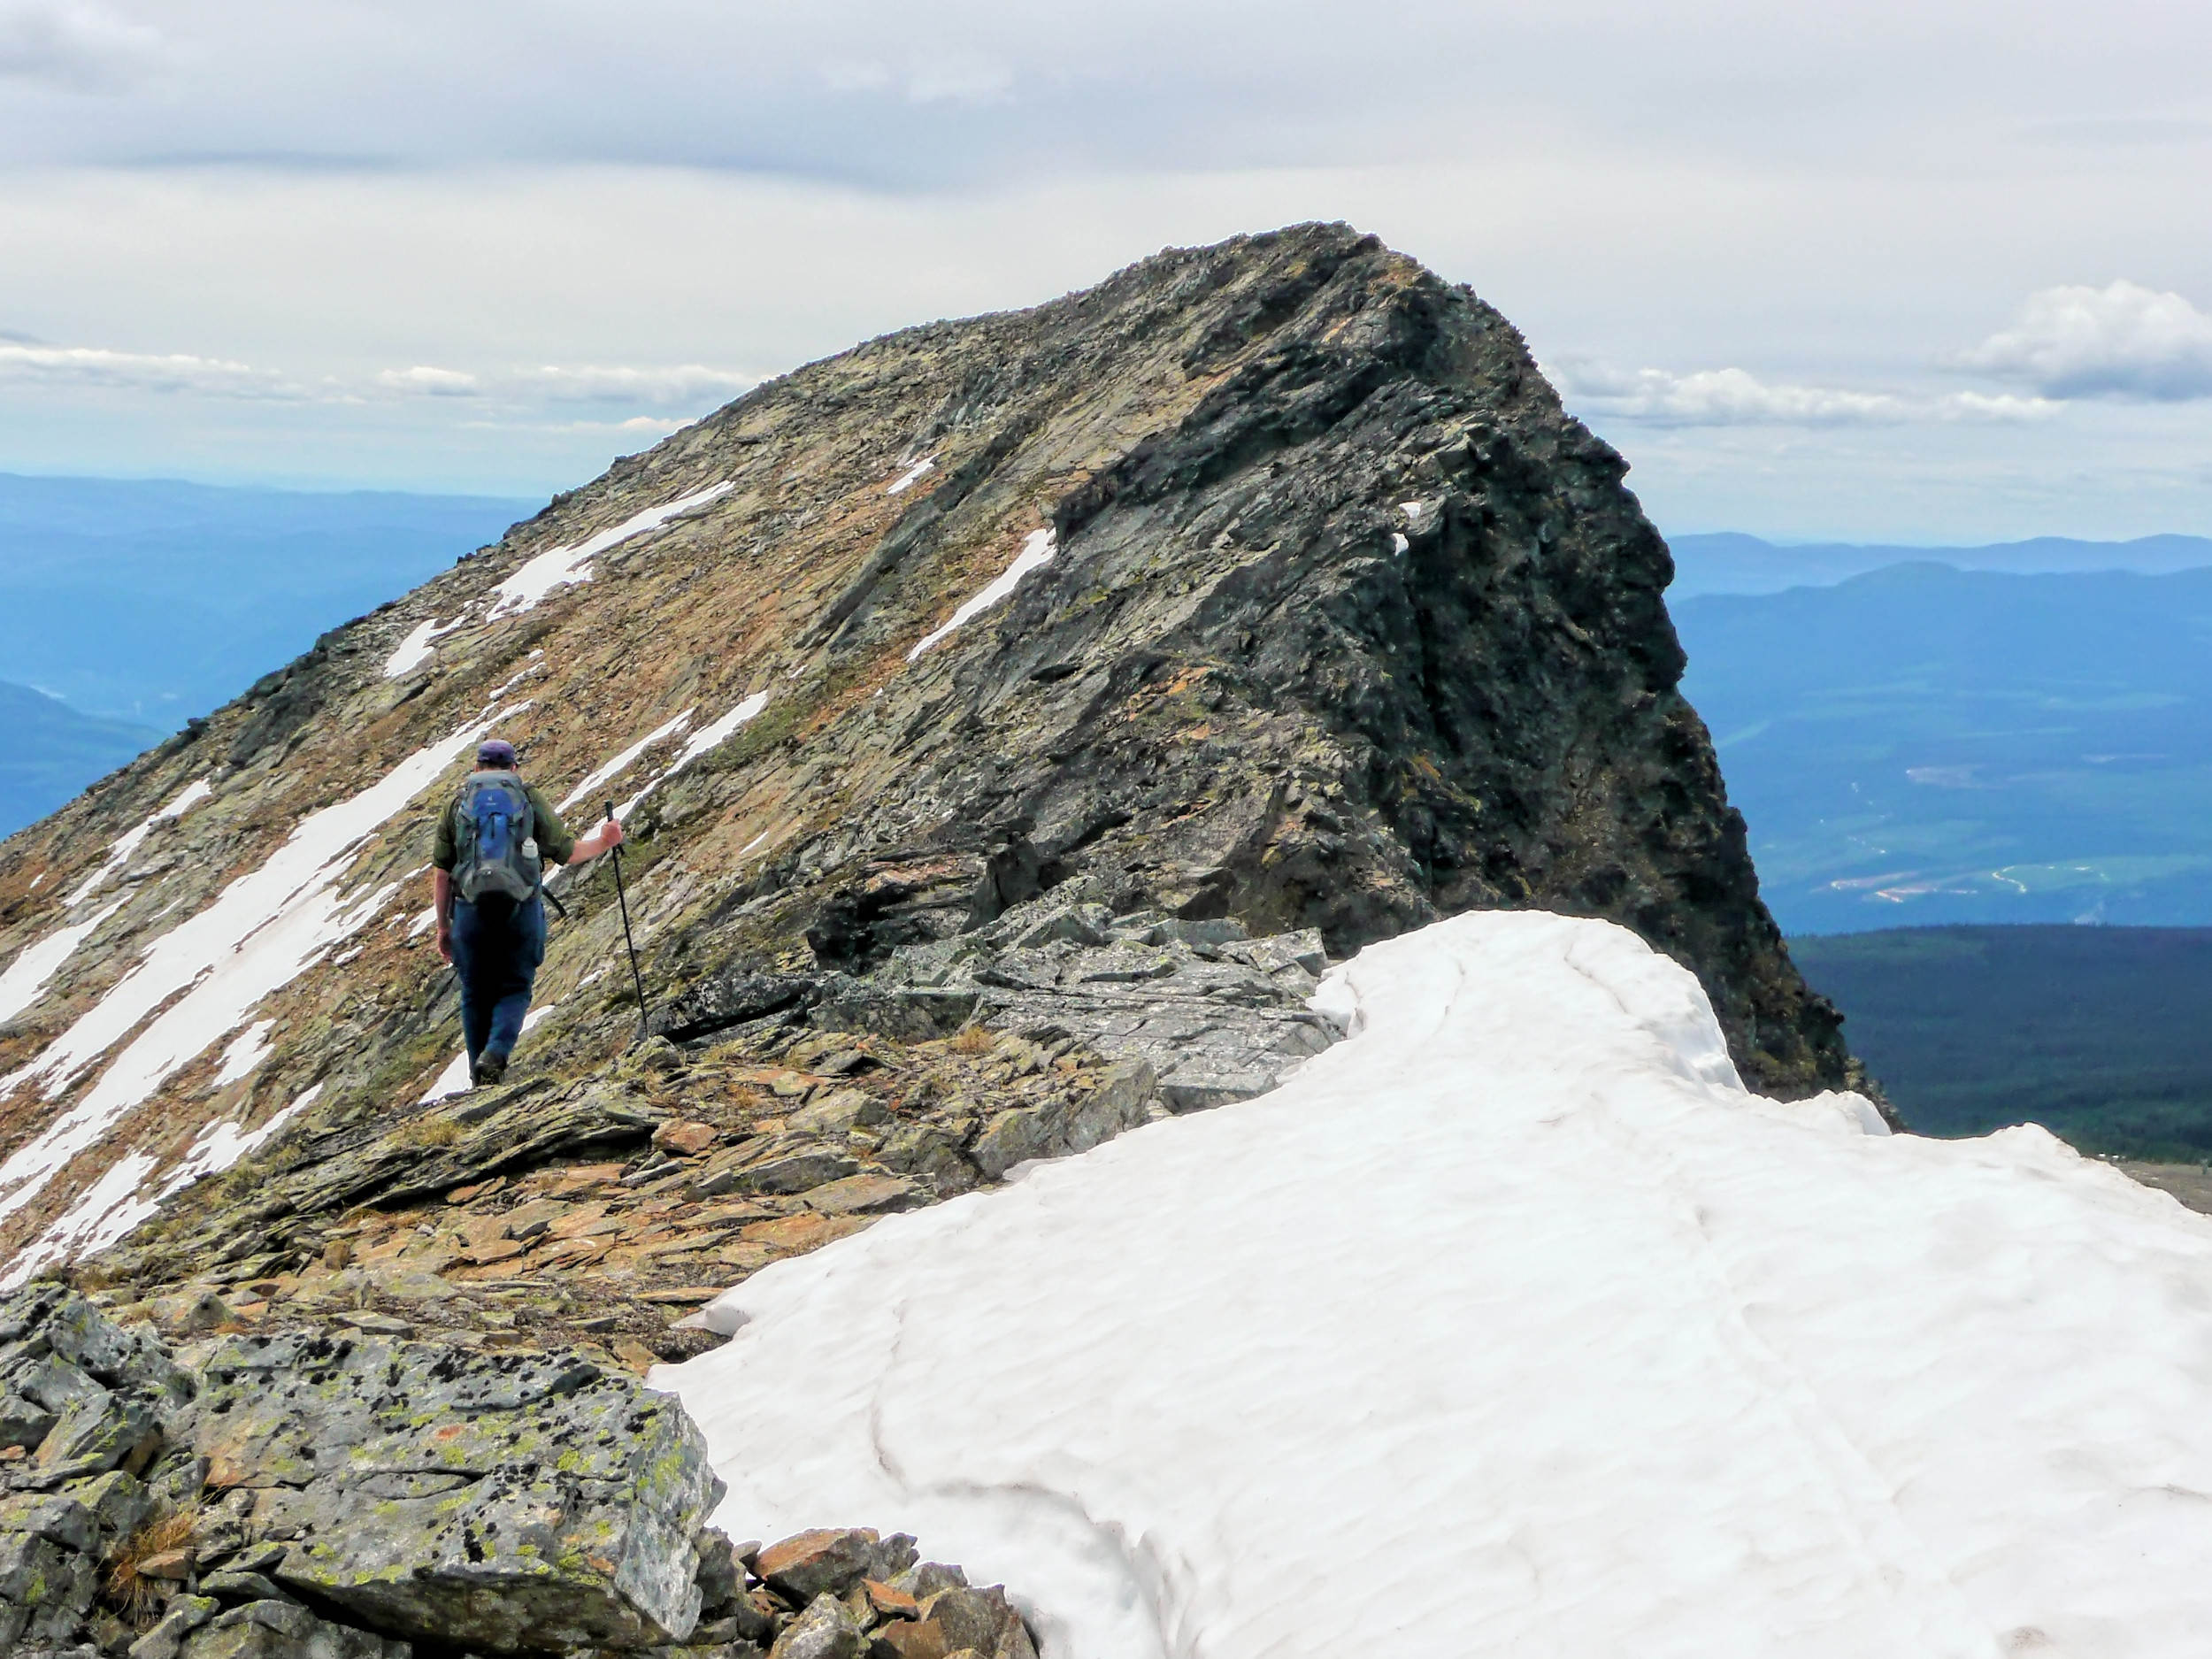
Ascent from the ridge to the peak
While I watch the others ascend, I have to close my eyes repeatedly because looking around makes me dizzy. Eventually I lose sight of the group, but then they reappear right on top of the peak and wave.
View from the top to the ridge
Later, I will feel very disappointed because I missed out on reaching the summit, but right now I can’t wait until the others come back and we finally are on safe ground again. As soon as we return to the wider section of the ridge, I am fine and my legs work normal again.
JF tries to find a shortcut to the cabin. As it happens, this results into a much longer trip home. We run into a marshy area where we have to frequently backtrack in order to avoid deep standing water or fallen trees. Now it is Inge who wavers; JF’s job is not an easy one today.
In the end we reach the hut safely but exhausted. It has been an exciting day. I am still sad about having missed the summit, but even though I don’t know it yet: with every future hike, my fear of heights will diminish and it won’t bother me as much.
13 km - ca. 6 ½ Hours - Ascent 375 m, Descent 725 m
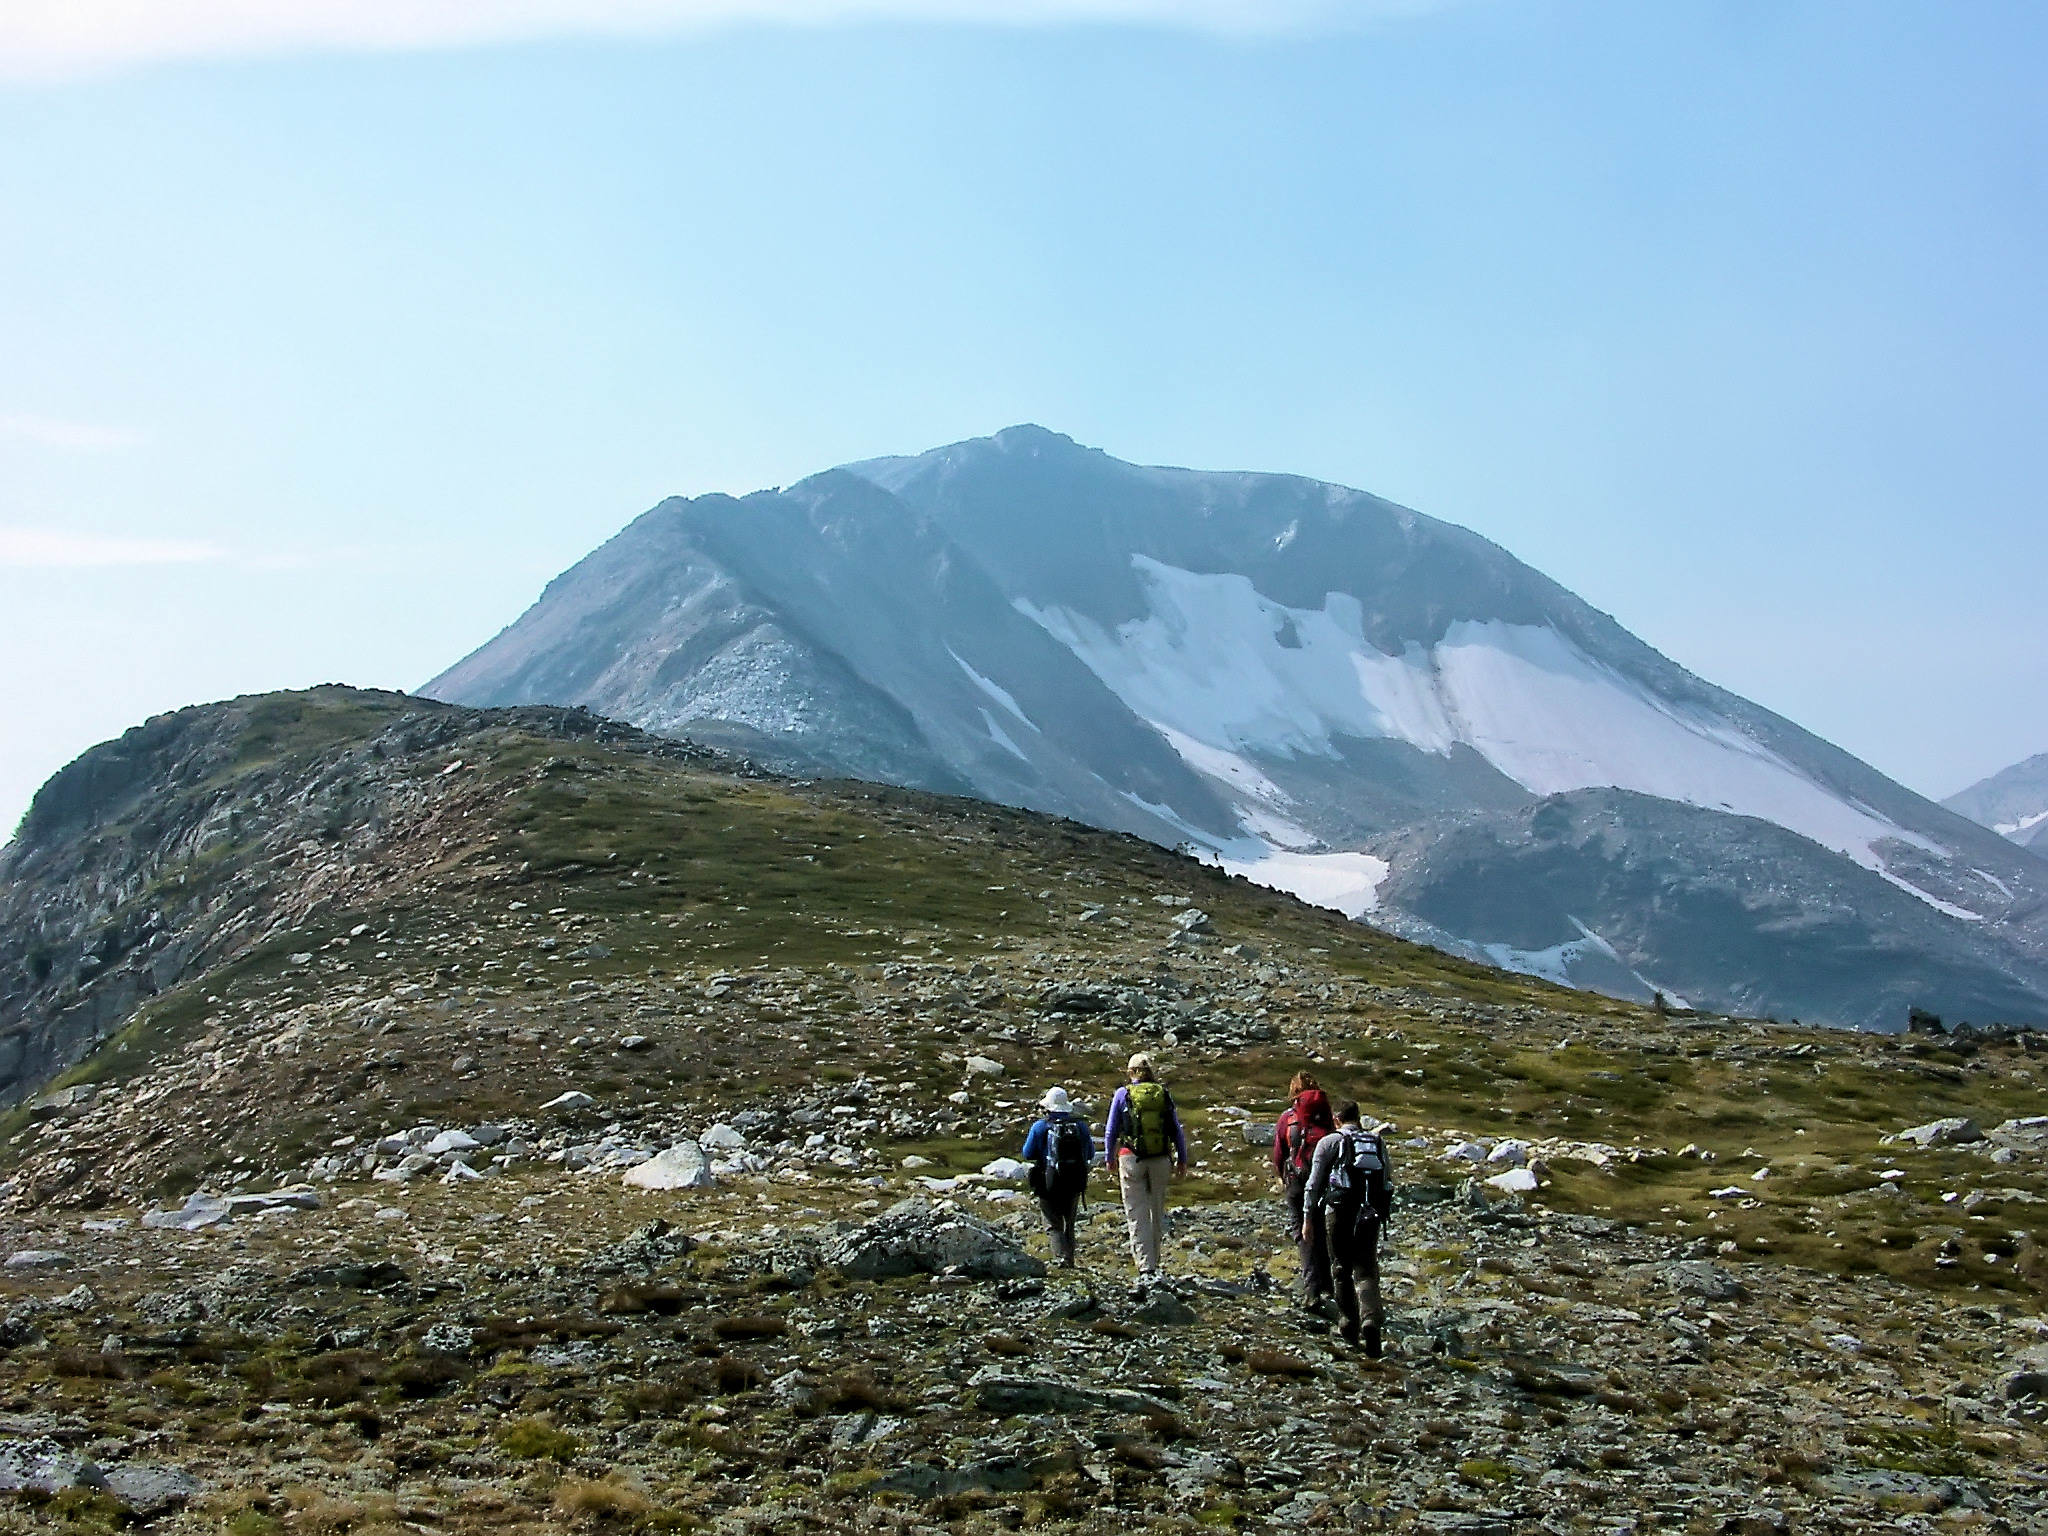
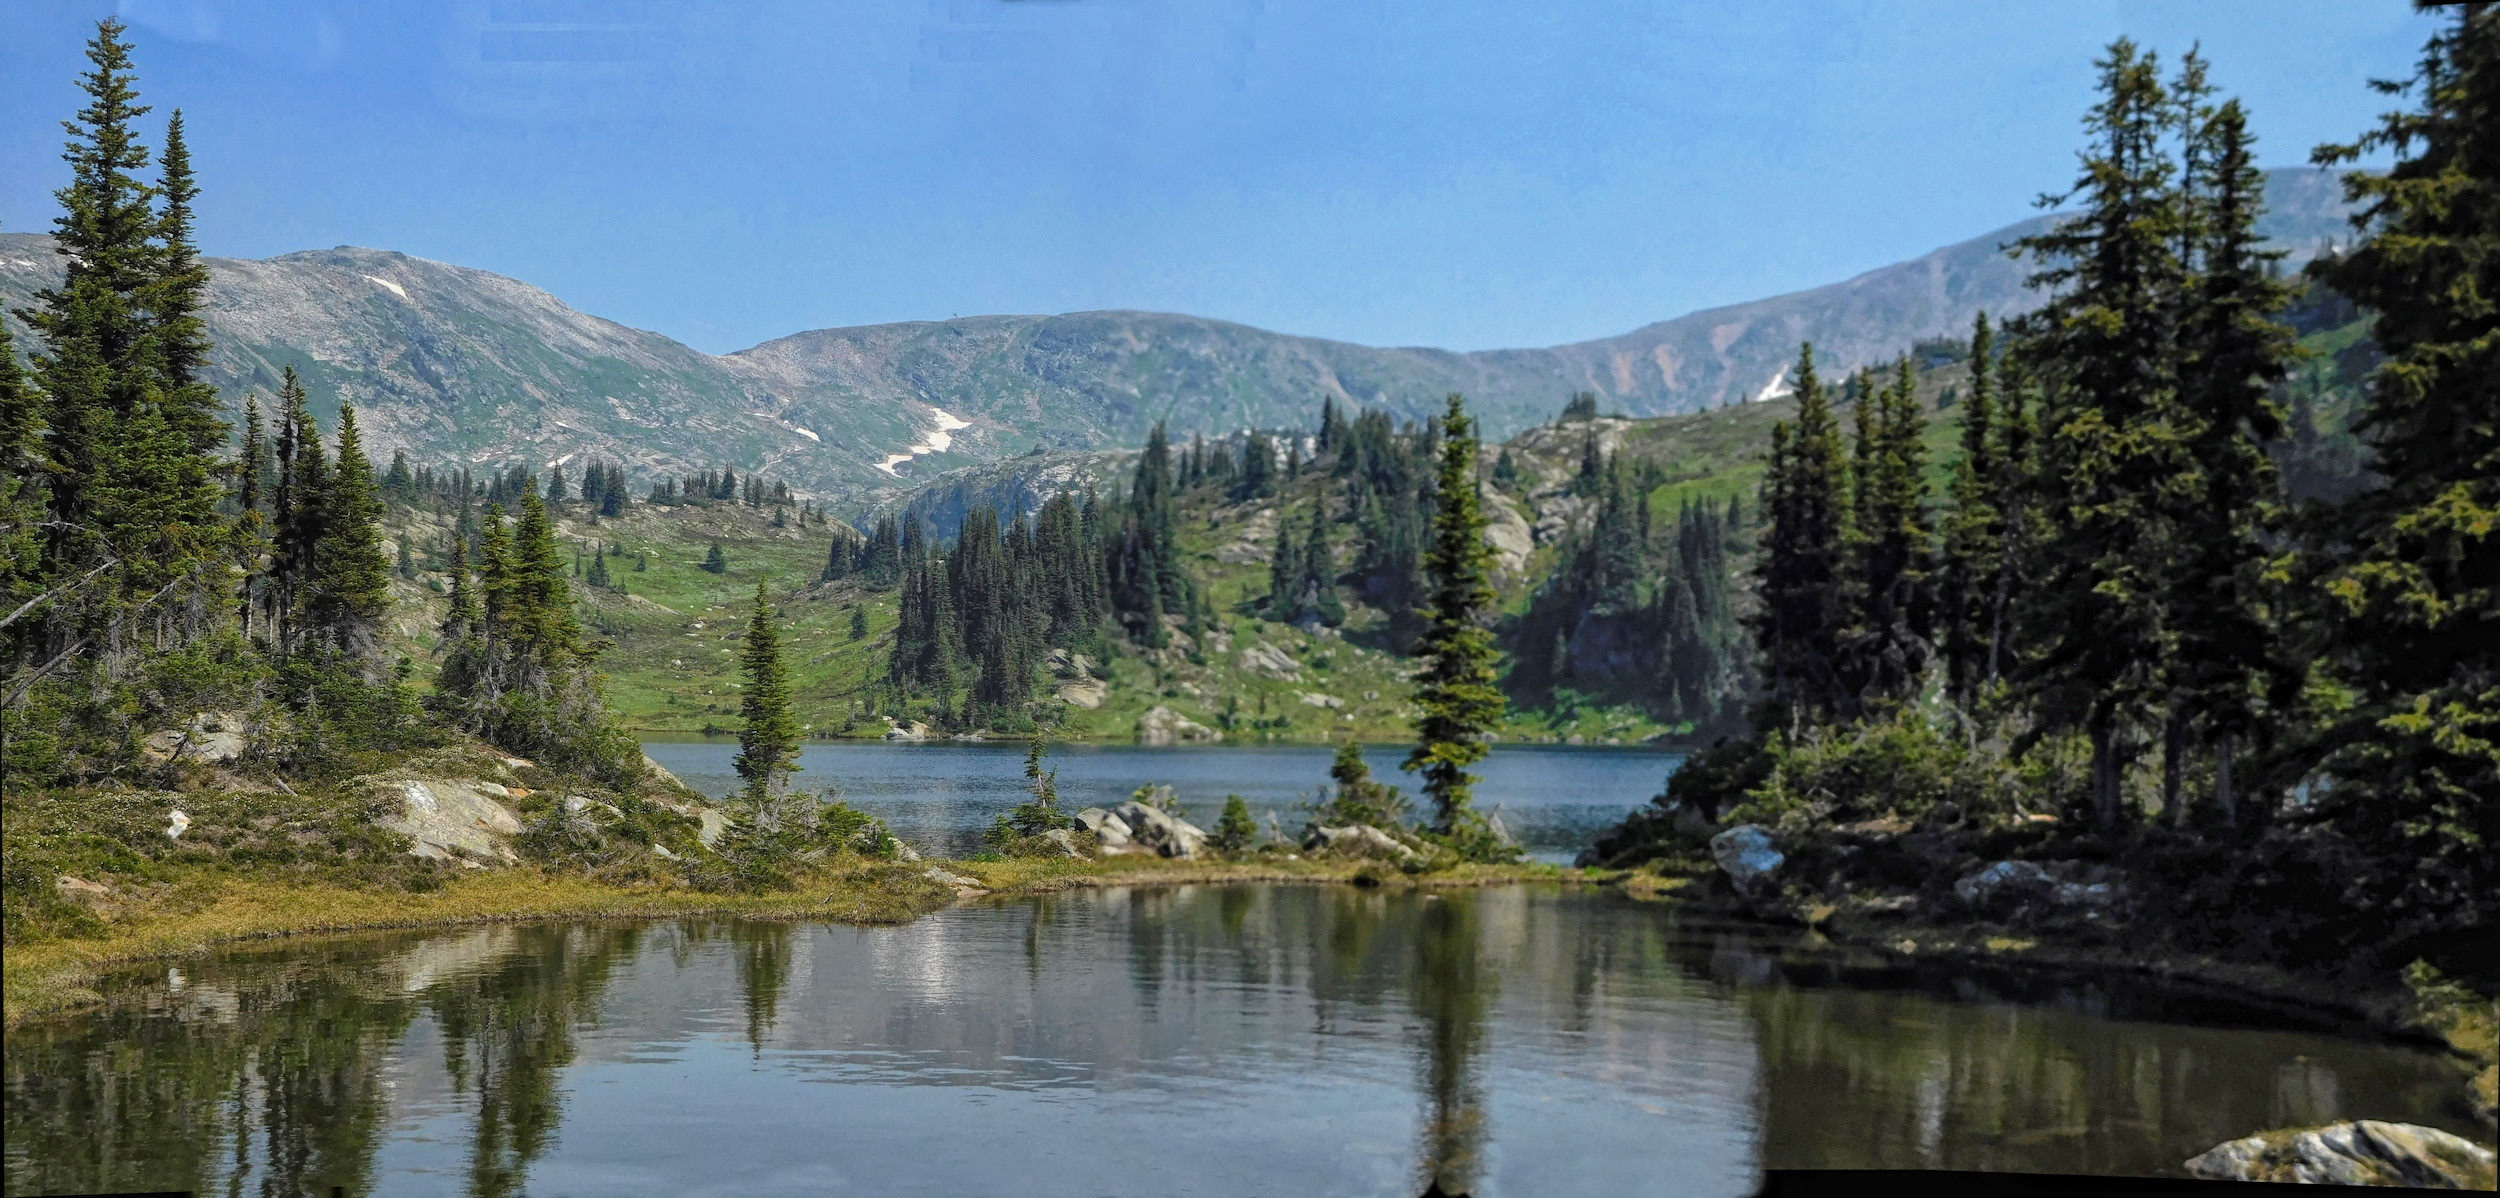
Time has flown by and today is already the last day of our trip. We hike north and come upon another lake. Trophy #3 provides us with a last view to say goodbye.
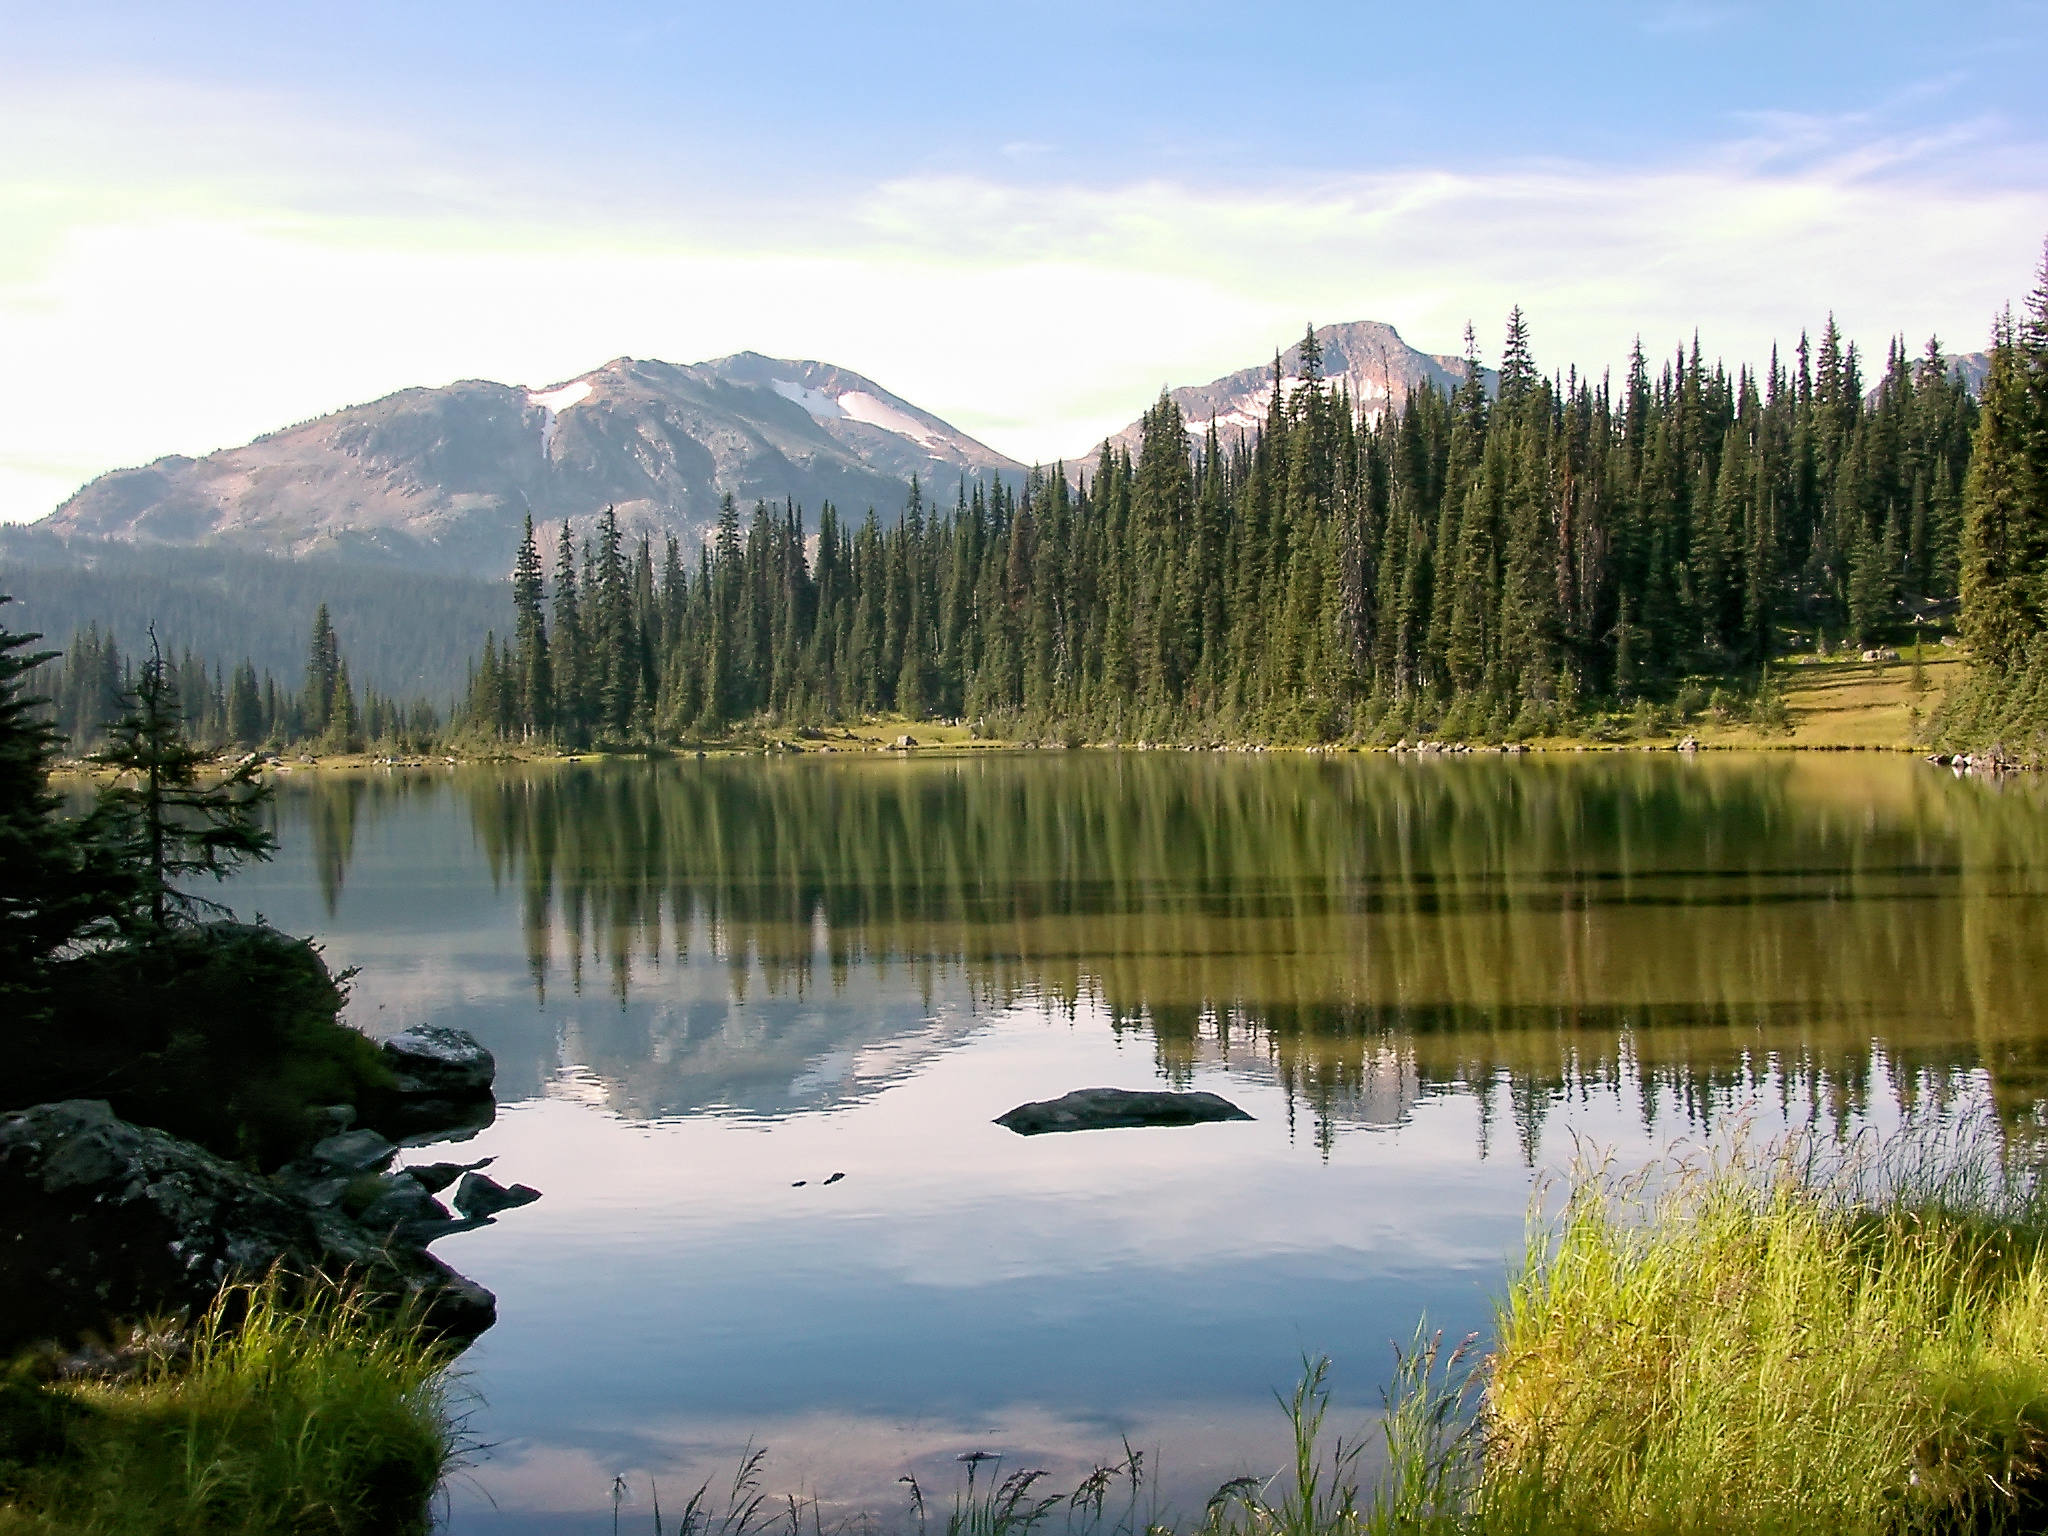
Lake with Trophy #3 and Trophy Mountain in the background
Soon Table Mountain appears in front of us. We will detour to its relatively flat top. Amazingly, it is 2224 meters high and still looks a lot less dramatic than the Trophies.
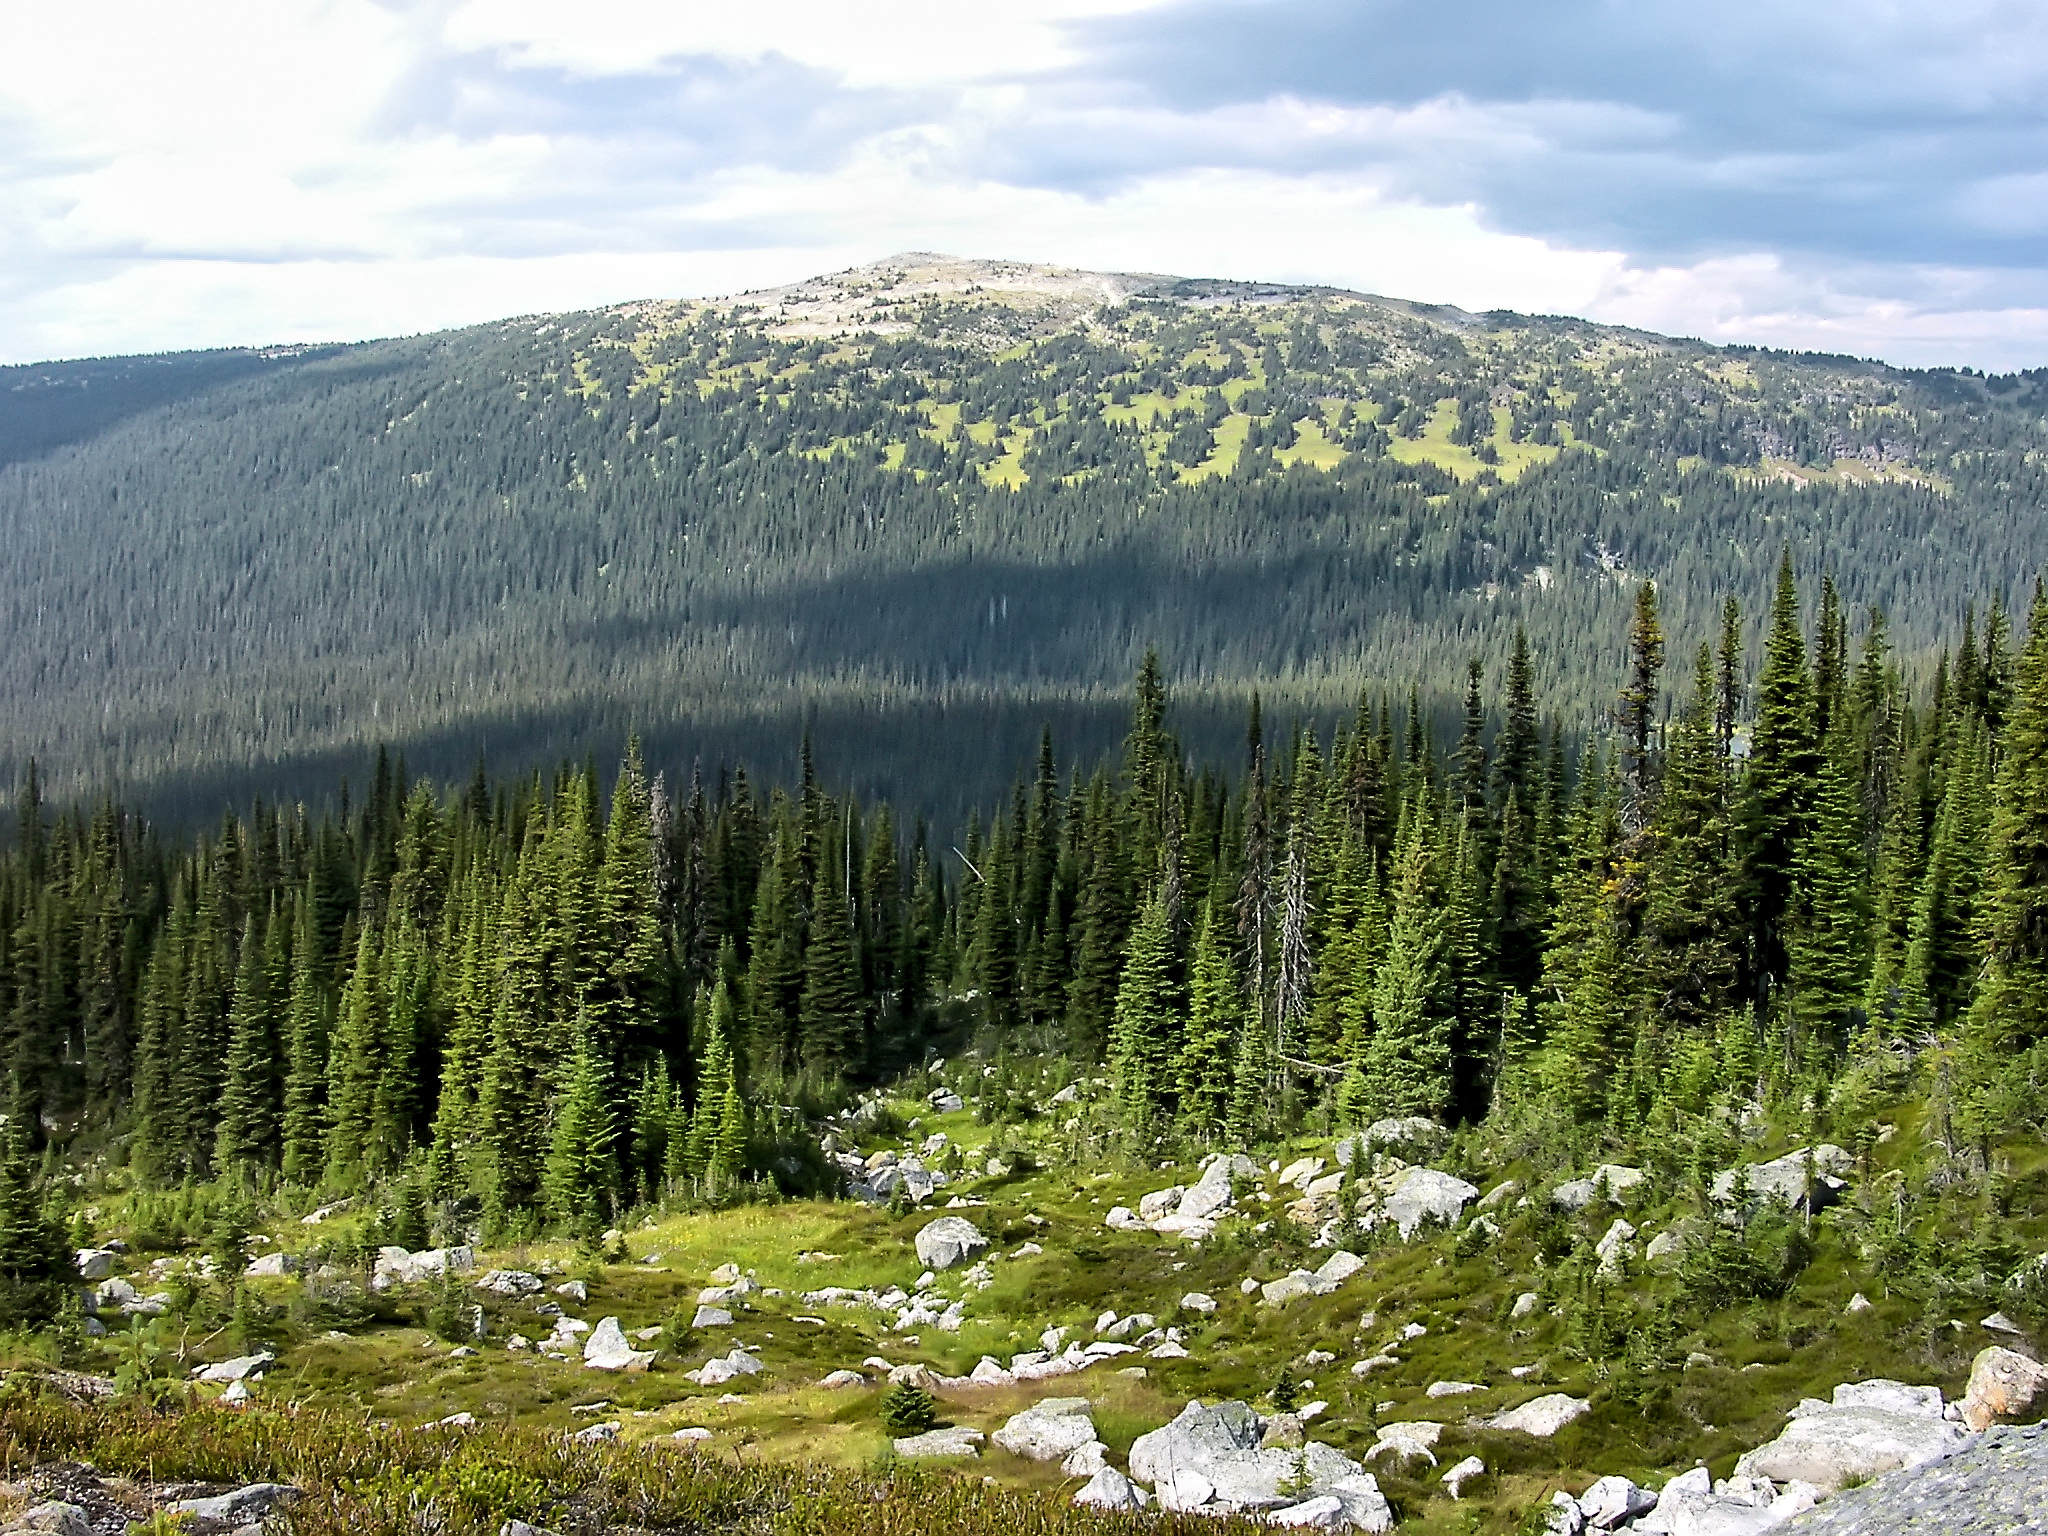
Table Mountain 2224 m
The climb immediately makes us aware of the mountain’s altitude and we are quickly out of breath. We cross through vast meadows, which earlier in the summer must have been lush with wildflowers.
Ascent to Table Mountain
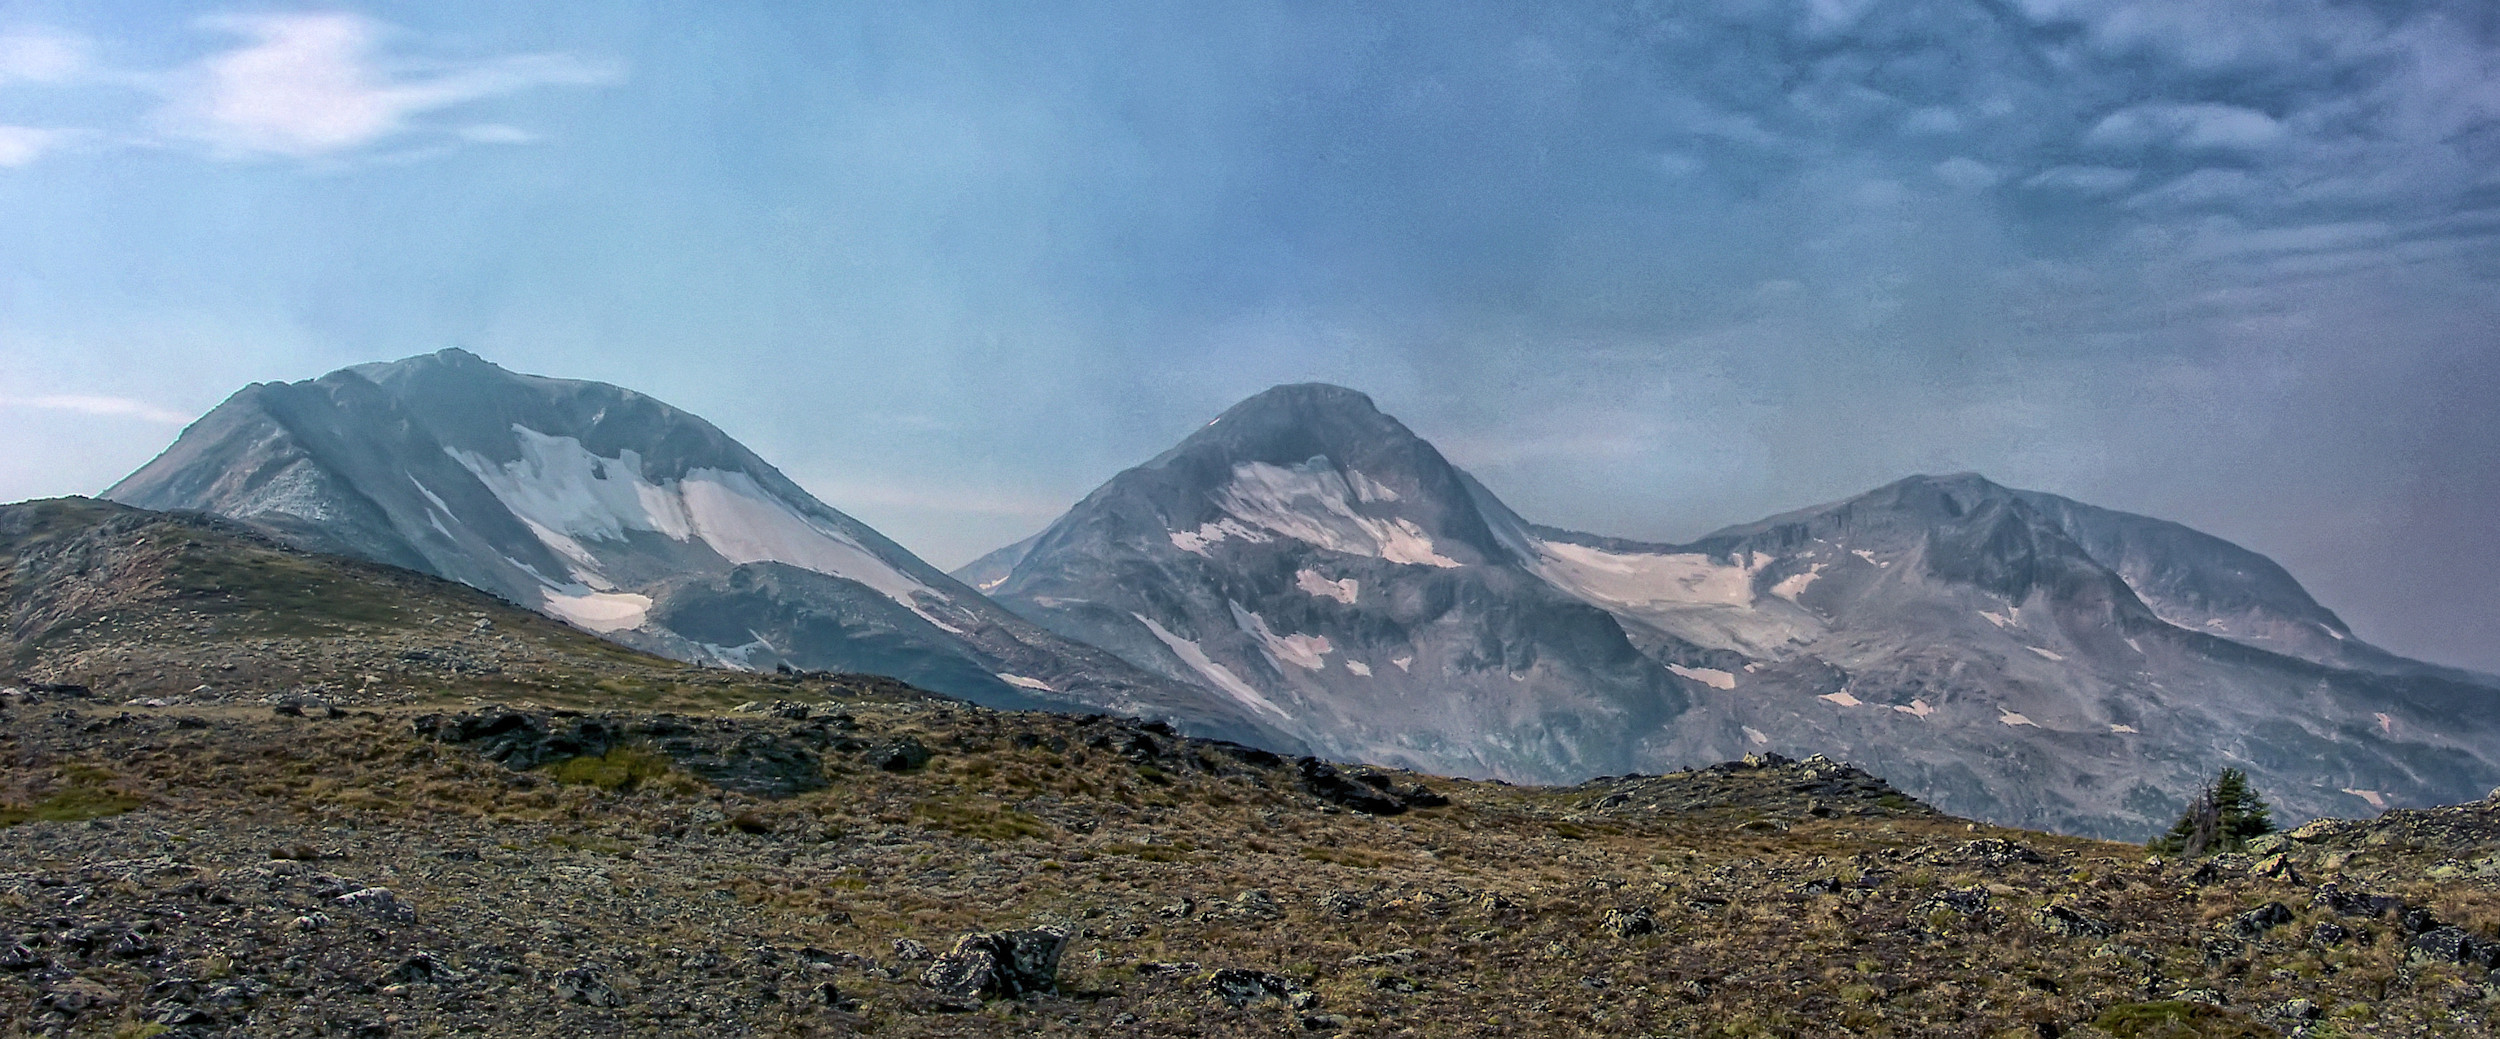
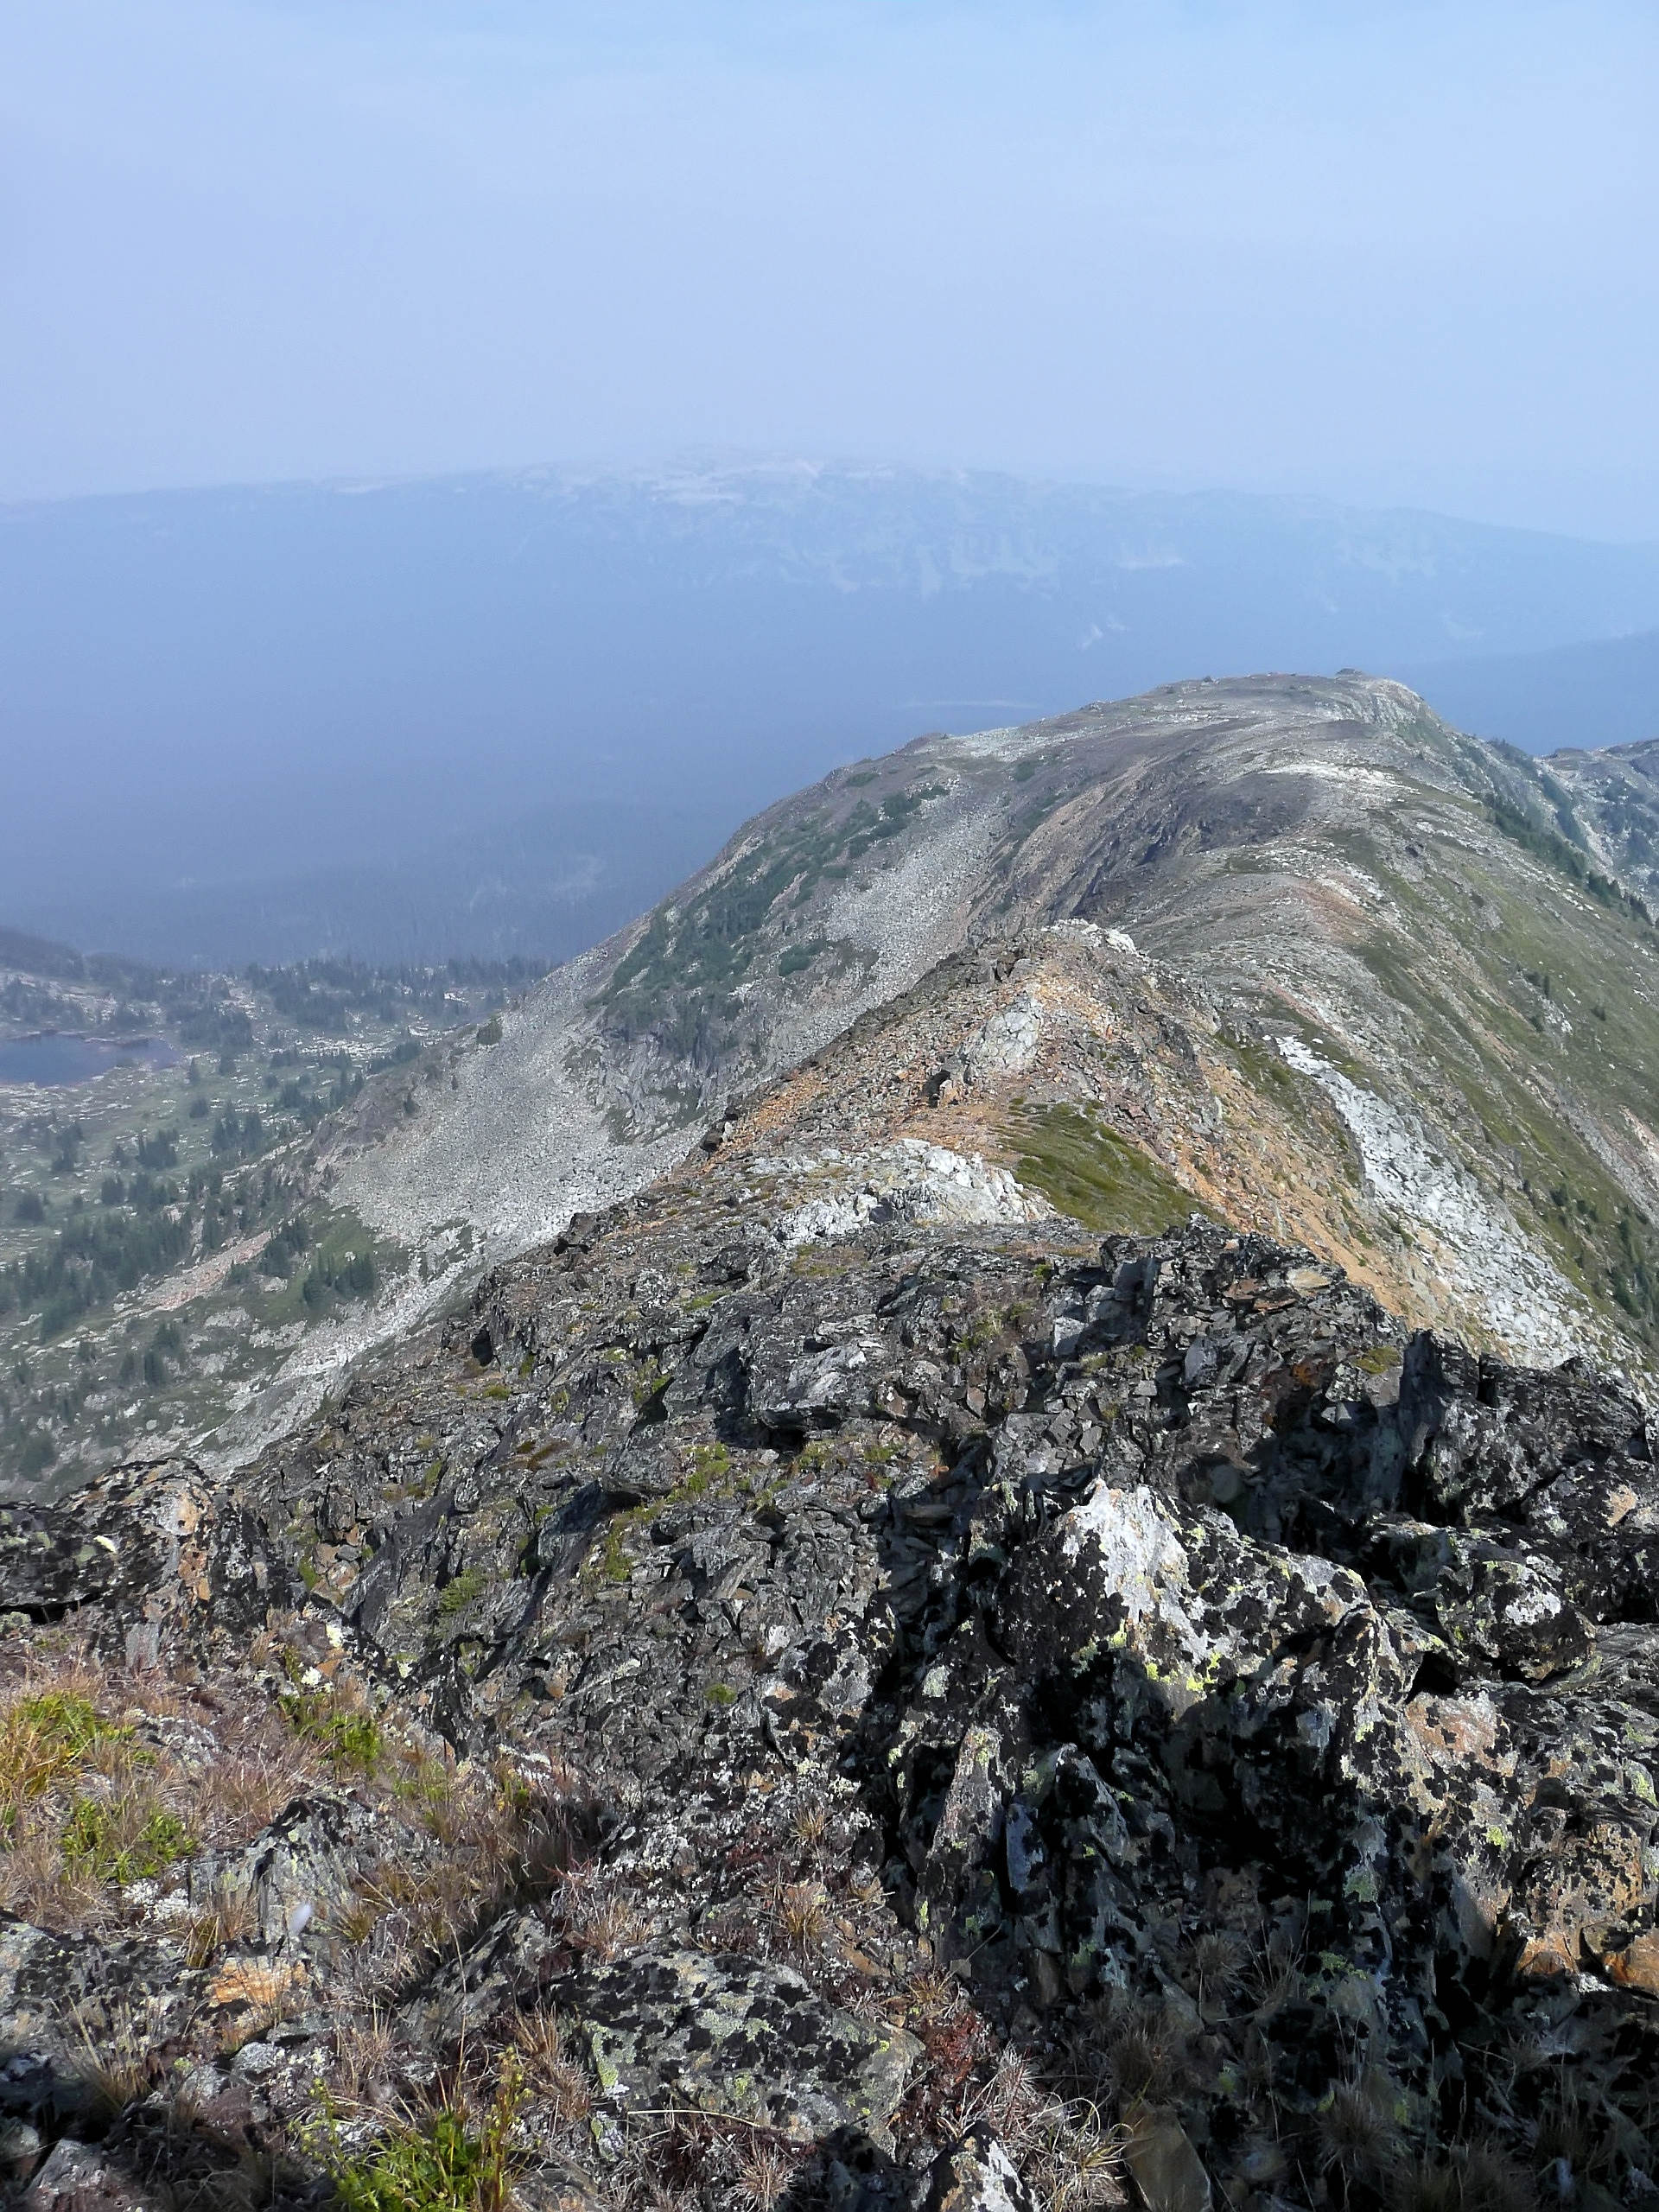
From the top we can see Trophy Mountain, Battle Mountain and Philip Lake; the view of the distant mountains to the north is a bit hazy, though. A strong cold wind is blowing and makes us uncomfortable.
Looking back to Trophy #3 and Trophy Mountain
Battle Mountain, 2369 m, with the Wells Gray Park’s northern skyline in the background
Philip Lake and Battle Mountain
From the bottom of Table Mountain, we begin a seemingly endless descent through the forest until we finally reach the intersection with the Fight Lake/Cariboo Meadows Trail. Wells Gray Adventures offers a 7-day-trip which continues on to their Fight Lake Chalet for two additional days. From there you can summit Battle Mountain. The five of us, however, finish today and continue along Philip Creek and out to the Battle Mountain Road. A dented old pickup truck awaits us there for a bumpy journey back. The Battle Mountain Road is so badly potholed that we have to hold on to our seats in order not to hit our heads on the cab’s ceiling.
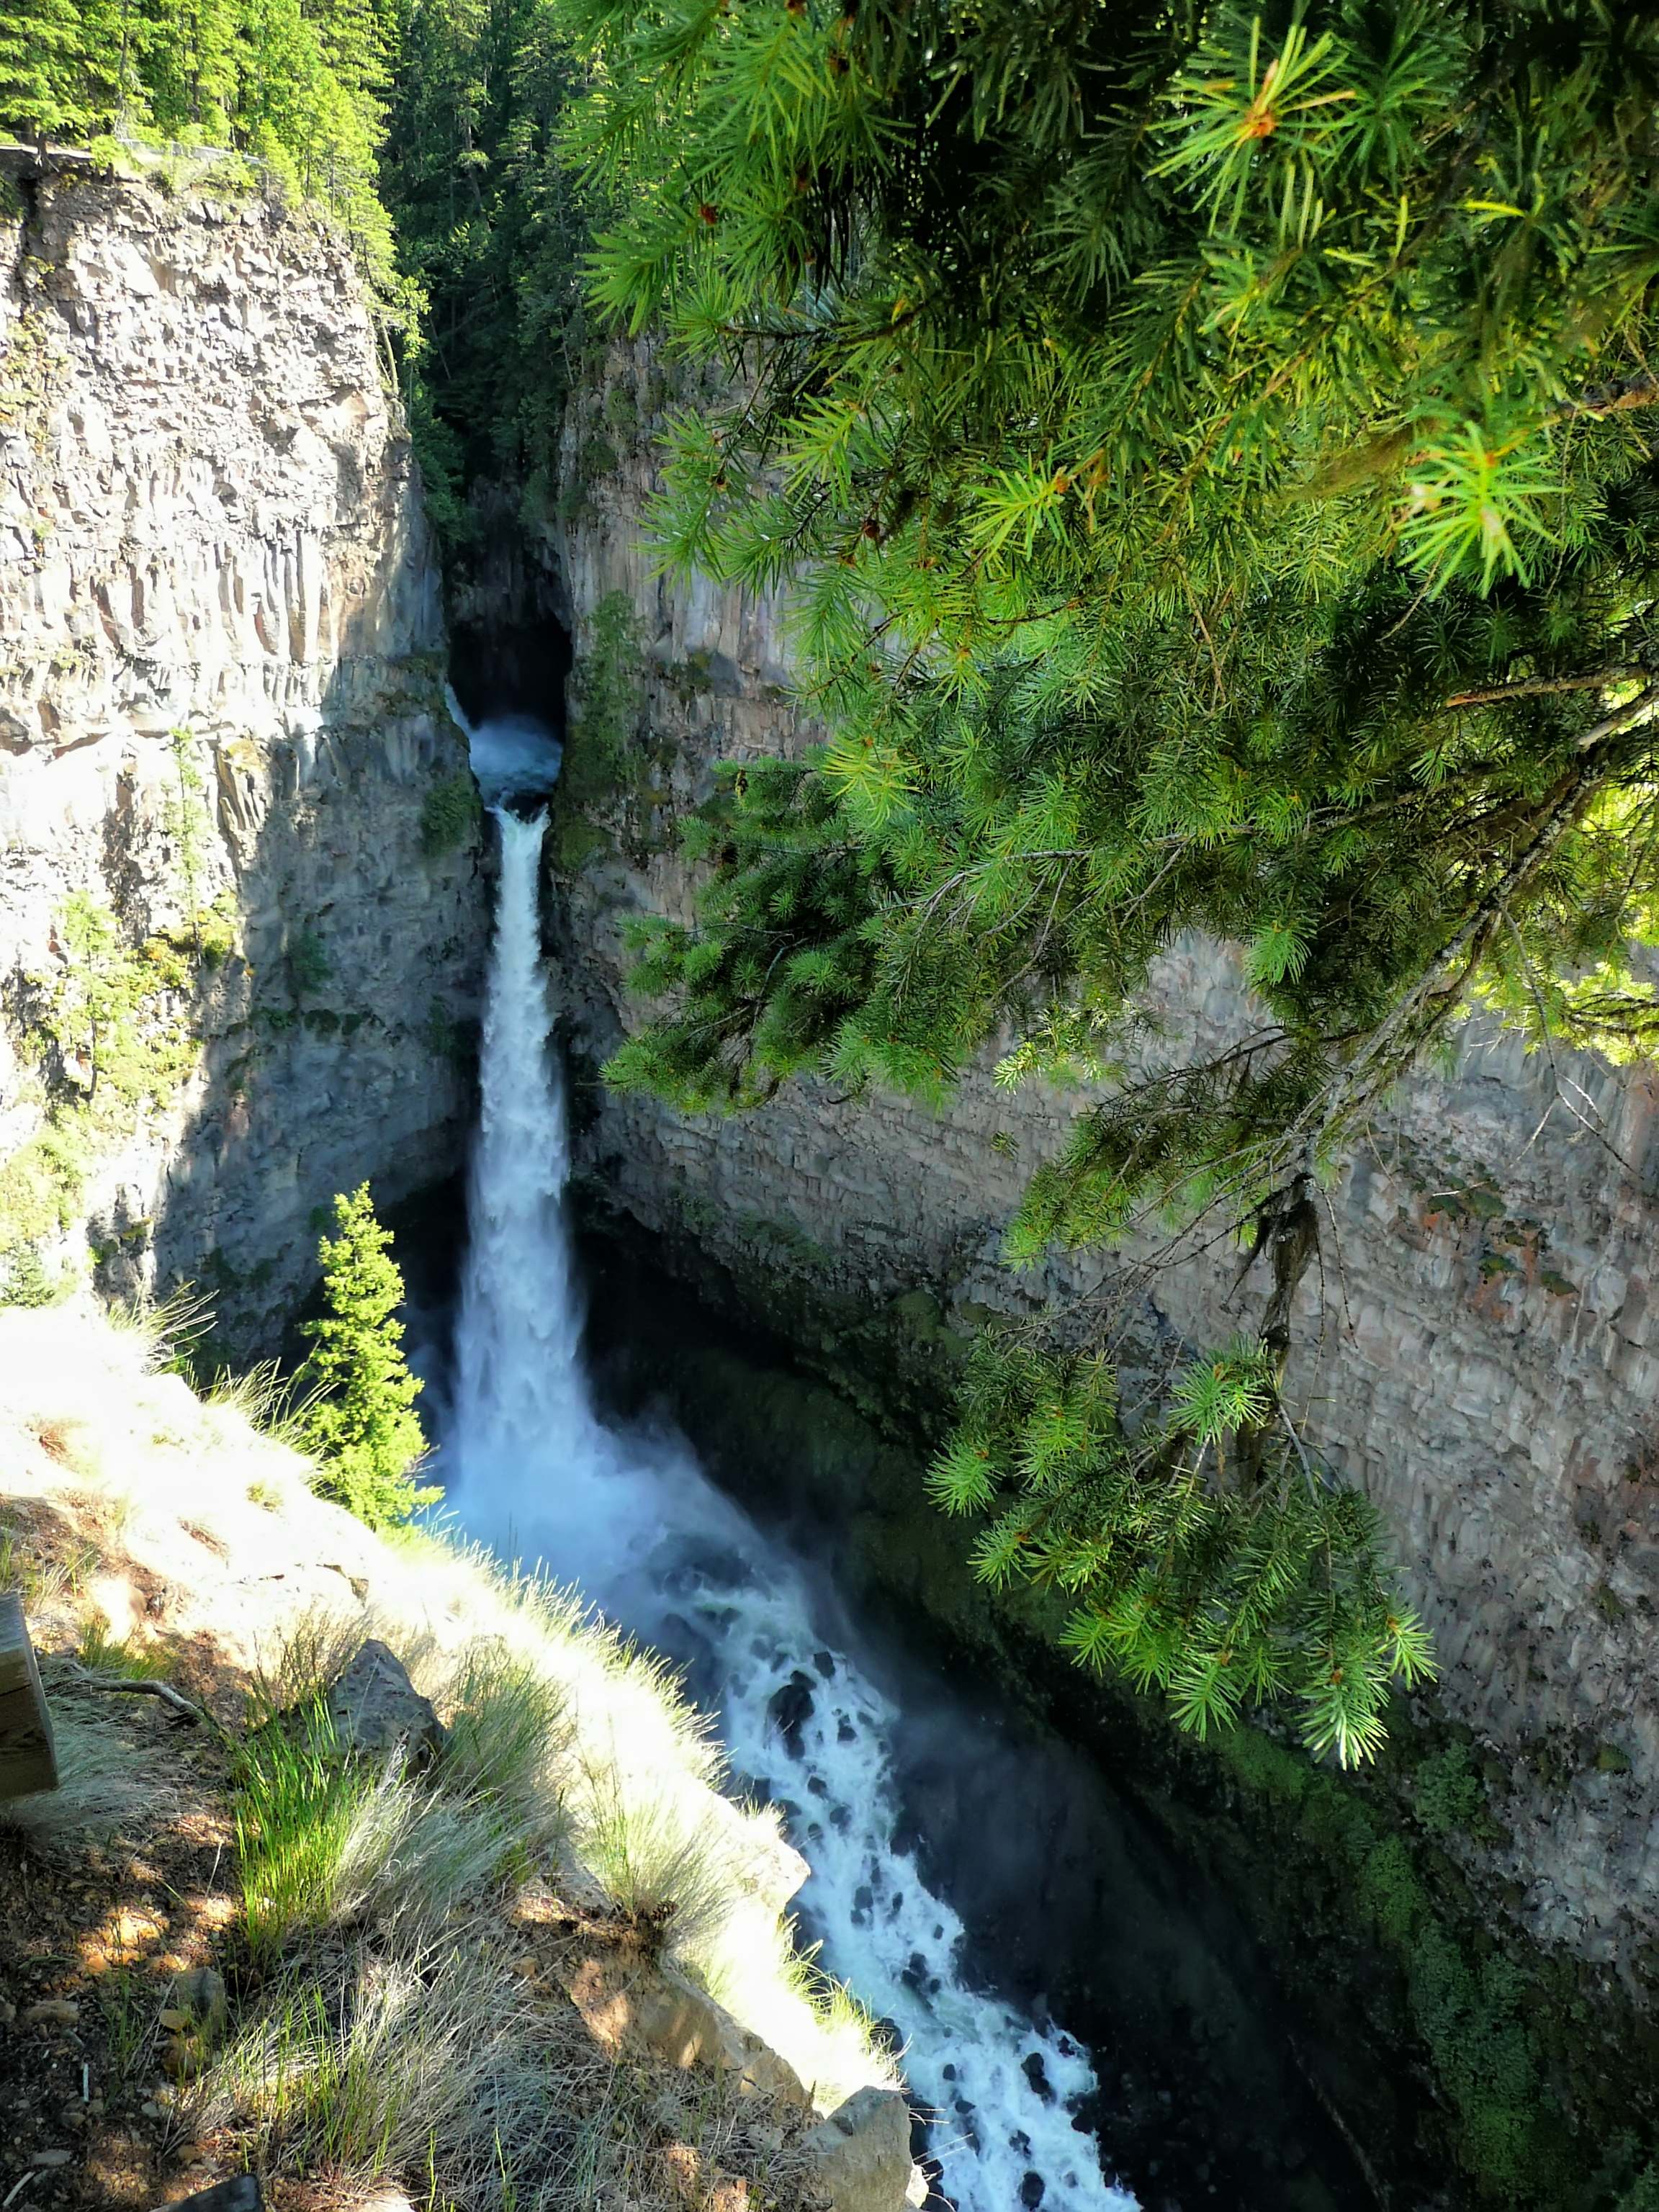
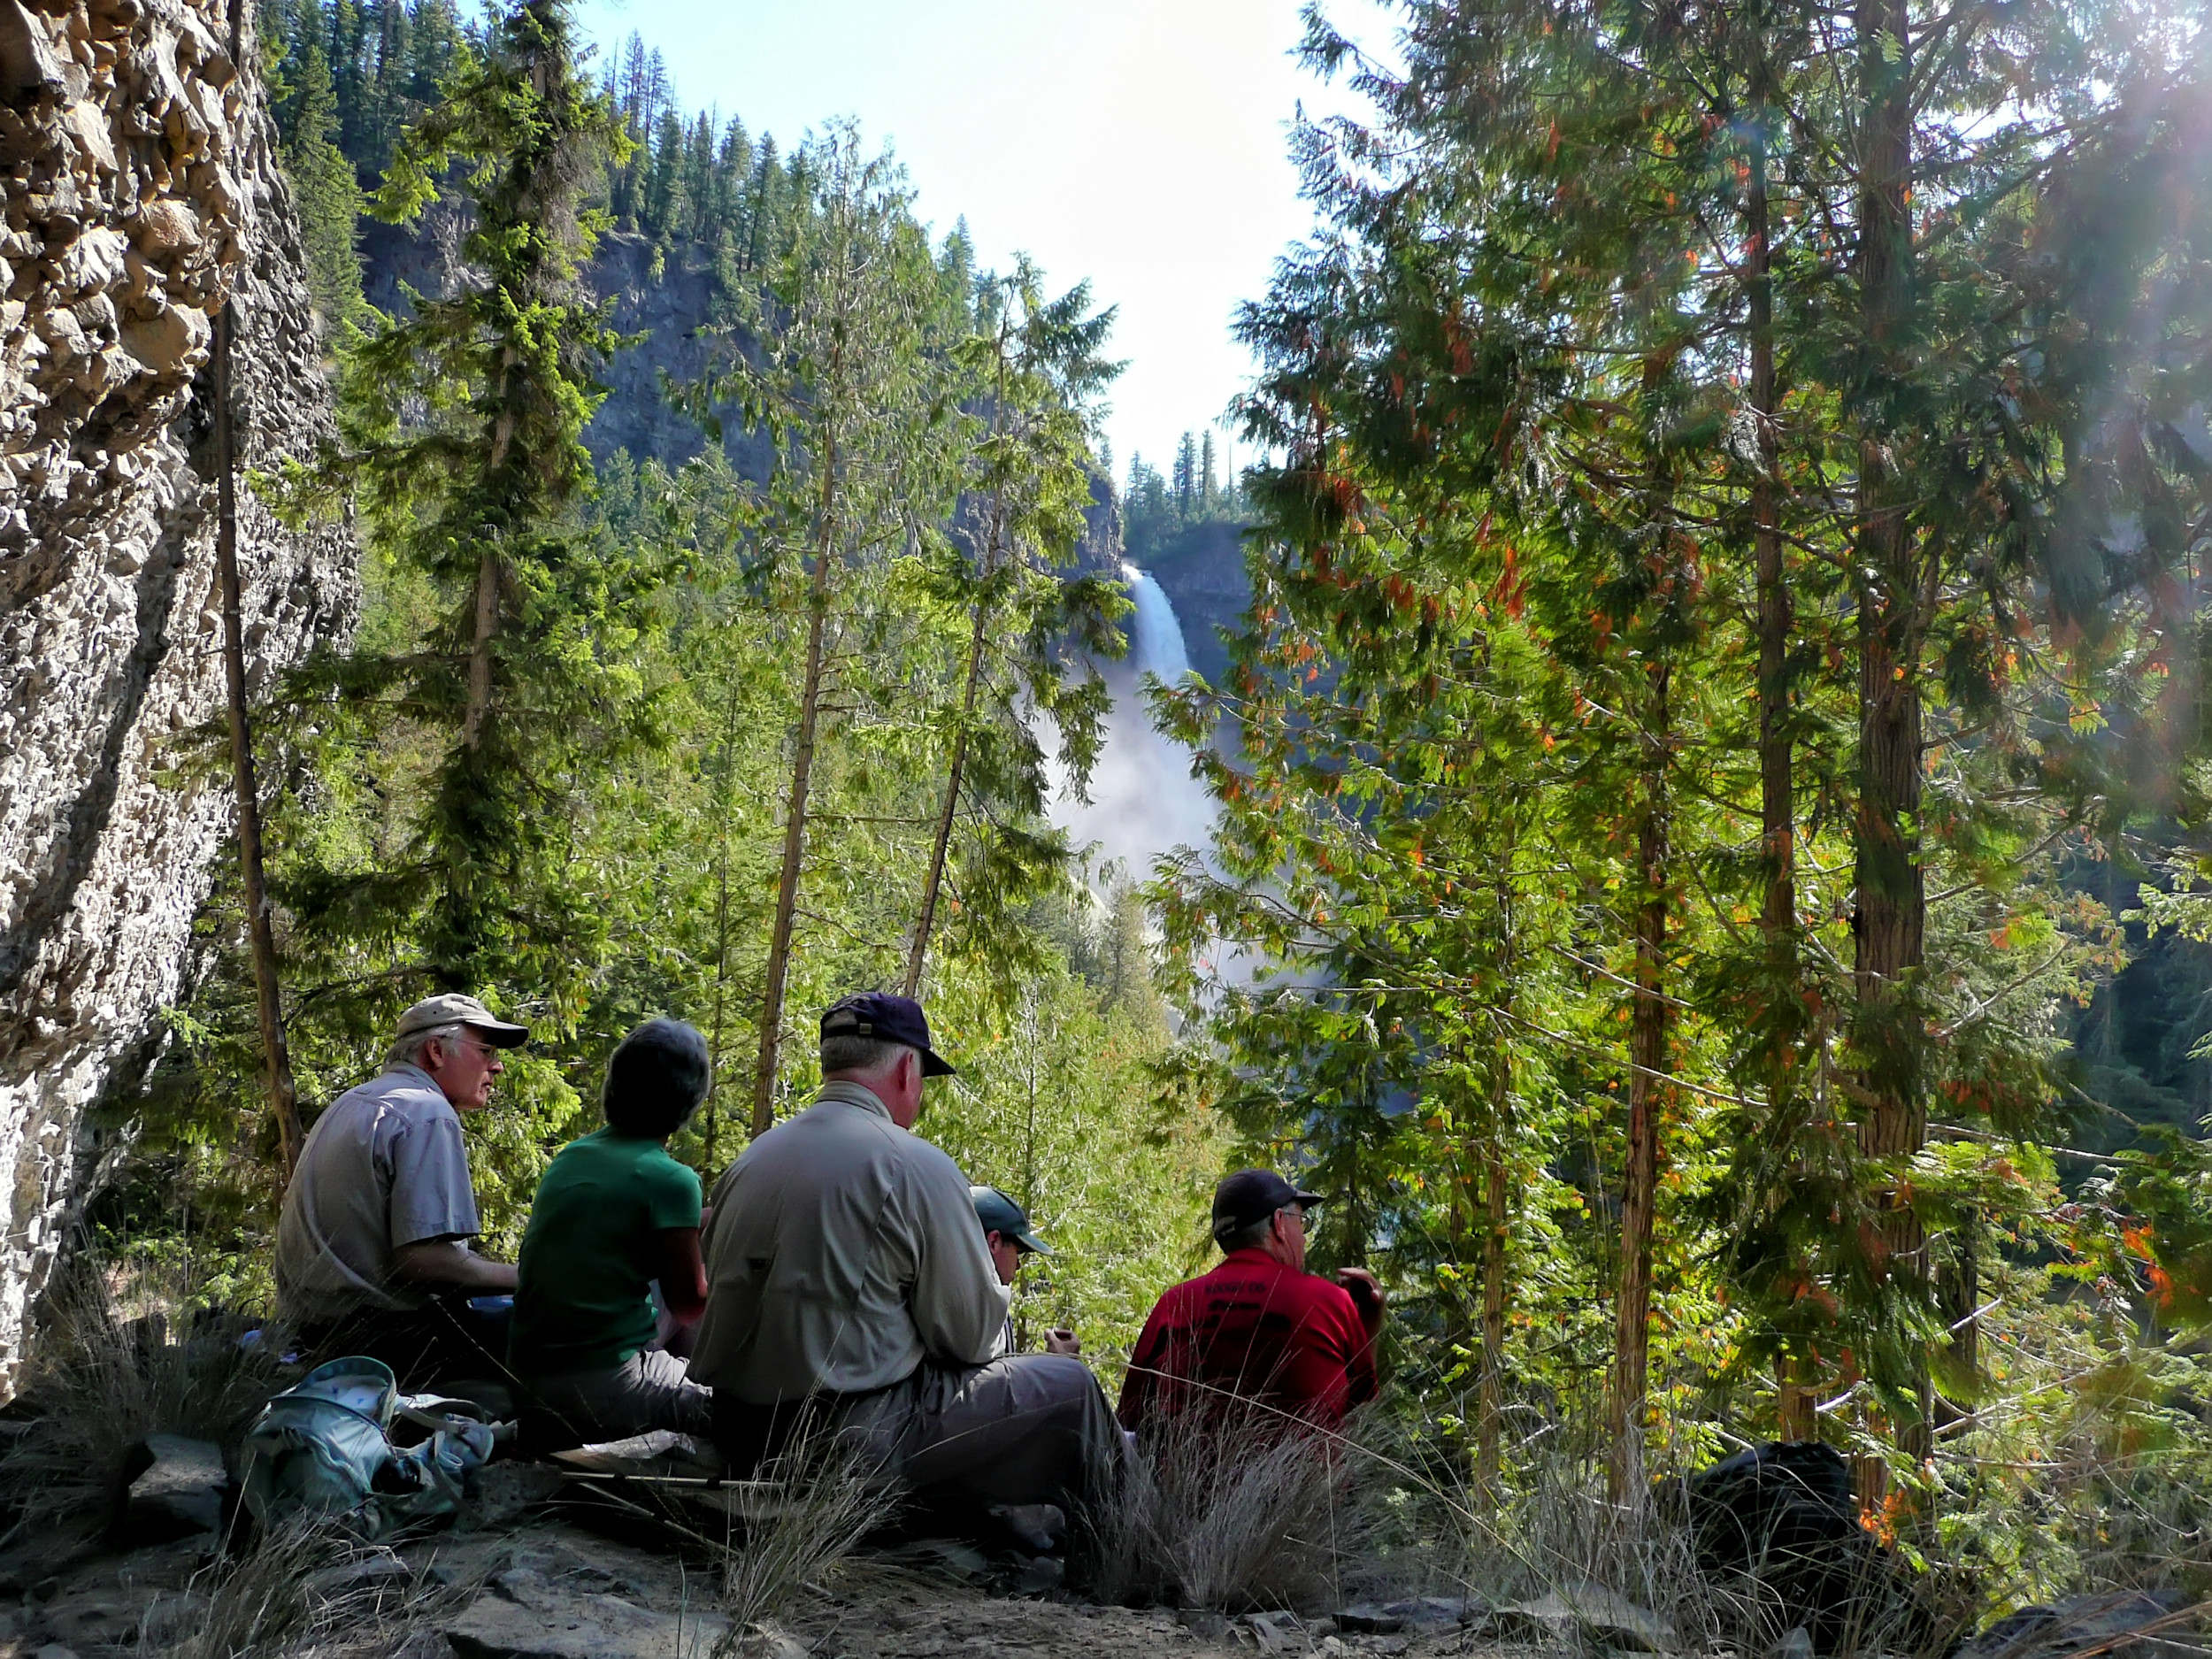
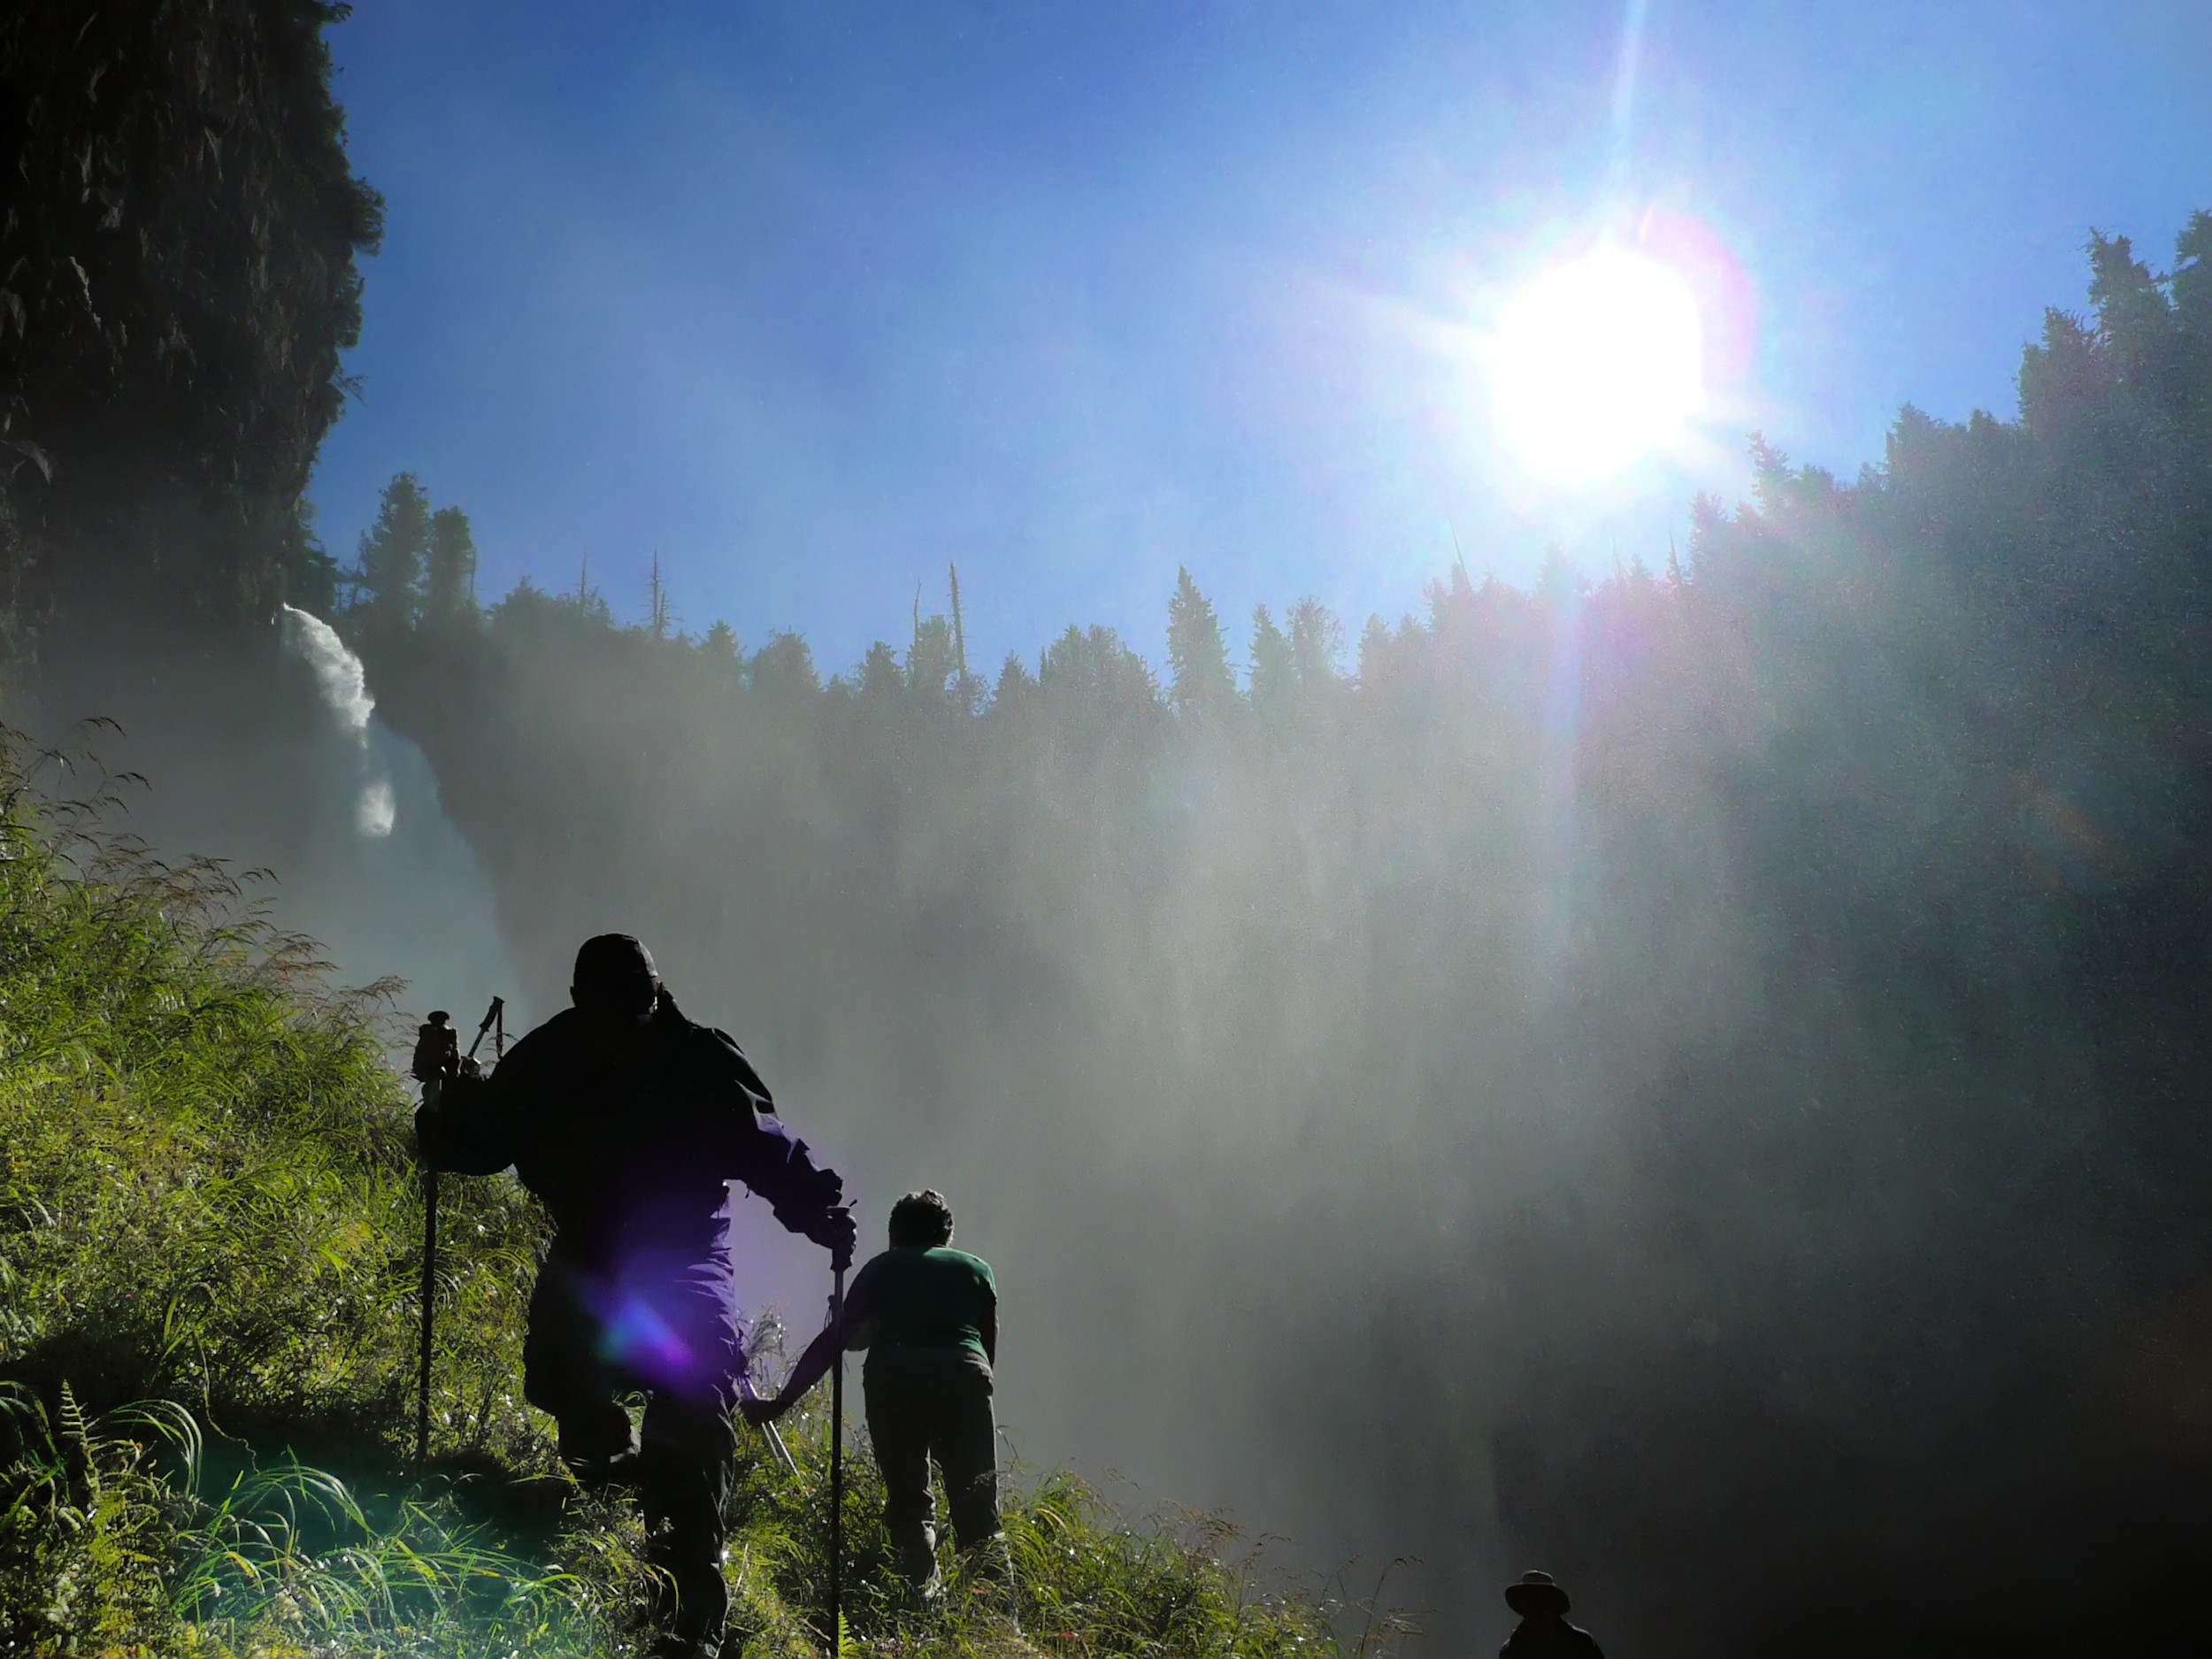
Before we leave the park, we stop at the Helmcken Falls viewing platform. Nobody should hike in Well Gray Park without a visit to its most famous waterfall!
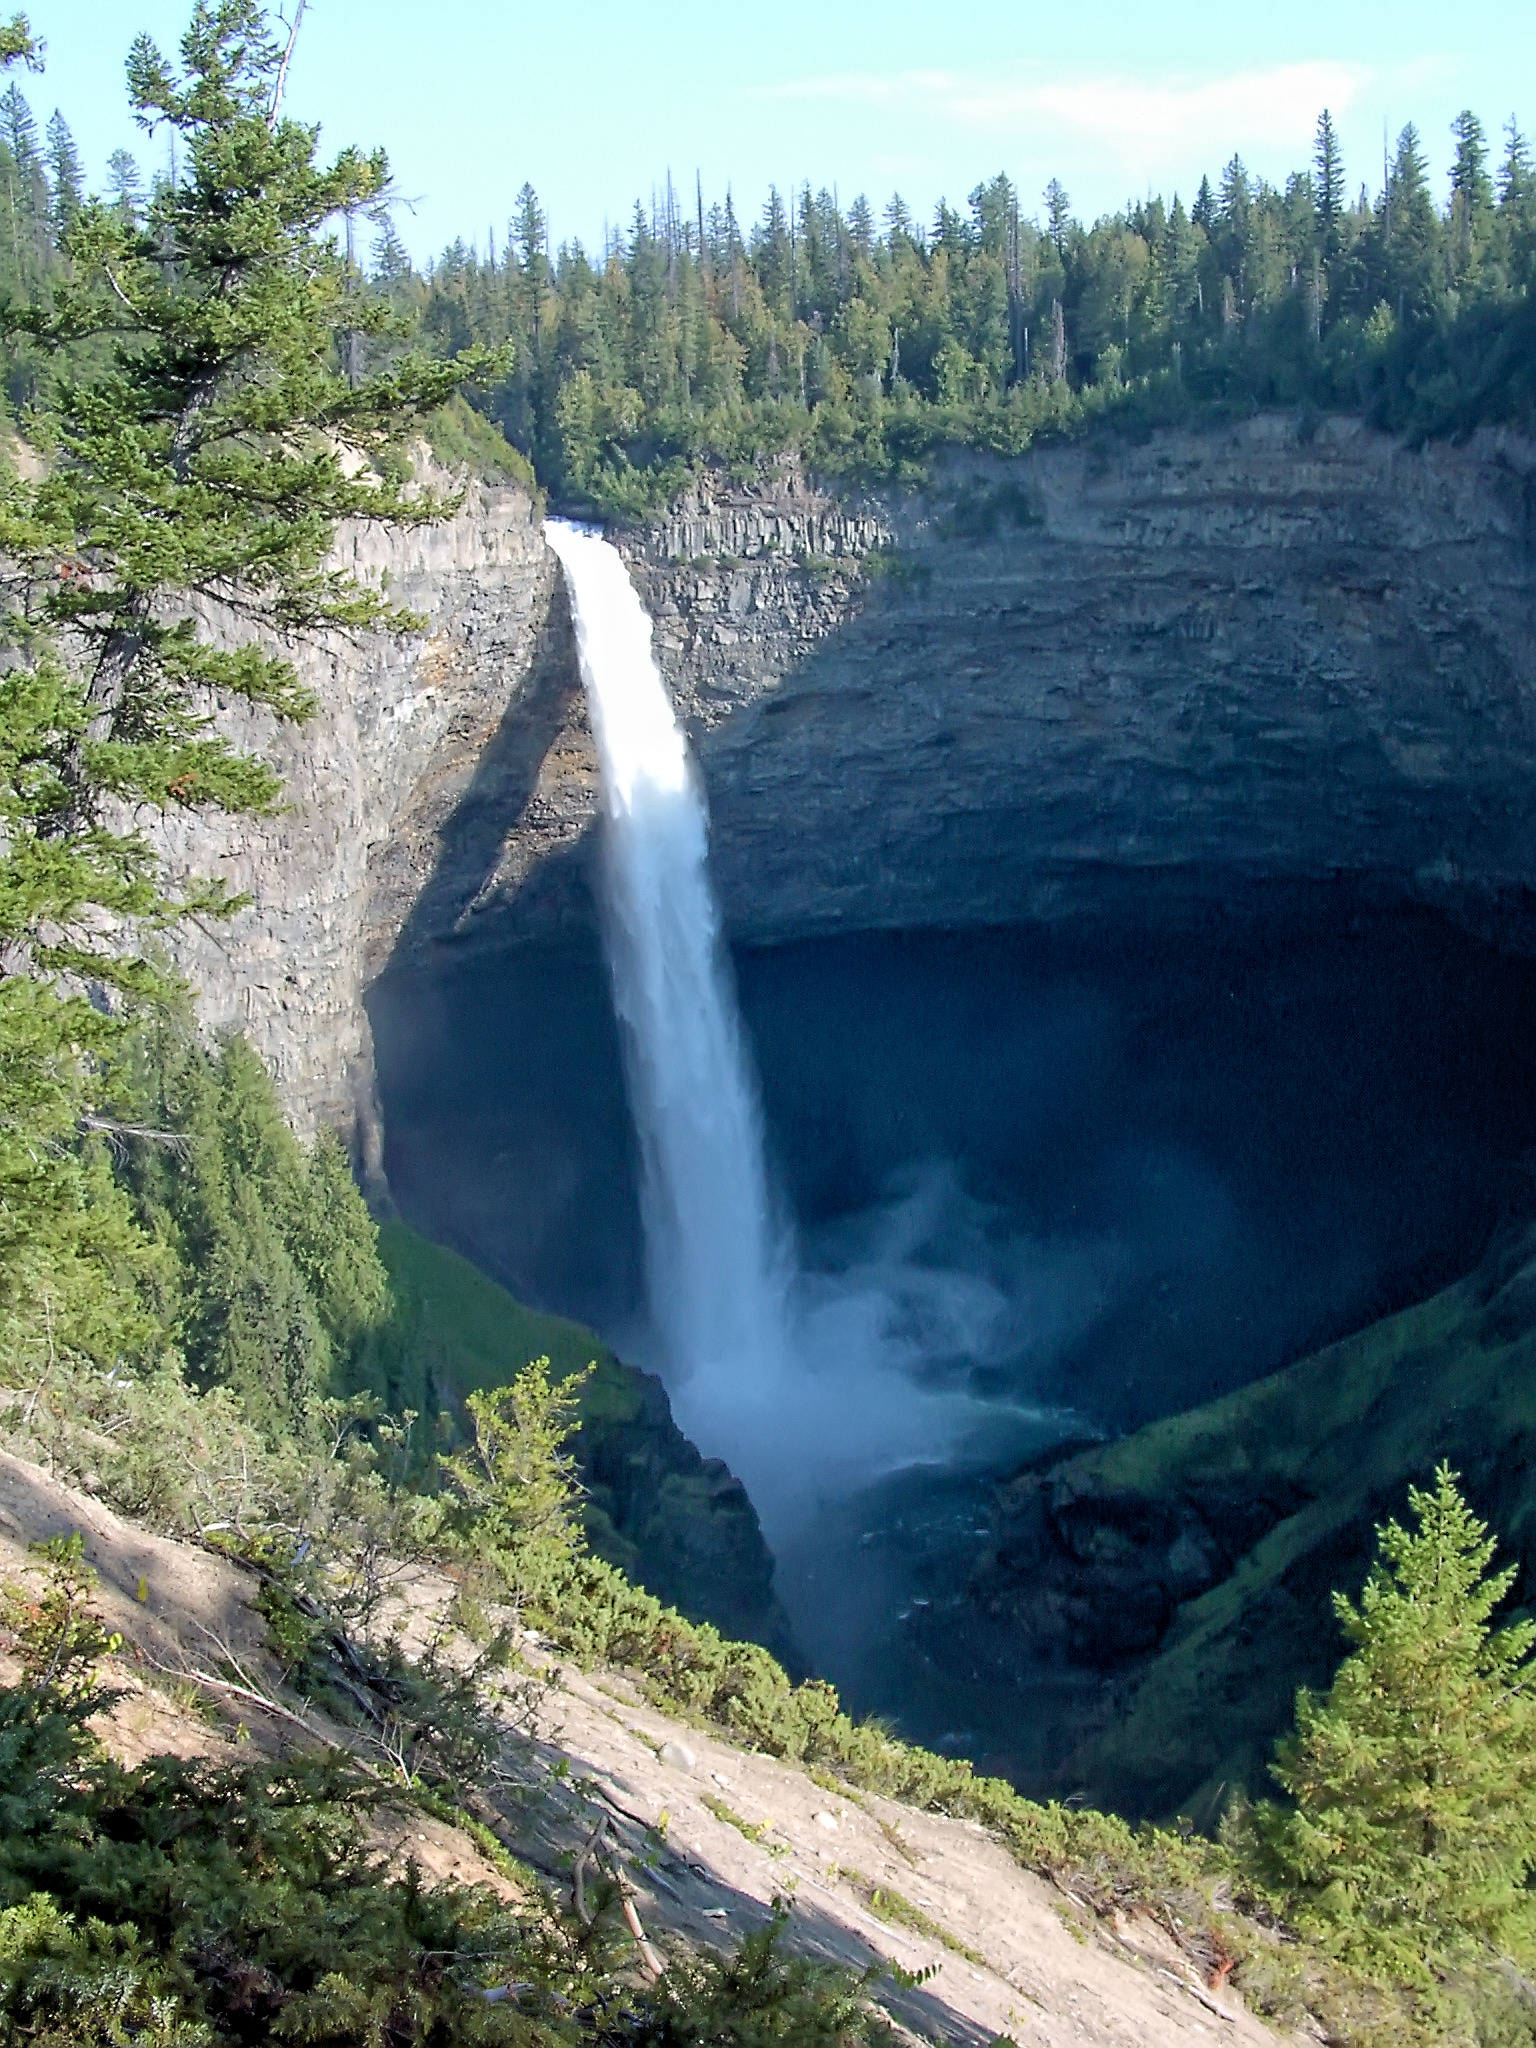
Helmcken Falls 141 m
If you are interested in this recommendable and well organized hiking tour, contact Wells Gray Adventures.
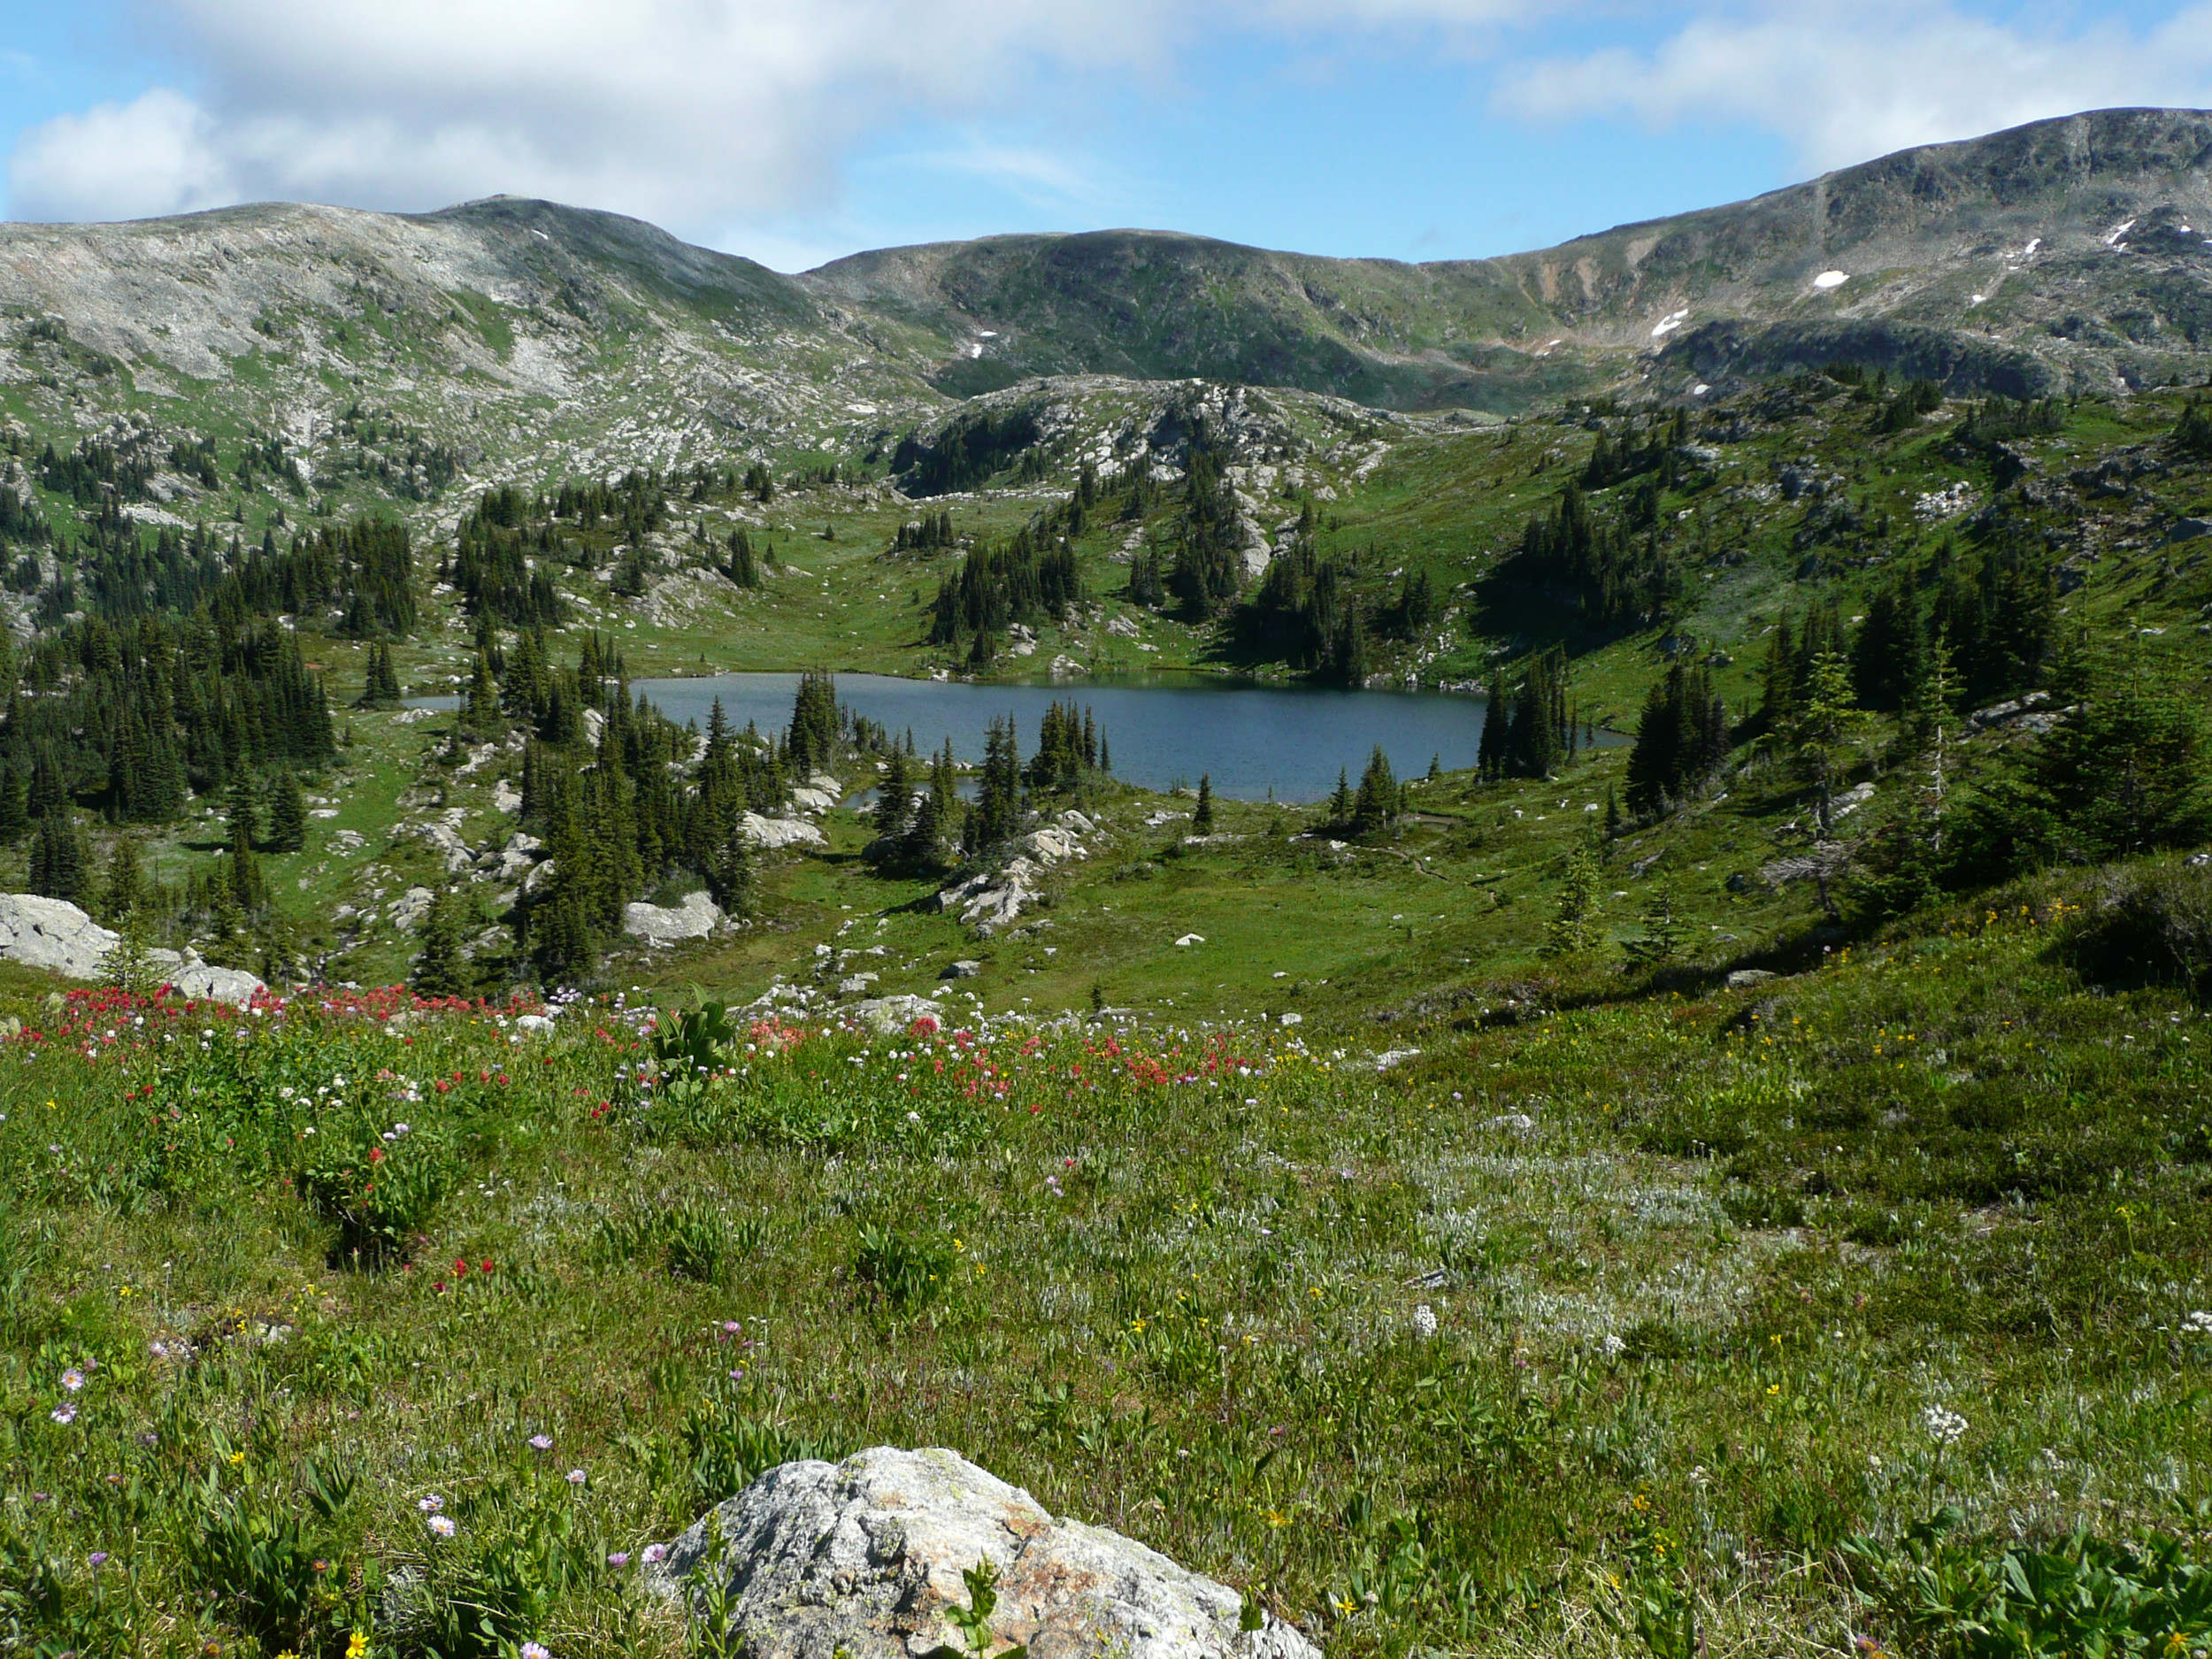
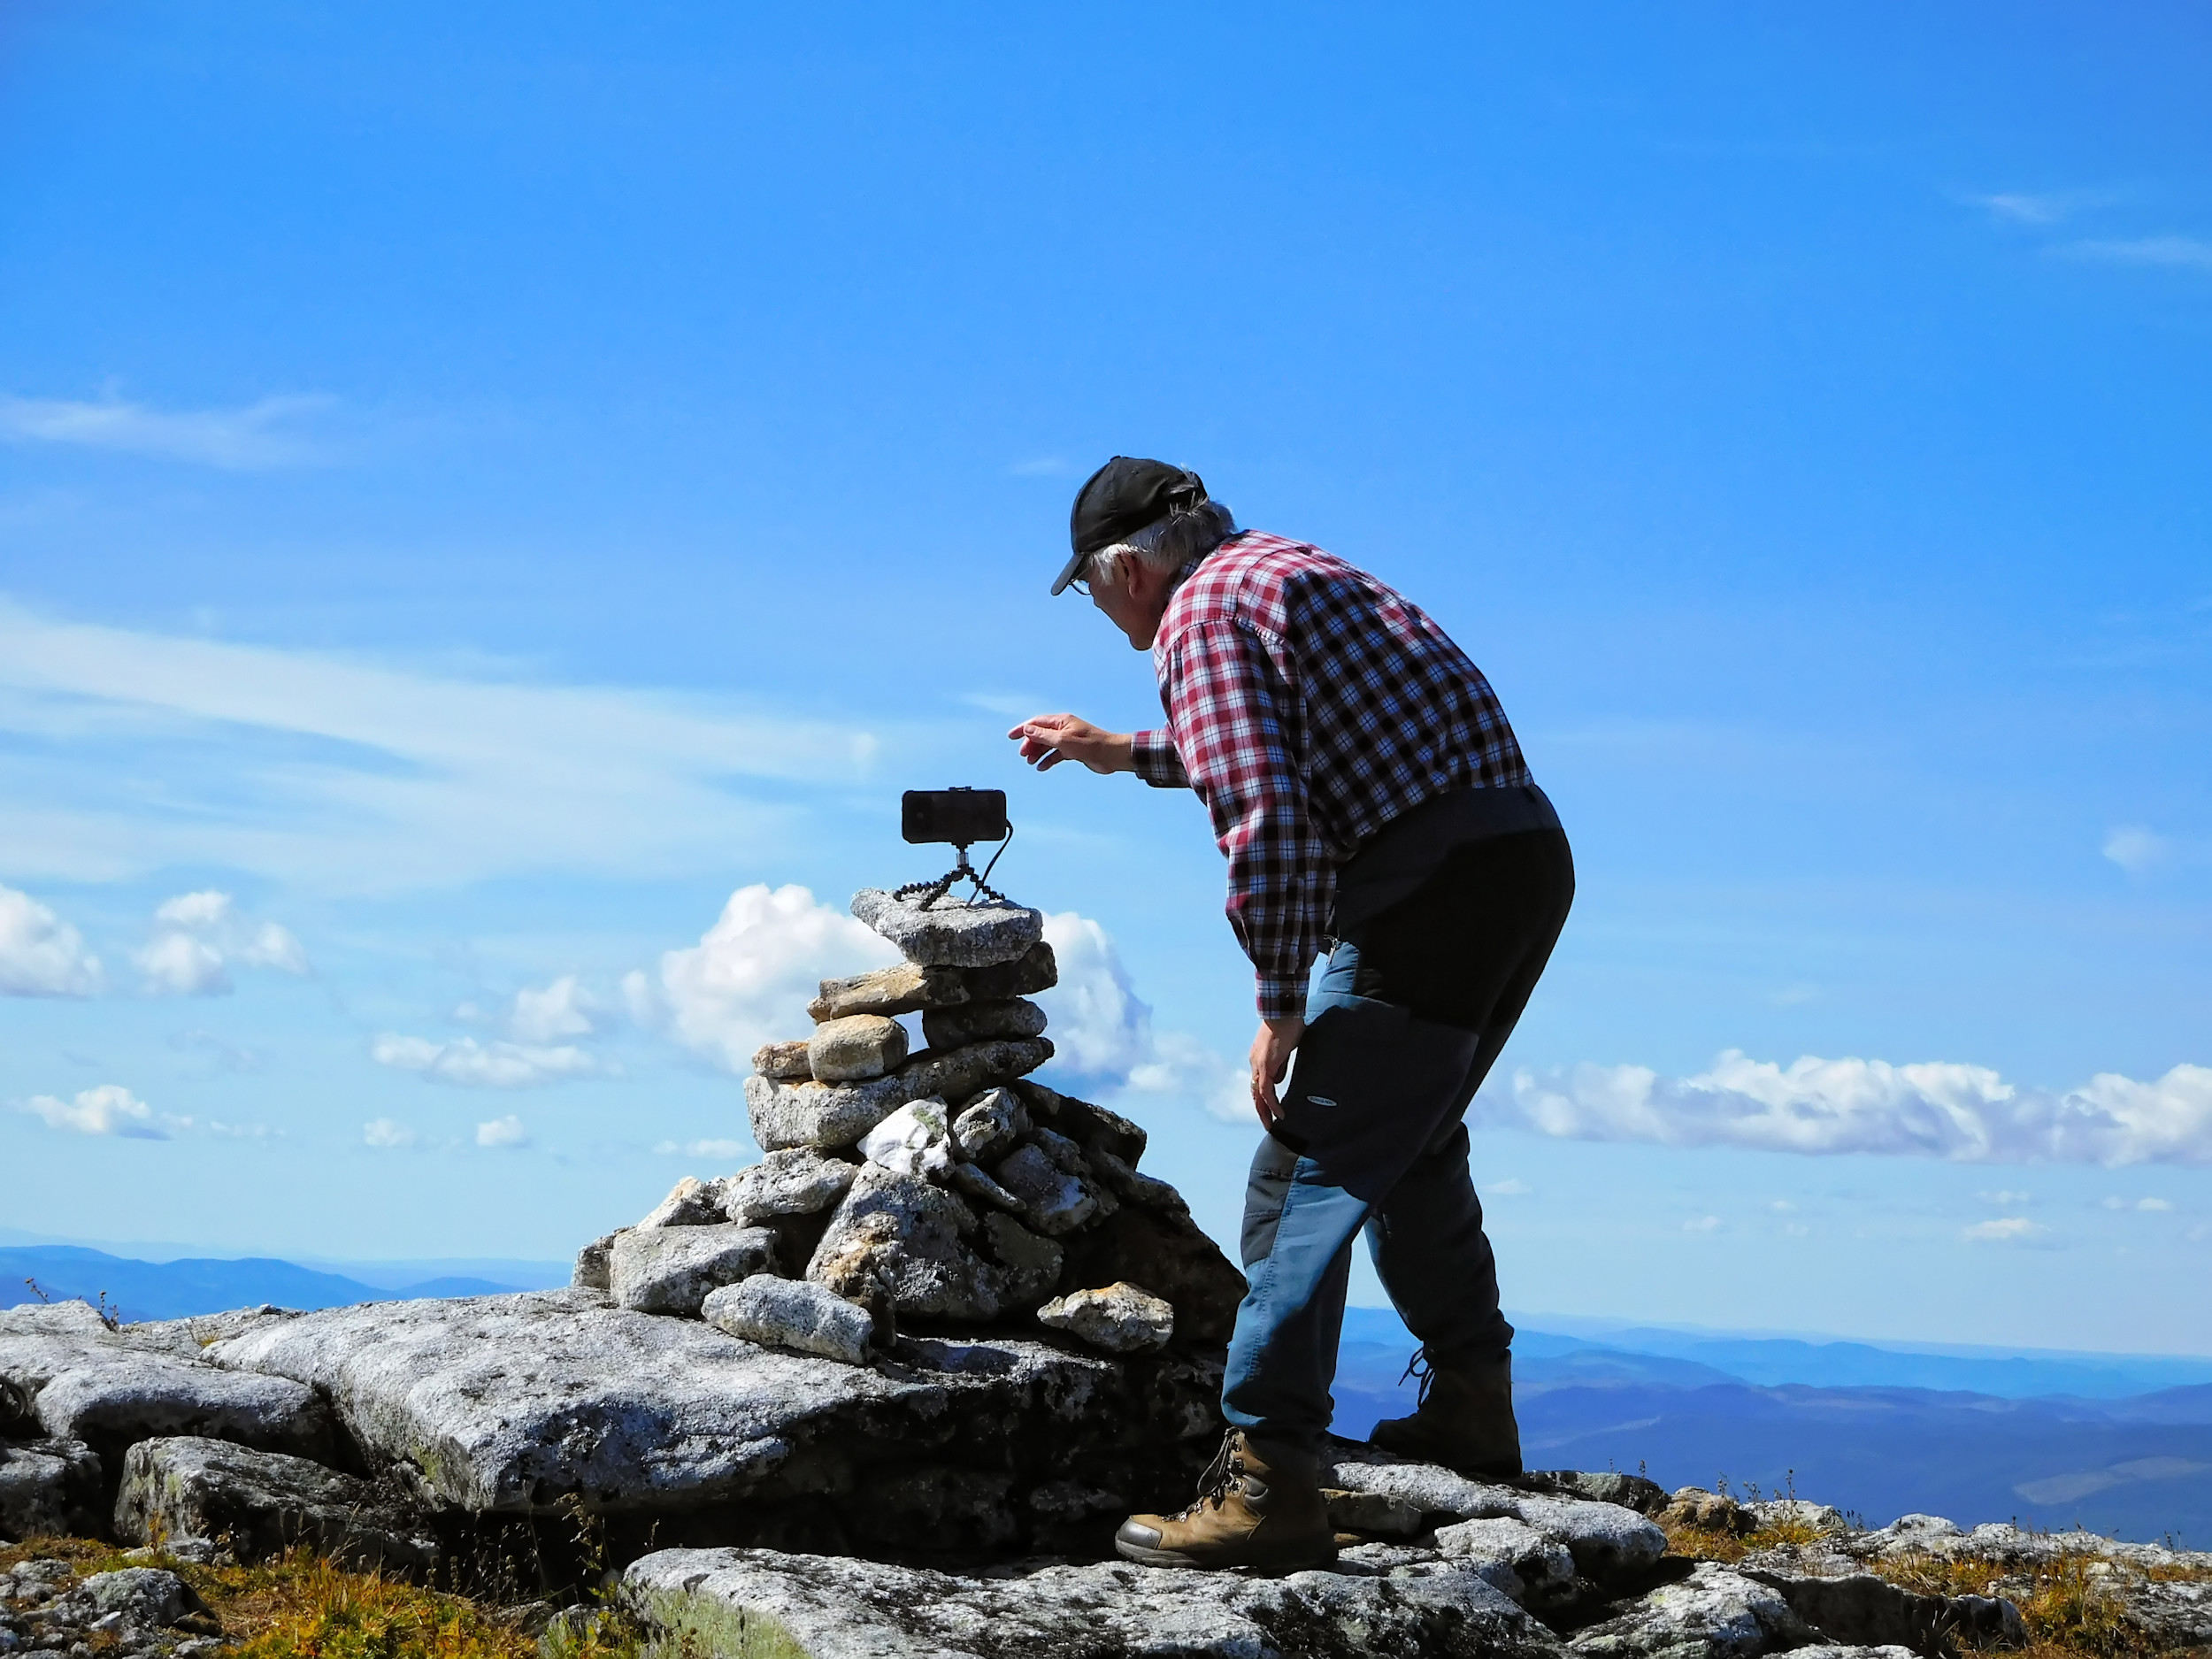
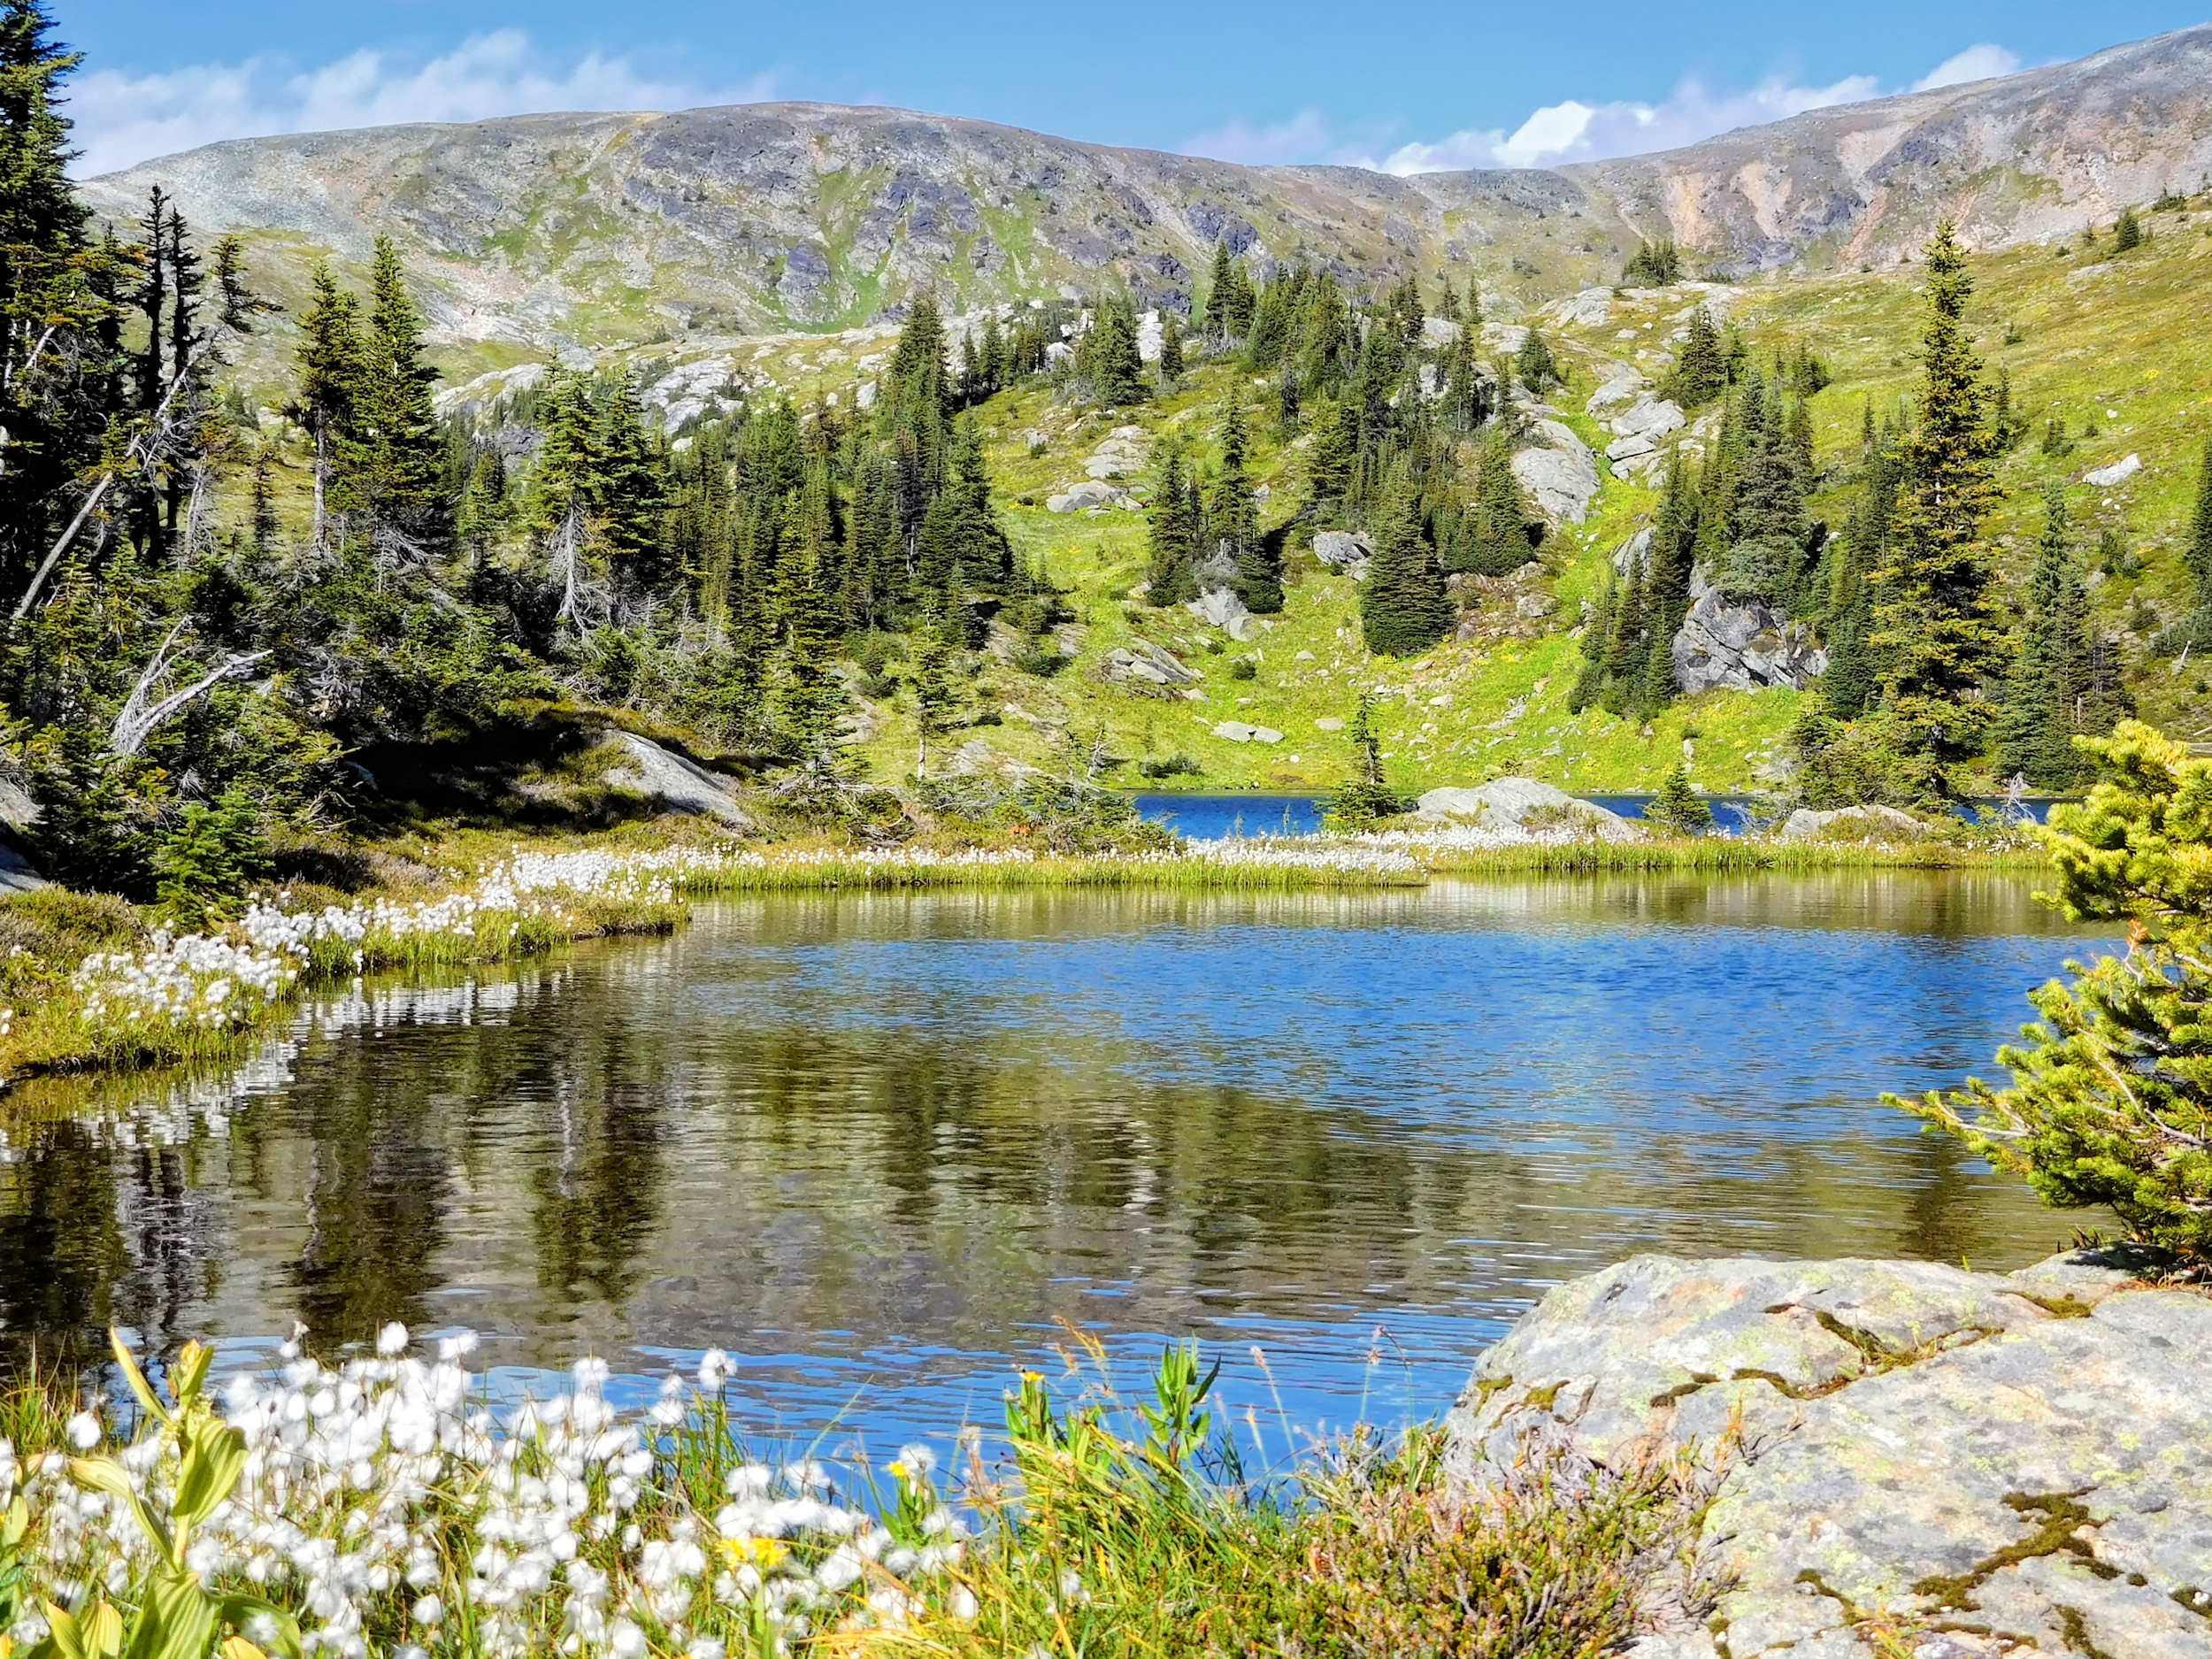
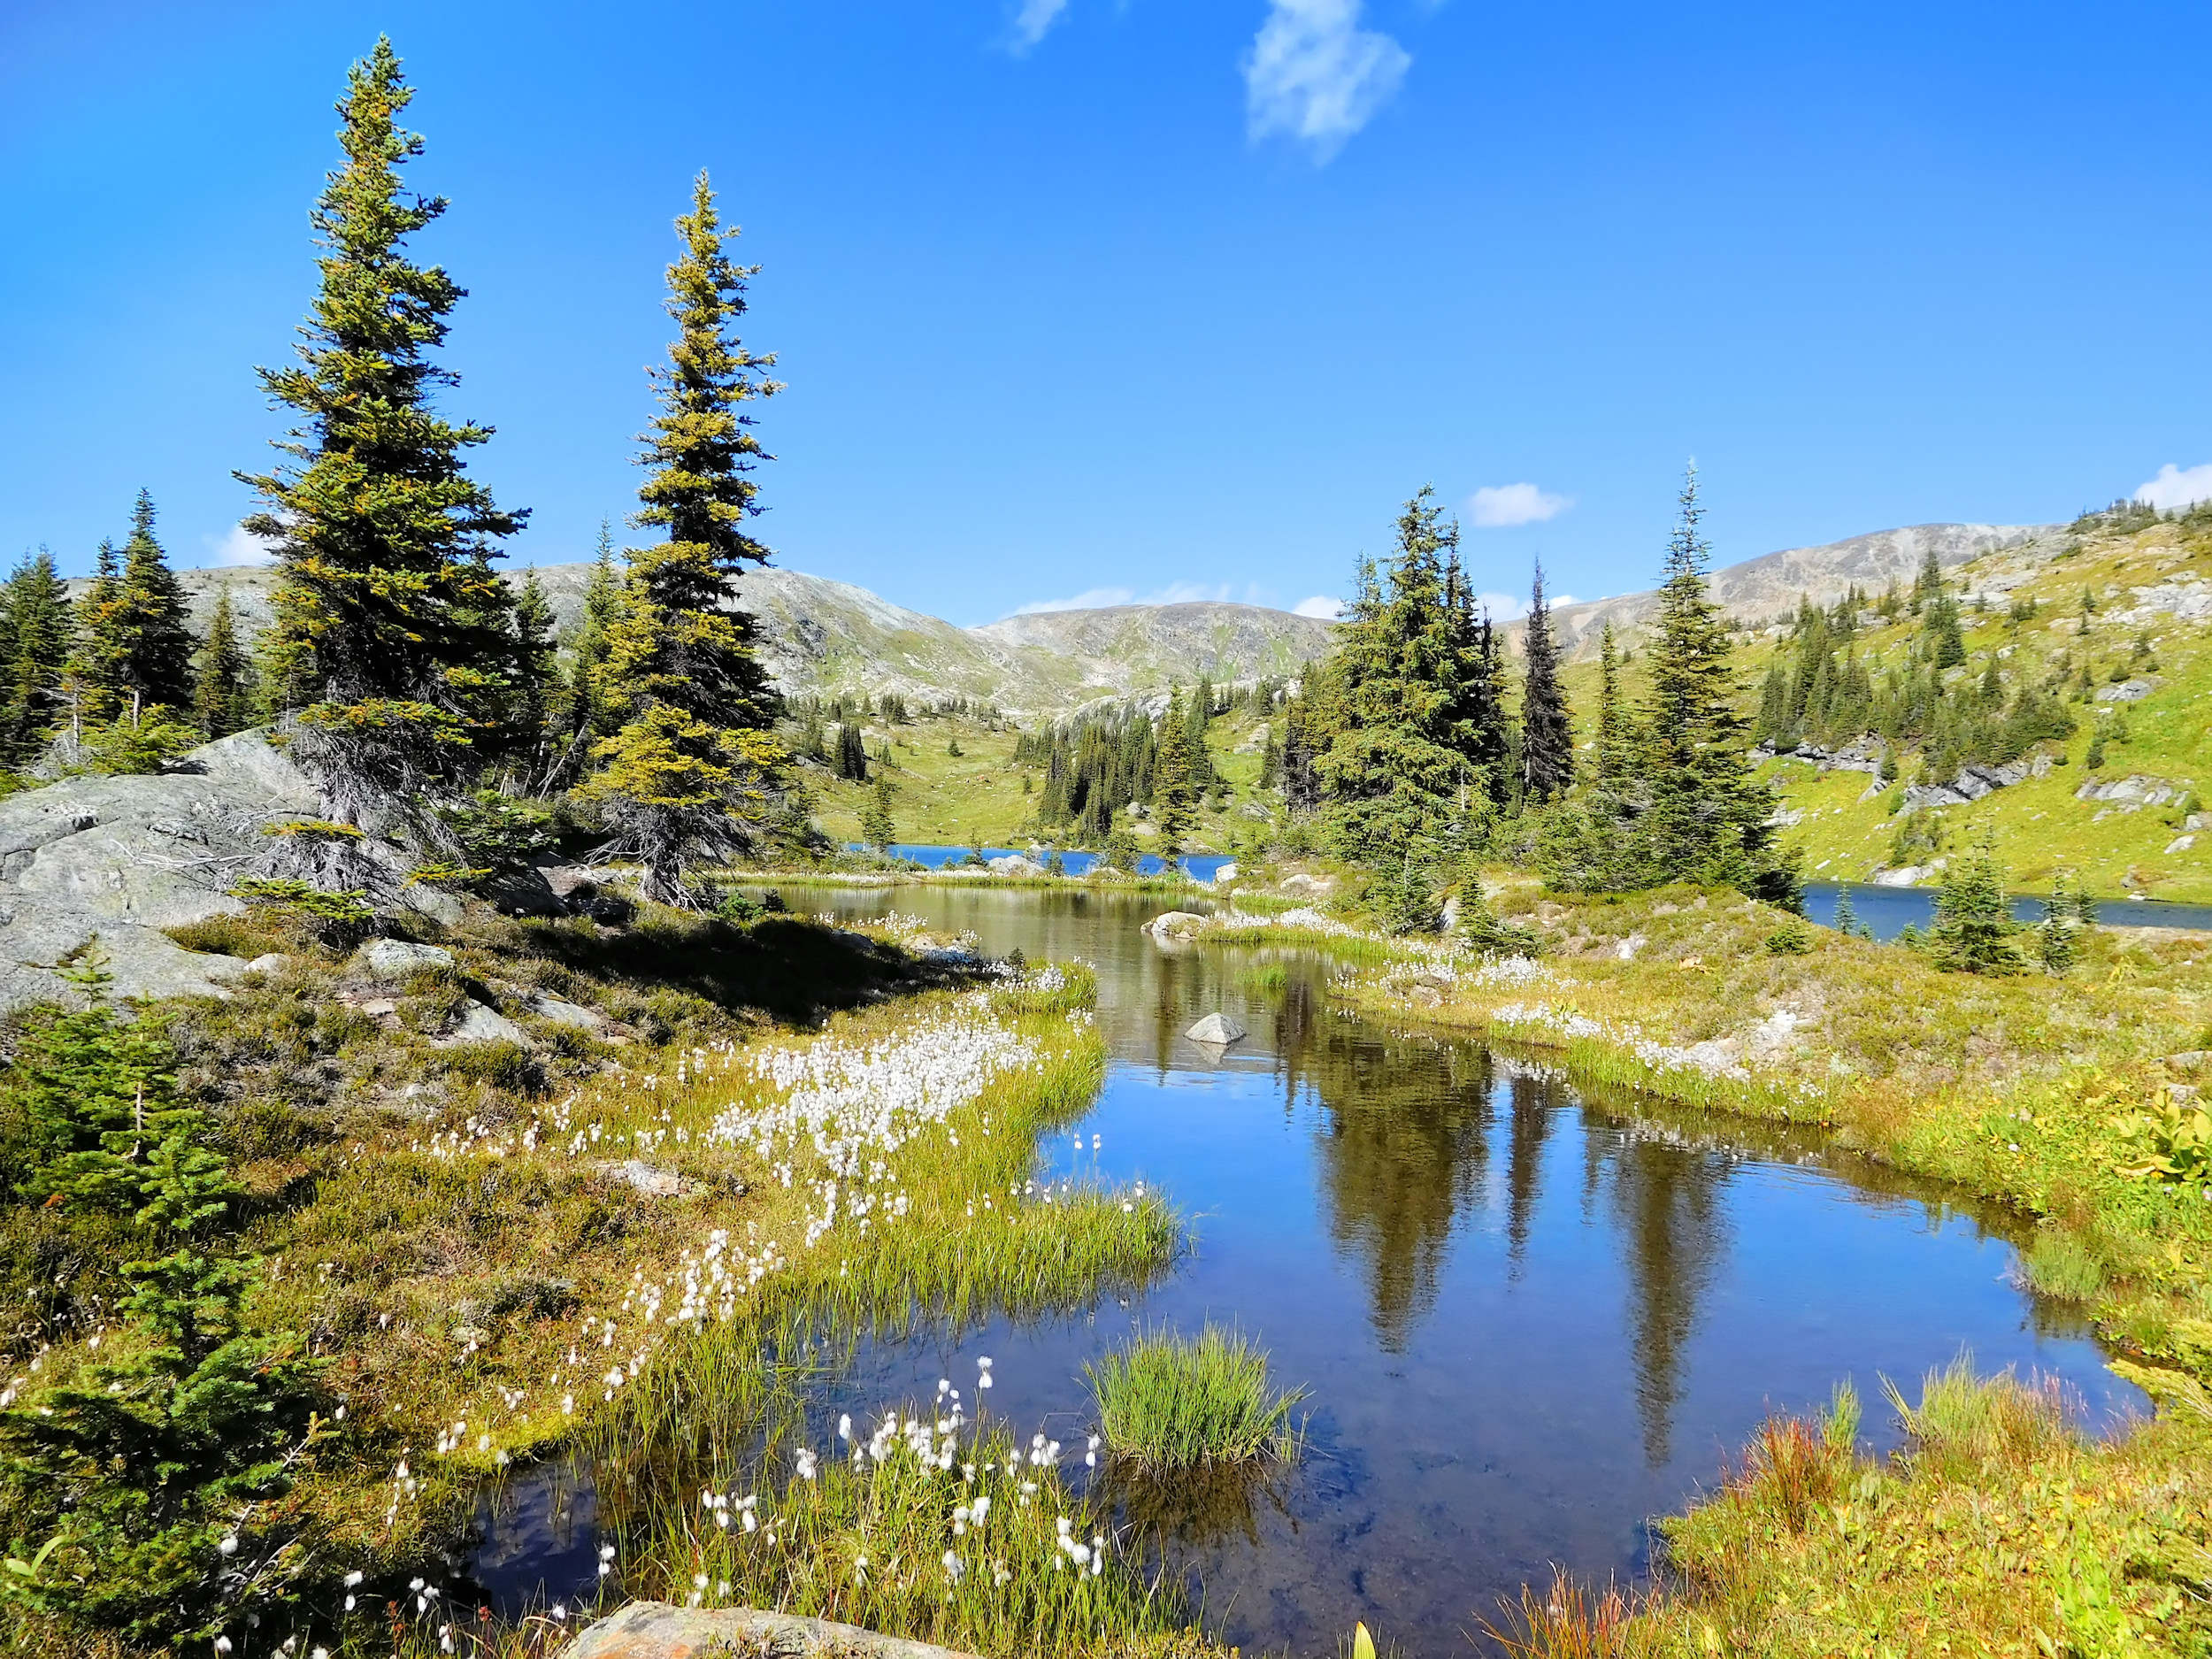
In the Trophy Mountains, there is a small campground at Sheila Lake. In August 2012, I take the opportunity to try out my new camping gear and to get a first feeling for solo camping in the backcountry.
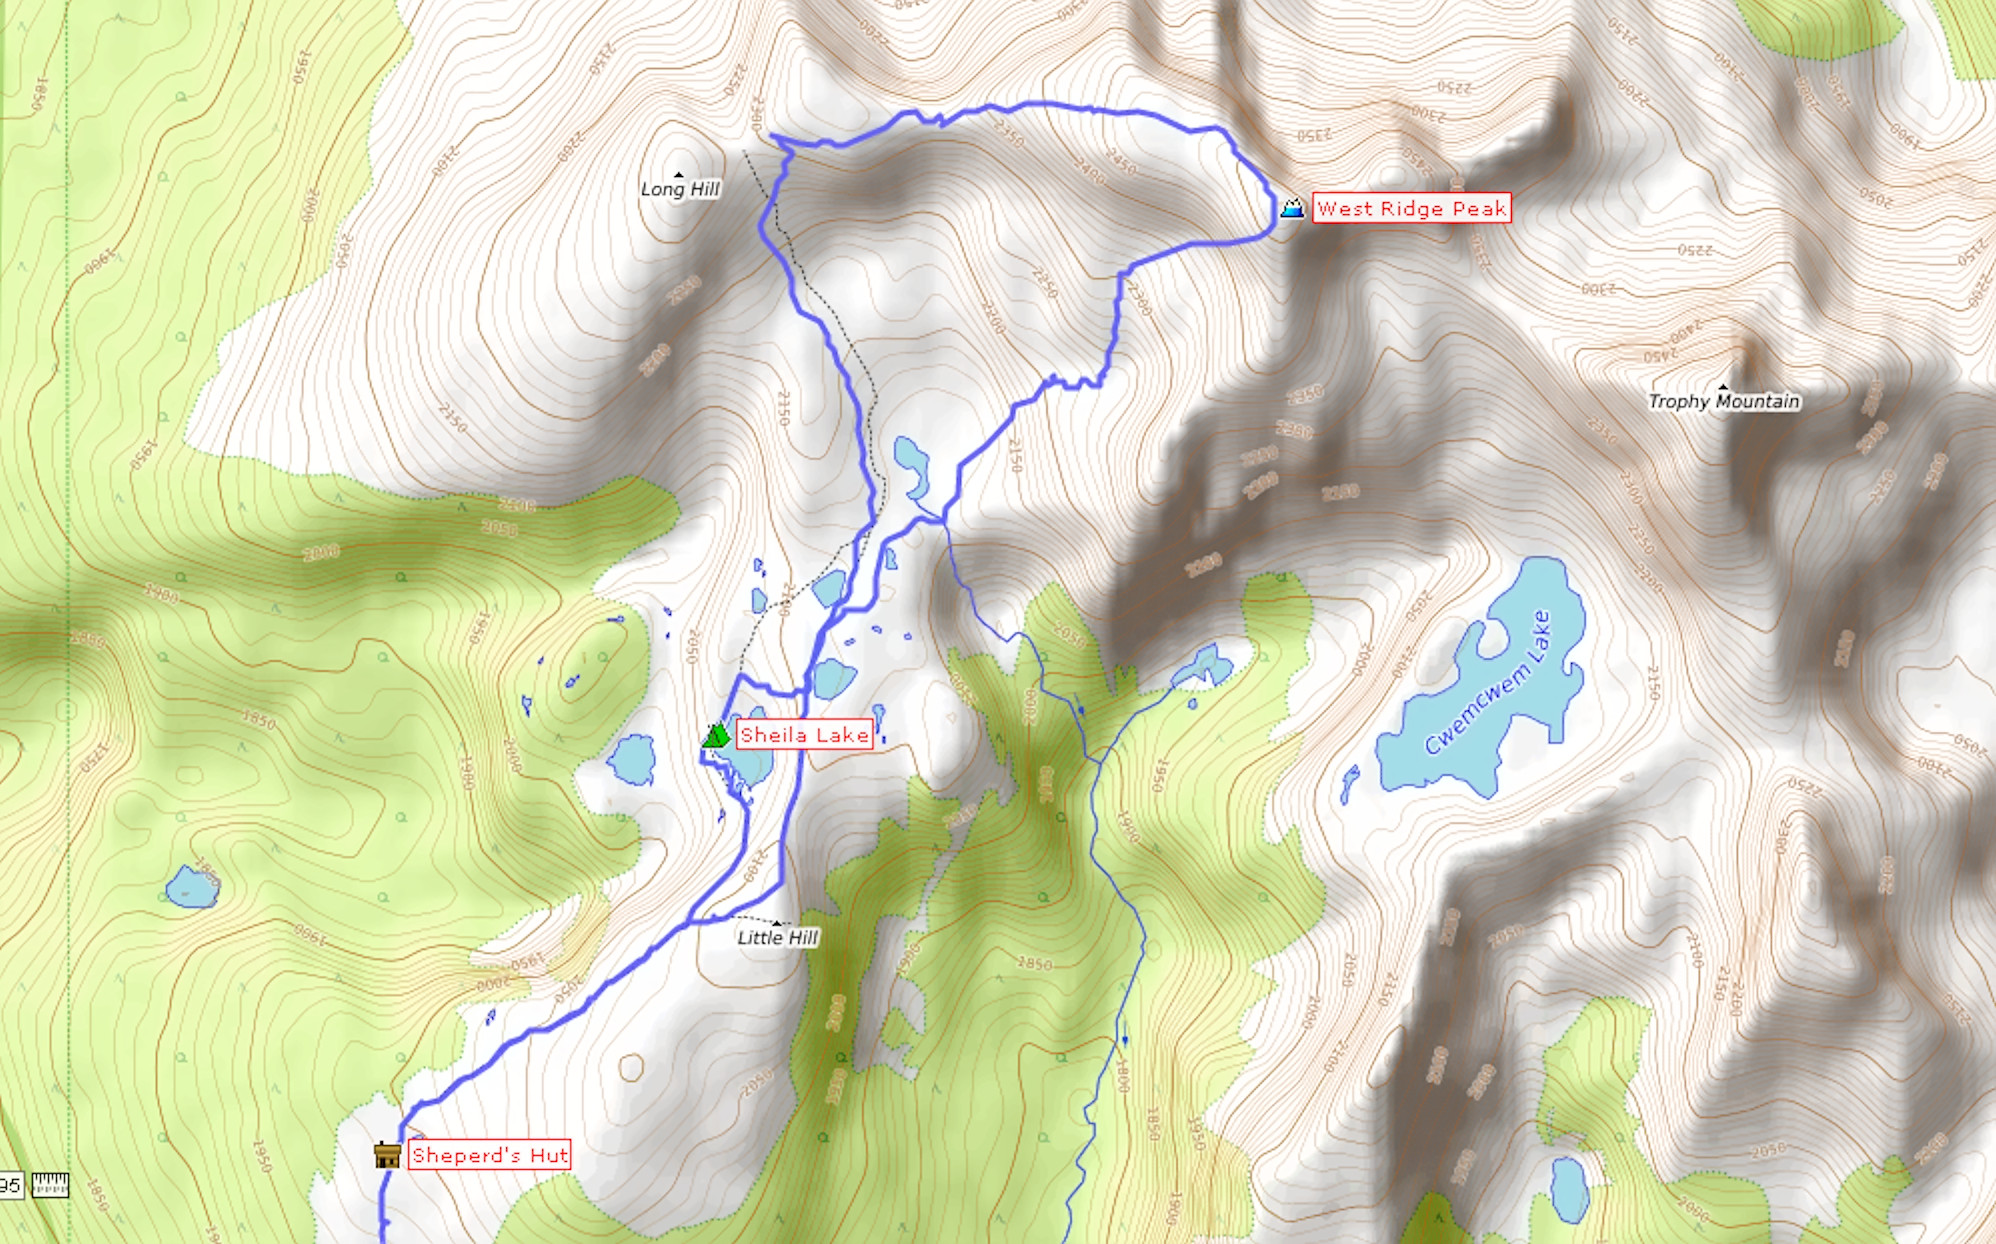
Staying overnight will also give me a lot of time to hike the so called Trophy Skyline. If started from the Trophy Mountain trailhead, this hike up and along the Trophy West Ridge to the West Summit takes over seven hours. Add two hours of driving each way, and it makes for an excessively long one-day trip. Spending the night gives me an extra day to cover the distance. From the trailhead to Sheila Lake it takes one-and-a-half hours and from there to the West Summit (and back) another four.
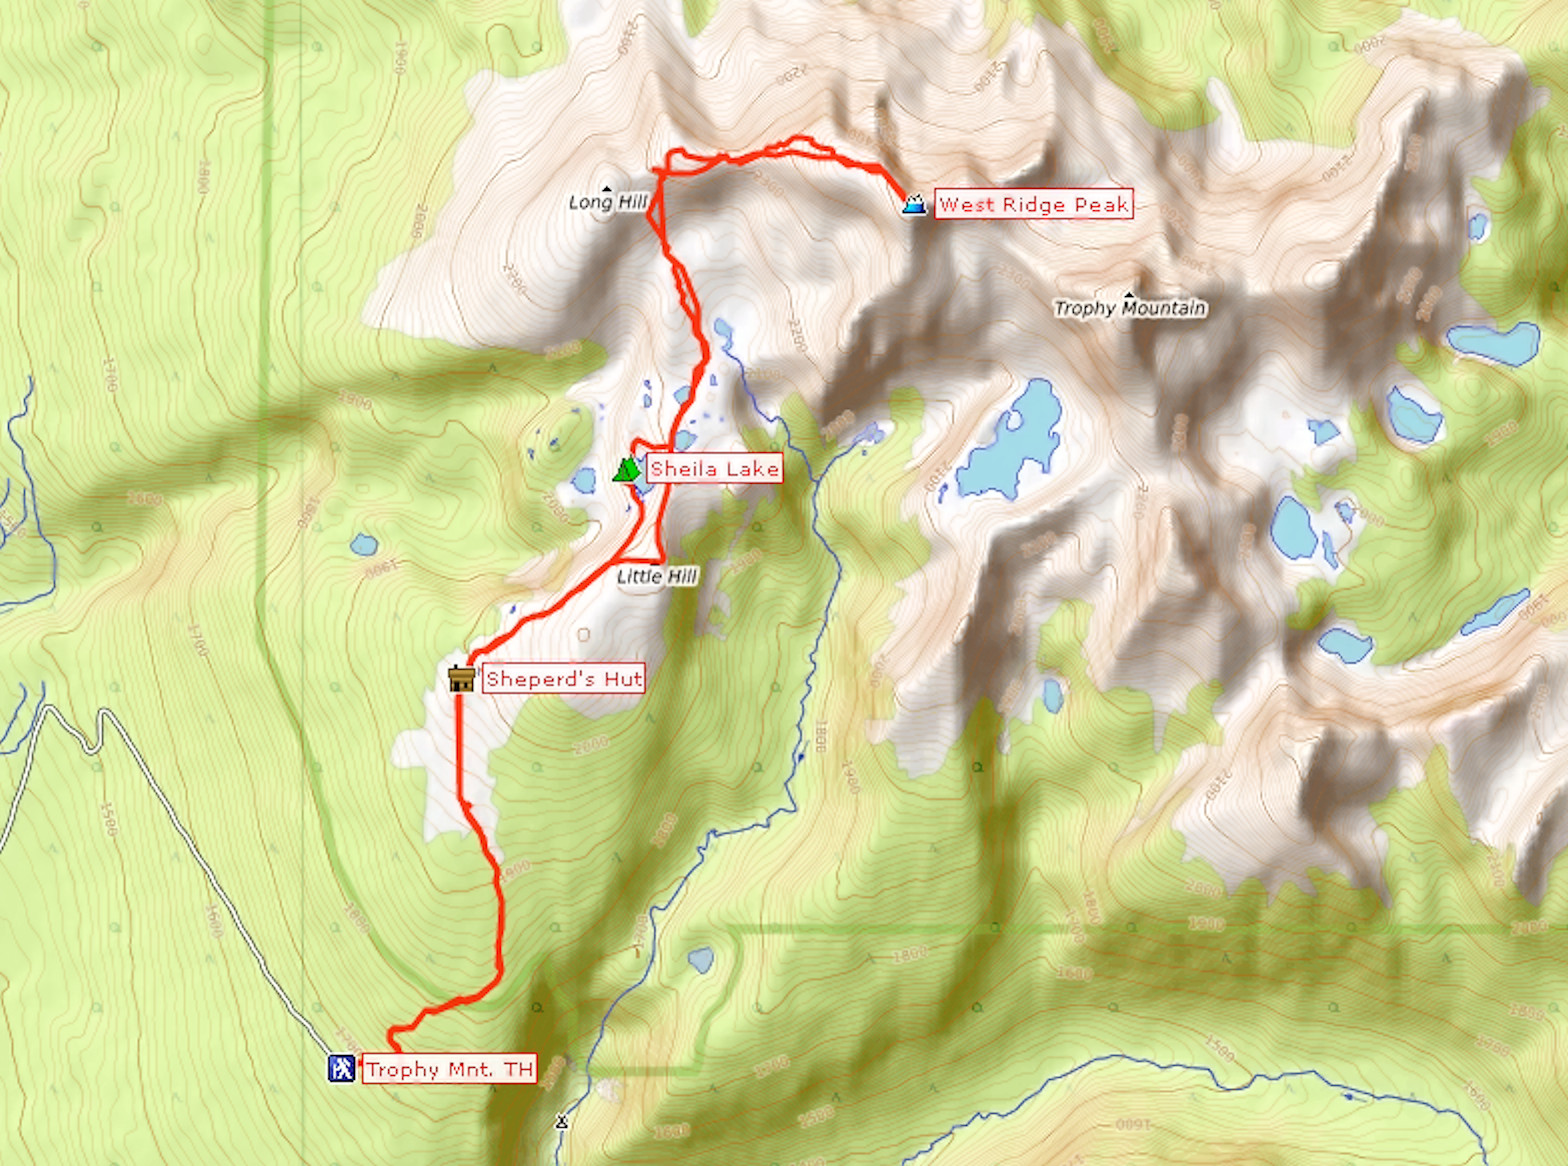
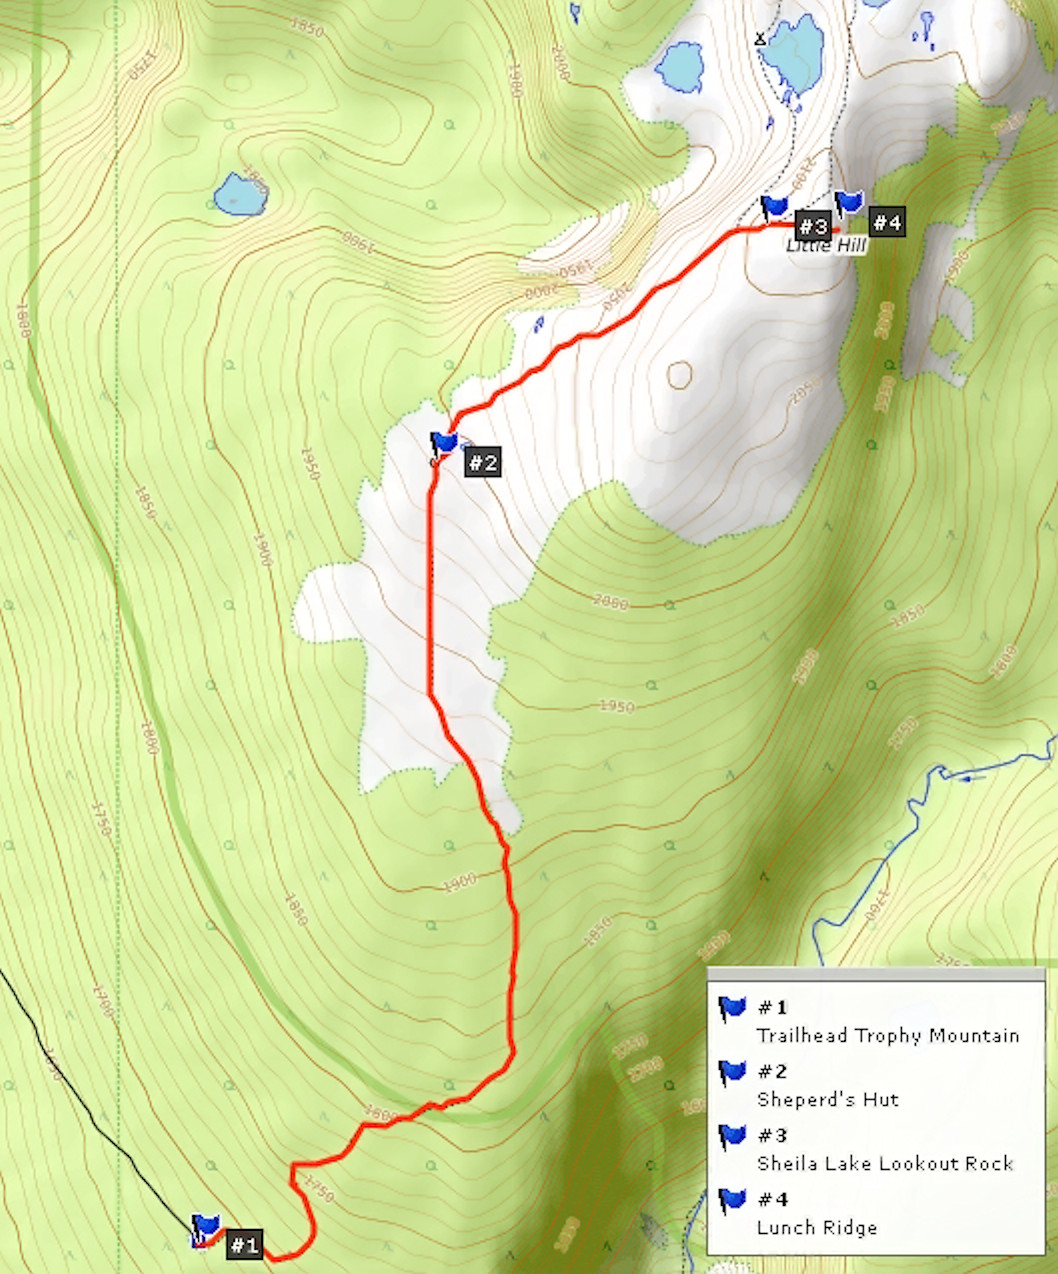
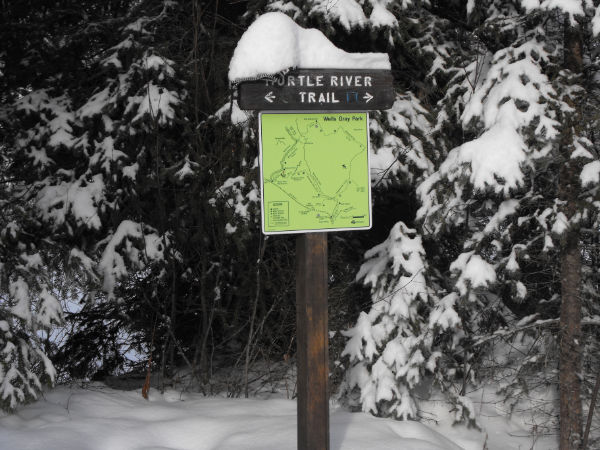
Mid-afternoon, I drive to the town of Clearwater and take the paved park road leading into Wells Gray Provincial Park. Just past the turnoff to Spahats Falls at kilometer 11.3, a rough logging road to the right leads steeply uphill. It takes me to the Trophy Mountain trailhead at an elevation of 1690 meters. The trail begins across from the large information sign; I shoulder my backpack and head out.
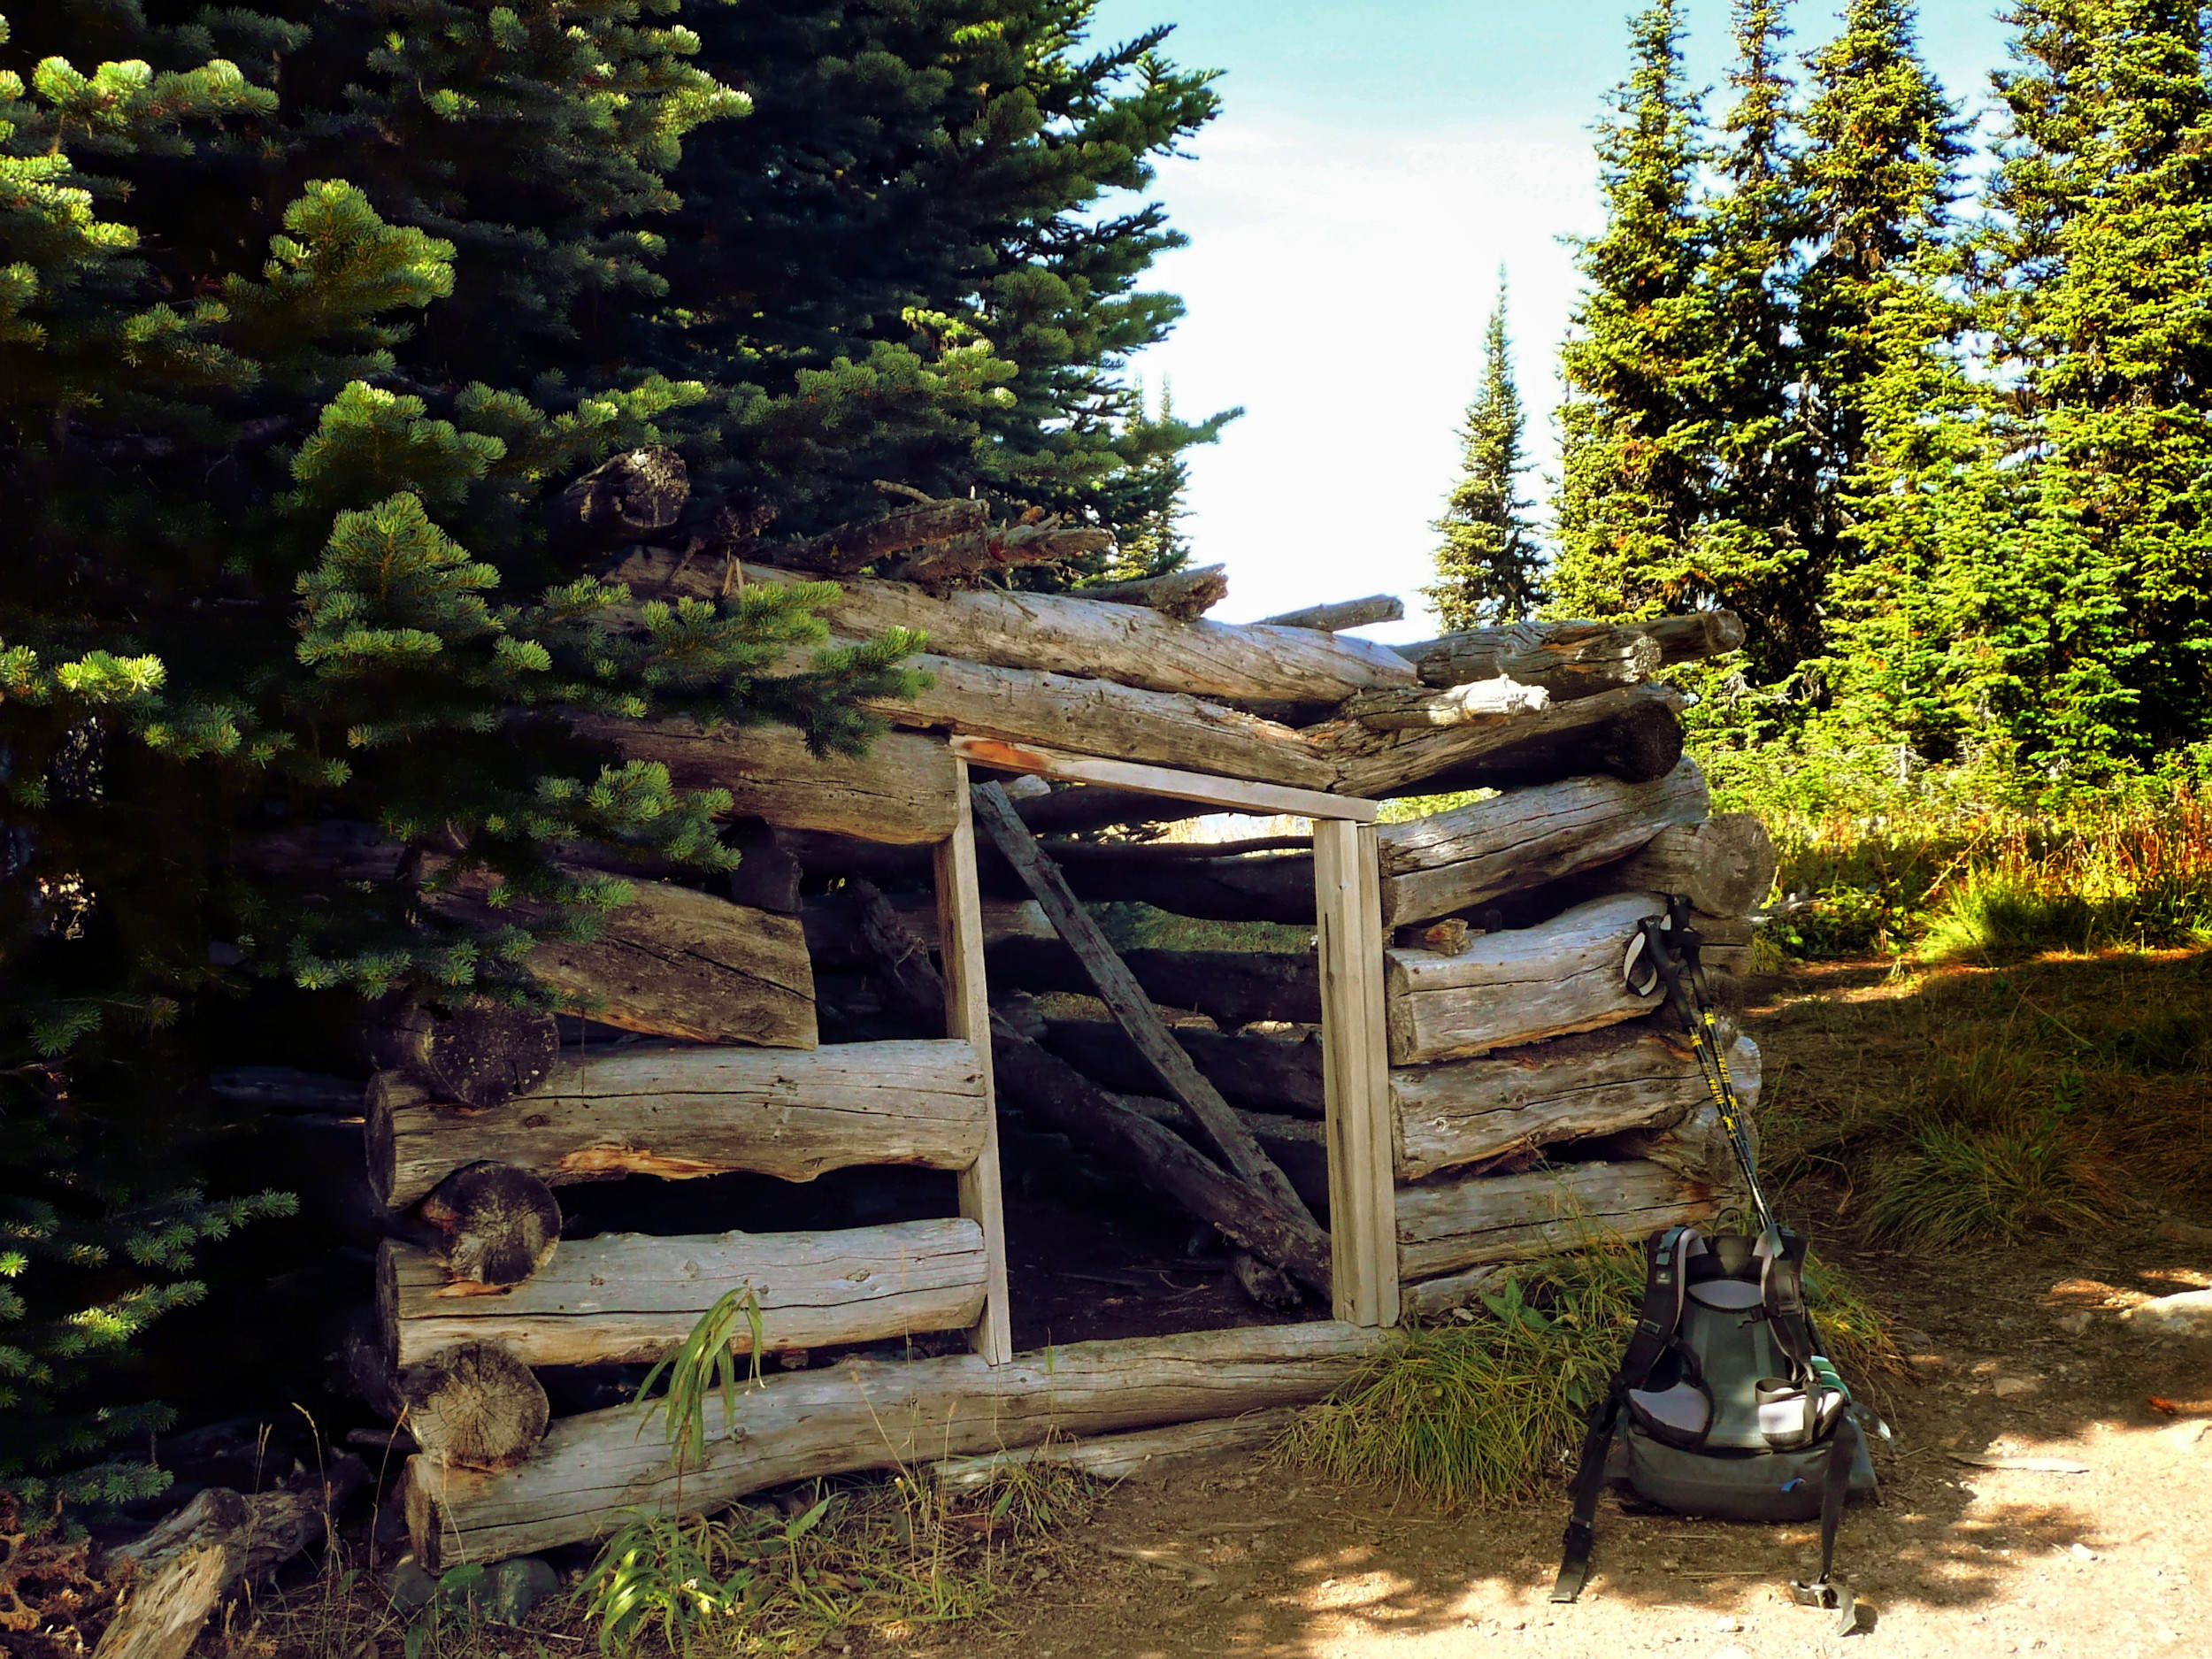
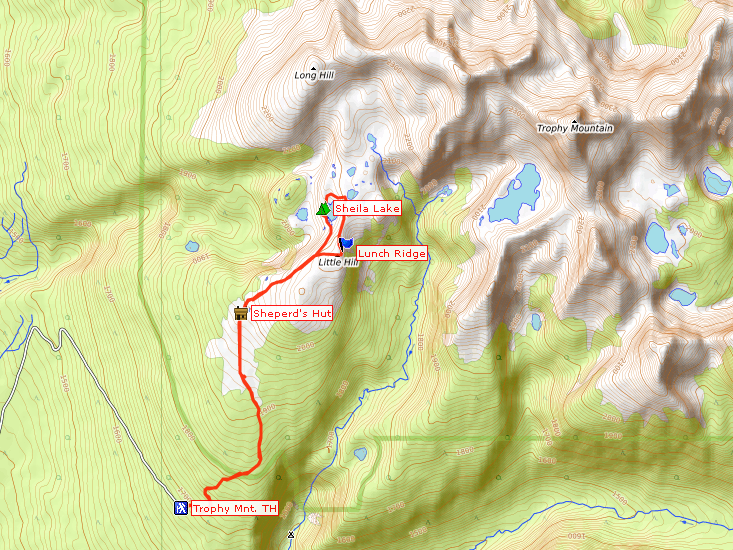
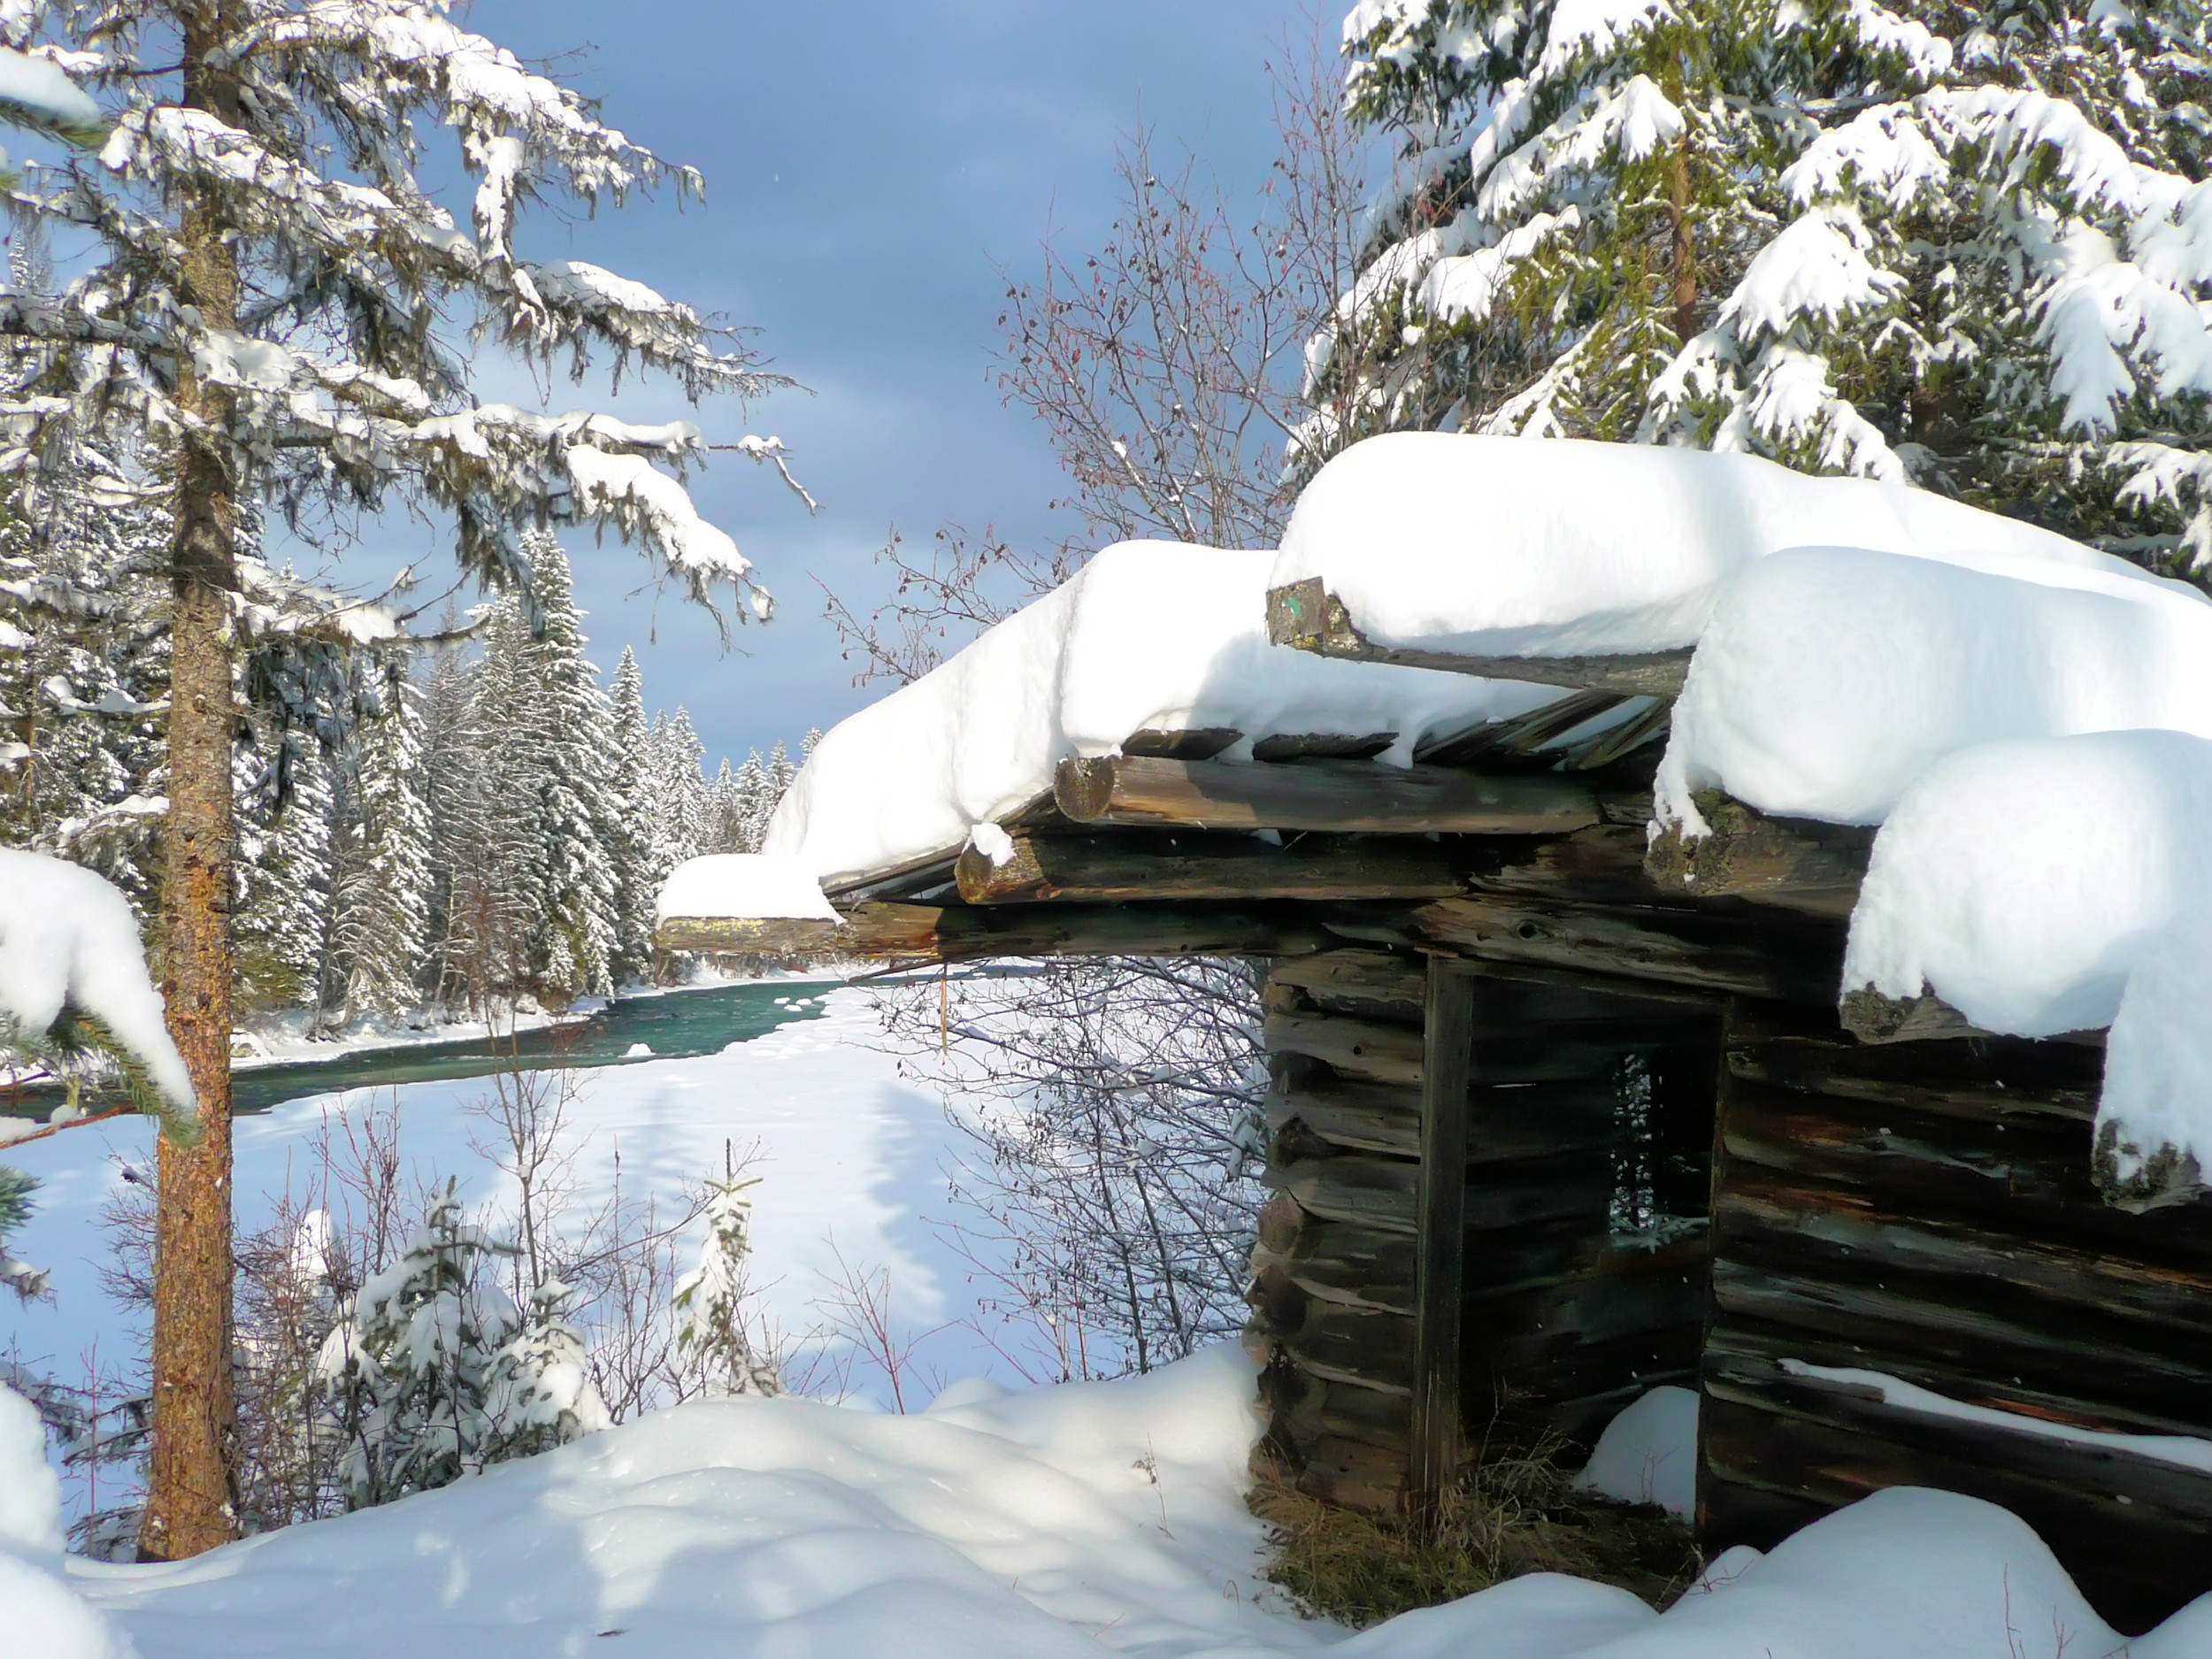
Shepherd’s Hut
After fifteen minutes, I have left behind the old clear-cut that surrounds the access road and I enter a belt of intact forest. The trail is steep and this is all the more noticeable to me, because for the first time I am hiking it with a fully loaded backpack. Fortunately, it takes only forty minutes to reach the treeline, where the trail levels somewhat. That late in the afternoon I don’t meet many other hikers. A few are returning from their trip to the mountain and wish me luck for my solo trip. After another twenty minutes I arrive at the Shepherd’s Hut, a derelict shelter built in the 1950s by some shepherds who originated from Austria and used to graze their sheep in the surrounding meadows.
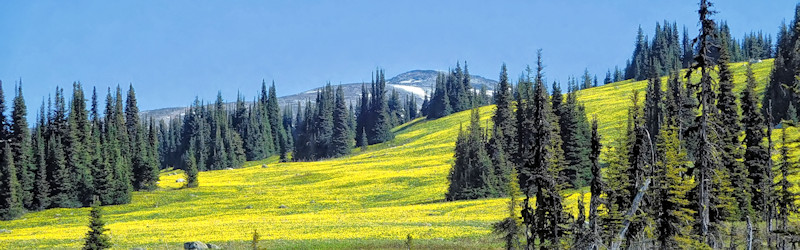
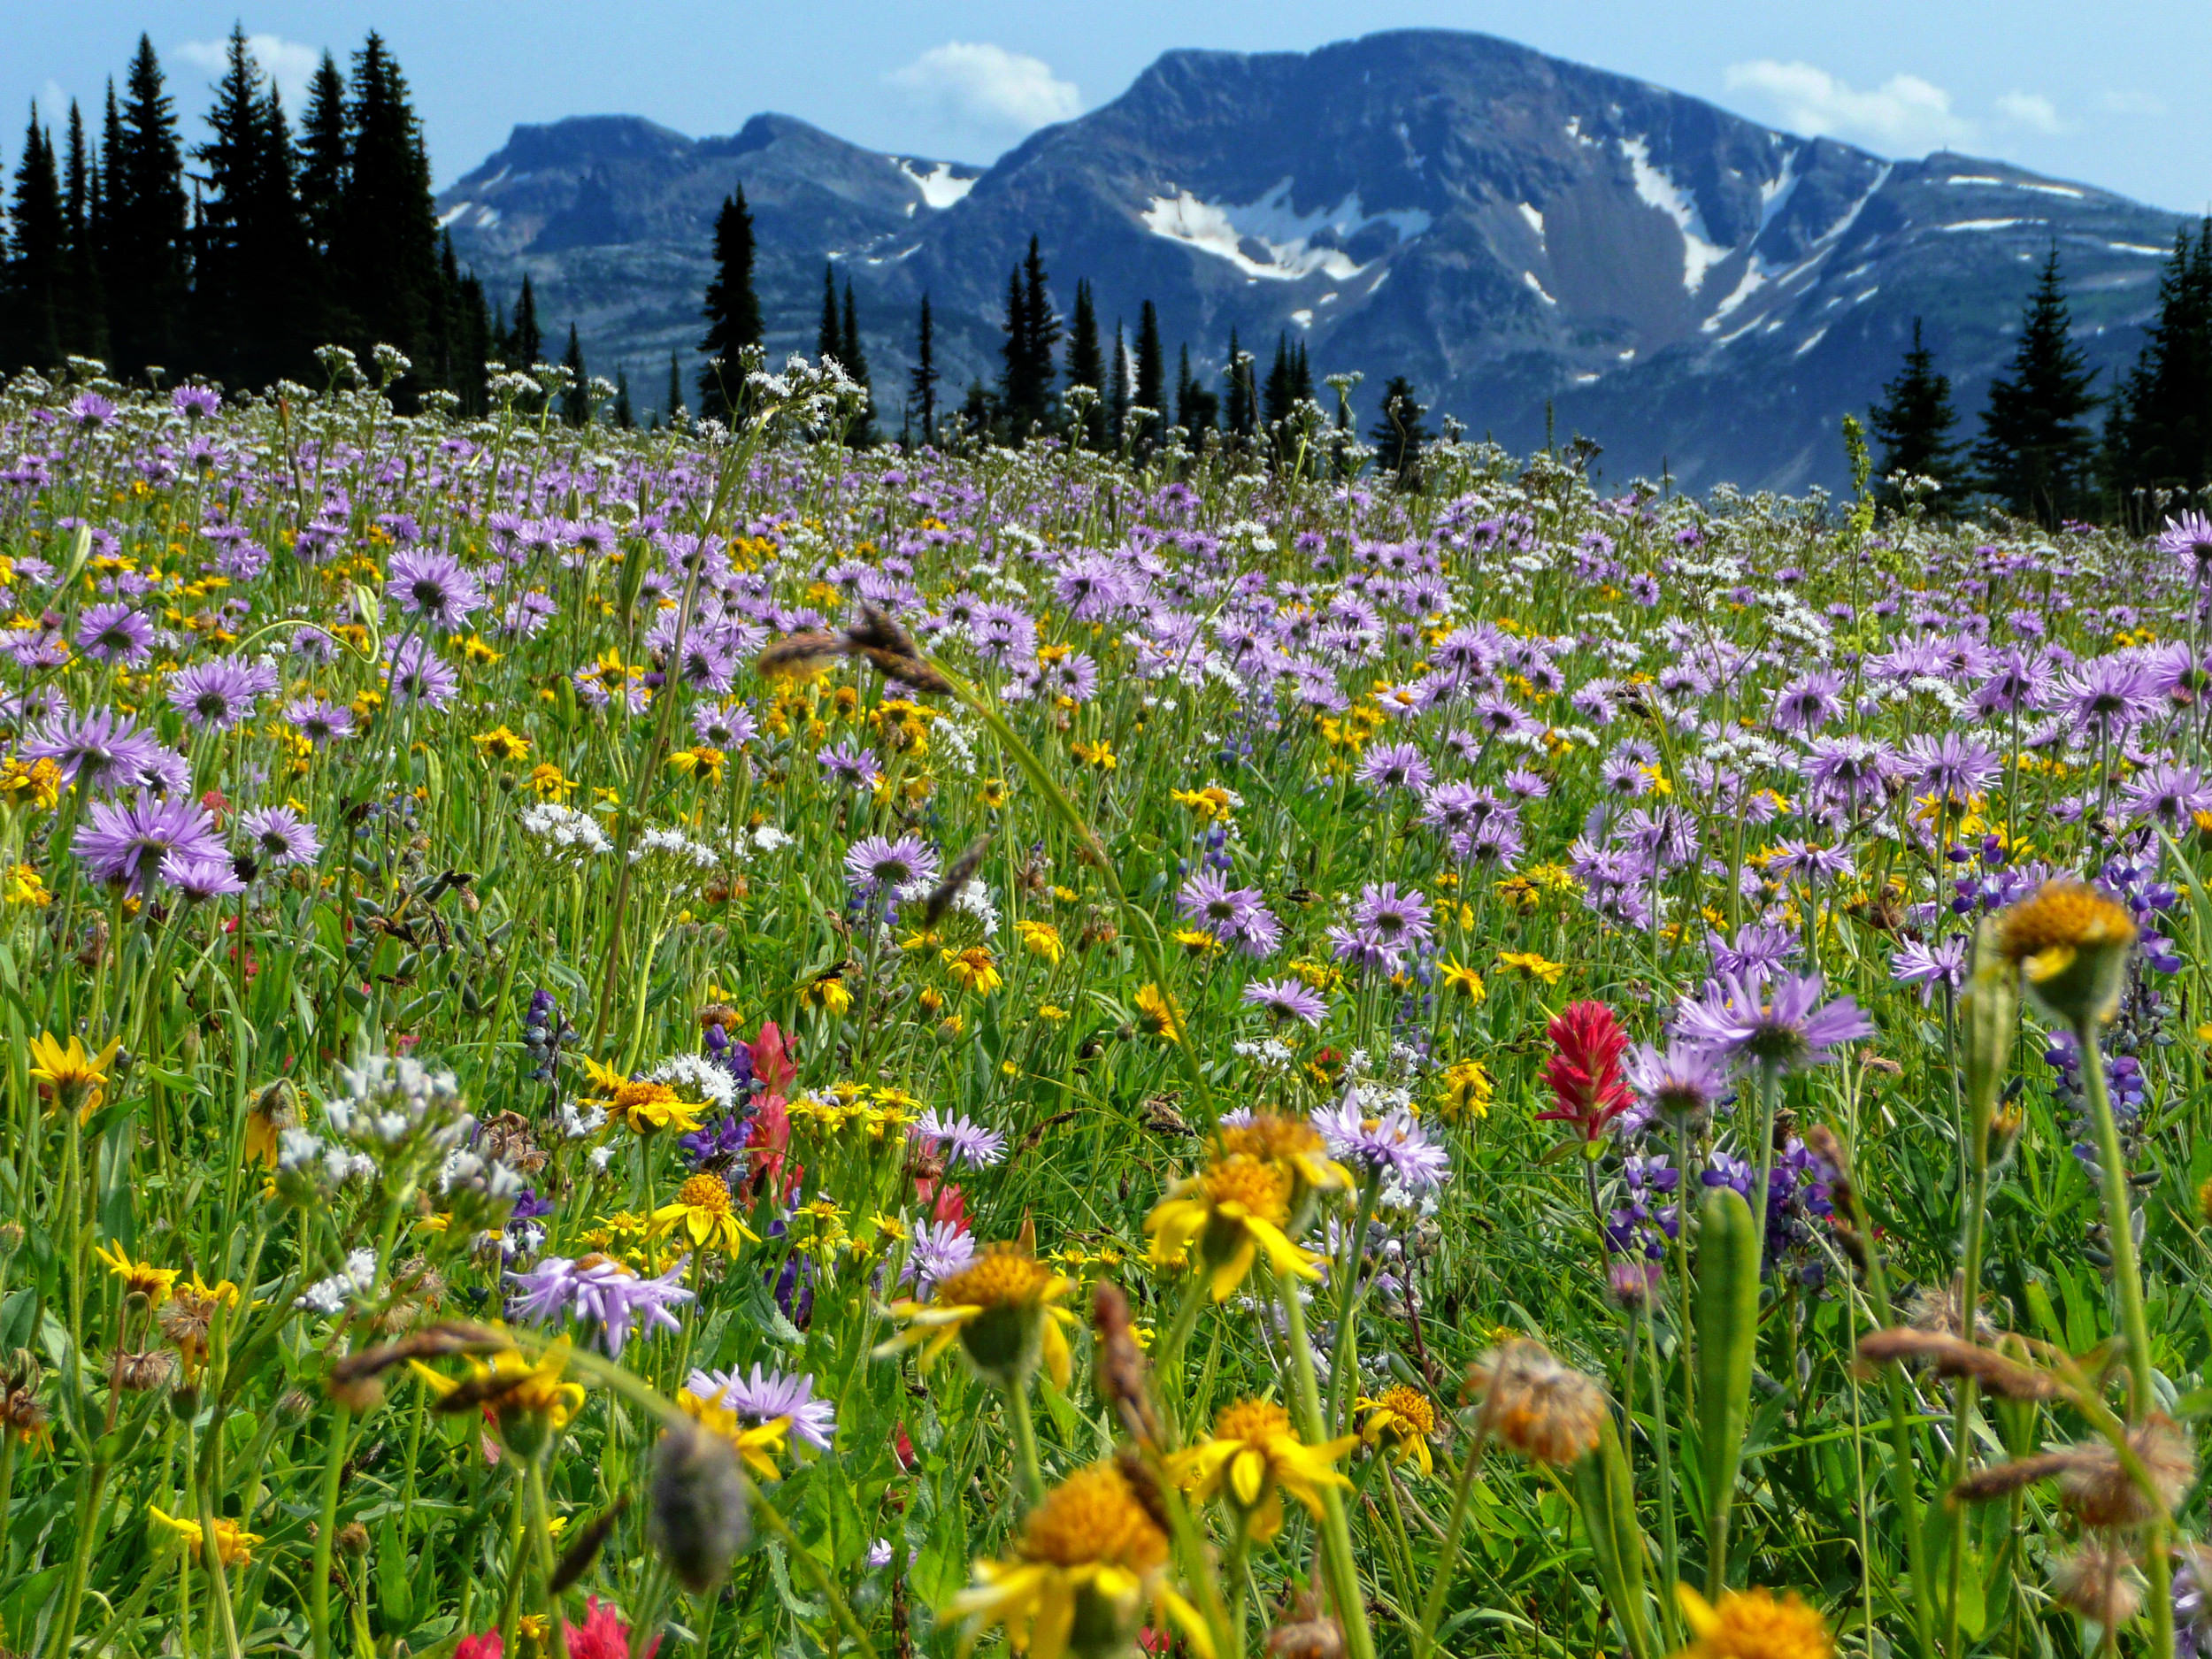
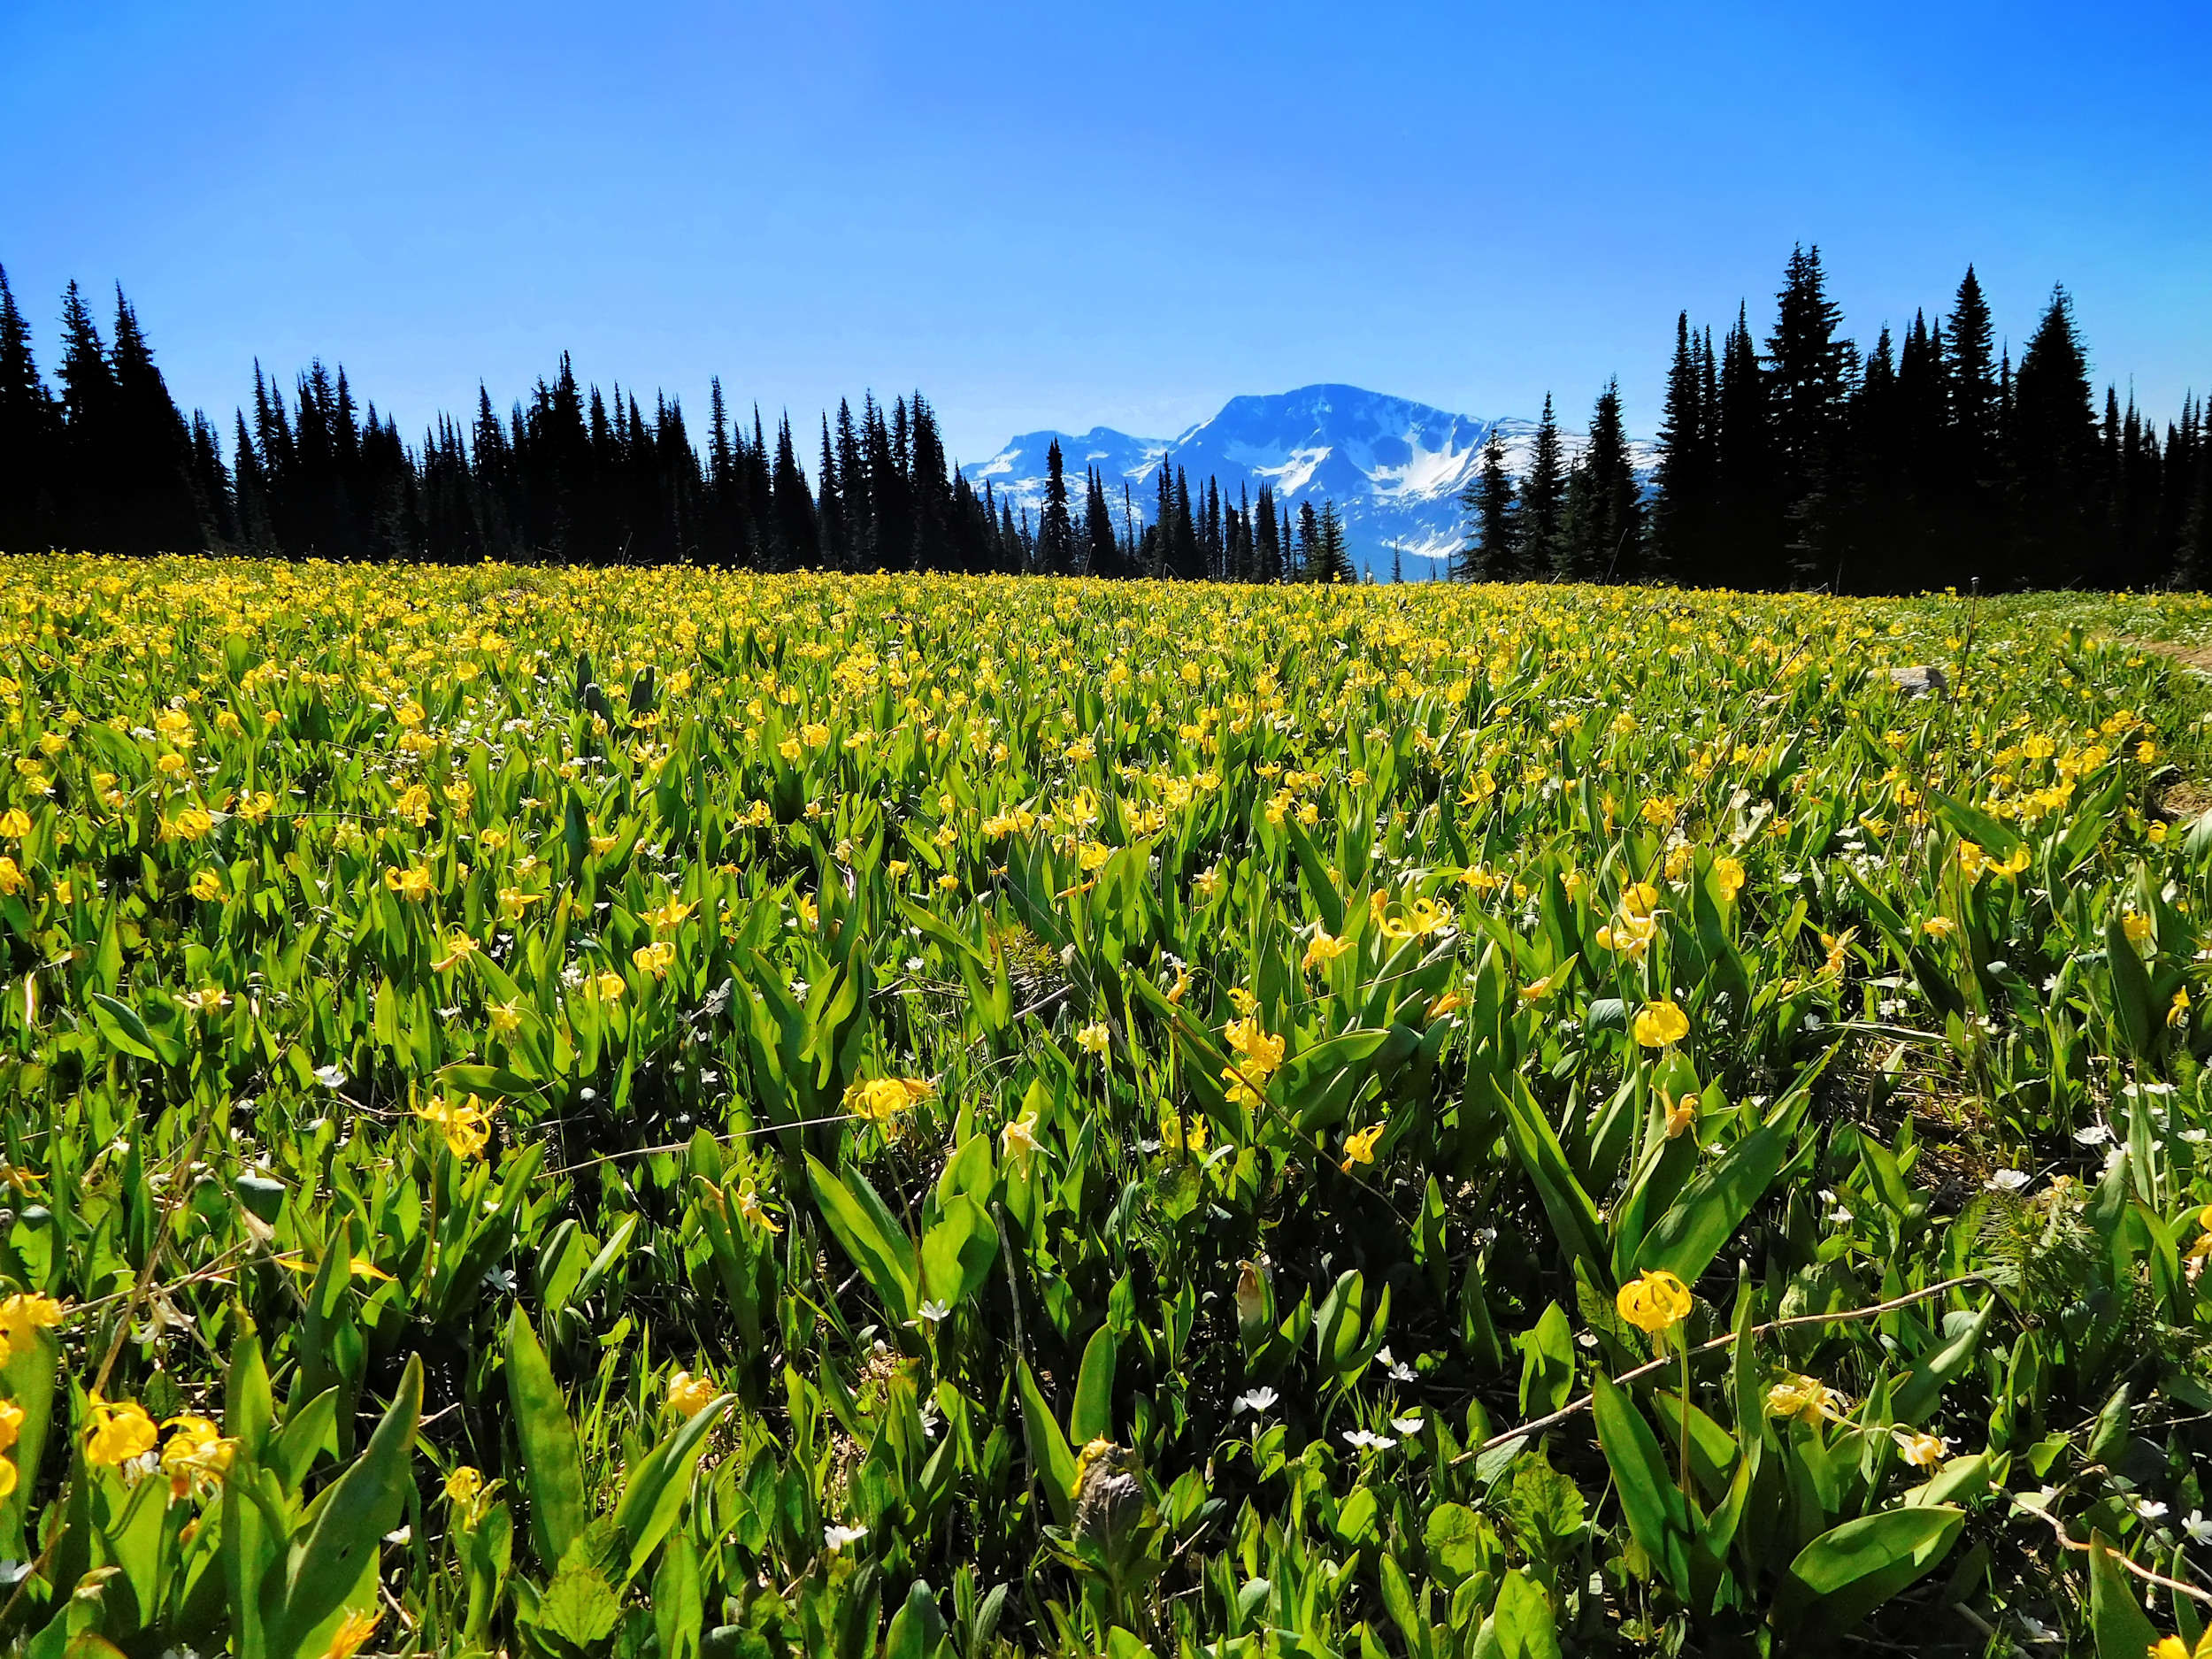
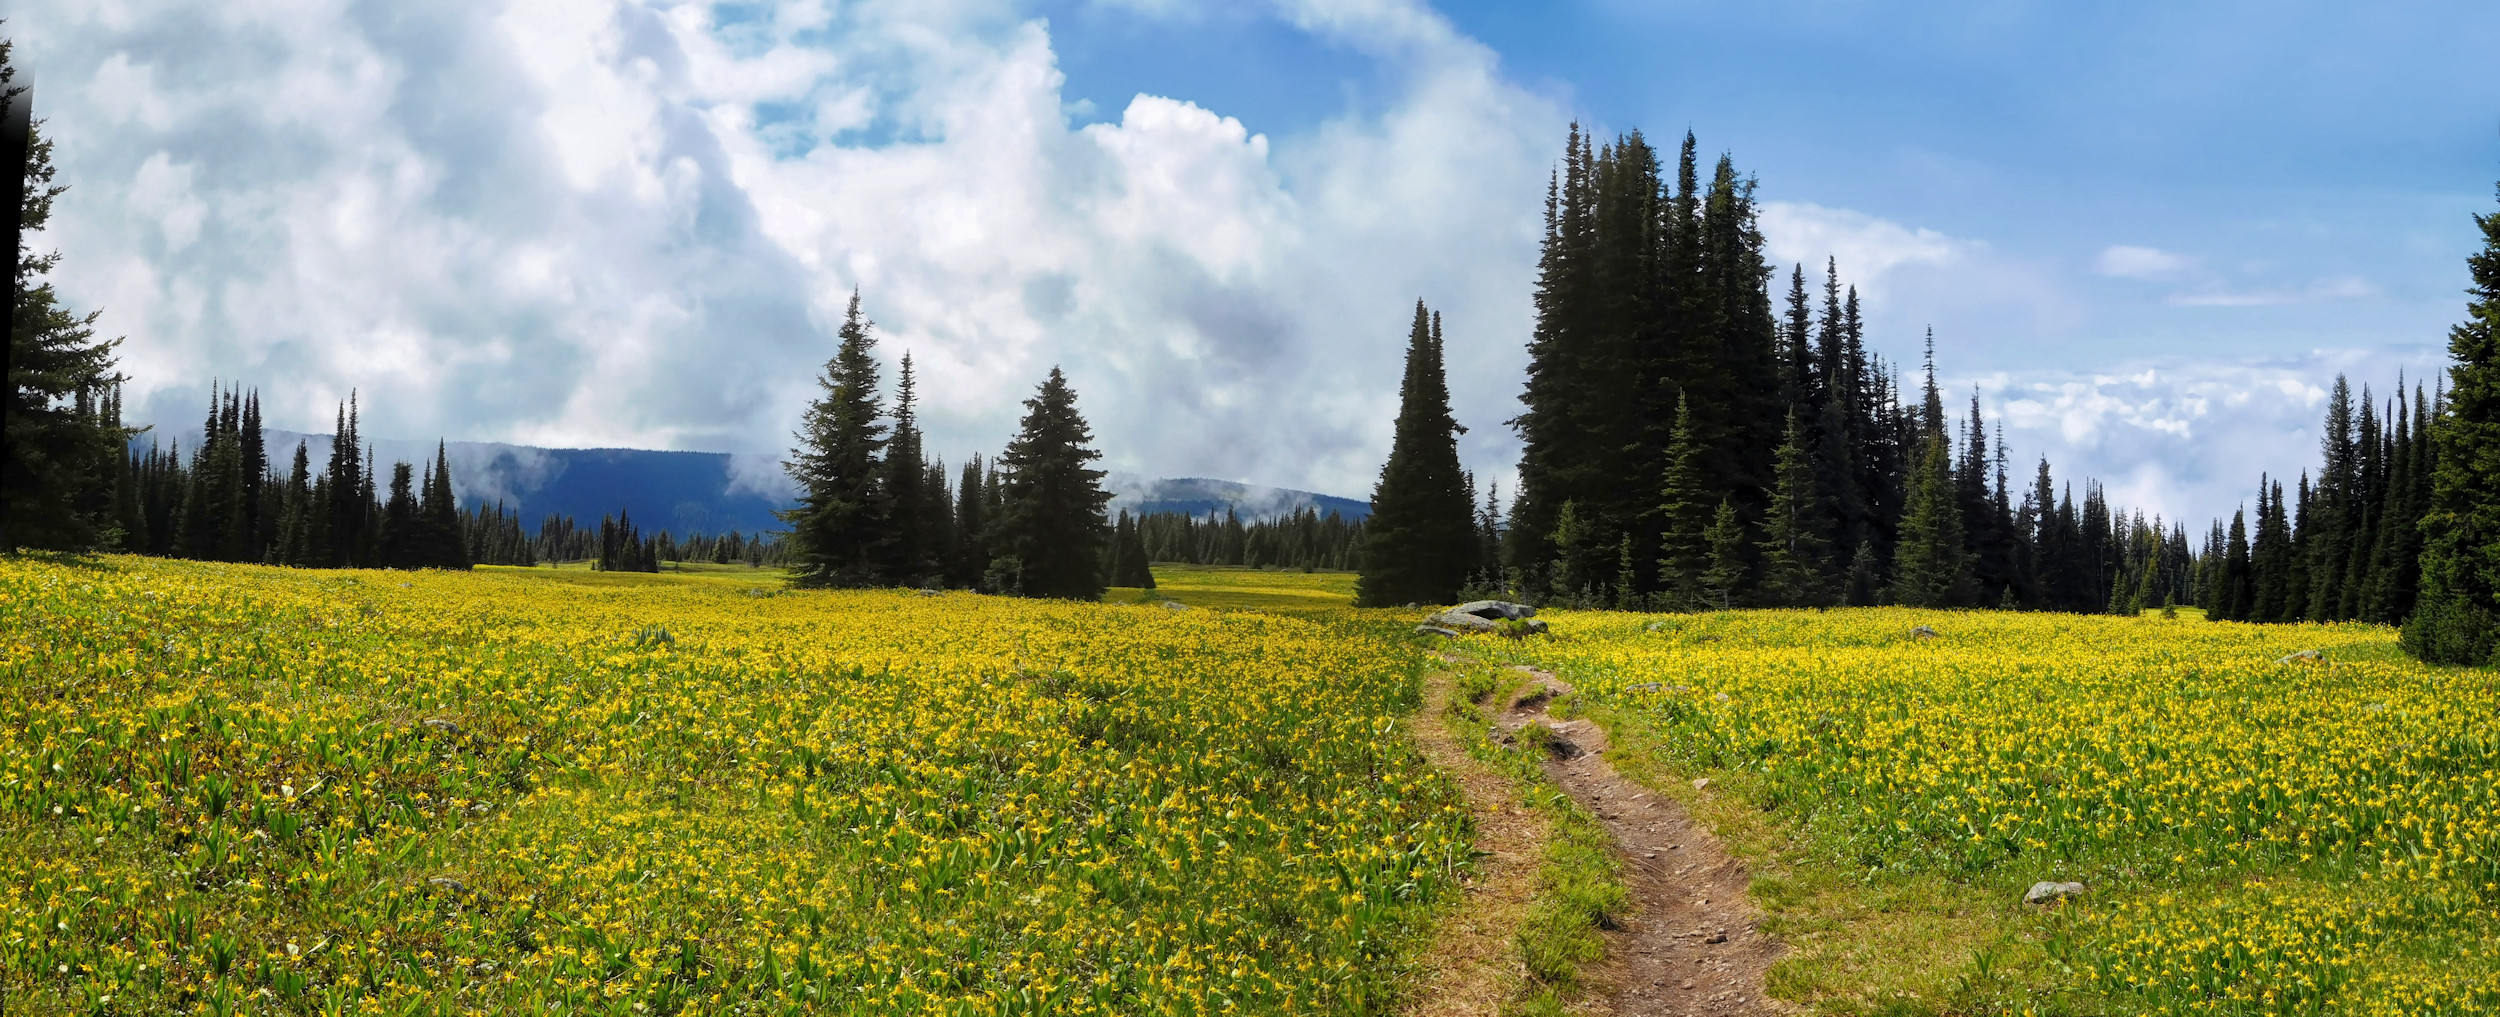
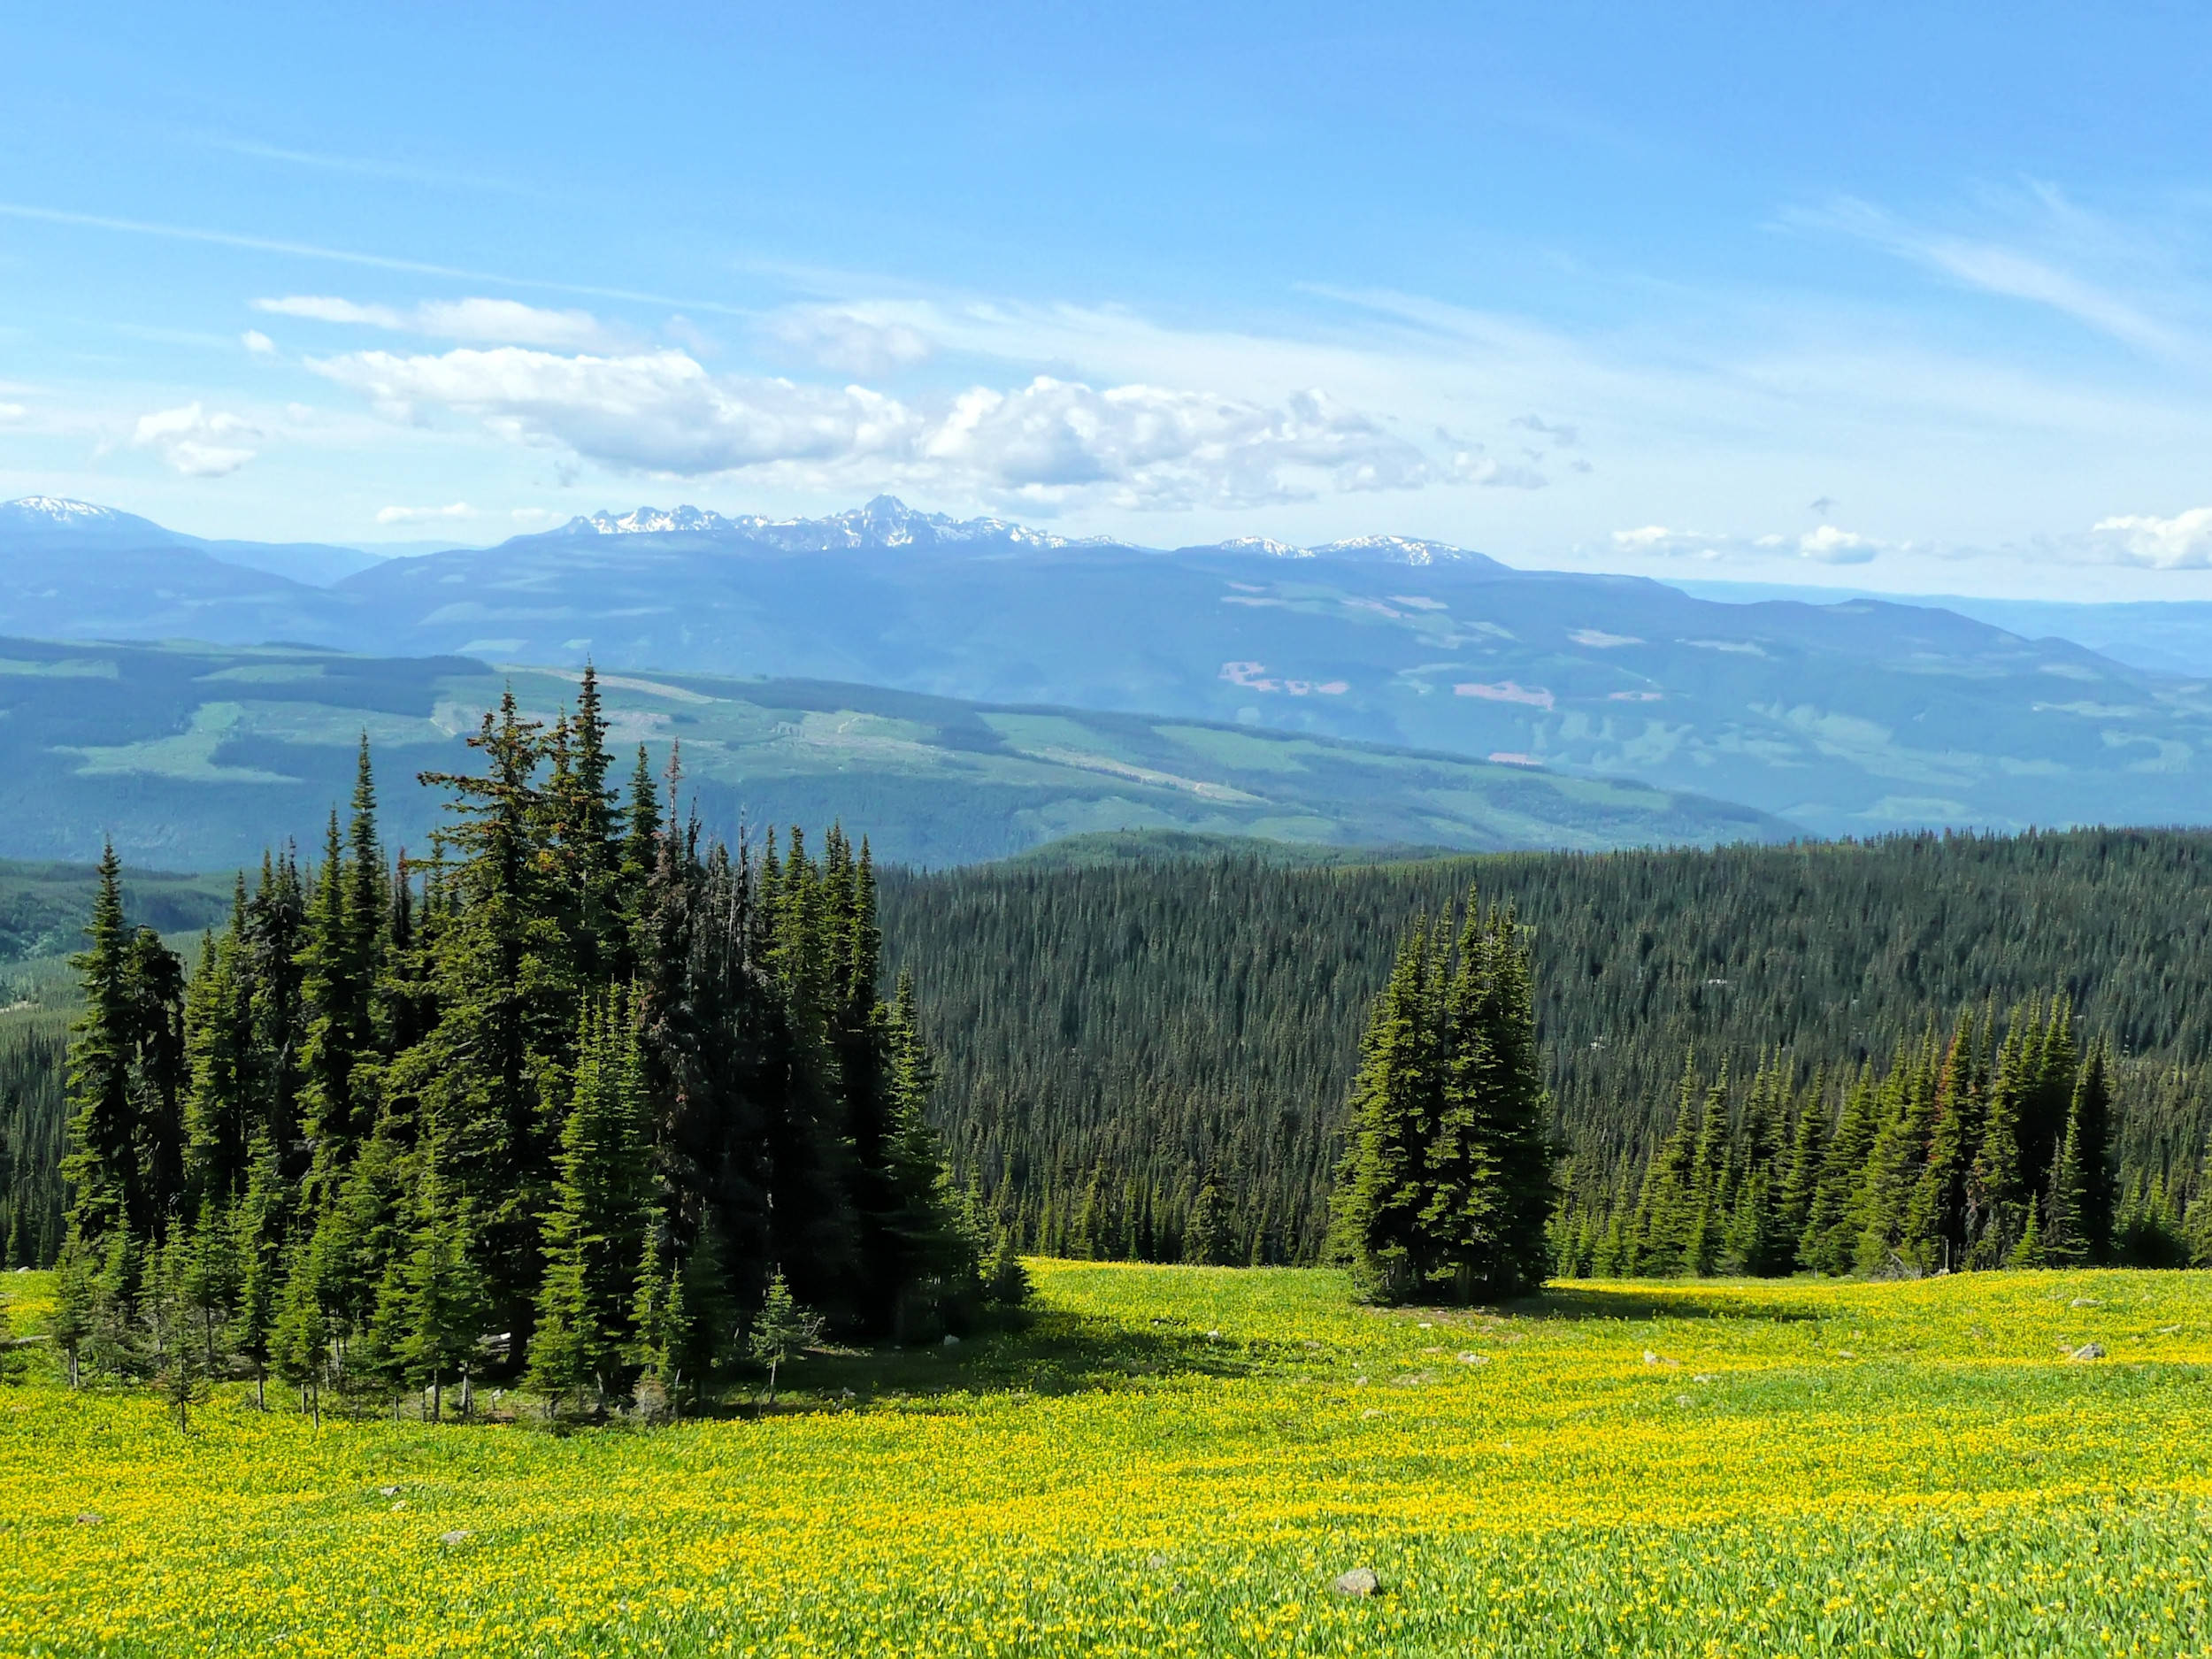
The Trophy Mountains are famous for their lush flower meadows. During the first bloom of the season, in late June or early July when the snowmelt is still underway, you find carpets of yellow flowering glacier lilies. Later, in the beginning of August, the colourful summer bloom takes over, which to my delight is peaking right now. The trail leads right through the wildflowers and is in some spots improved by boardwalks, as it can be quite muddy after a rainfall. Raft Mountain towers in the background.
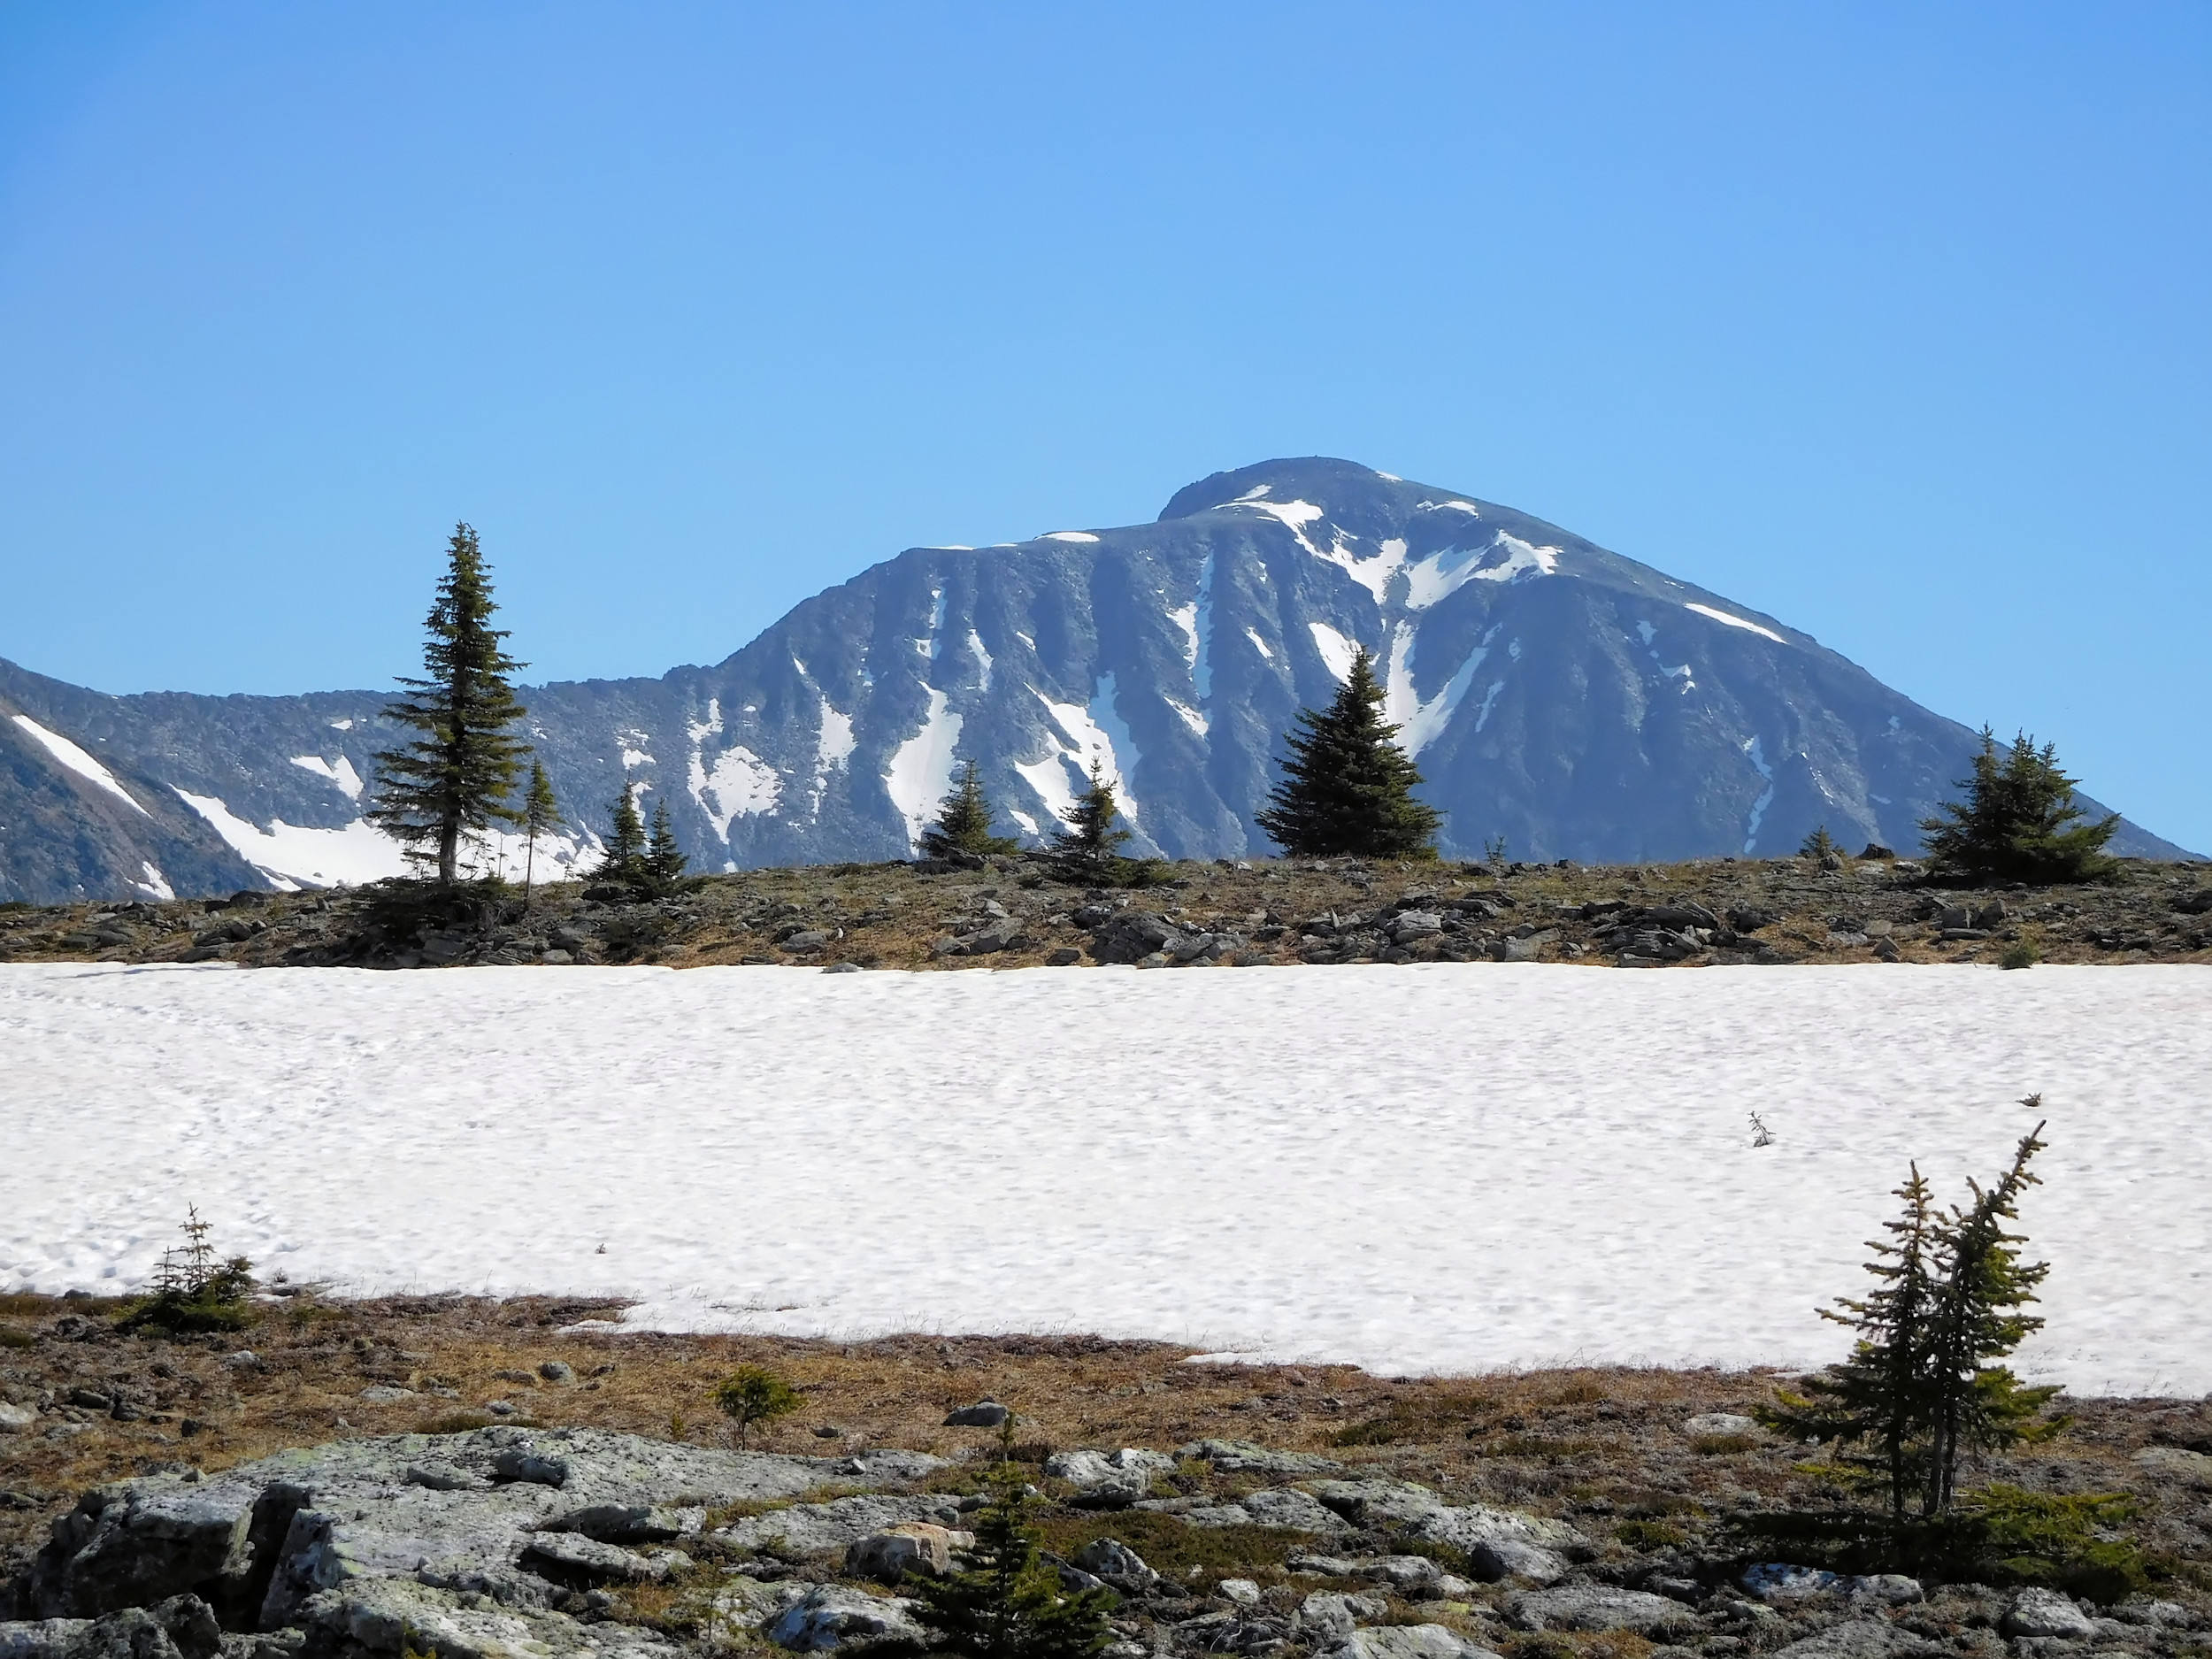
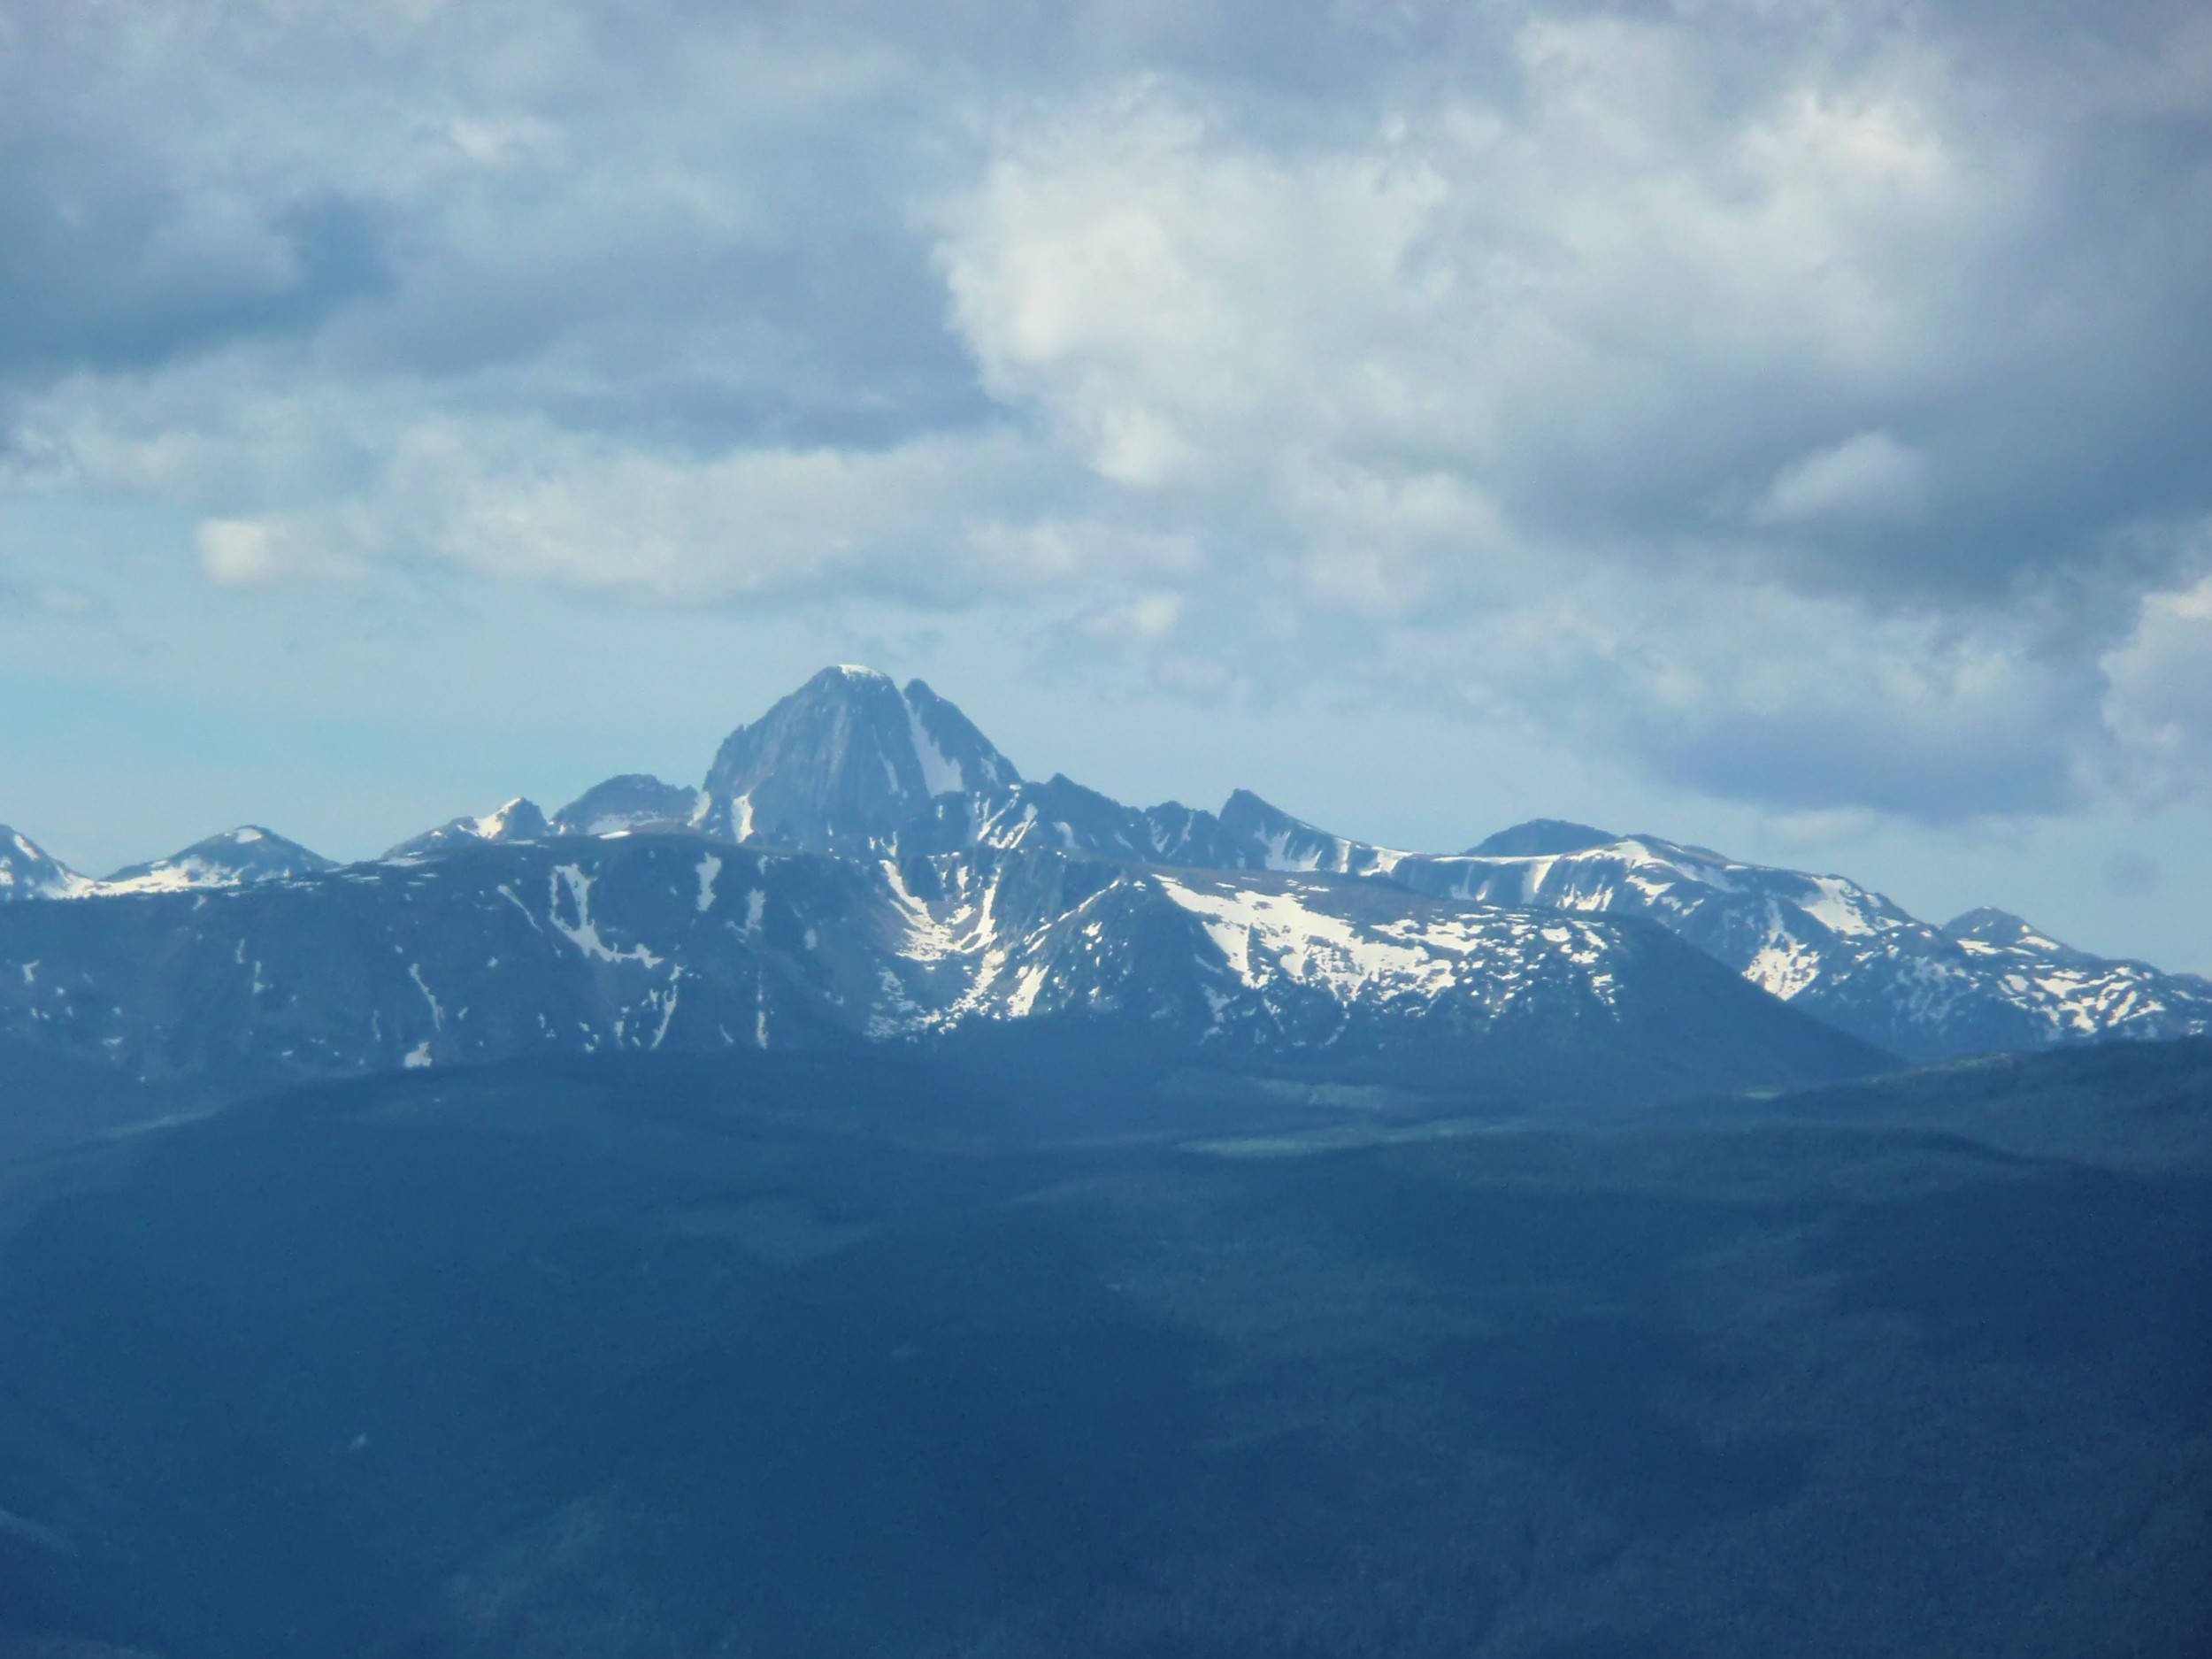
Above the flower meadows, the trail becomes rockier and is bordered by anemones and heather. Soon I arrive at the sign that points down to Sheila Lake. From here I have a first good view of the main peak of Trophy Mountain.
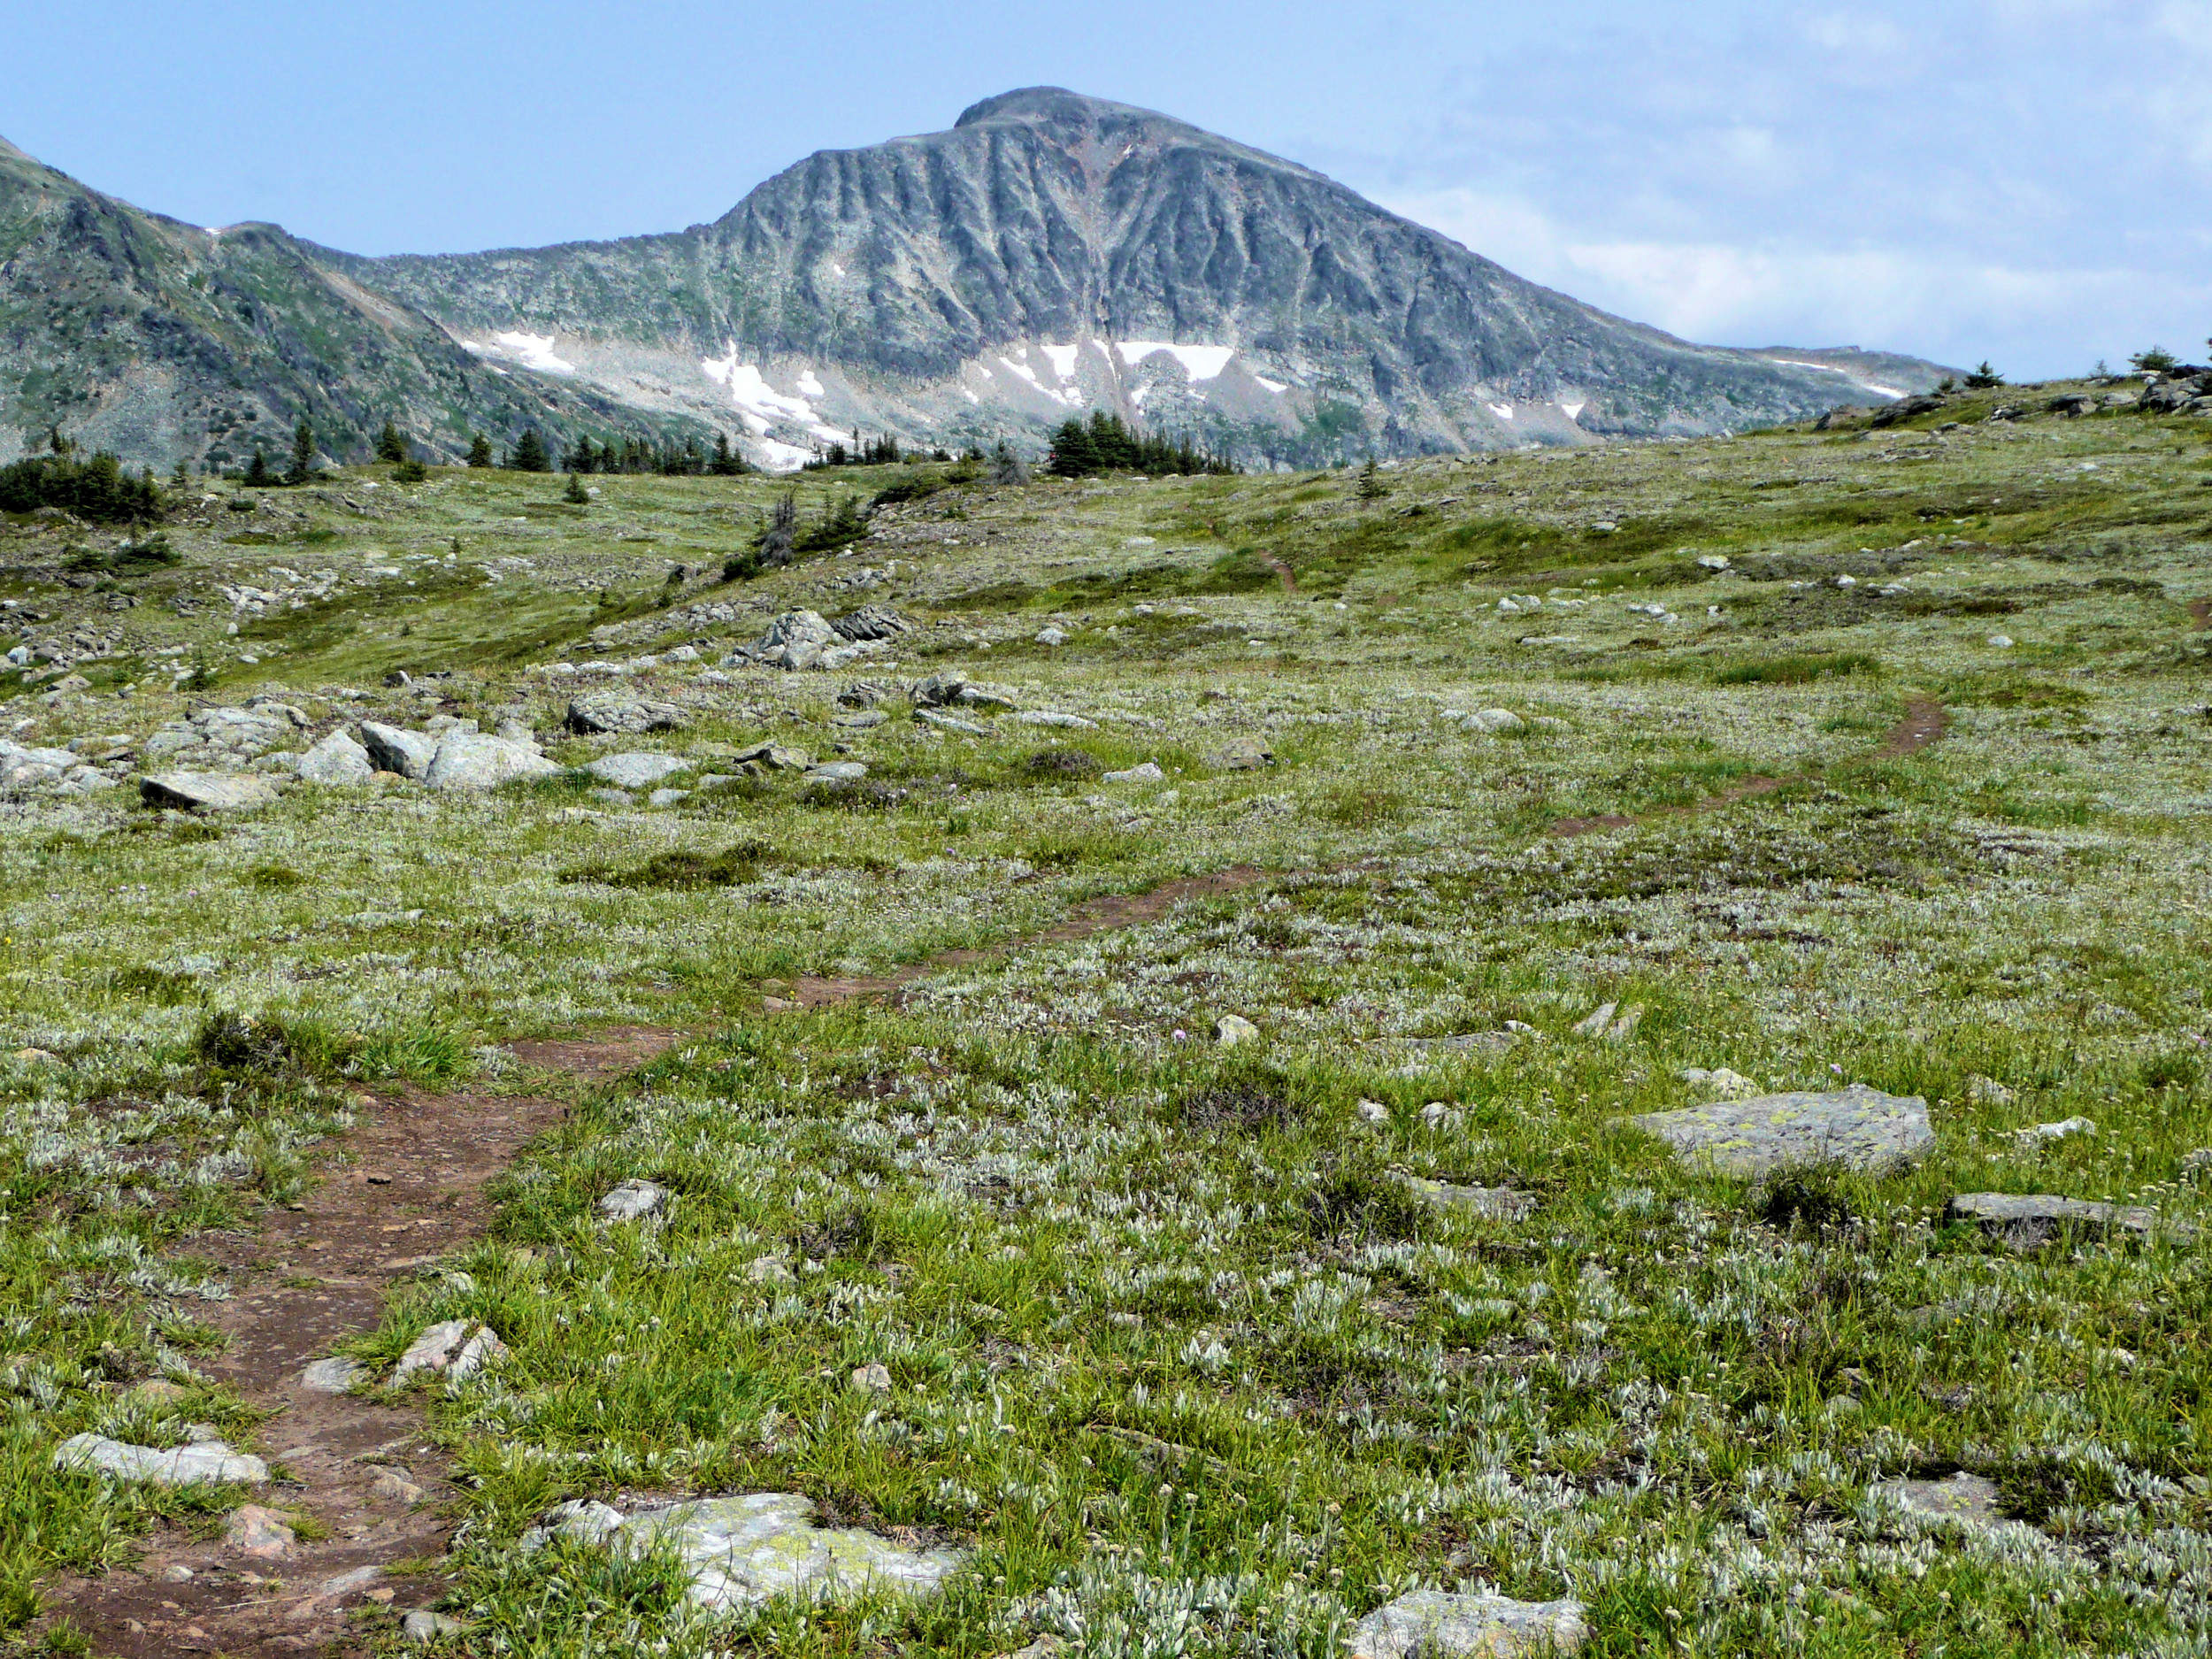
Trophy Mountain 2577 m
This time, I don’t continue on to Sheila Lake Lookout or the ridge above like I usually do. Instead, I take the turnoff and aim for the lake with the campground on its shore. I want to drop my heavy pack as soon as possible.
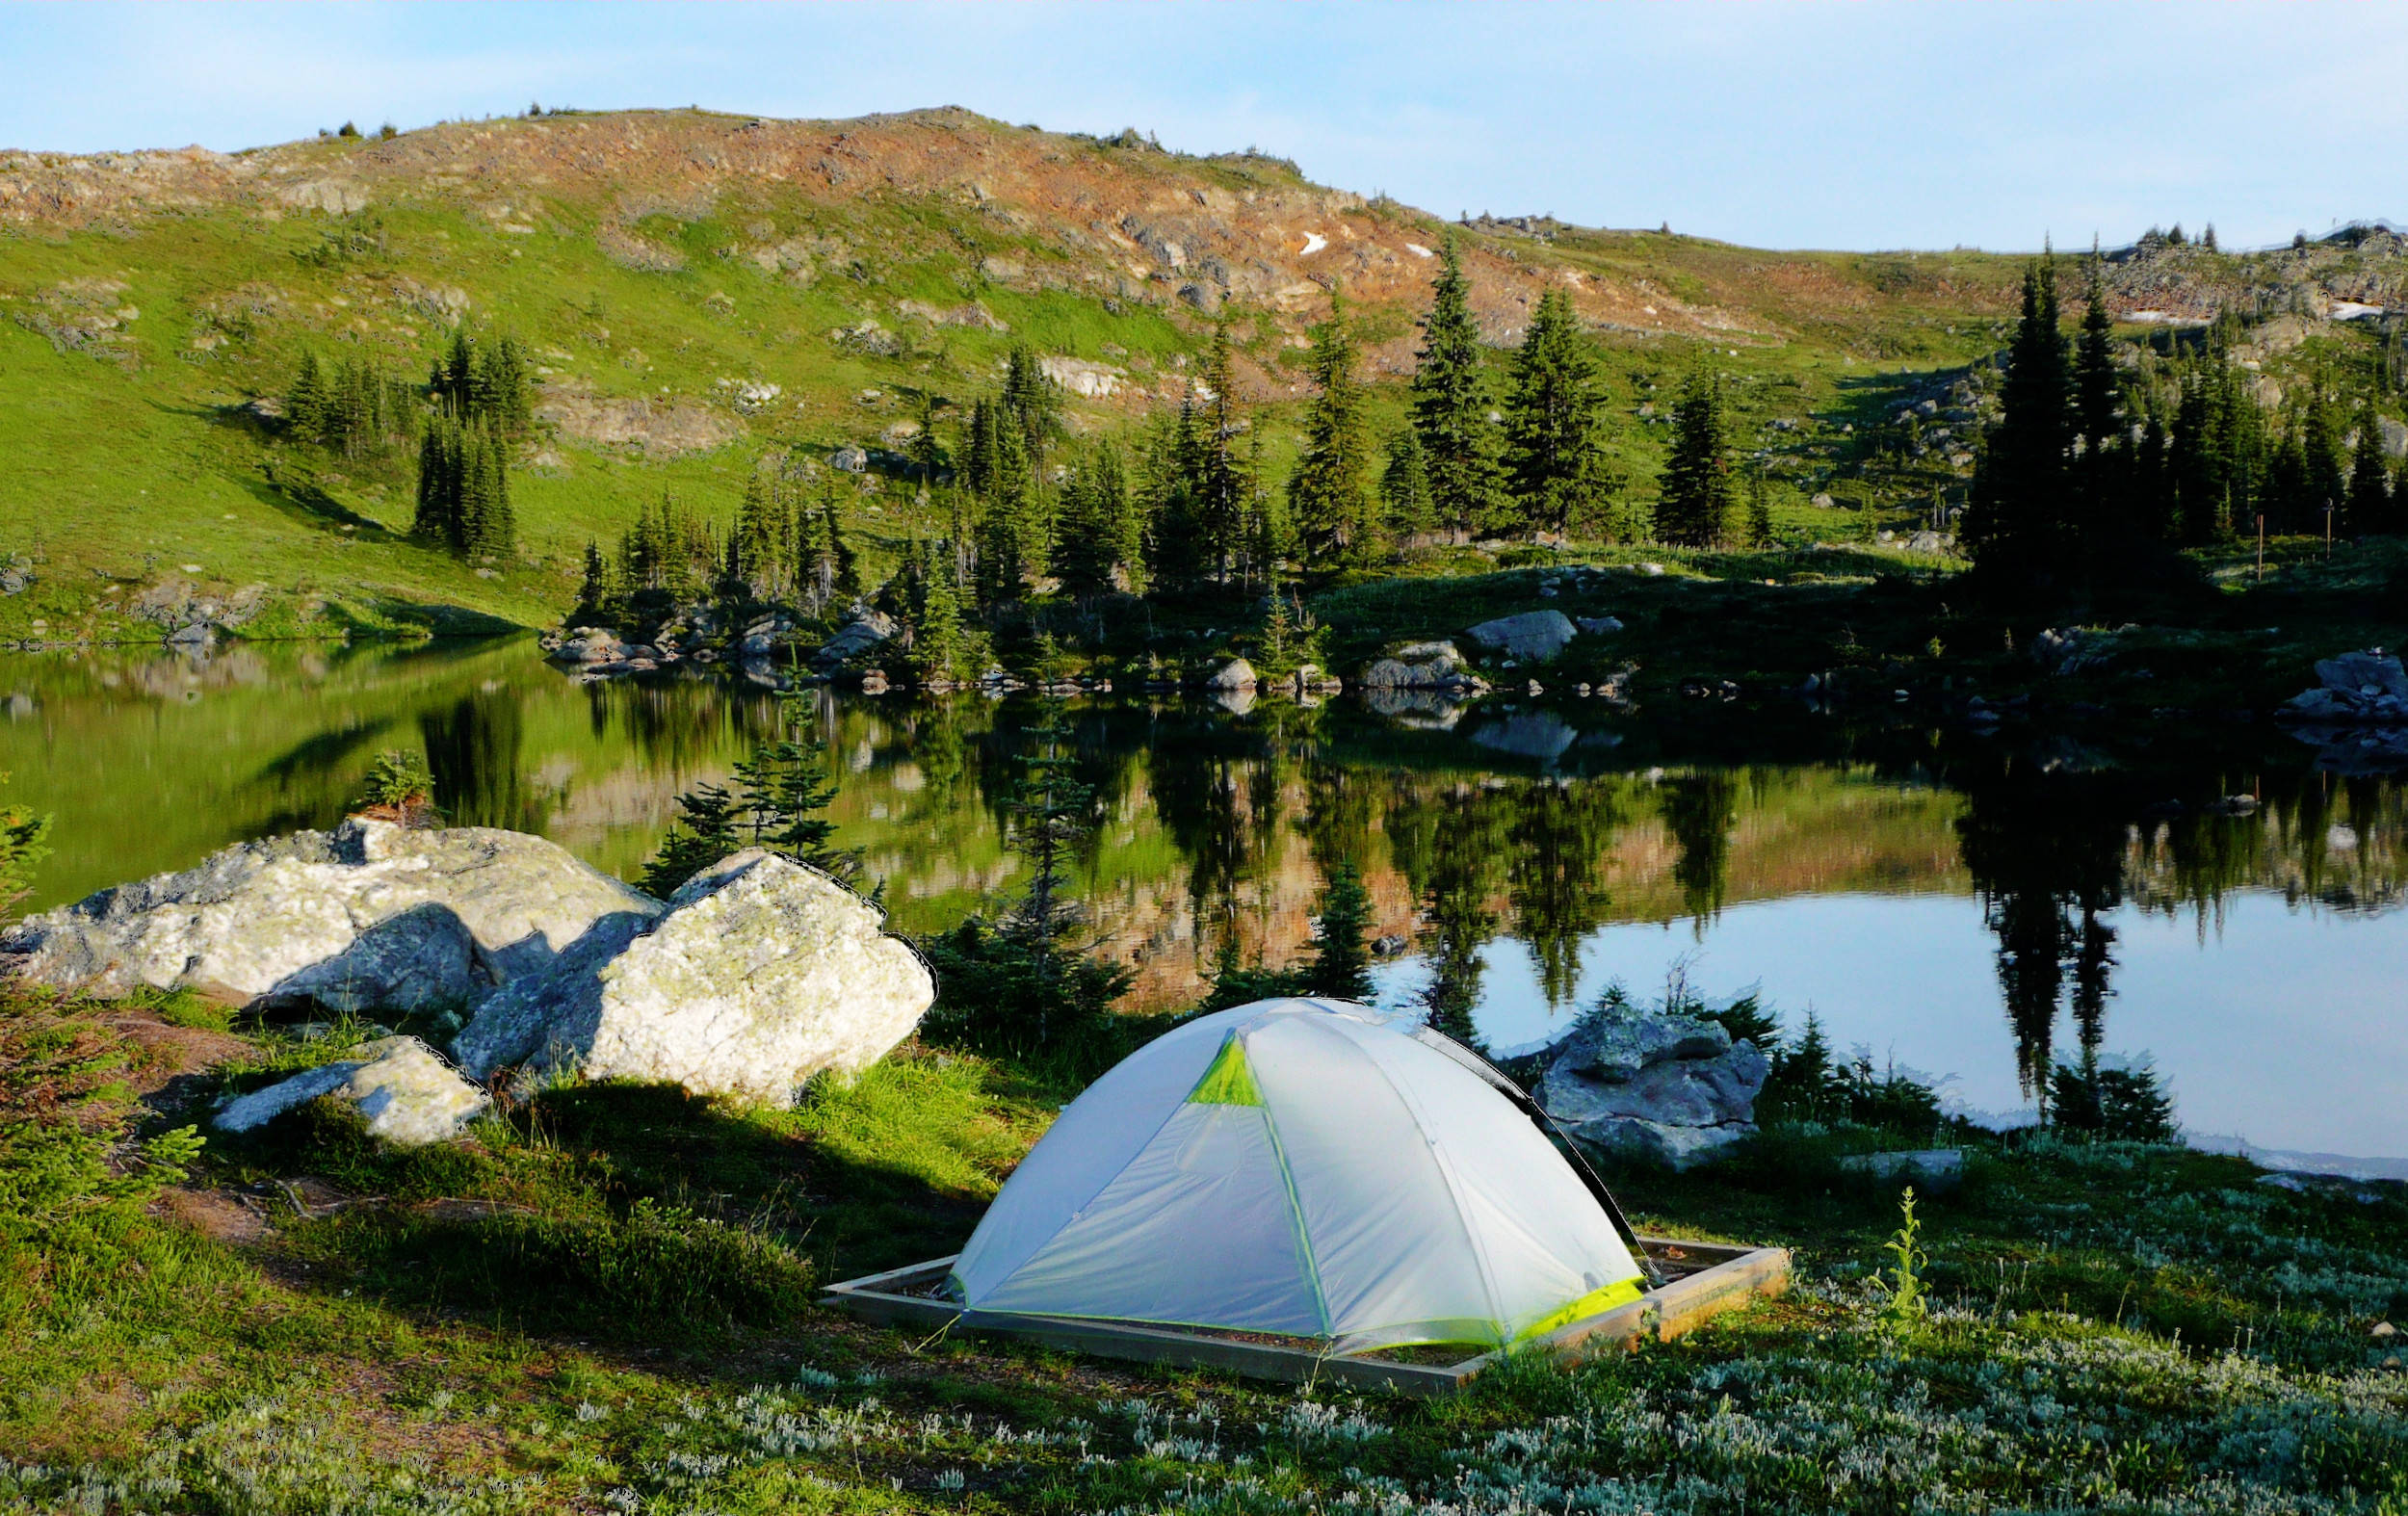
The campground provides six sites, each framed with boards and covered in a thick layer of wood shavings. I pick a tent site directly by the water. There is an outhouse and a locker for keeping the food safe from bears and smaller critters. Grizzlies do occasionally come through here, but they are mostly spotted during the lily bloom when they like to feed on the bulbs.
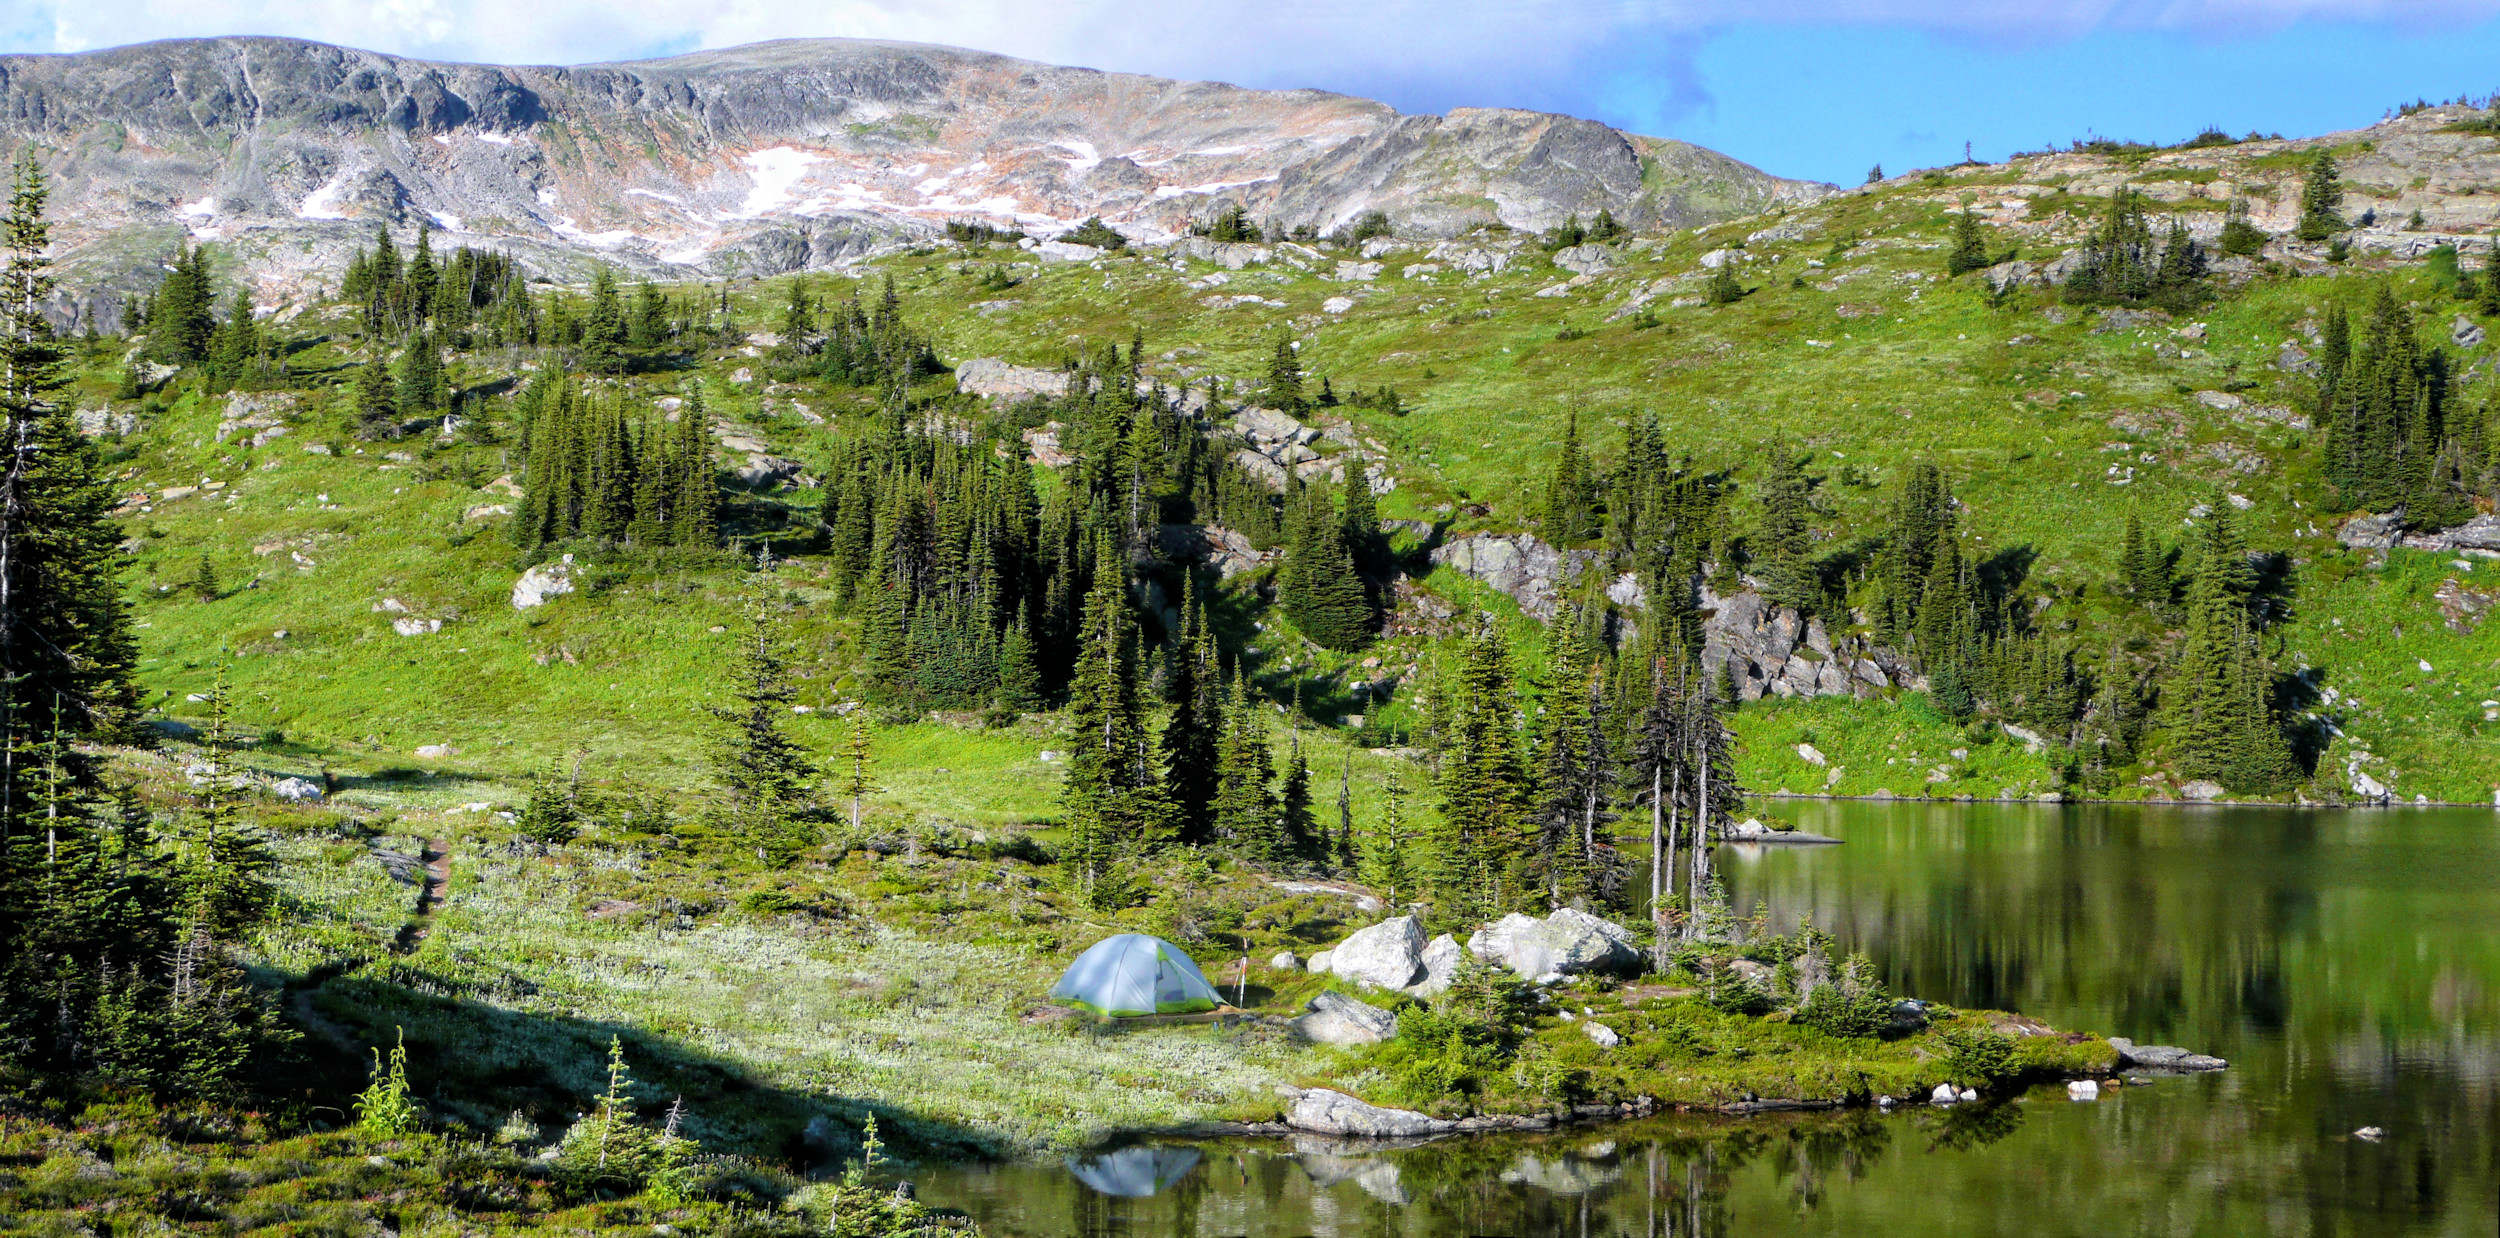
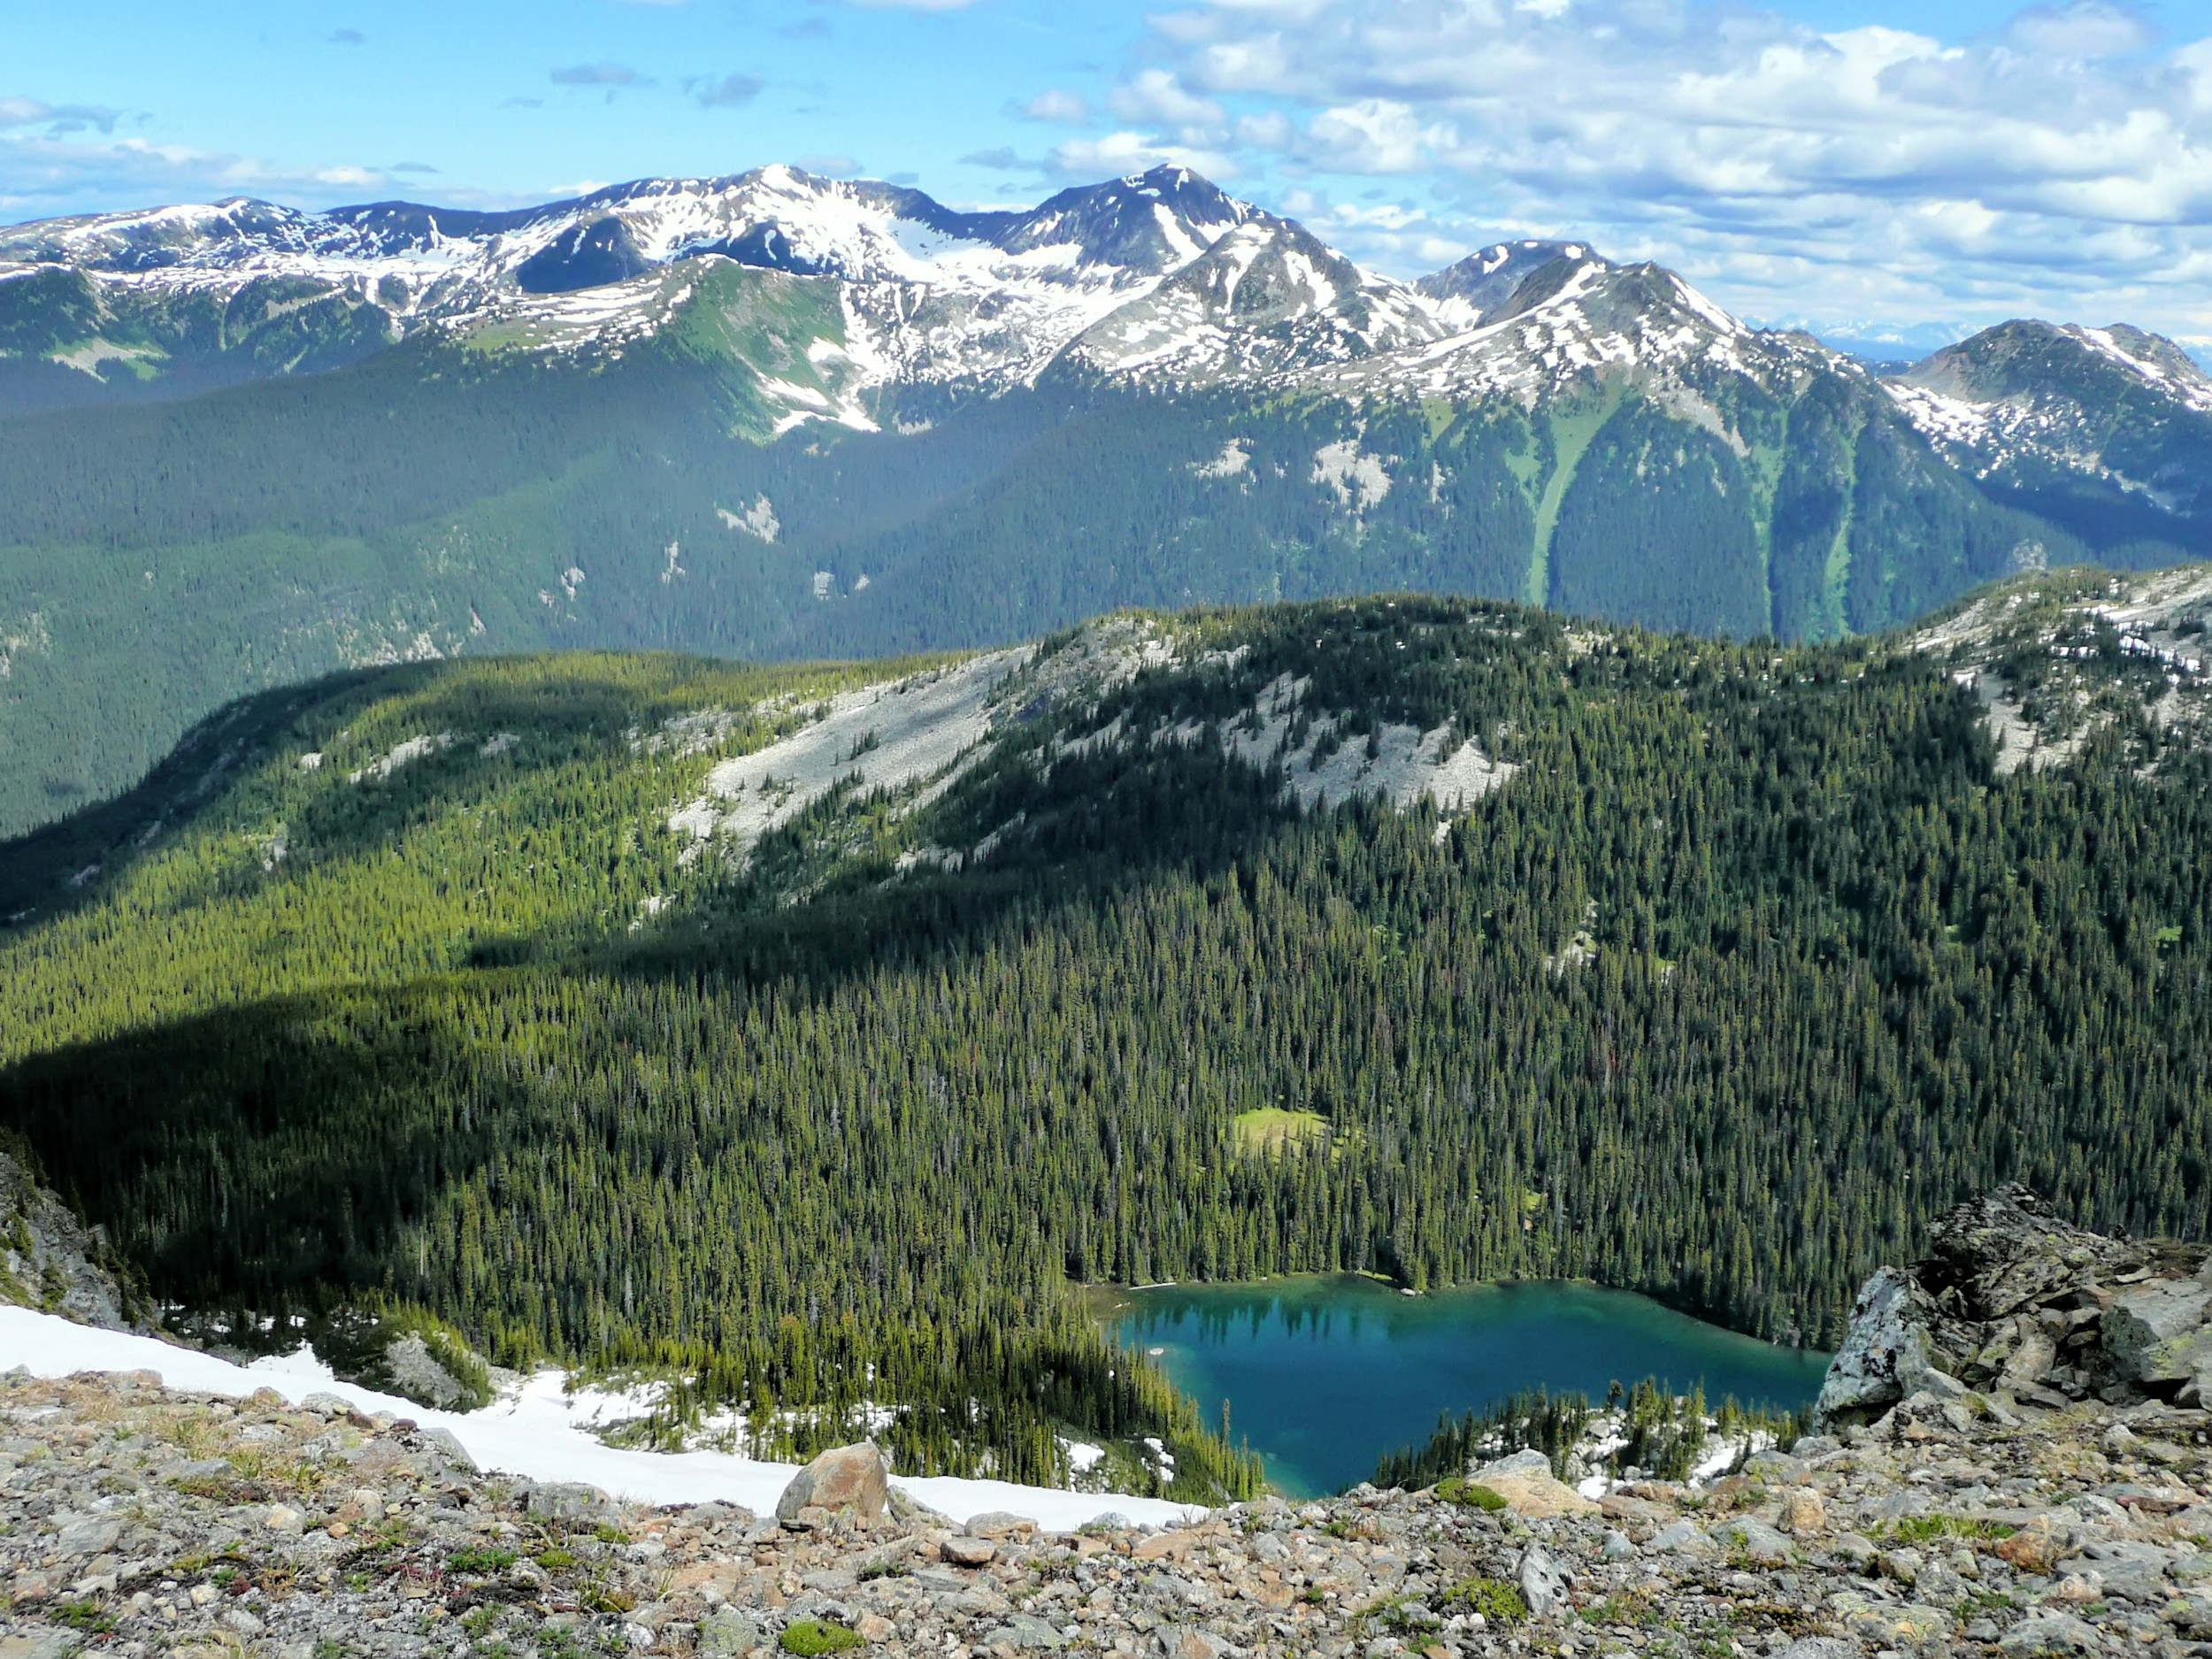
My tent site on Sheila Lake, the West Ridge in the background
I set up camp and have a Mac & Cheese dinner. It is a store-bought meal for backpackers that is ready to eat after being soaked in boiling hot water for ten minutes: very easy, but definitely not gourmet and also relatively expensive. I am getting more acquainted with my gear that I have used only once before, on a trip with friends into Mt. Assiniboine Provincial Park a few weeks ago.
Another group of four people is staying at the campground. I am happy not to be the only one up here, as I am still new to solo-camping in the backcountry. After dinner, I go for a little walk. In the distance, Dunn Peak hovers over Sheila Lake Lookout Rock, and in the other direction, I spot a waterfall running down over the slopes of Trophy West Ridge.
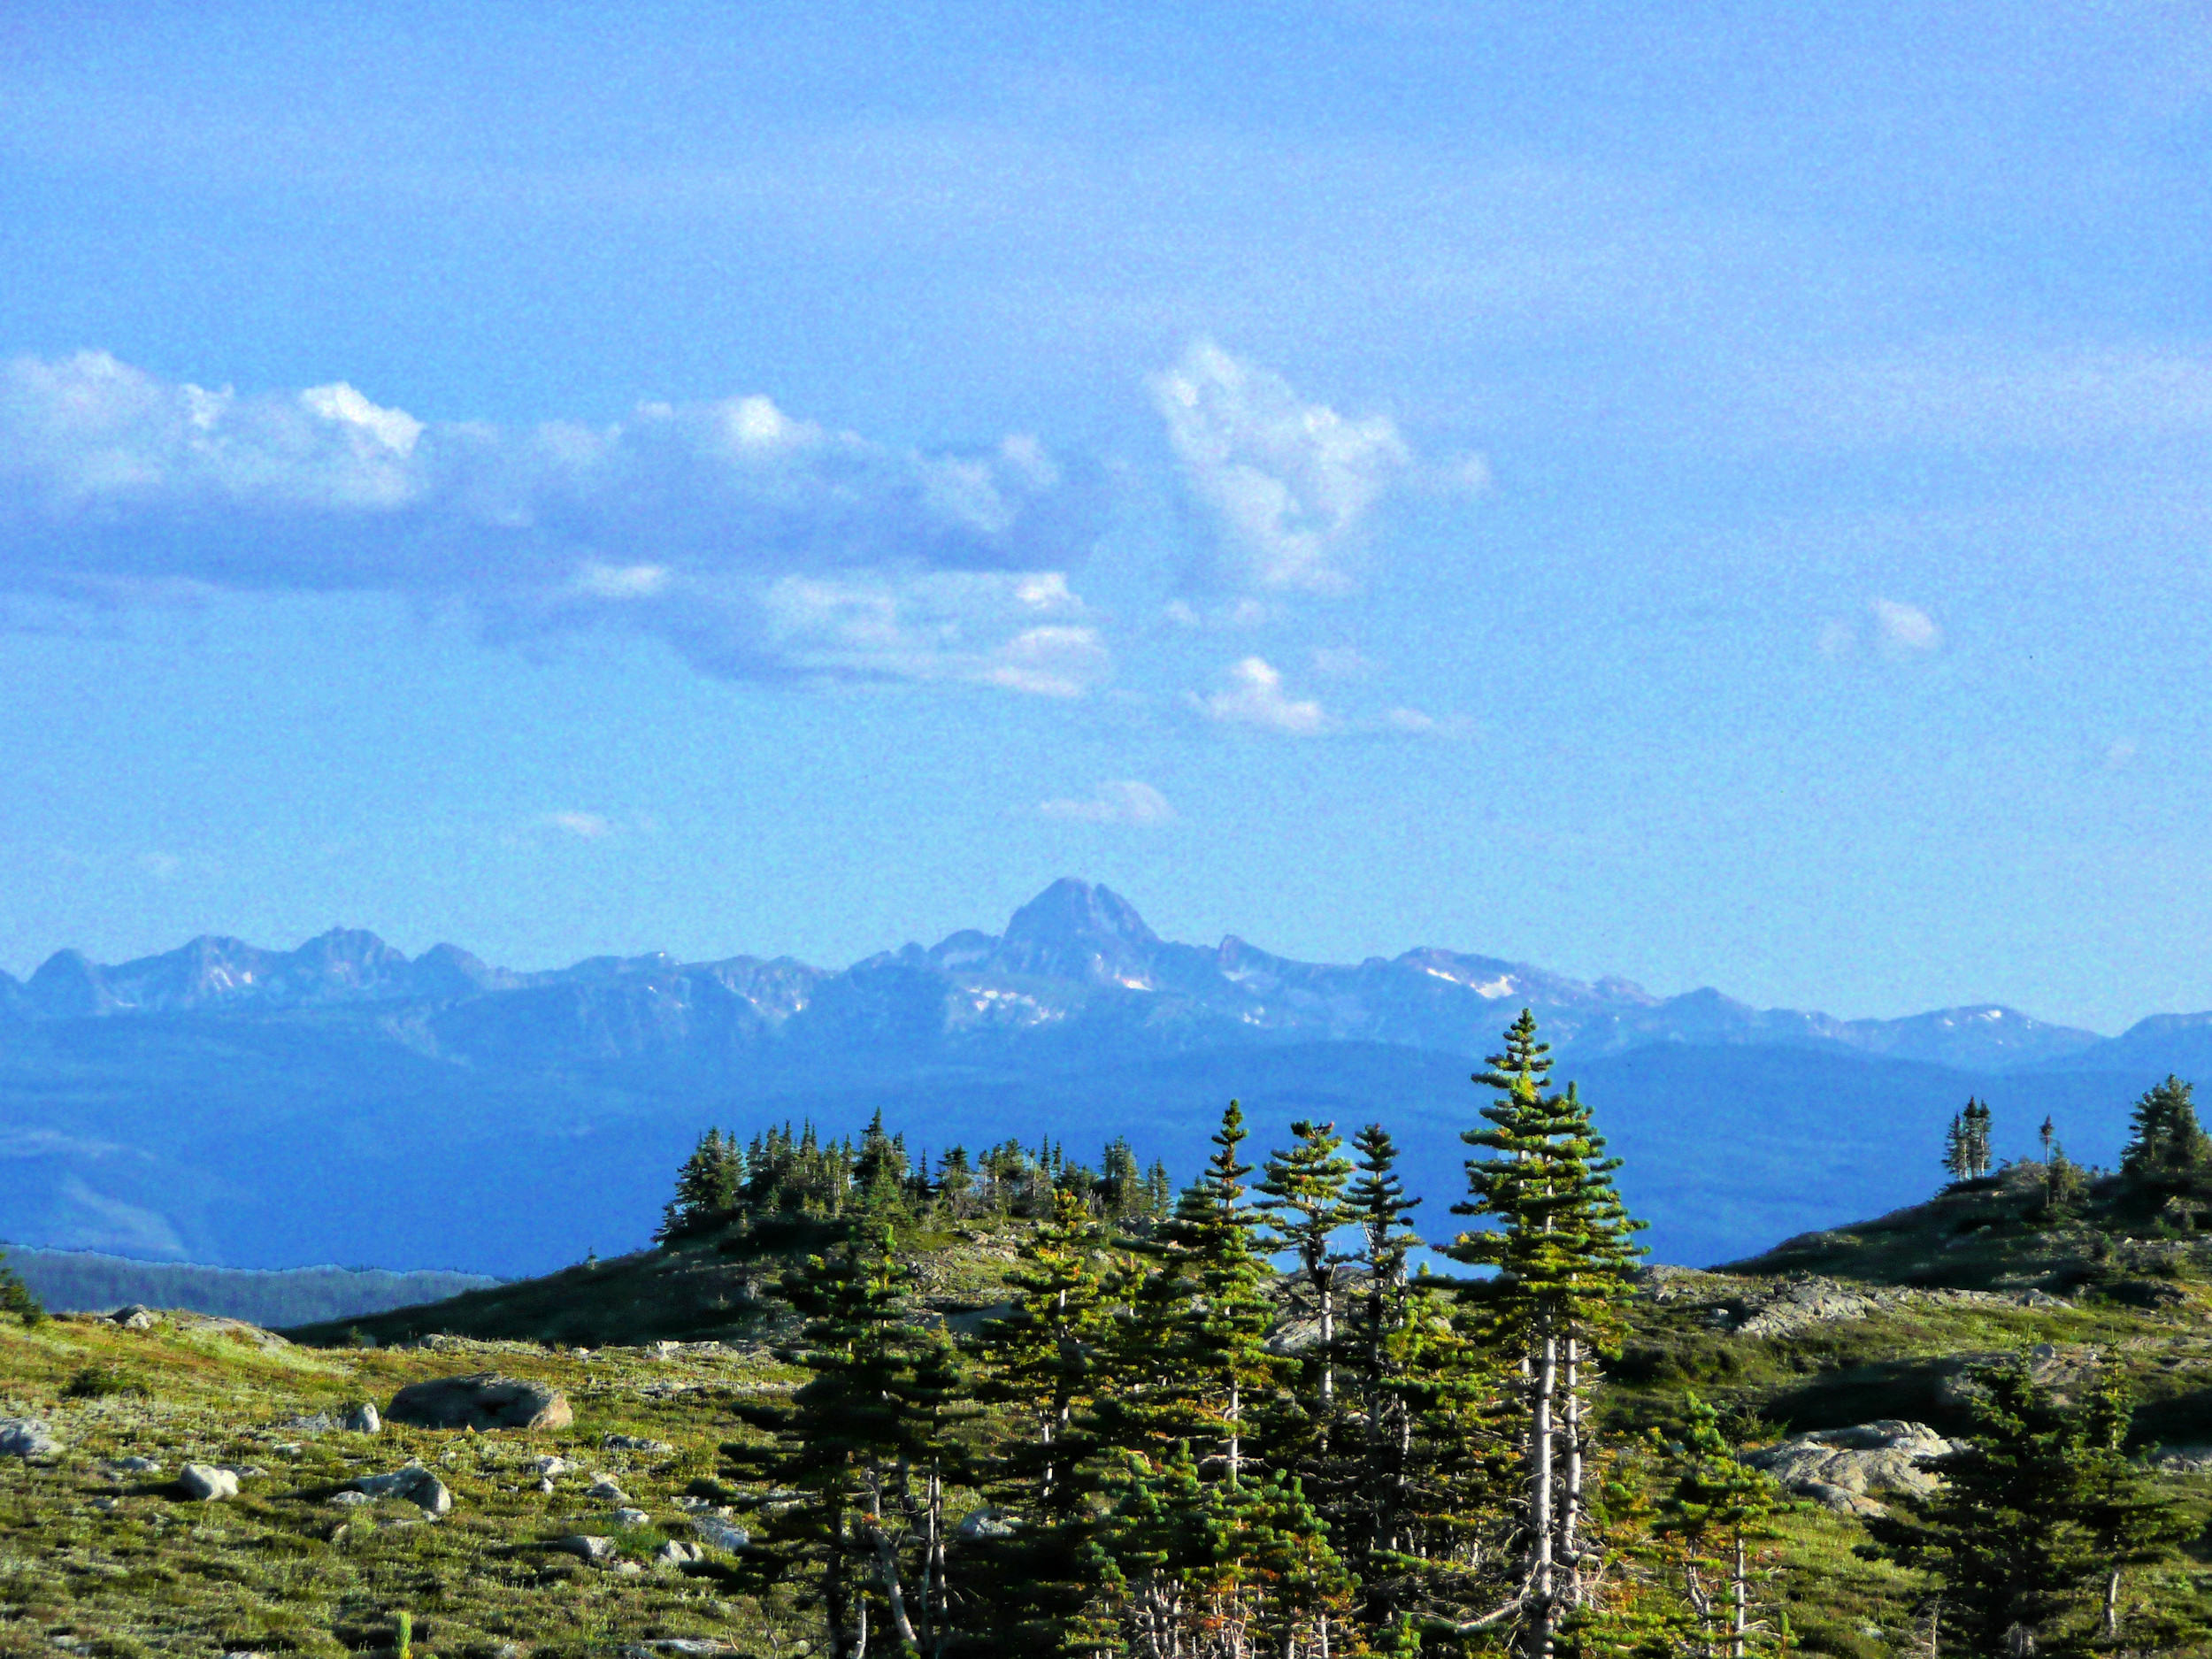
Dunn Peak

‘Trophy West Ridge
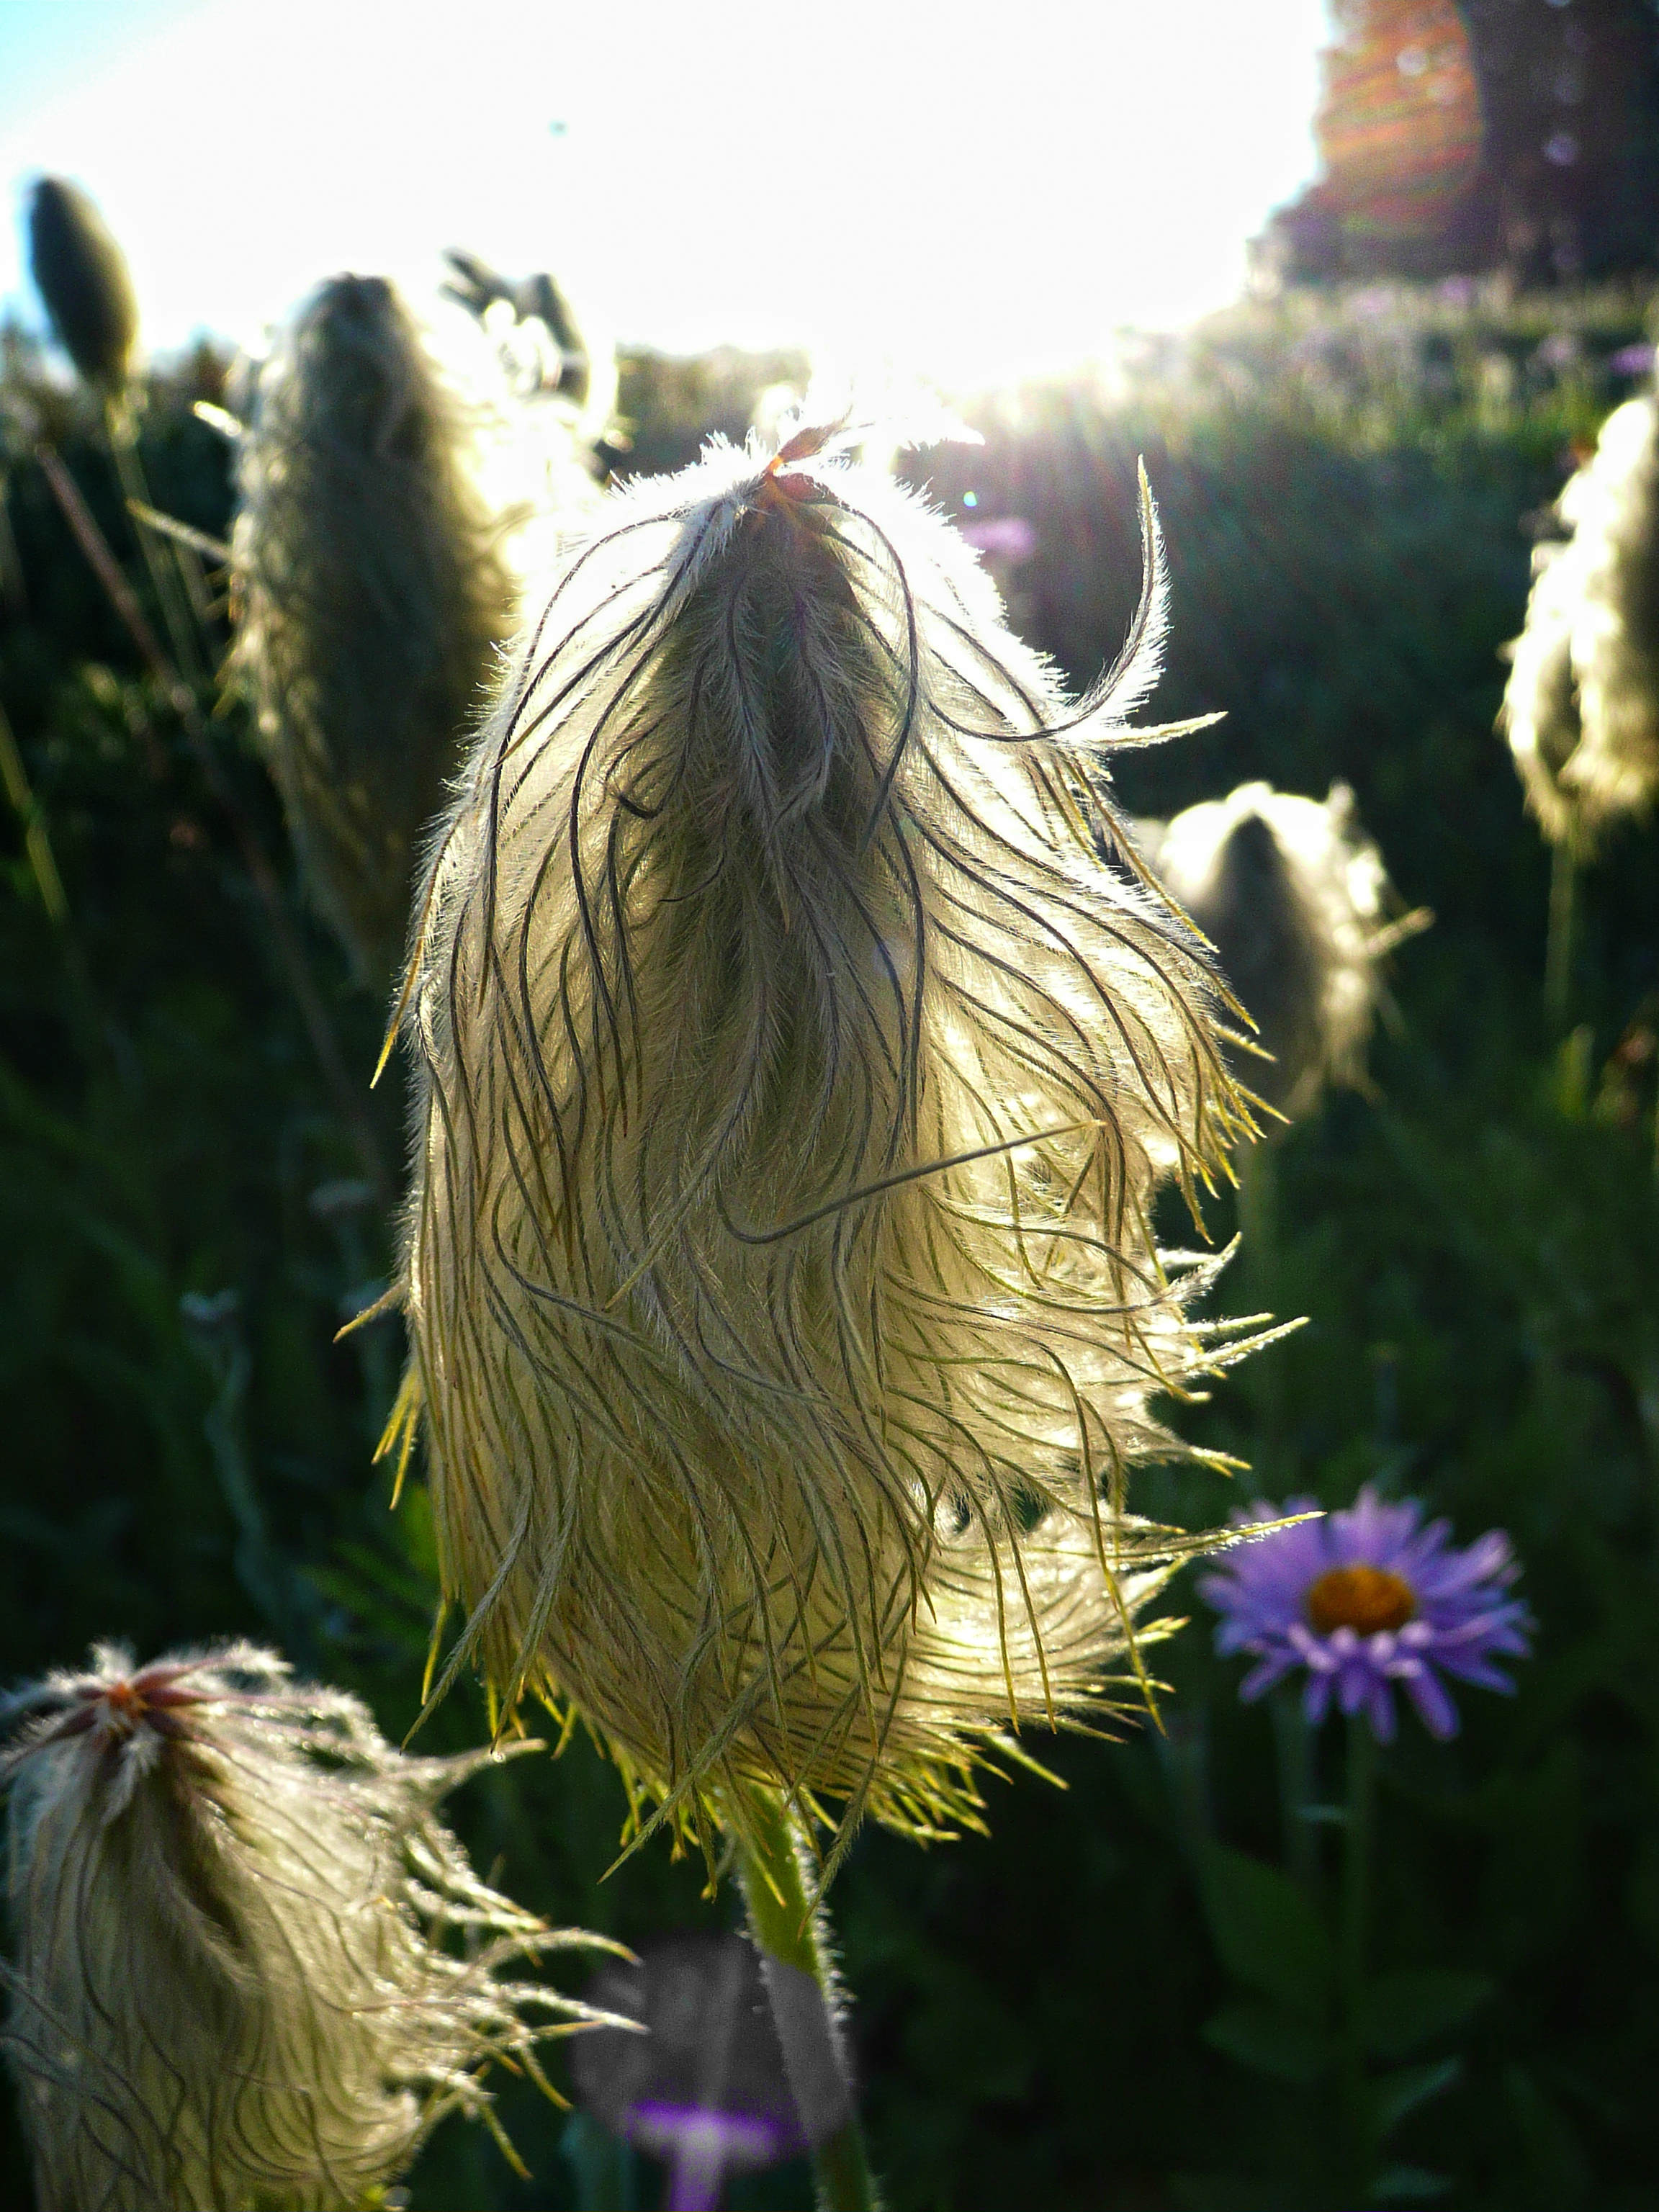
Western Anemones look quite funny once they are spent. There are several names for them, one is „Hippie on a Stick“. Backlit by the low evening sun, they look particularly attractive.
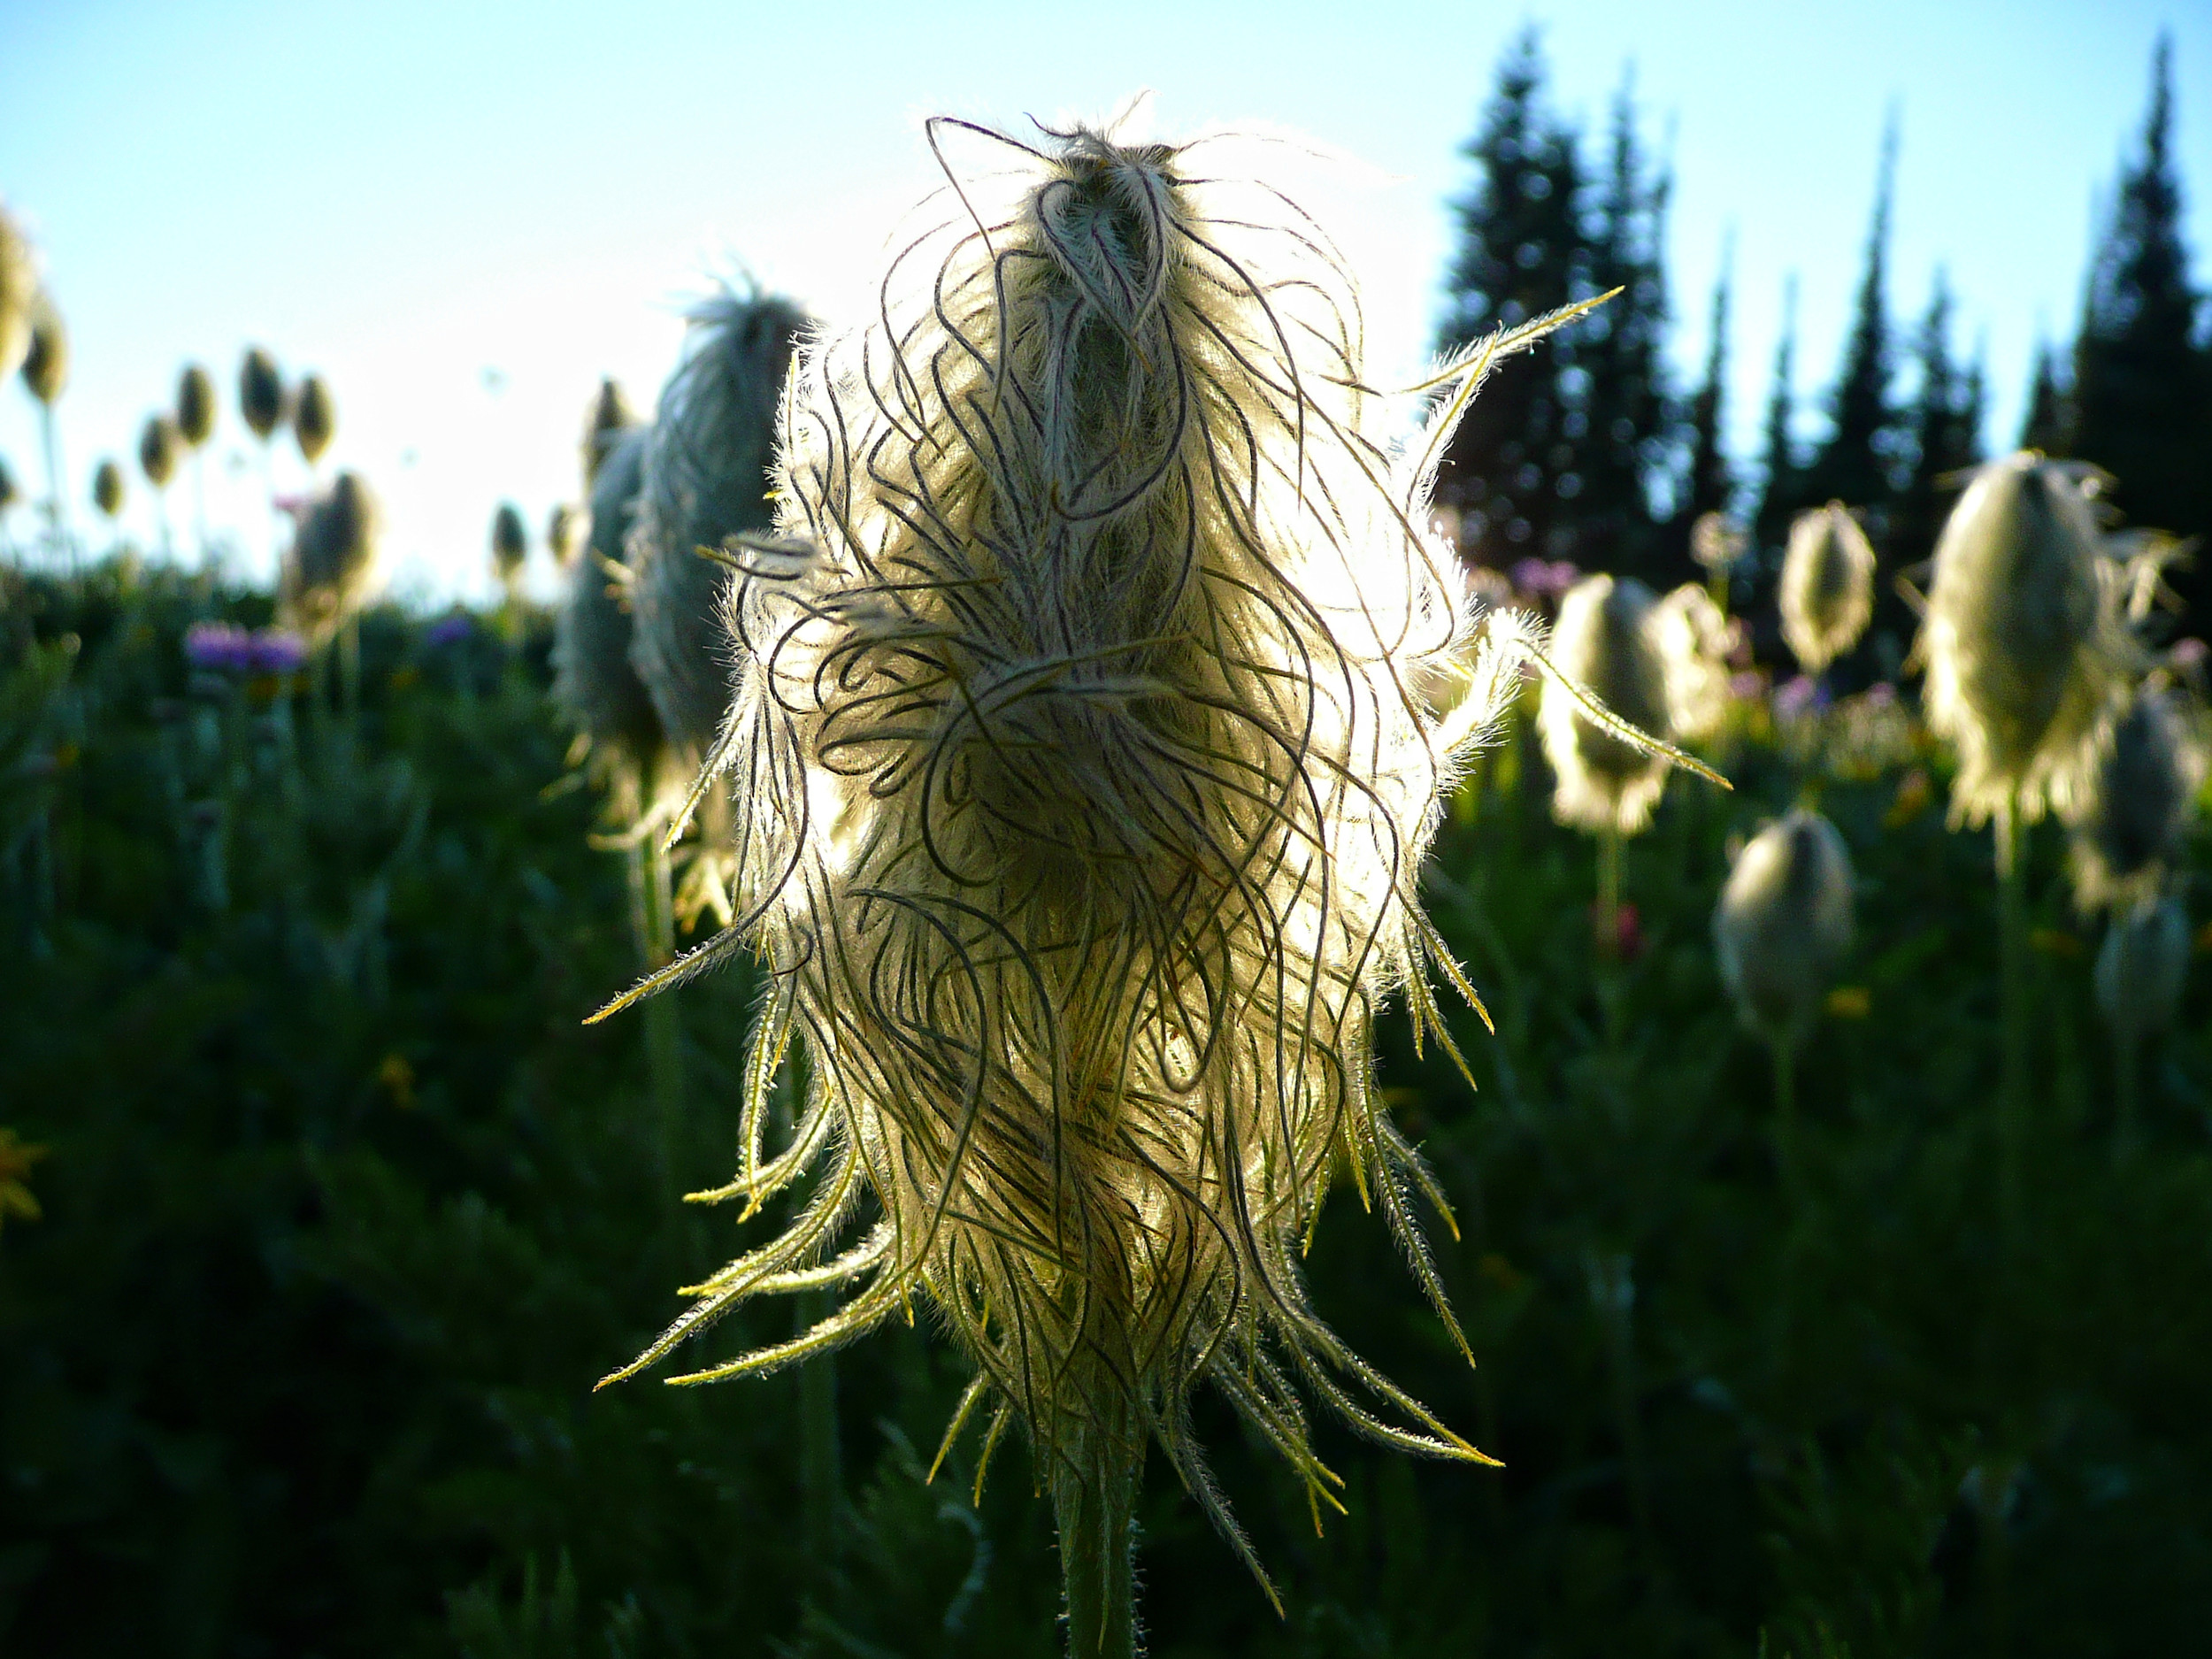
Hippie on a Stick
In the evening, at over 2000 meters altitude, it gets chilly quickly, and so I retire to my tent early. Huddled in my cozy sleeping bag, I enjoy the silence, and read in my e-book. The night is very restful, my first one alone in the backcountry.
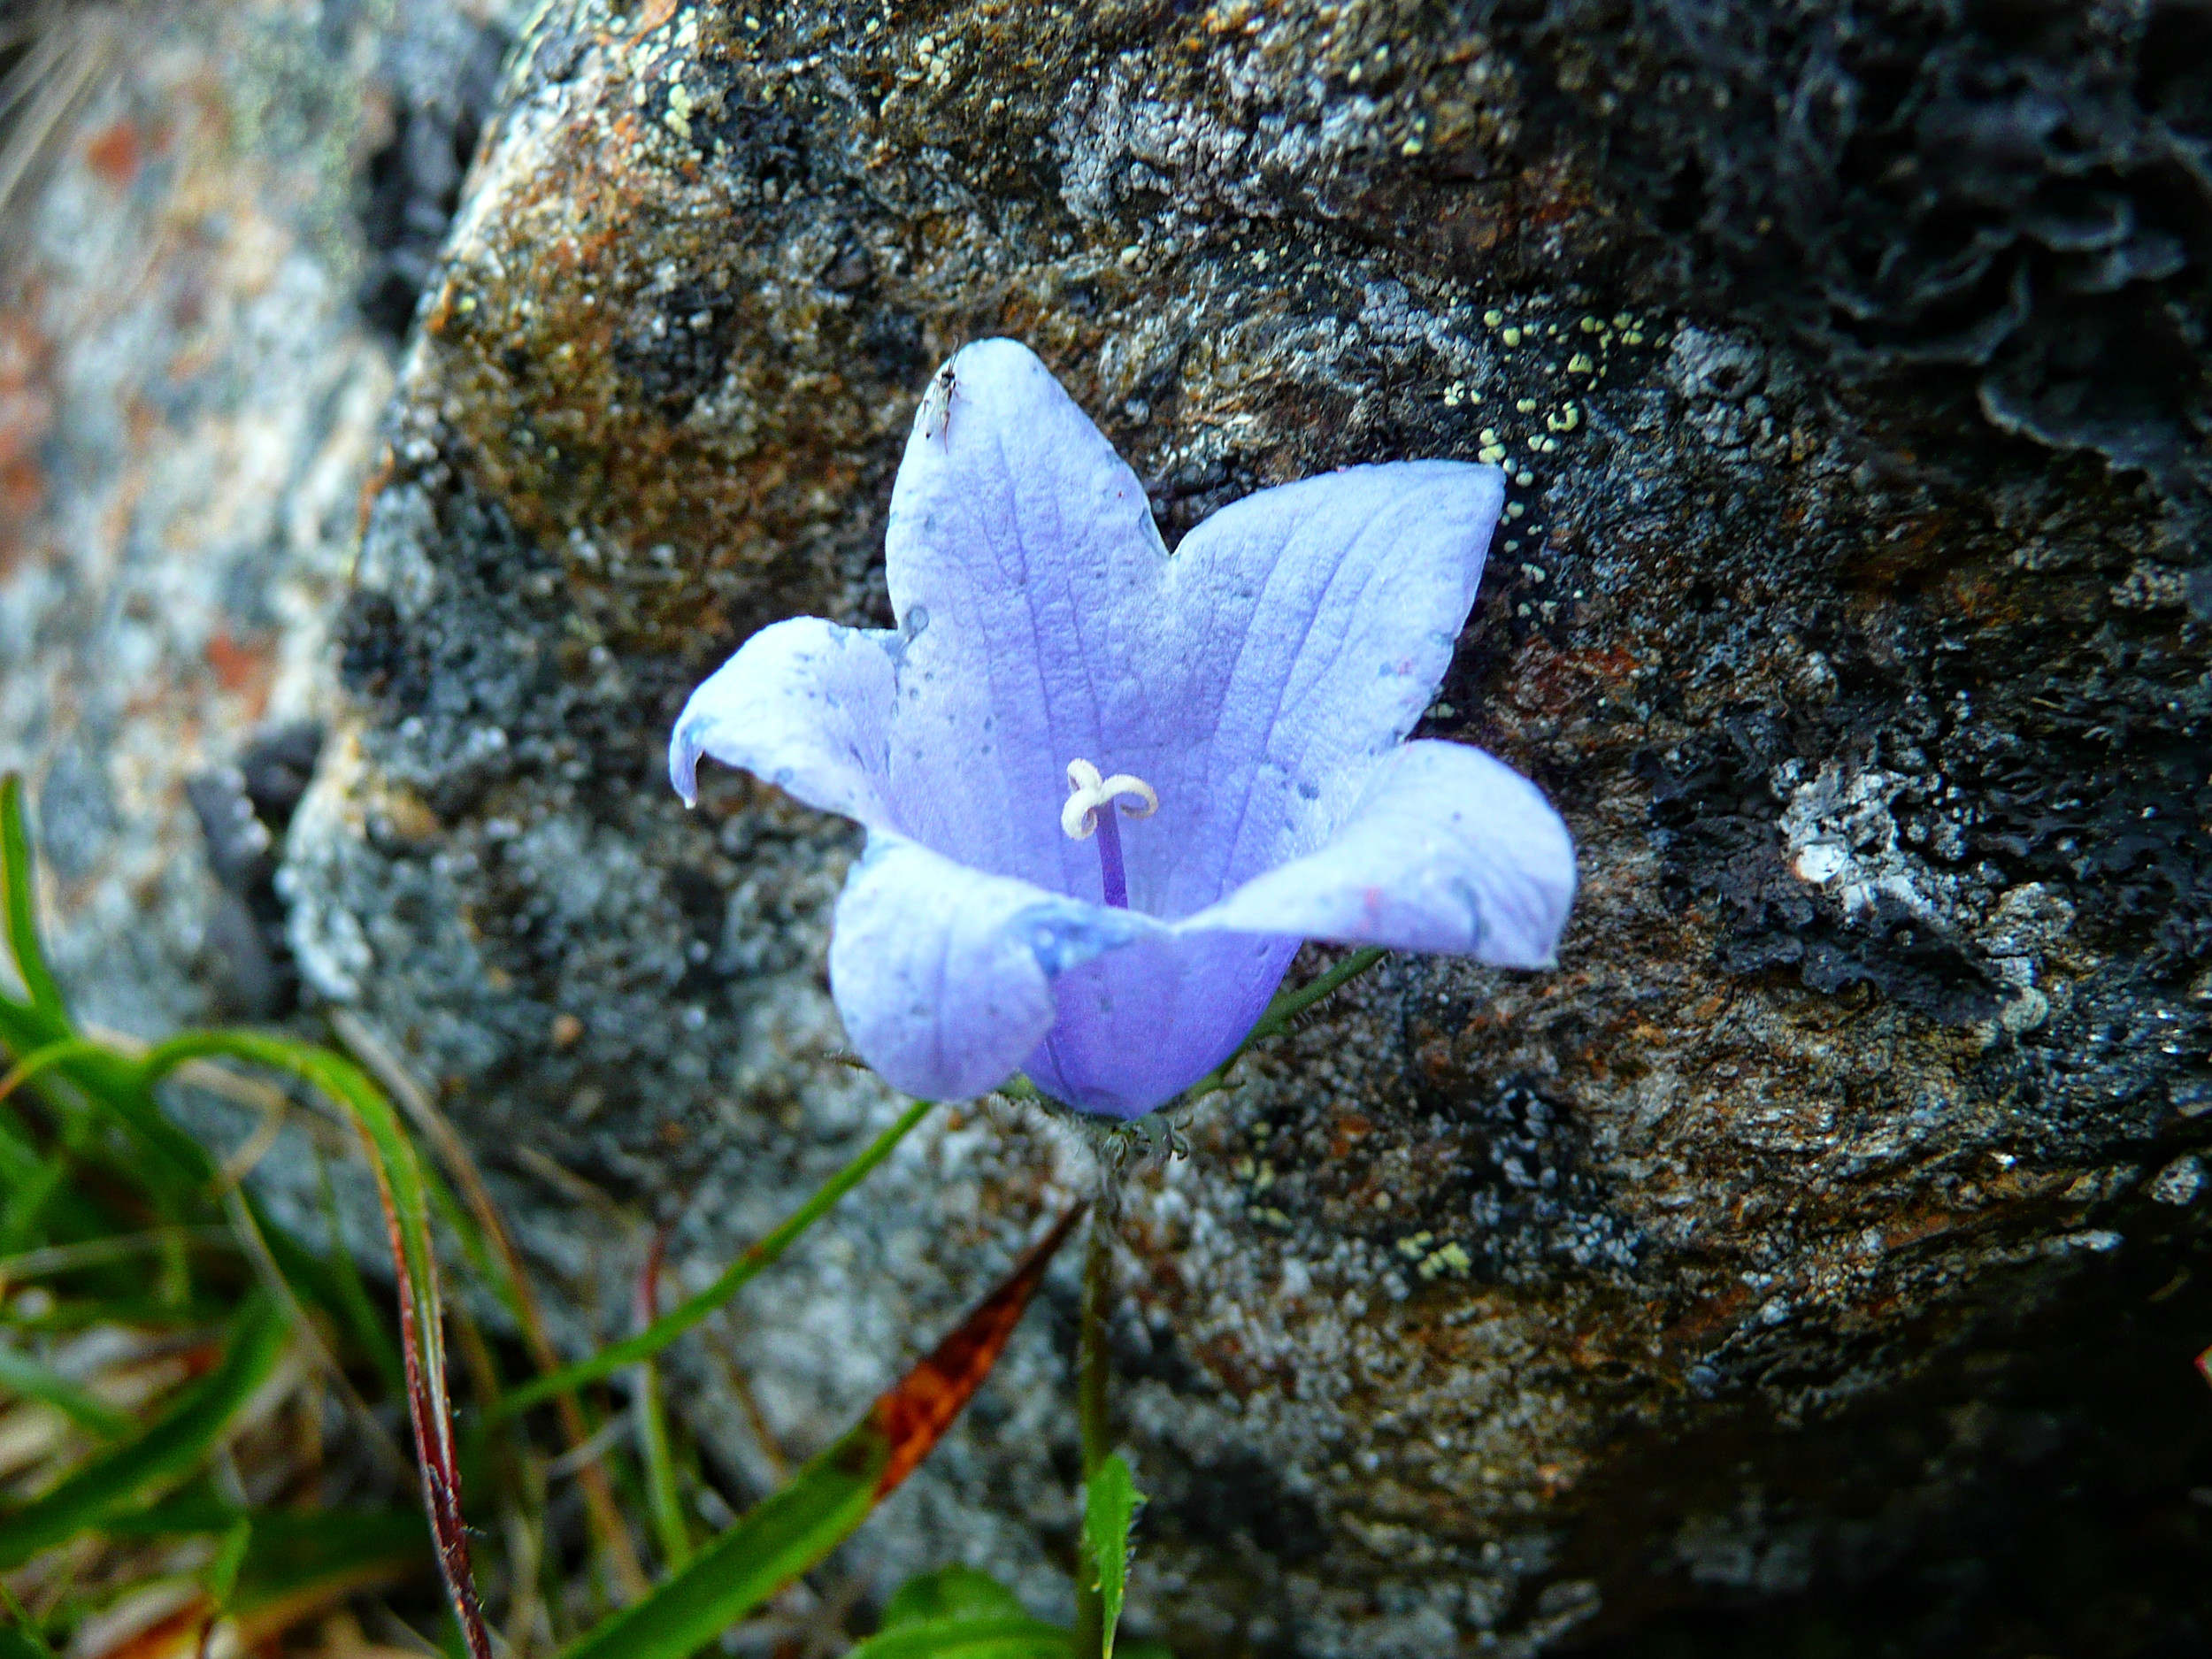
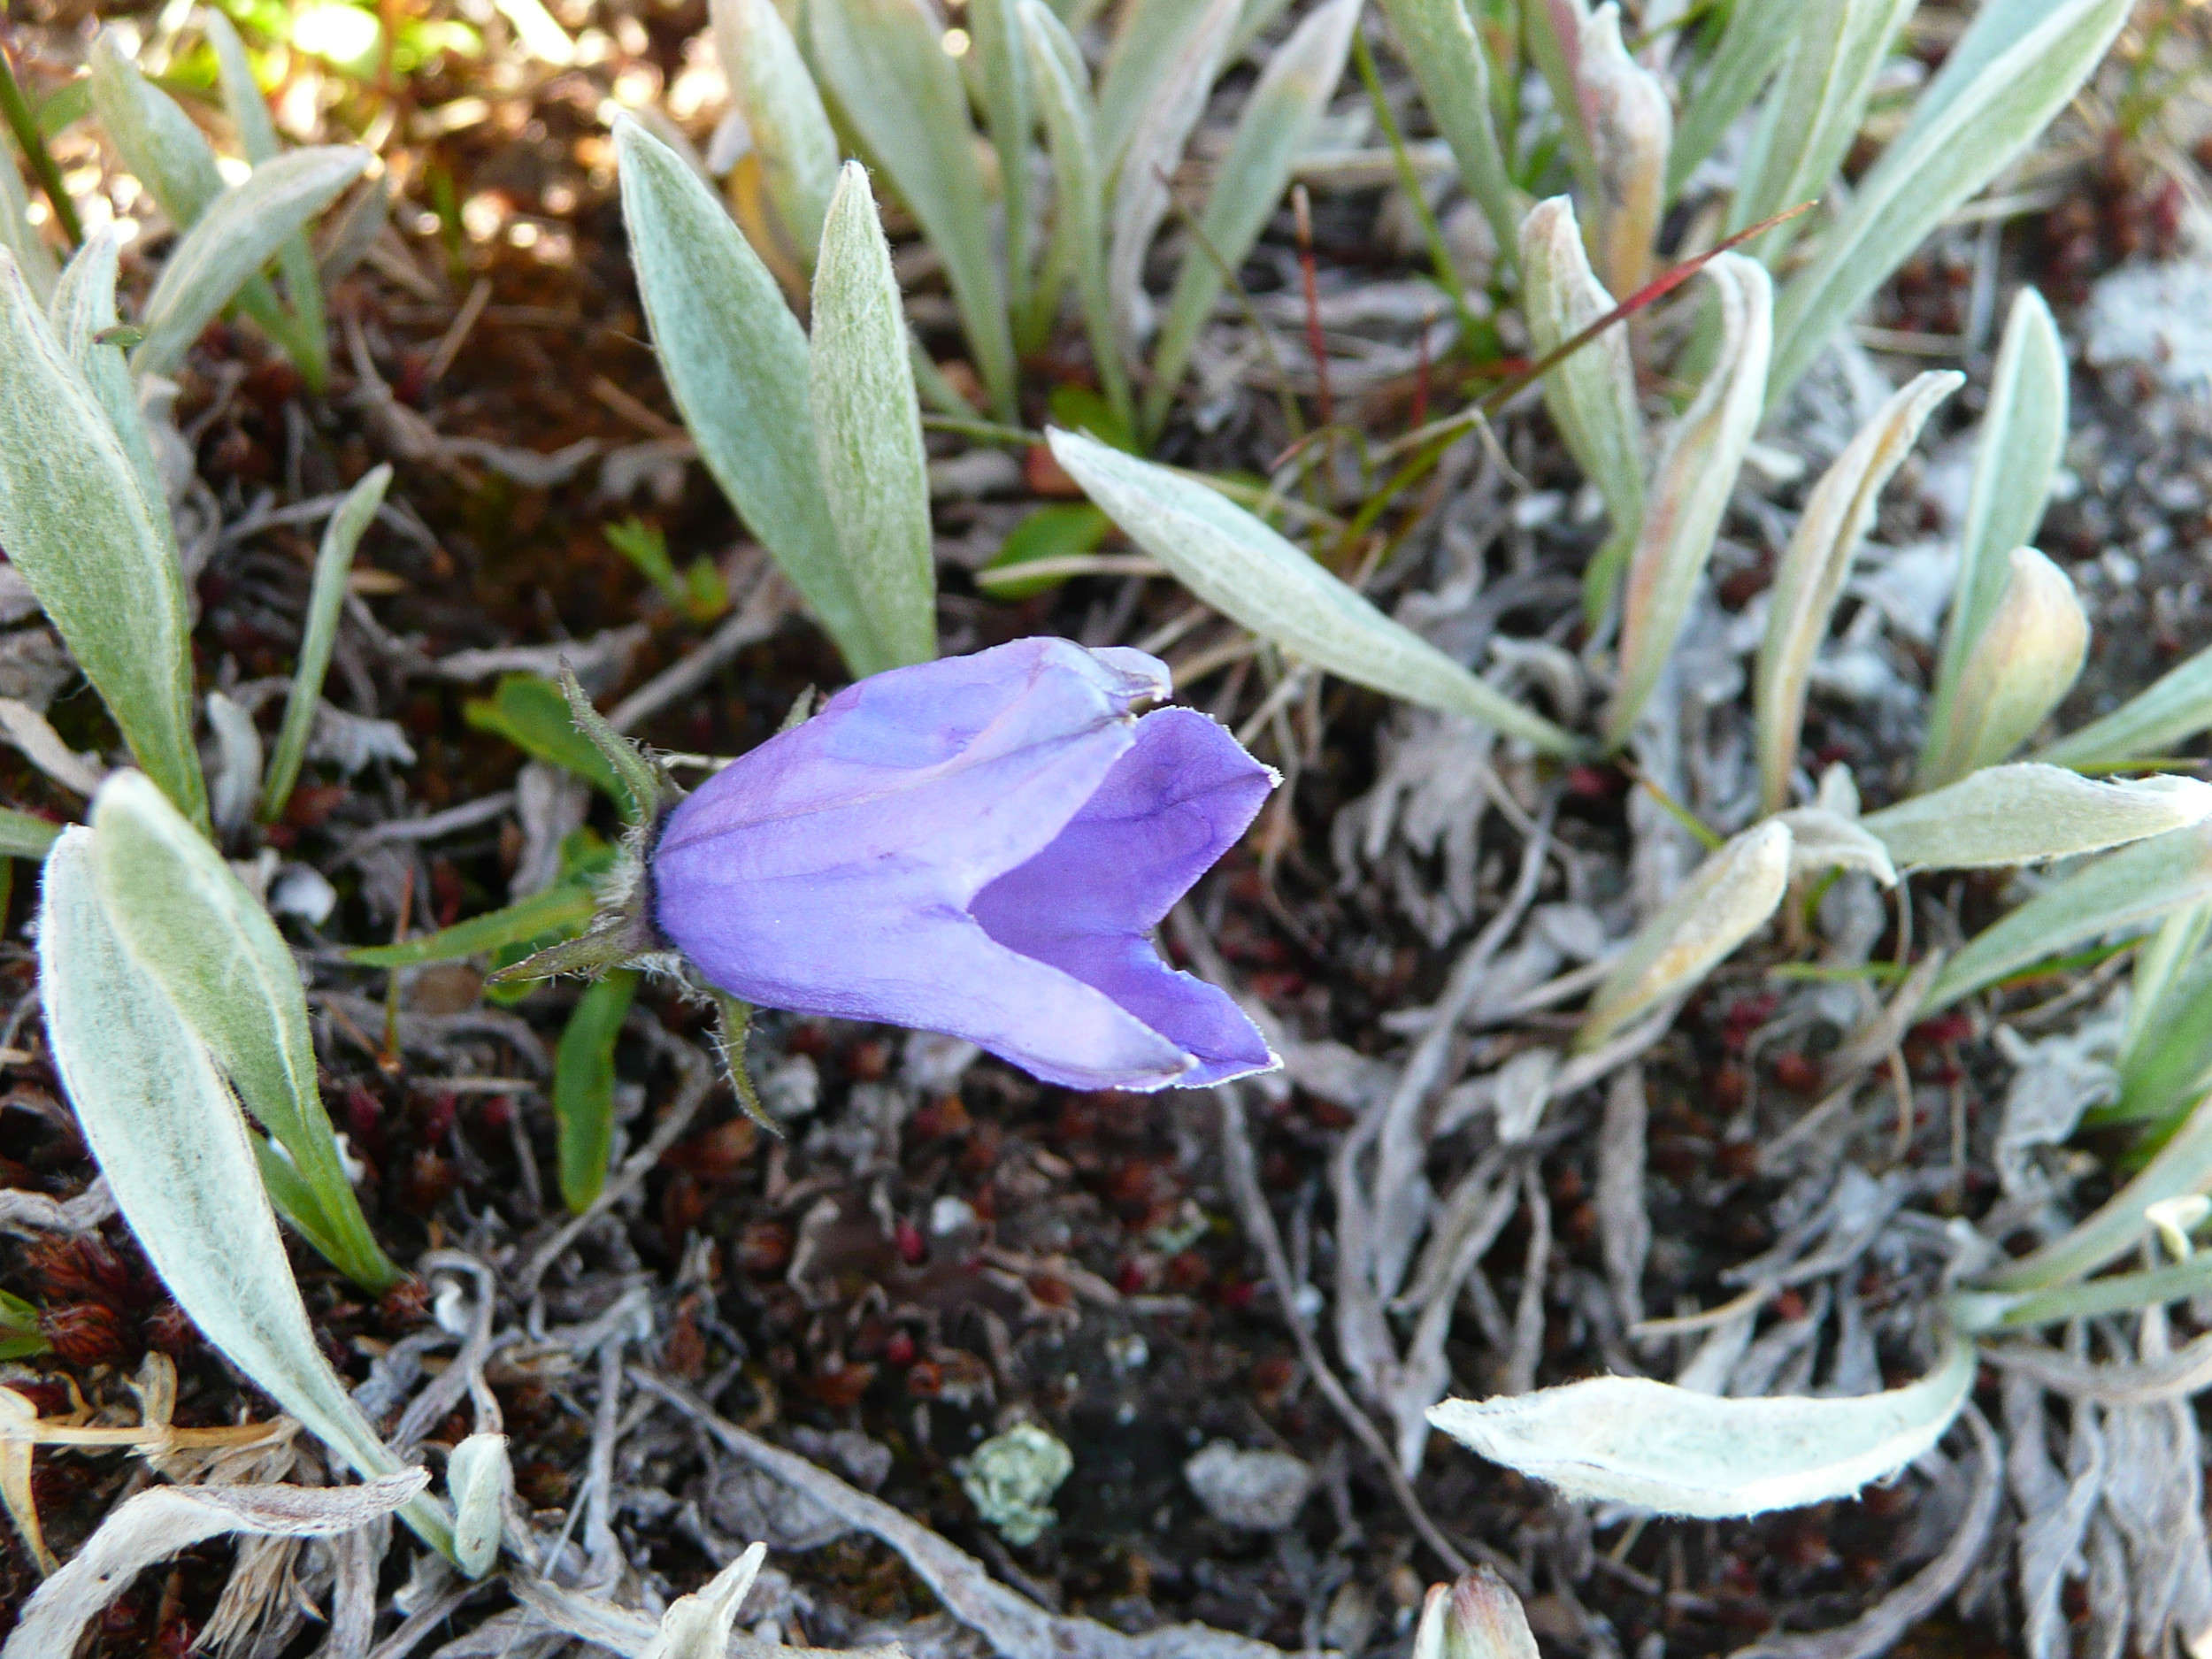
The next morning I have a breakfast of cooked minute oats, milk powder and raisins. I brought some nice instant coffee from my last visit to Germany. By eight o’clock I am on the trail. Flowering heather and harebells grace the high elevation meadows.
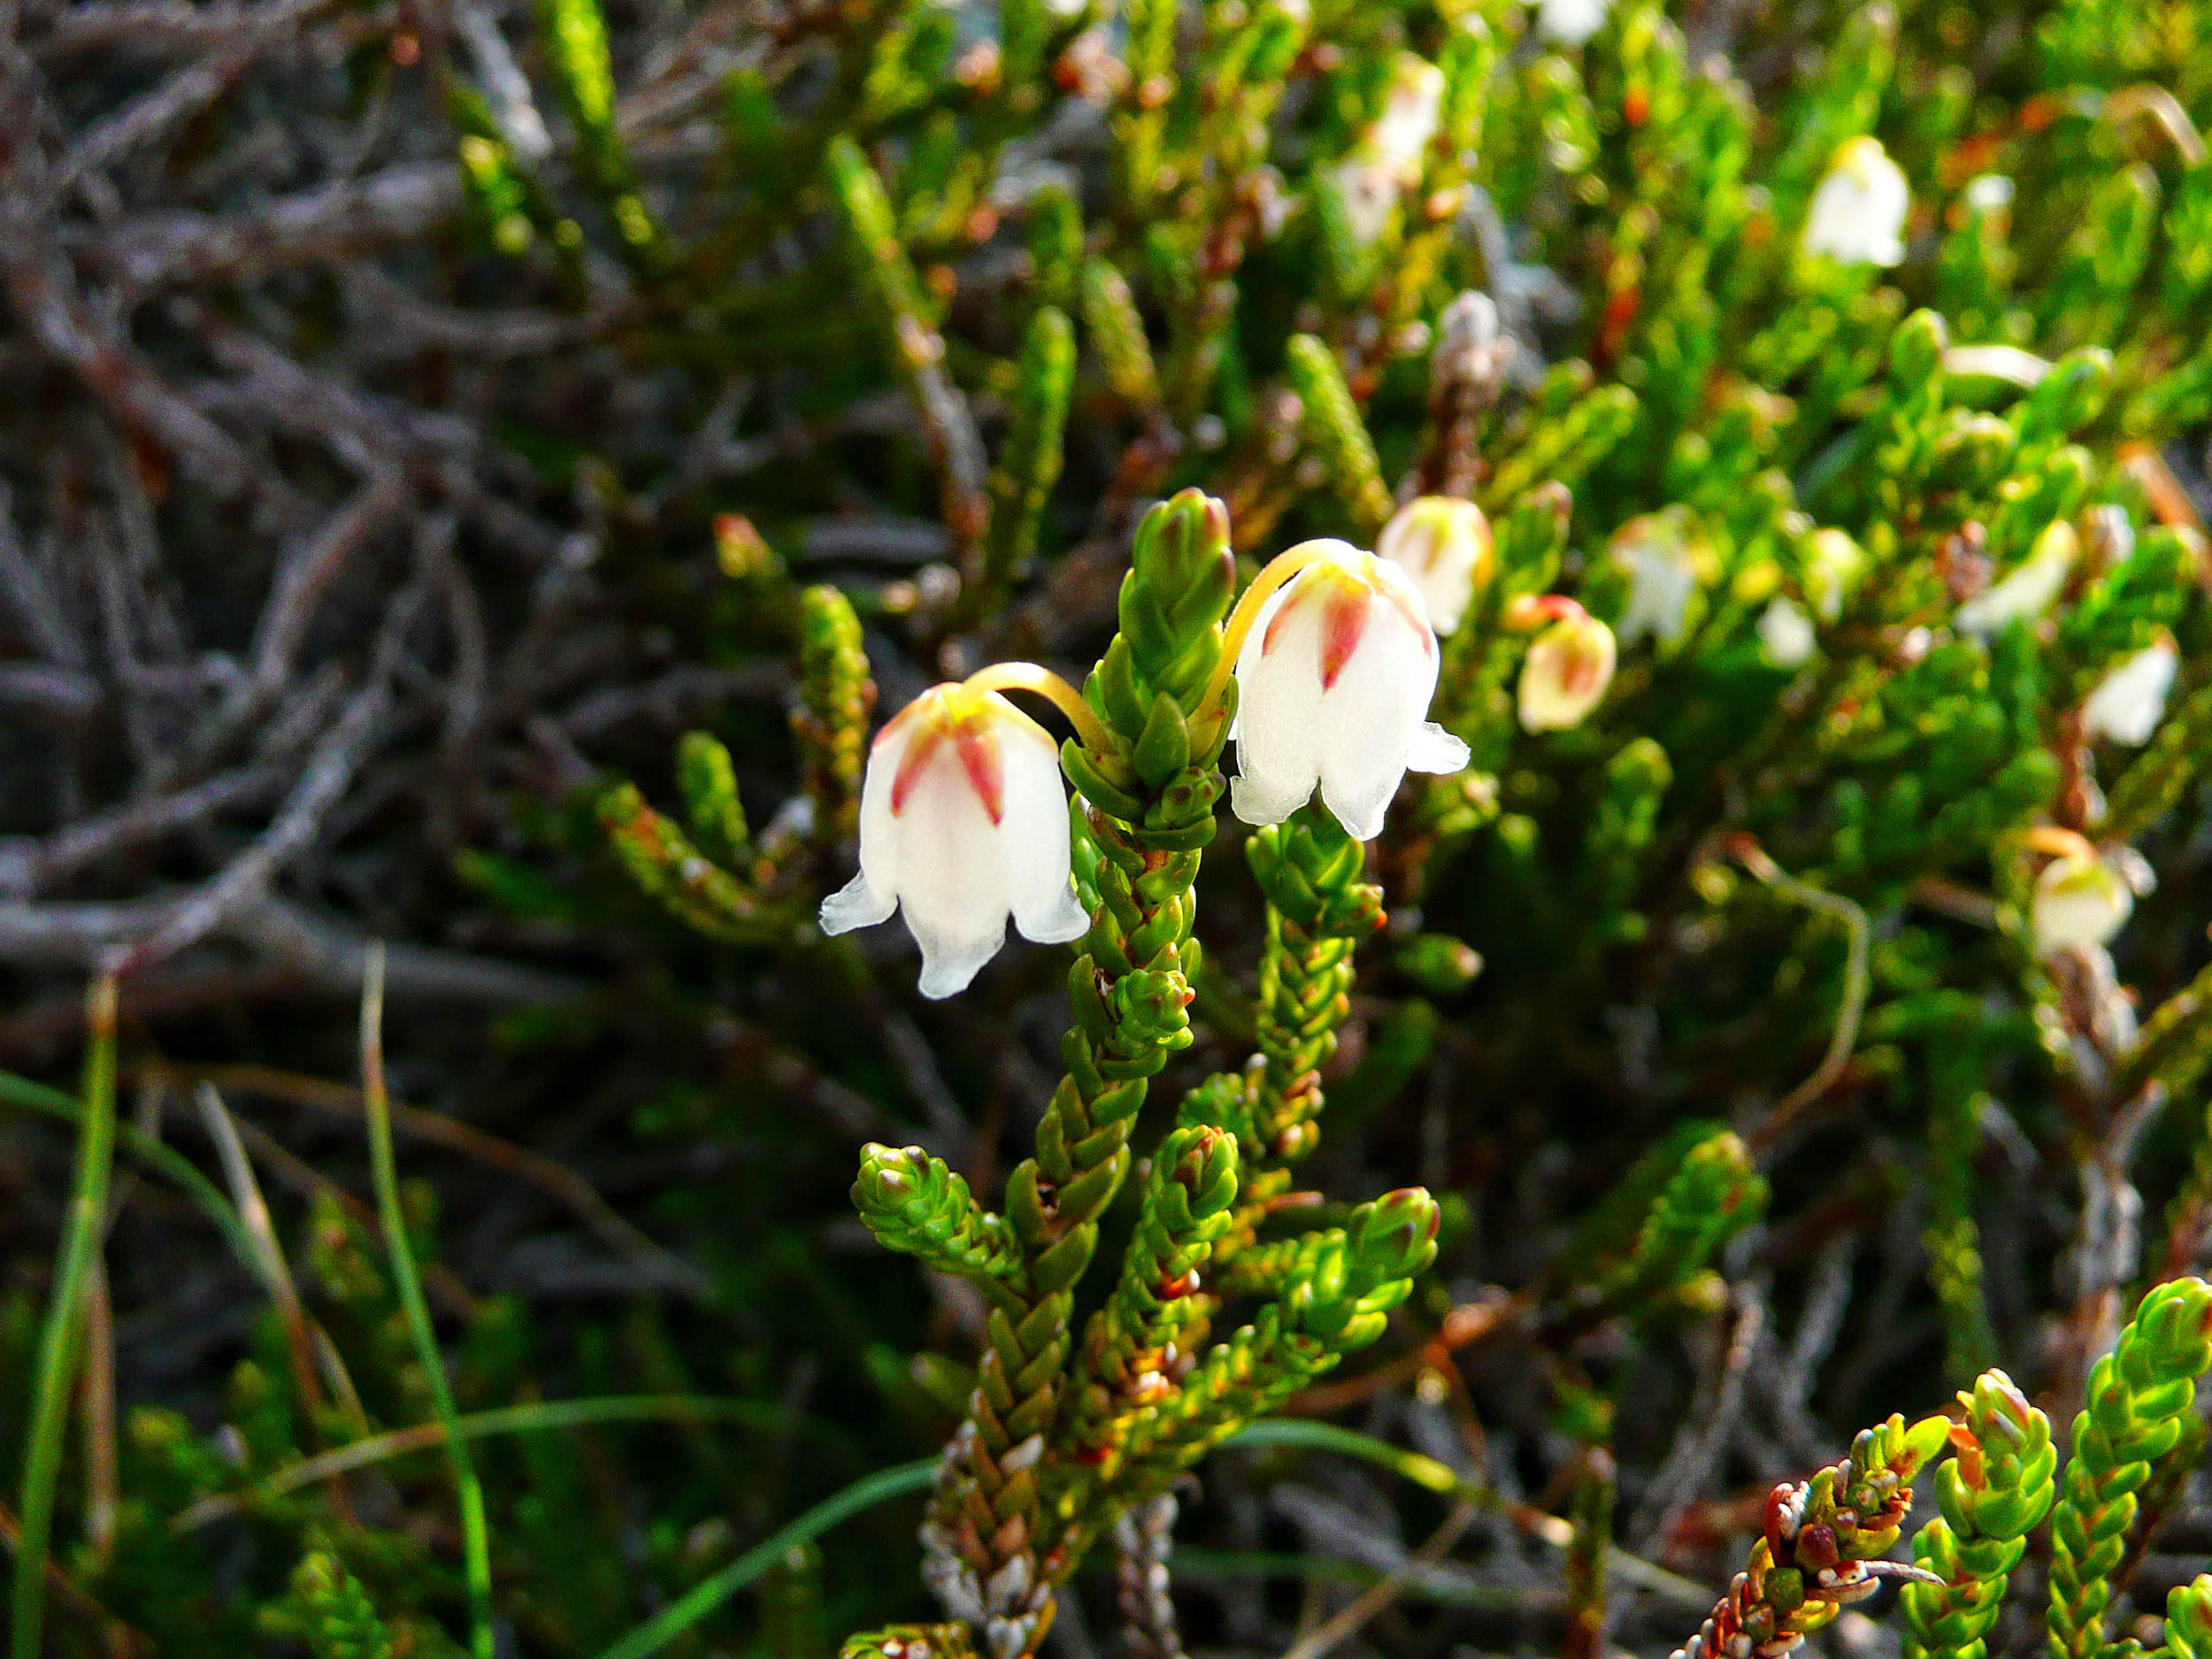
Heather
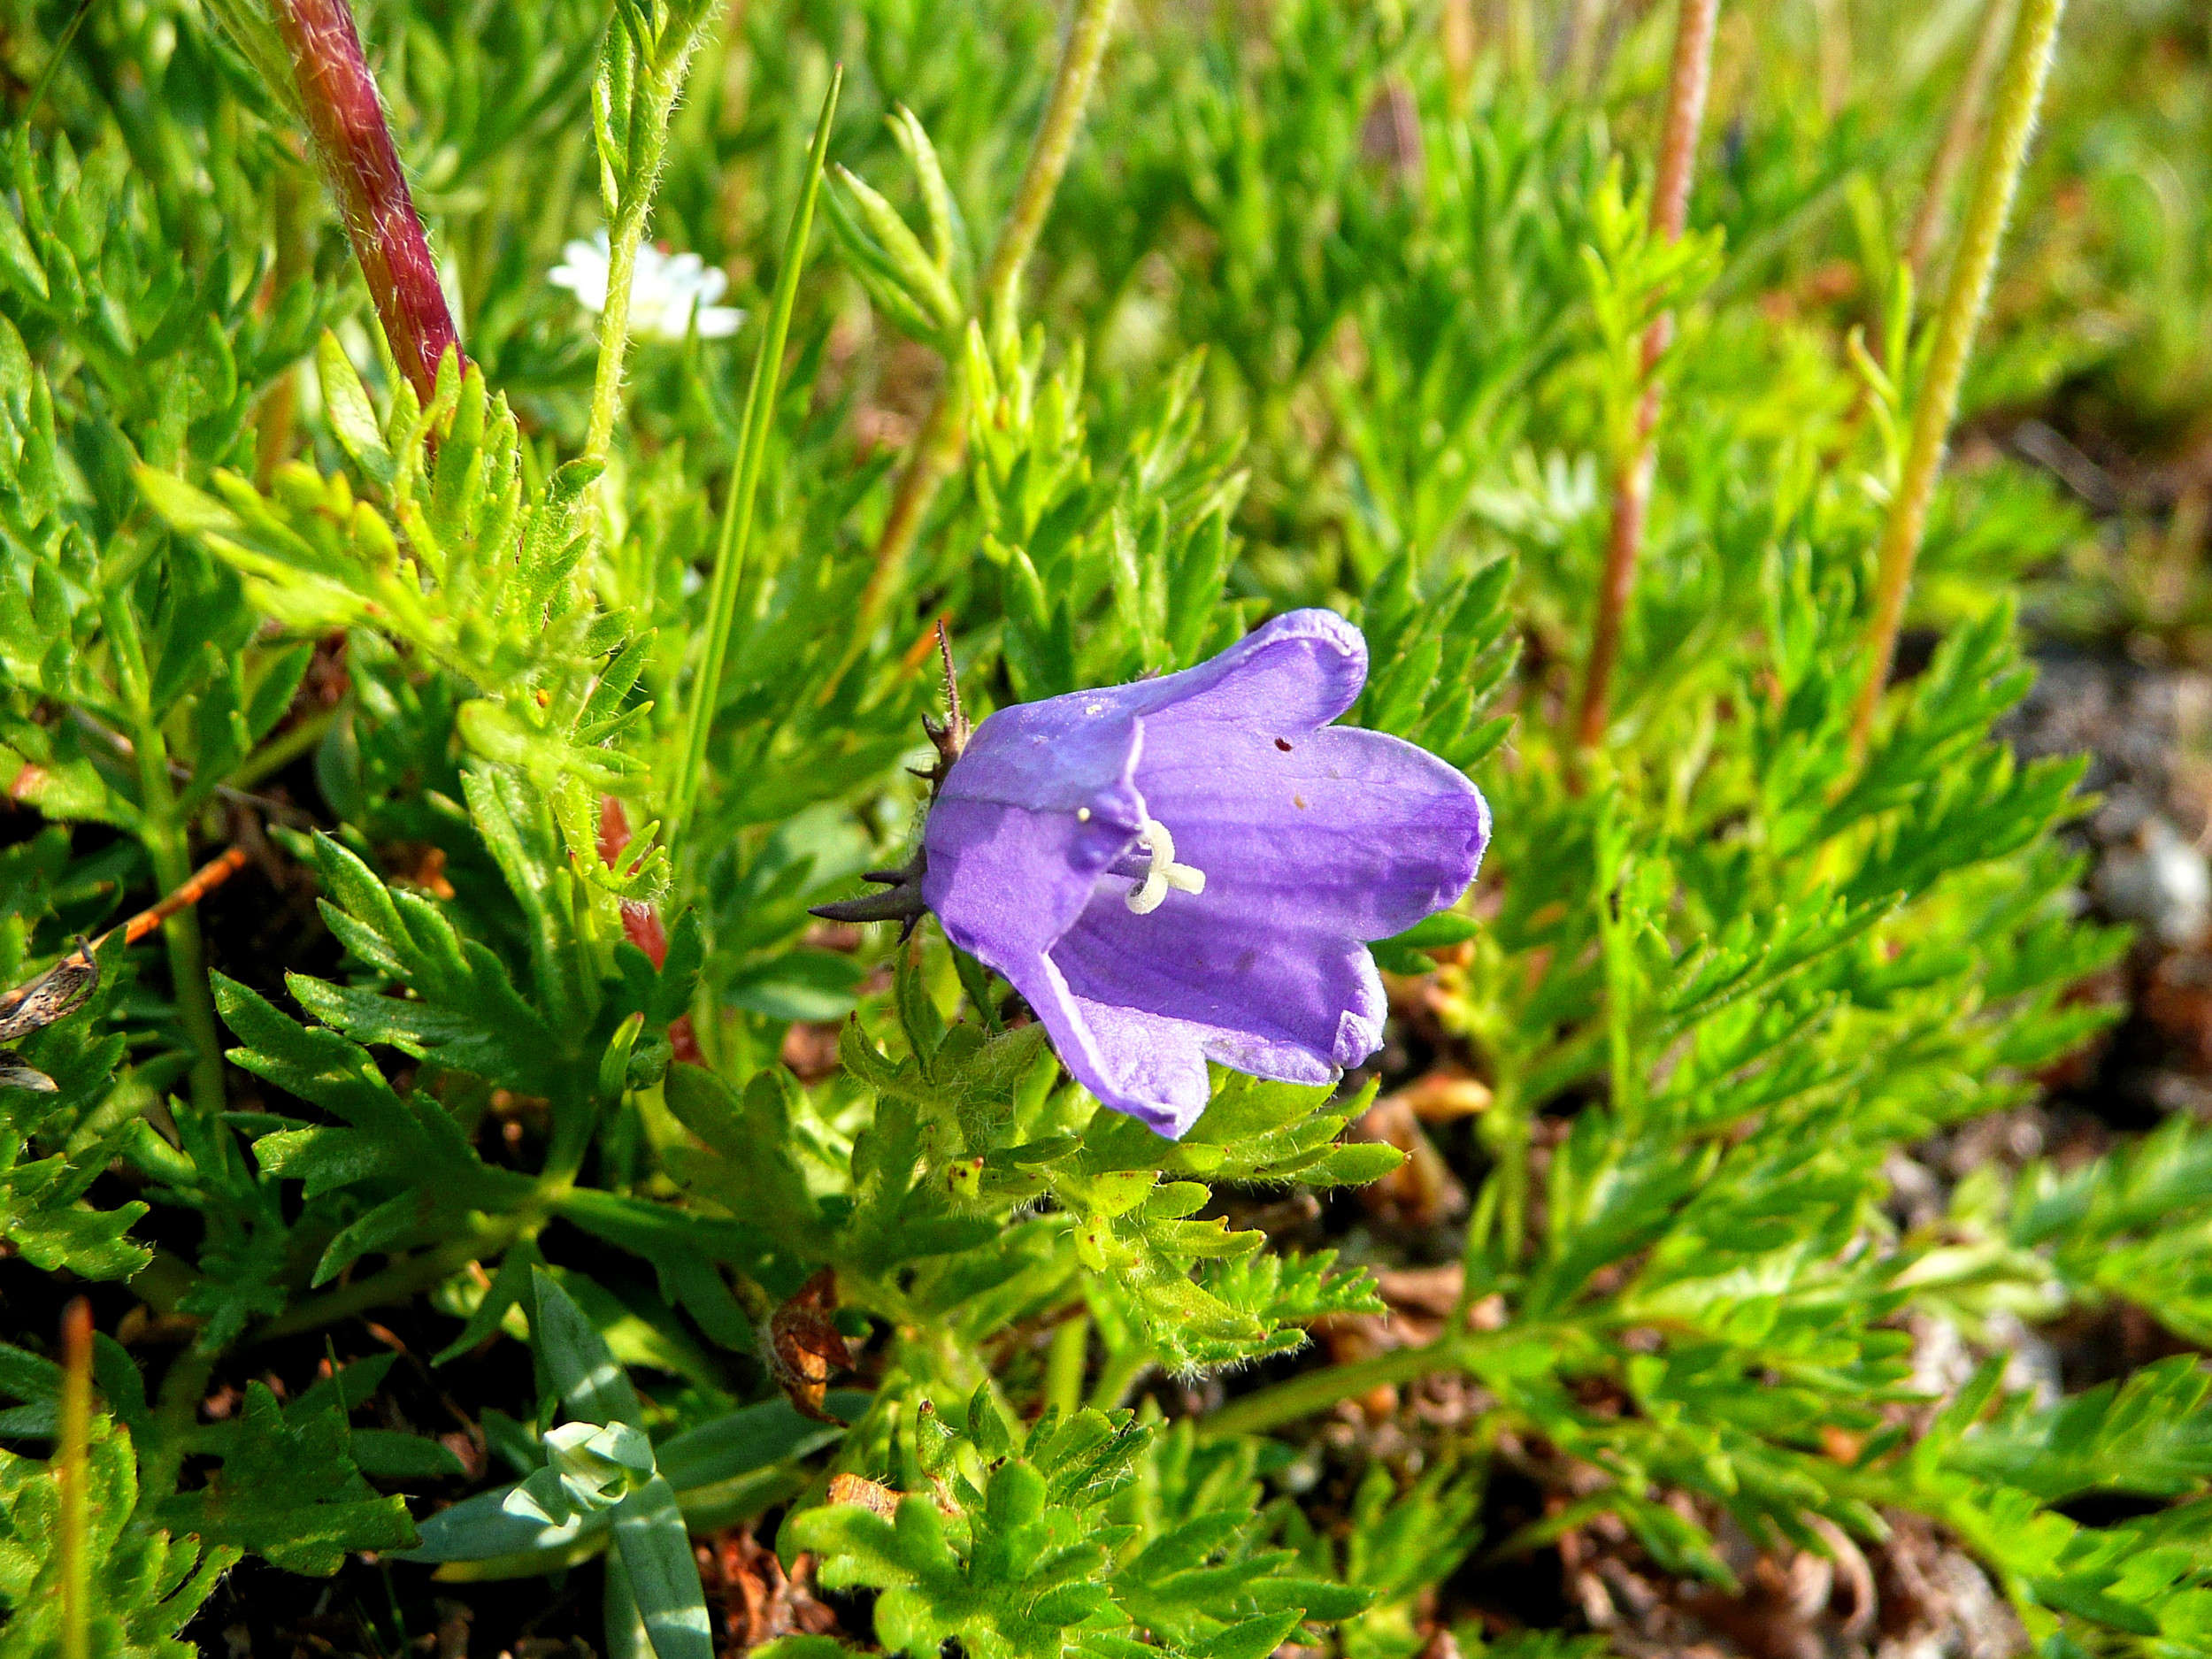
Harebell
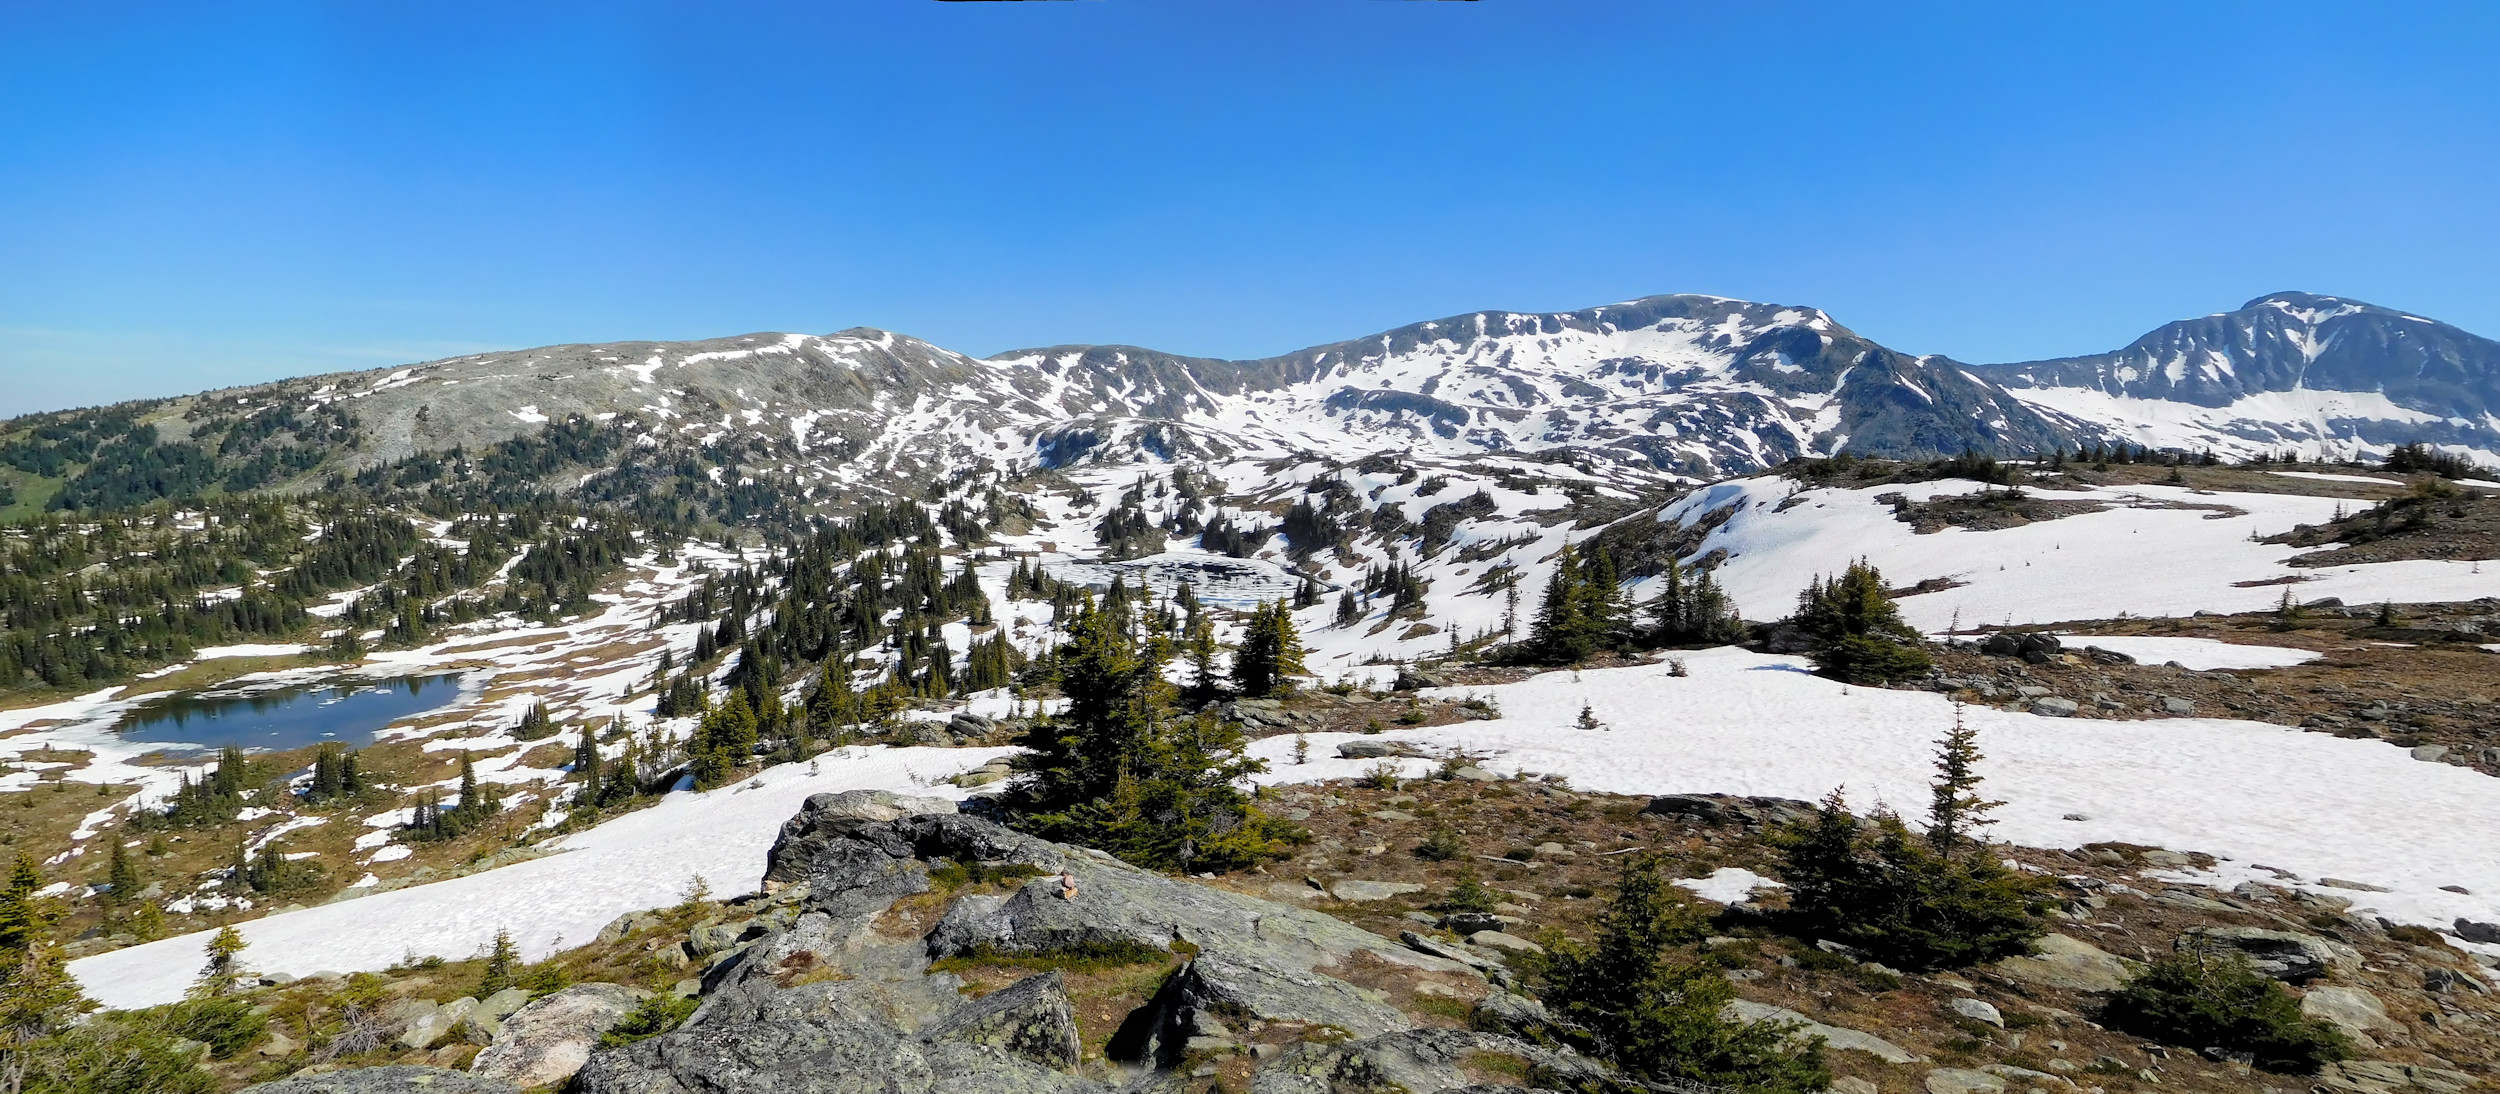
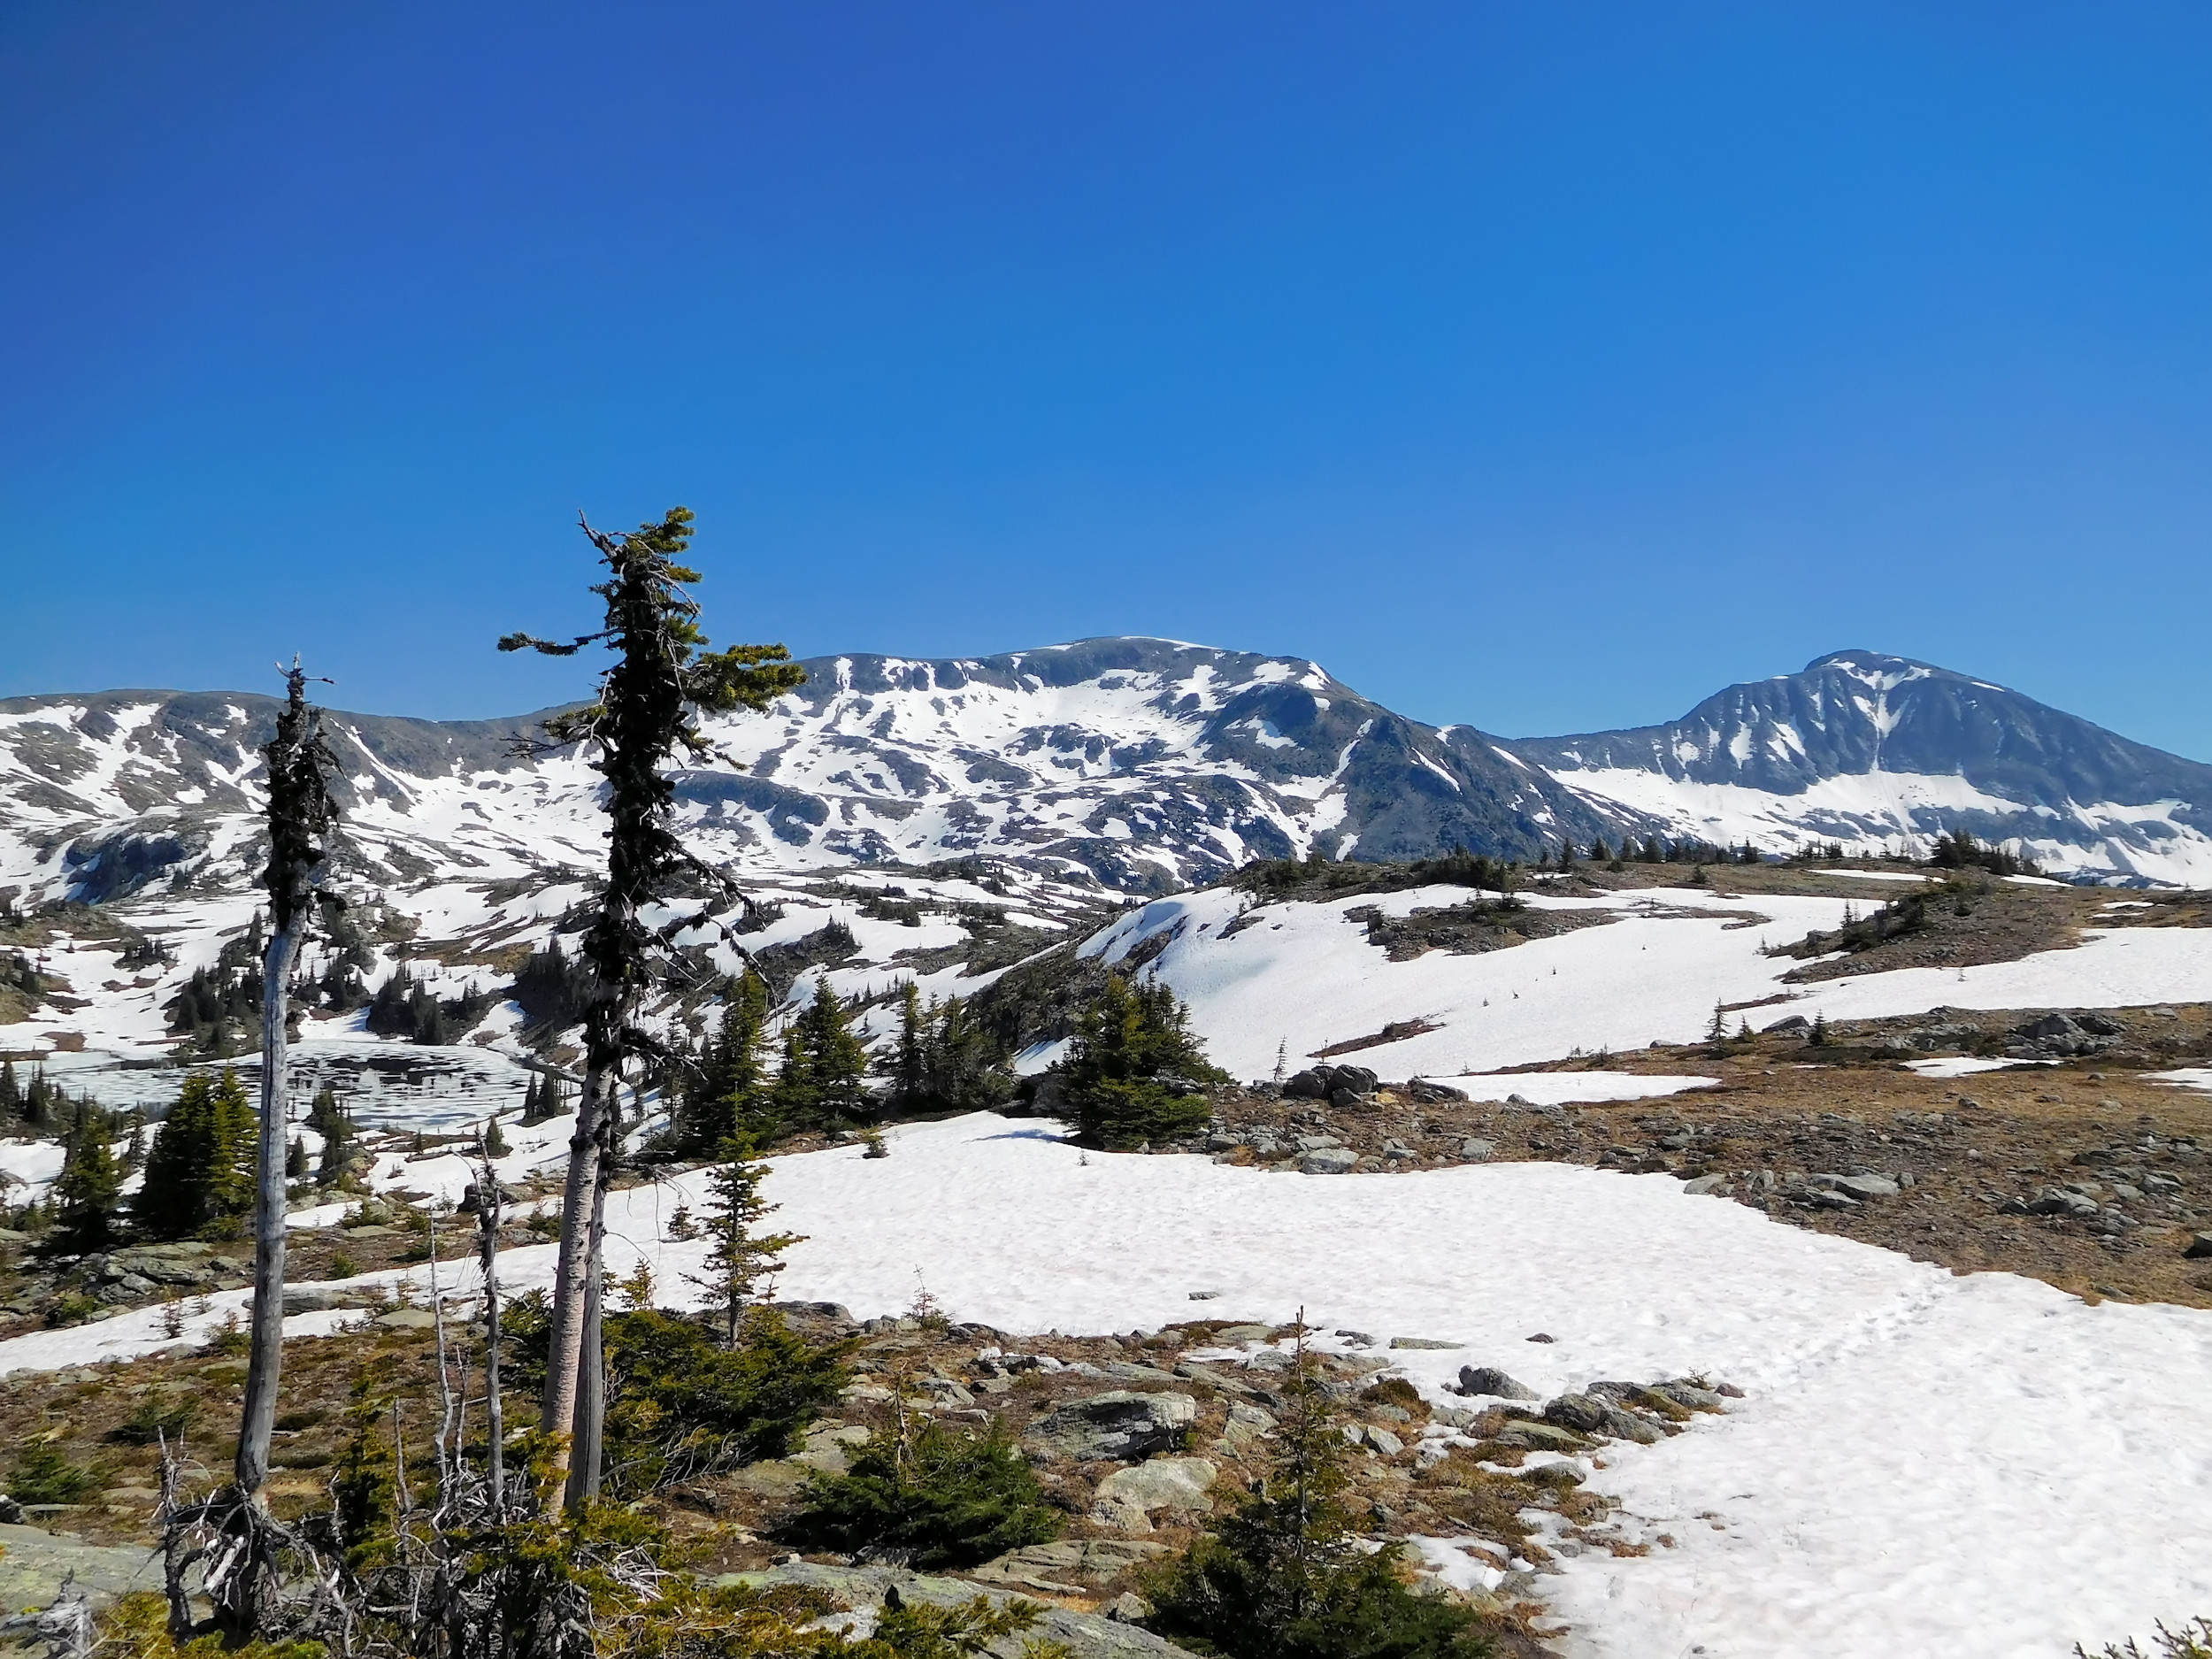
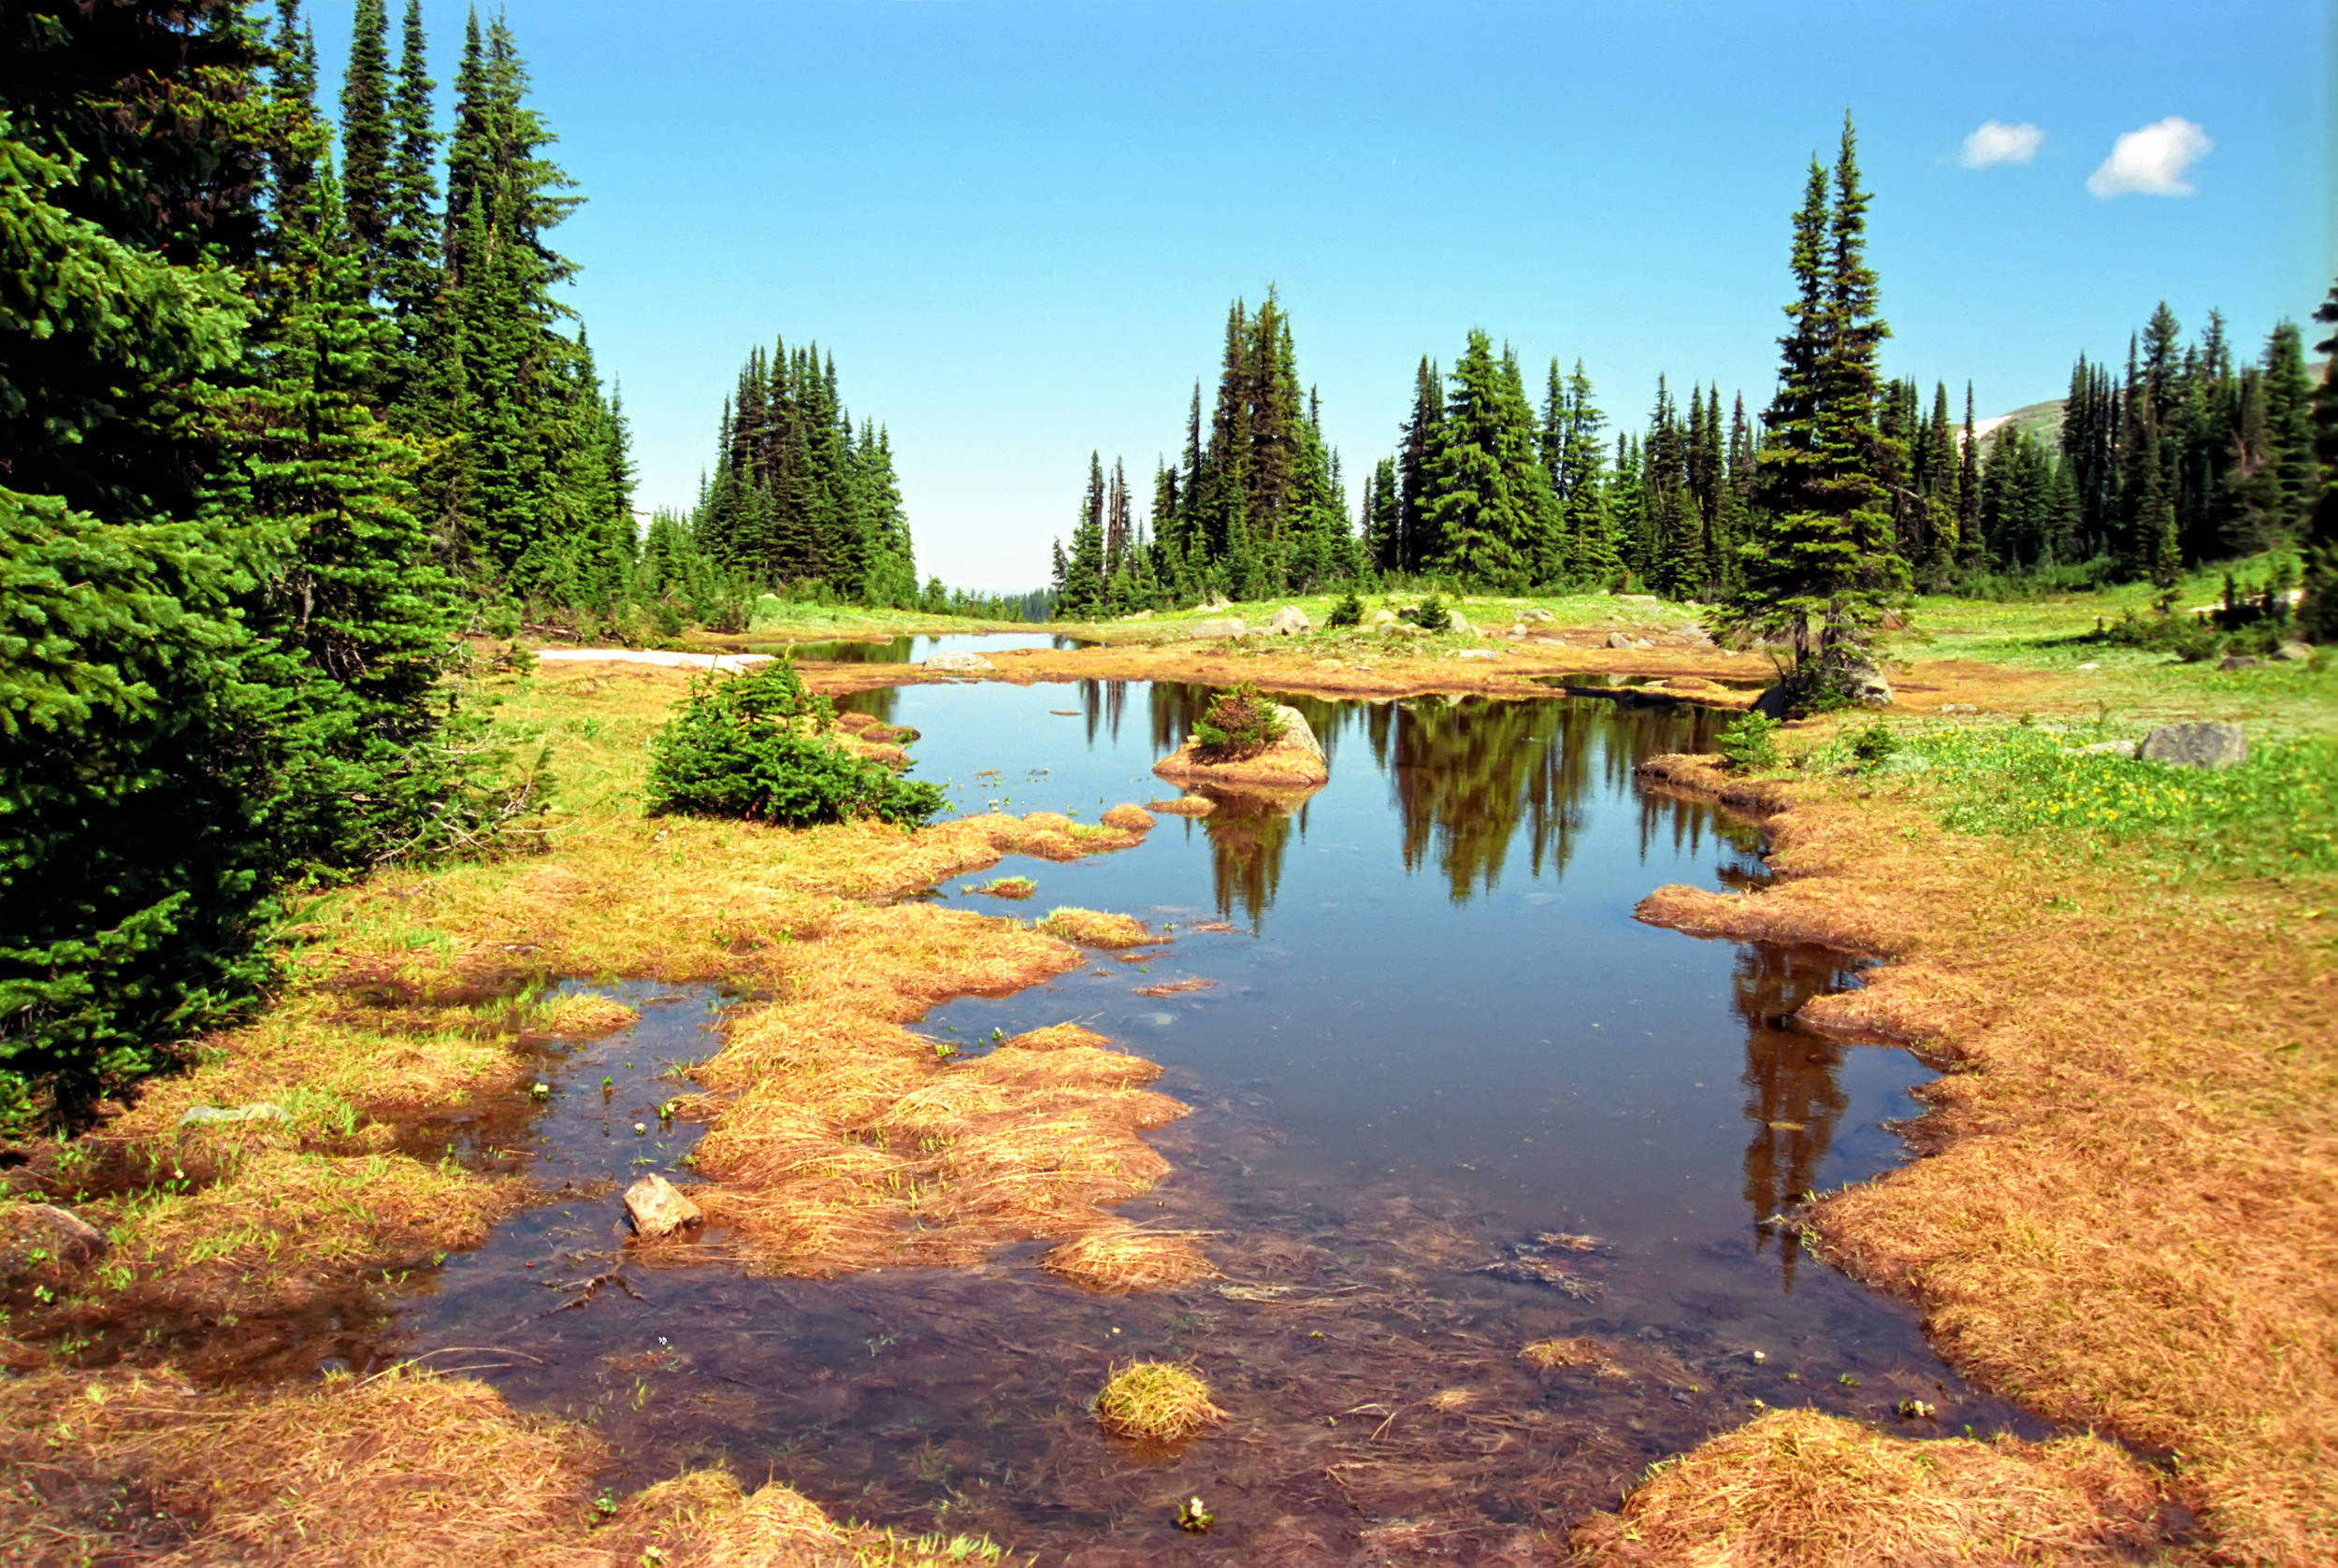
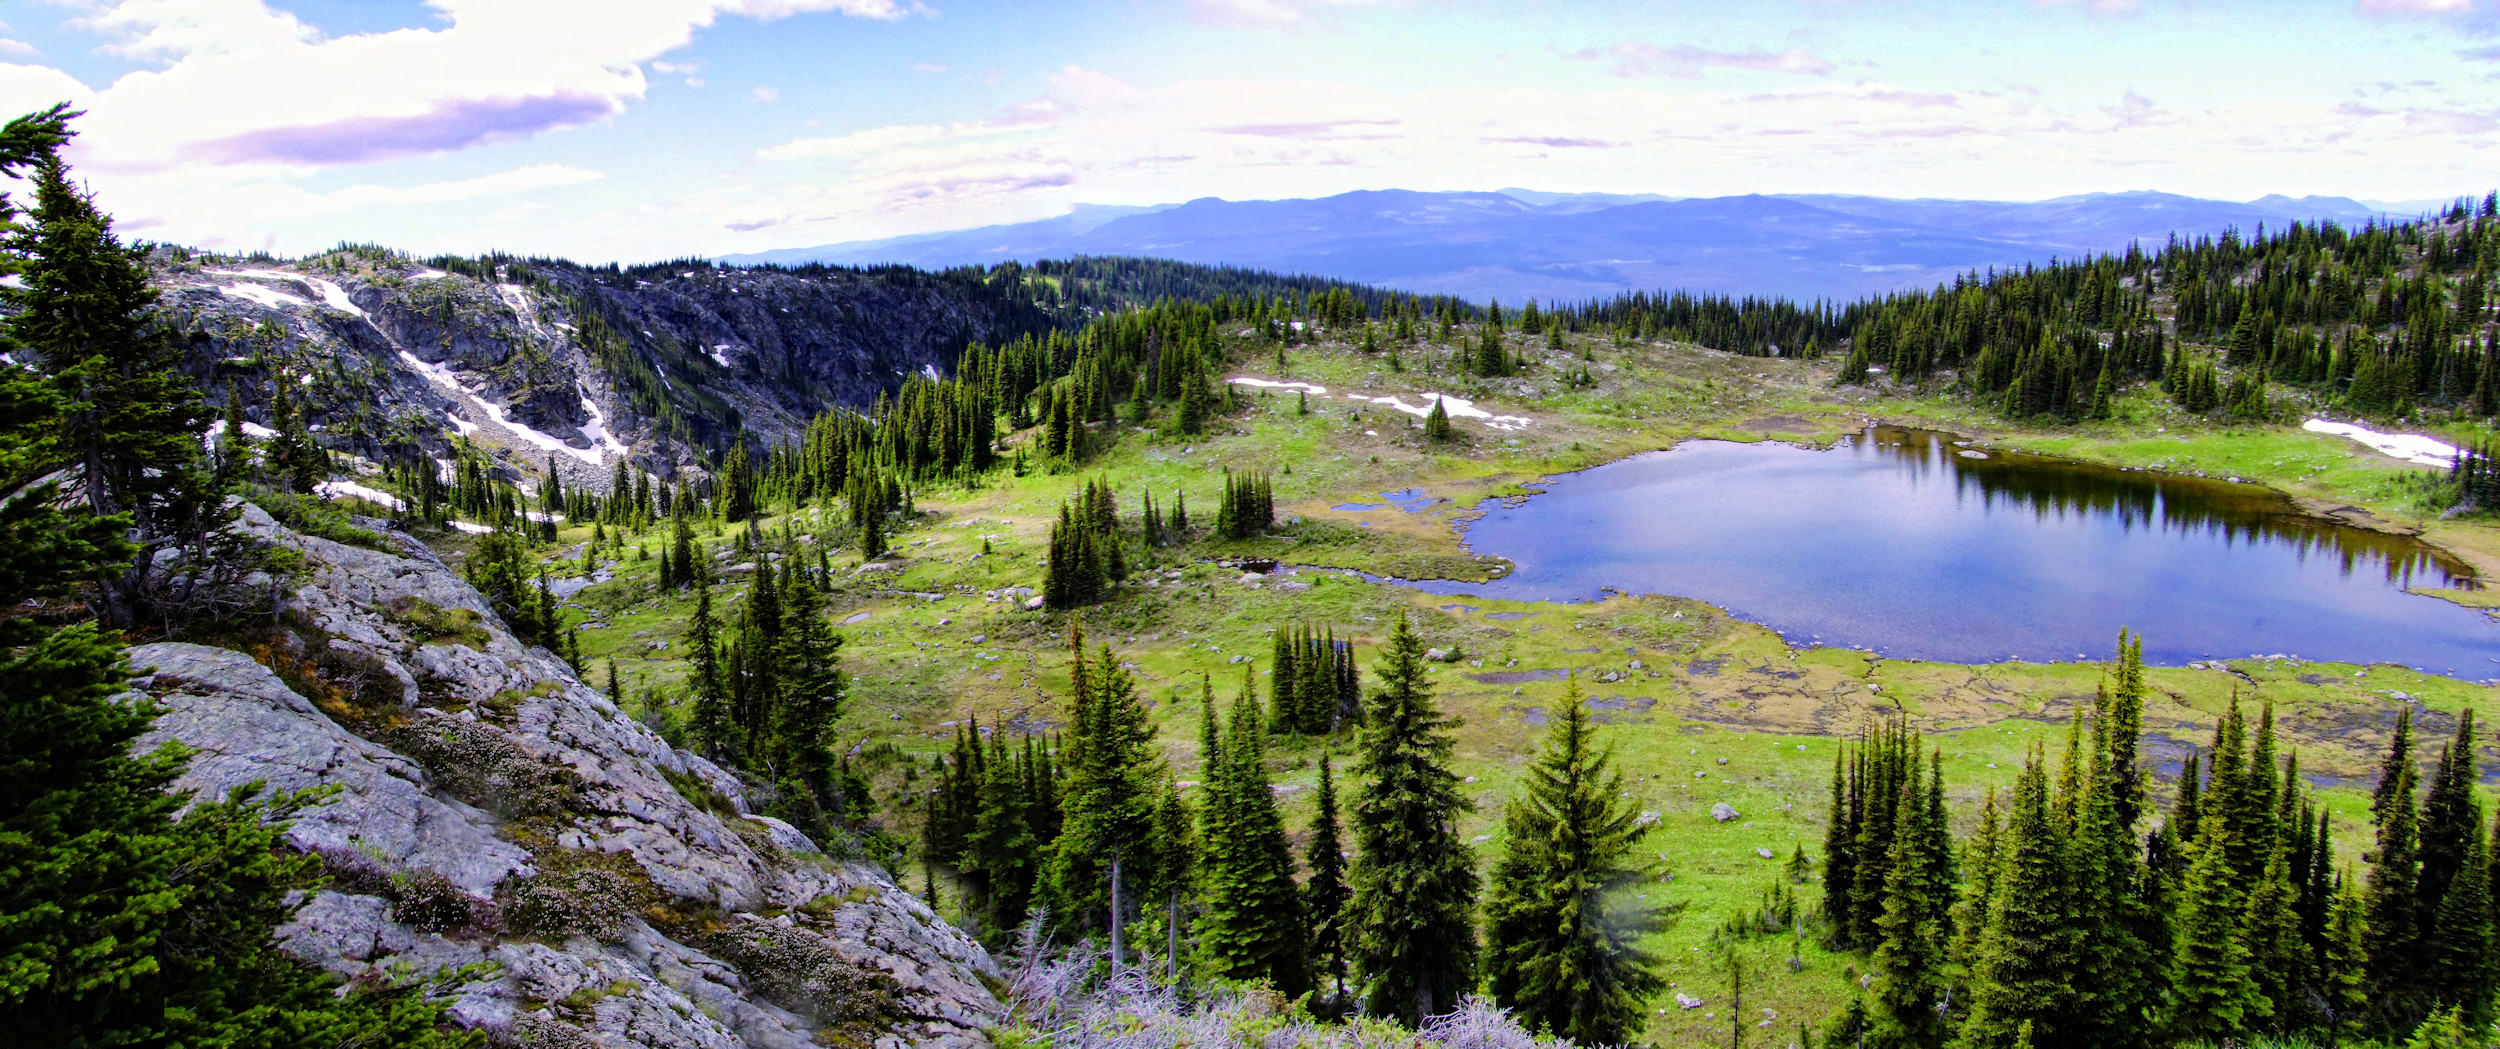
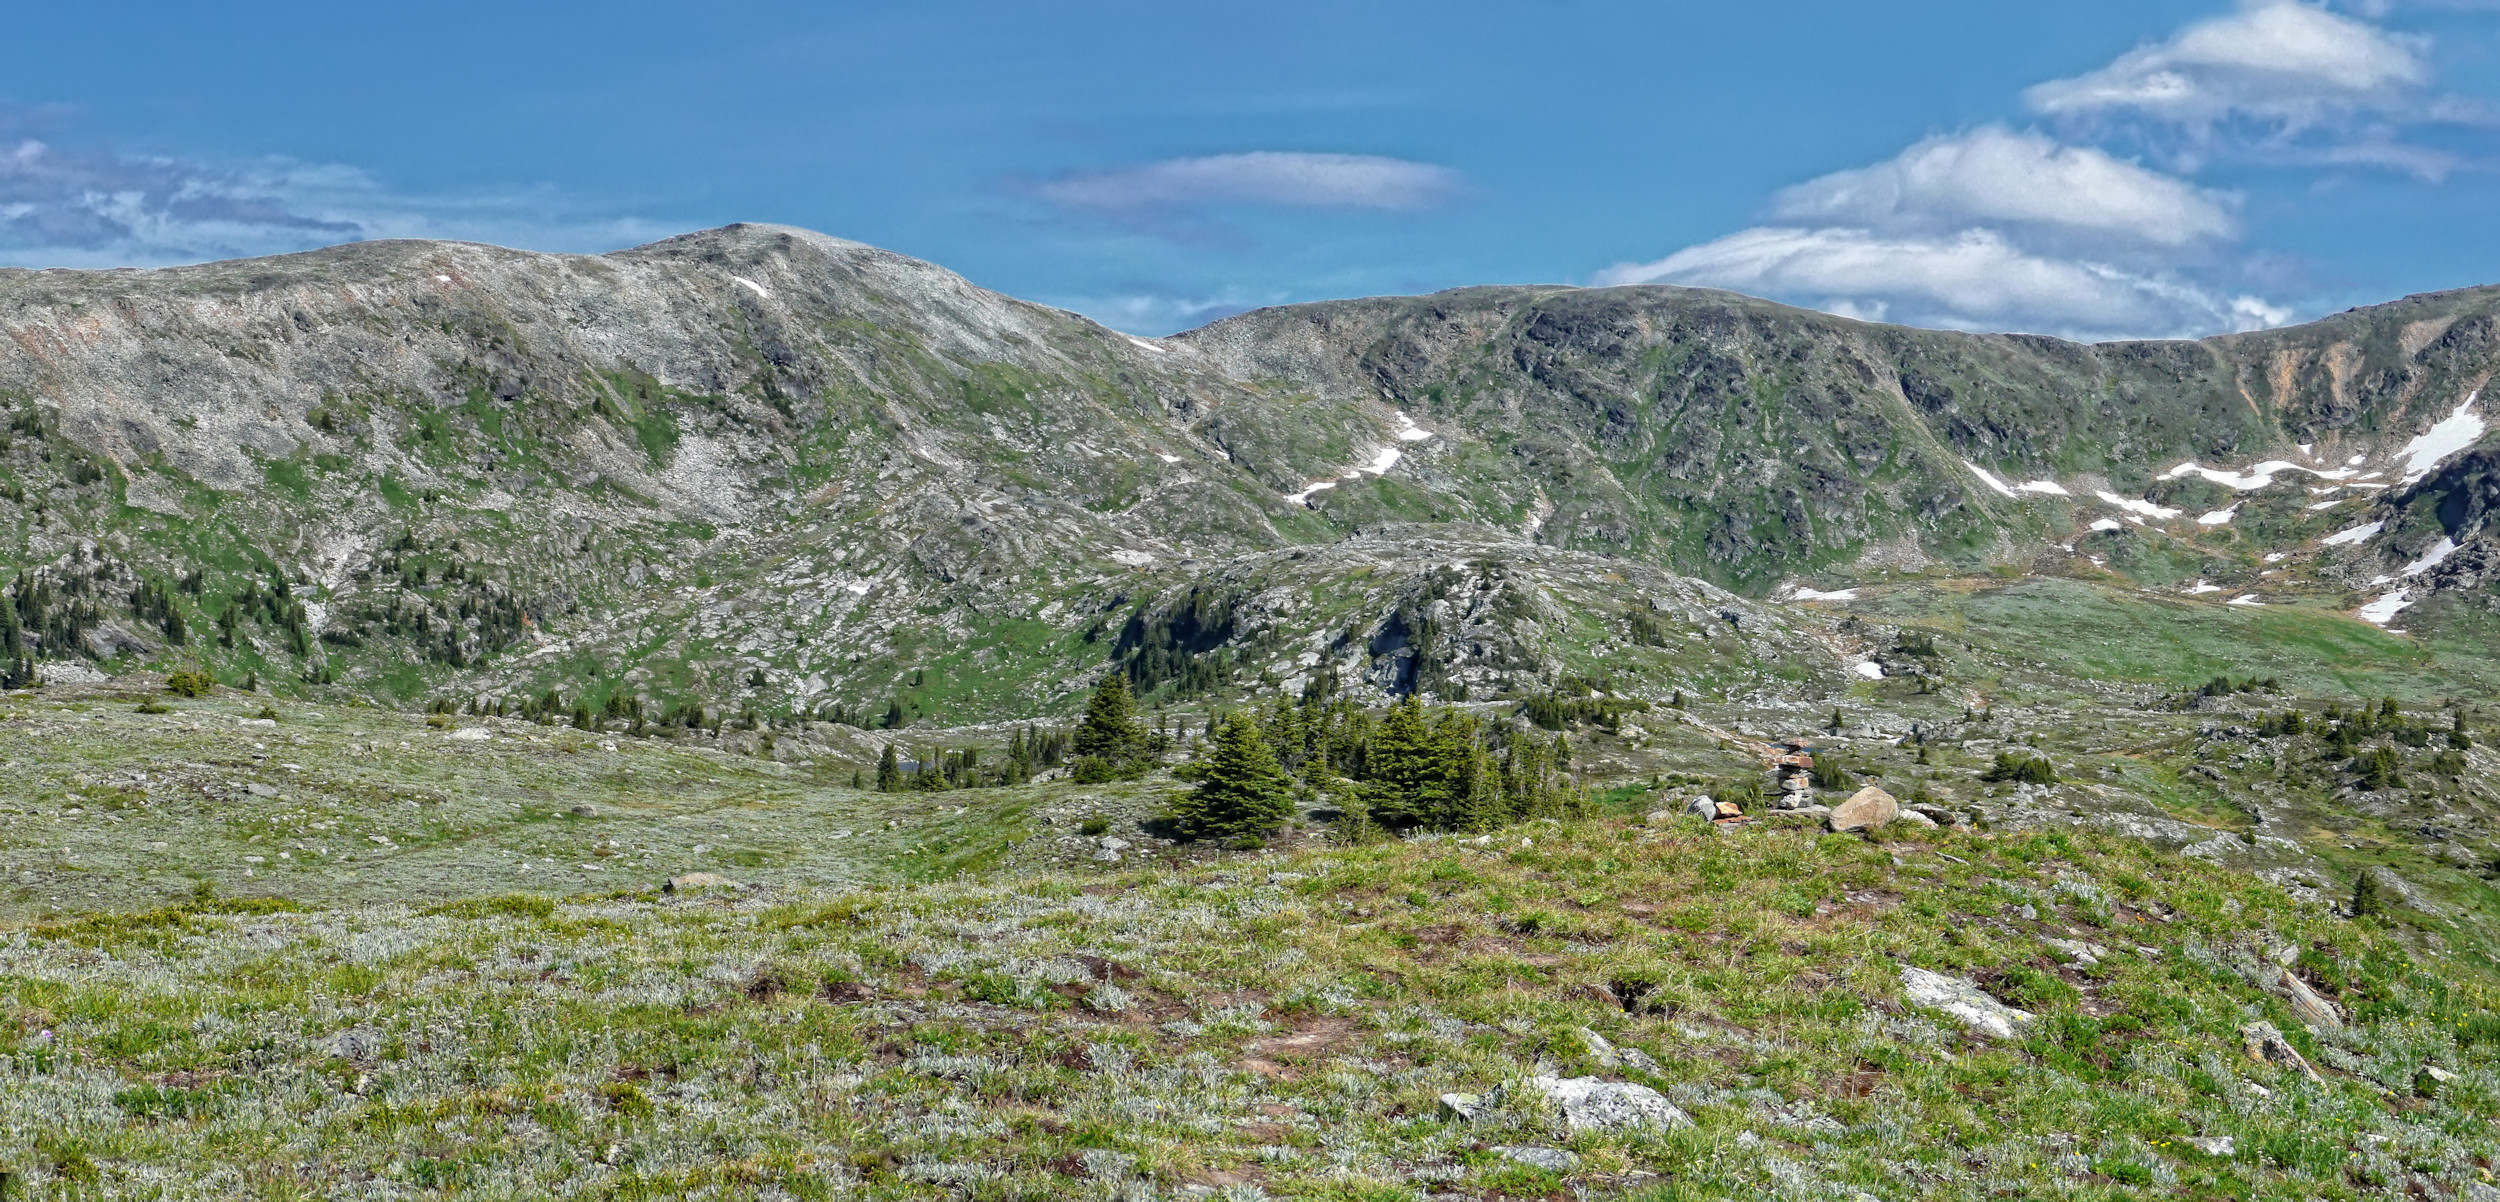
The trail passes along numerous lakes of different sizes on the Plateau of the Lakes.
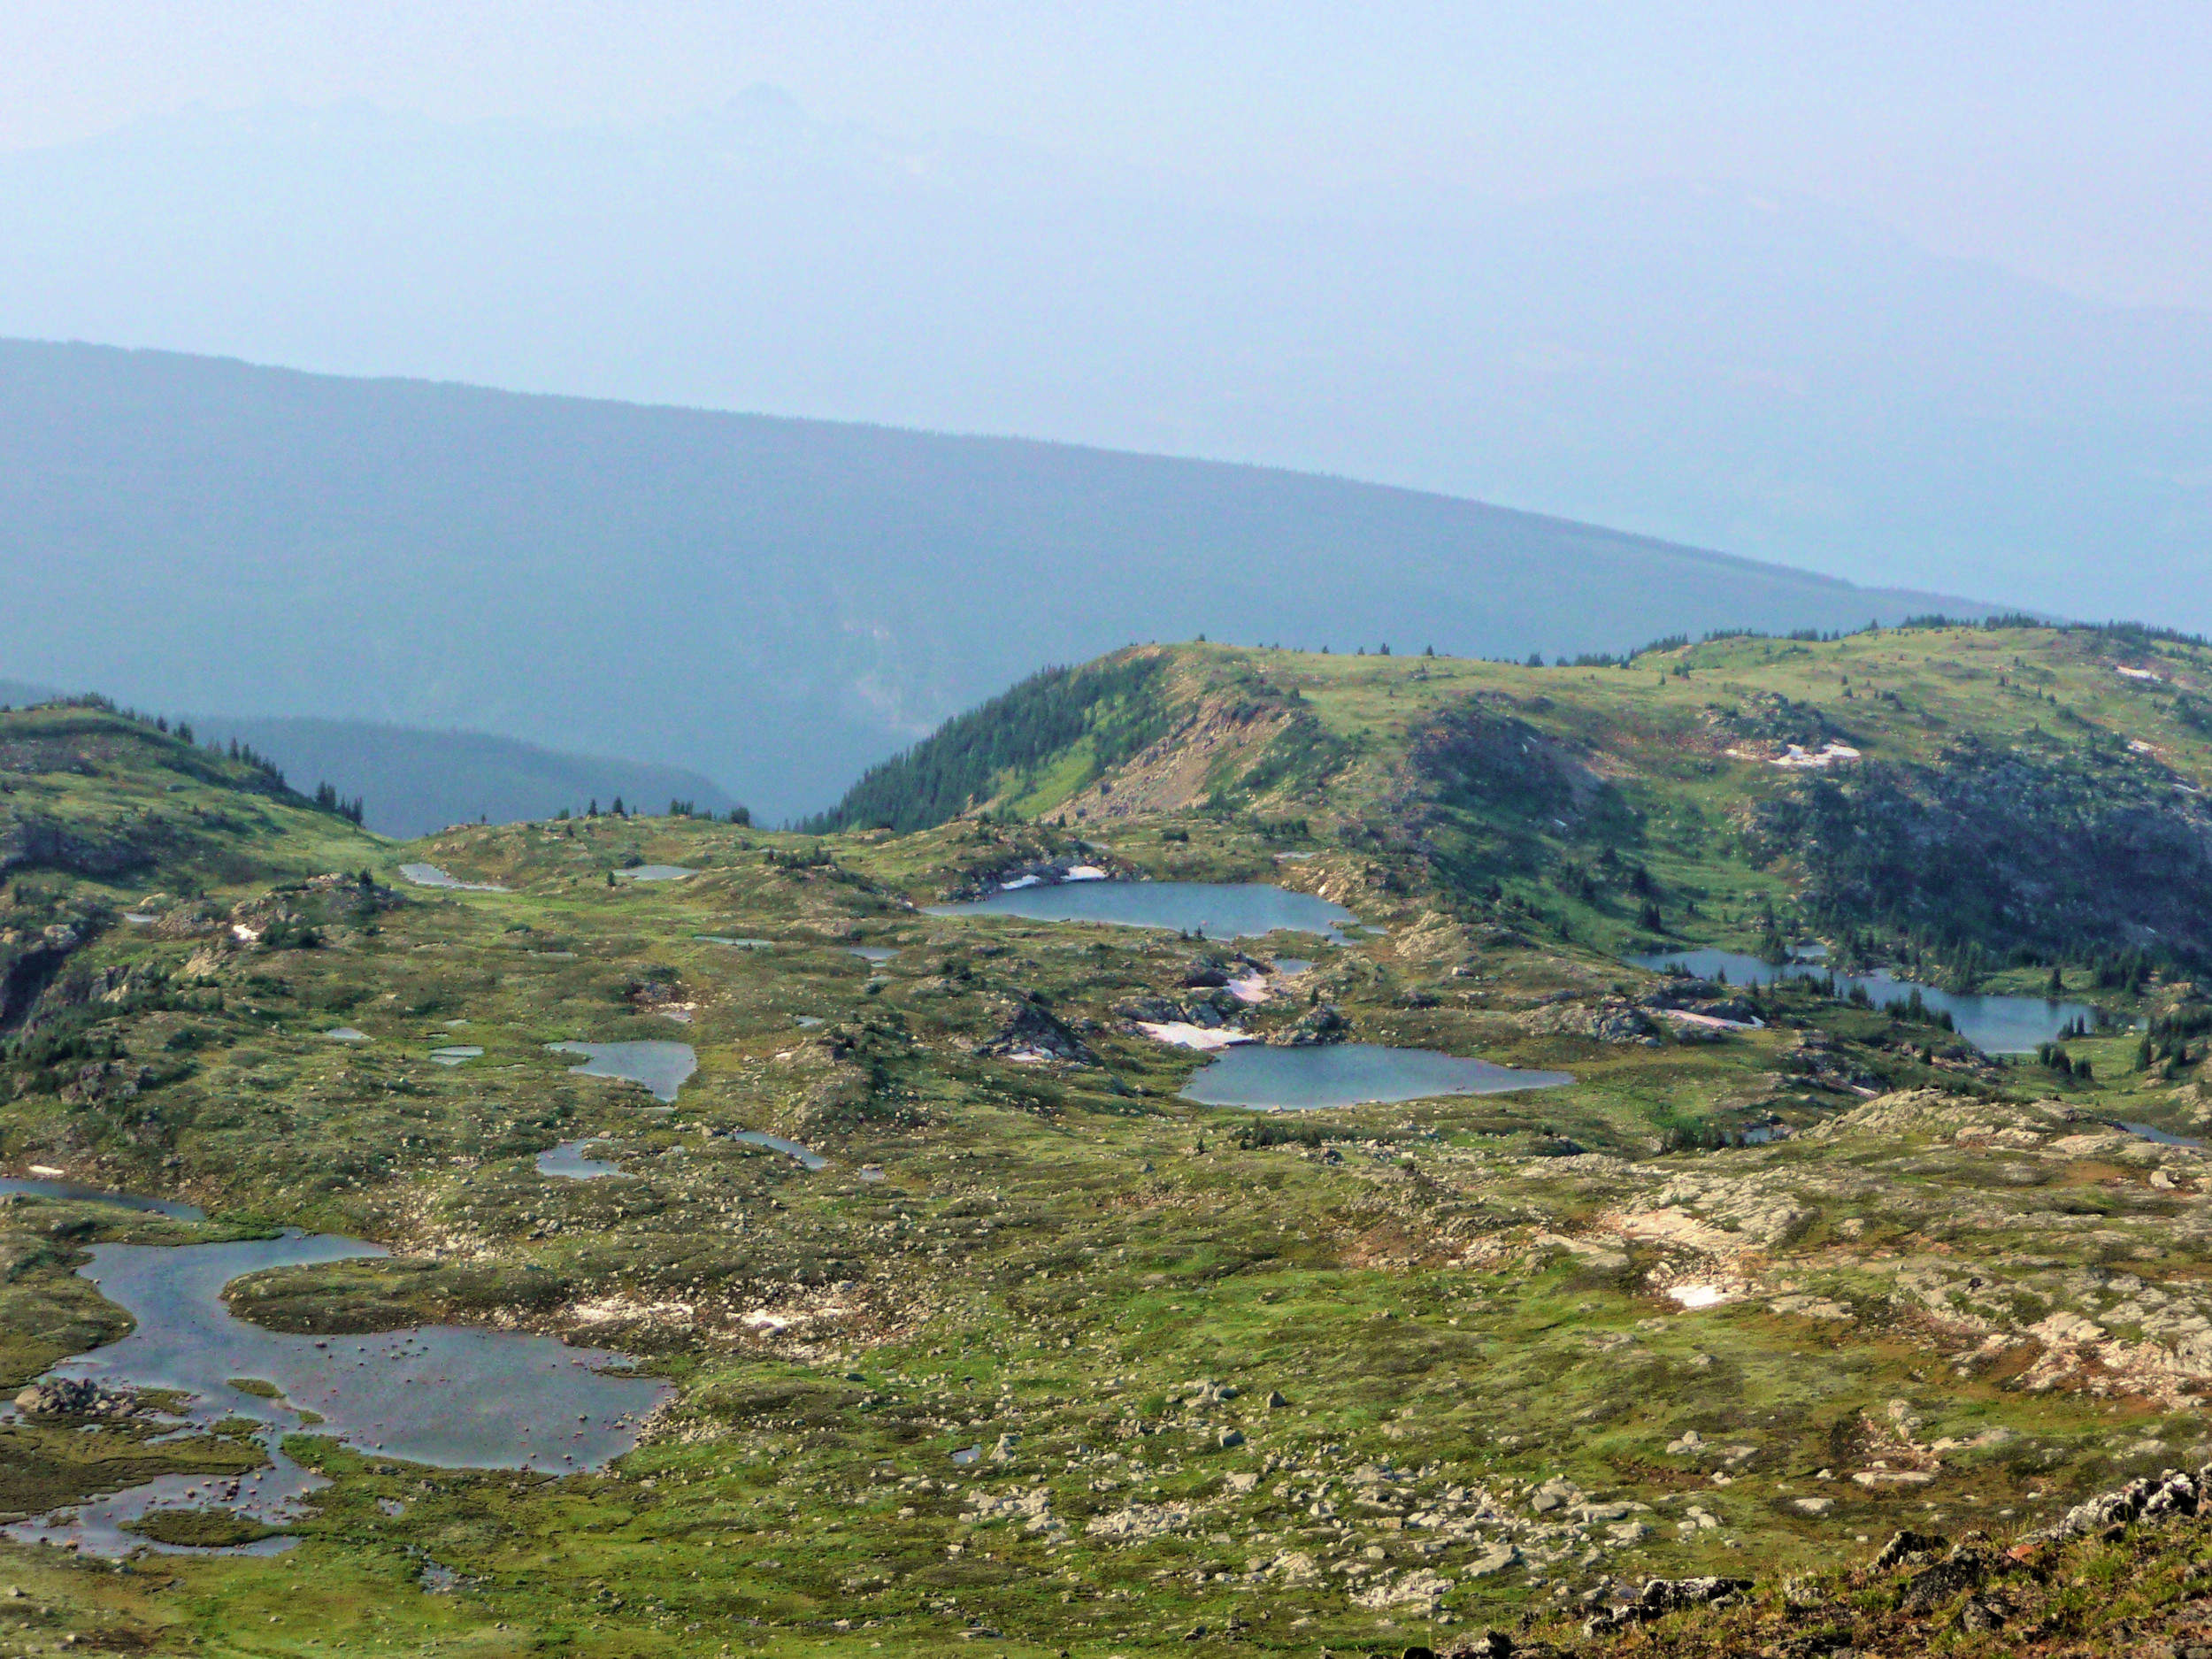
Plateau of the Lakes
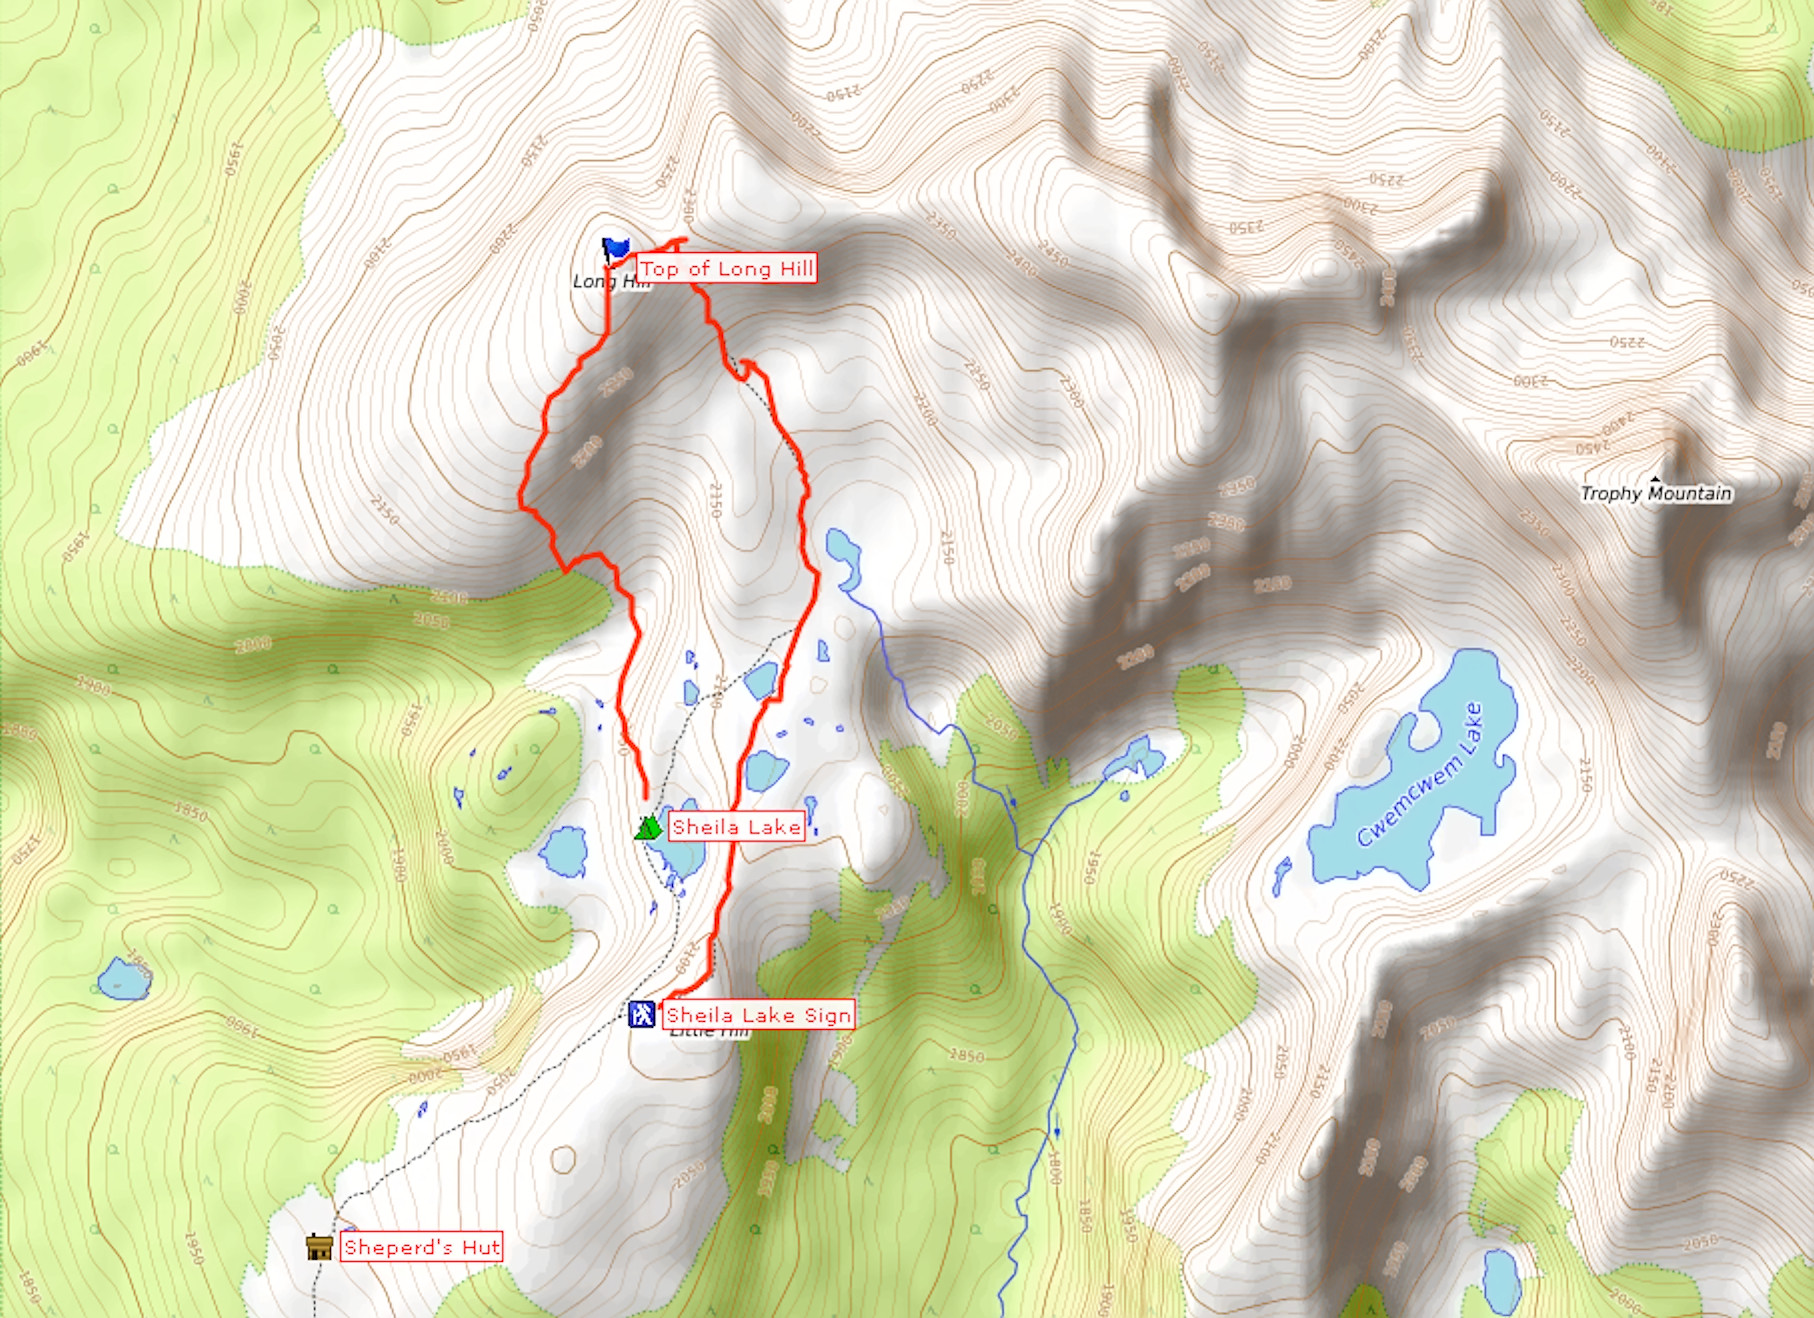
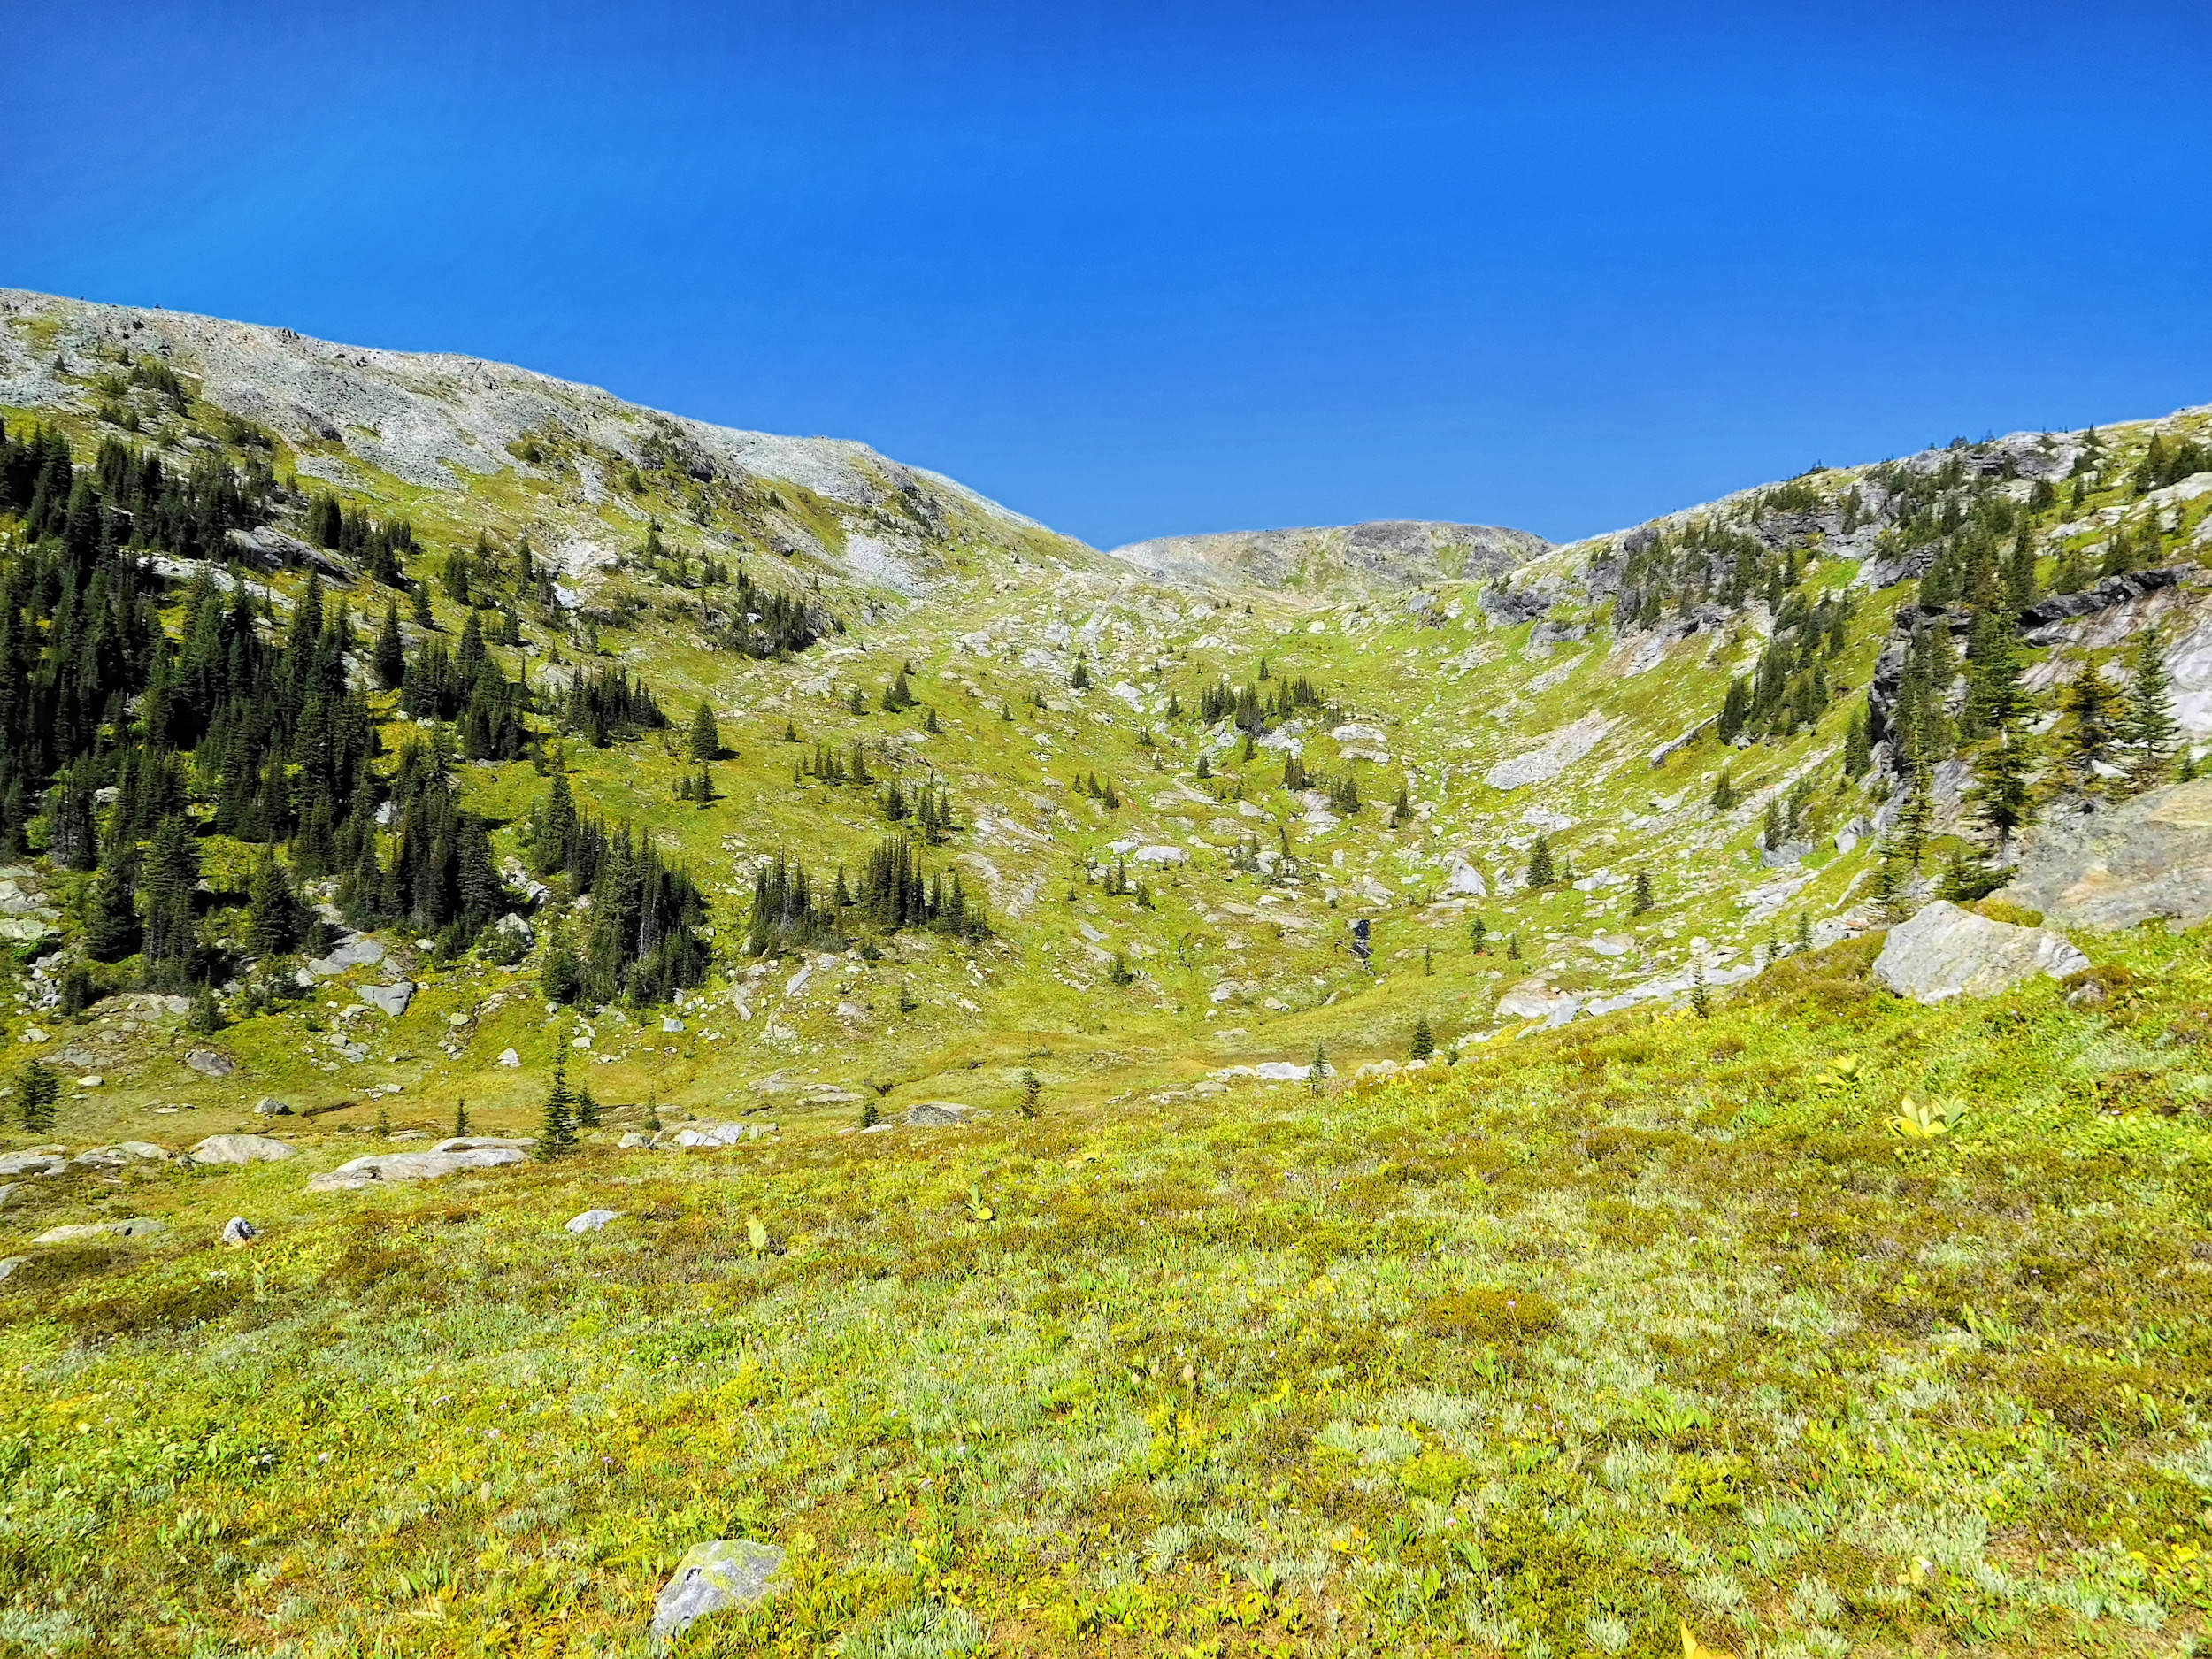
The main trail peters out, as hikers have made several different footpaths of their own. The West Ridge is right in front of me and cannot be missed, though. I have to pick an access route. I aim for the steep gully between Long Hill and the West Ridge that leads up to a saddle: Long Hill Col.
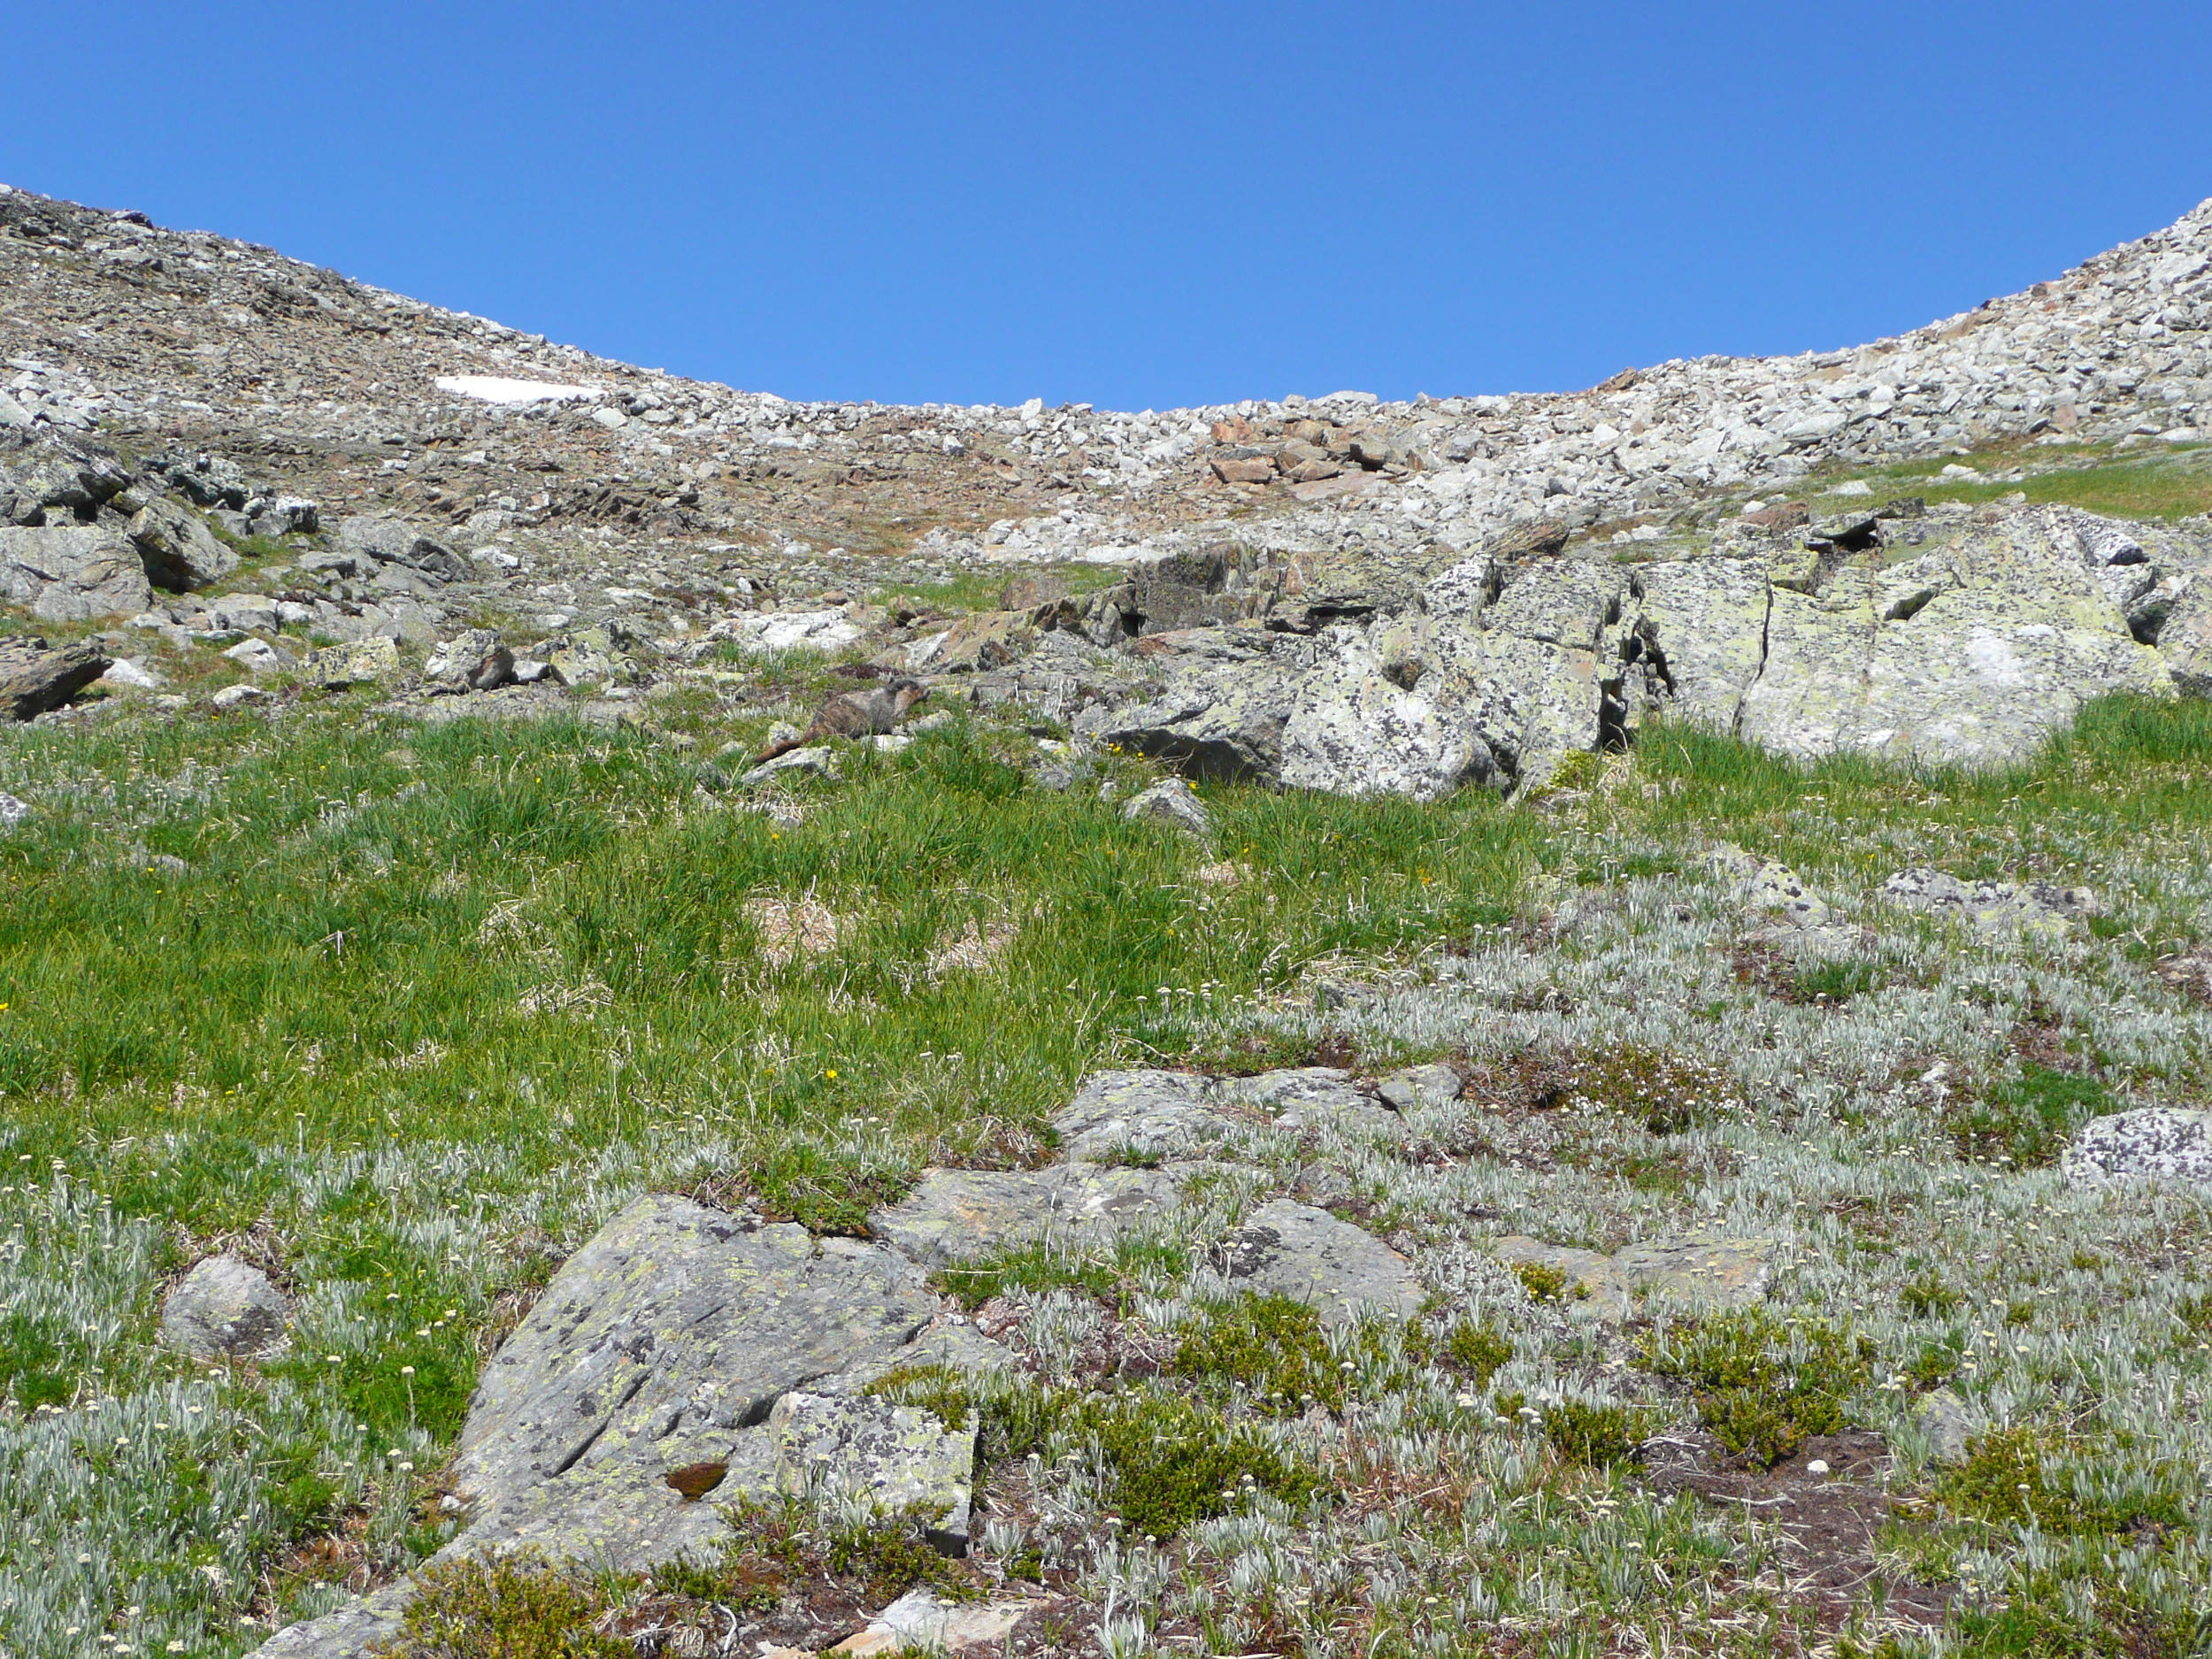
A well-camouflaged grouse roosts between the rocks. Western Anemones flower everywhere. At this elevation they have not yet turned into Hippies on Sticks.
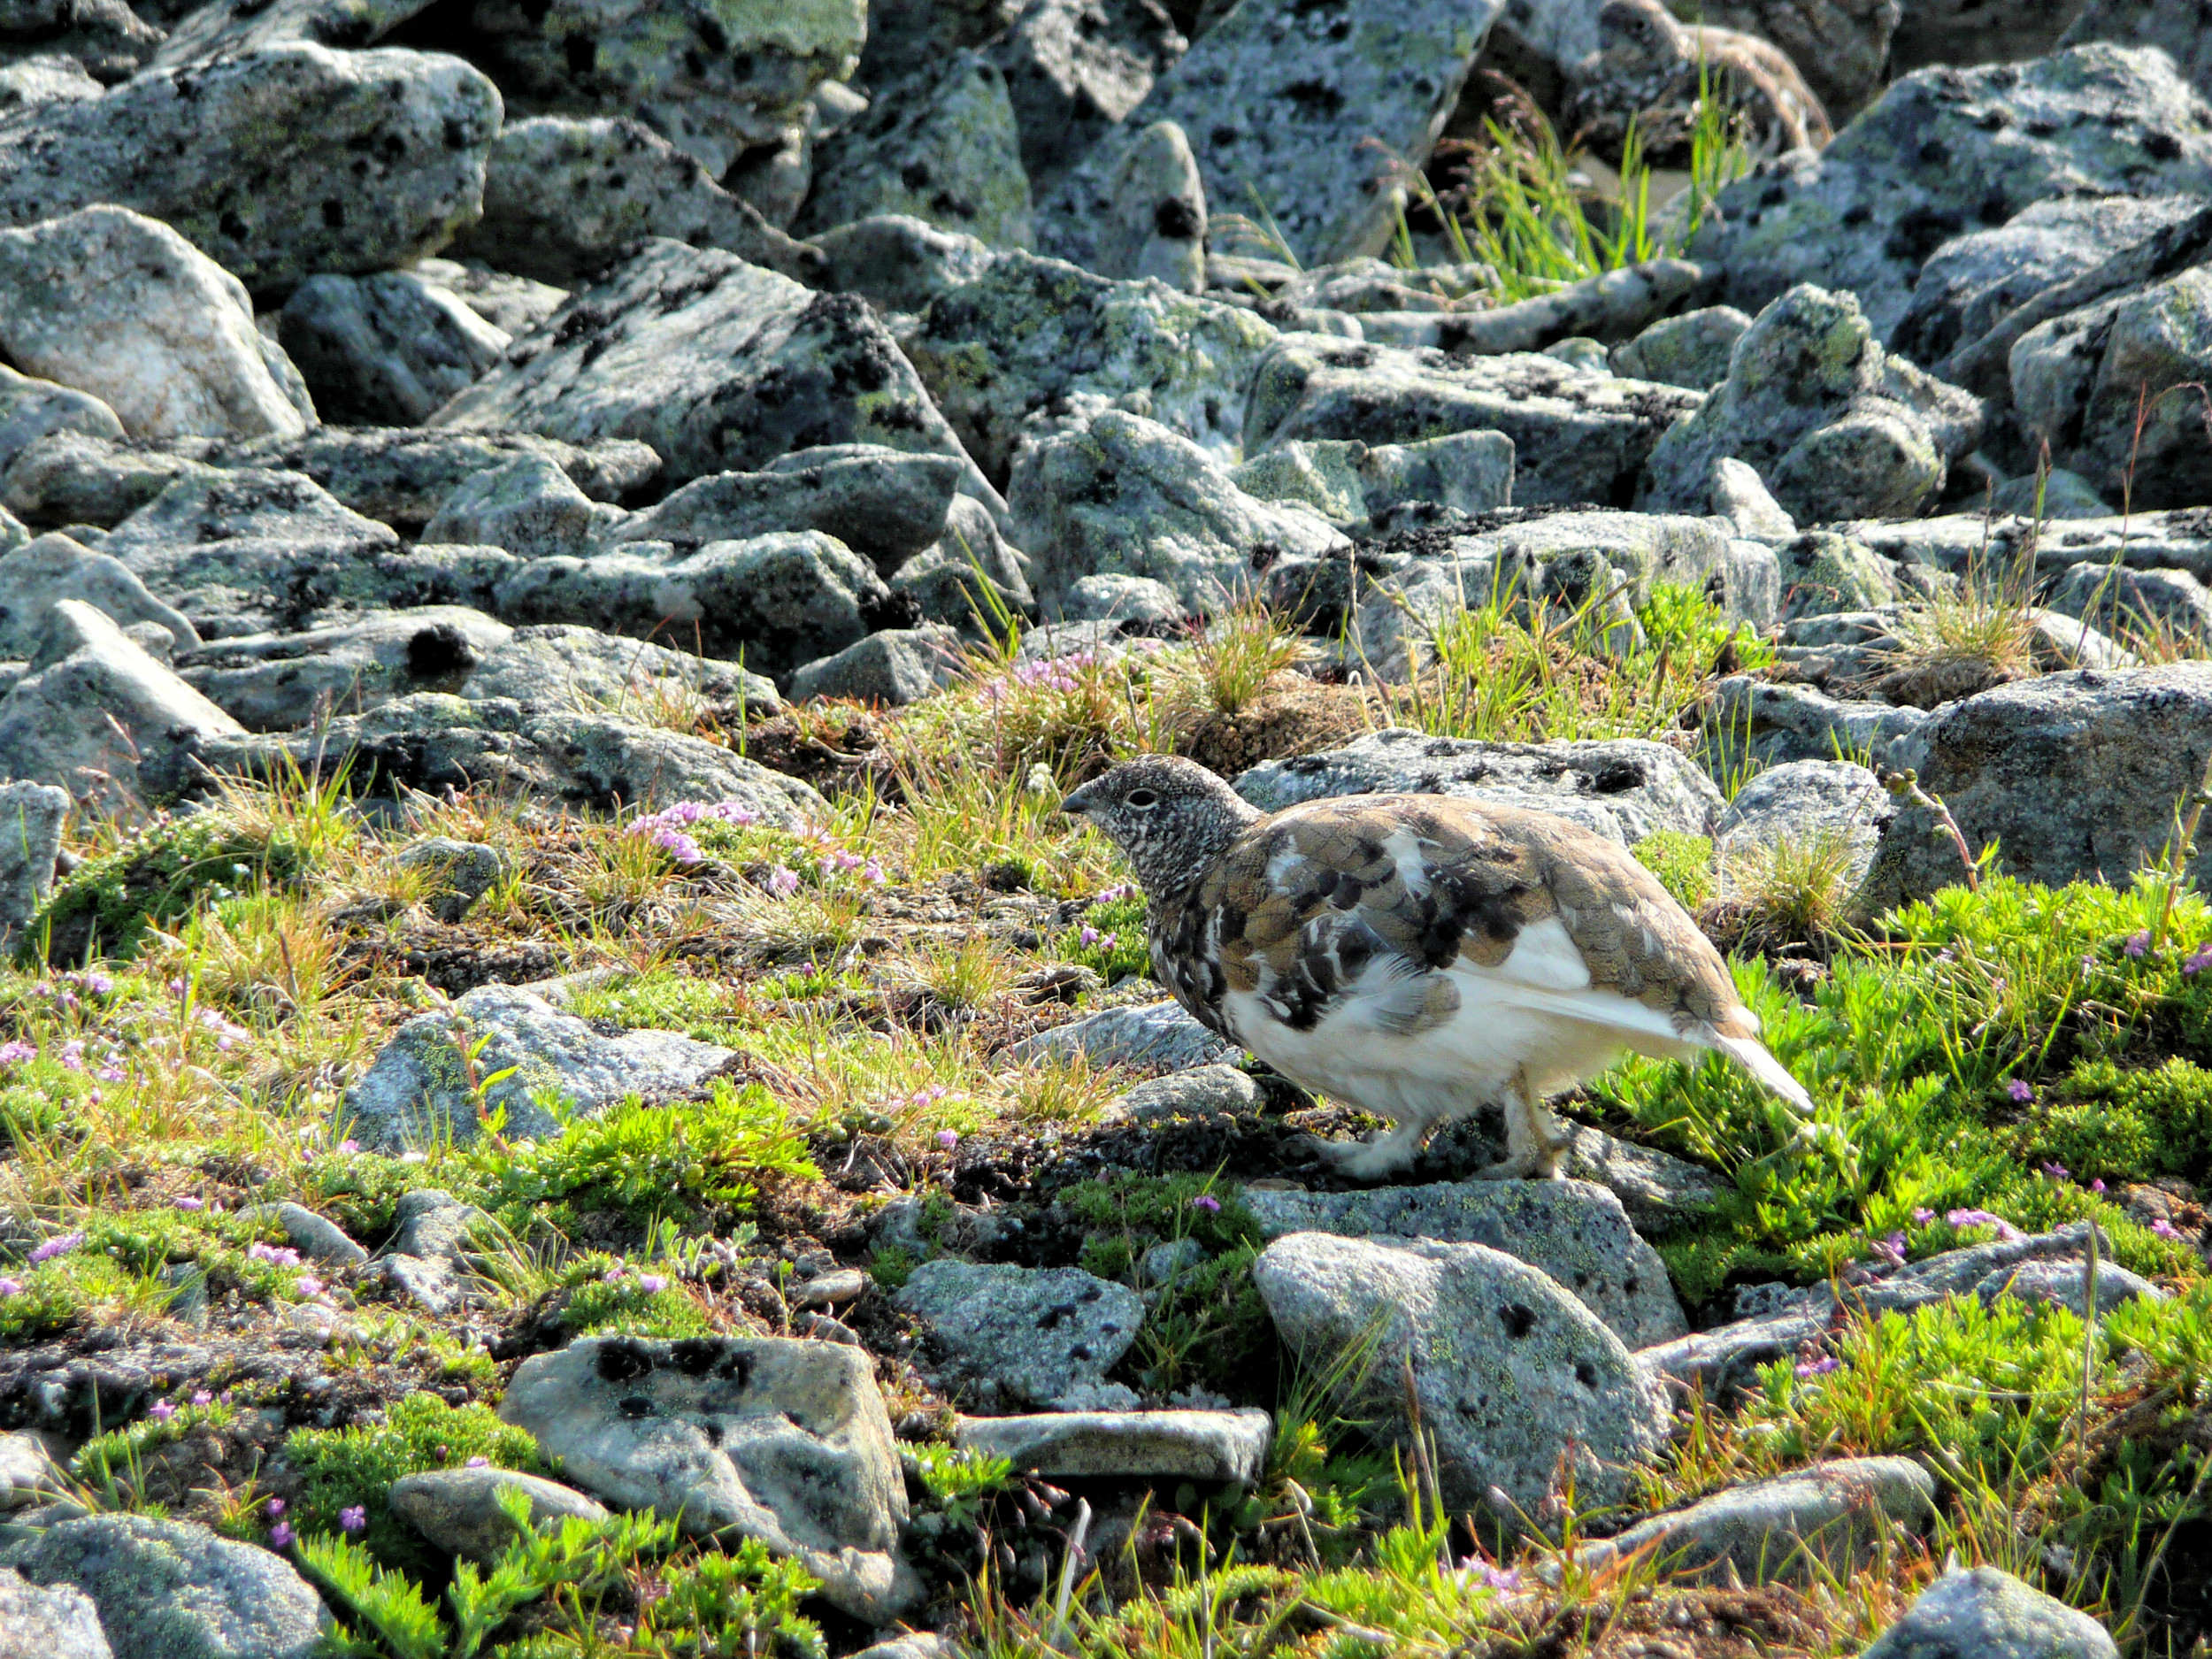
Grouse
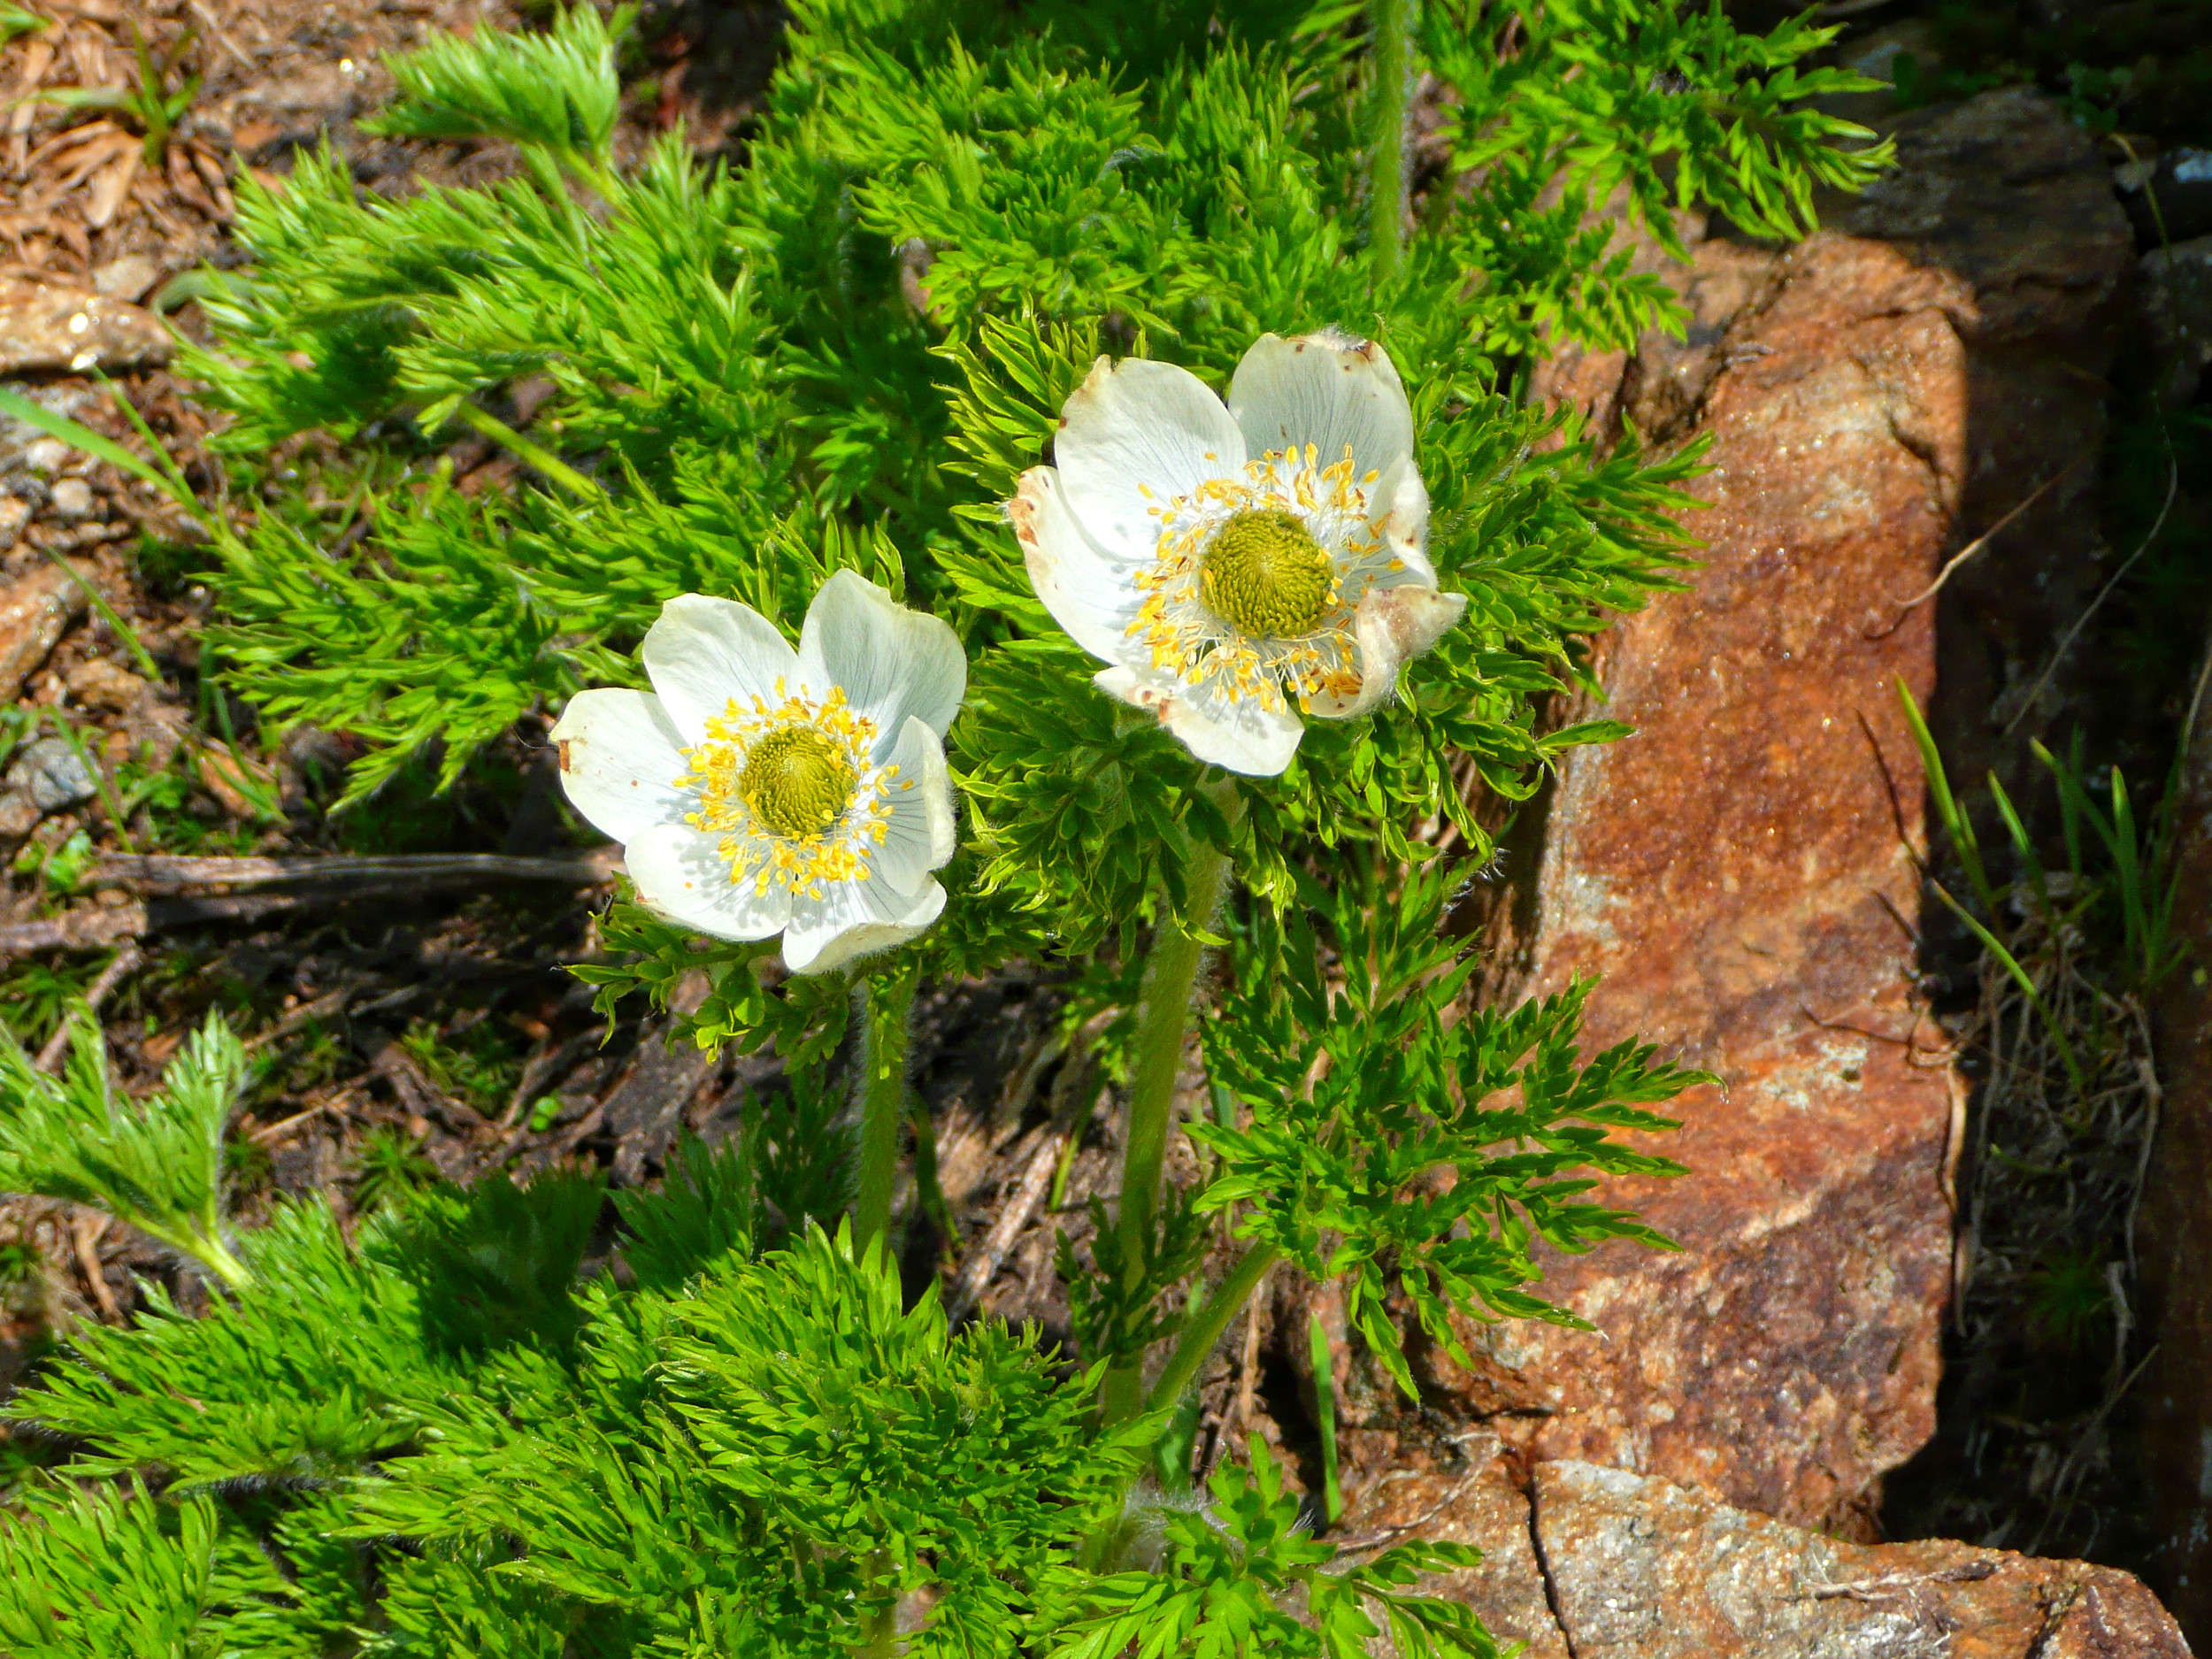
Western Anemones
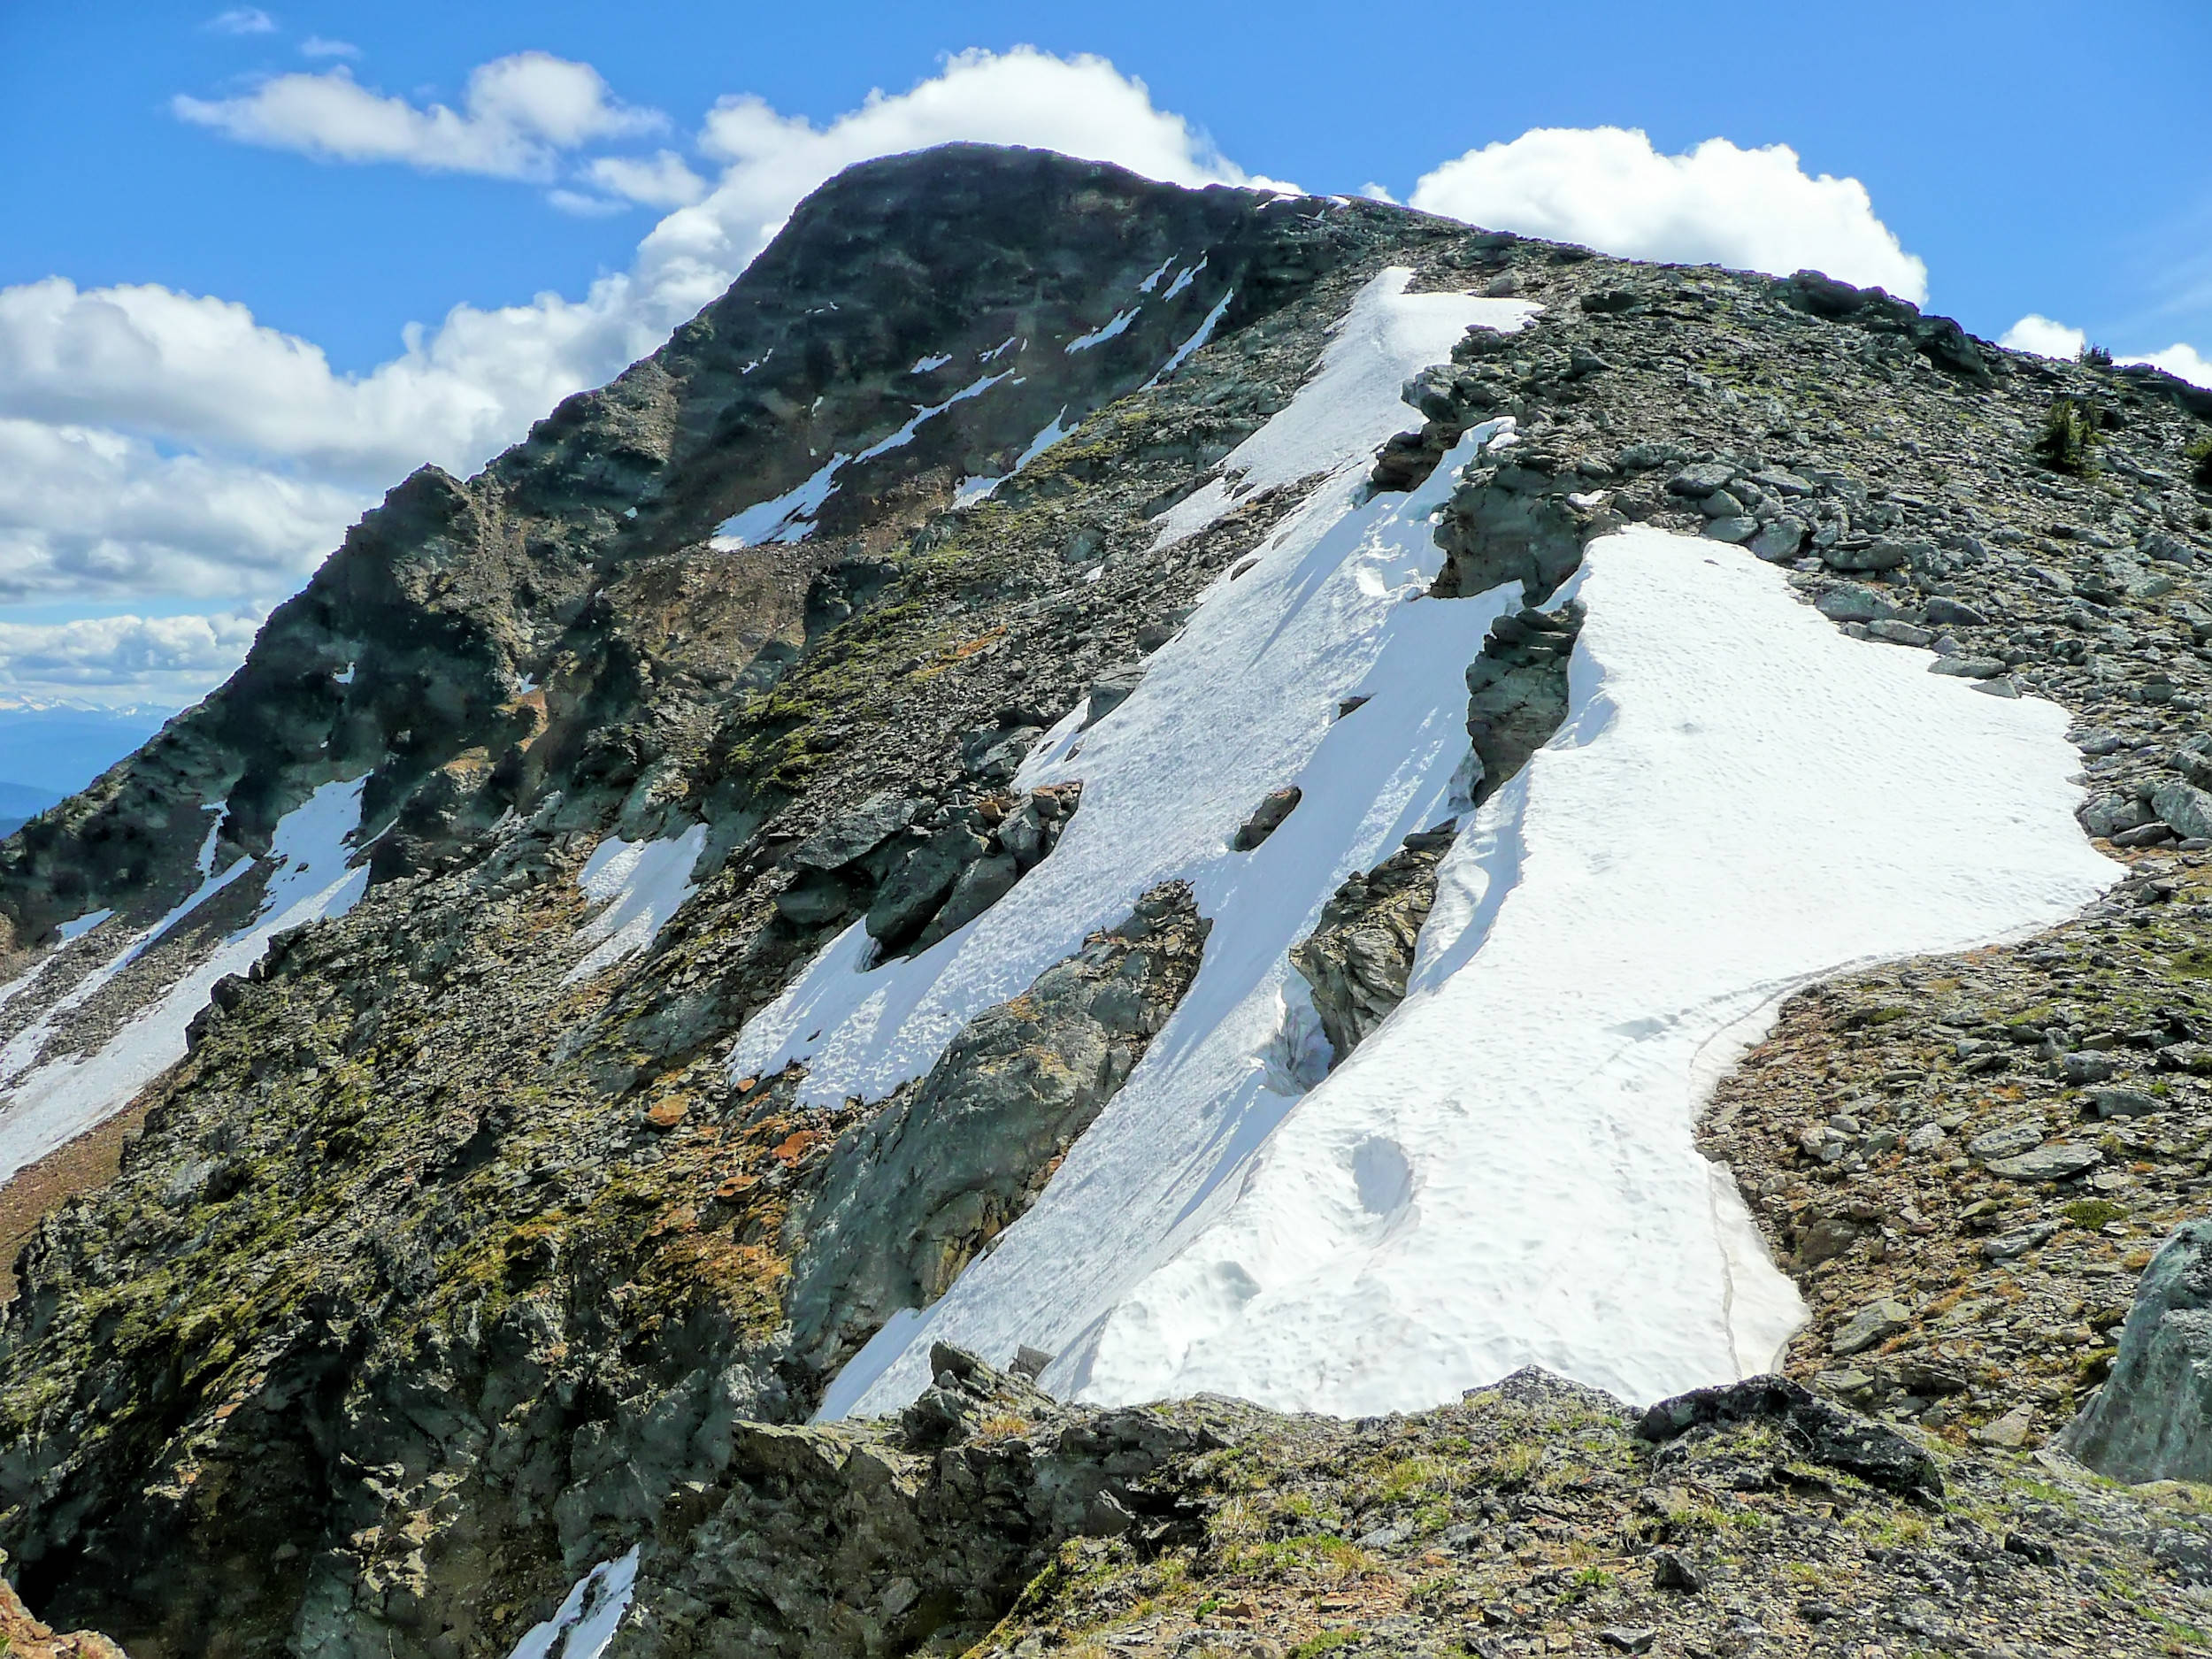
The climb through the gully is the steepest and roughest part of the hike. I don’t think I managed to find a good line, at times it seems almost vertical. I am panting heavily when I finally reach Long Hill Col at 2293 meters. From here on, the route is less steep. To the left lies Long Hill Summit at 2343 meters. I turn right towards West Summit and need good balance in order to scramble over a large field of loose boulders.
Behind the boulder field the route becomes easier. I hike across another saddle, the West Col at 2332 meters, and cross the widening ridge to its other side. The drop-off at the northern flank is deep and the views are spectacular.
On the West Ridge
Following the ridge, I arrive at the 2532-meter-high West Summit.
West Summit
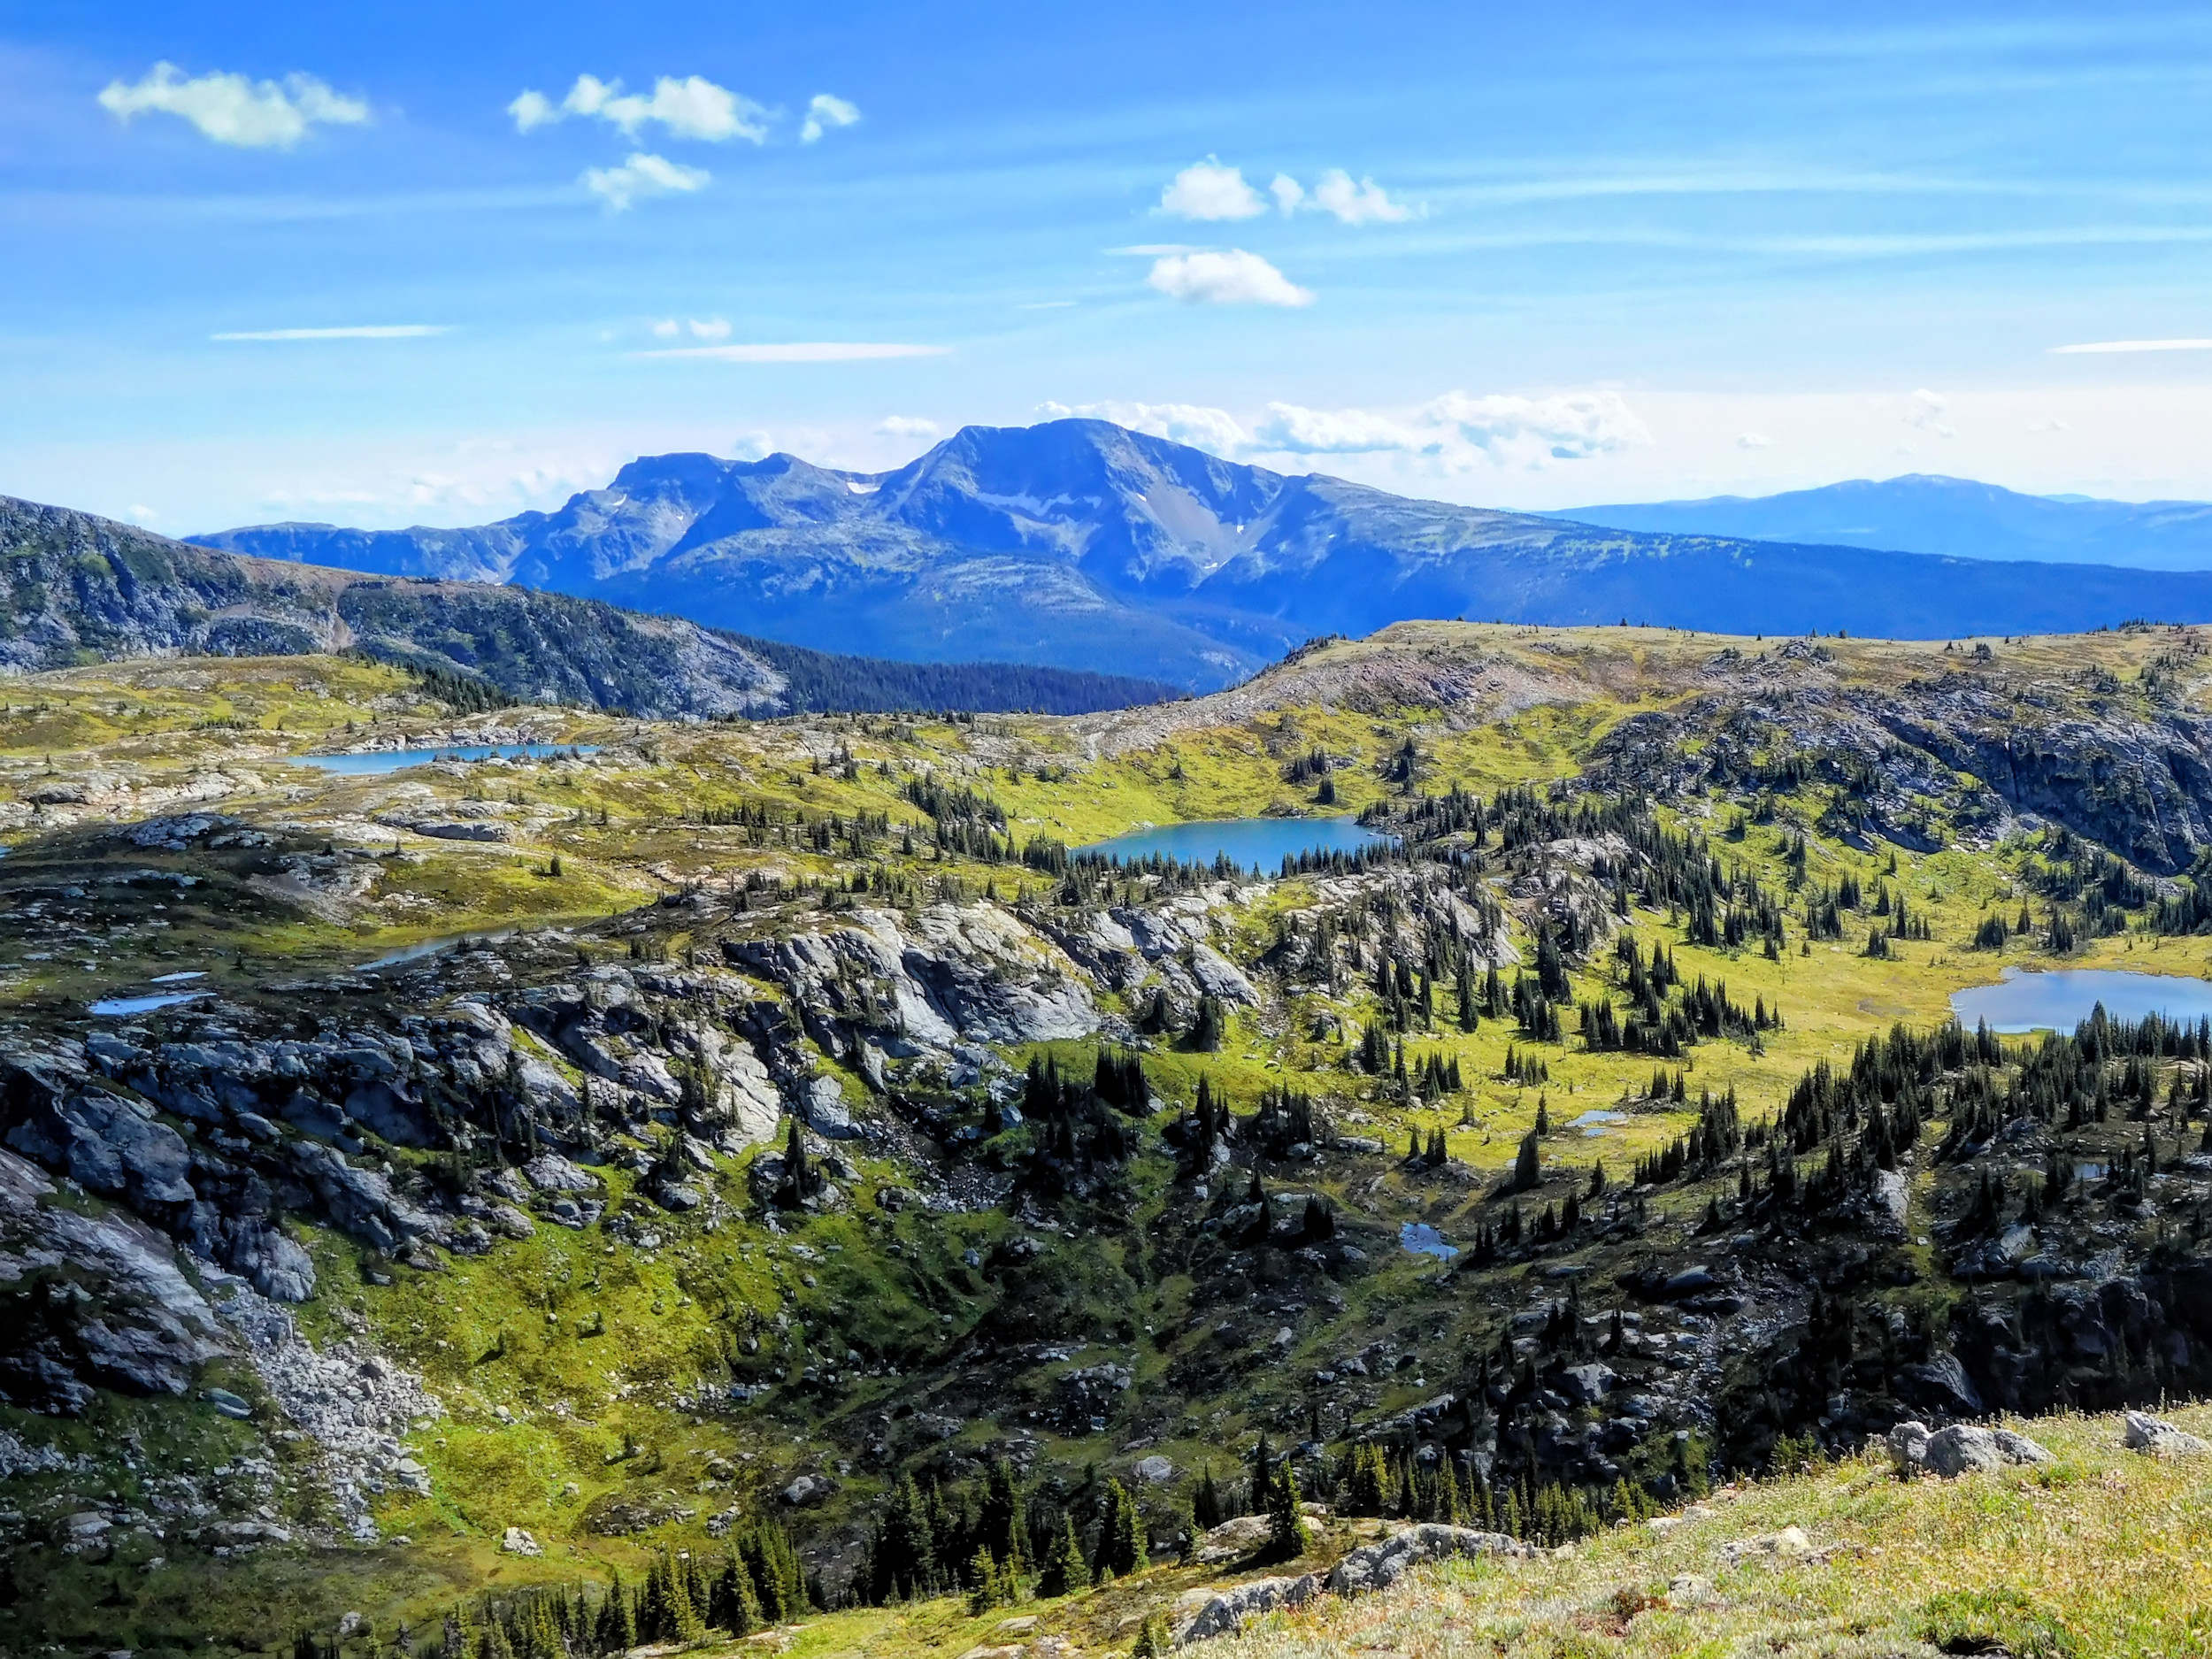
The view from up here is stunning. Ahead of me rises 2577-meter-high Trophy Mountain, right next to Cwem Cwem Lake at its bottom.
Trophy Mountain and Cwem Cwem Lake
Trophy Mountain’s main peak is not easy to conquer. The most common route starts here at the West Summit and requires the crossing of the knife edge ridge between the two peaks. As far as I know, people even use ropes and helmets for that. On the other hand, the technically easier access over the much wider eastern ridge can only be reached by a long hike along the slopes of the Cwem Cwem Lake valley.
From the West Summit looking north, I recognize 2369 meter high Battle Mountain in the distance. Table Mountain at 2224 meters lies in front of it.
Battle Mountain seen from the West Summit
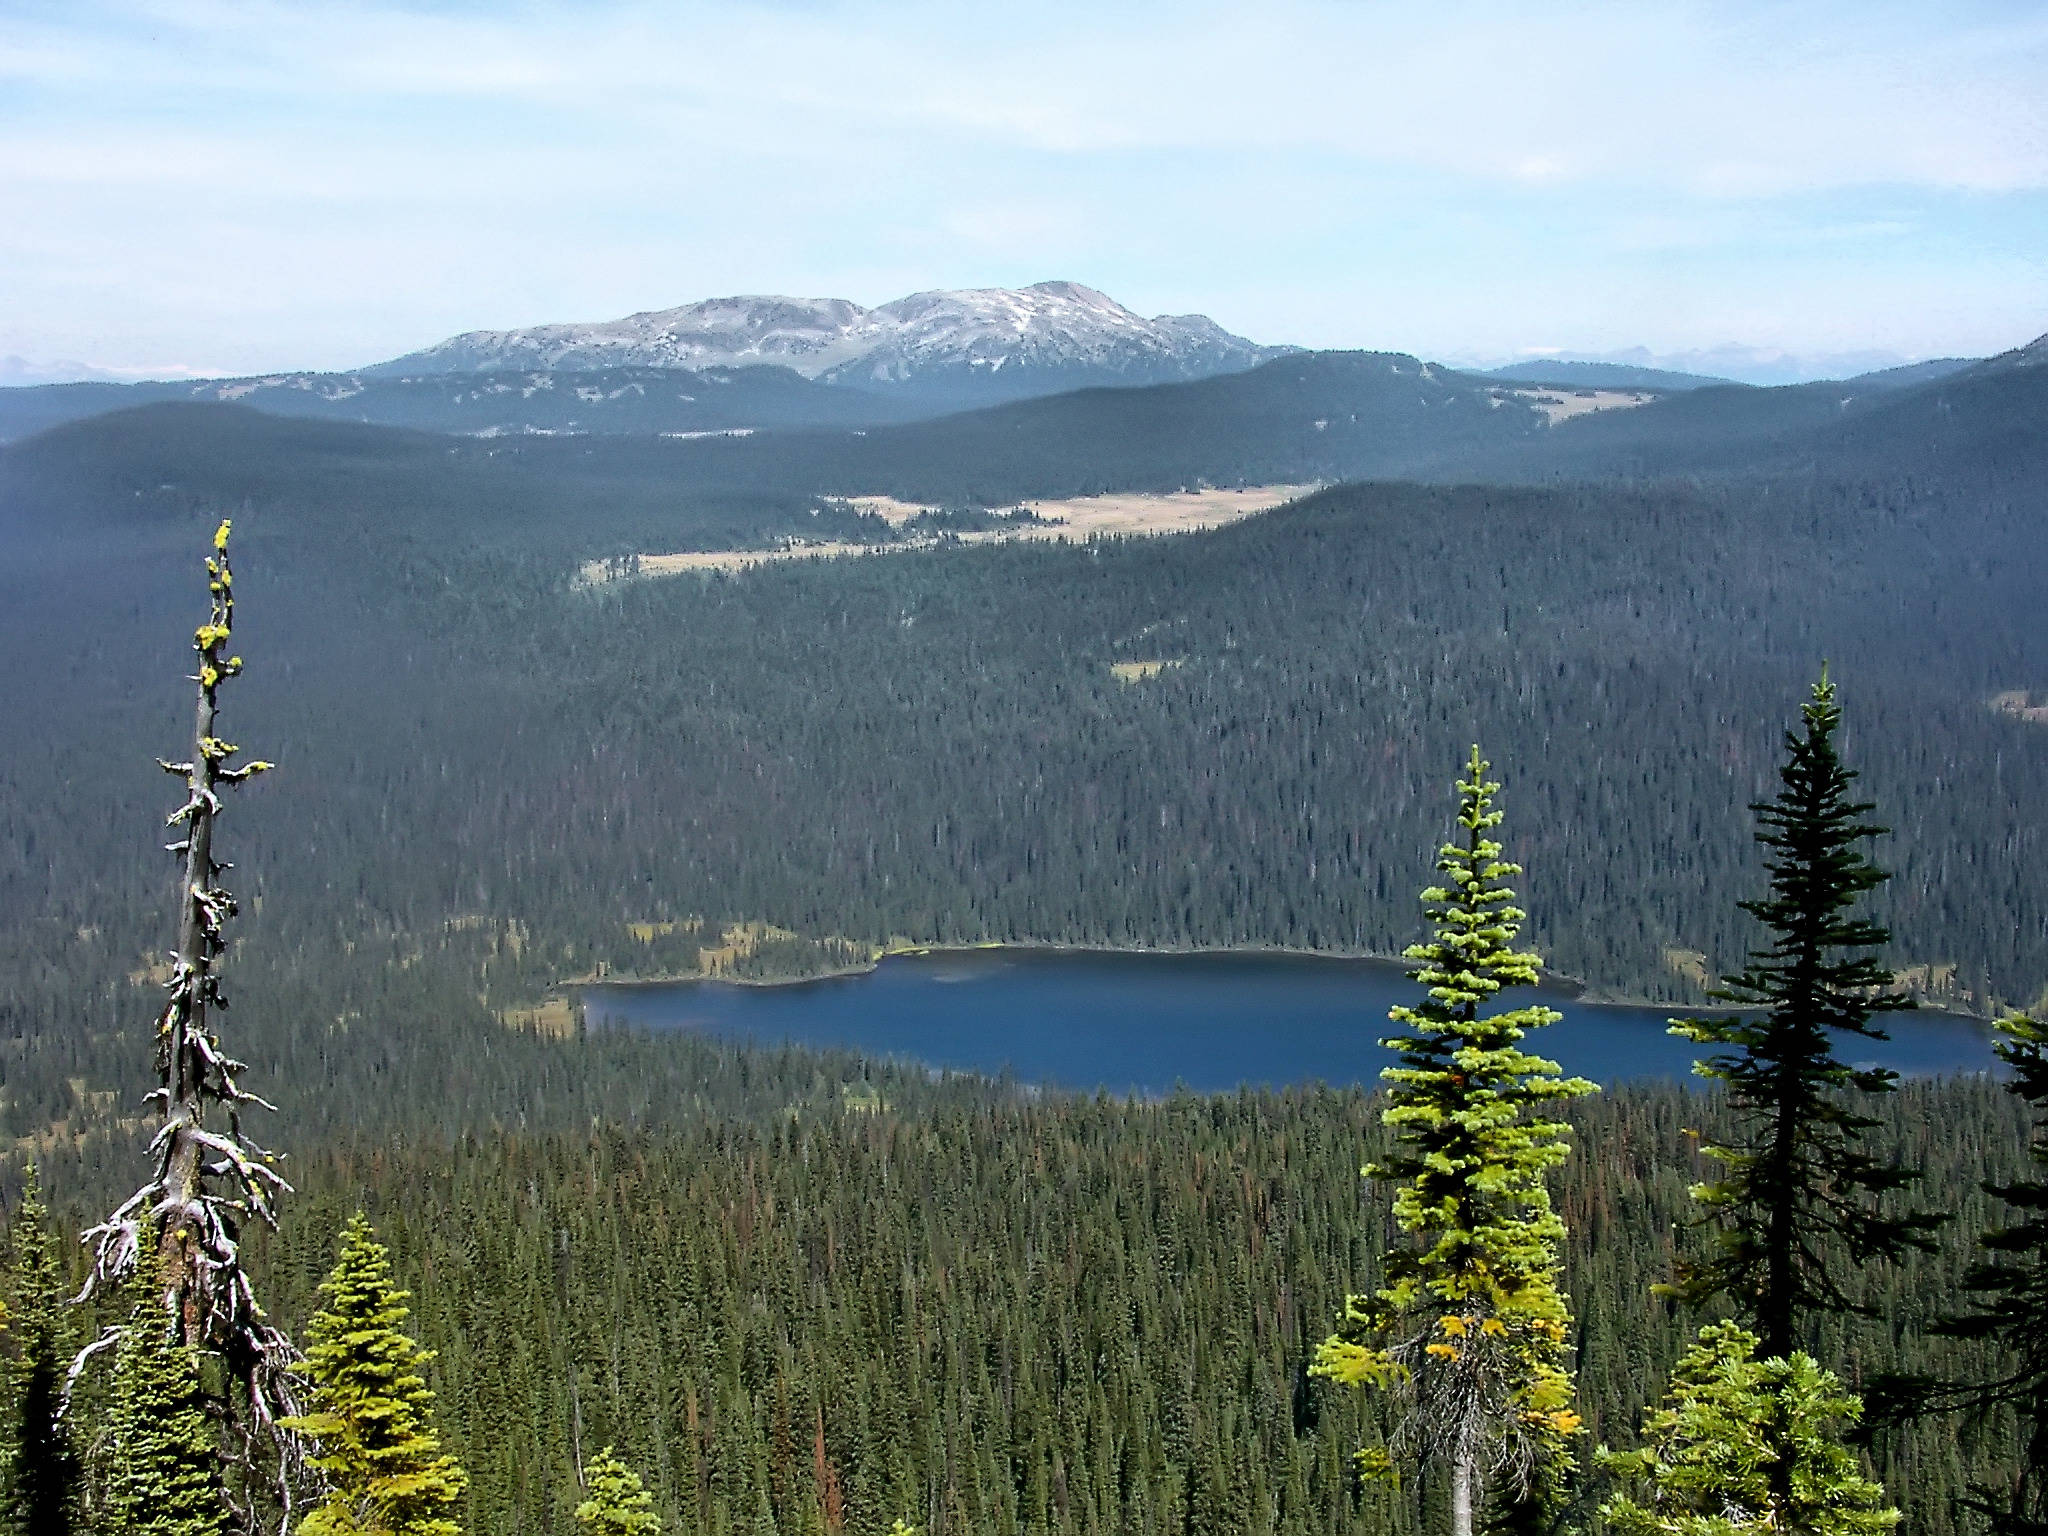
Deep below me gleams a deep blue lake with some picturesque islands.
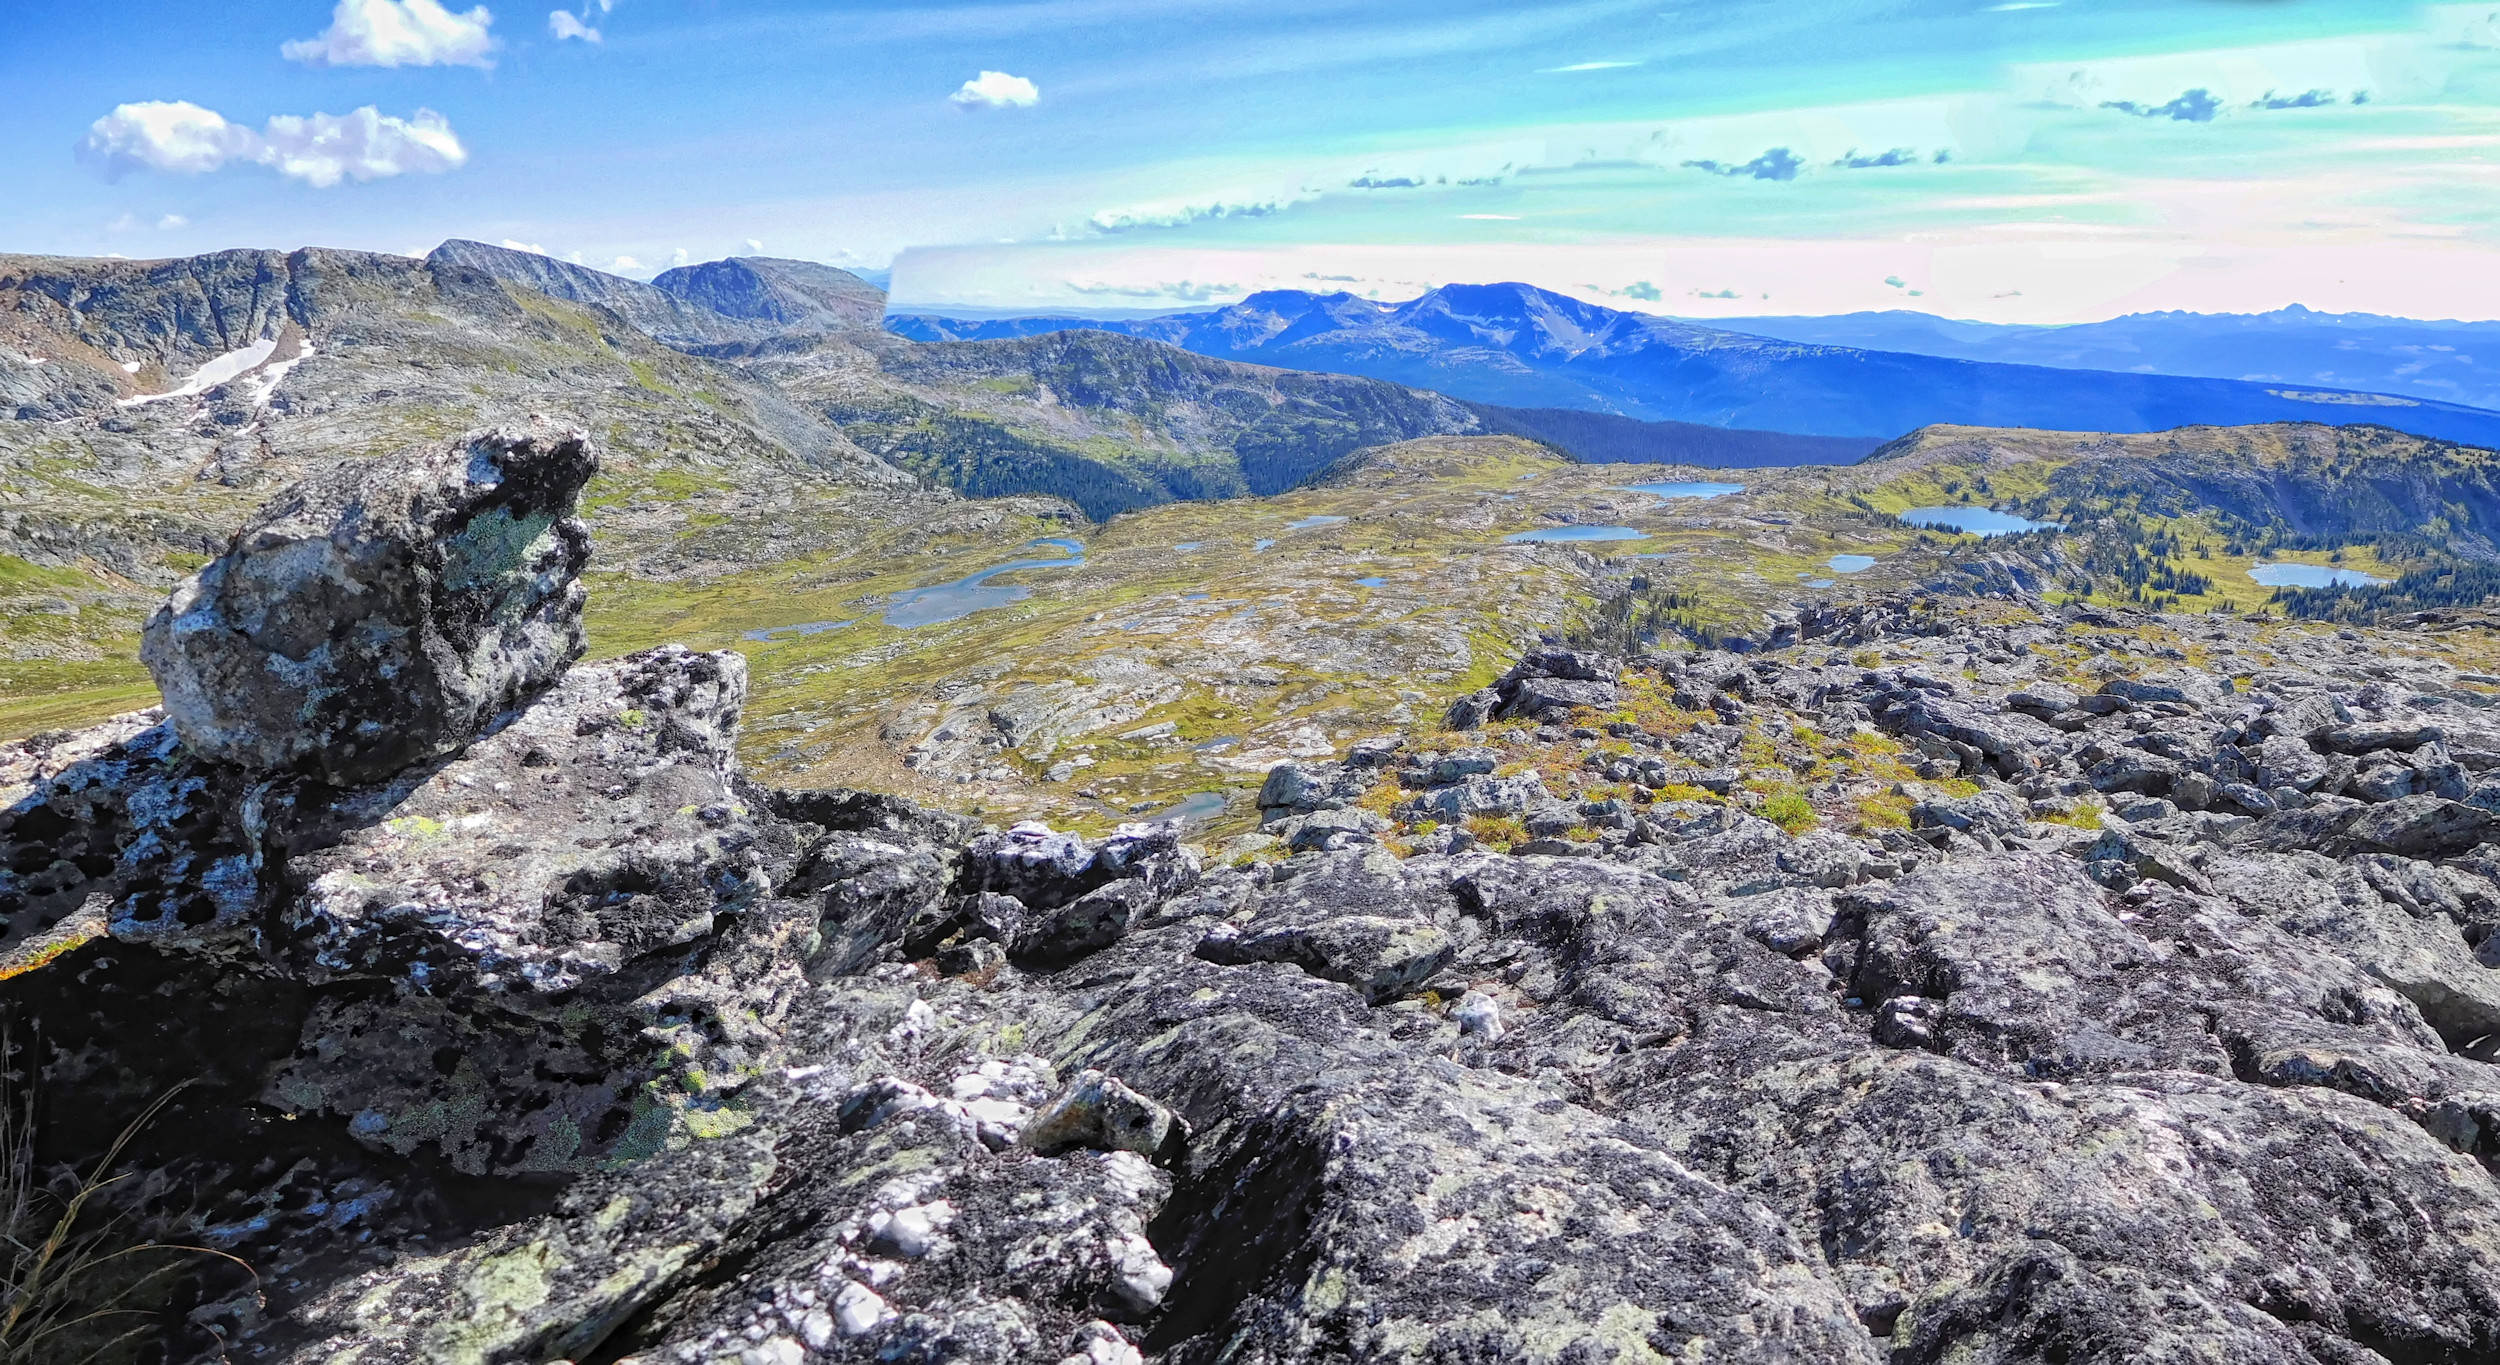
To the south, I get a good view over the Plateau of the Lakes that I crossed on my way up. The lake to the far left is Lake of the Rock, Sheila Lake is the second to the right and partially obscured by a hill.
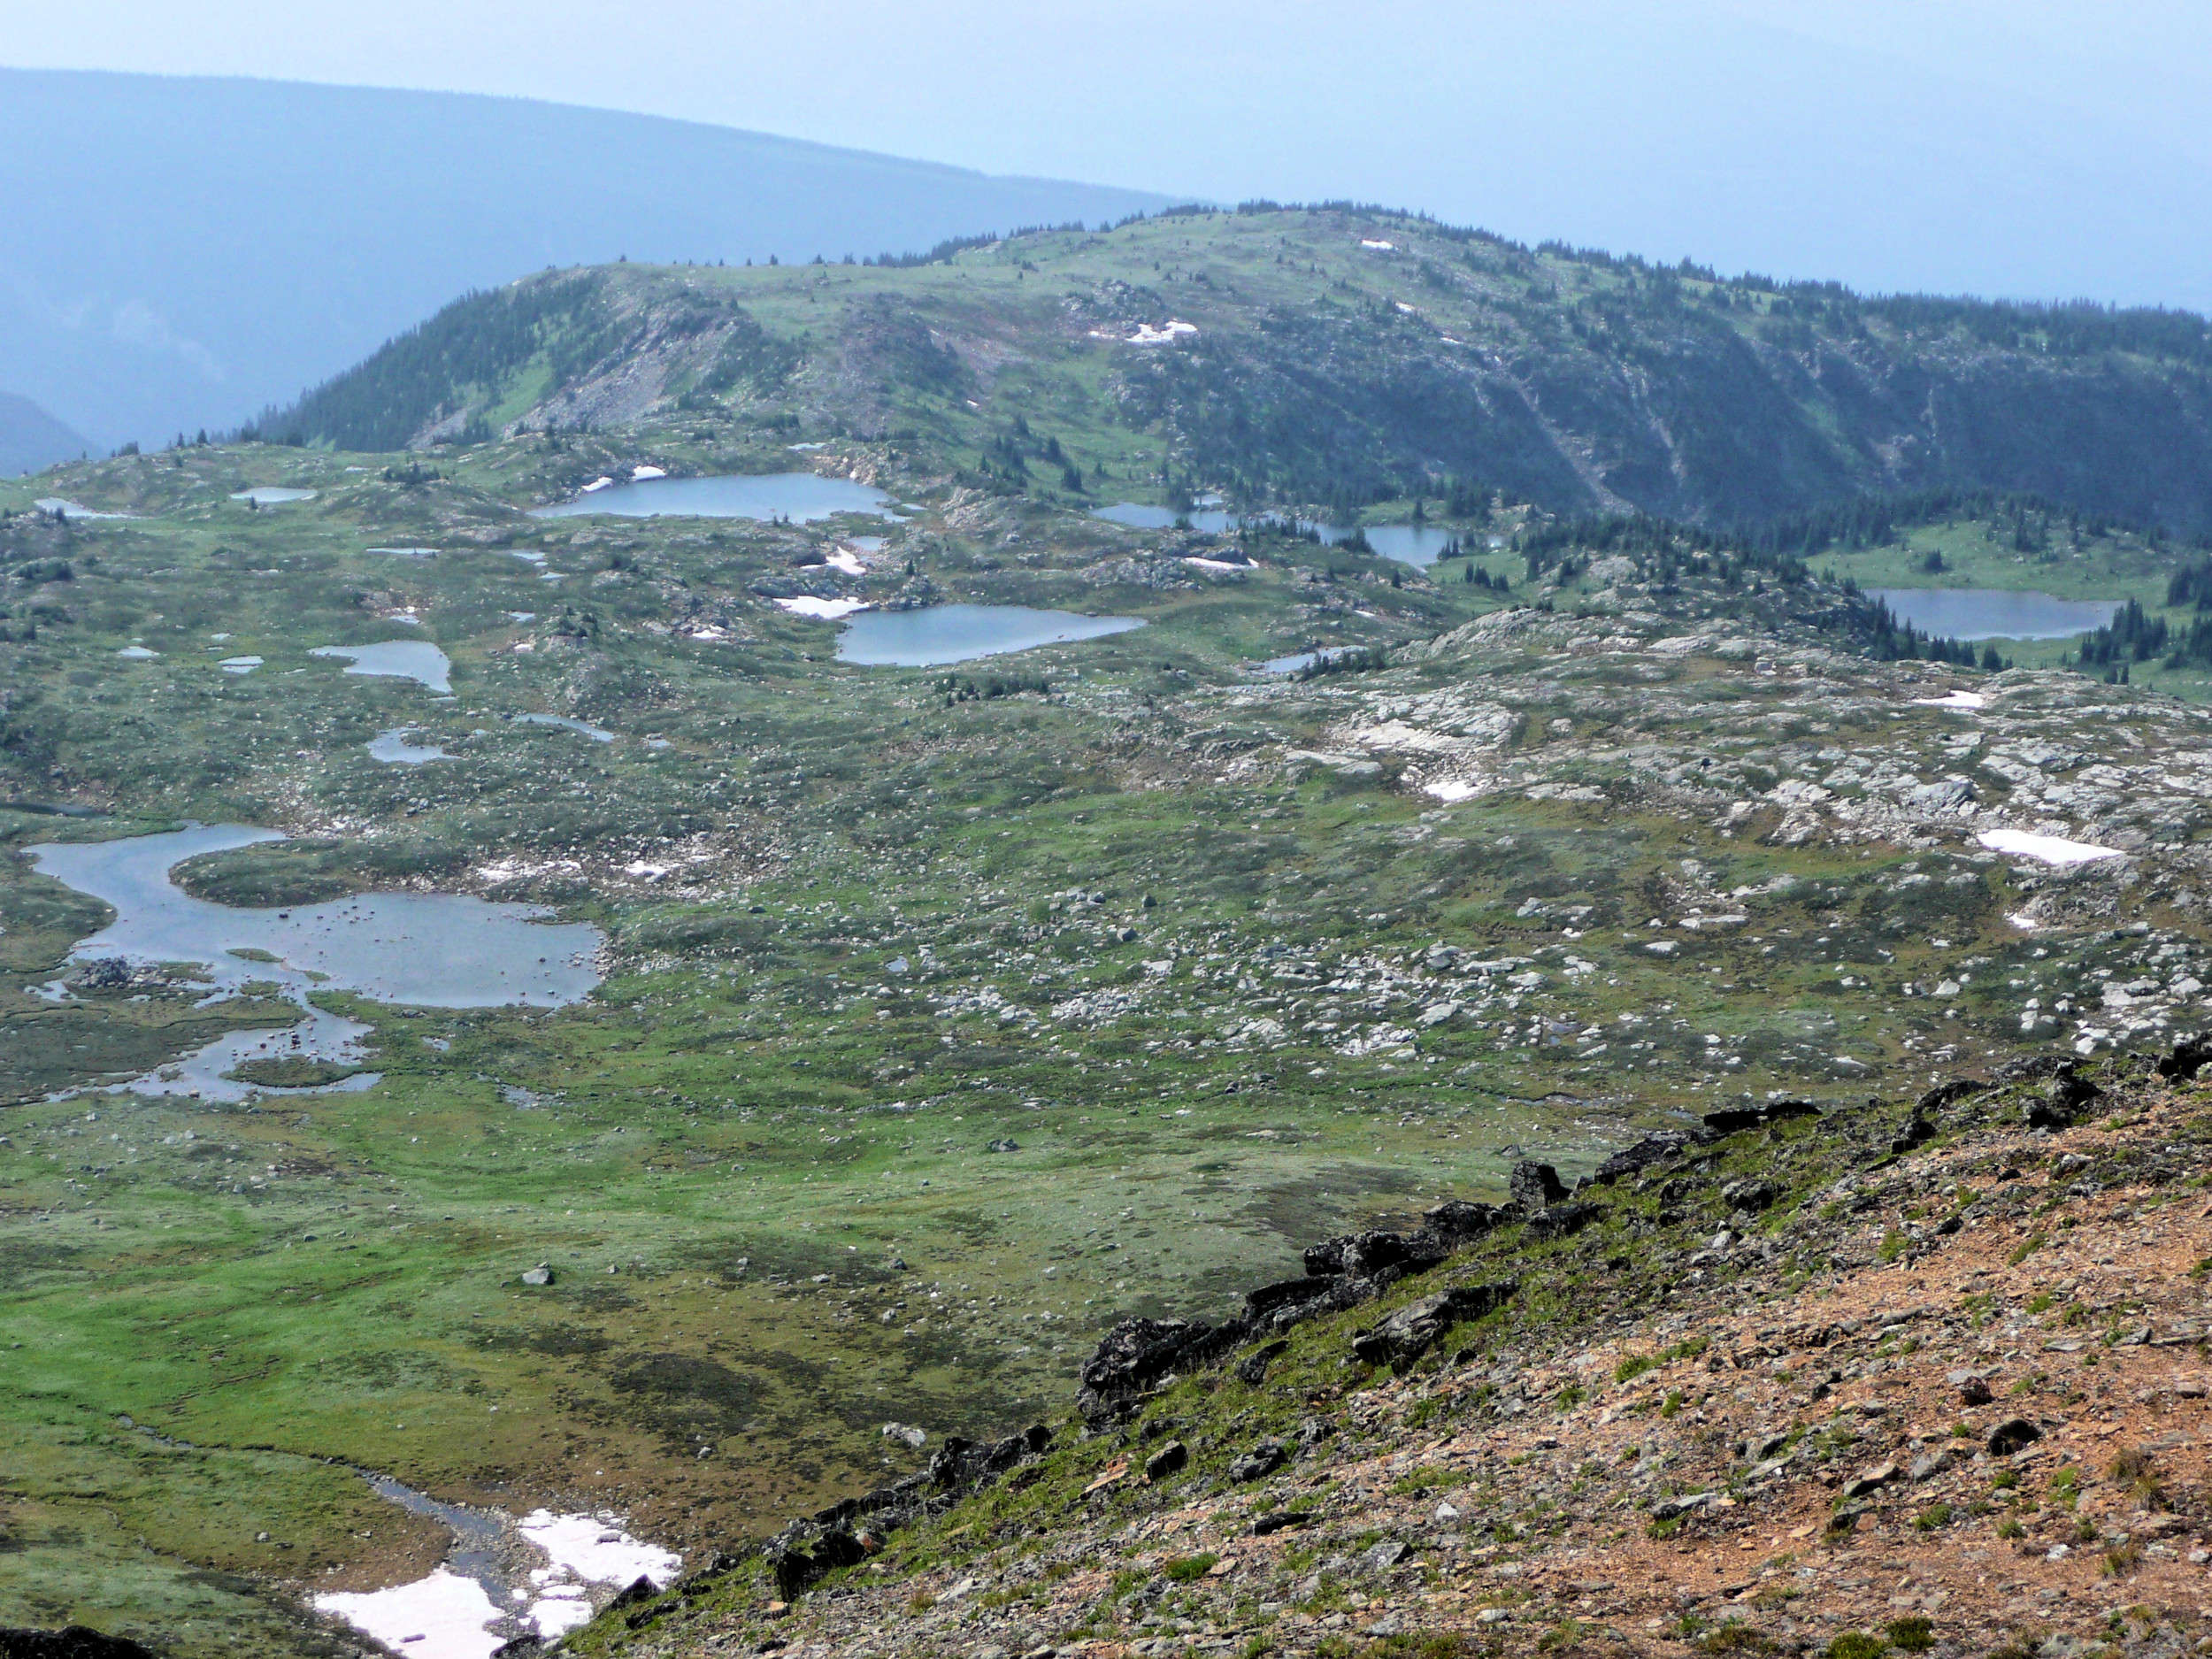
Plateau of the Lakes seen from West Ridge
Today there is no wind and the sun is warm. I can enjoy a long rest at the summit, a luxury that cannot be taken for granted.
West Summit
On my return, I am fascinated by this unnamed heart-shaped lake. It is located directly above the Lake of the Rock and drains into it.
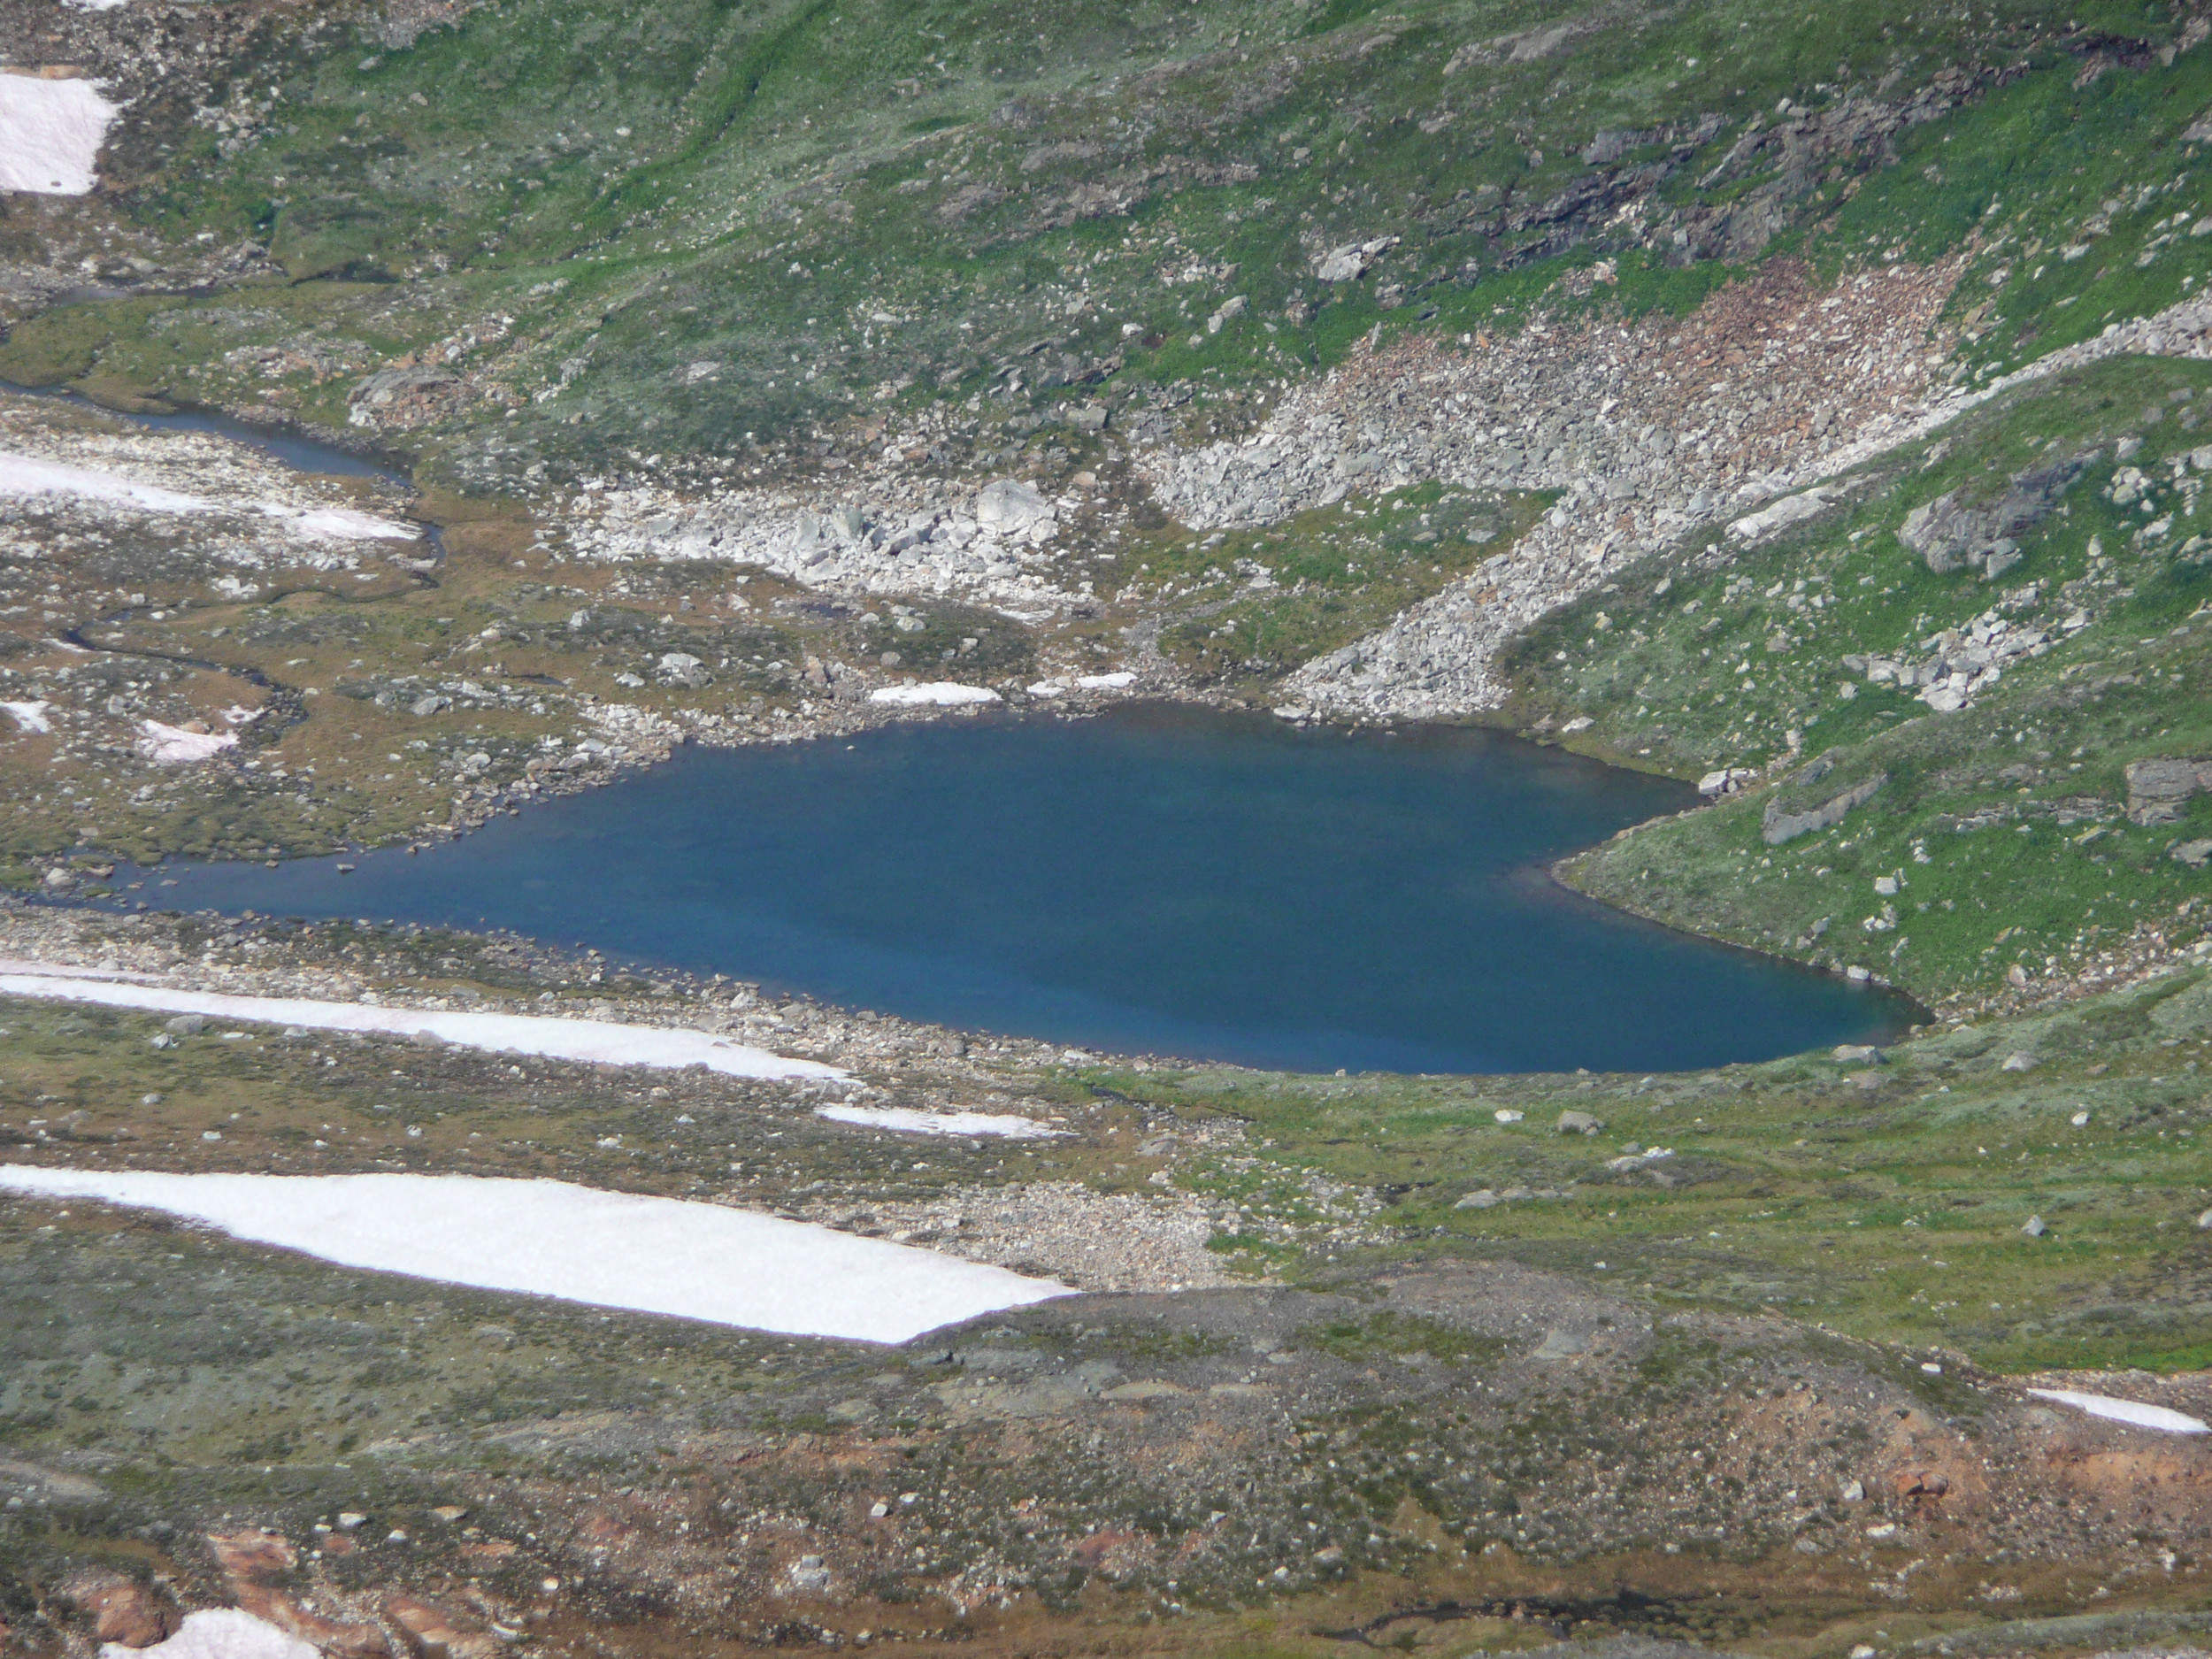
Heart-shaped Lake
Western Anemones are everywhere.
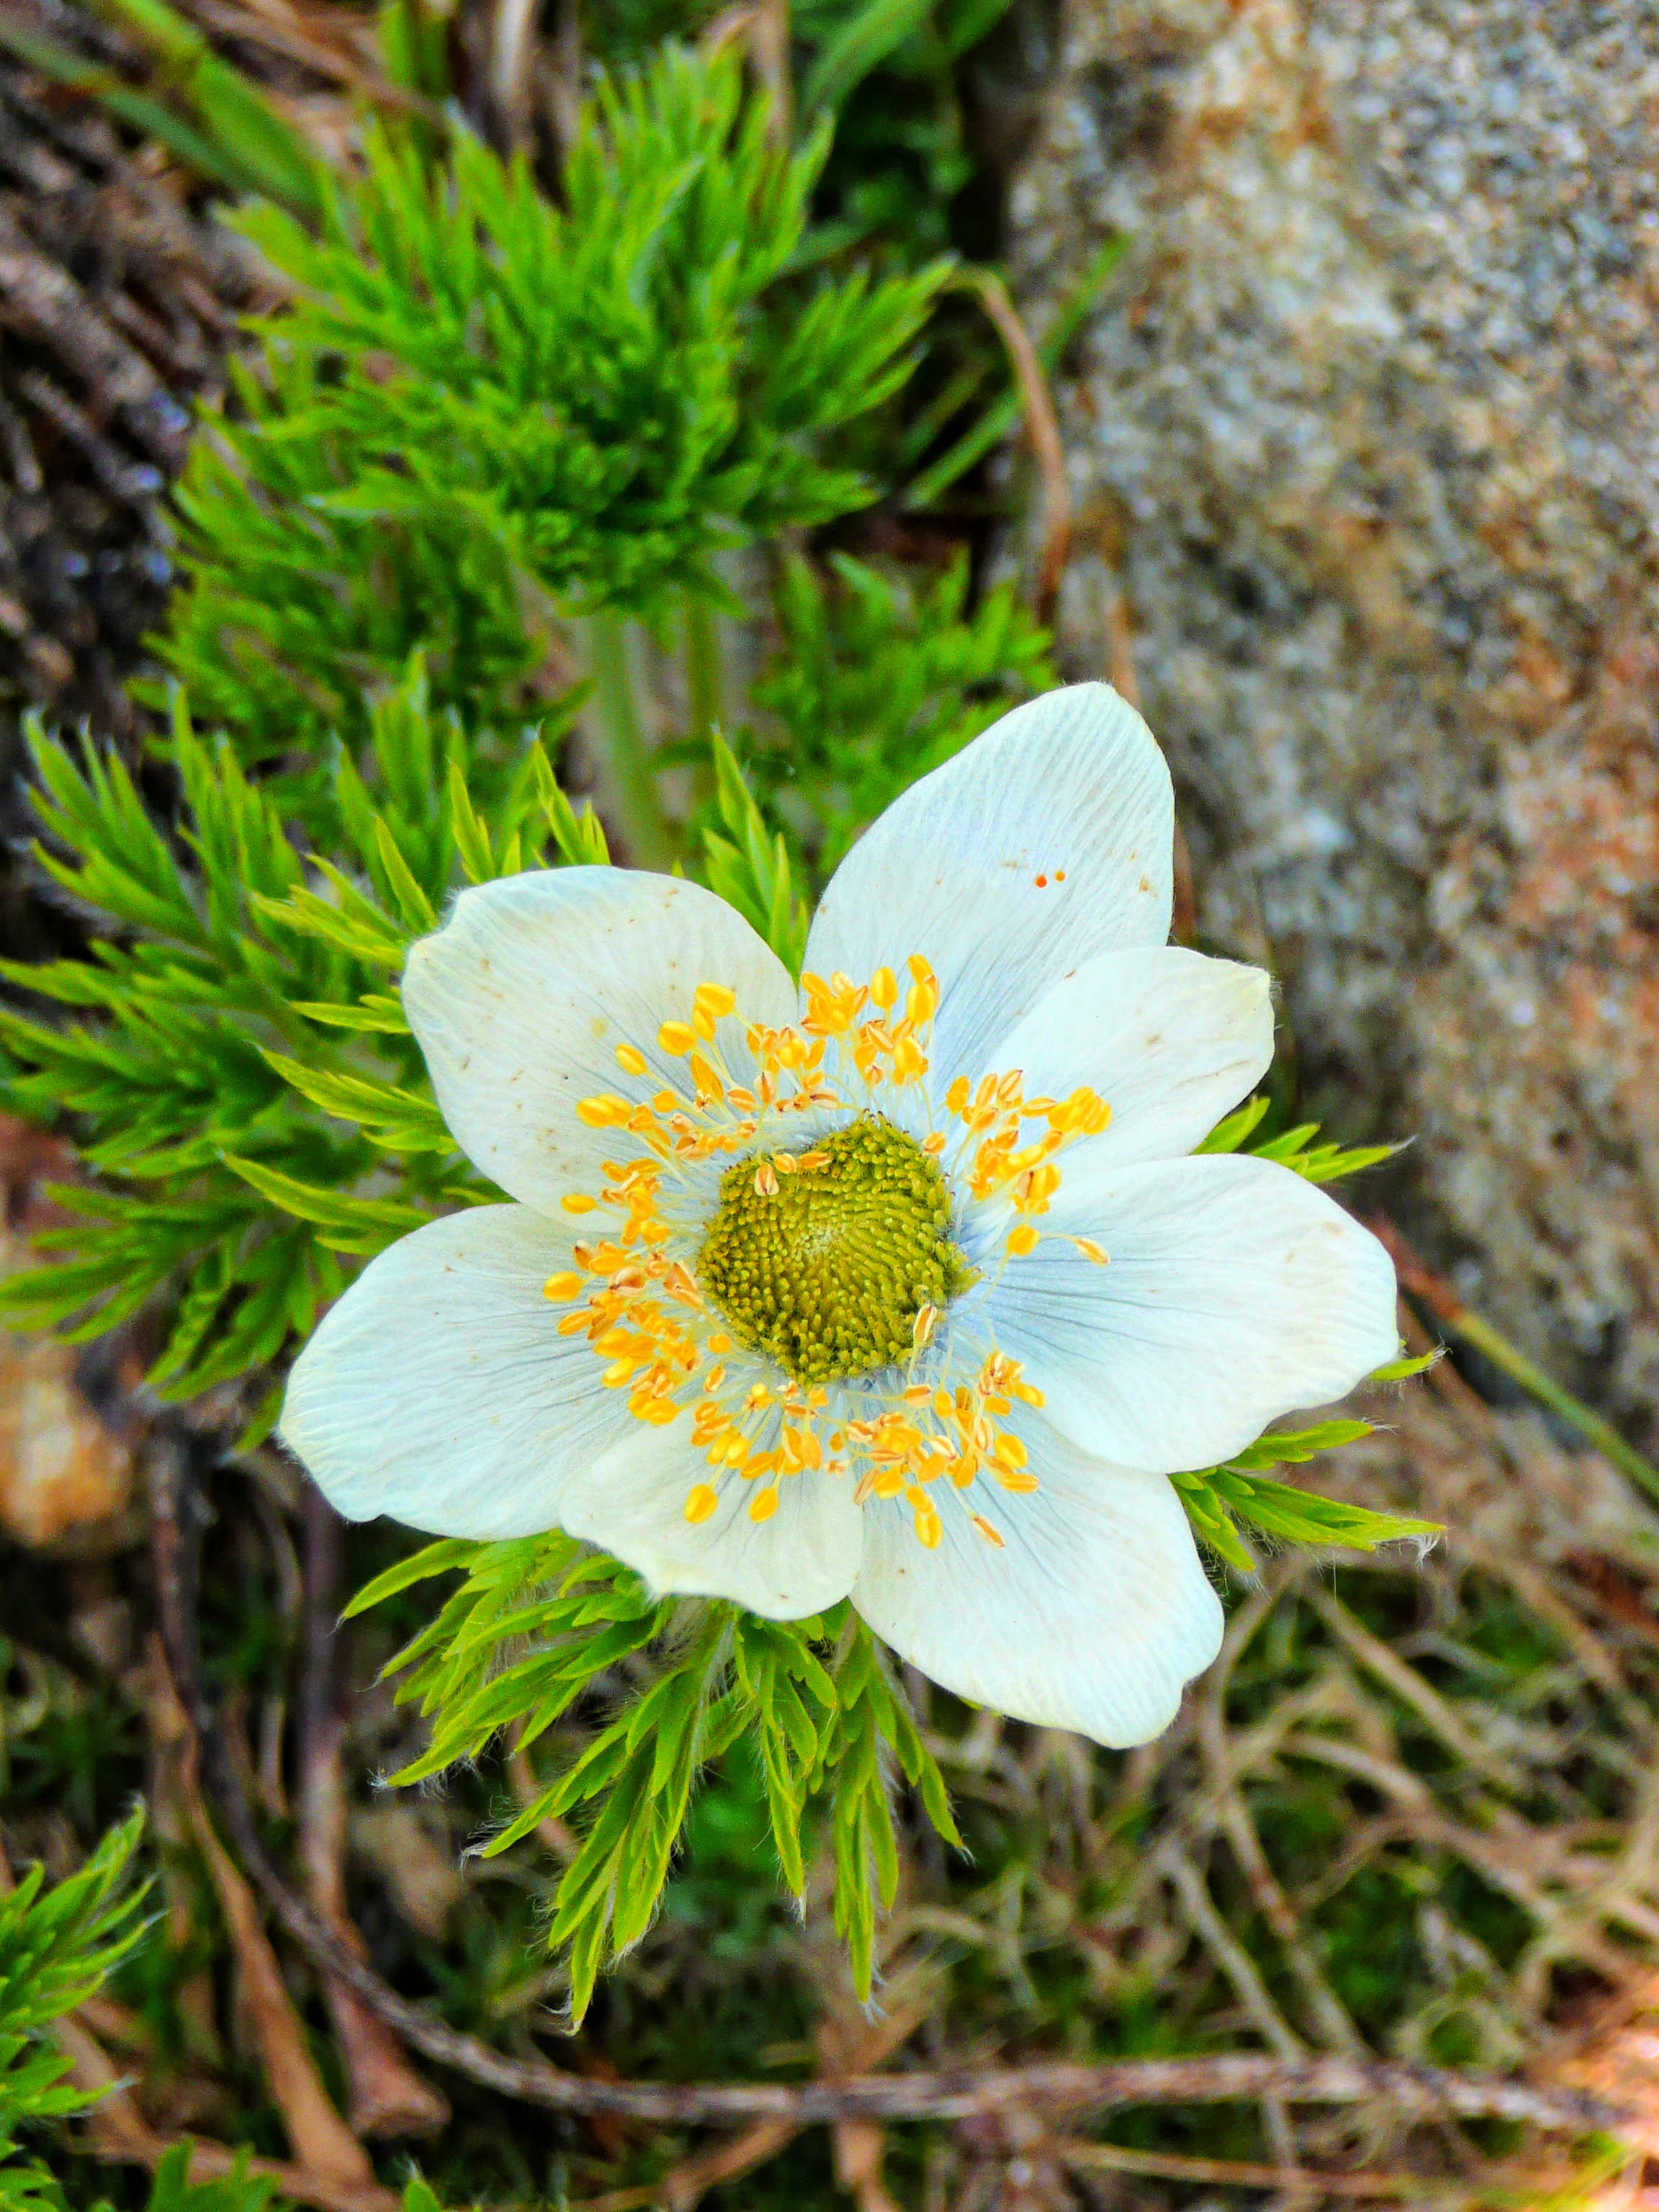
Western Anemone
Bunches of Mountain Arnica flower a little further down.

Mountain Arnica, Long Hill as a backdrop
I return to Sheila Lake campground and have a short rest. Lacking practice, it takes me more than an hour to break camp; I still need to find some better routines.
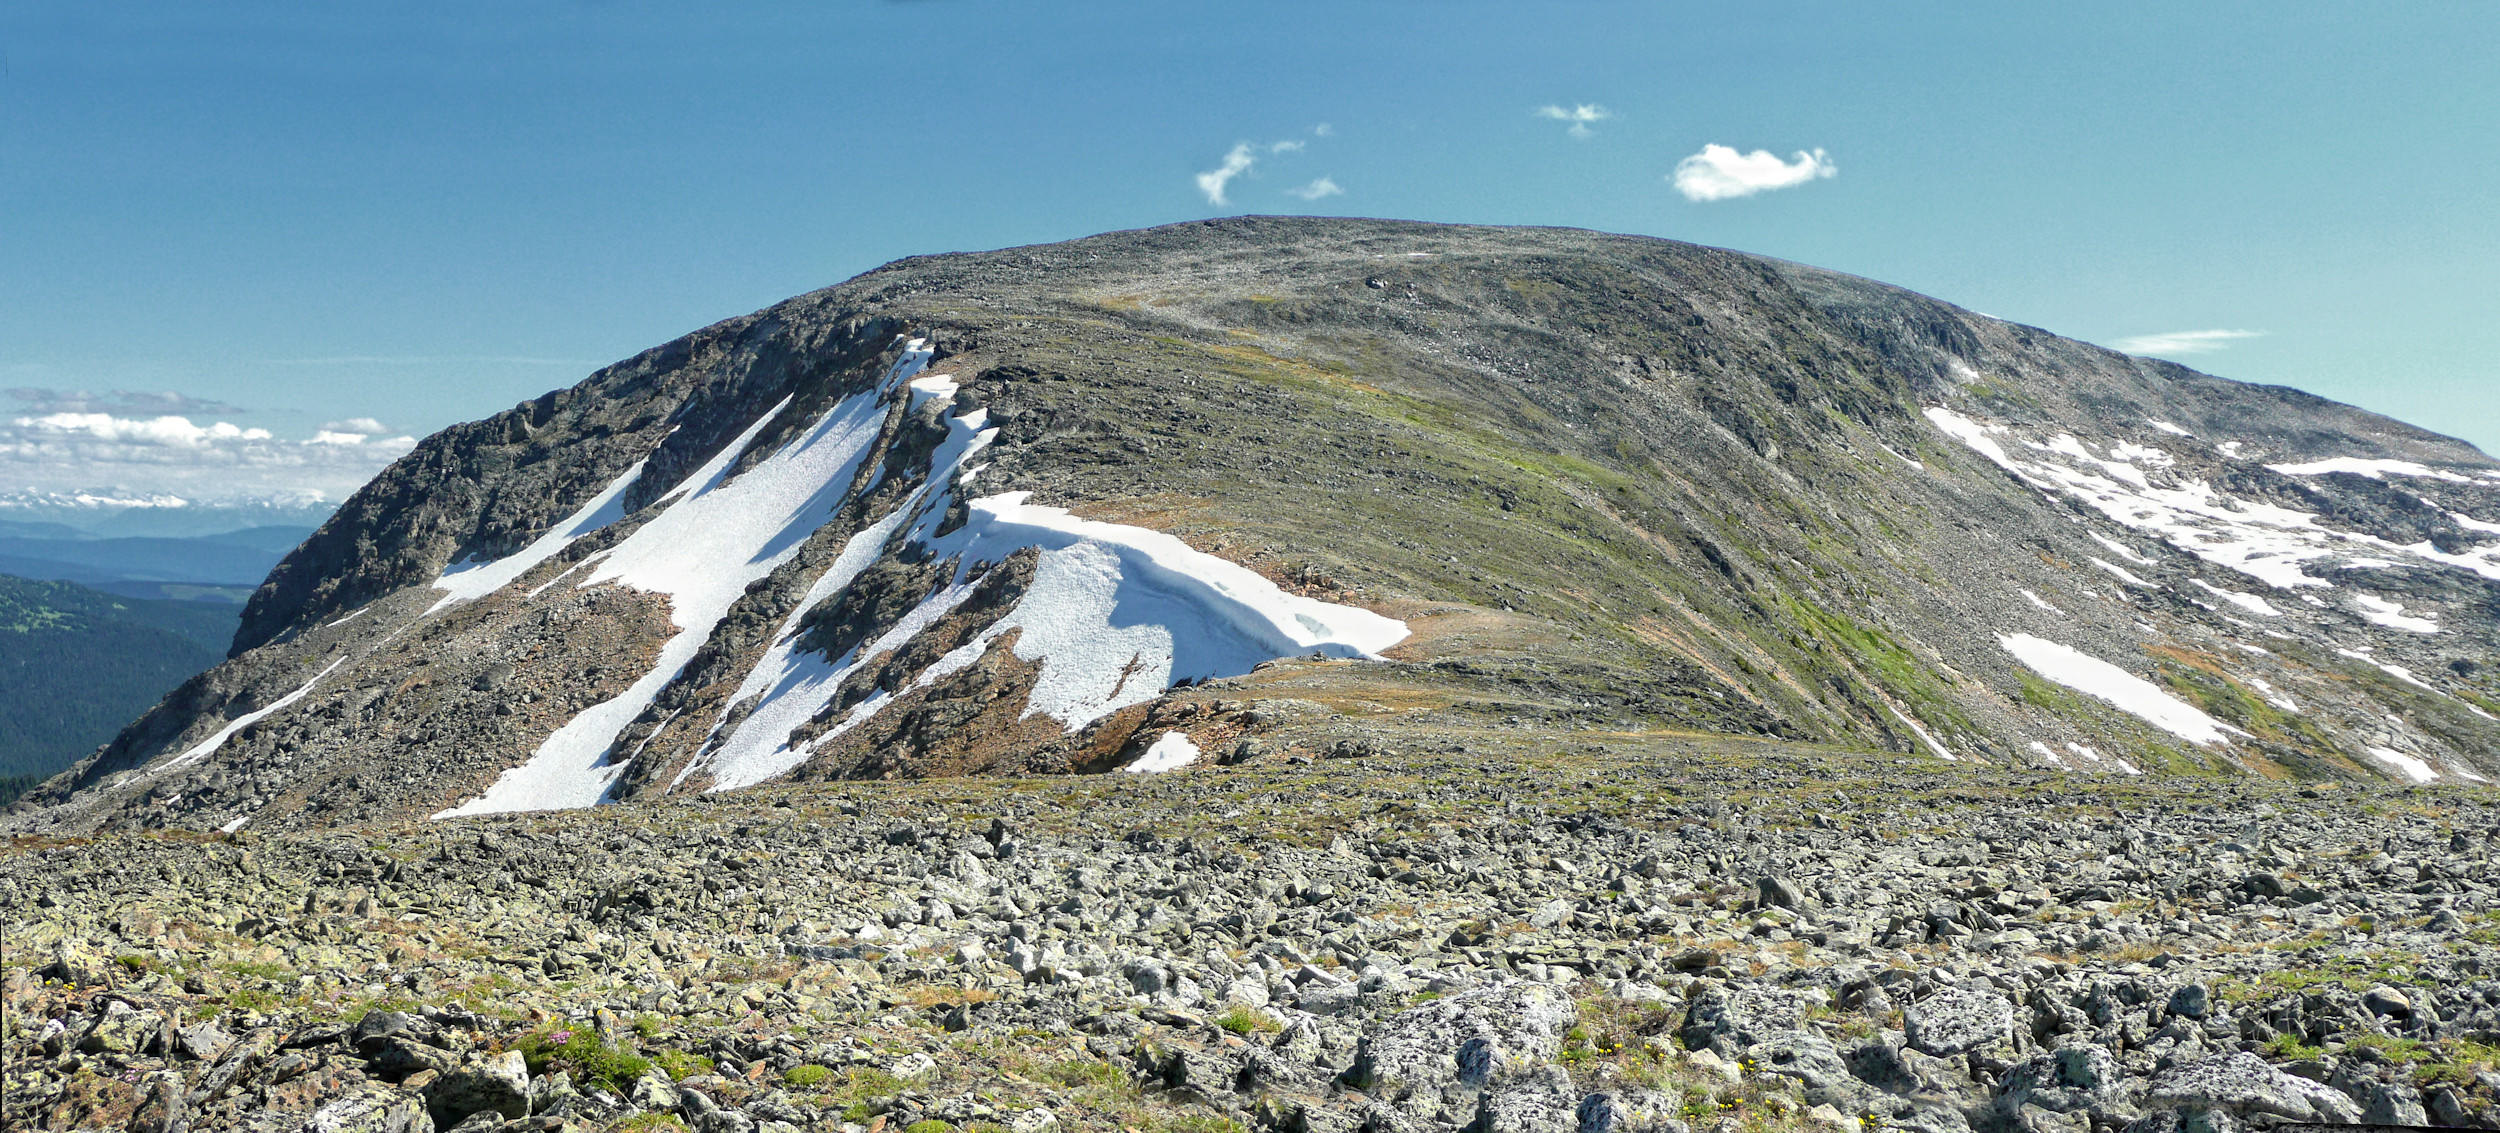
On leaving the alpine, I have a last look back towards Long Hill and the West Ridge.
Long Hill (M) and West Ridge (R)
In no time I am back in the meadows. Lit by the early afternoon sun, the wildflowers are particularly colourful.
Even the stay of just one night has warranted lugging a heavy backpack to Sheila Lake campground. Another time I might extend my stay for a second night. There is a lot to explore up there.
Wildflowers in front of Raft Mountain
Trophy Mountain Meadows - Lunch Ridge
| Distance | 9.8 km |
| Time | 2 hrs |
| Incl. Breaks | 3 hrs |
| Min. Elev. | 1671 m |
| Max. Elev. | 2126 m |
| Ascent | 455 m |
| Dates | 19/6/2018 10/7/2020 |

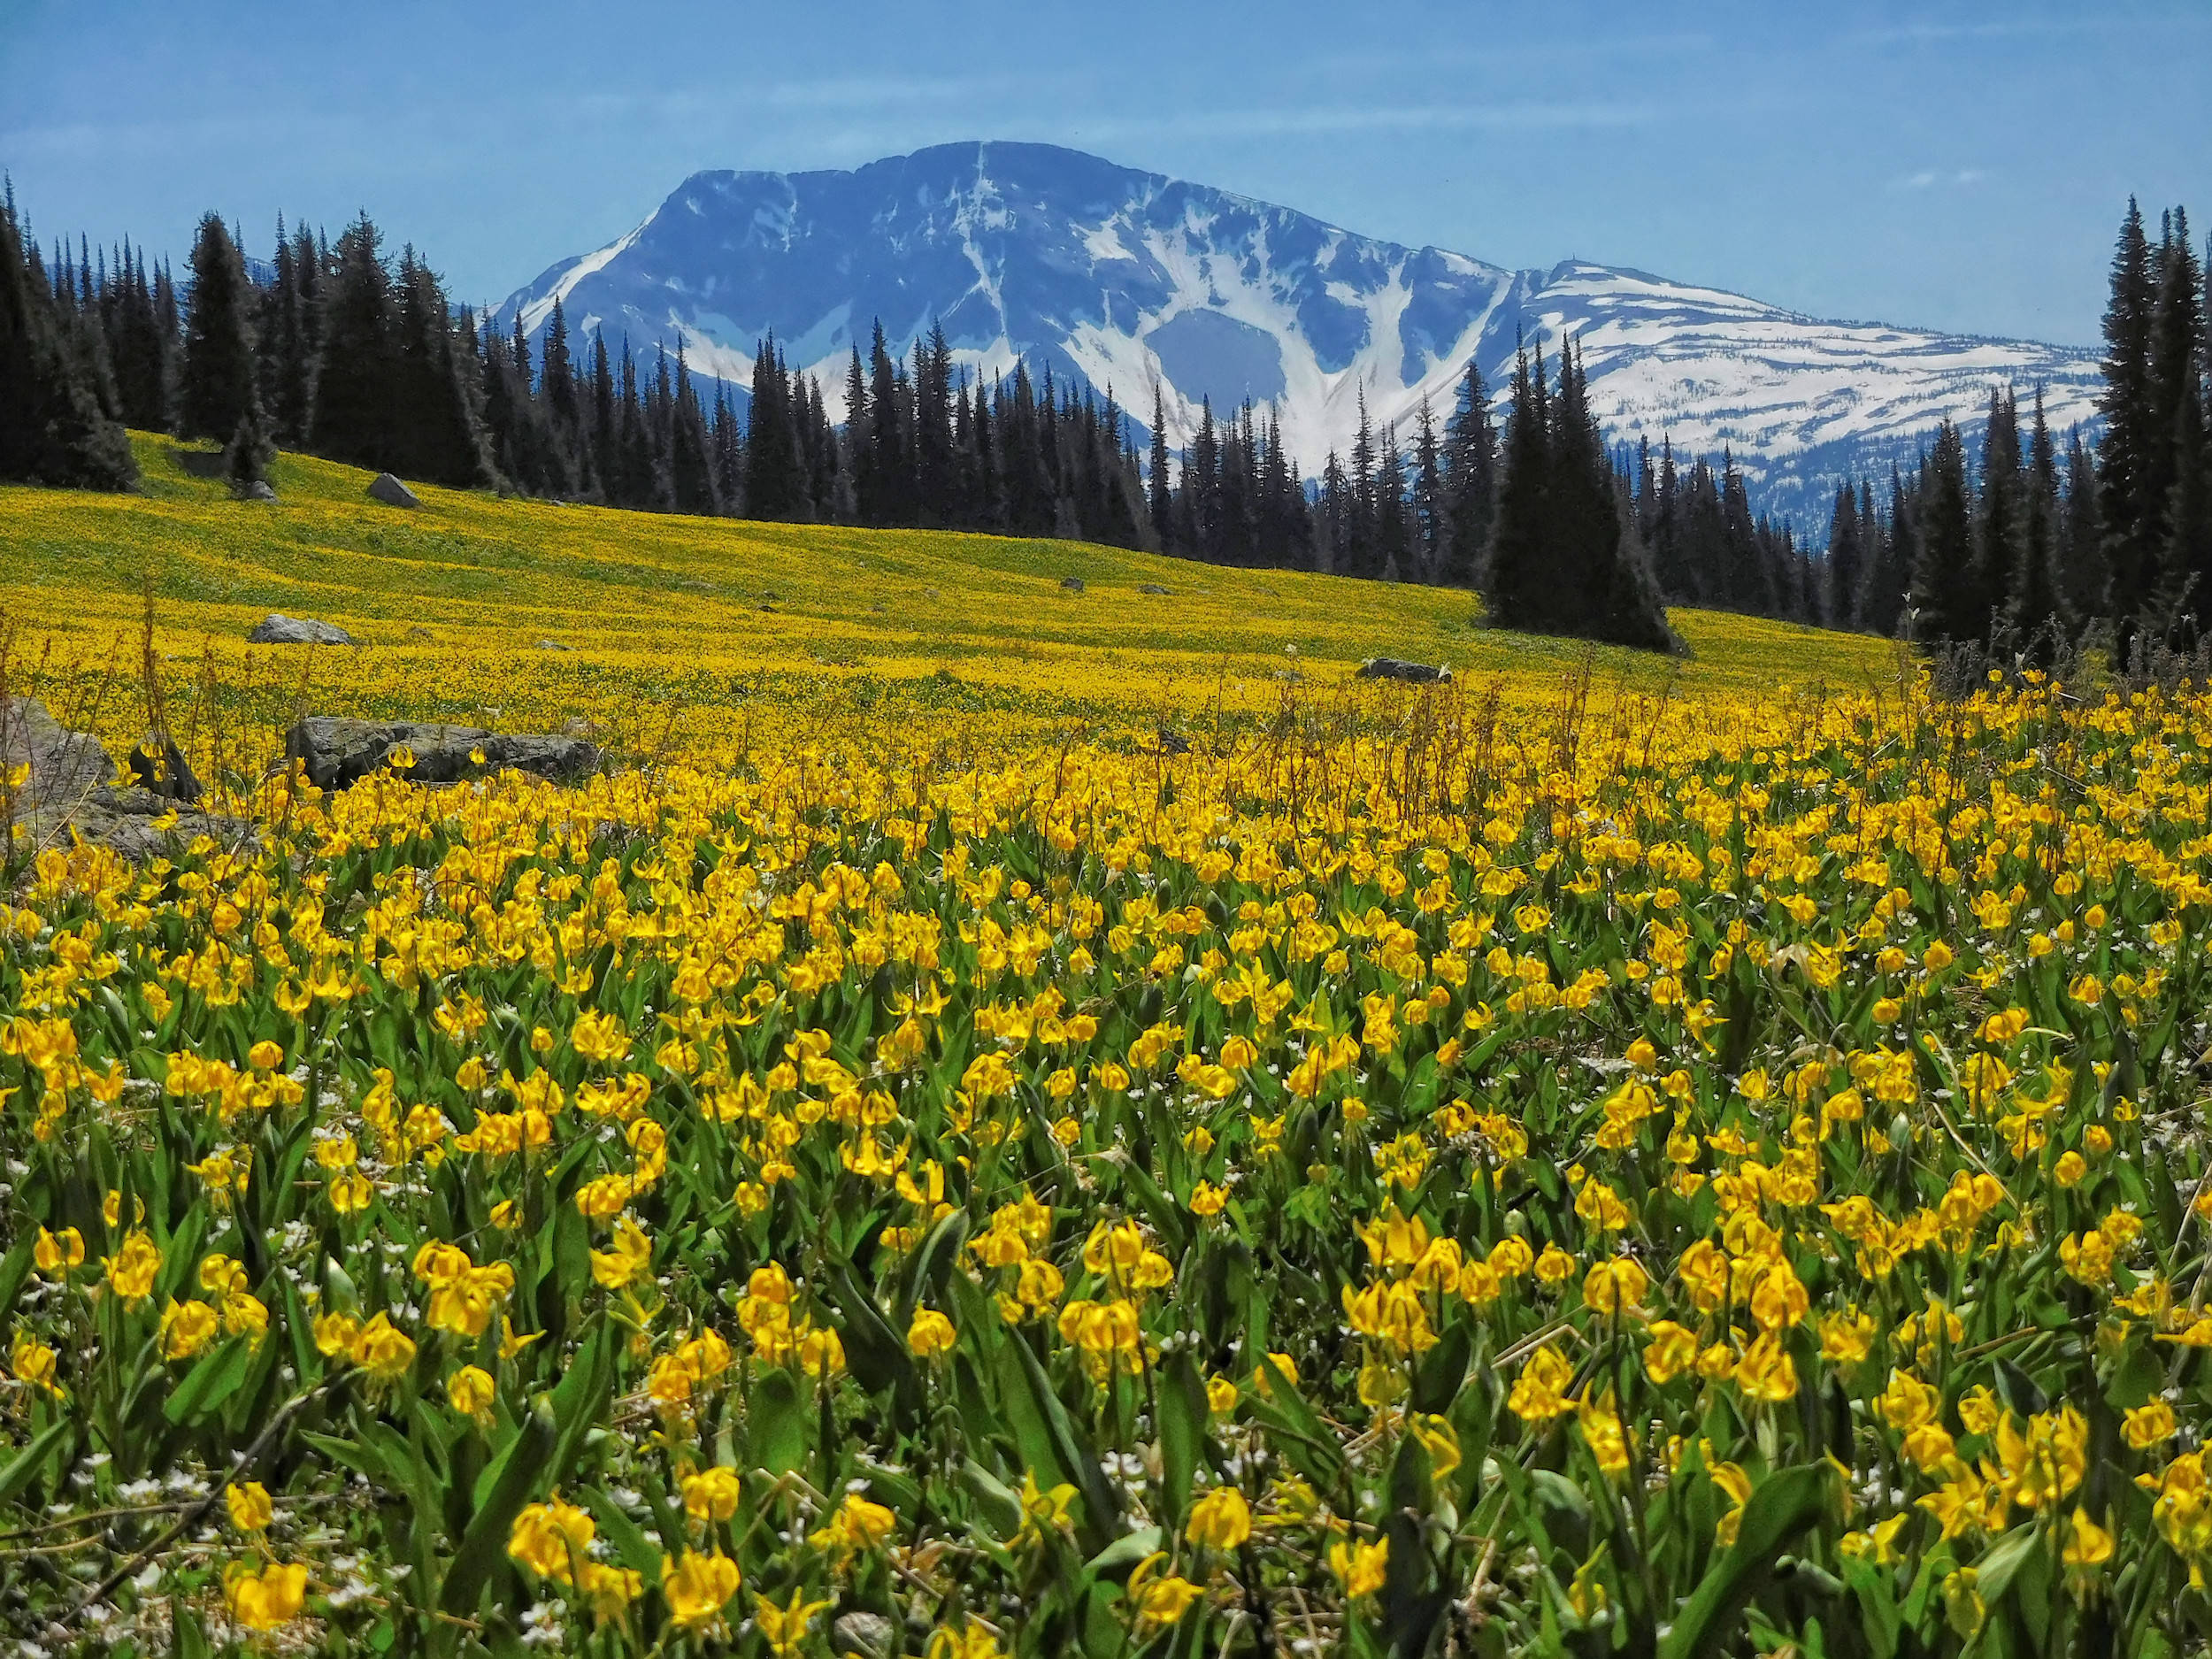
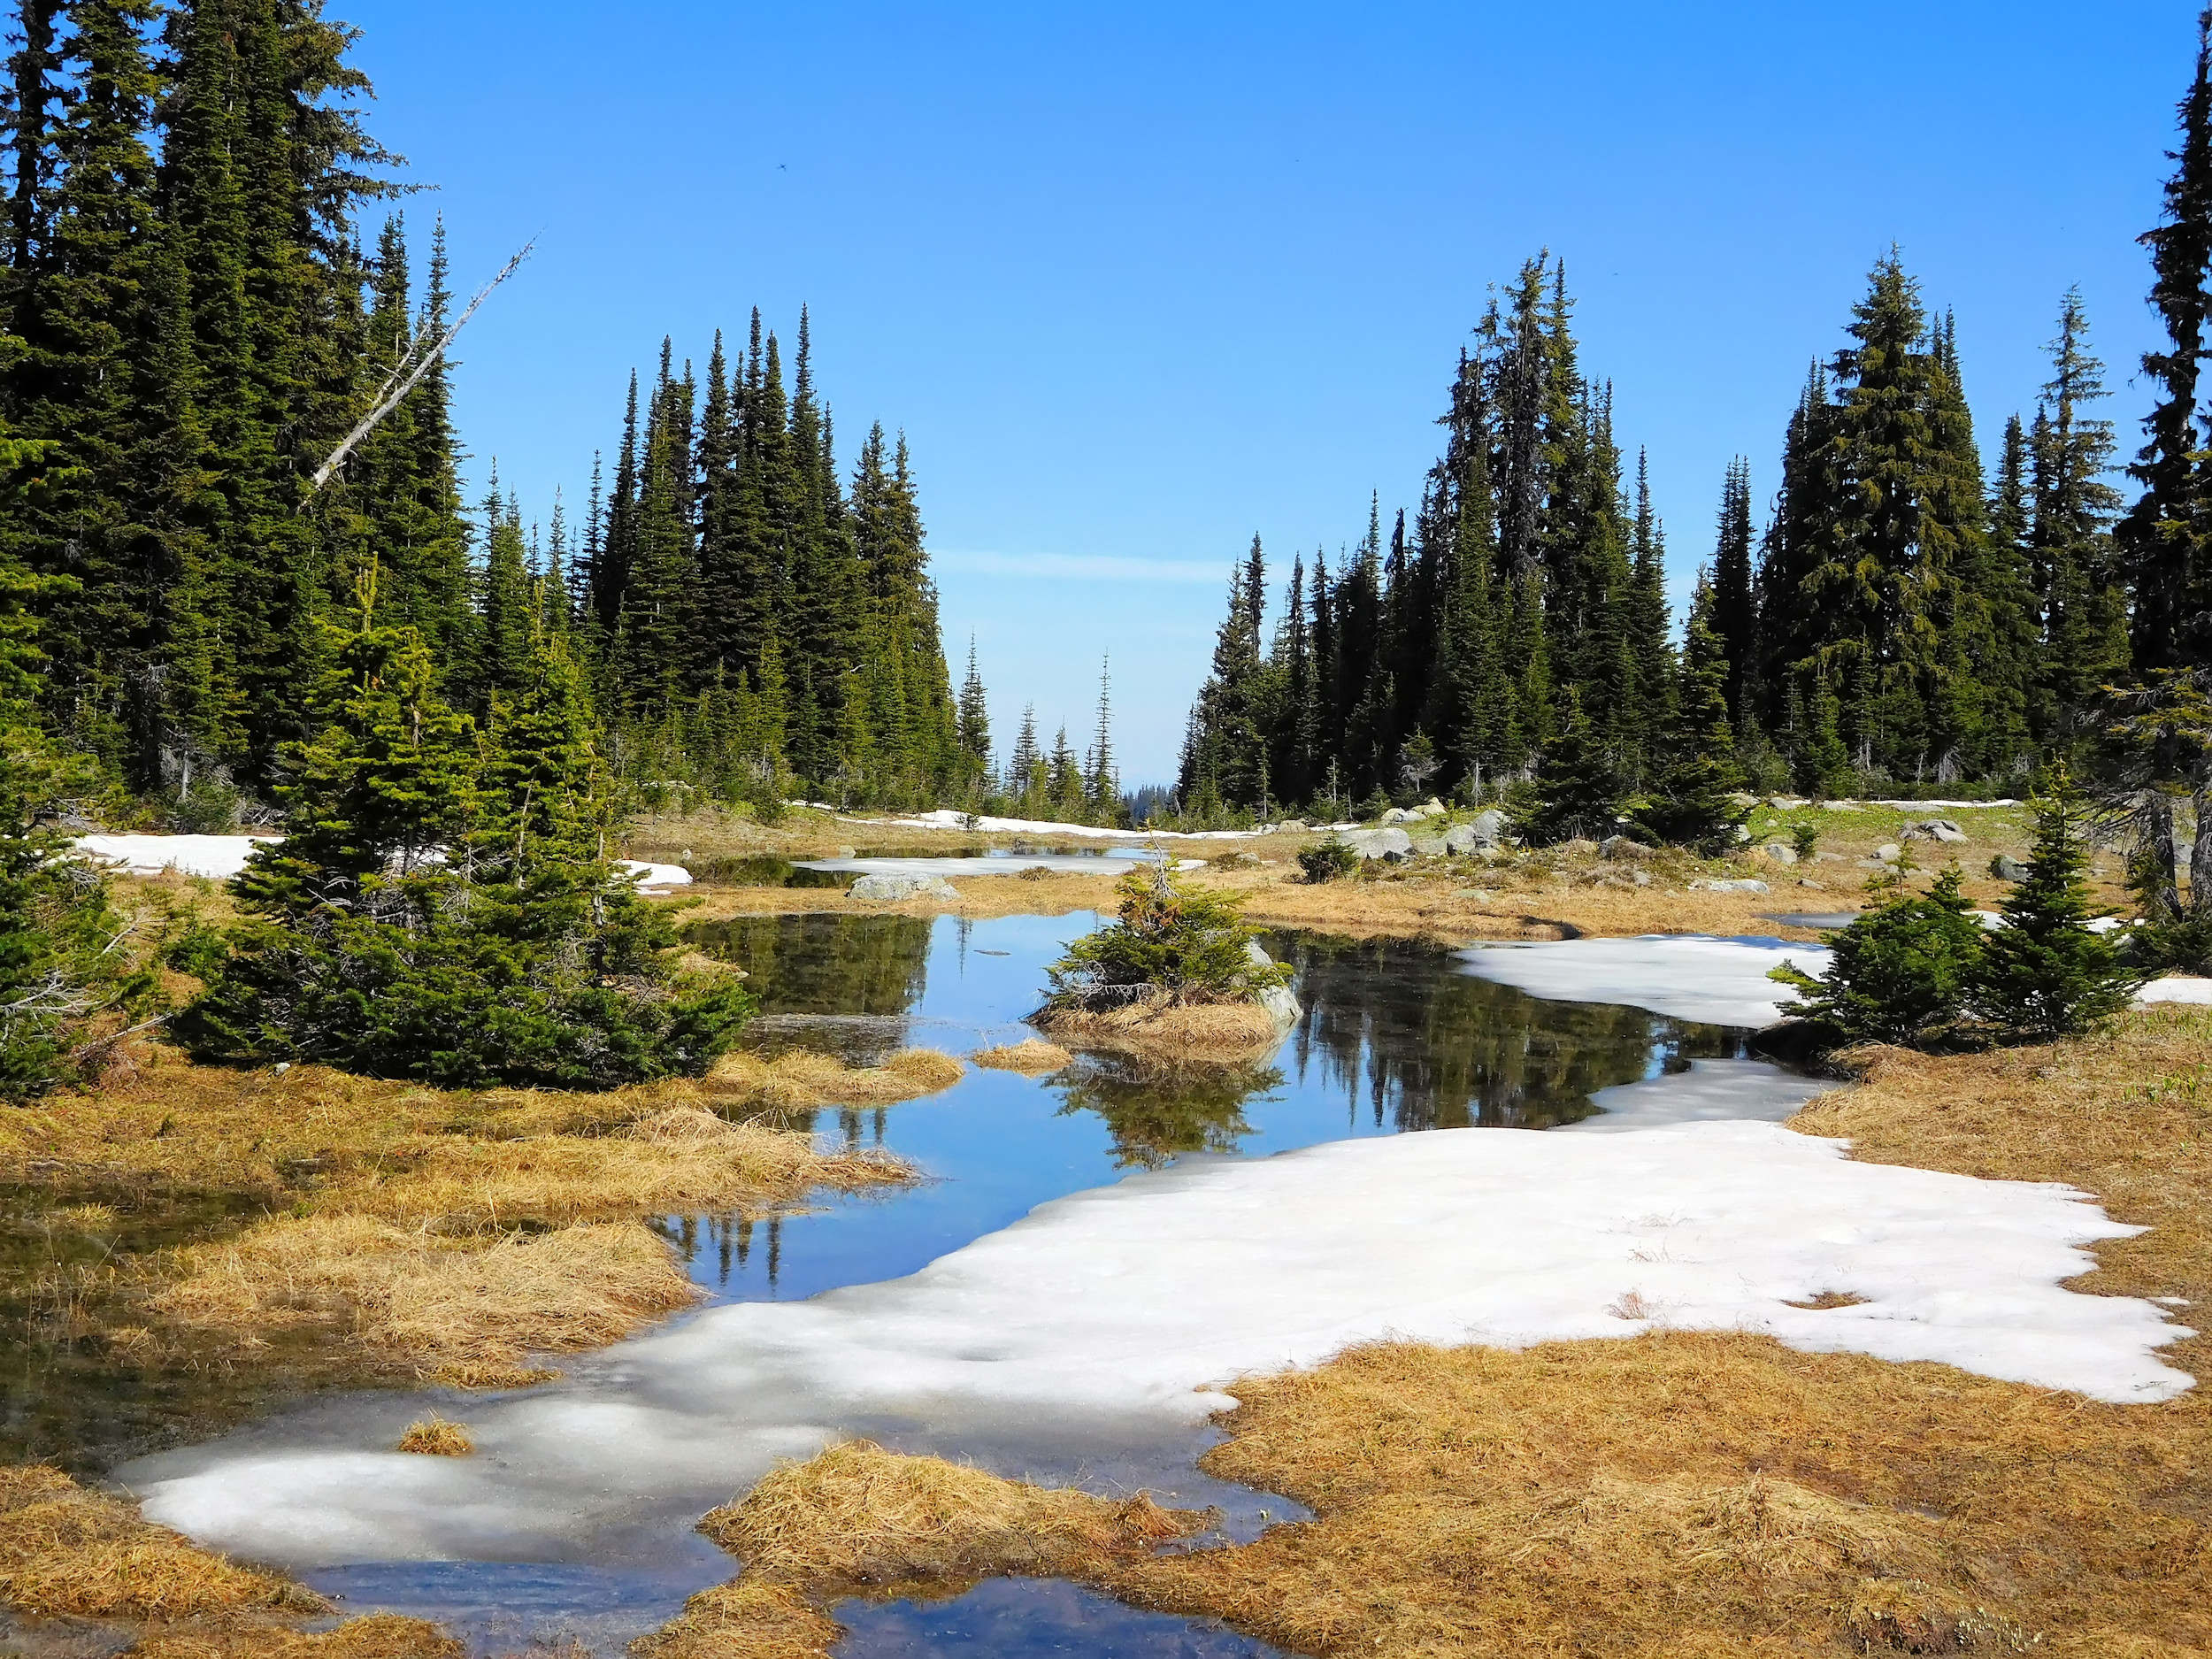
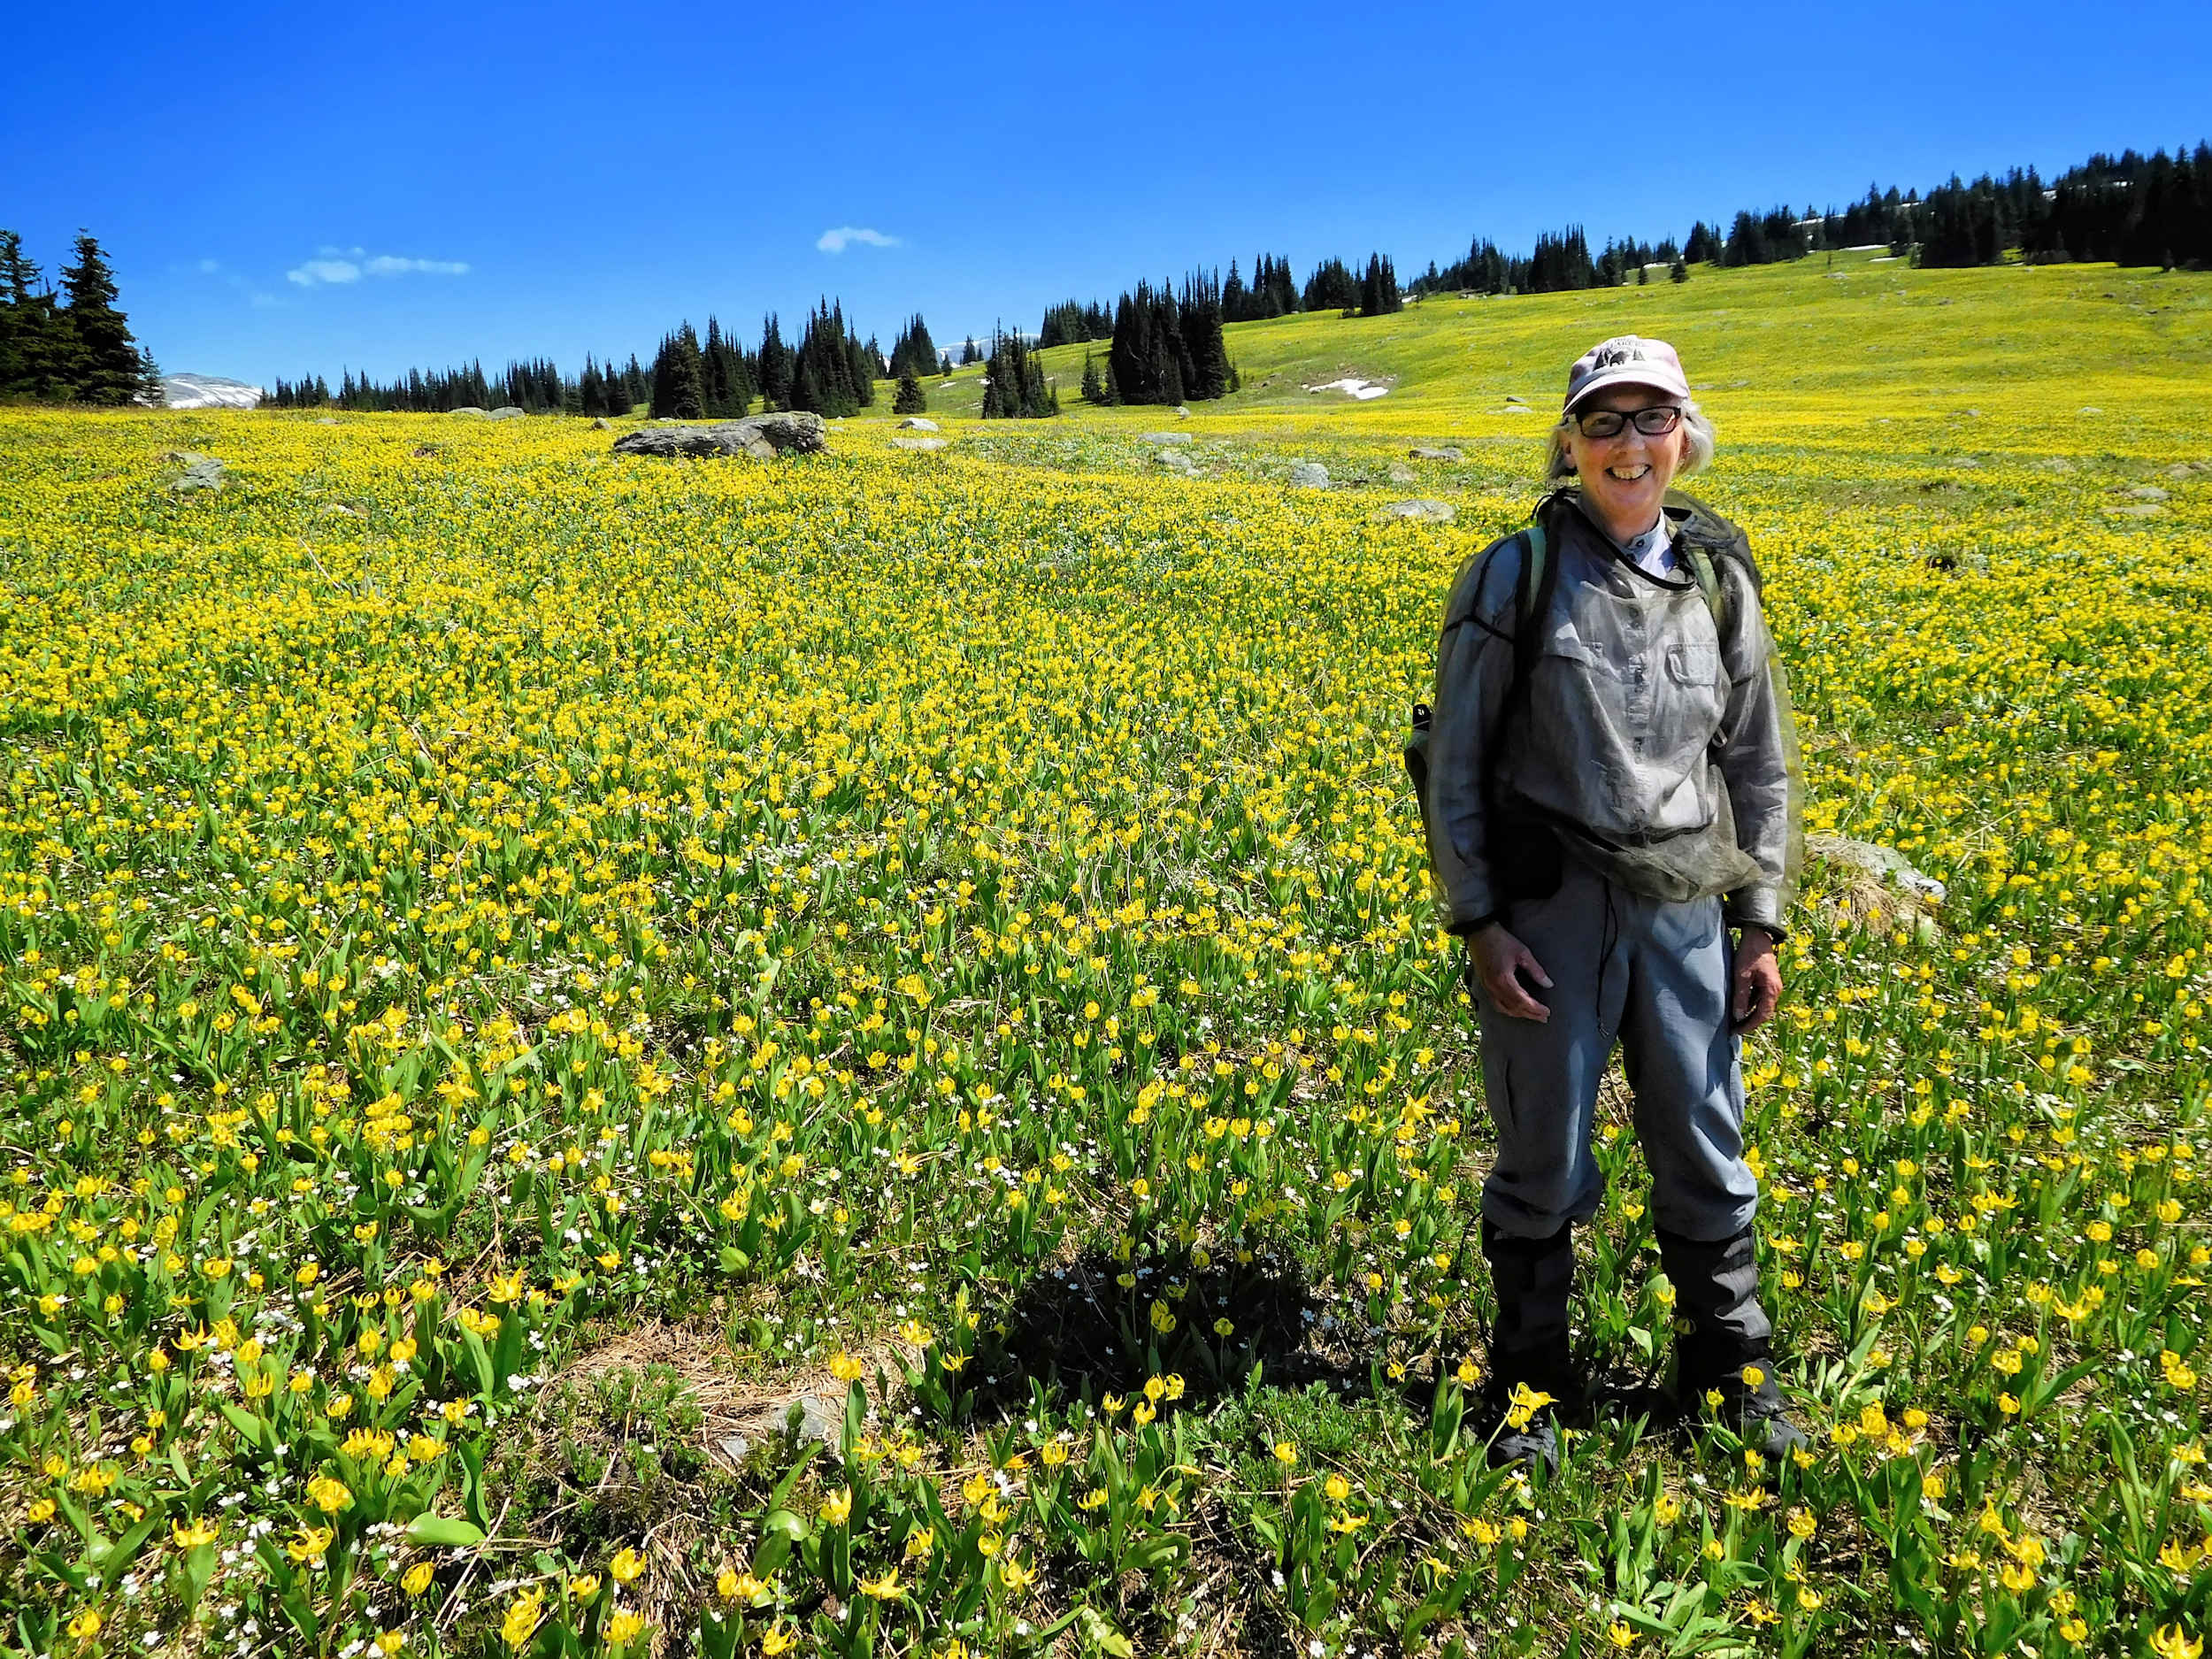
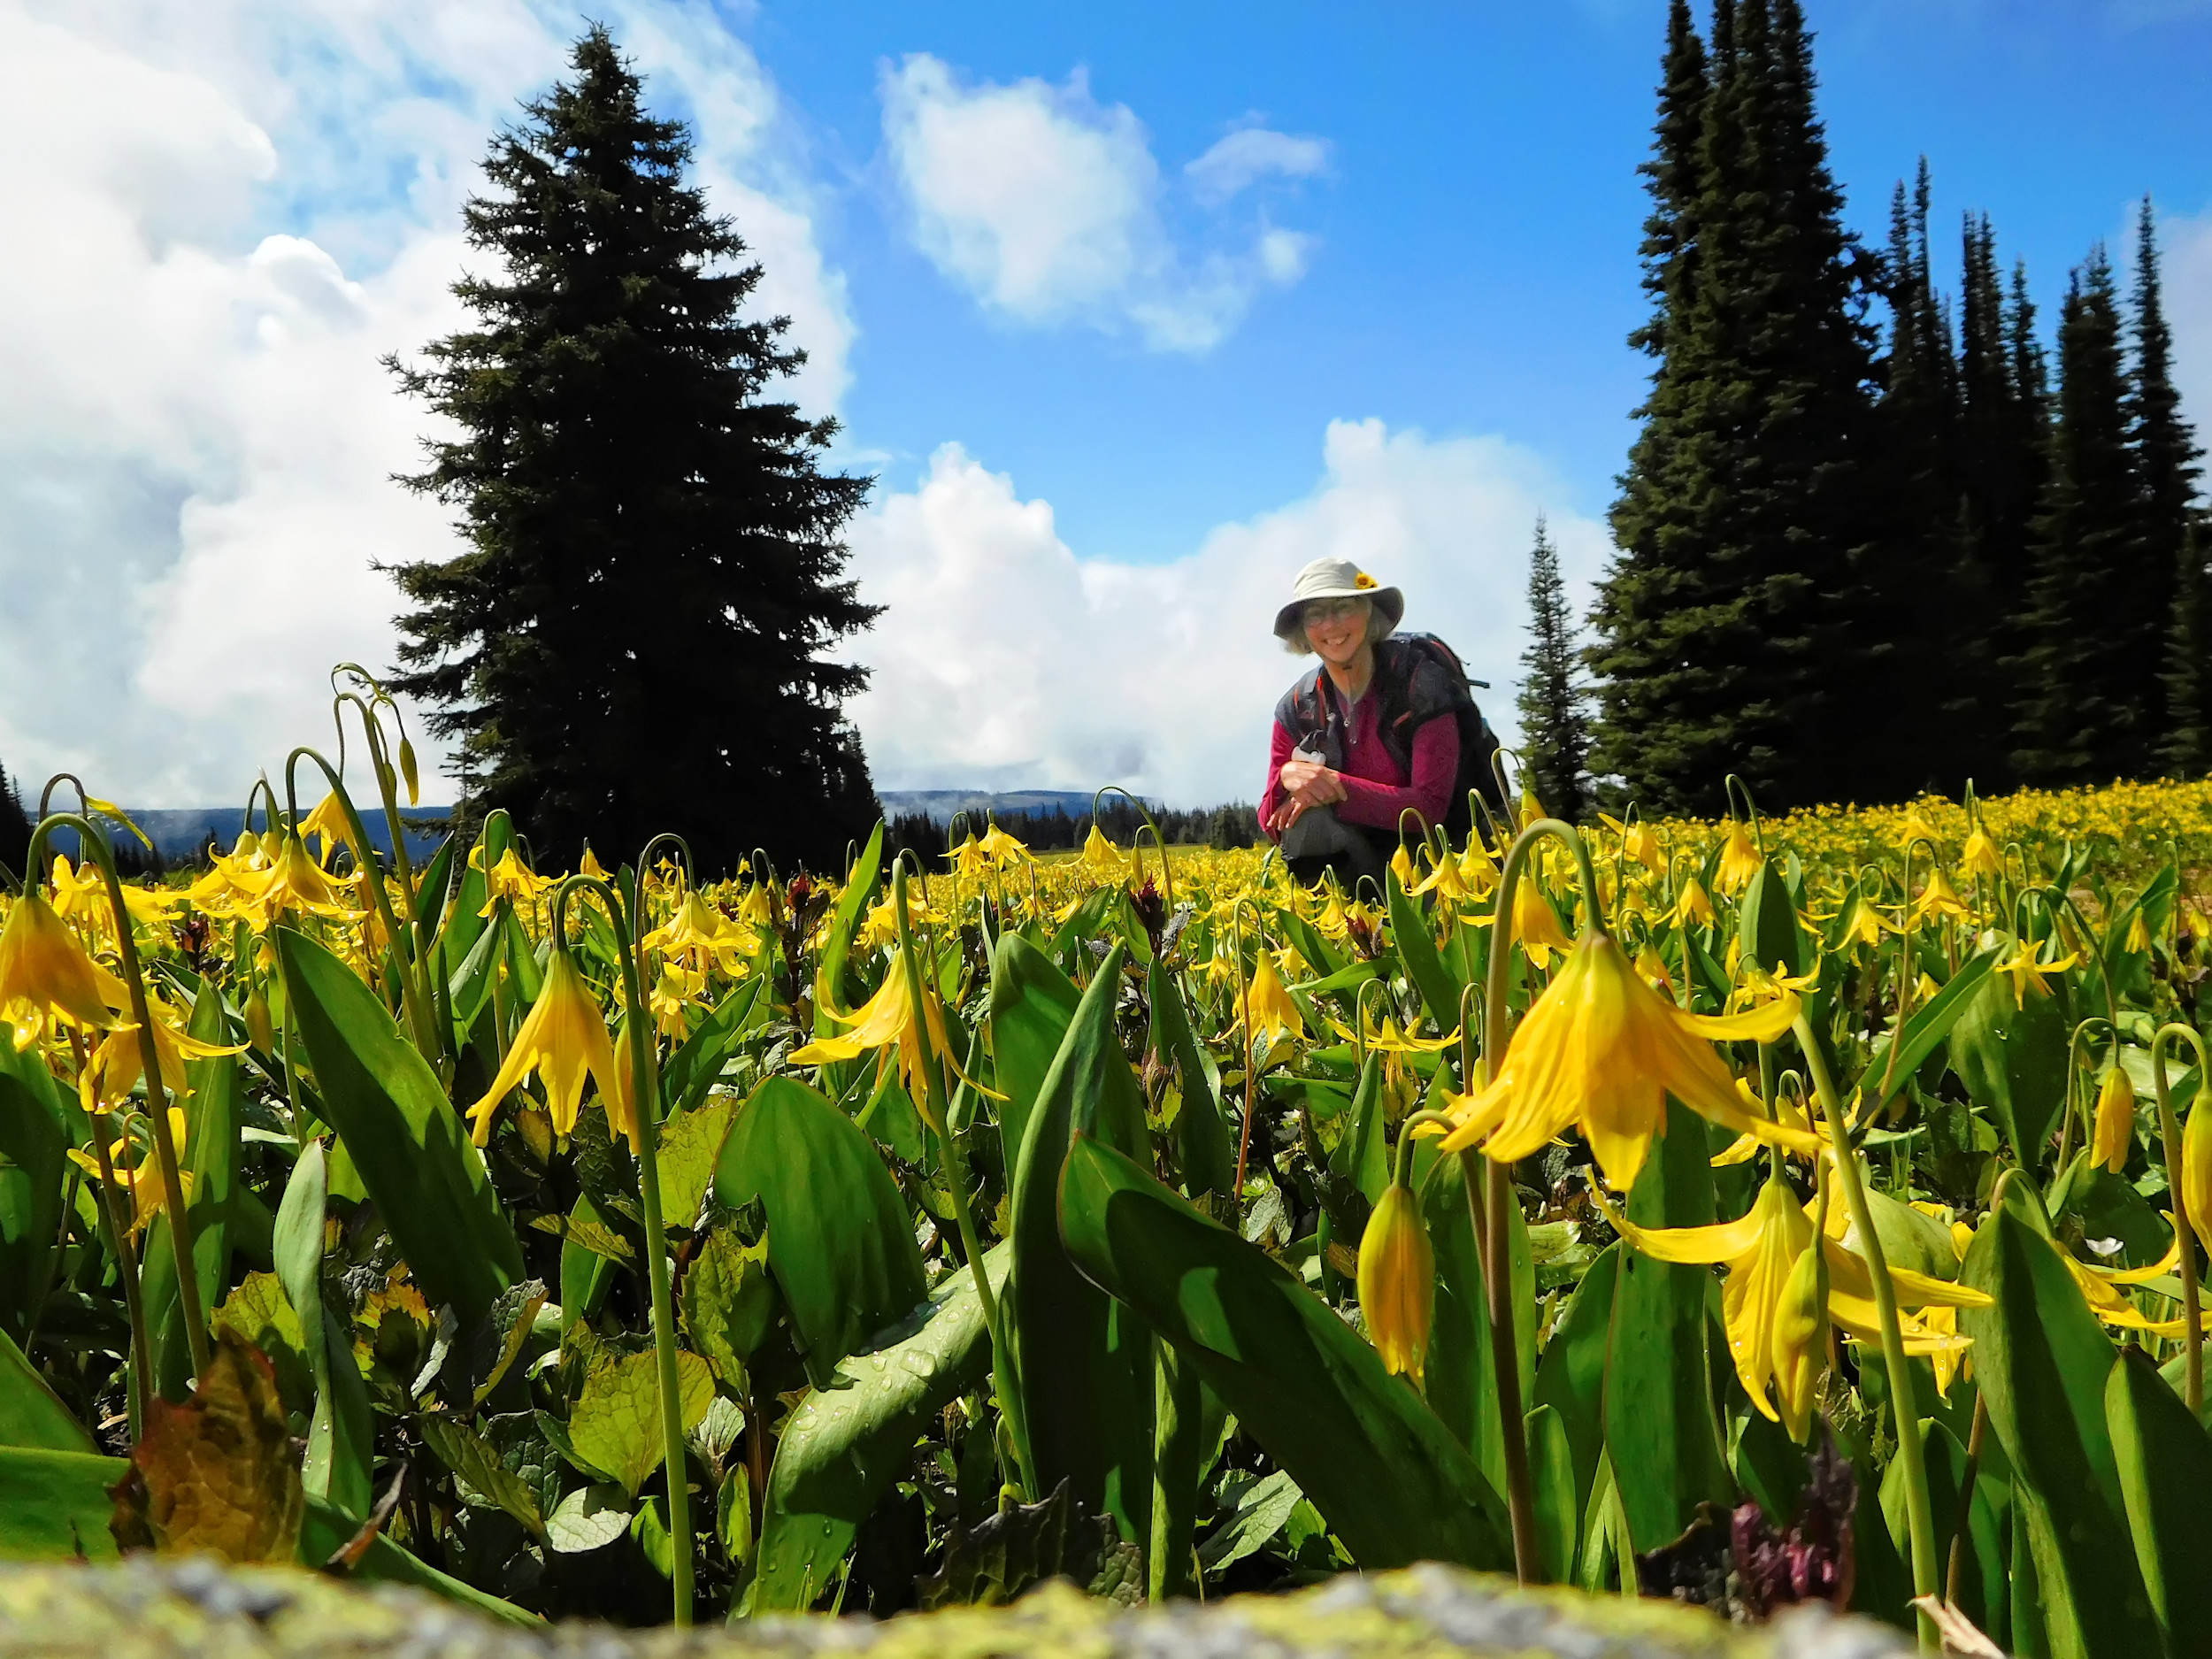
Glacier Lilies and Spring Beauties
Every year at the end of June, I start watching the mountain weather and wonder about the peak time for the Glacier Lily bloom in the Trophy Meadows.
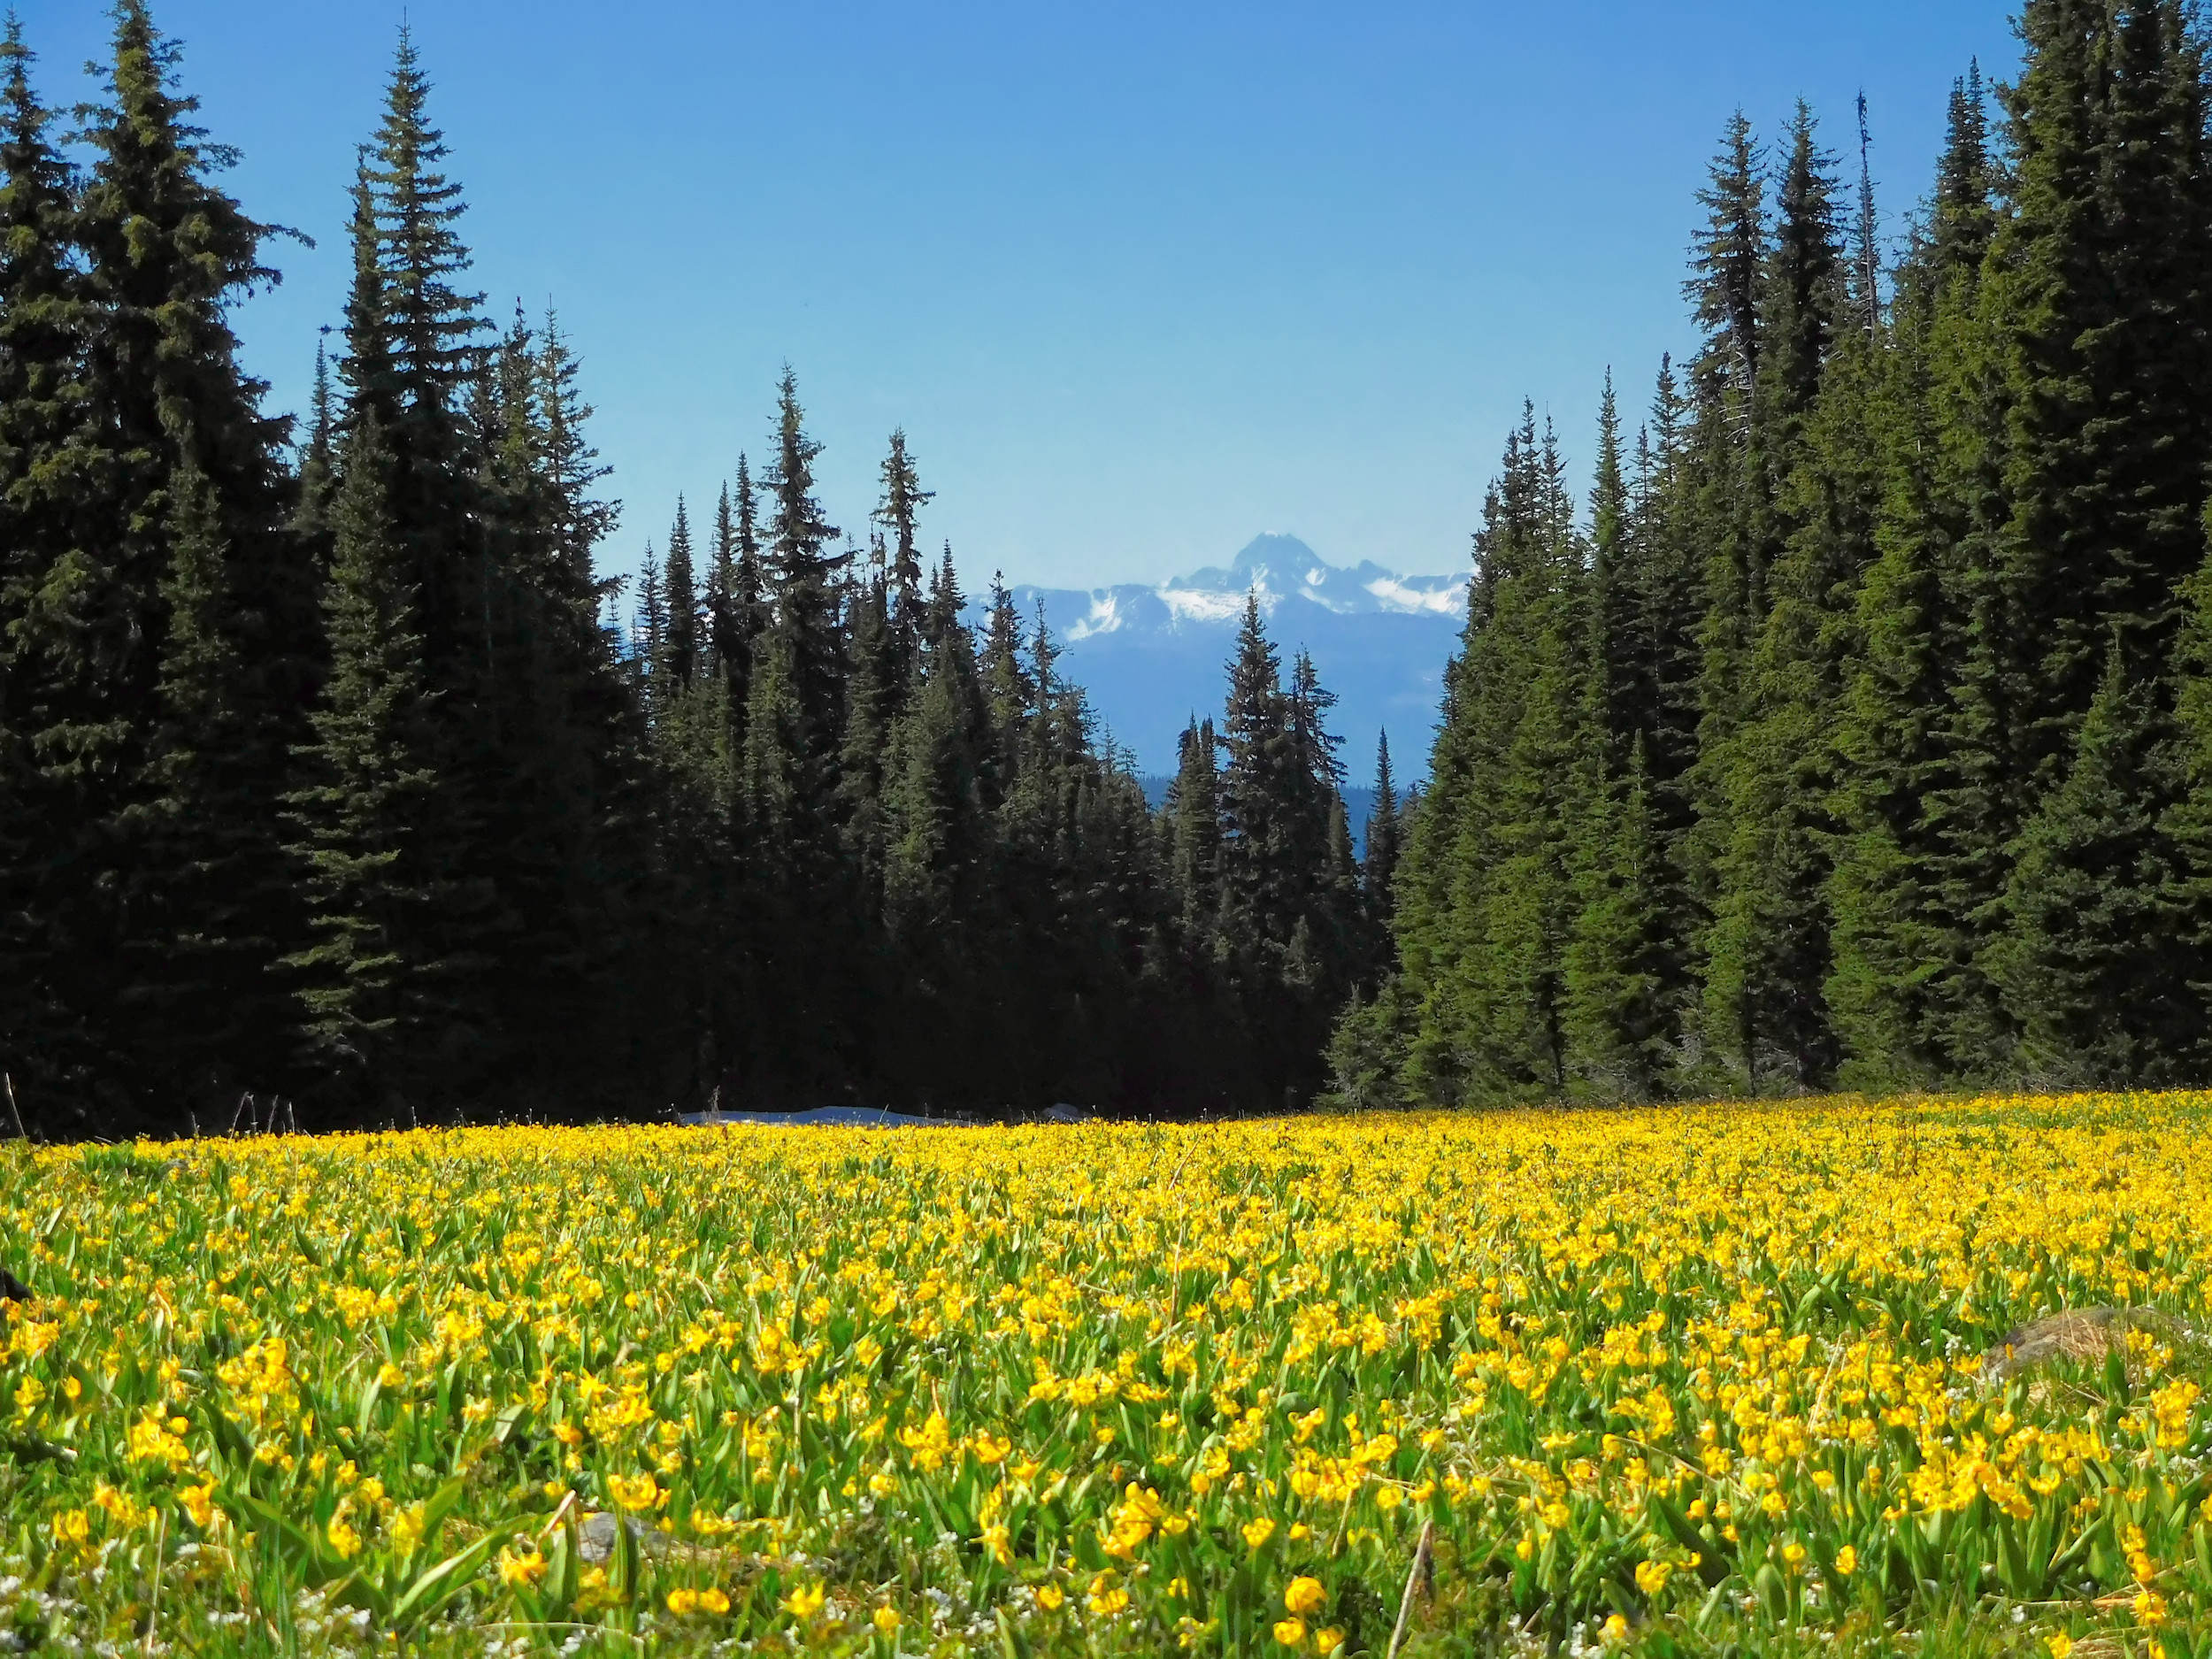
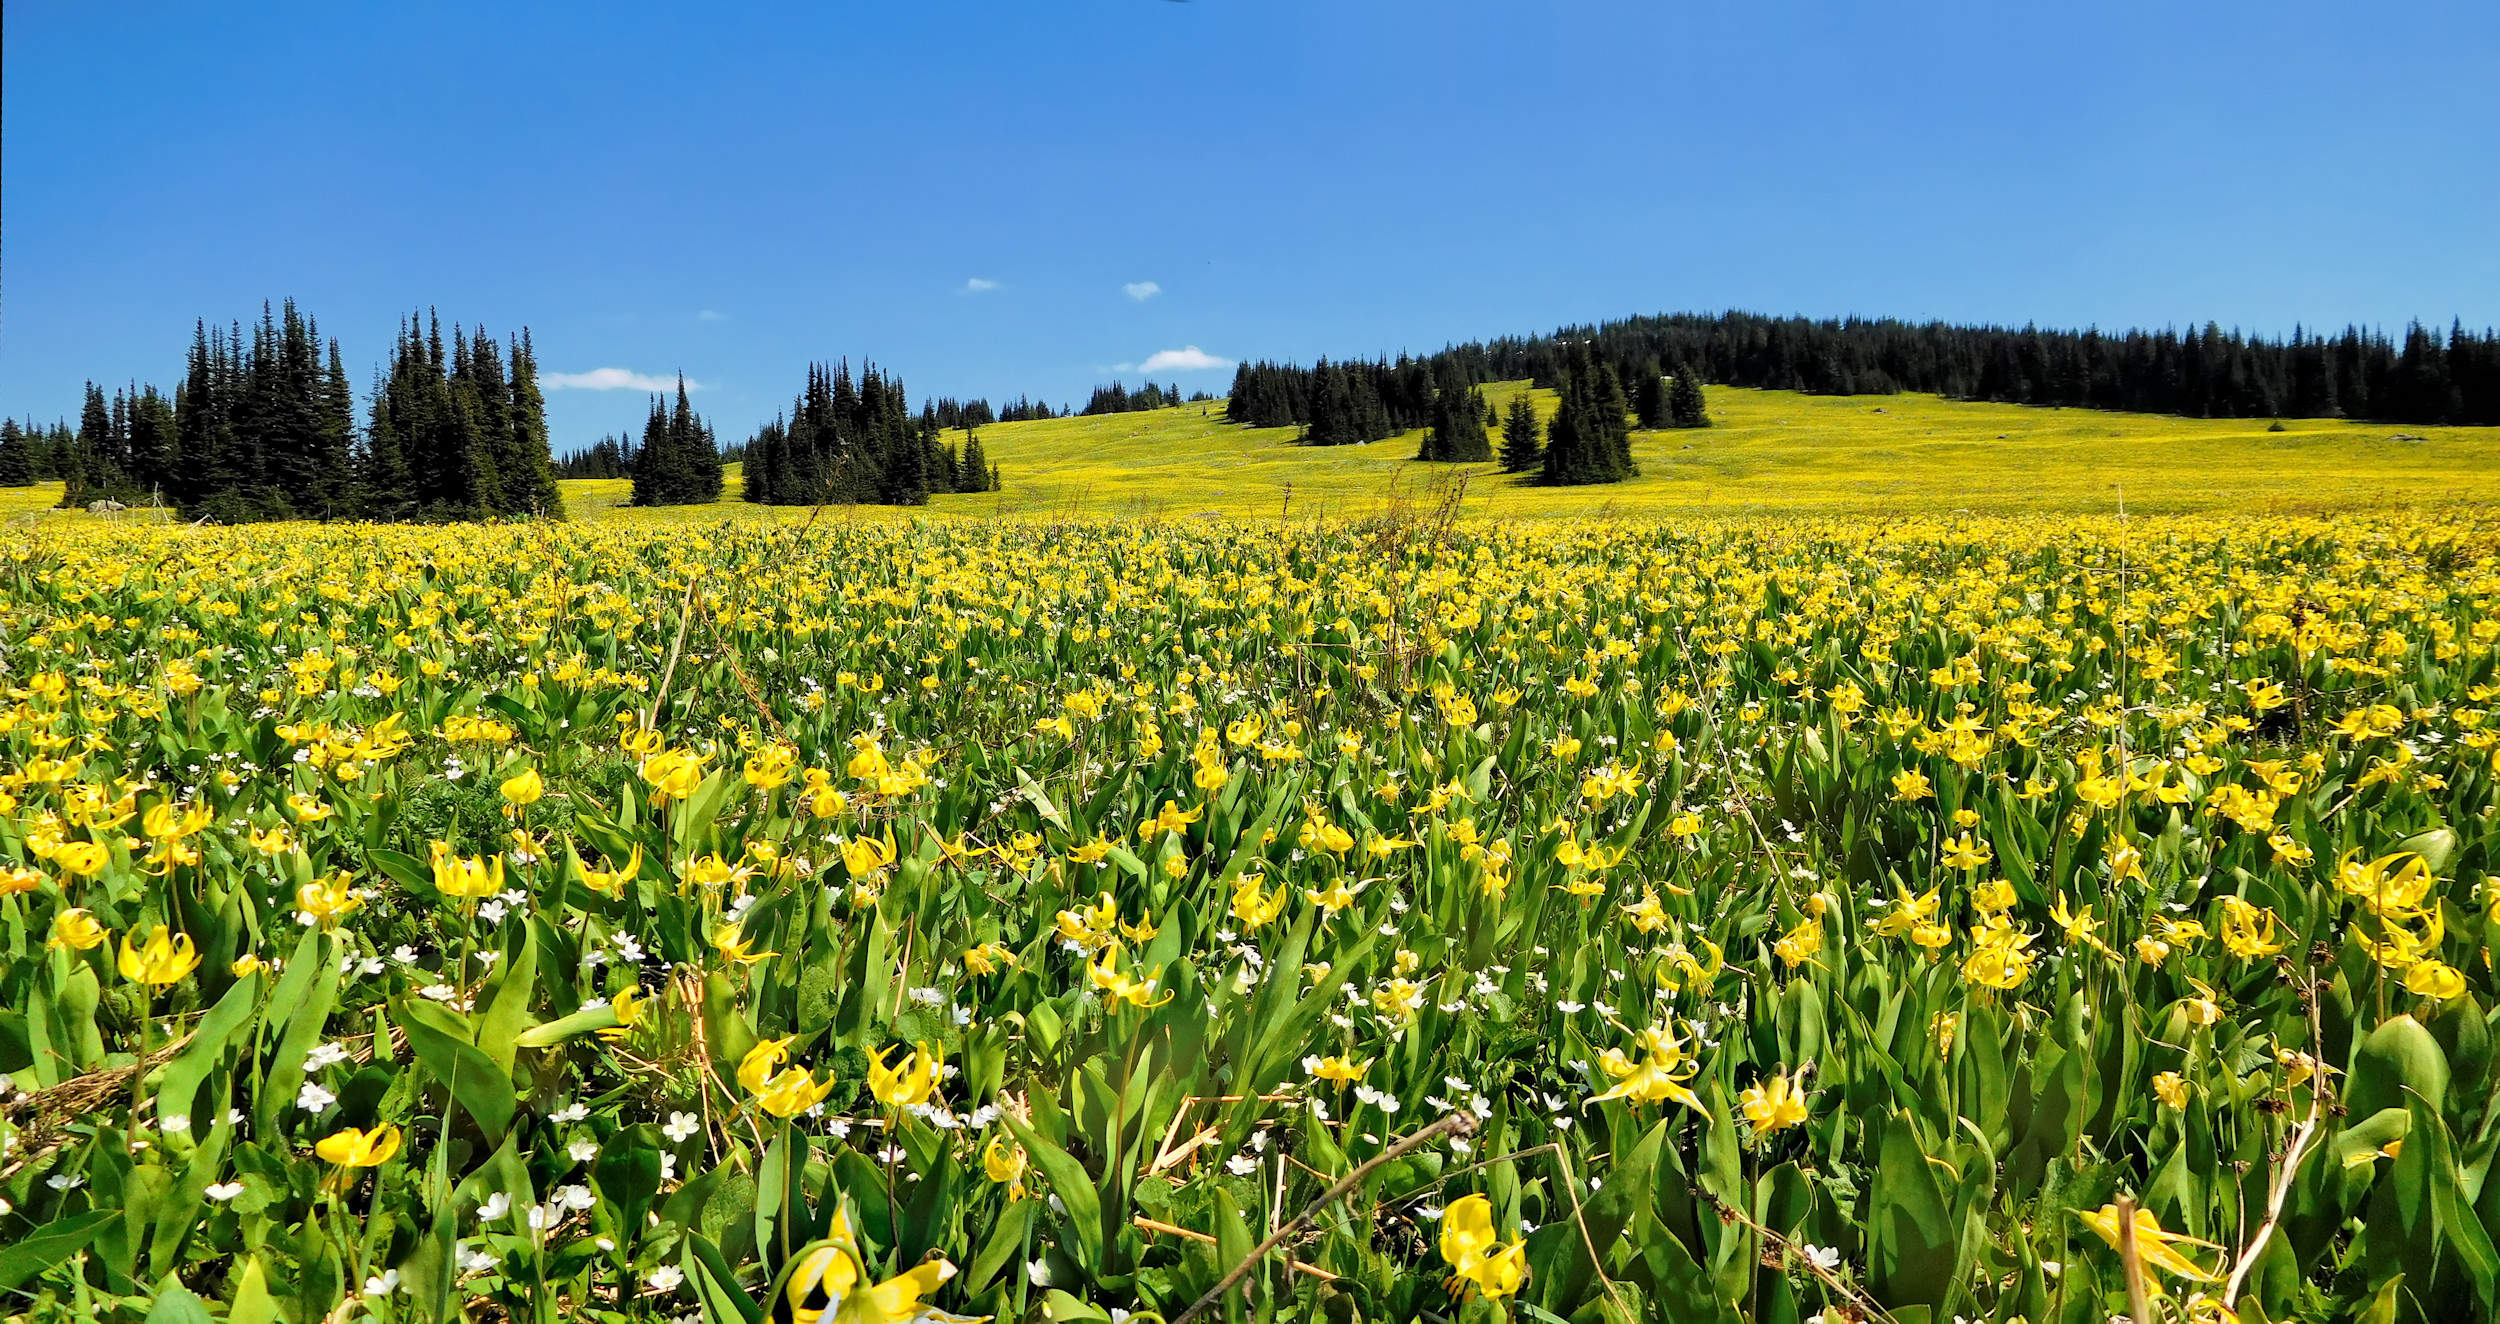
Glacier Lilies bloom during and just after snowmelt. Their bulbs awaken under the snow cover and grow a plant with bright yellow flowers that show up as soon as the snow melts. They take over the snow-free areas in the subalpine meadows and form huge golden carpets. Depending on the weather, the lilies often bloom for one week only, but as they don’t flower all at the same time, we can enjoy them a little longer.
The road to the Trophy Mountain trailhead at 1690 meters altitude is 13 kilometer long and rough at the best of times. The Wells Gray visitor center at the junction of Hwy 5 and the Wells Gray Park road is a good source to inquire about the current road condition and whether it has already been graded for summer use.
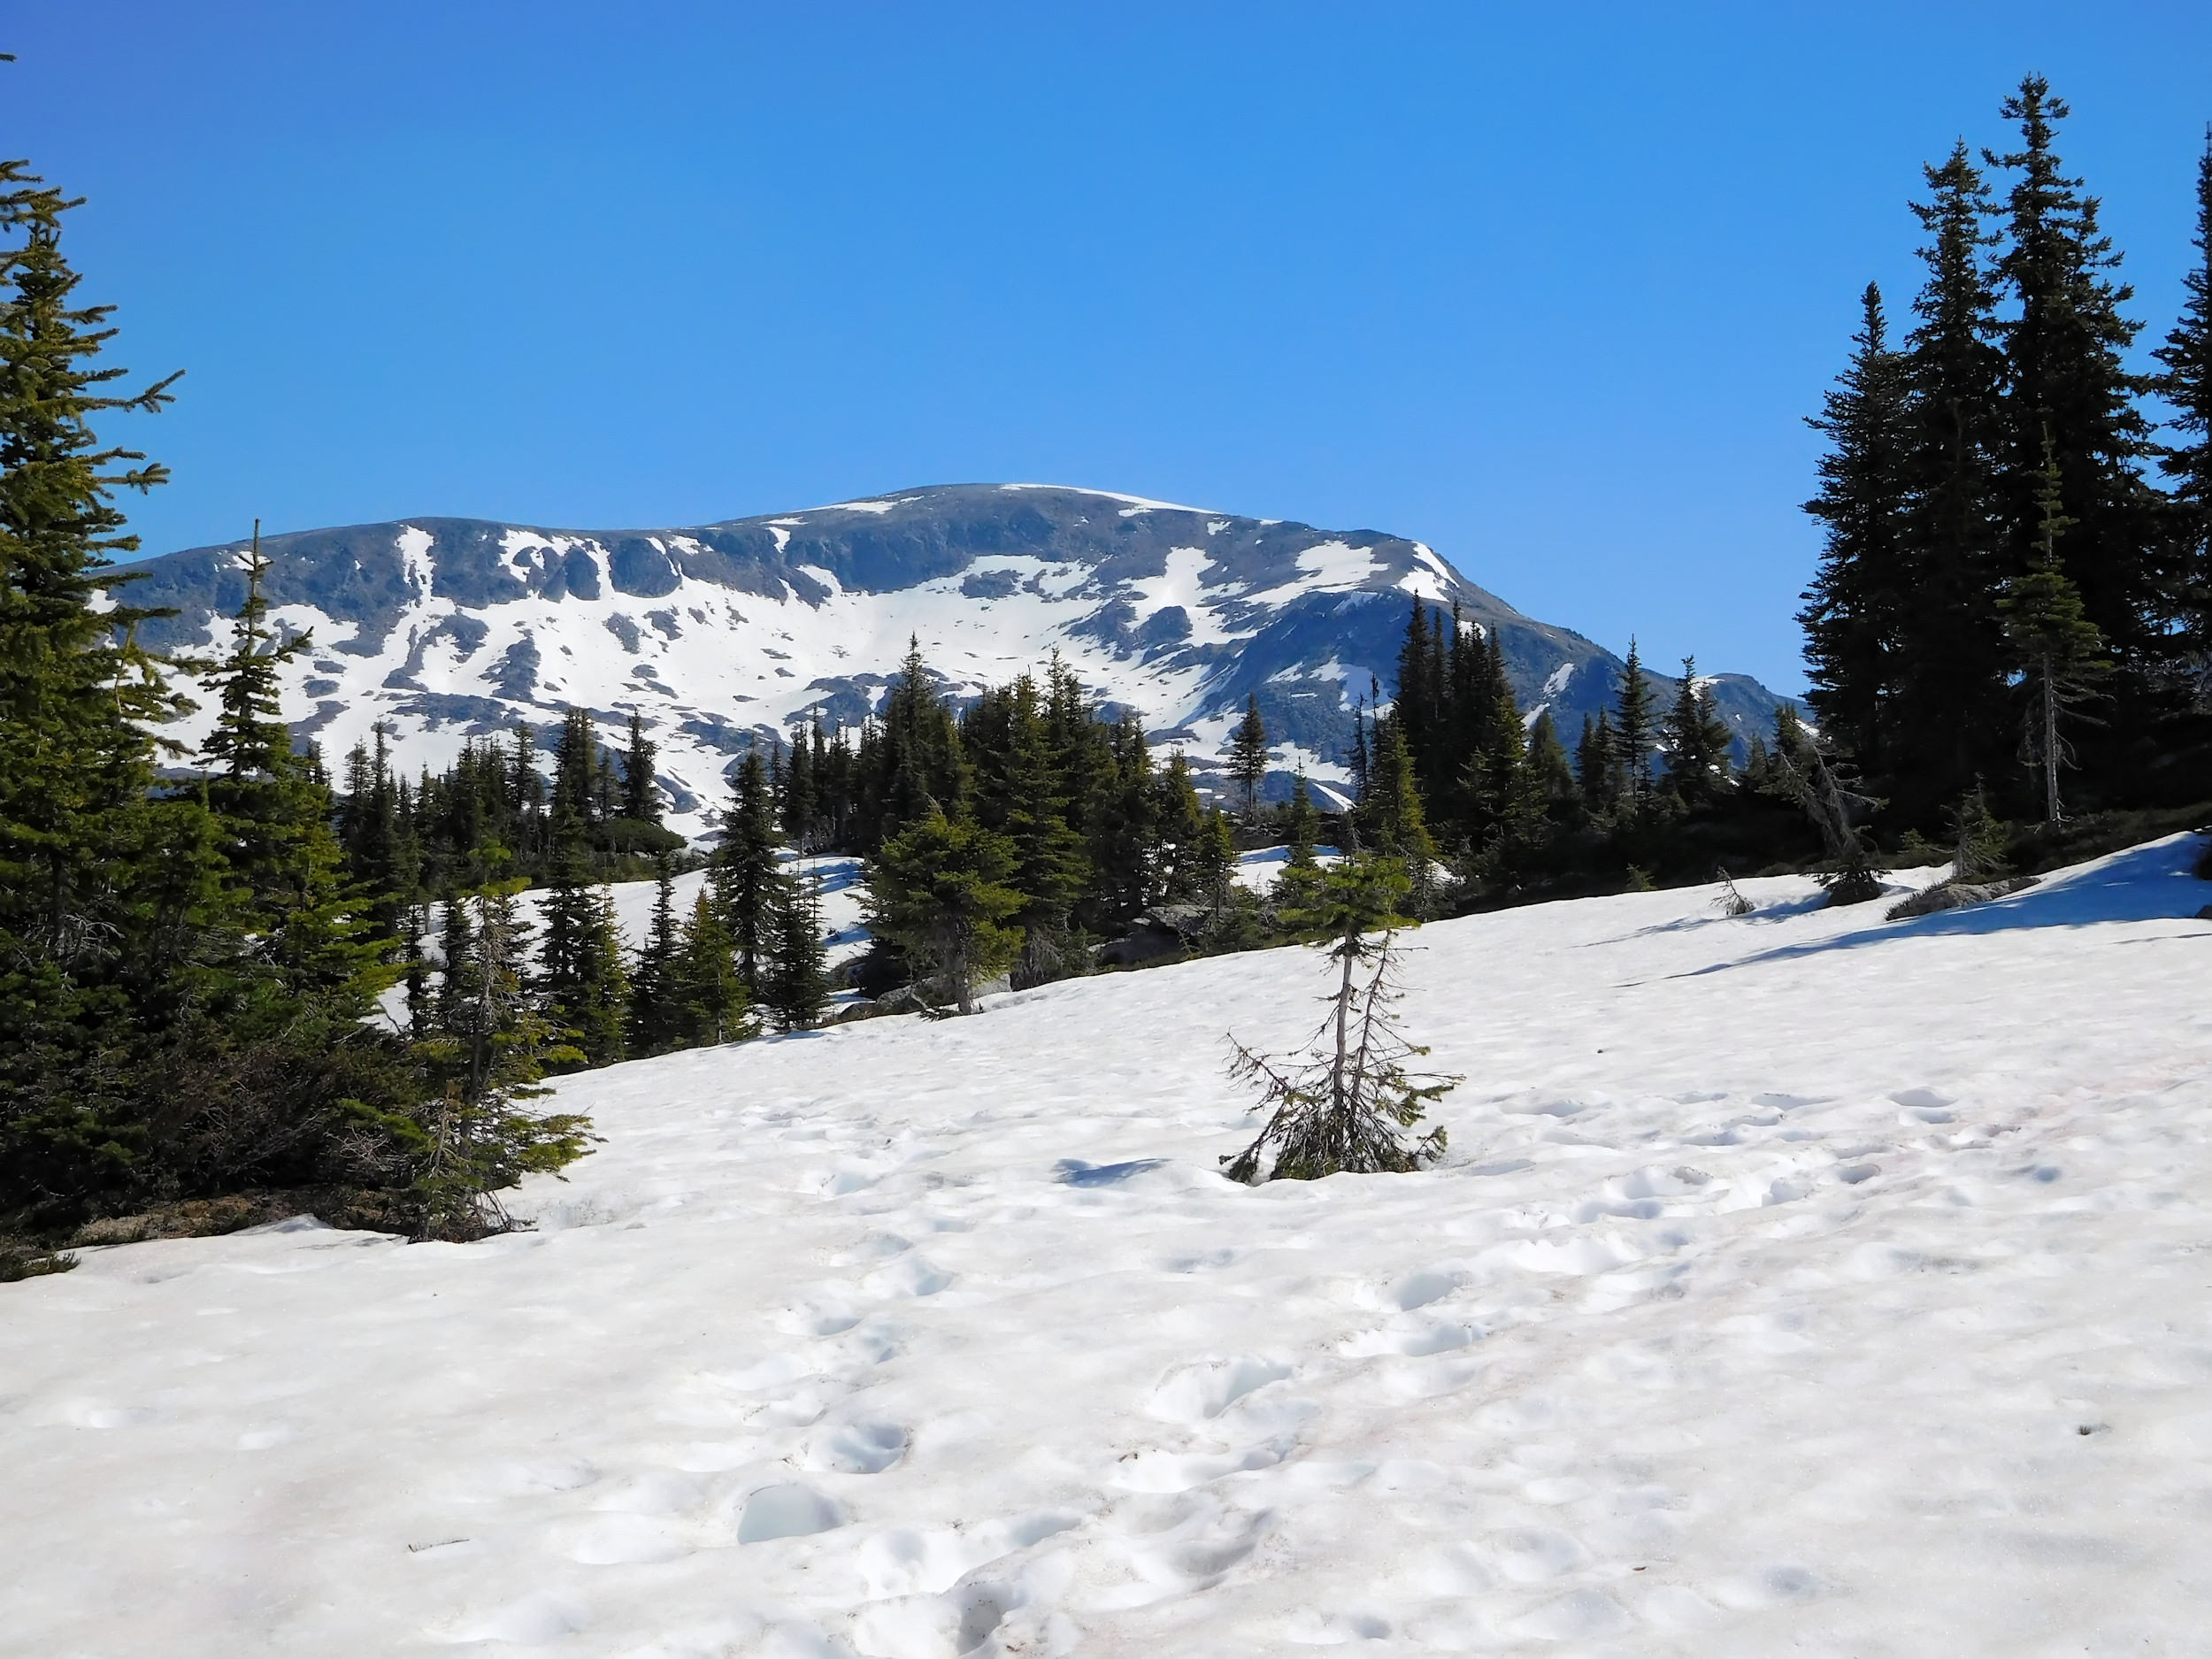
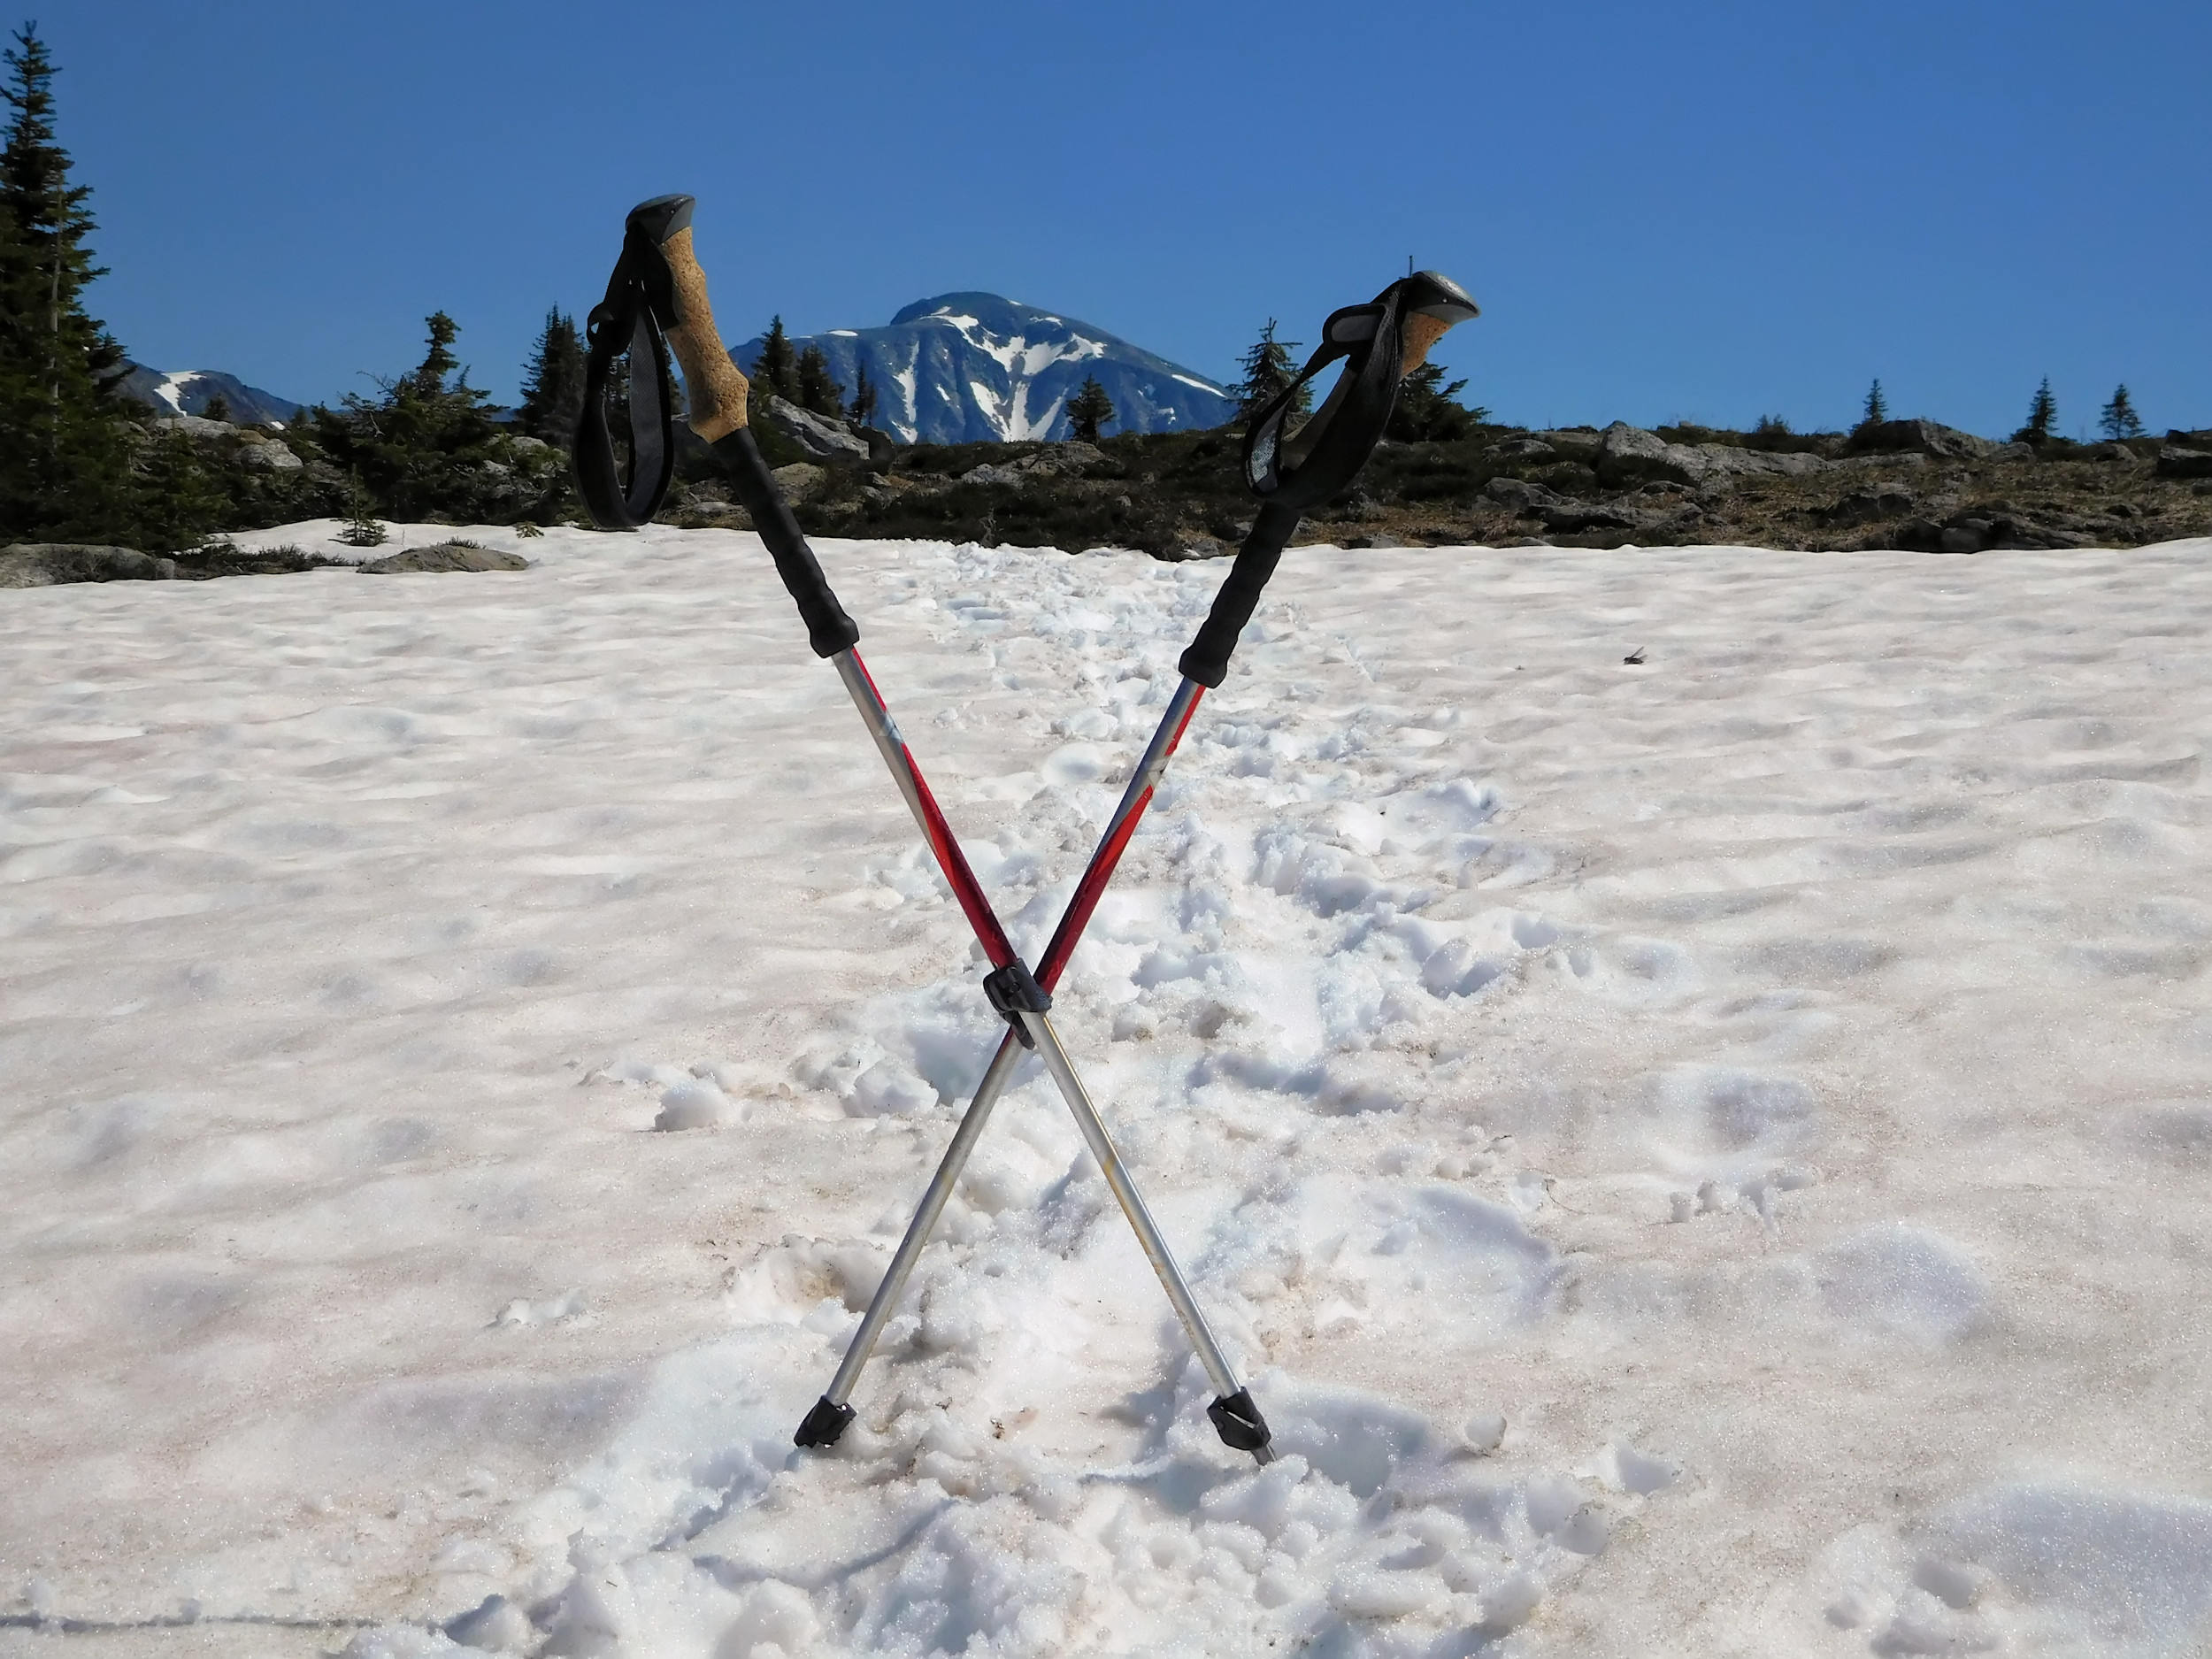
After winters with a lot of snow, sturdy boots, gaiters and hiking poles are needed to hike across the numerous snow drifts that still cover the trail. In other years there is only a little snow left in shaded areas of the forest and higher up in the alpine.
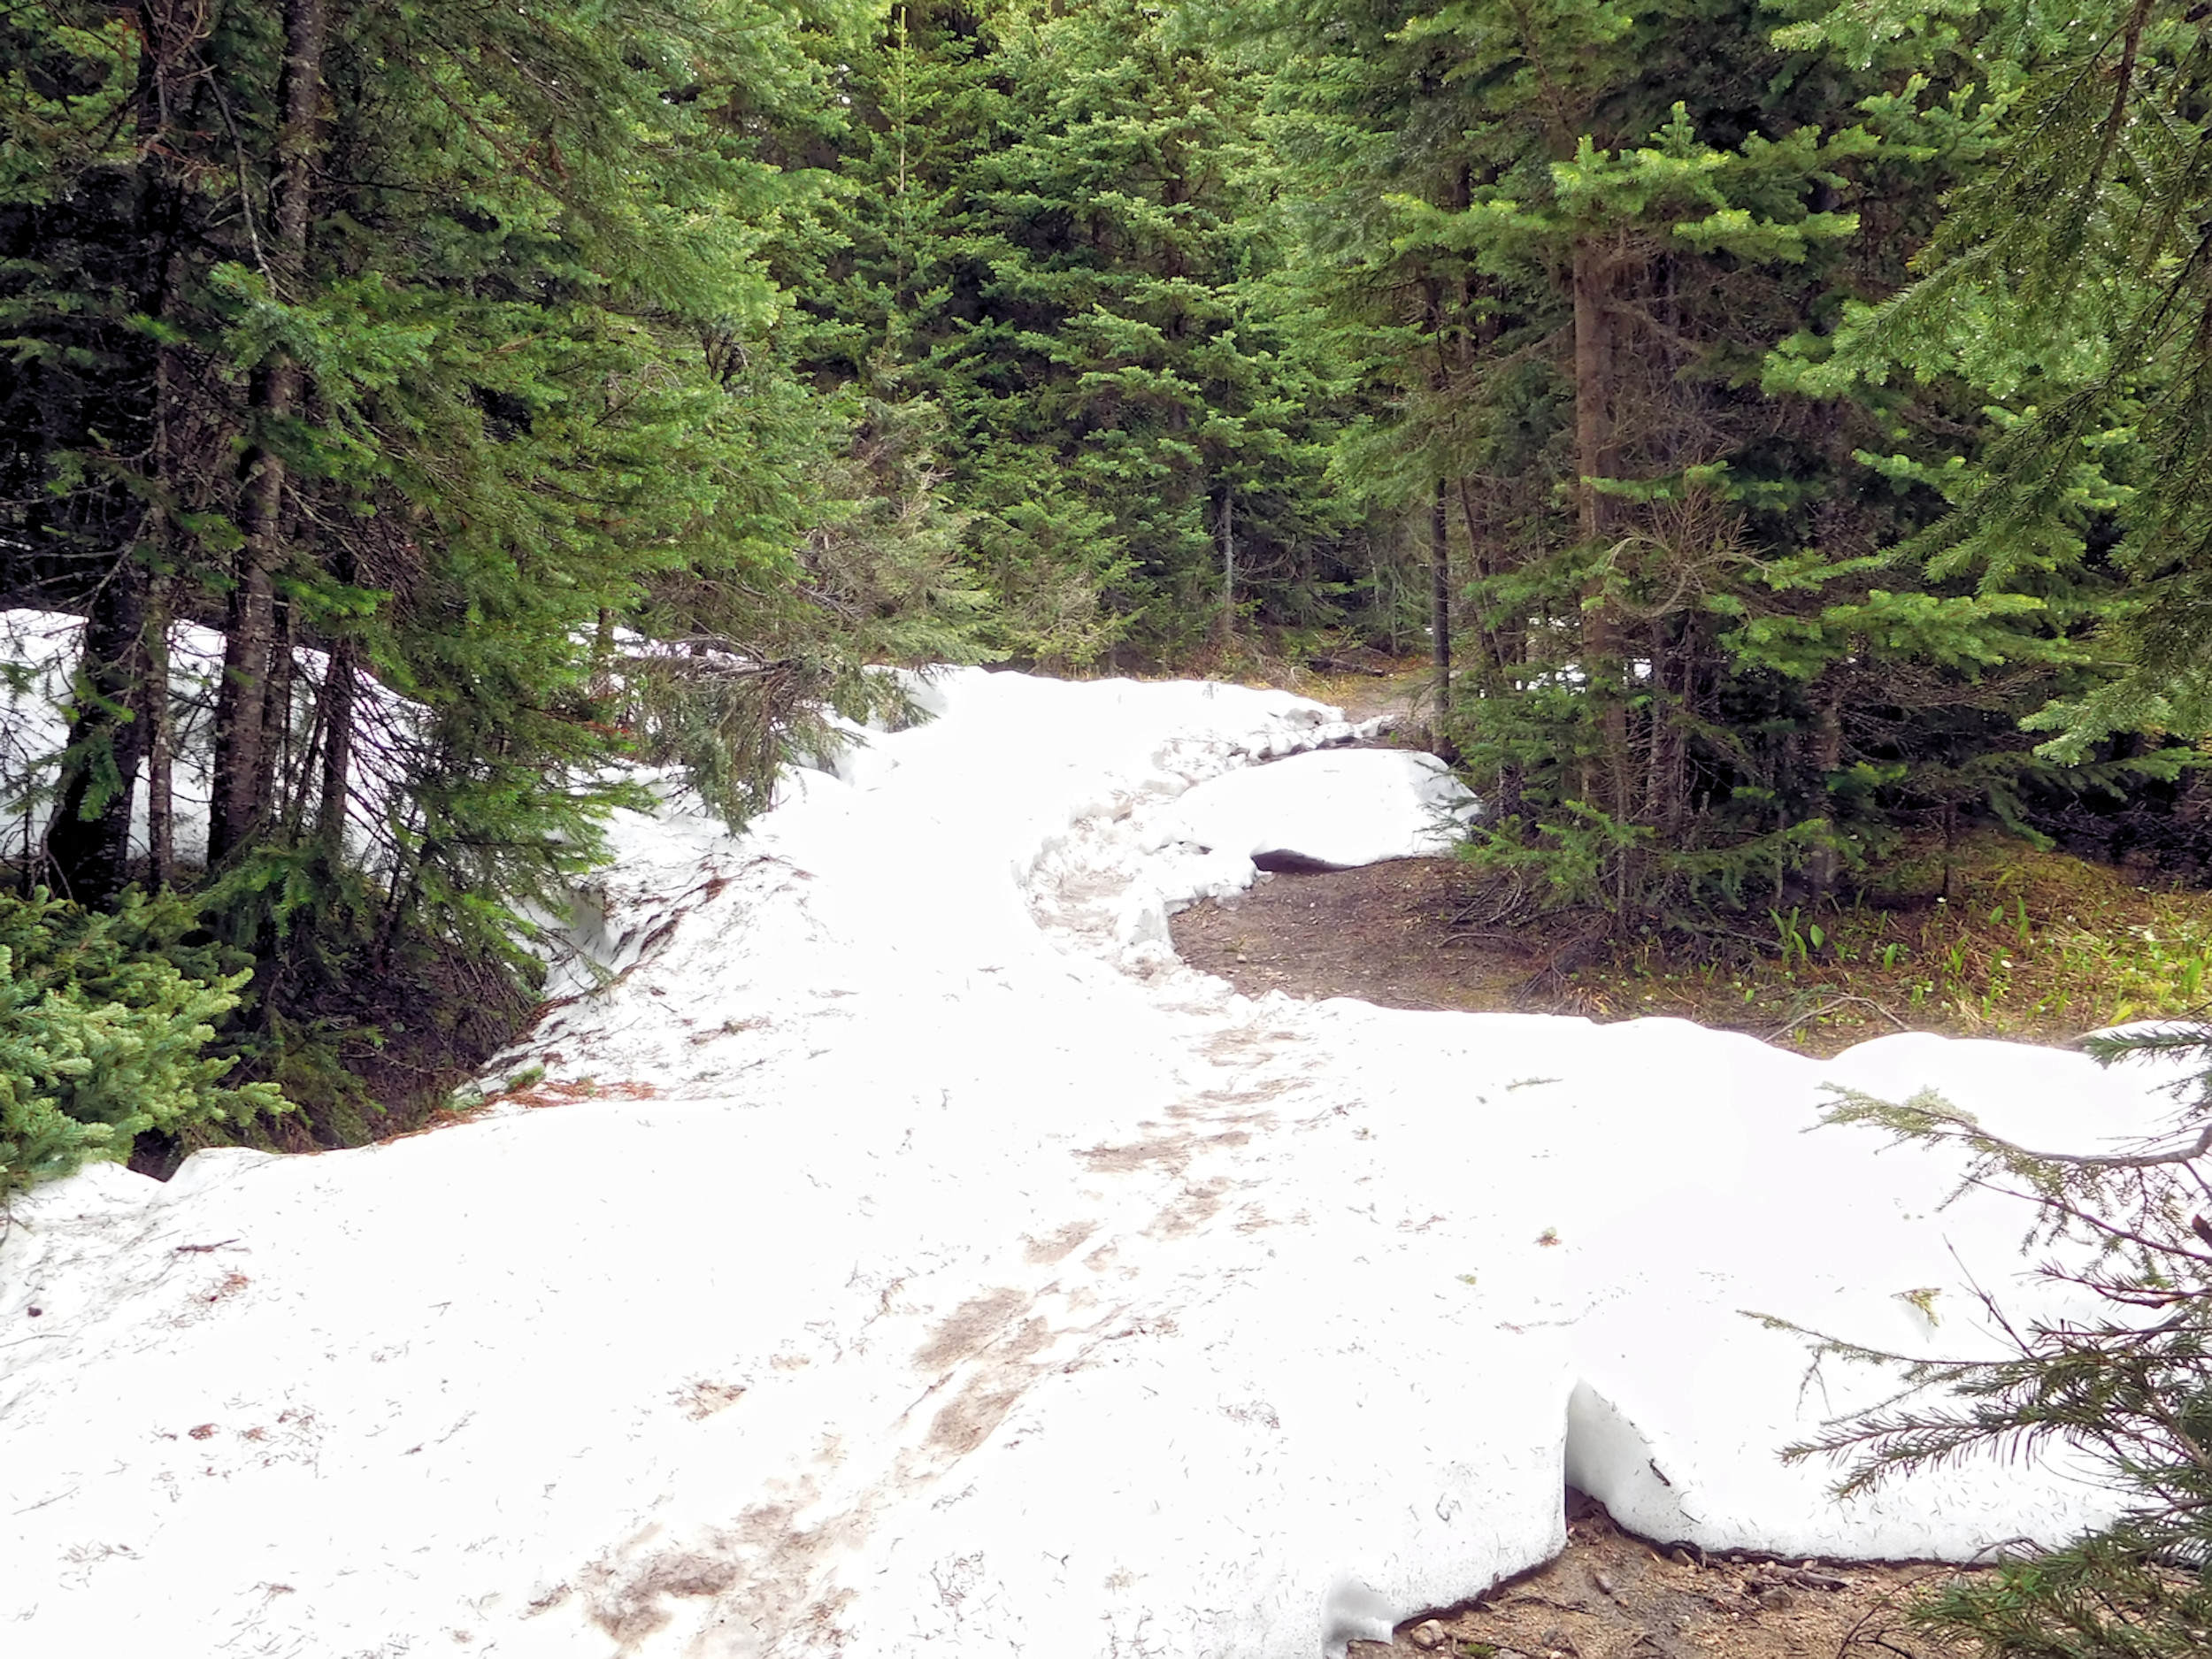
After a snowy winter
in June 2020
Lower Meadows and Raft Mountain
Lower Meadows and Dunn Peak
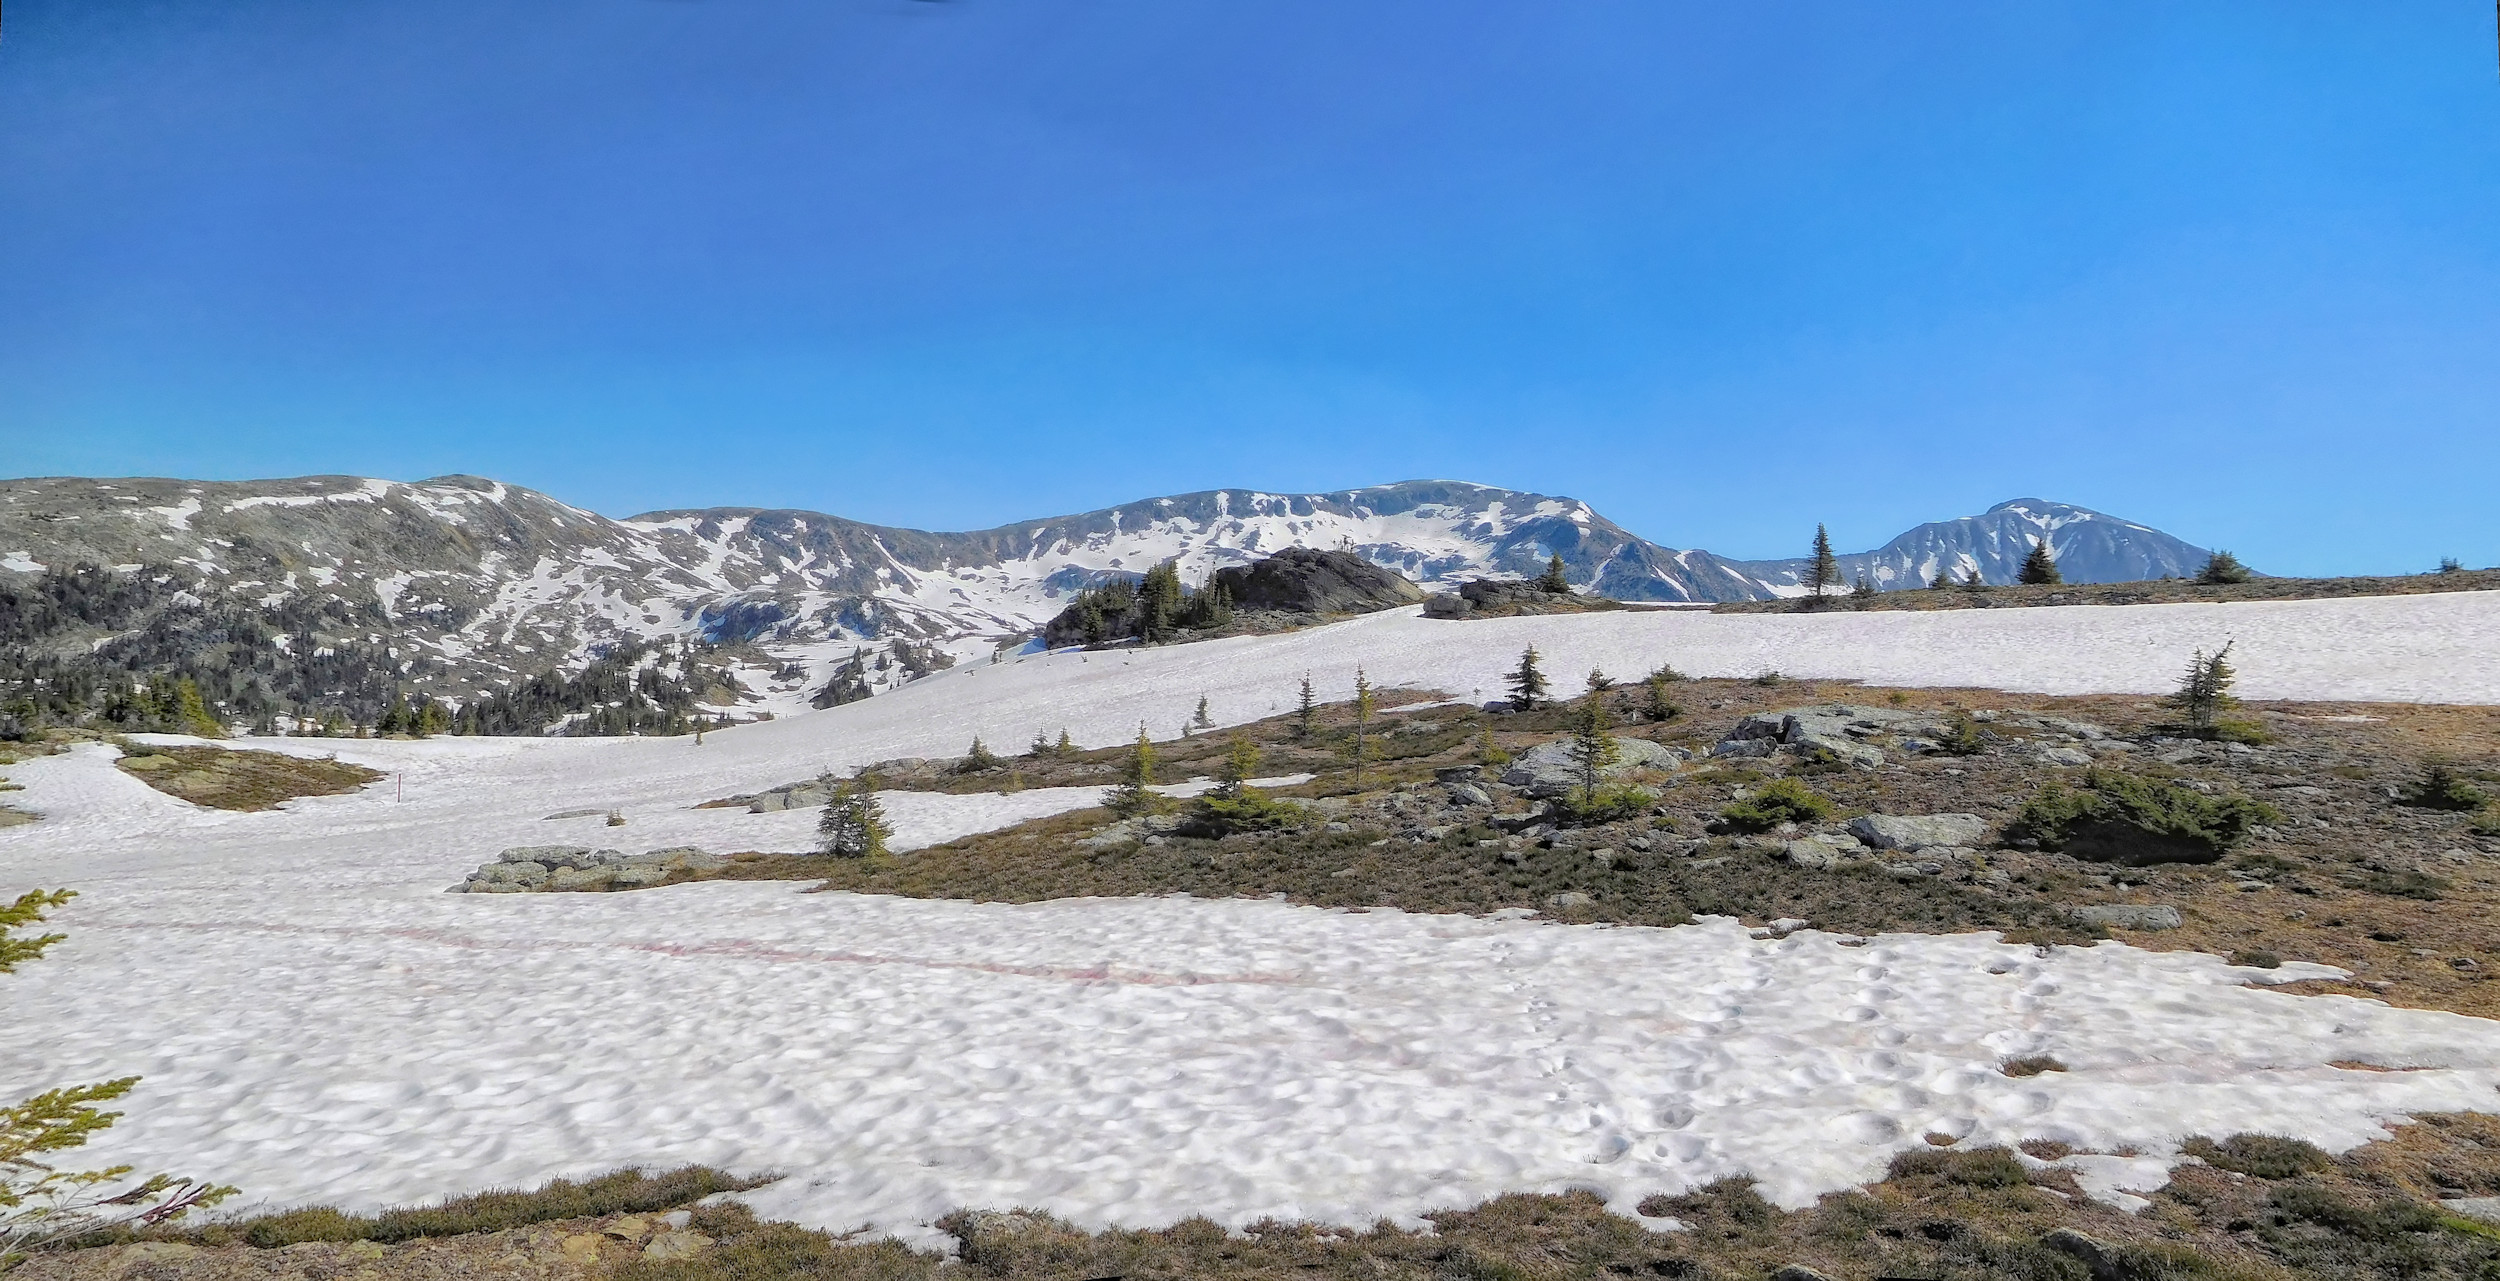
Upper Meadows
Upper Meadows and Raft Mountain
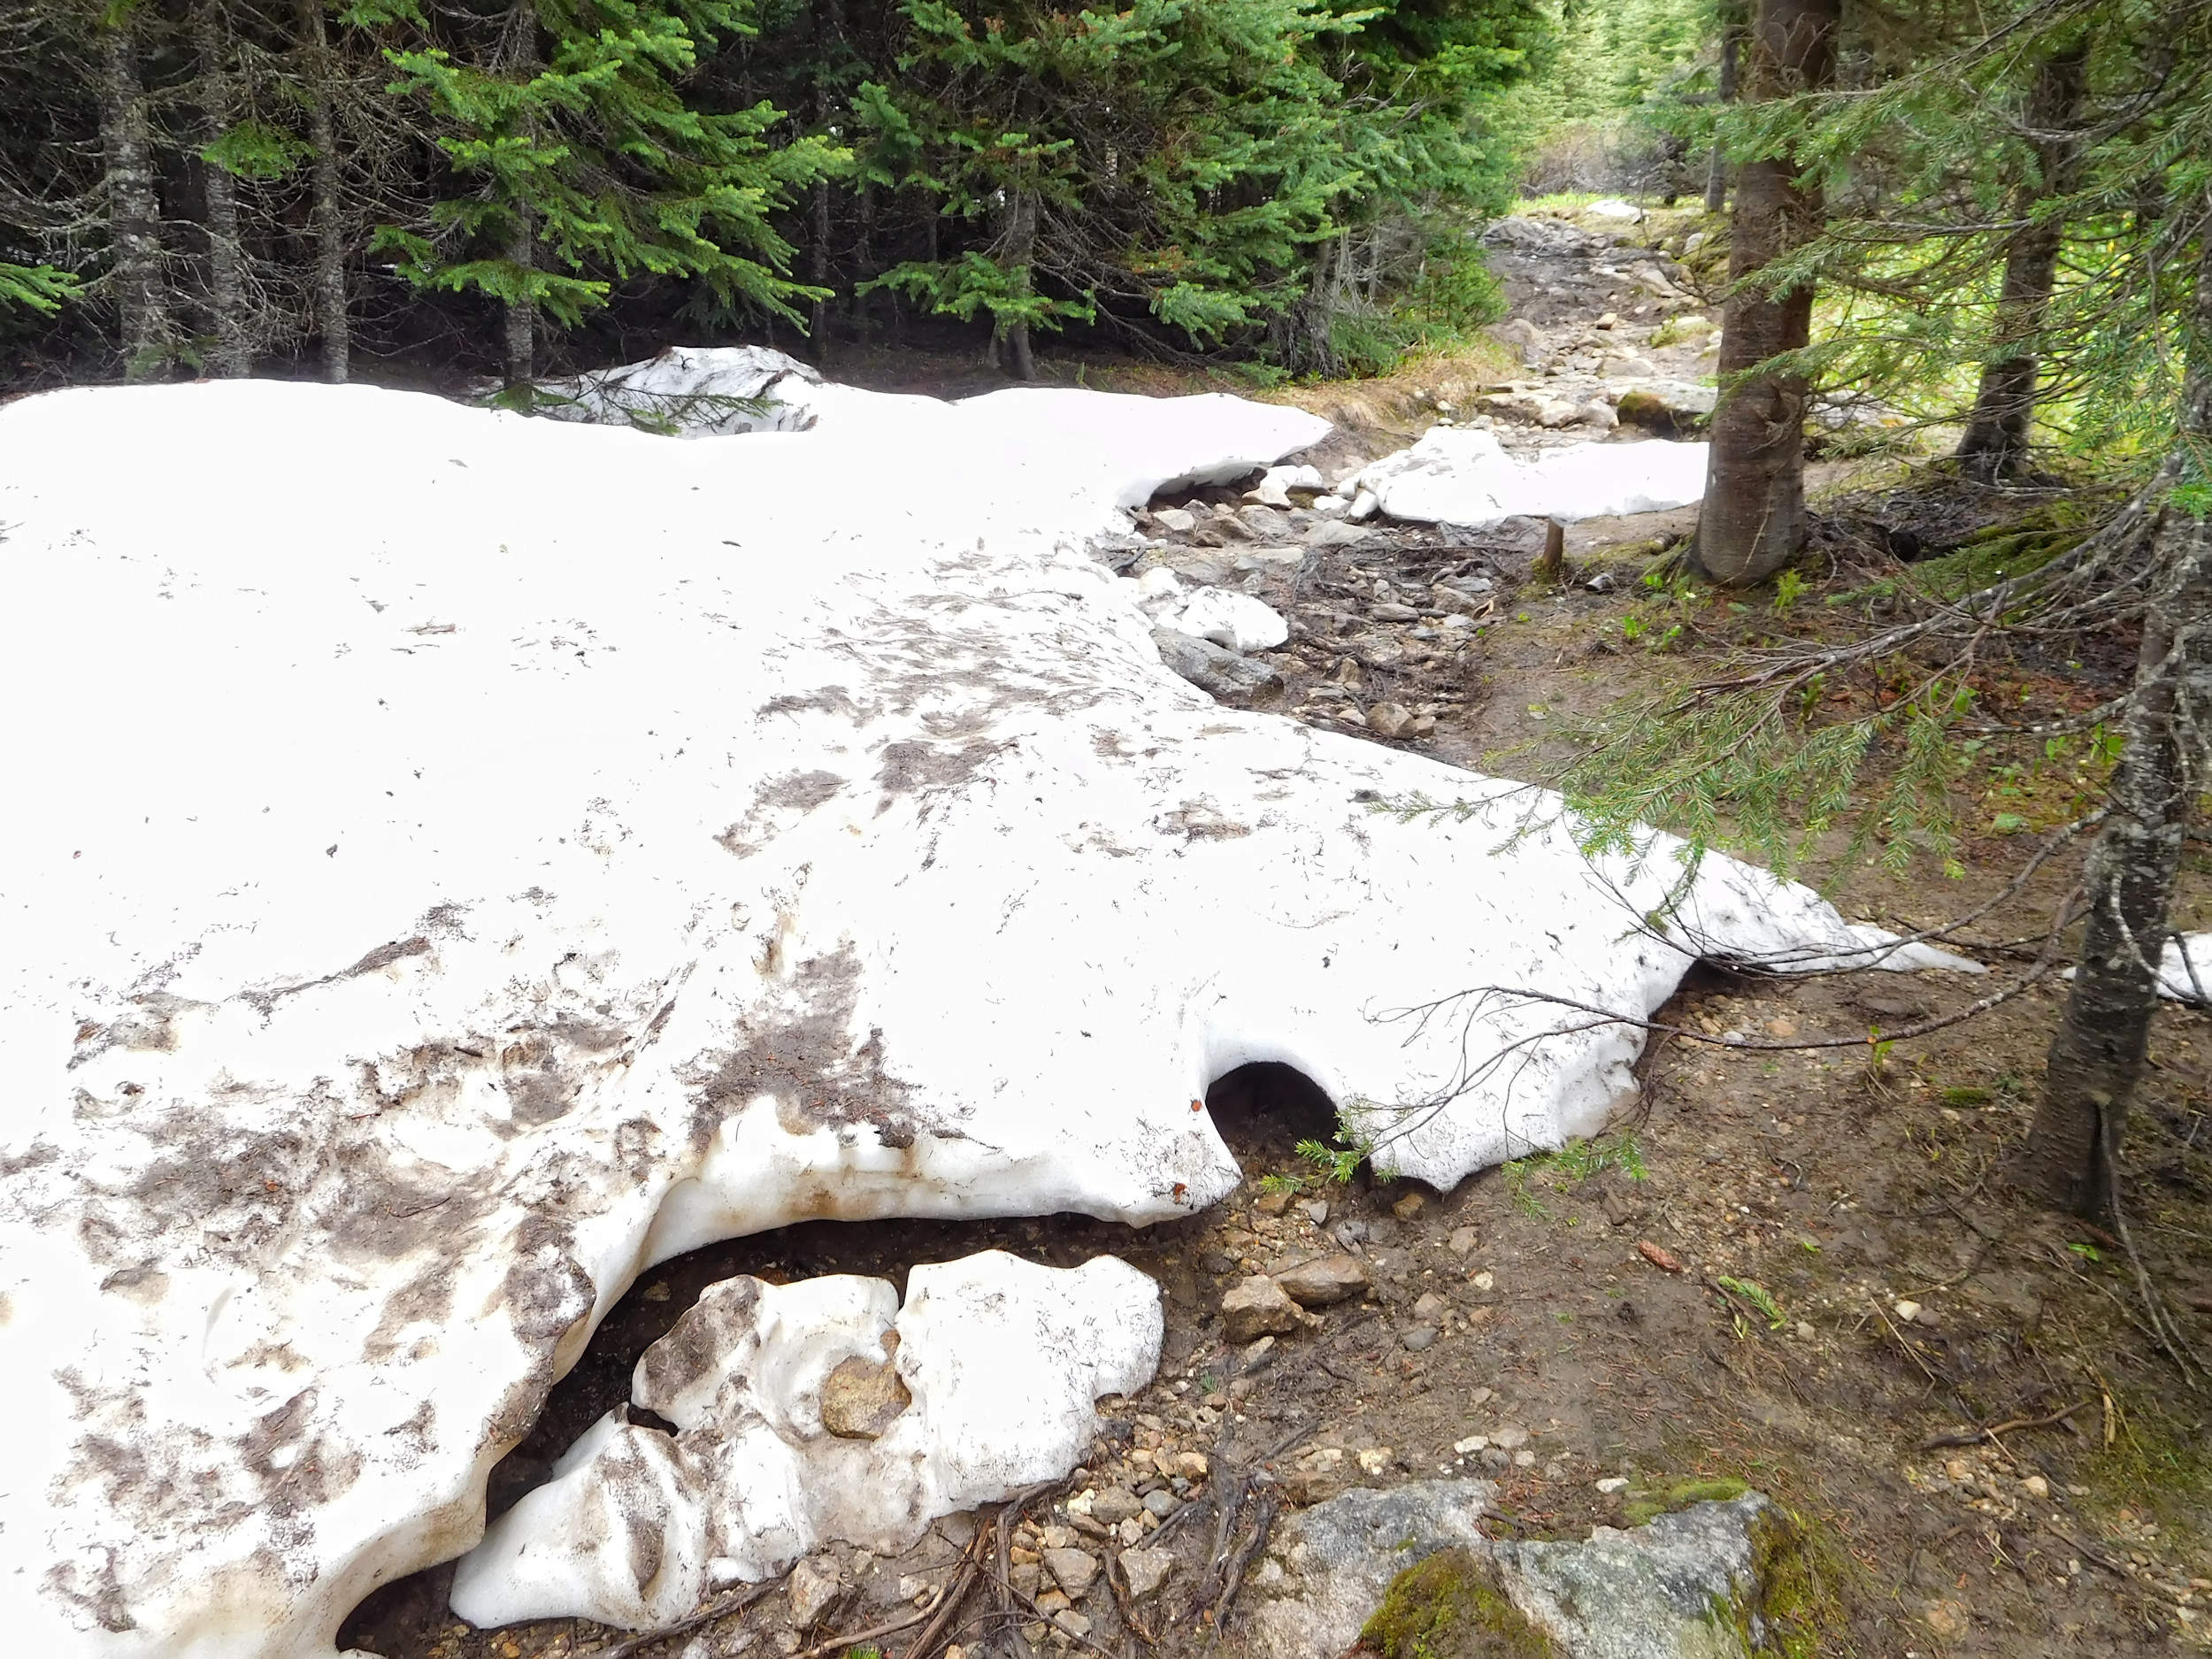
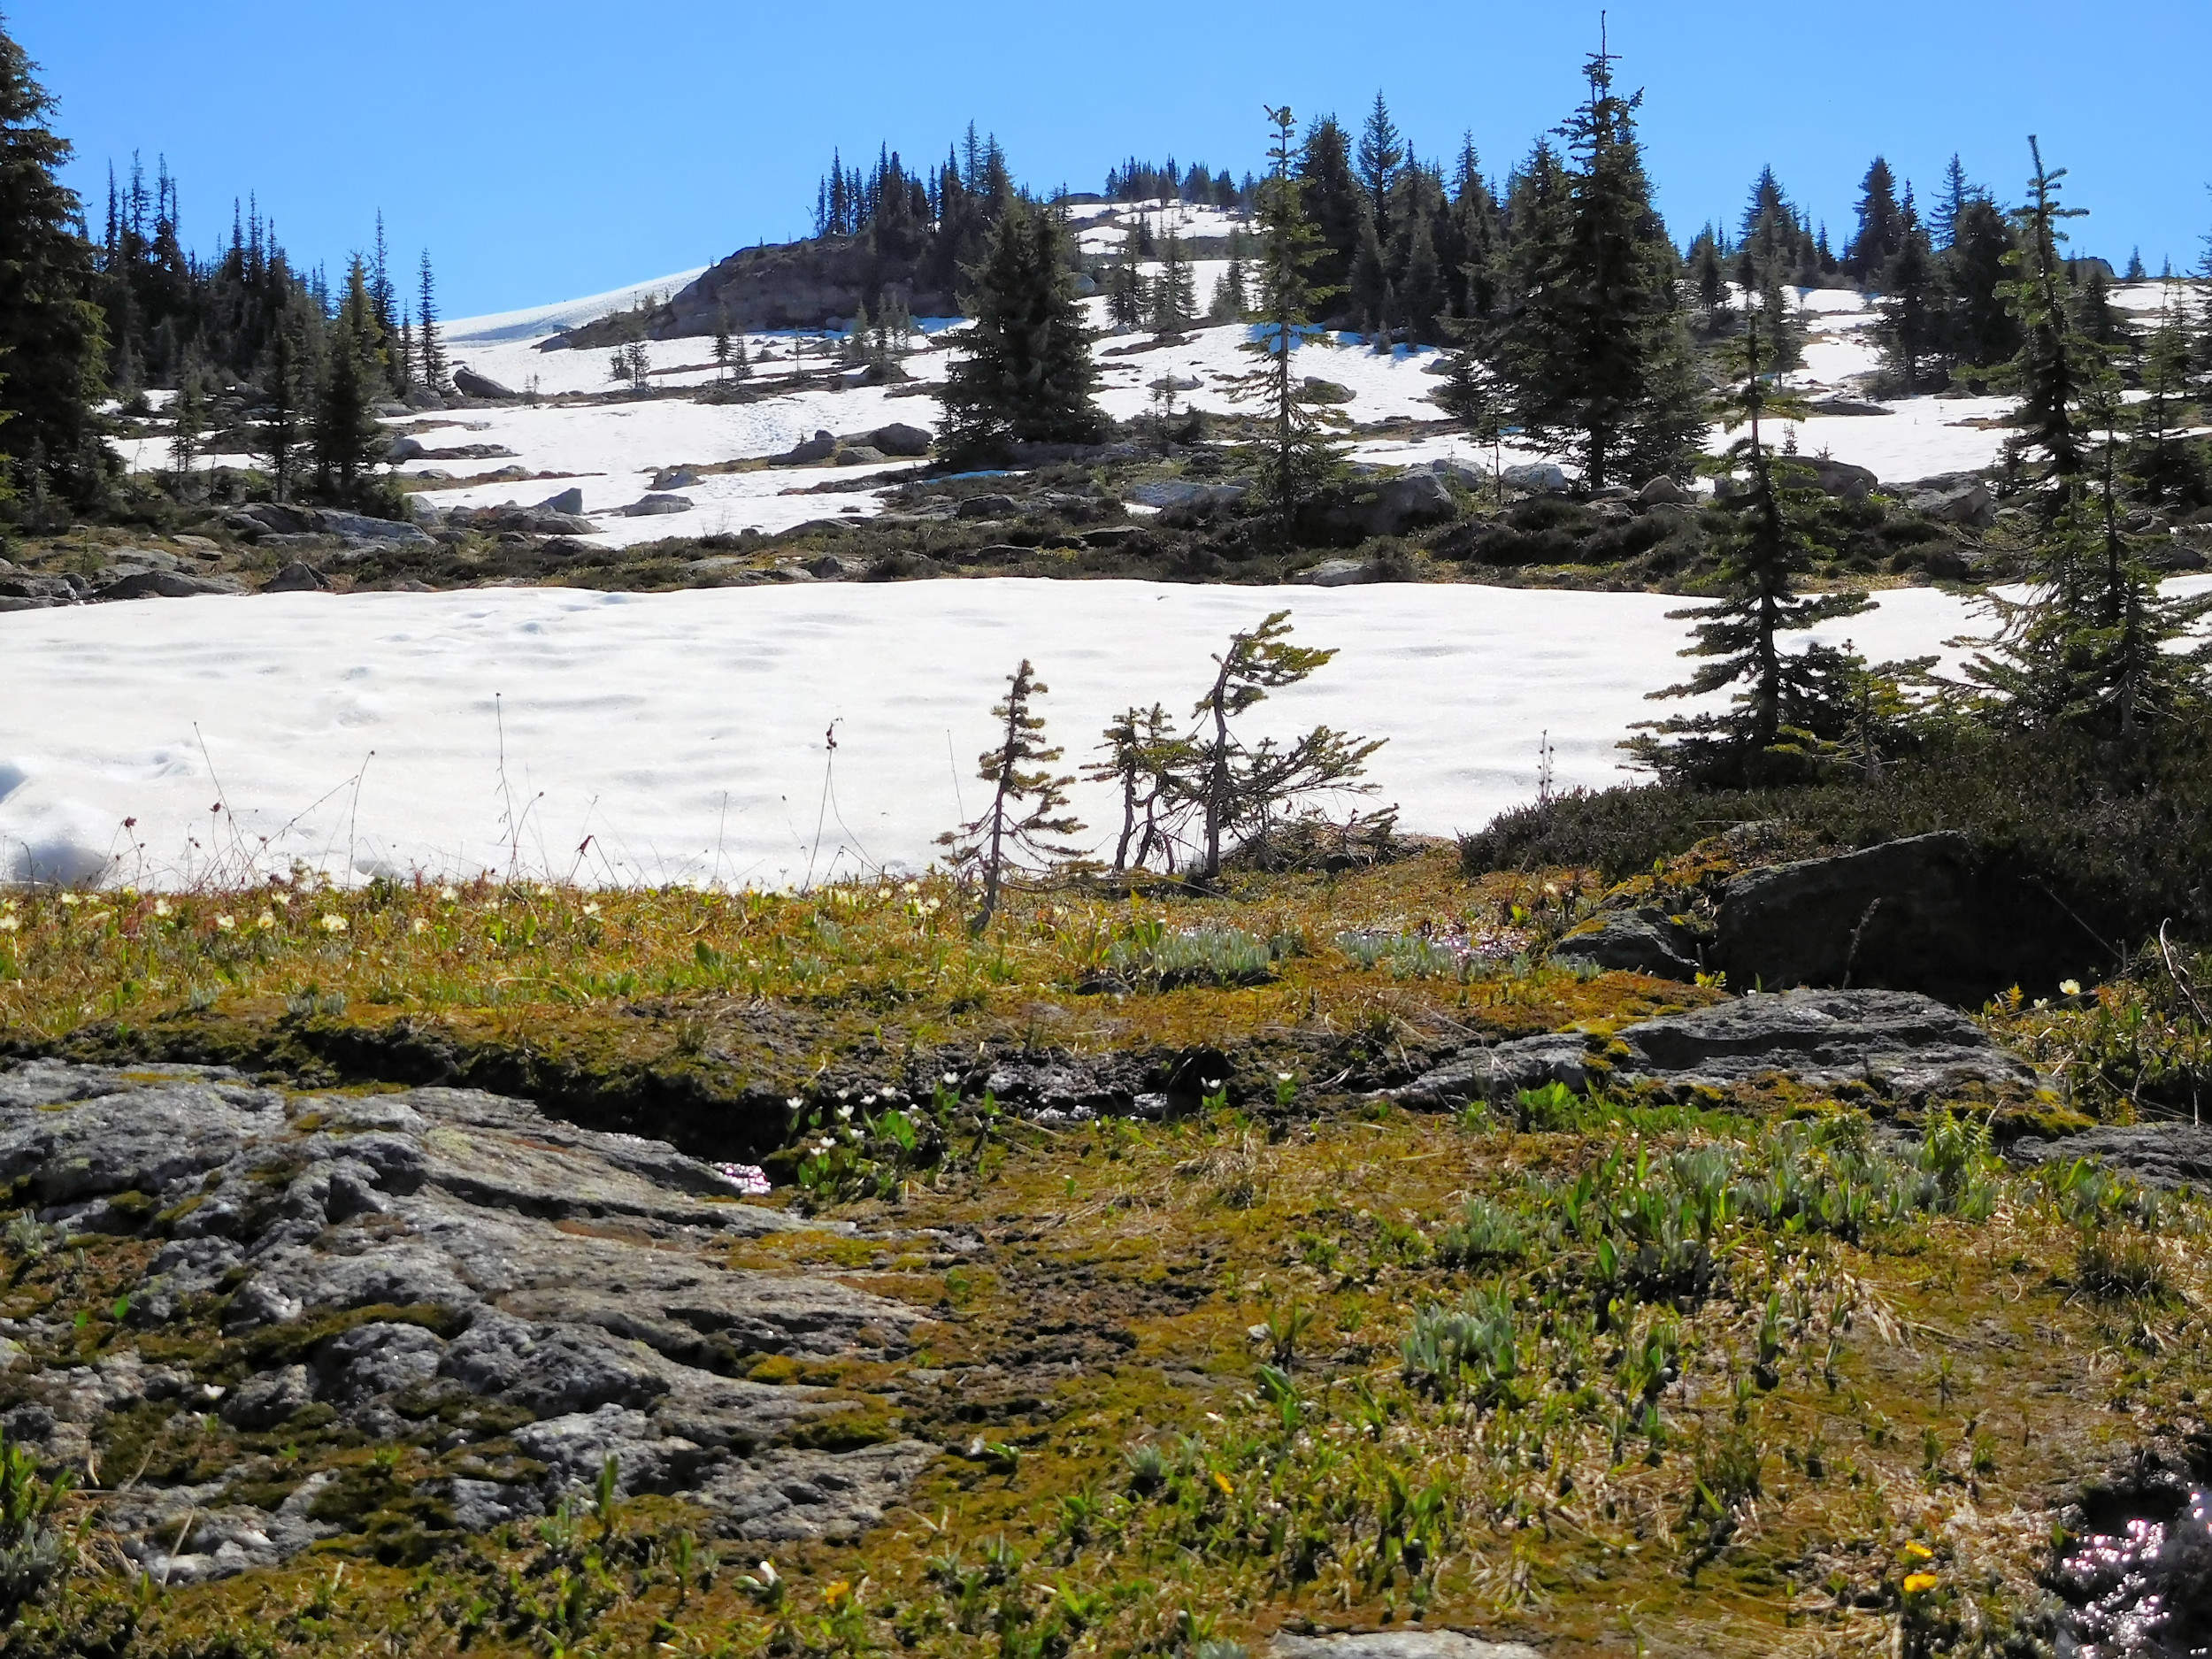
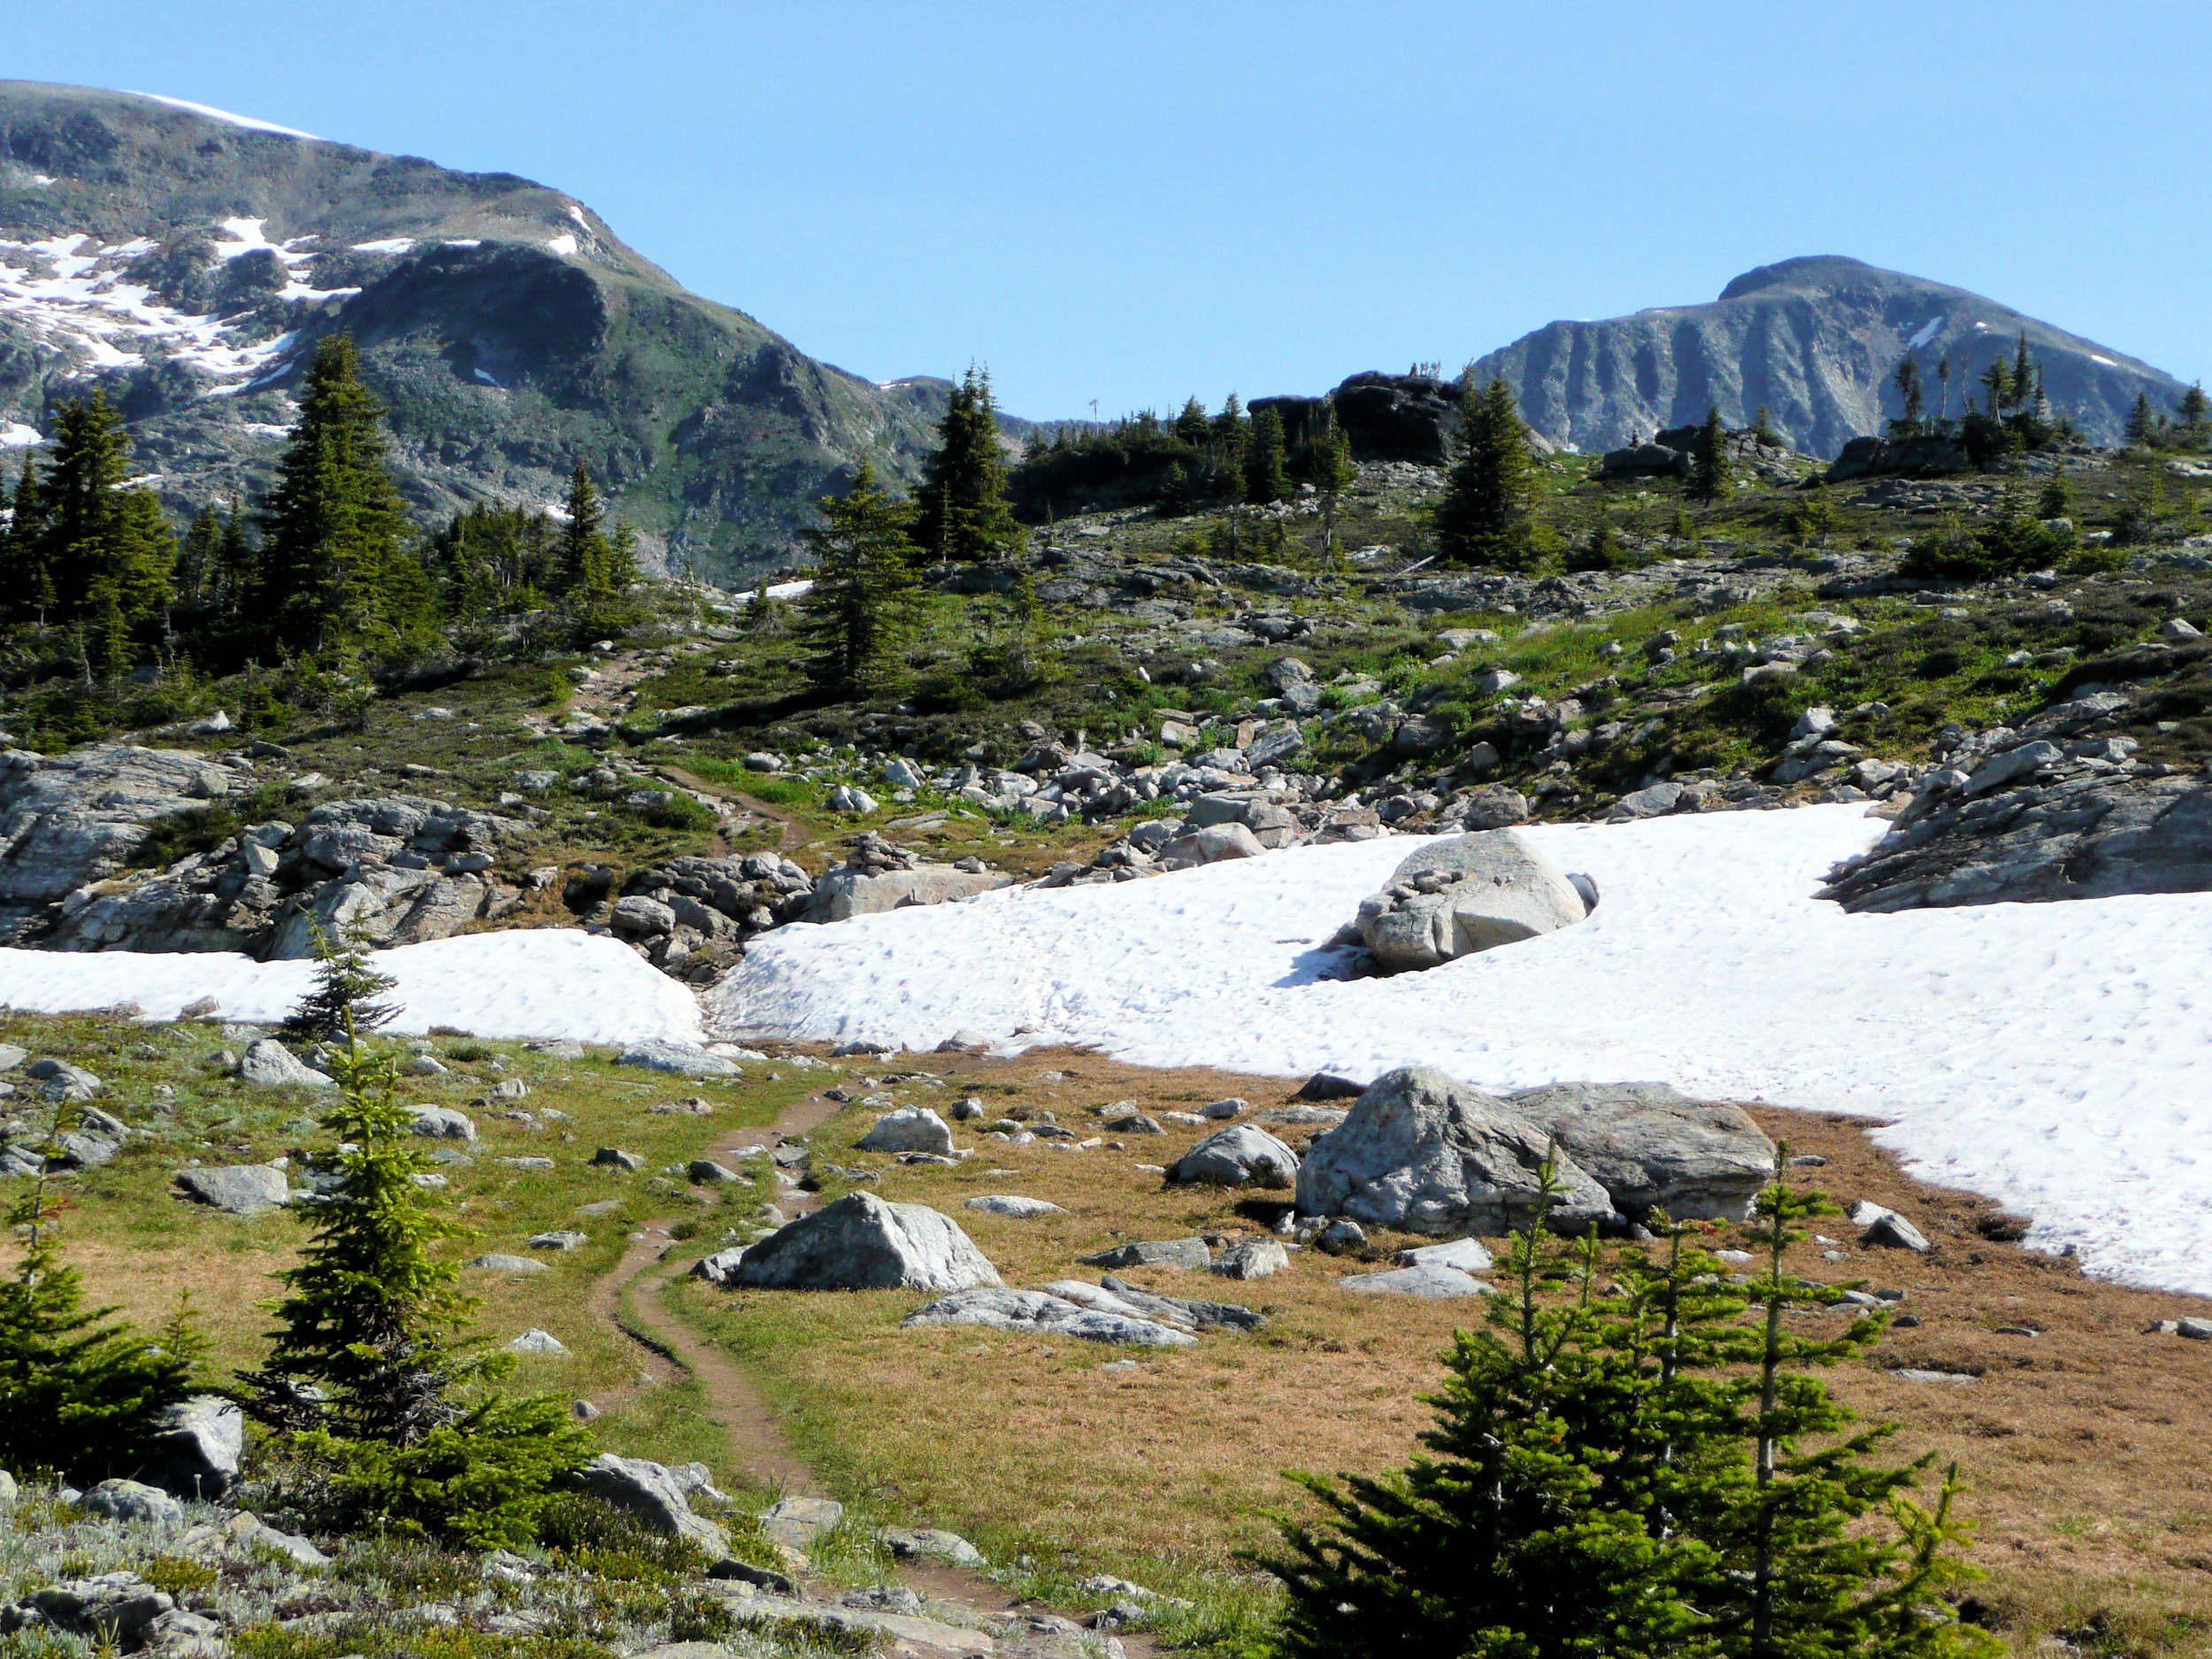
Above the Upper Meadows there is still a lot of snow. At this elevation the lilies don’t grow; the only wildflower that had a chance to come up yet, is the very early Marsh Marigold.
Remaining snow
Sometimes the trail disappears under the snow, but it can always be found a little further ahead again. I have hiked this trail often and know it well and for a worst case scenario, I always carry a GPS.
In 2020, the trail down to Sheila Lake is still covered under a particularly huge amount of snow. Snowshoes would come in handy.
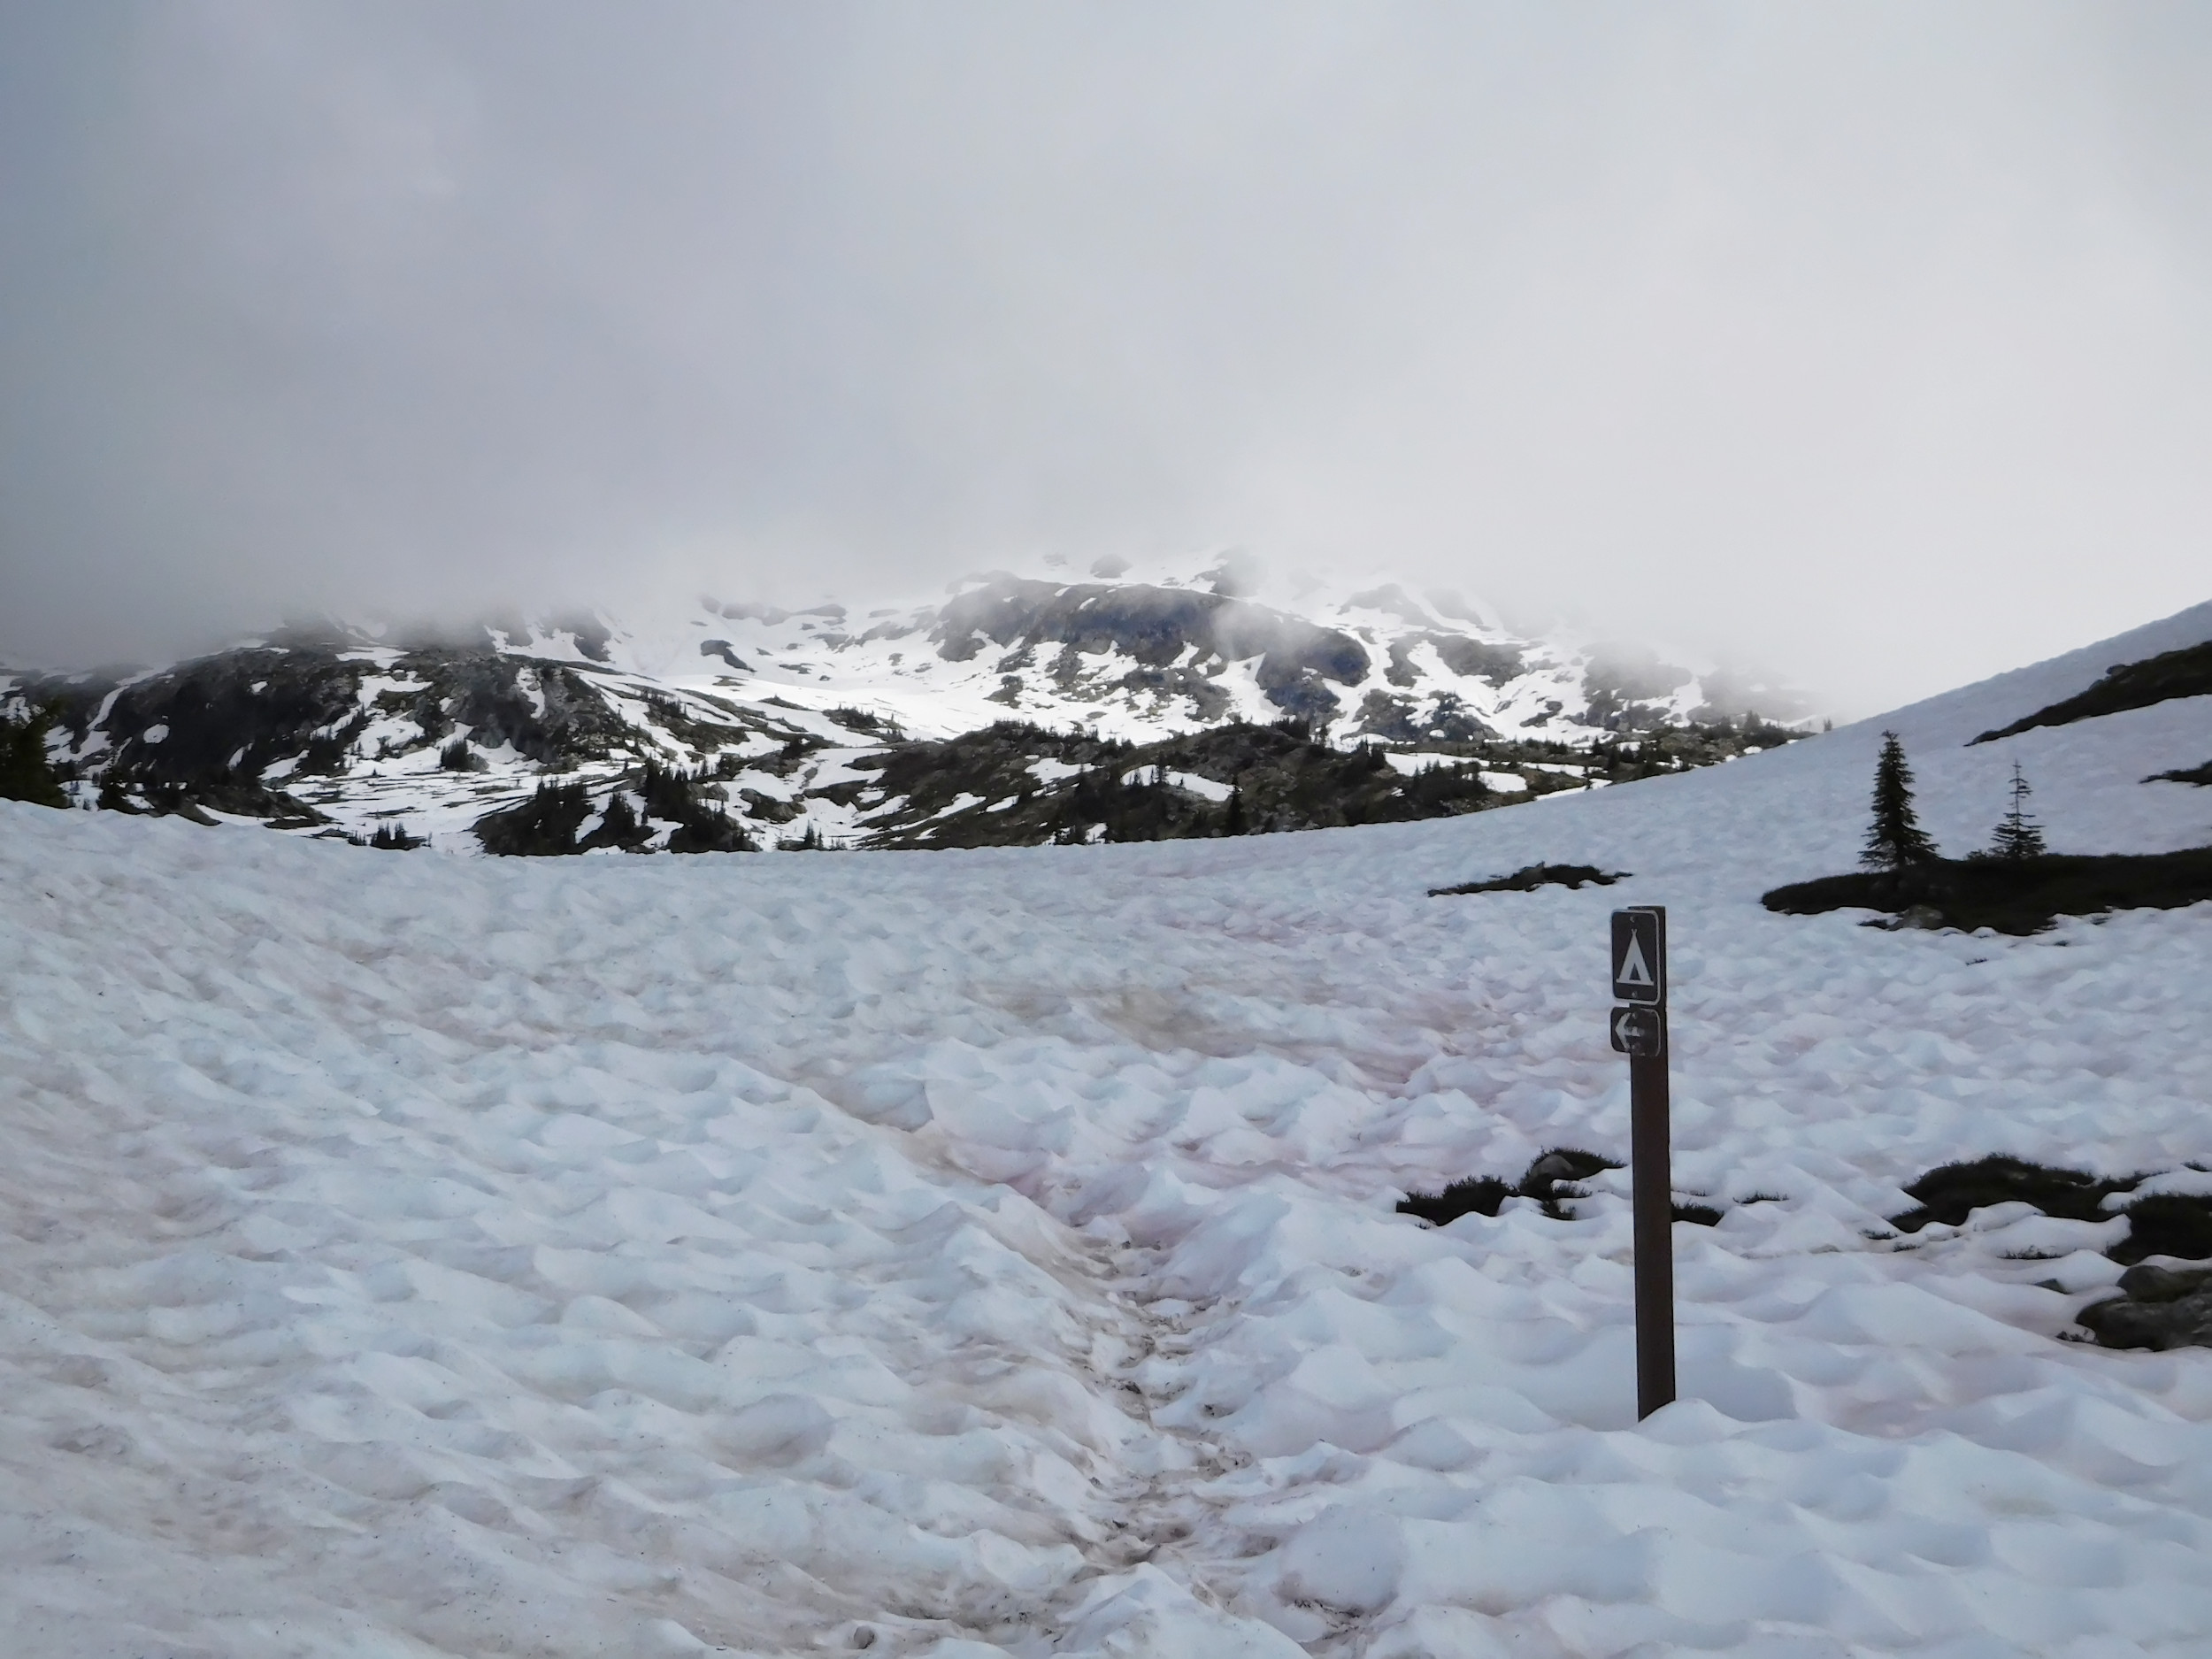
At this time of the year, Sheila Lake is still frozen.
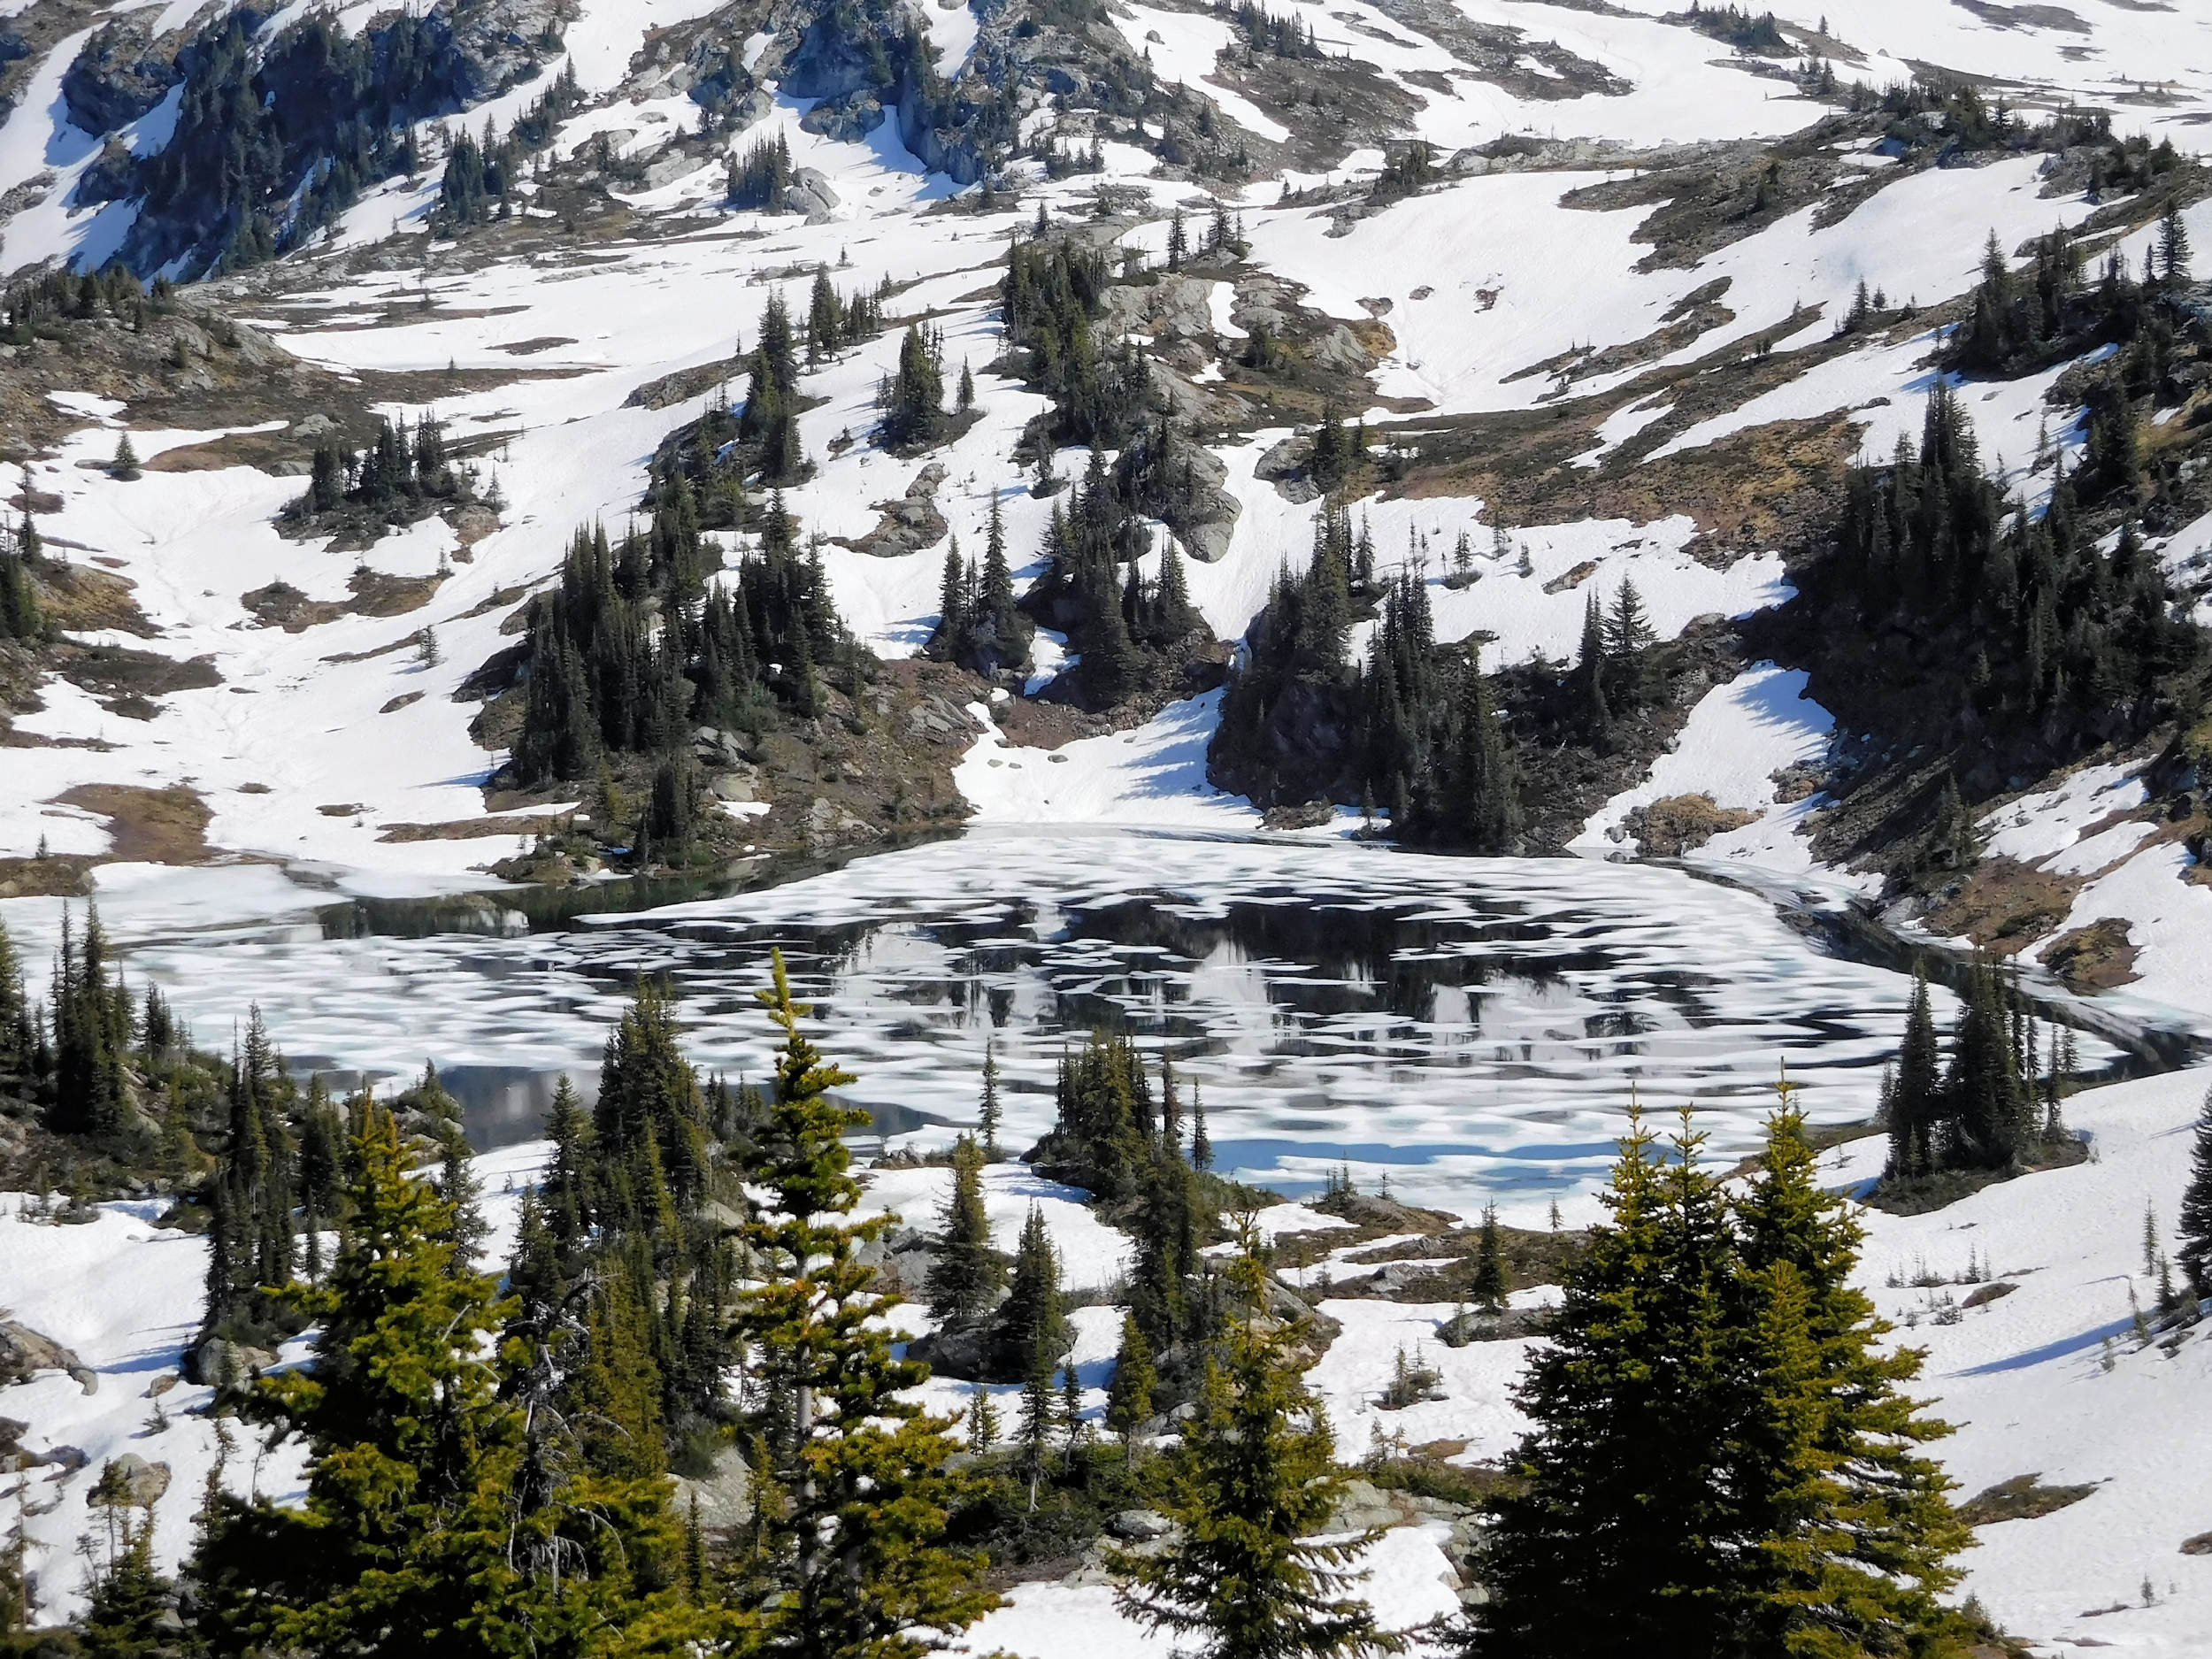
Sheila Lake 19/6/2018
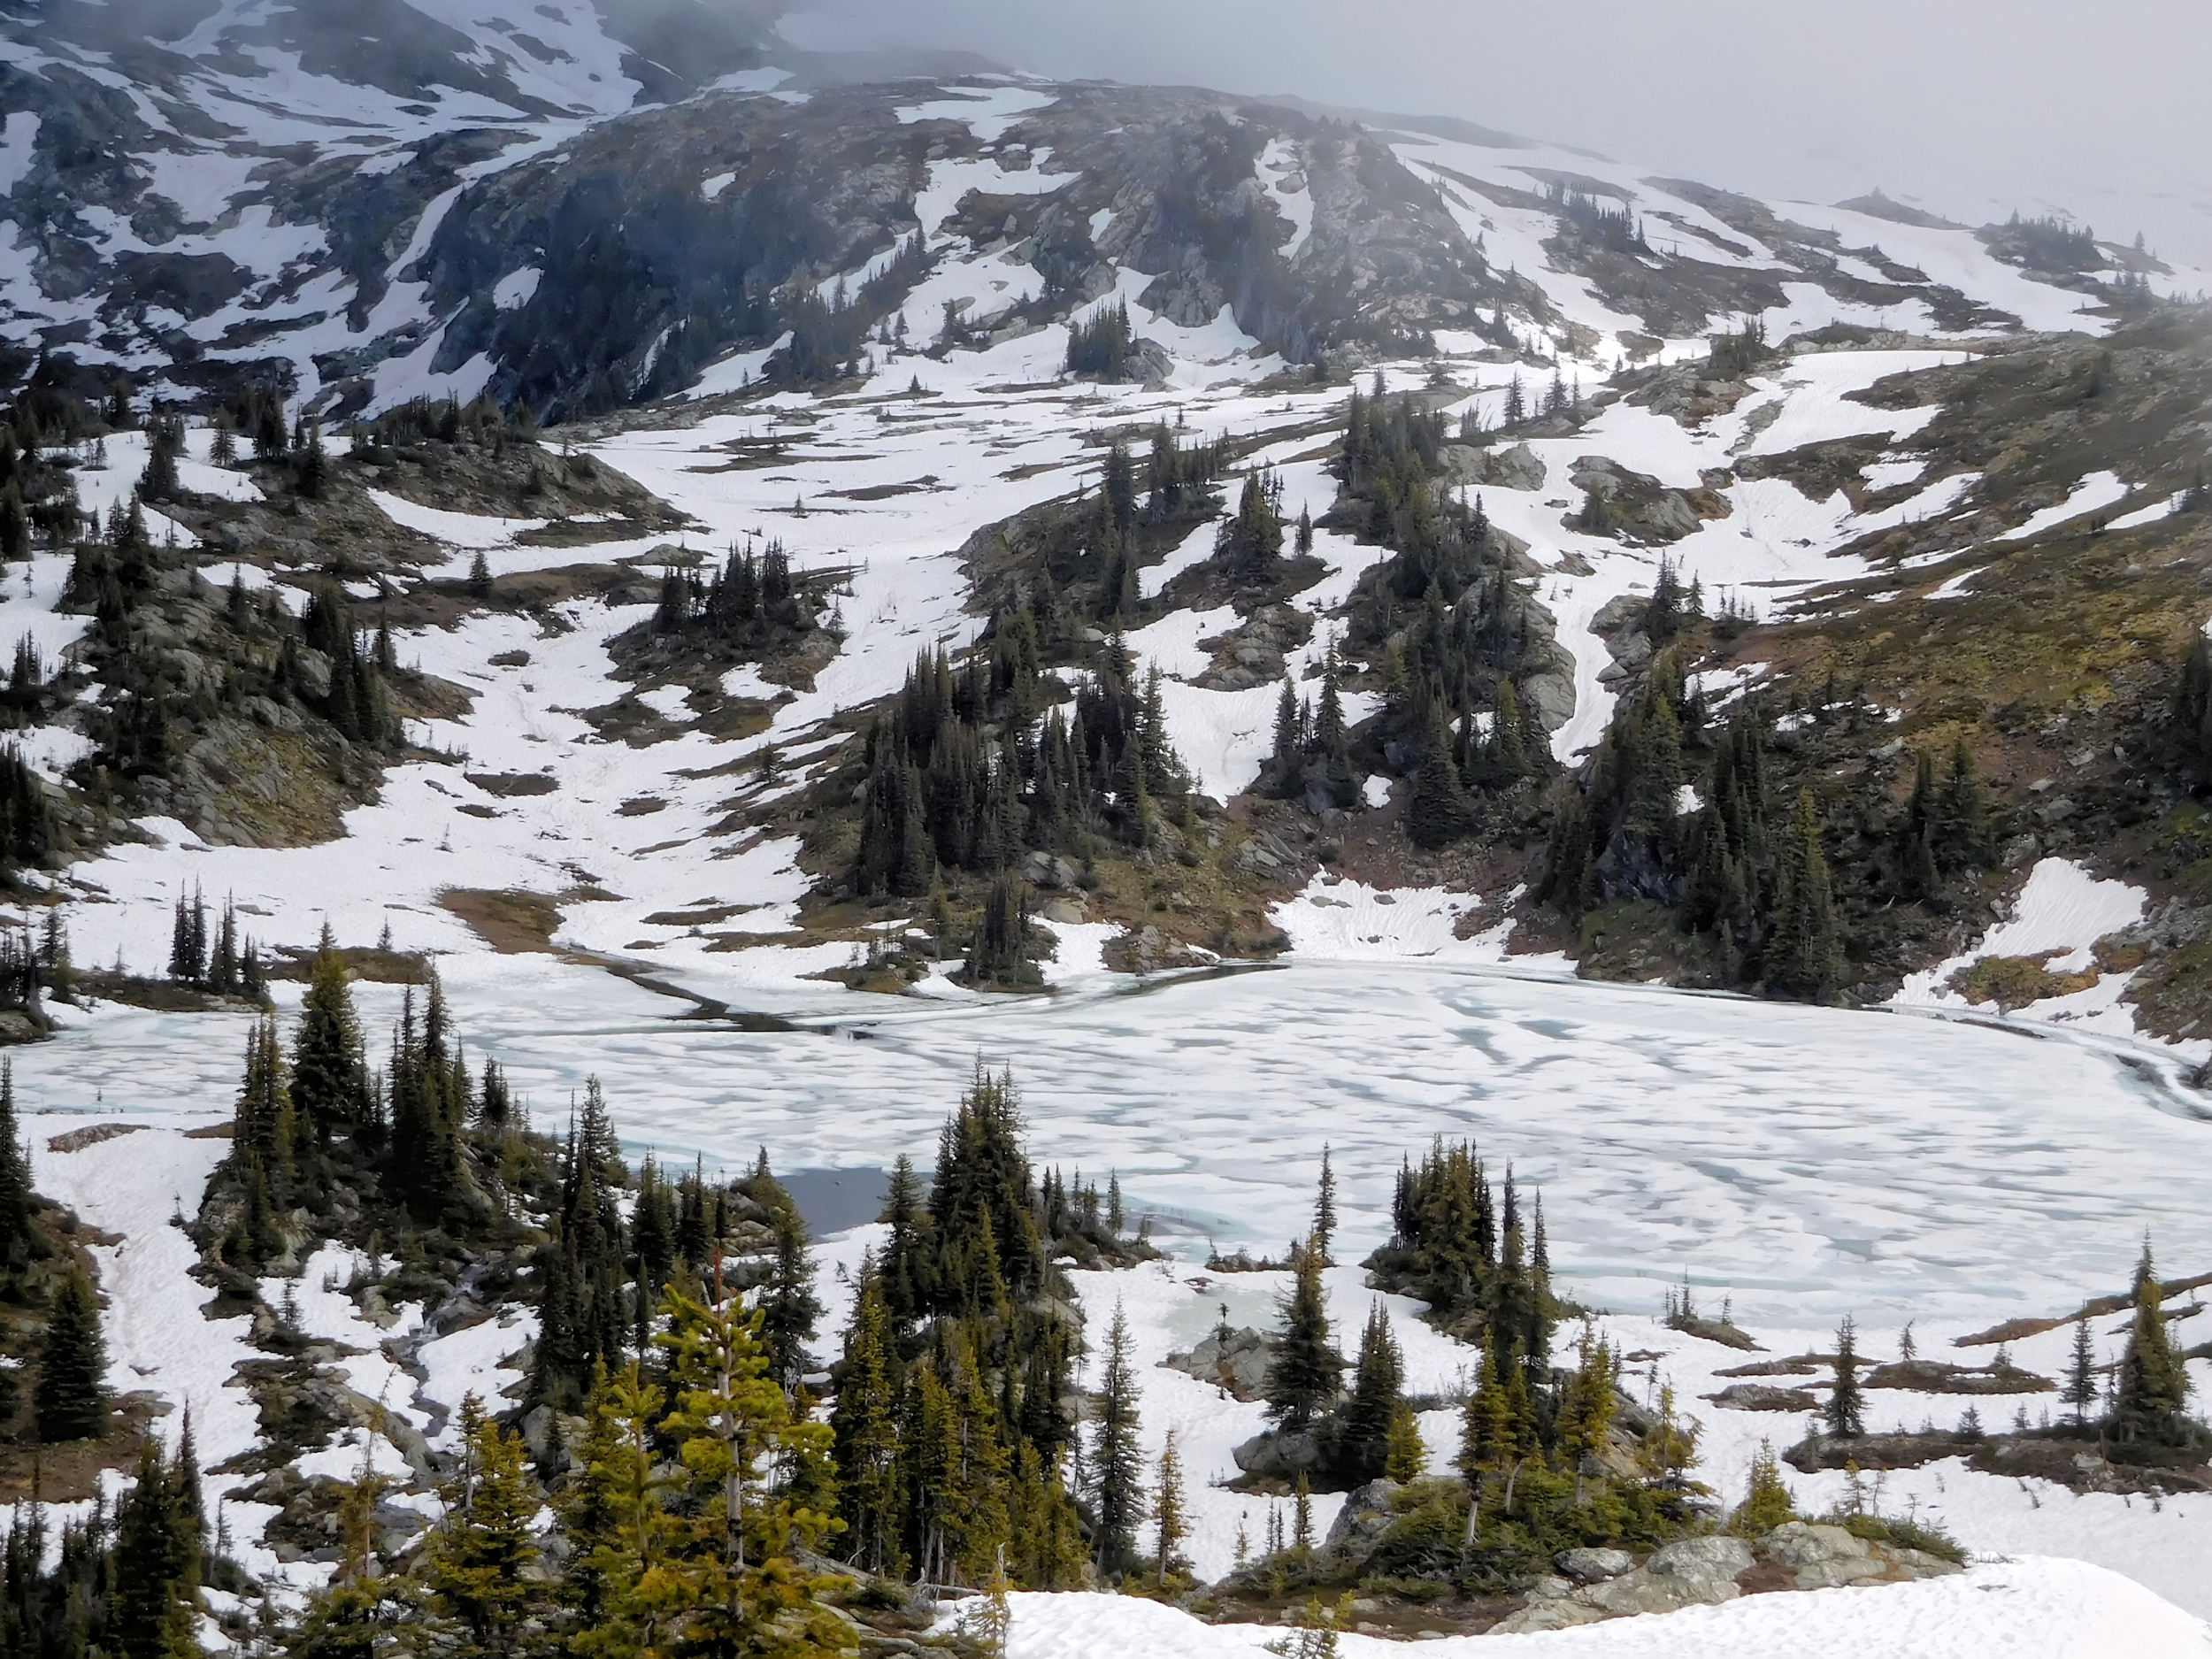
Sheila Lake 10/7/2020
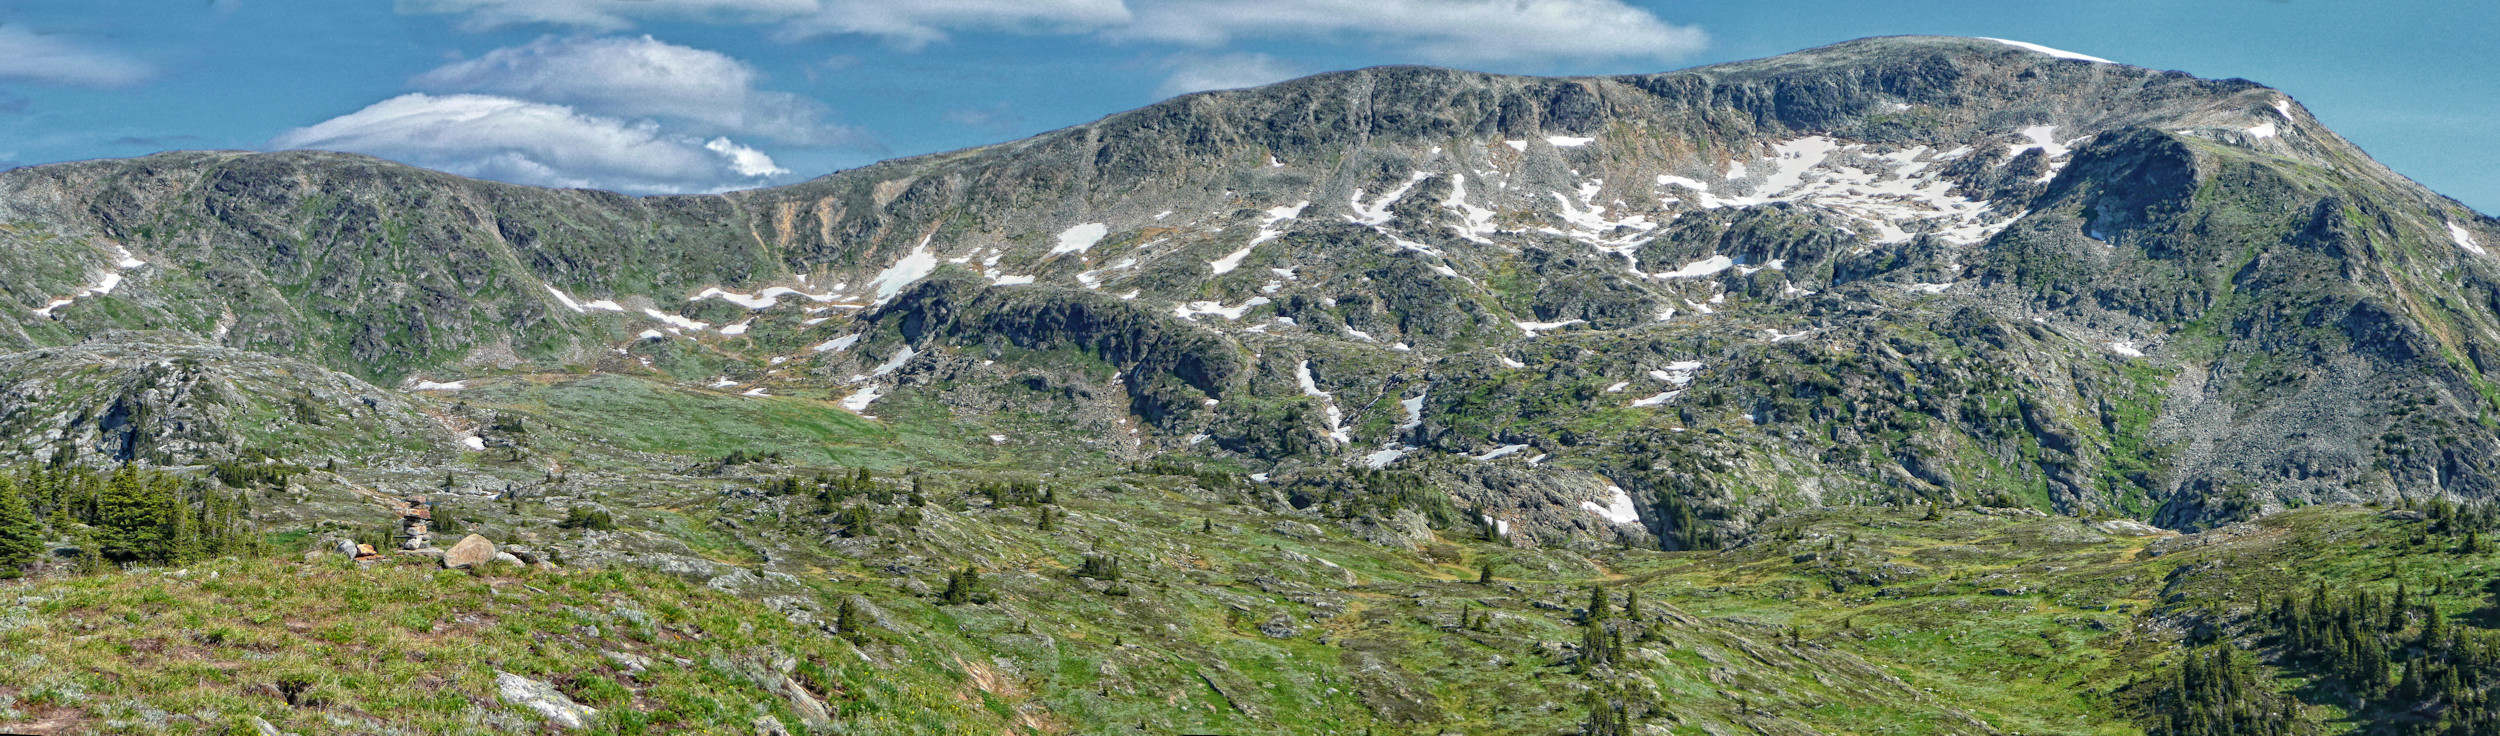
Trophy West Ridge
Trophy Mountain
This early in the season, the trail is usually passable to Sheila Lake Lookout Rock and Little Hill Ridge. We also call this ridge “Lunch Ridge”, as we like to have our break there. Both destinations are higher up than the lake, but they get much more sun and thaw out earlier.
Aproaching Sheila Lake Lookout Rock
Lunch Ridge with Trophy Mountain in the background
View from Sheila Lake Lookout Rock
Trophy West Ridge and Trophy Mountain seen from Sheila Lake Lookout Rock
A bug jacket protects against mosquitos and blackflies
On my decent, the temperatures in the meadows have risen so much that mosquitos and blackflies are a real pest. There is no wind to keep them at bay either, so I have to put on my bug jacket.
The weather in the Trophies is extremely variable and the skies are not always blue. Even in good weather, the mornings can be foggy. In July 2020, I am on the trail so early that the mist doesn’t lift until I'm on my way back to the trailhead.
Glacier Lilies in the rising morning mist
The Trophy Meadows provide one of the rare early alpine hiking opportunities in our area. Every year I enjoy the splendor of yellow blossoms anew.

Trophy Mountain Meadows and Silvertip Trails
| Distance | 1.6 km |
| Time | ¾ hr |
| Incl. Breaks | 1 hr |
| Min. Elev. | 1380 m |
| Max. Elev. | 1480 m |
| Ascent | 100 m |
| Date | 19/6/18 |
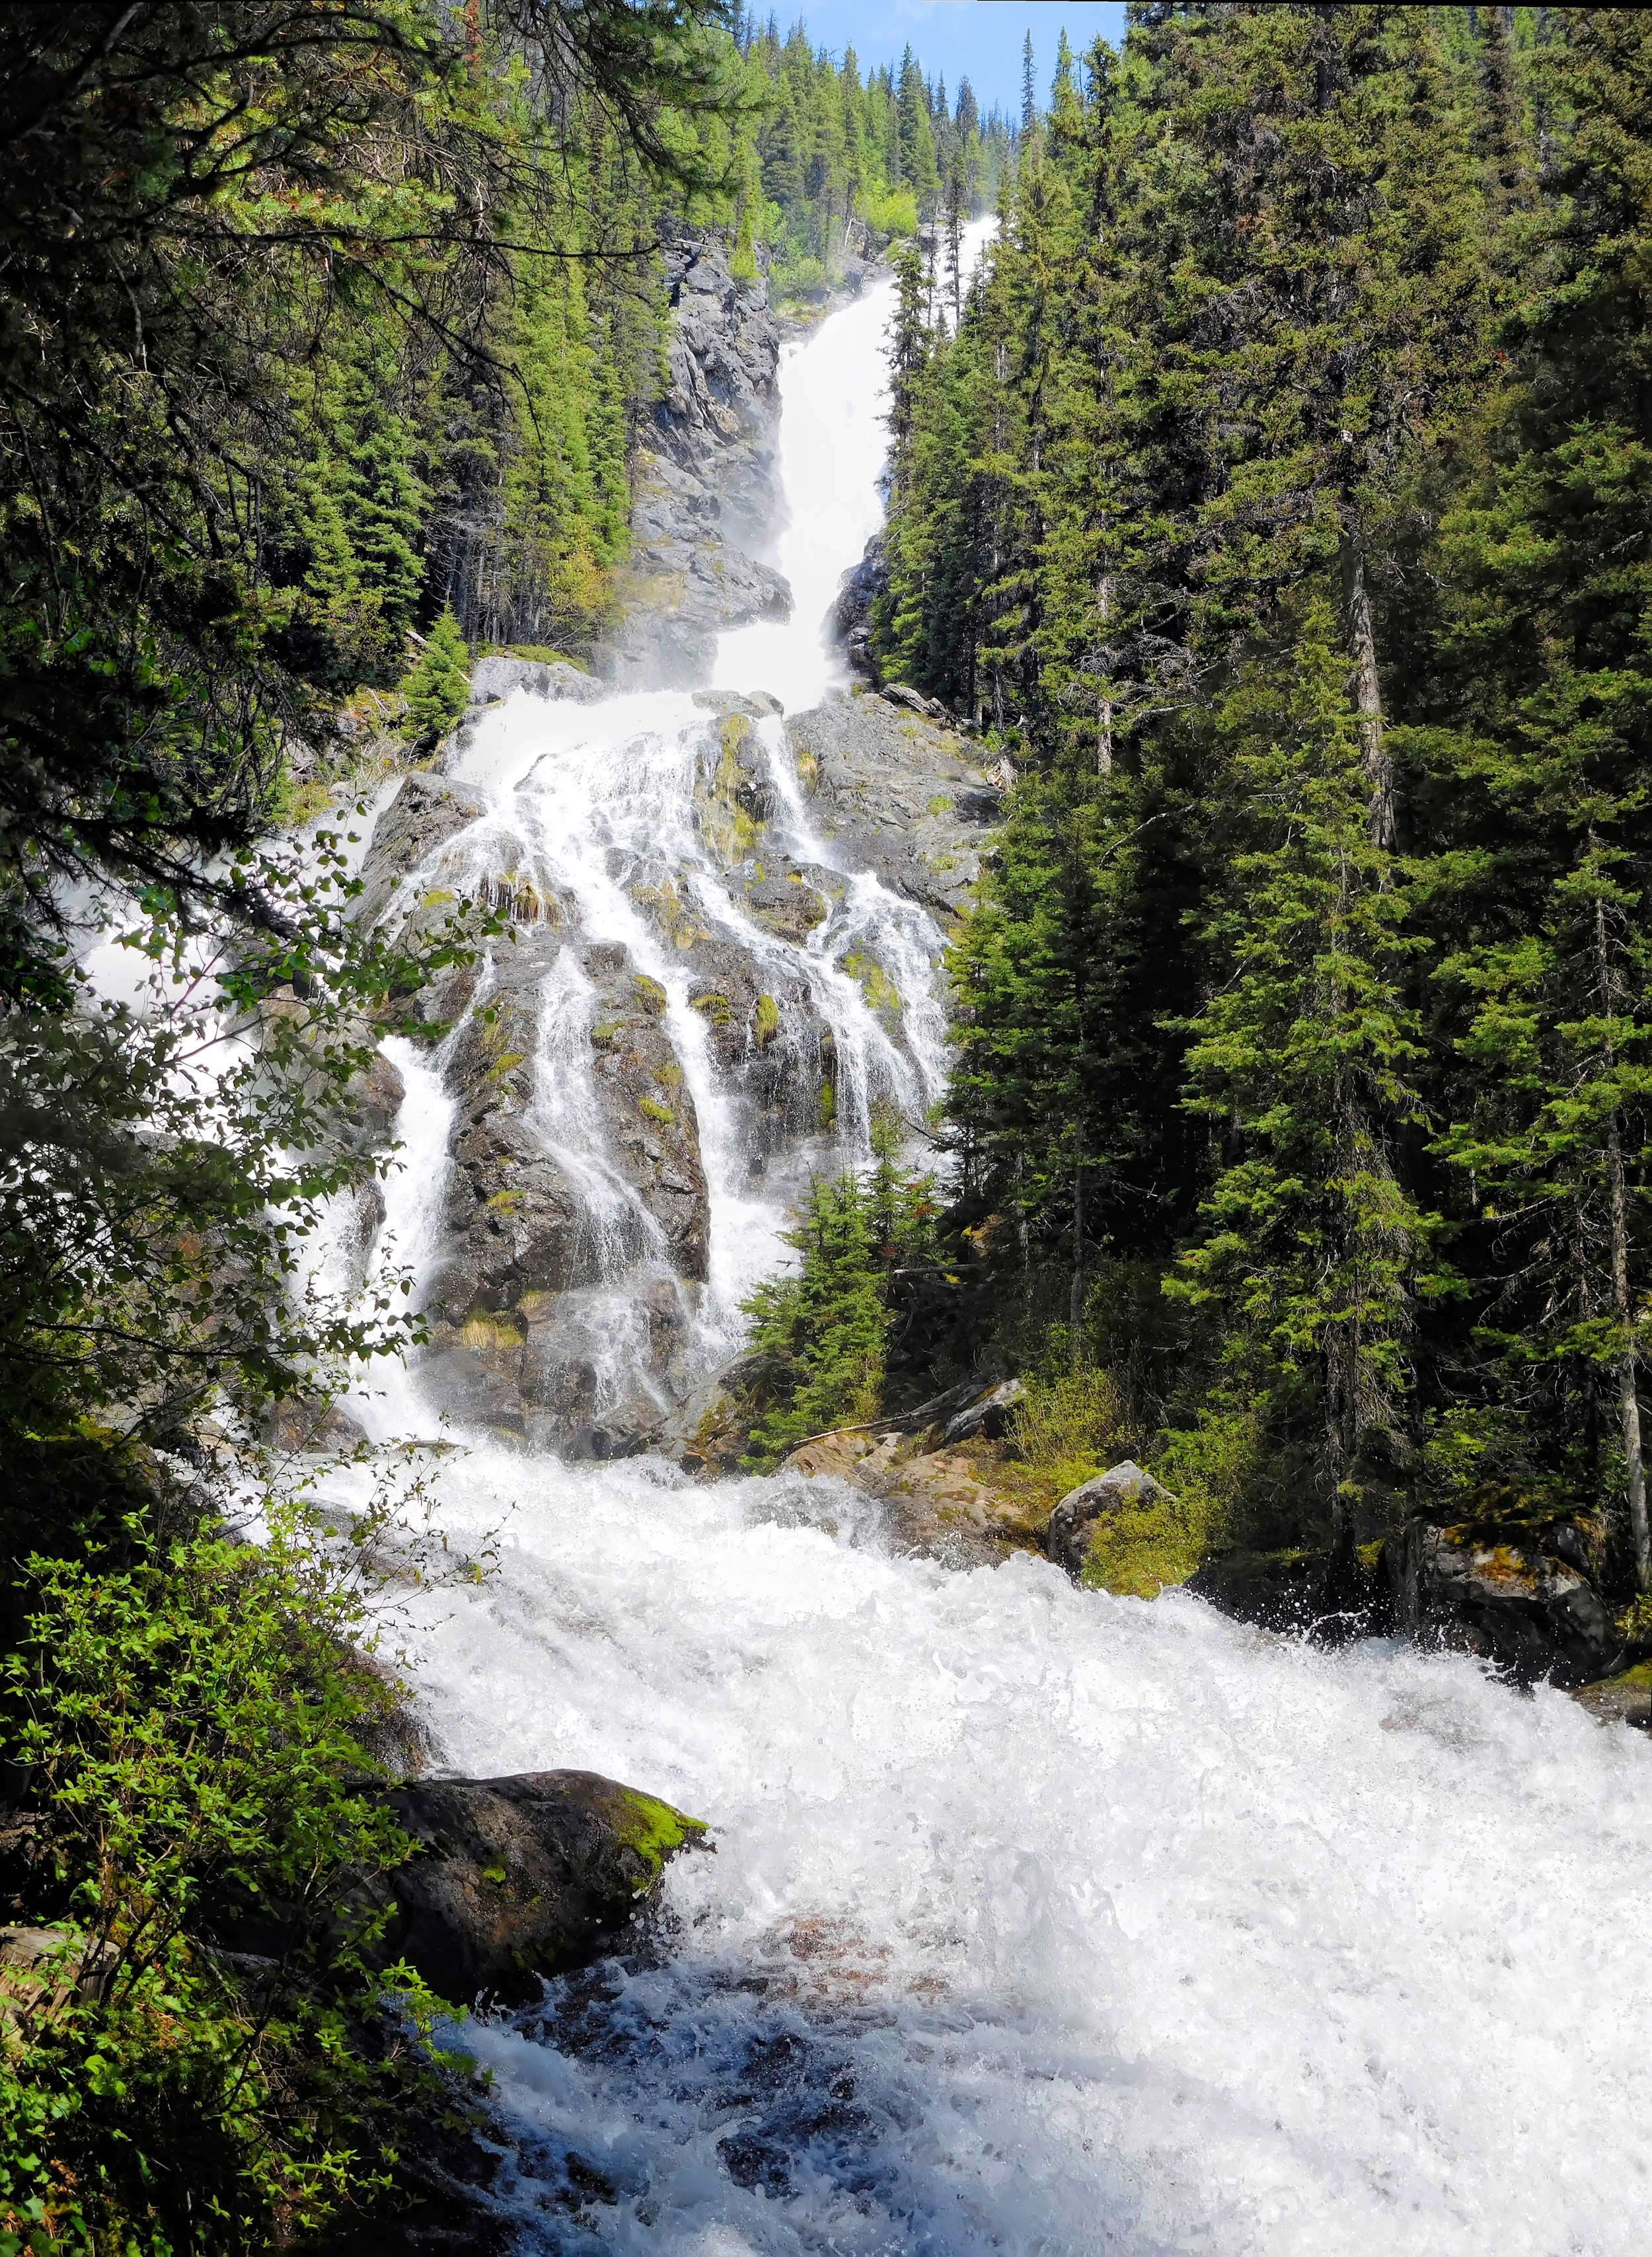
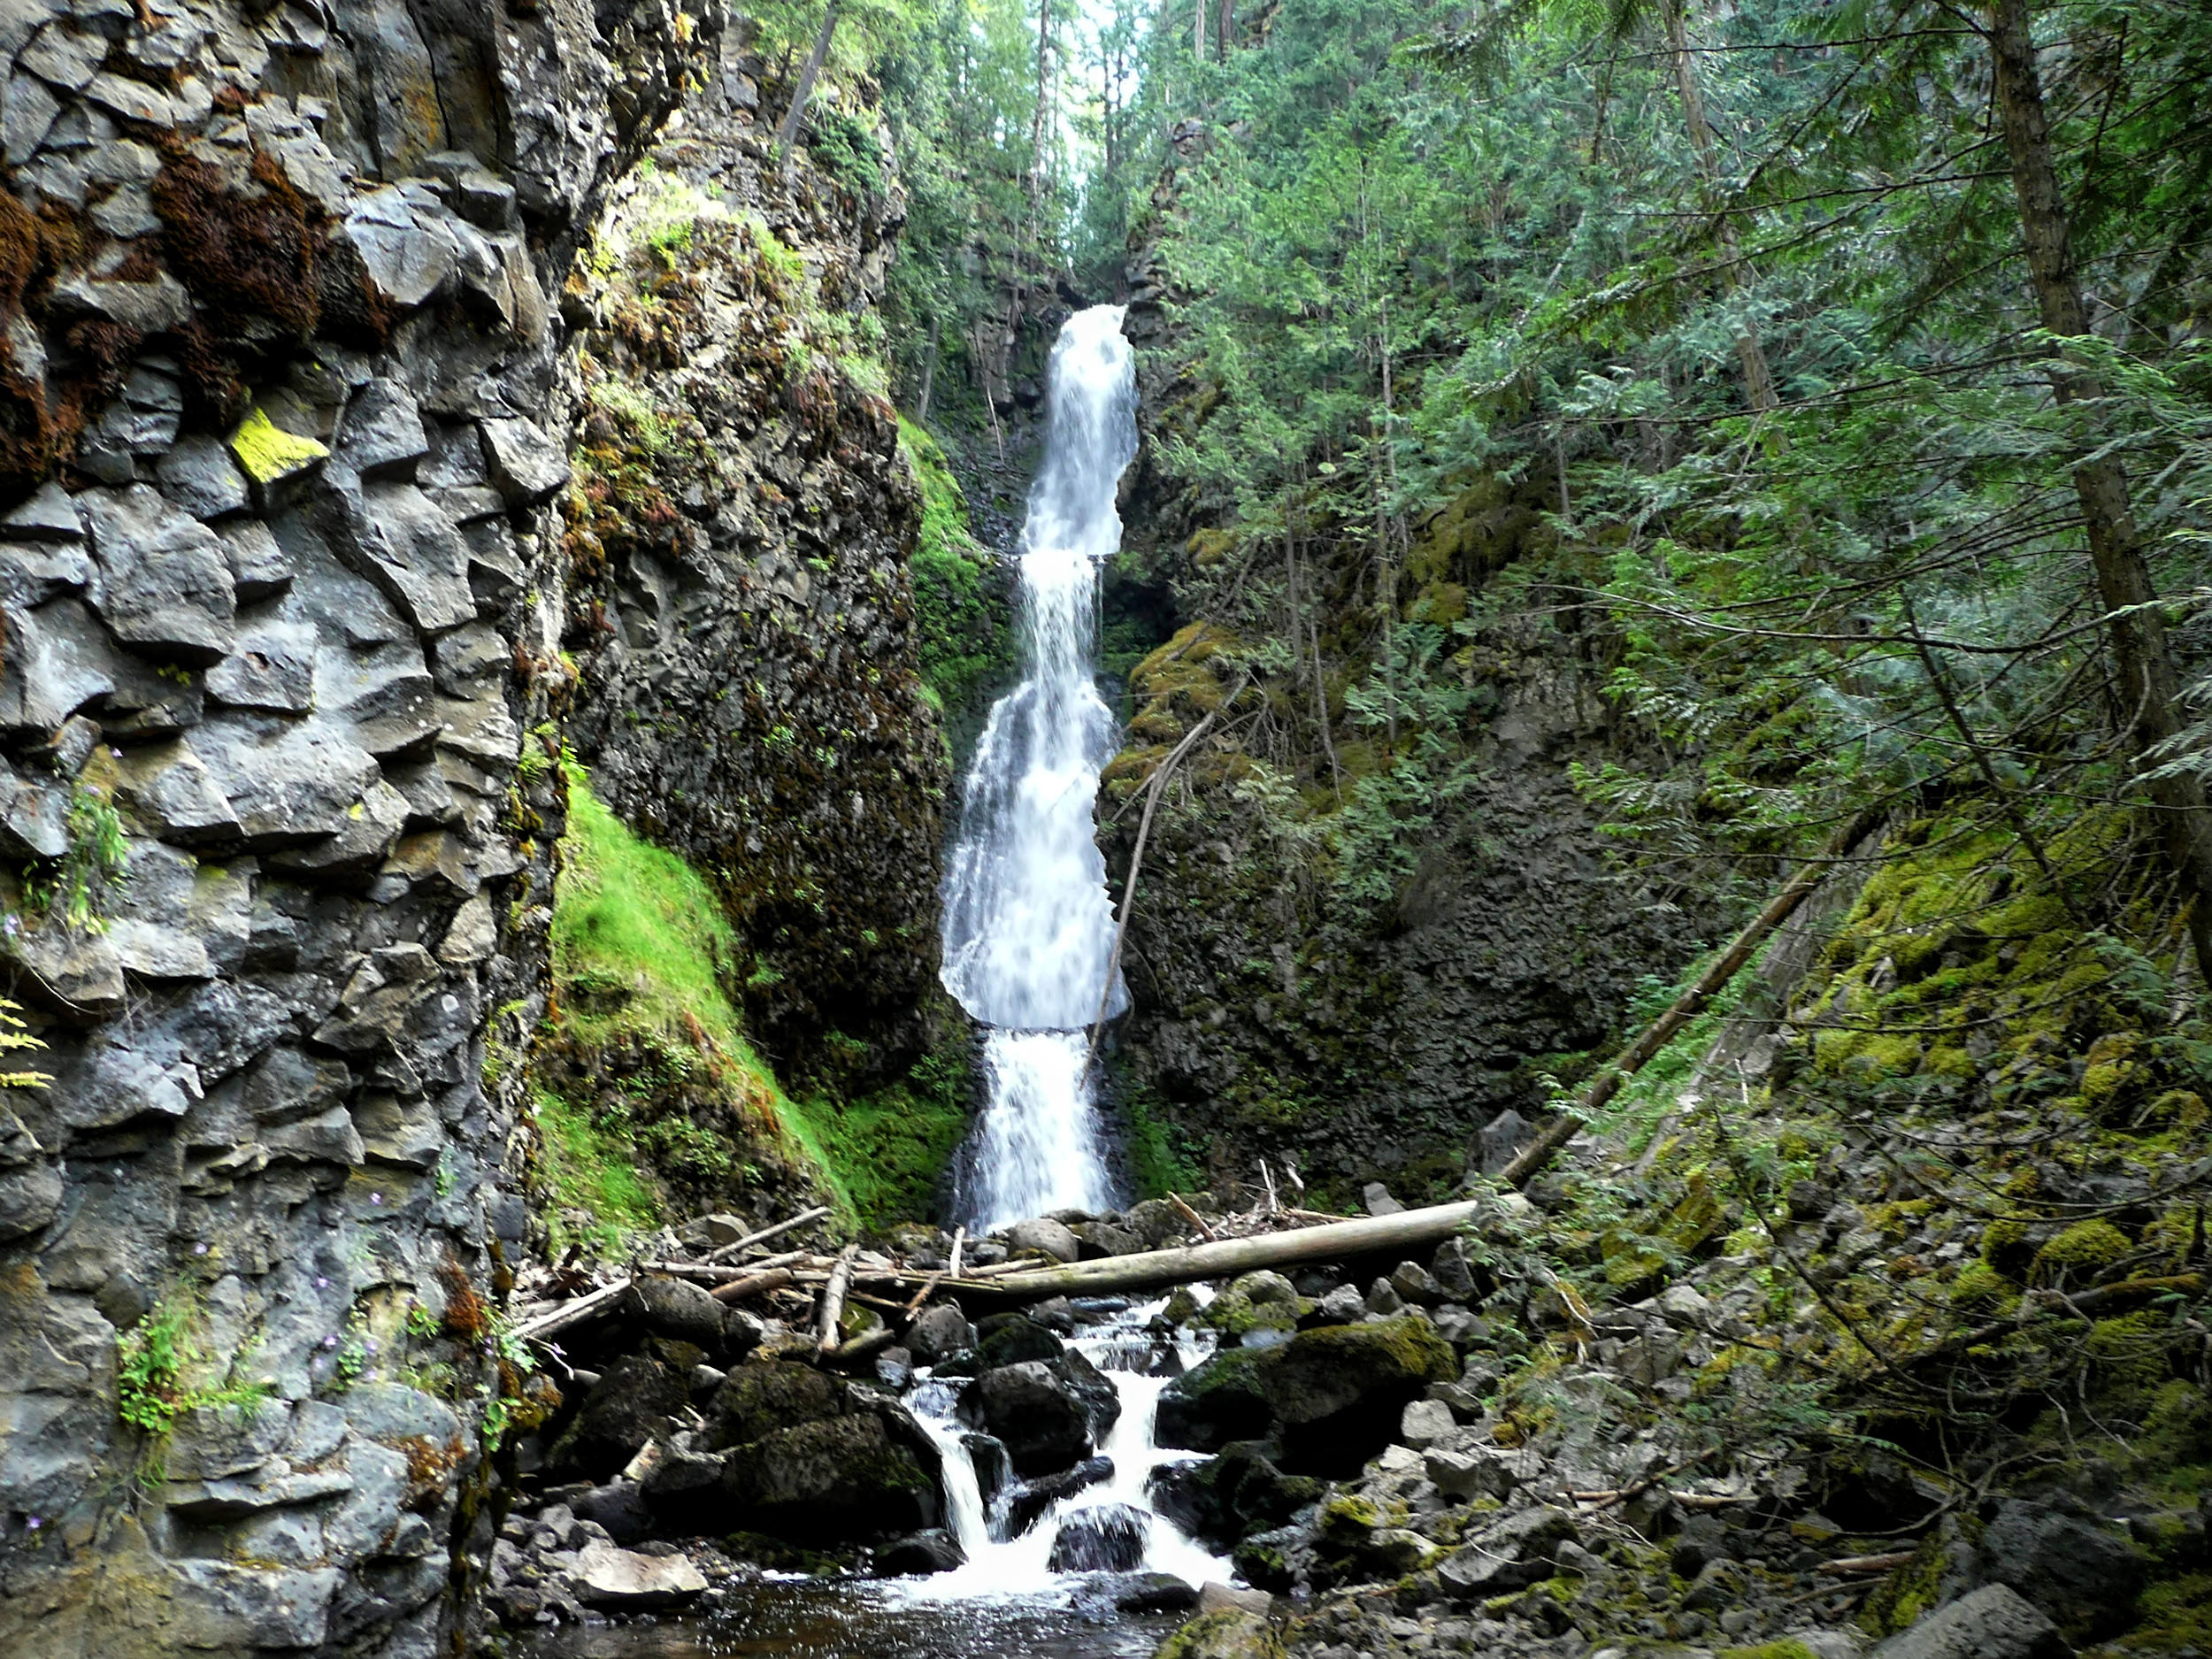
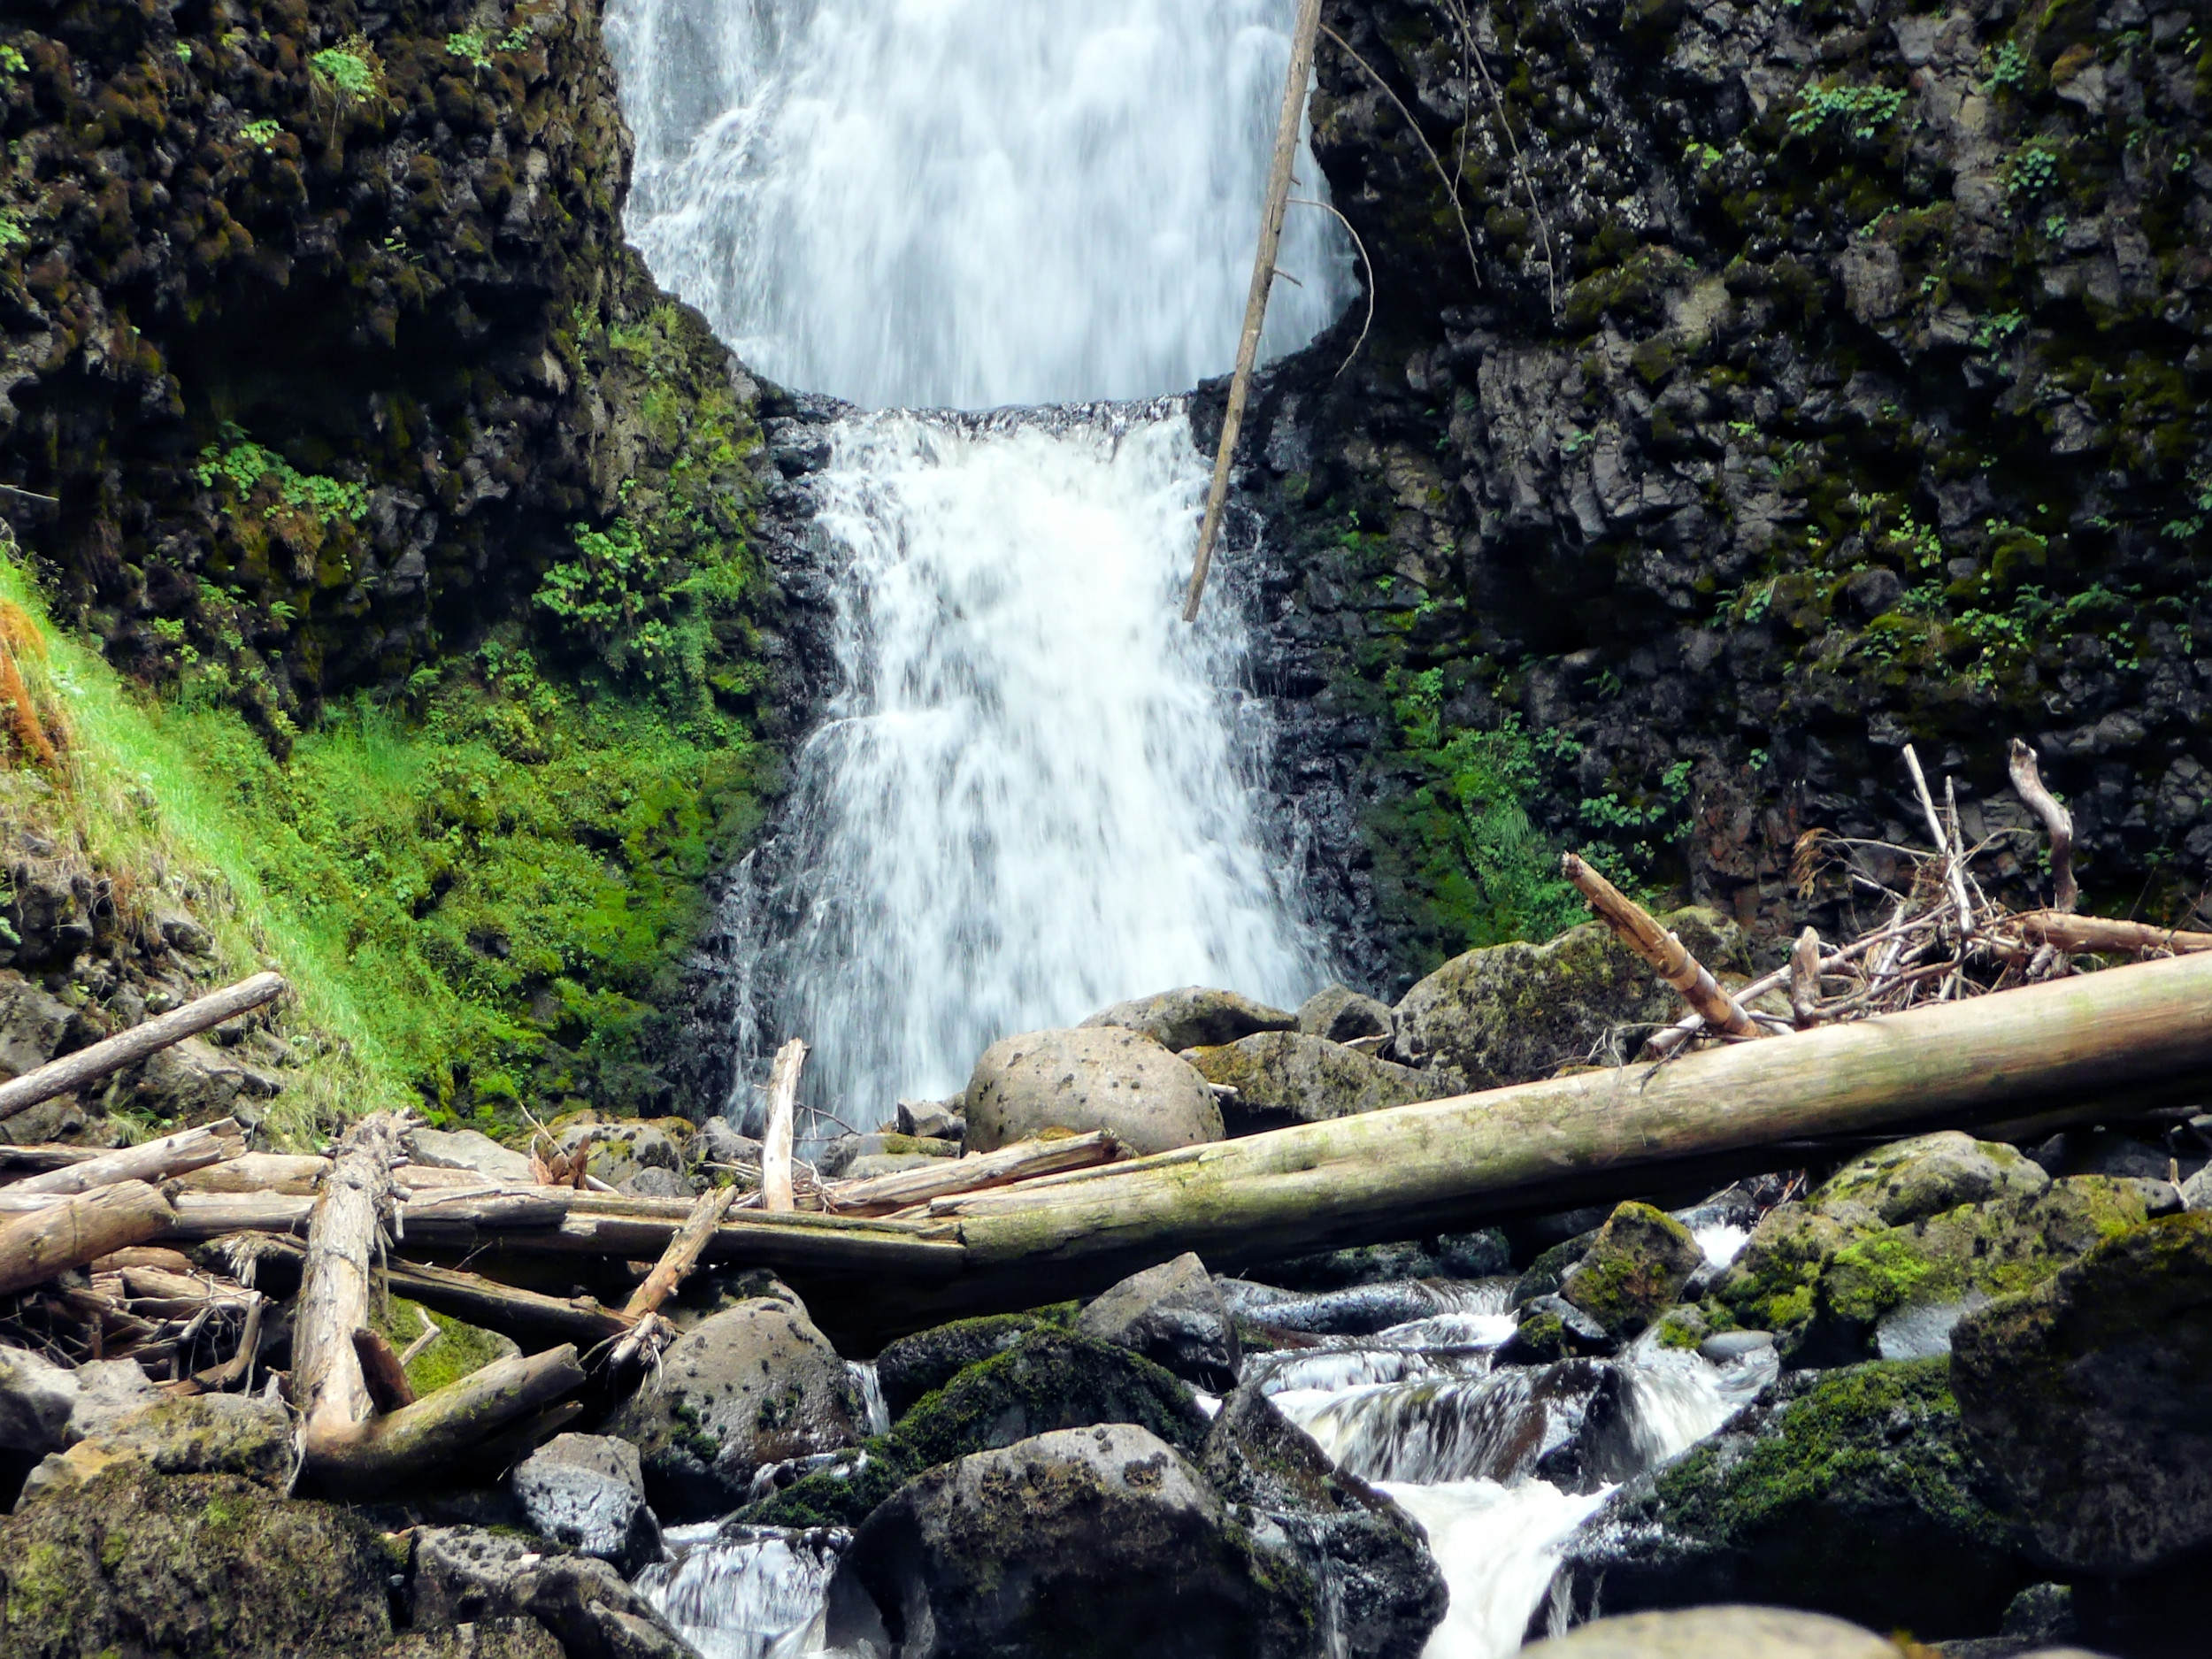
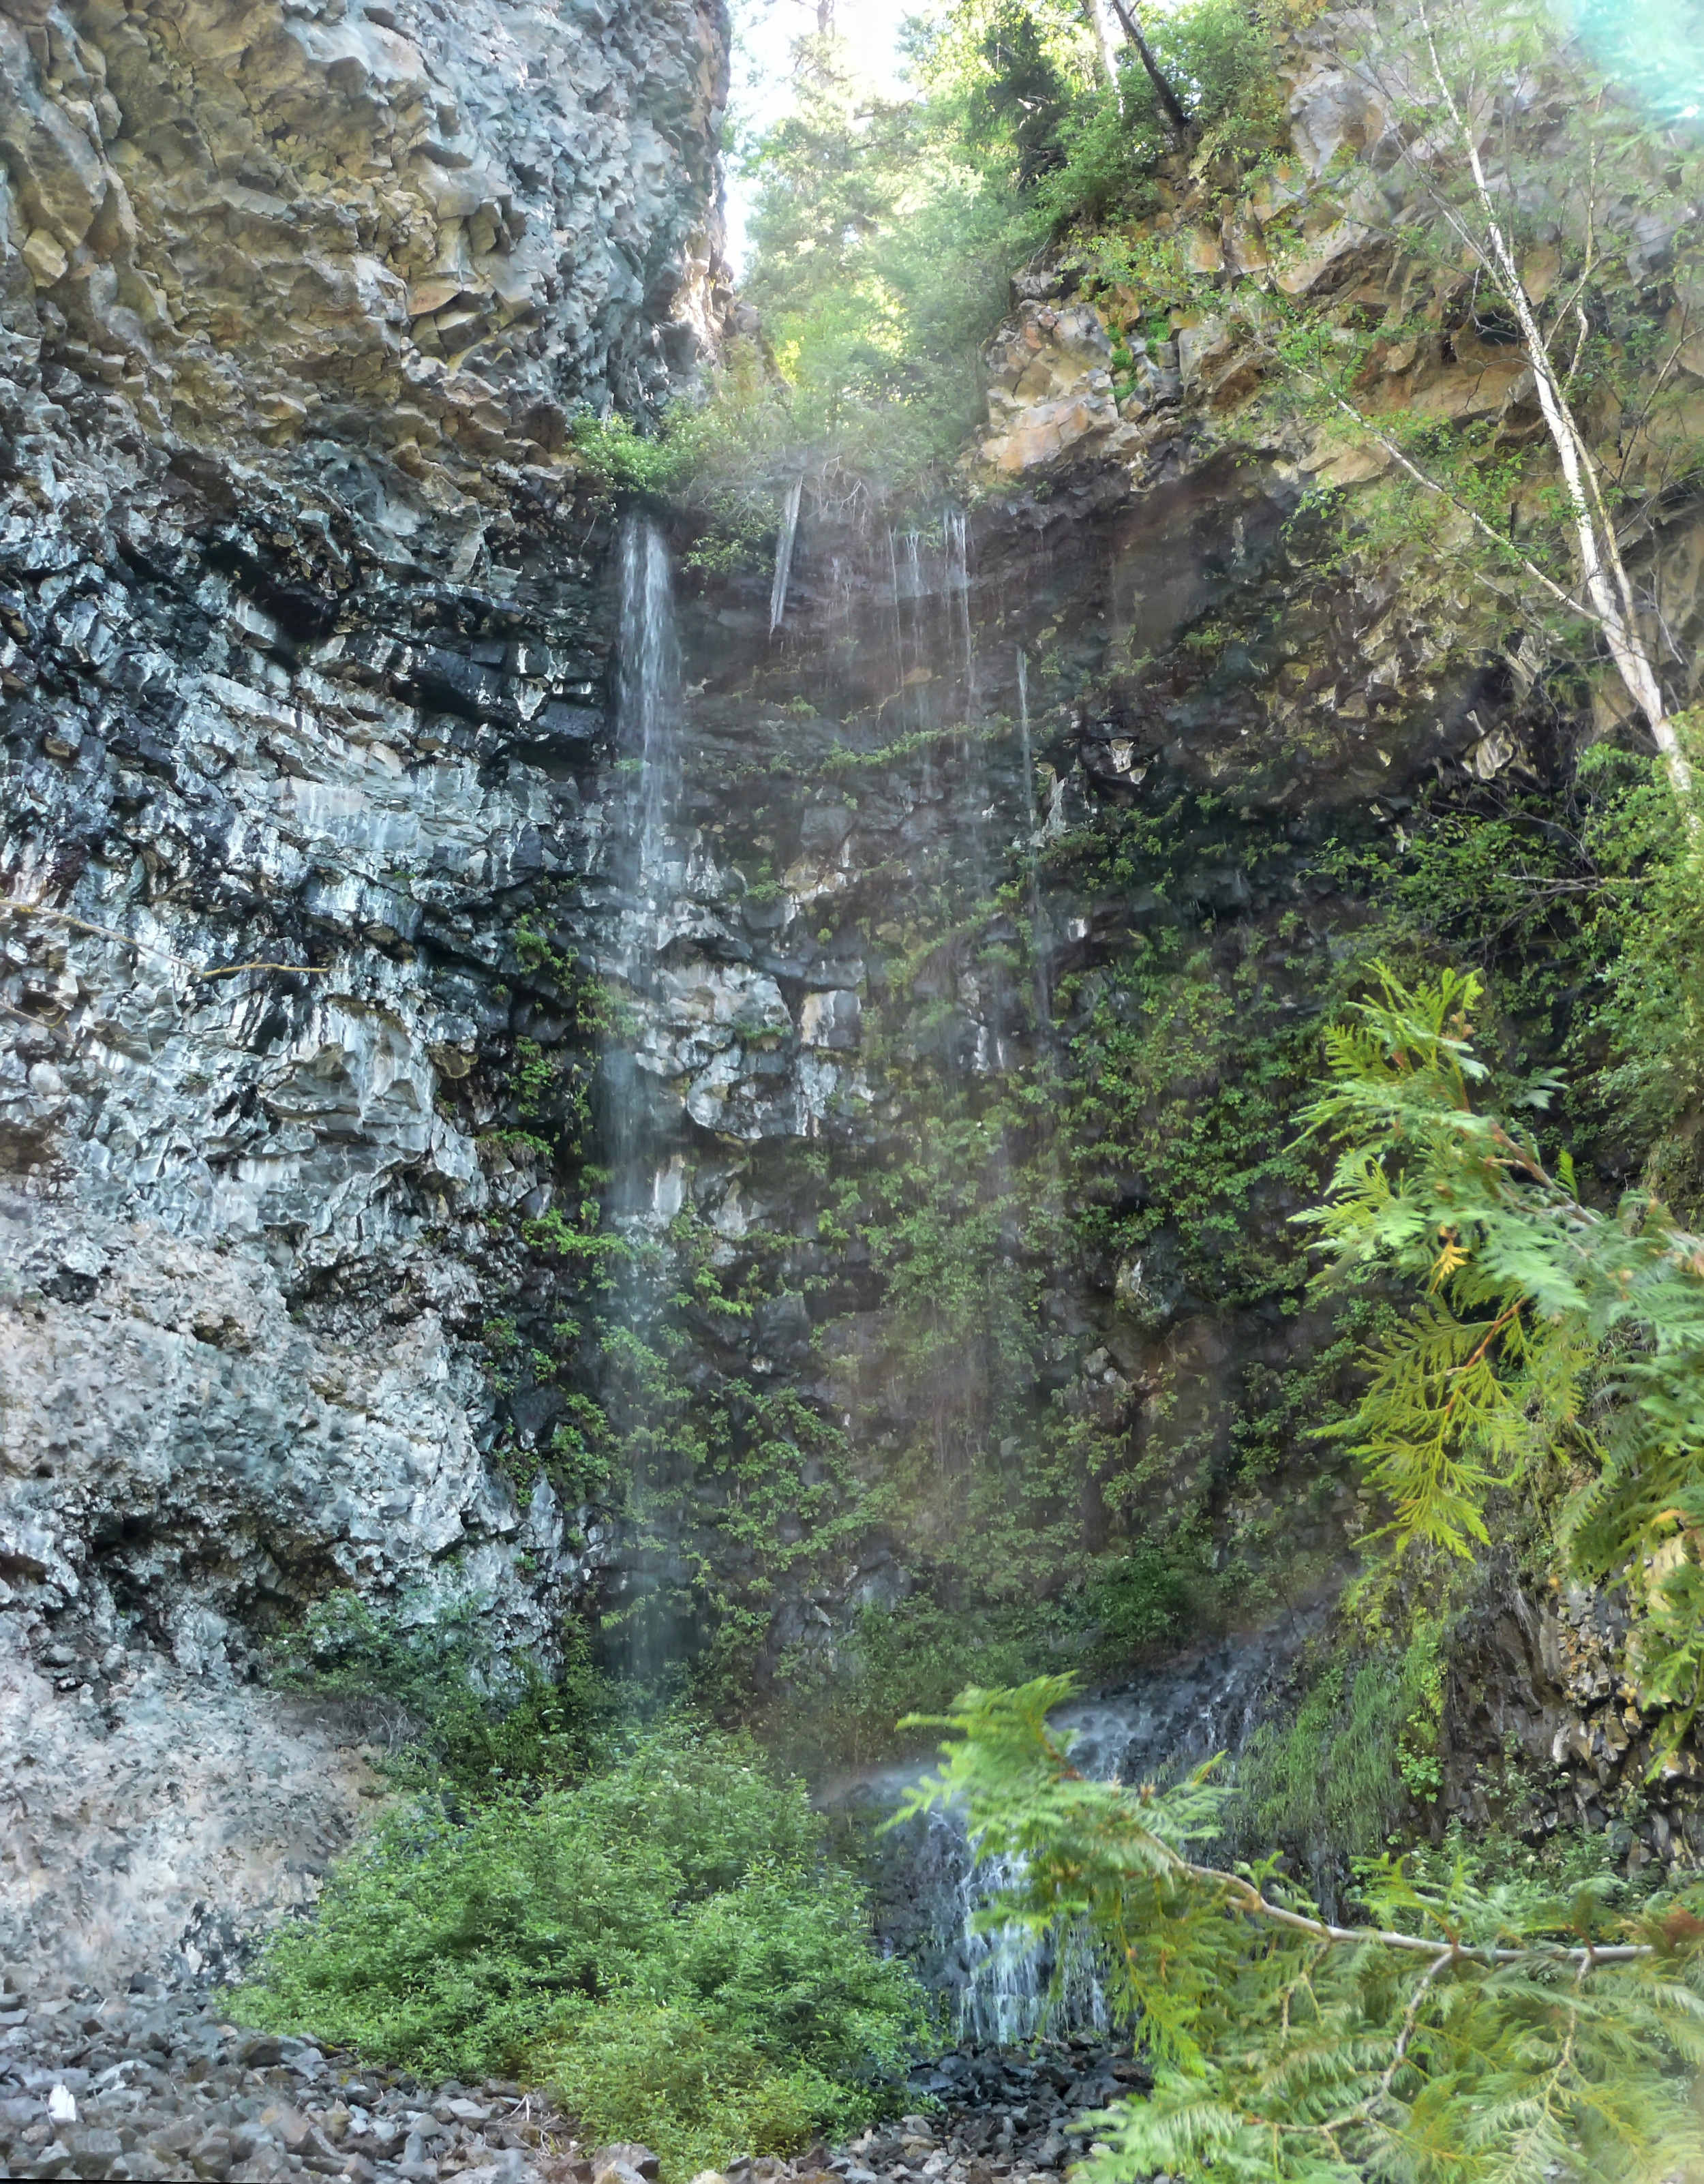
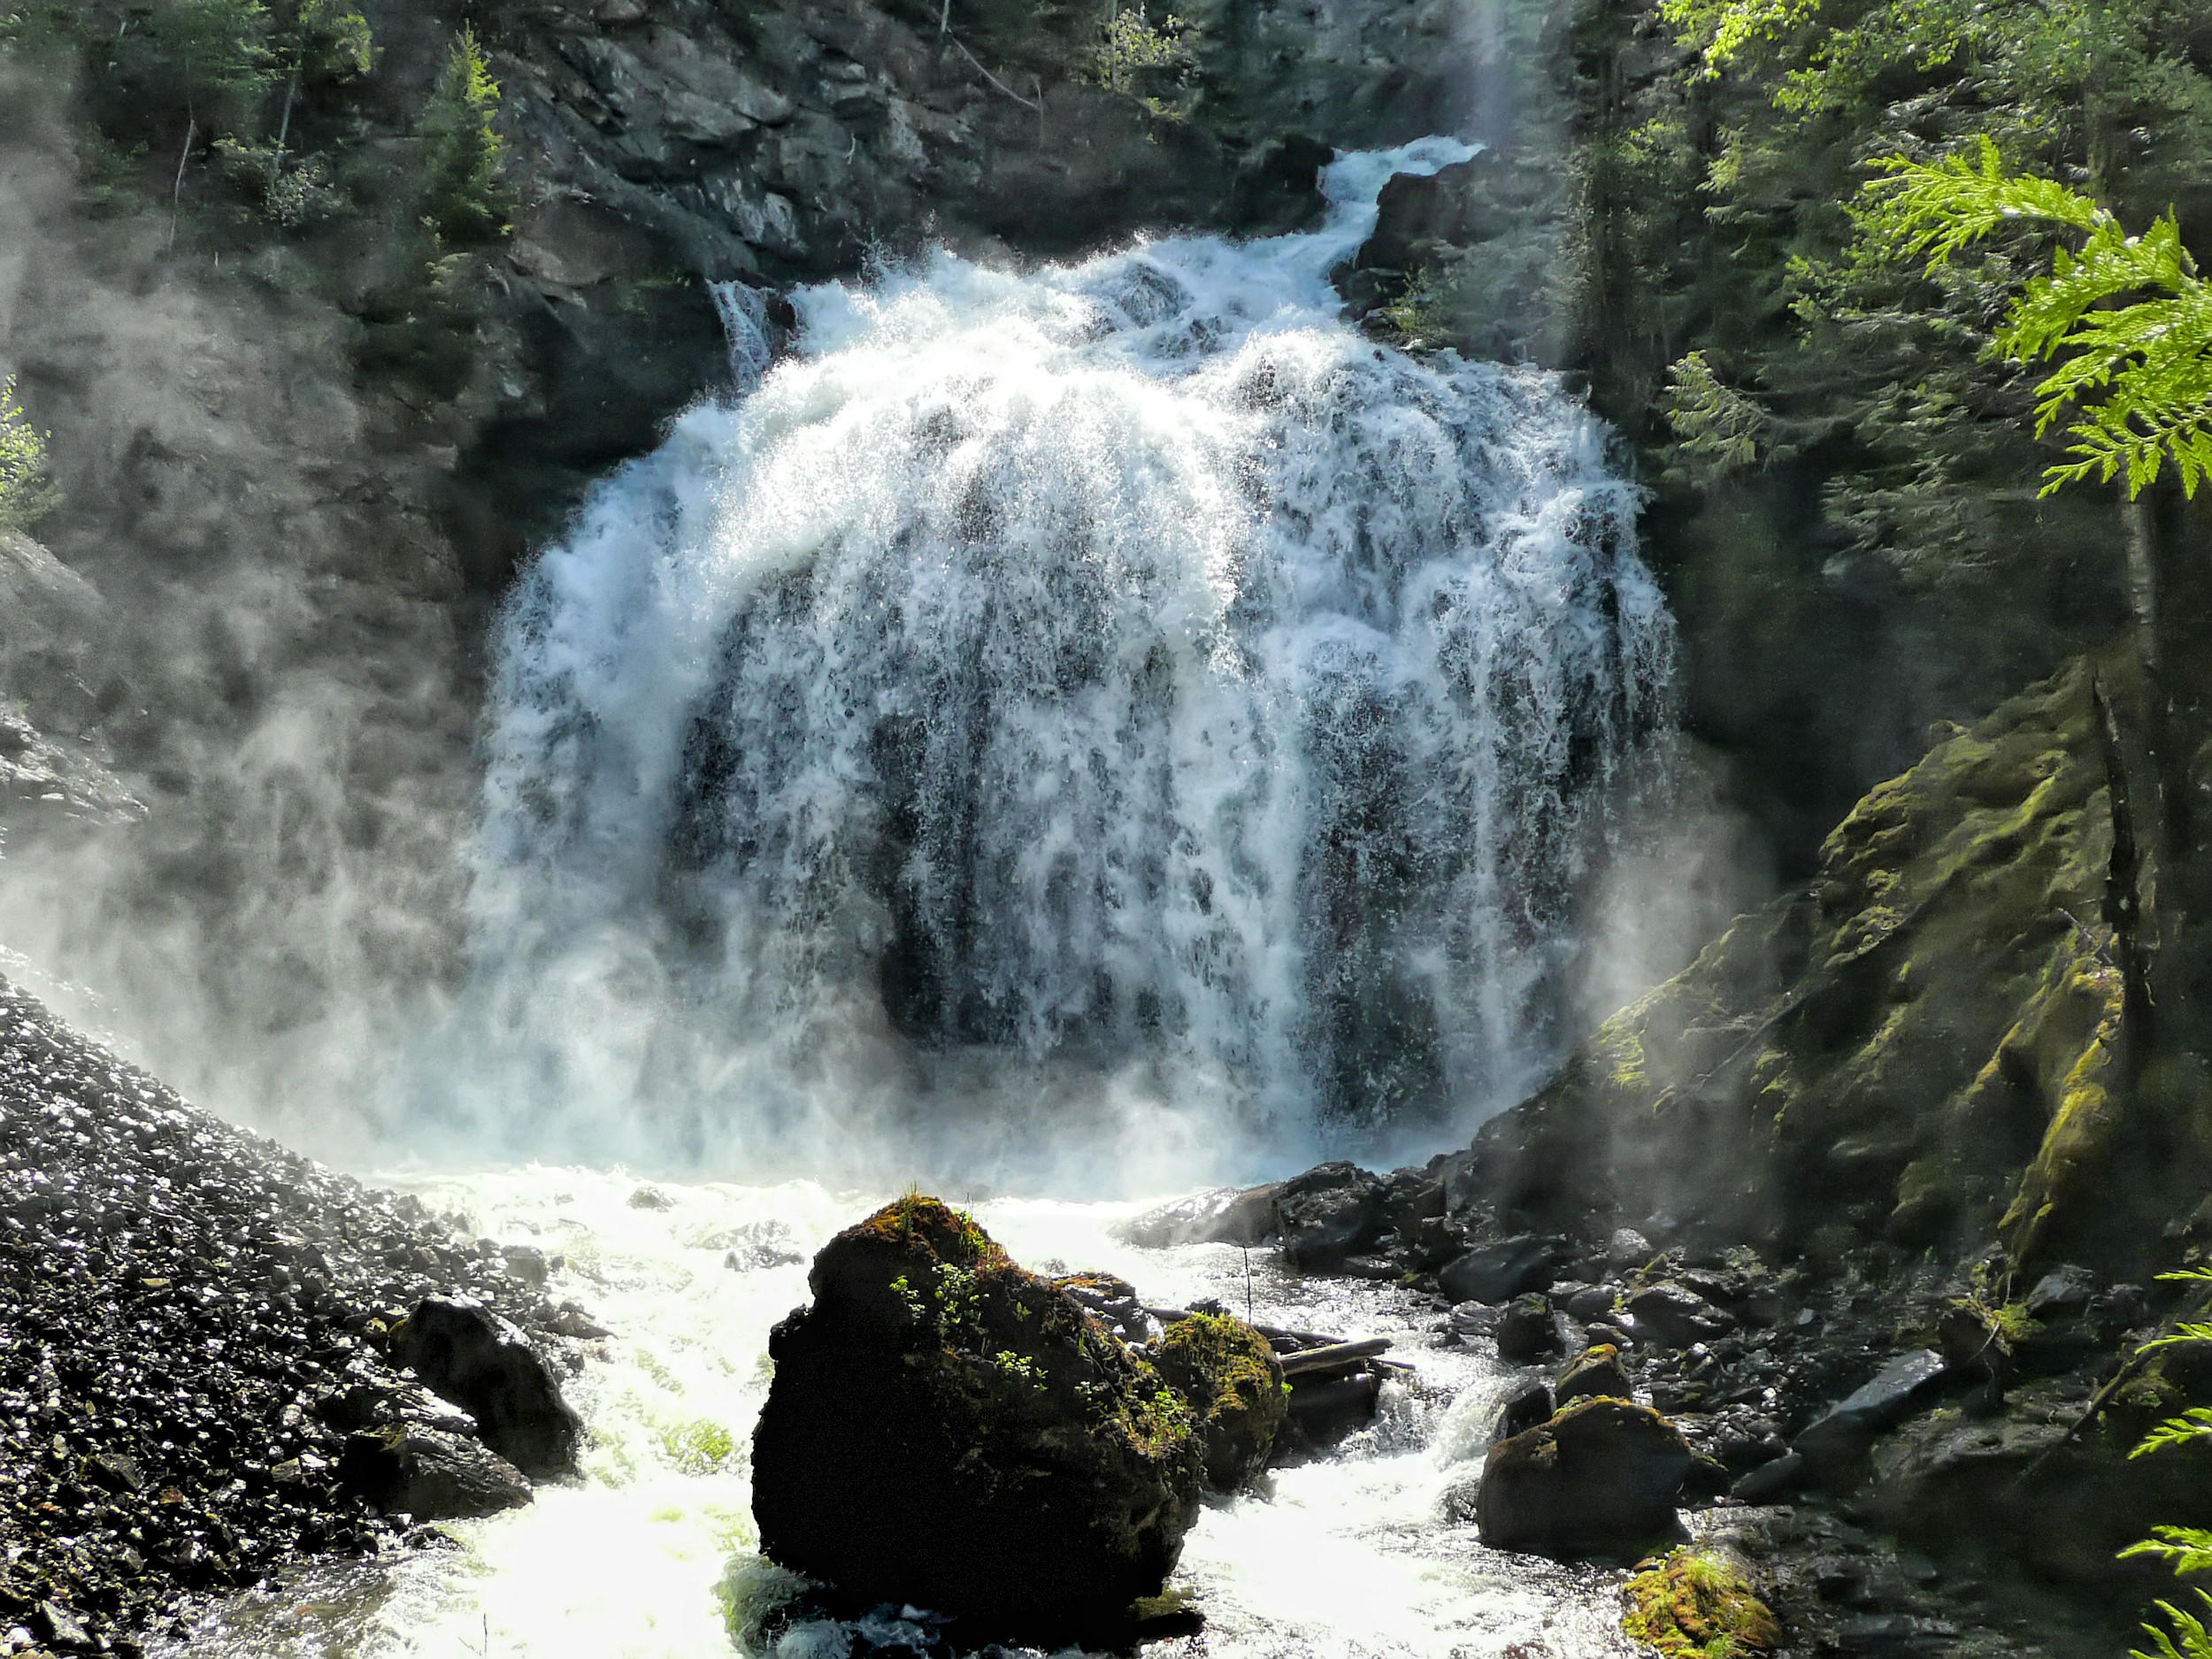
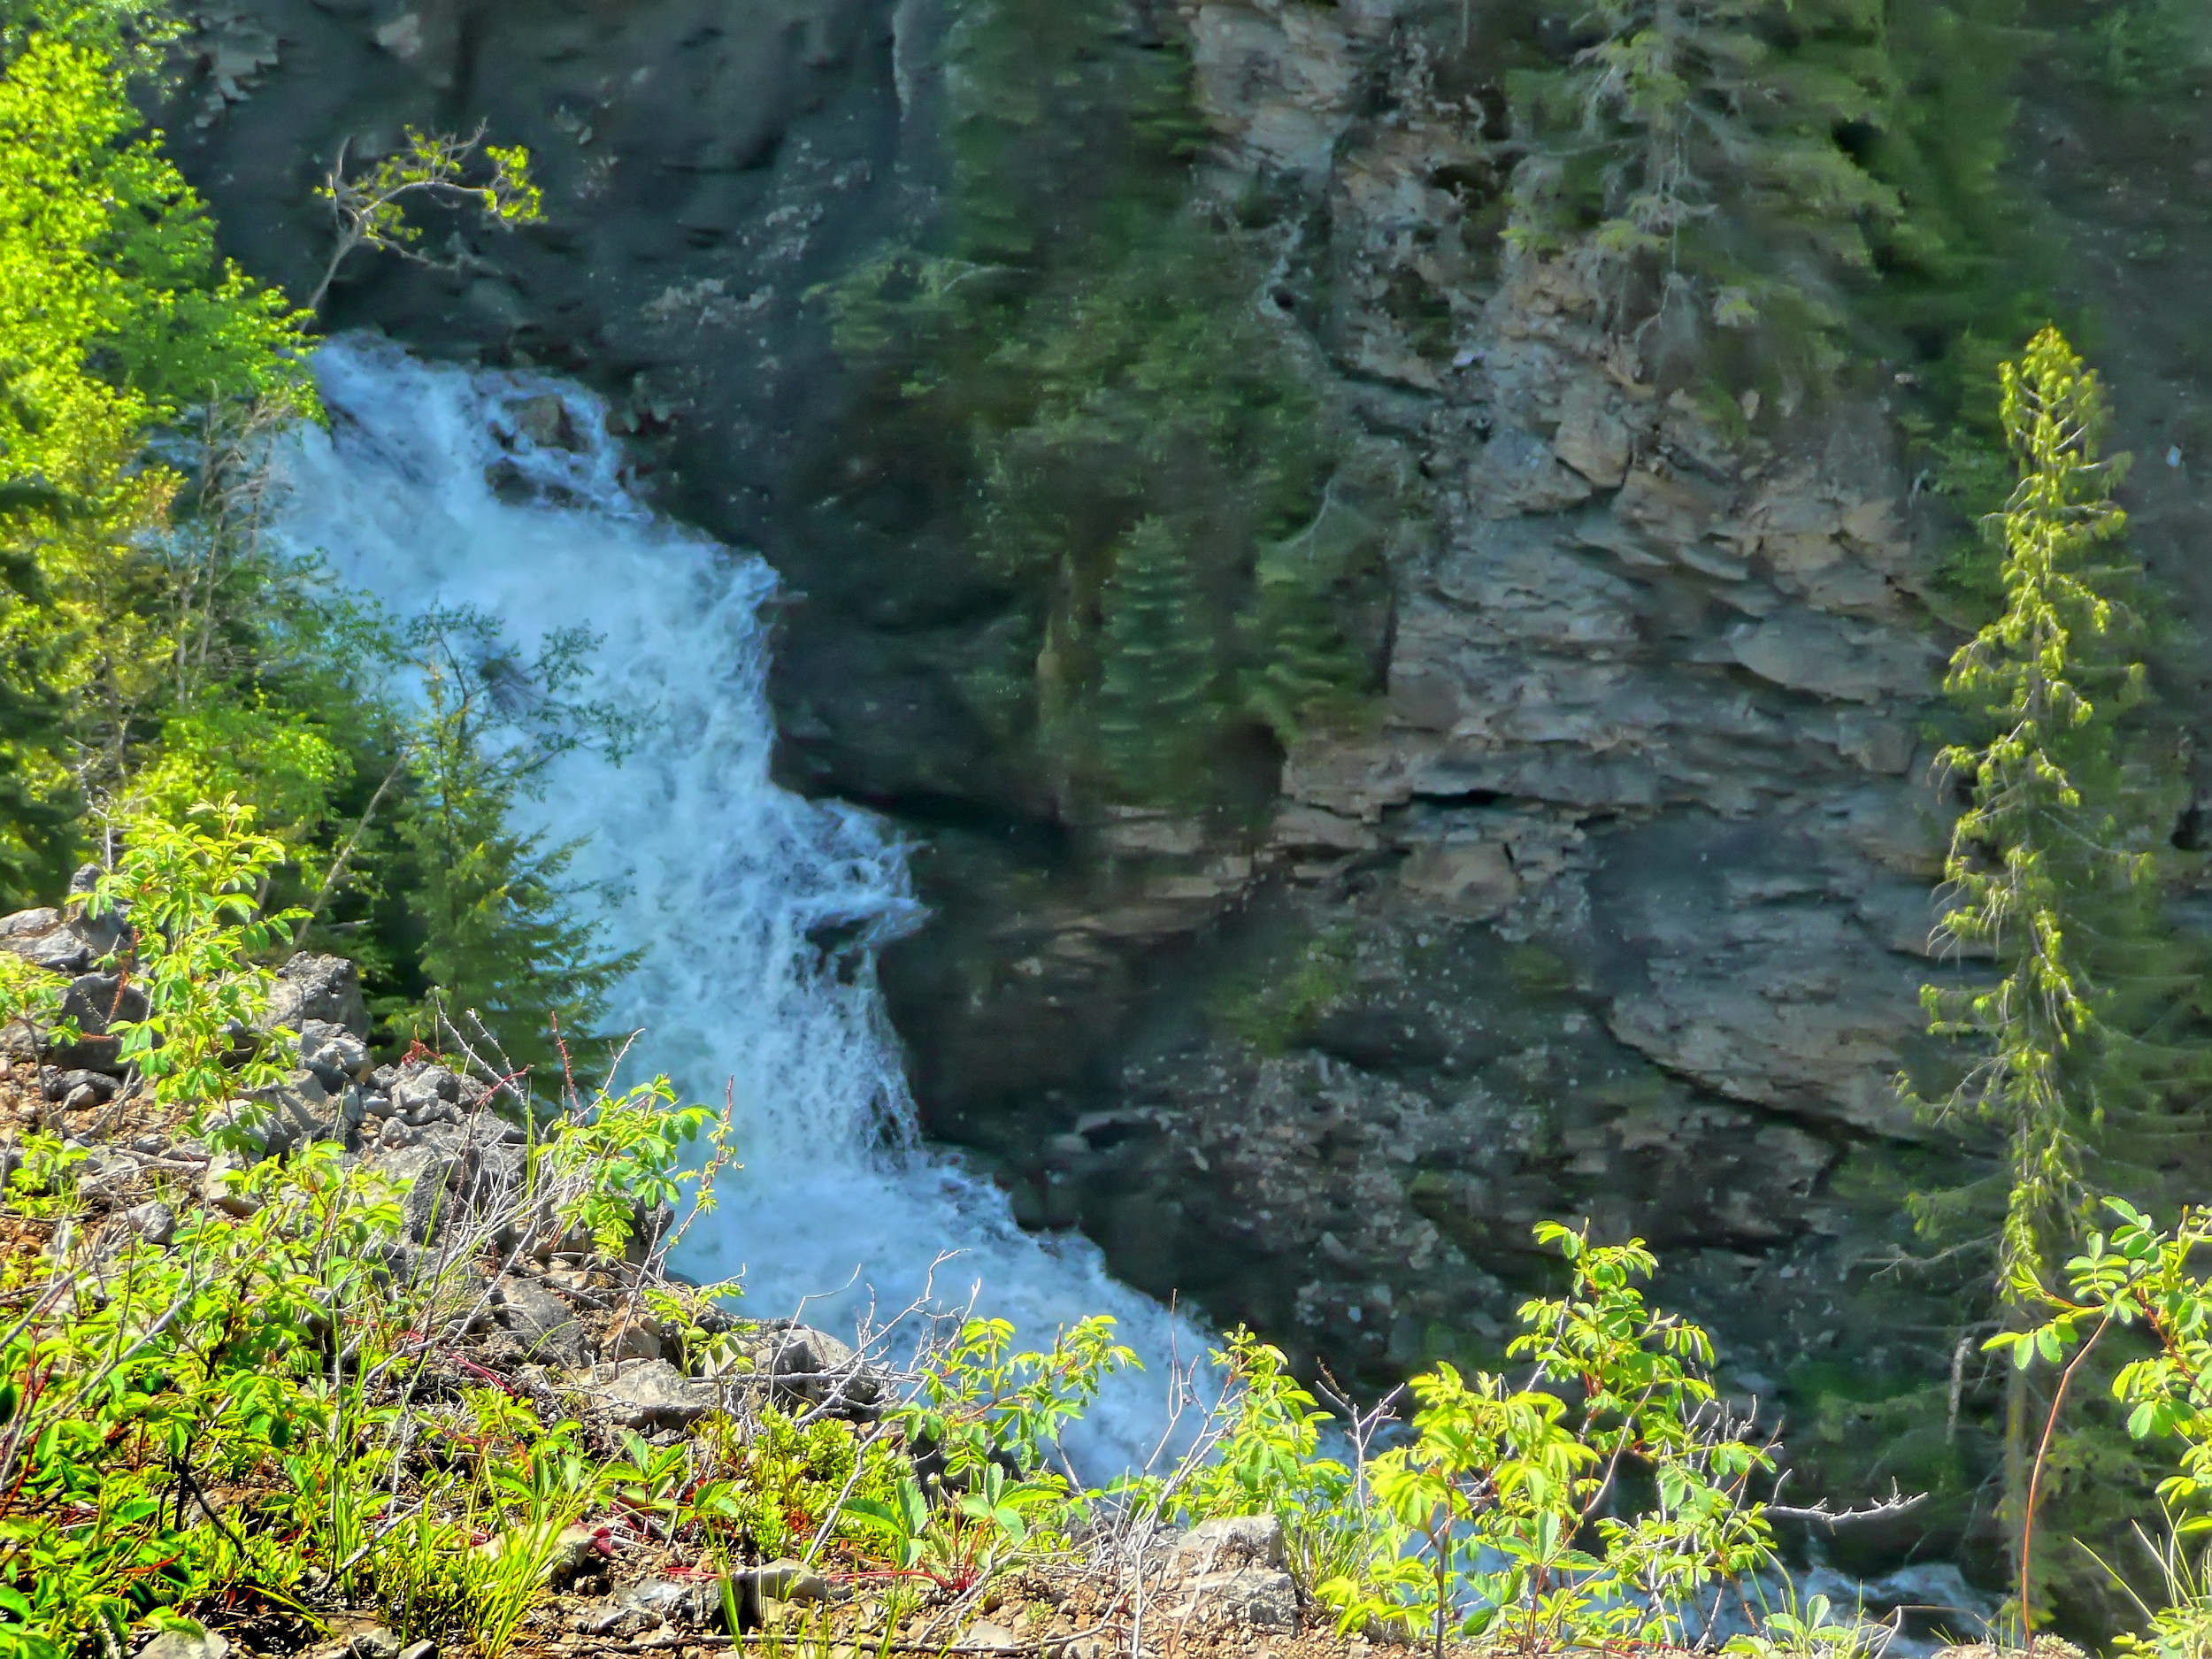
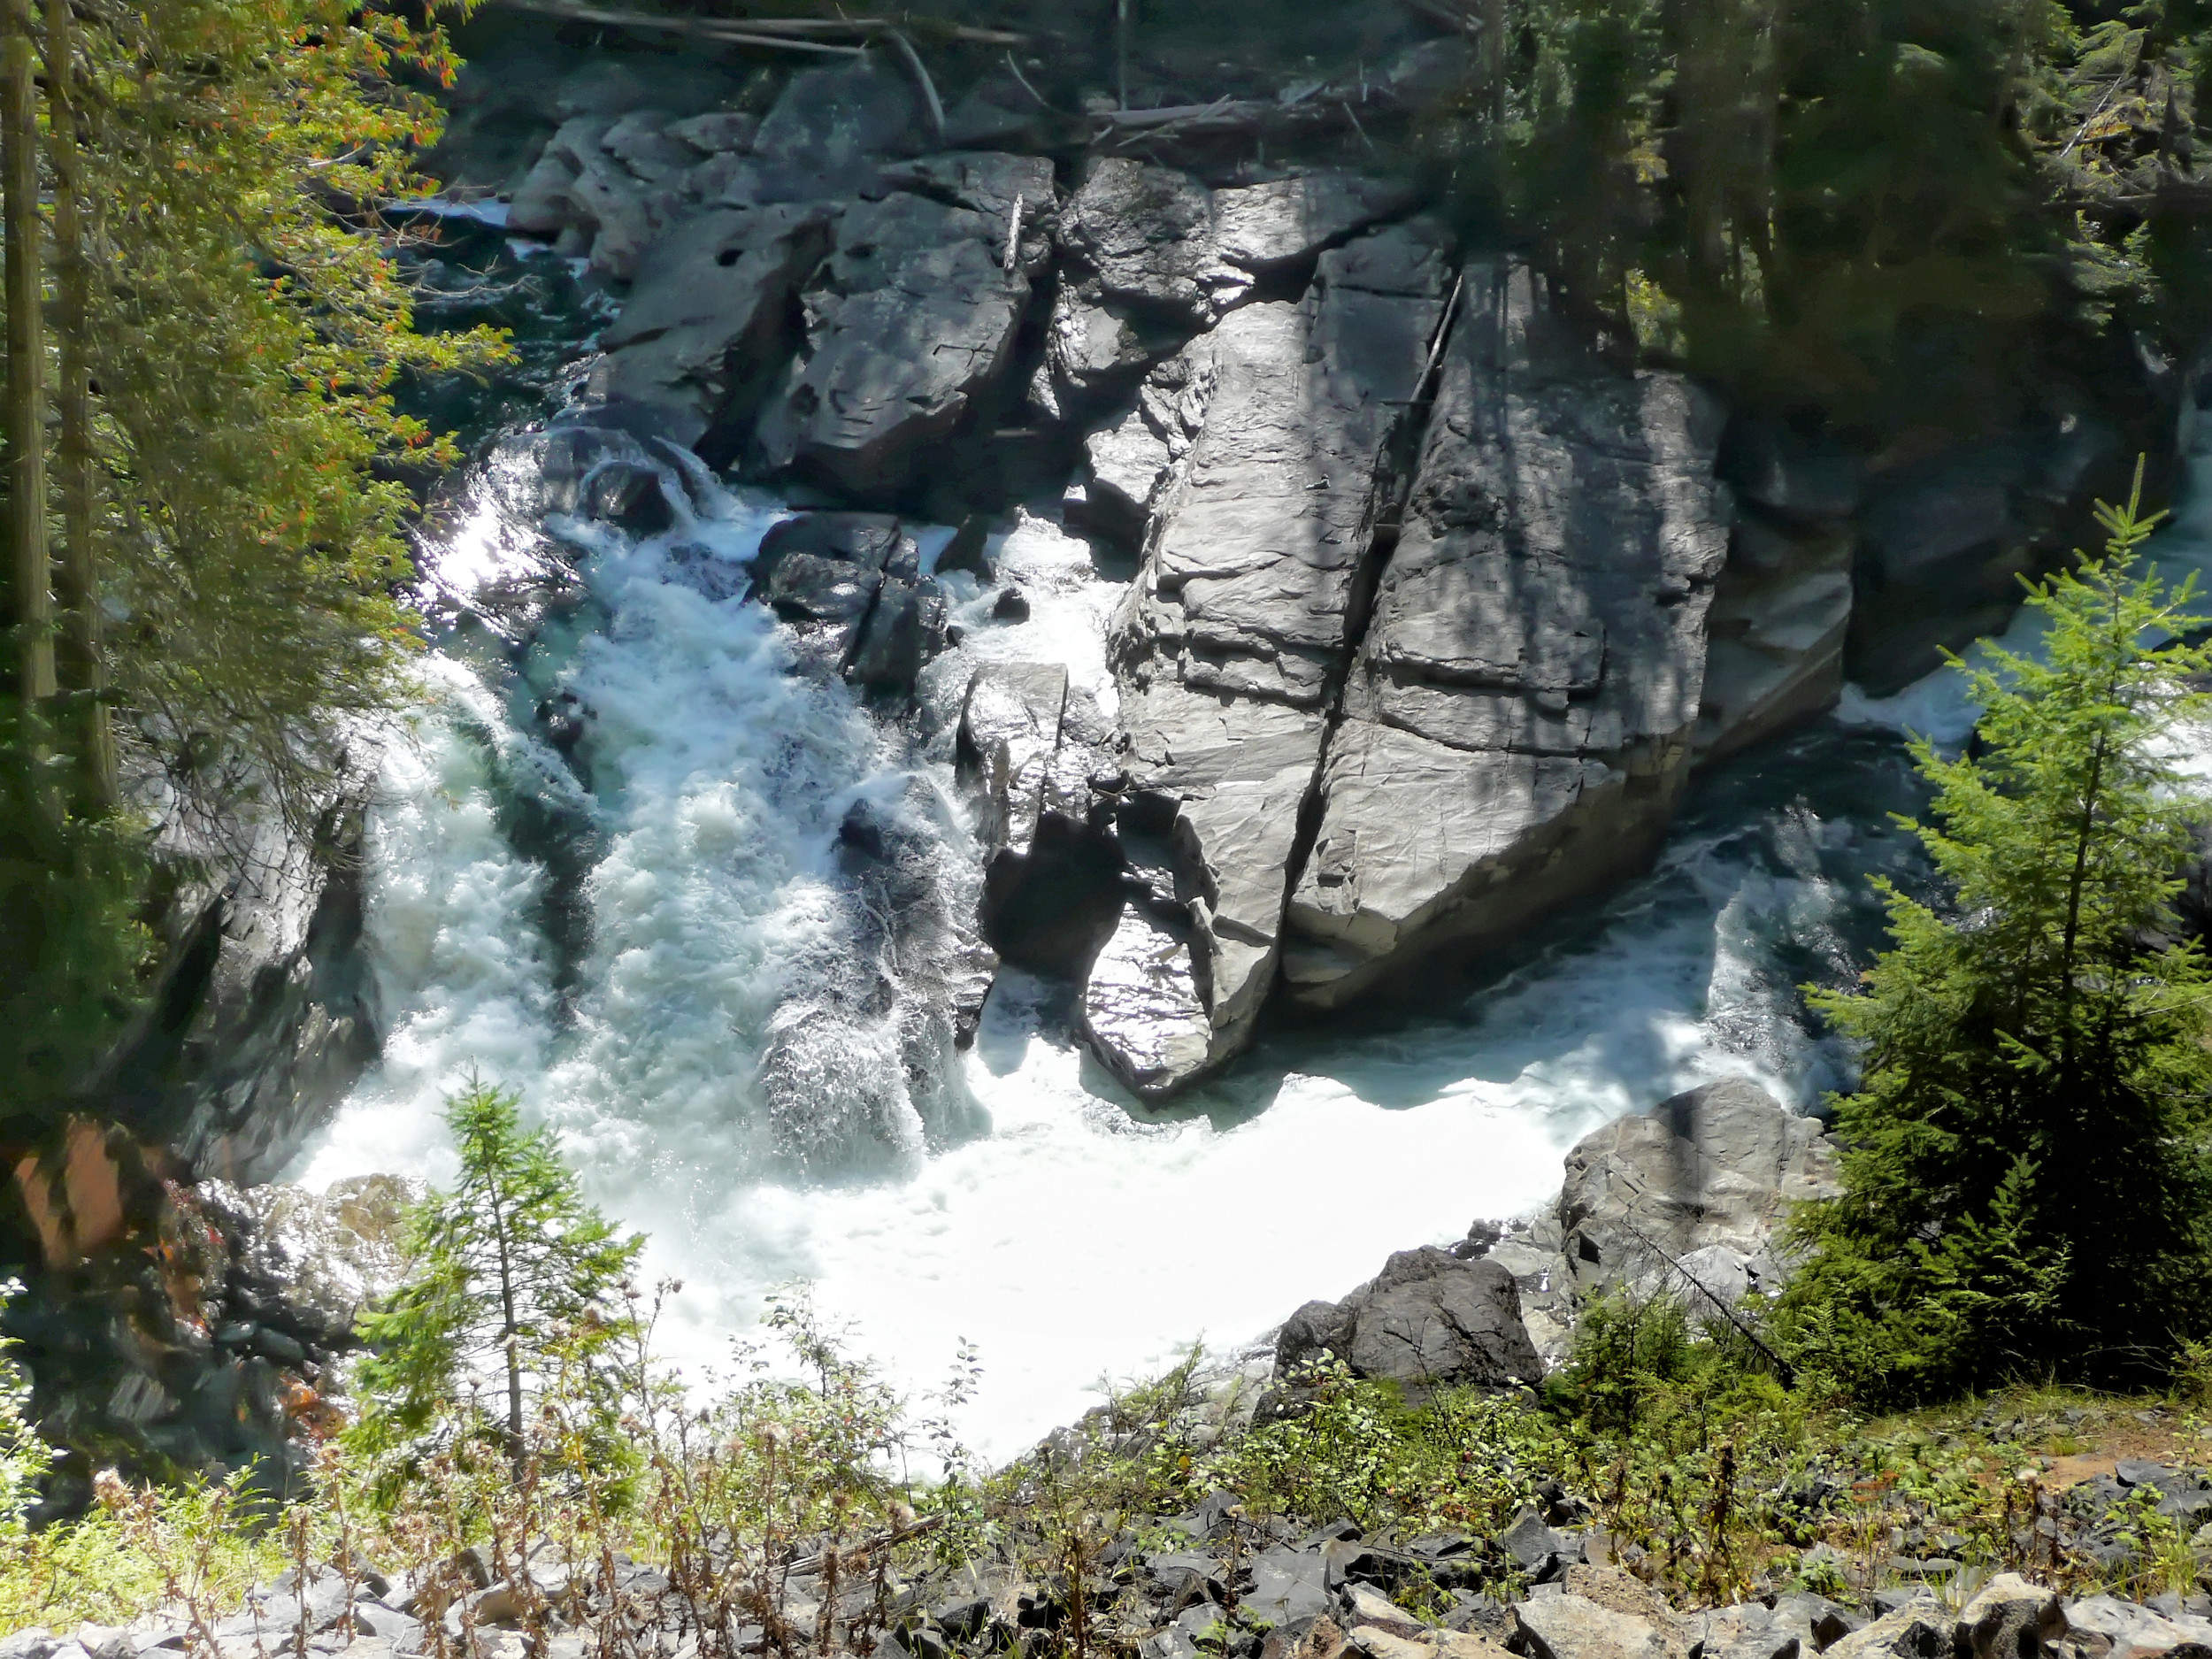
After a trip to the Trophy Meadows, which on its own is a rather short outing, I like to visit the nearby Silvertip Falls. Coming down the Trophy Mountain Access Road, I return to the intersection with the Spahats Creek Road. Turning left here, it is not far to the Silvertip BC Recreation Site. The trail to the falls begins behind the rearmost campsite. It leads along the cascades of Silvertip Creek and climbs up about 100 meters. The trail is narrow and steep, full of rocks and roots, and often muddy. The viewpoint of the falls is less than a kilometer away, but it takes 20 minutes or more to get there.
All along the way I hear the roaring of the falls which drowns out the noise of the tumbling creek nearby. The trees grow dense and tall here, and between them a tangle of Devils Club and other greens. Only at the very end, the dense vegetation opens up for a view of the falls.
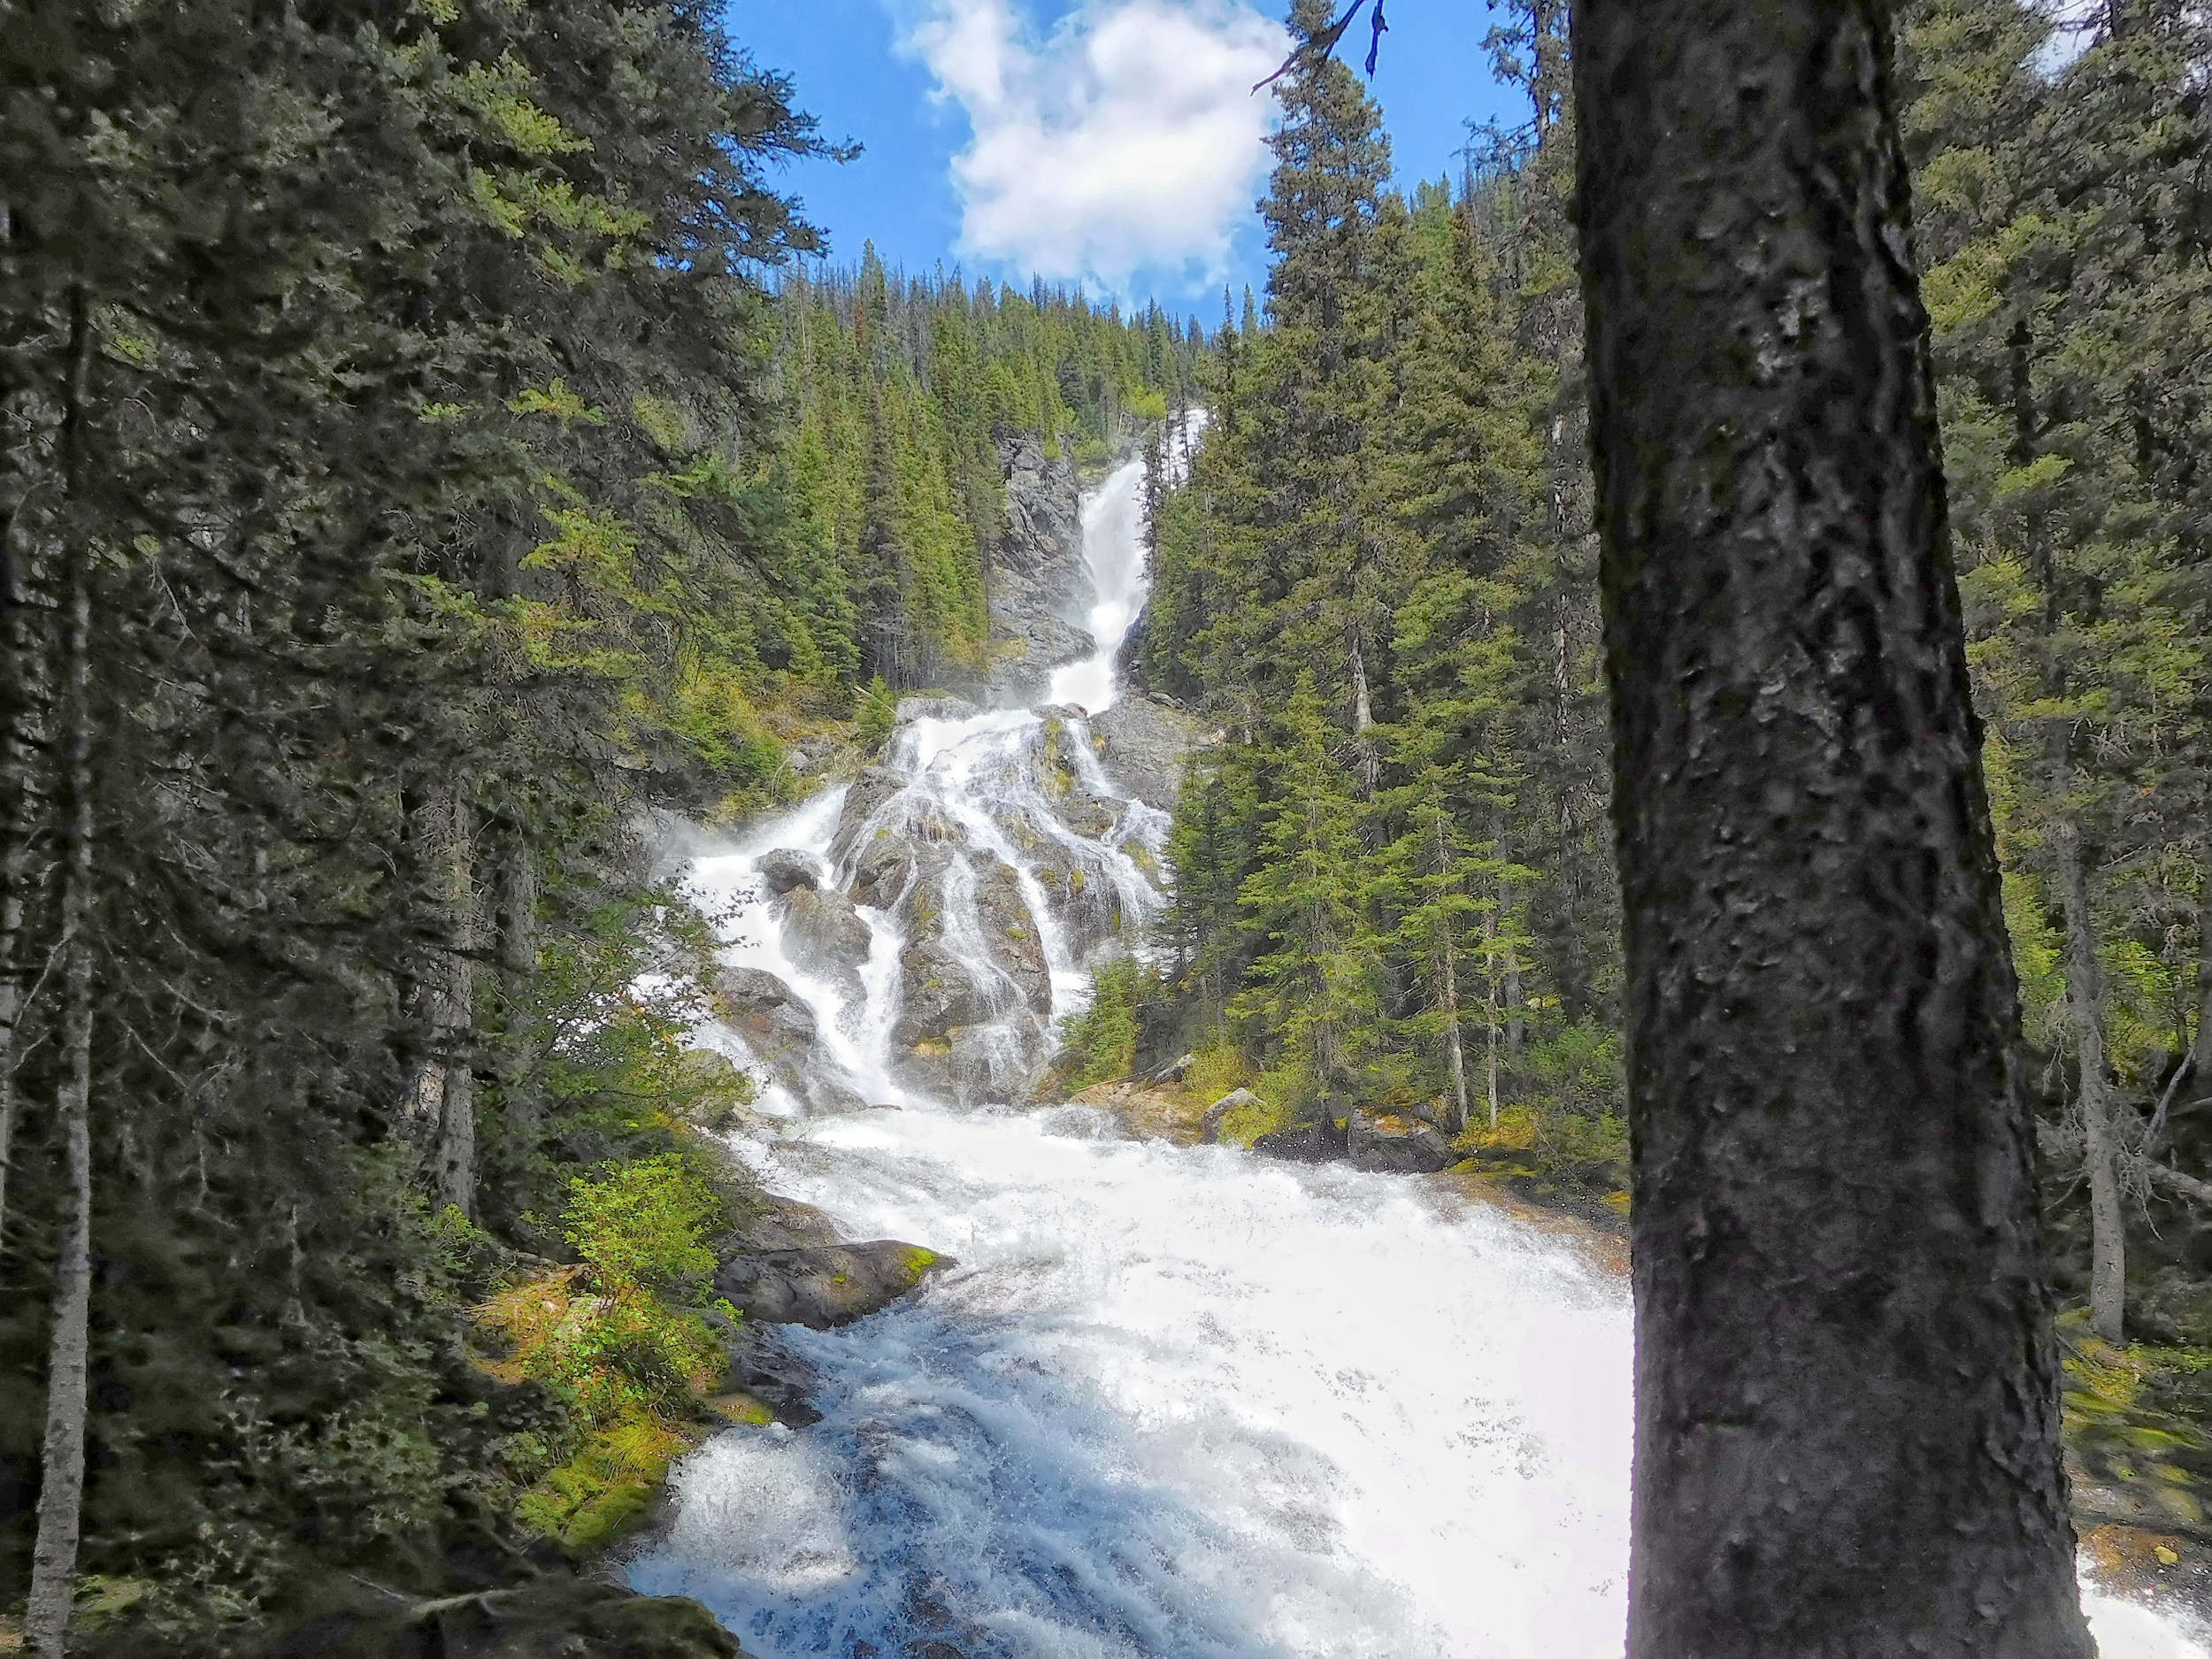
First glimpse of the Silvertip Falls
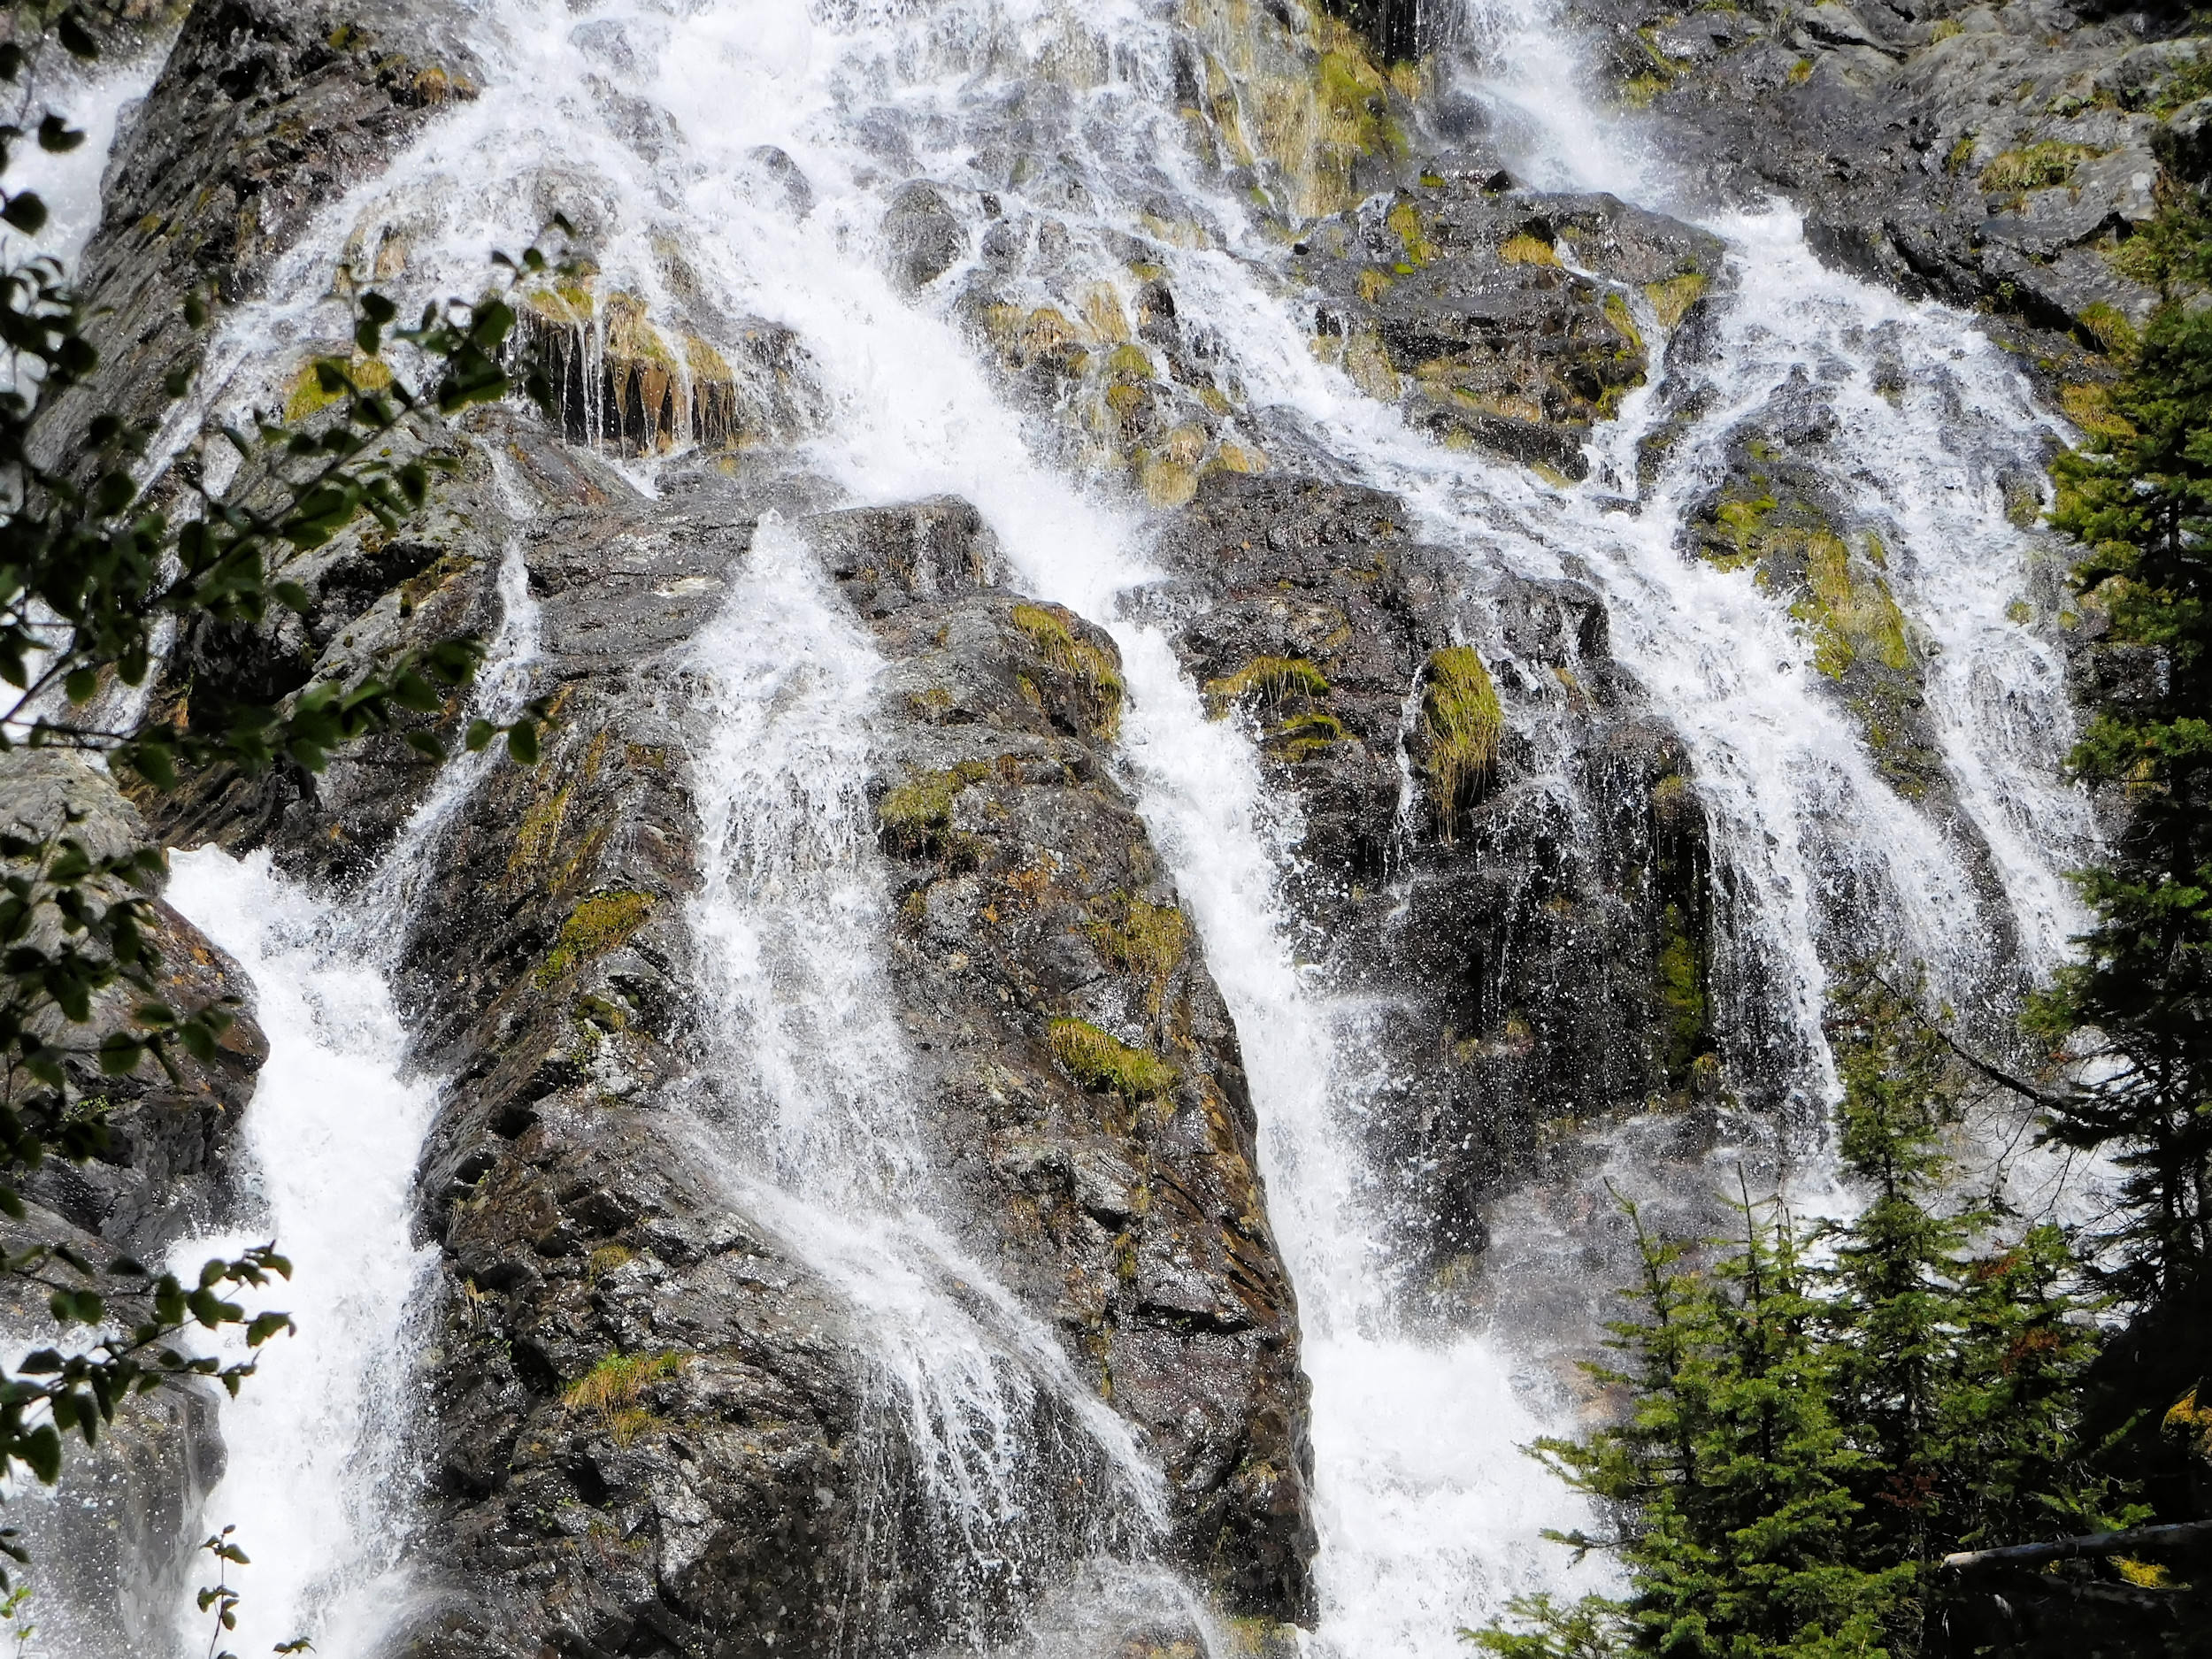
Silvertip Falls Close-Up
Silvertip Falls
| Destination | Distance from Parking Lot |
| Shepherd’s Hut (Meadows) | 3.2 km/1 hr |
| Sheila Lake Lookout | 4.7 km/1.5 hrs |
| Lunch Ridge | 4.9 km/ 1.6 hrs |
| Sheila Lake | 6.3 km />2 hrs |
| Min. Elev. | 1671 m |
| Max Elev. | 2126 m |
| Ascent | 455 m |
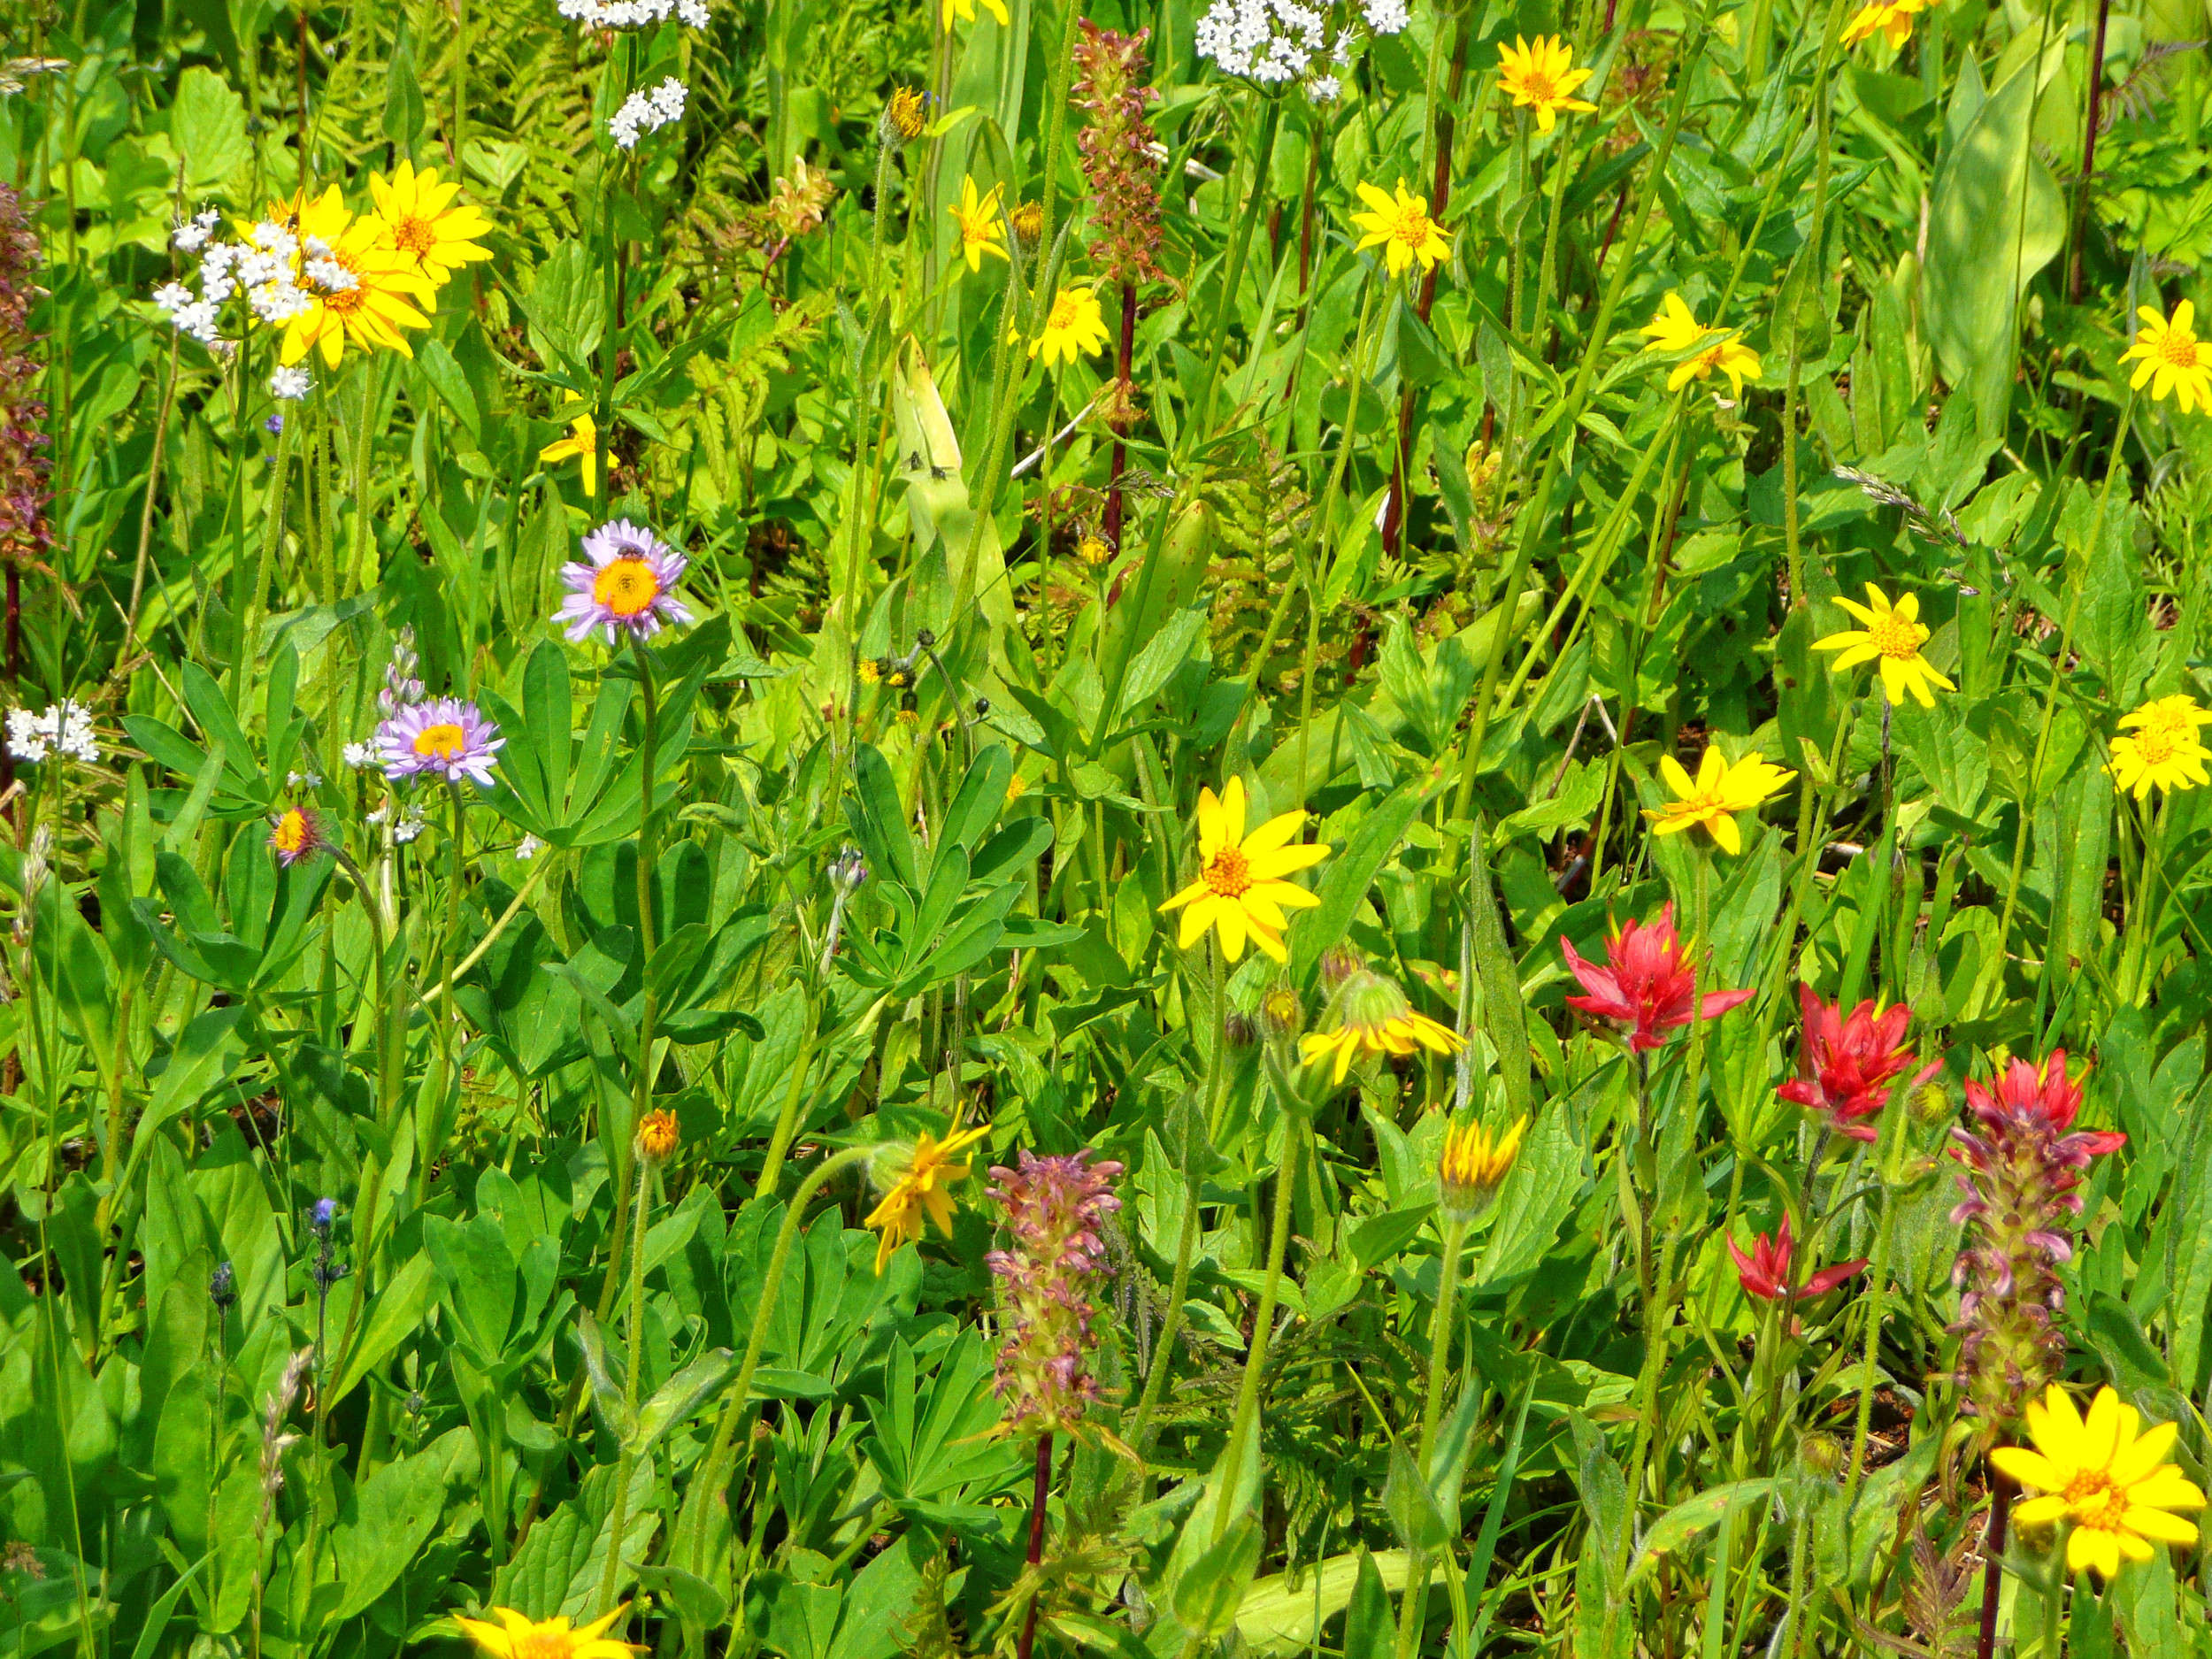
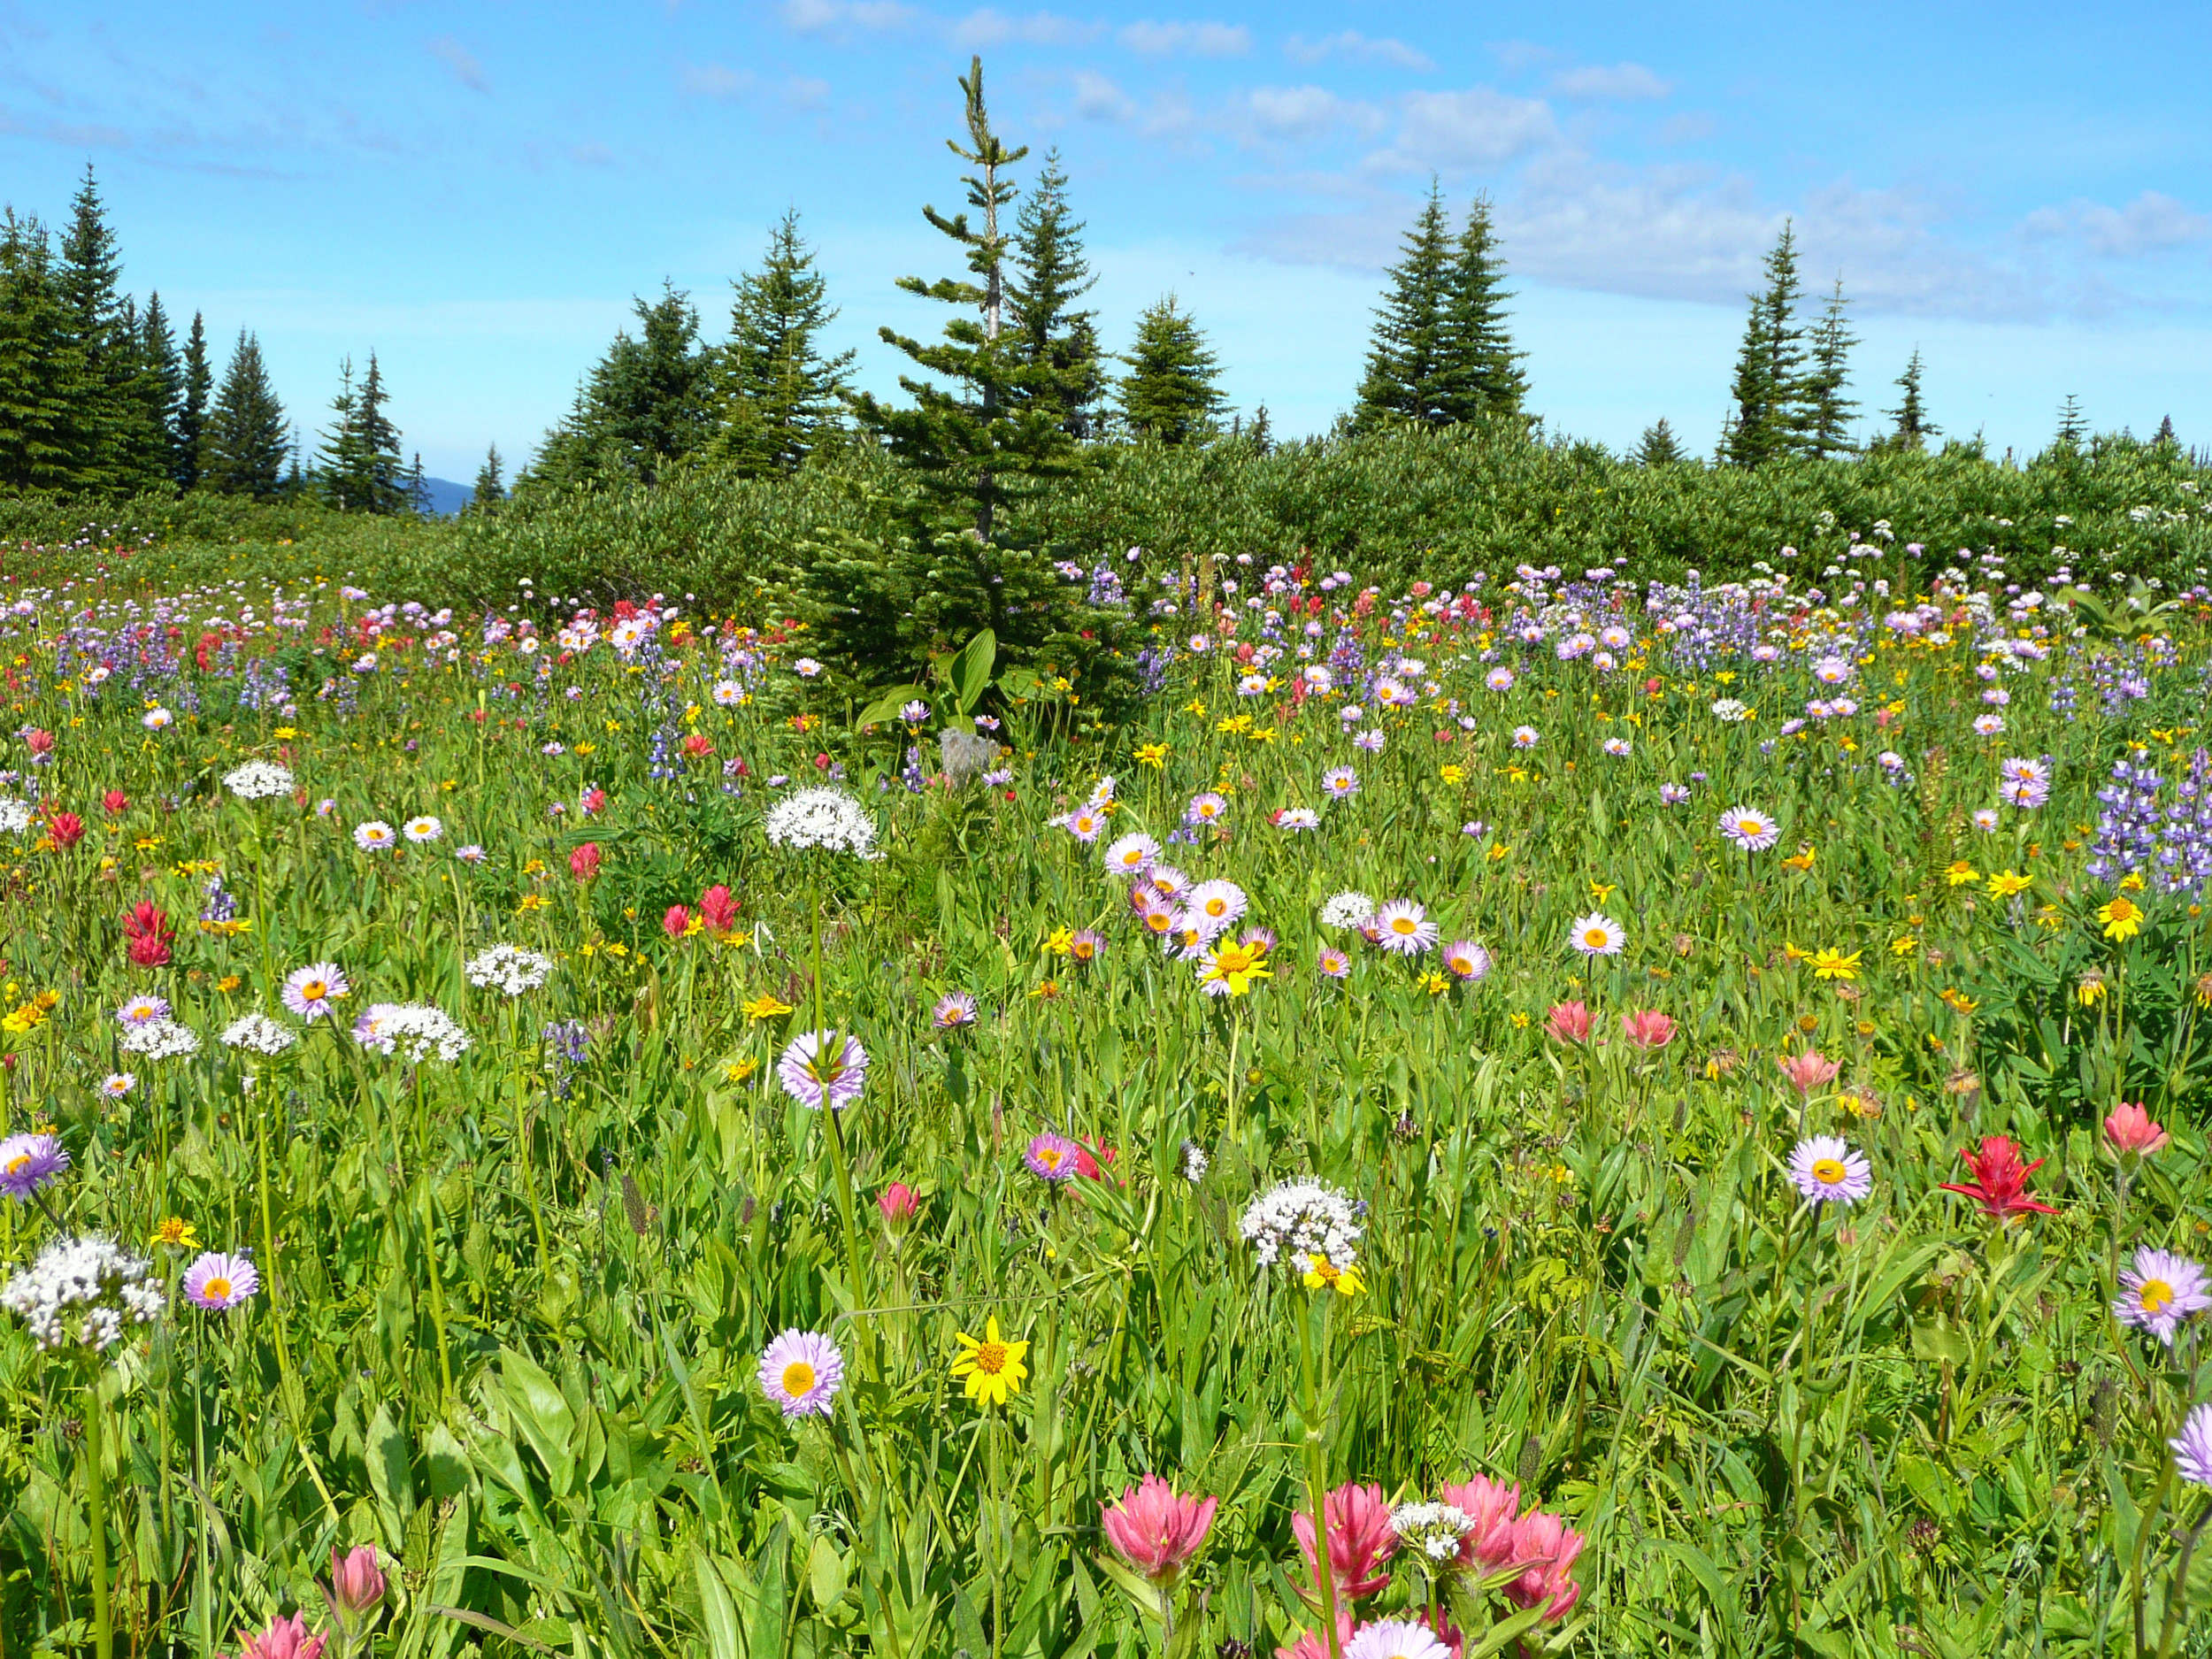
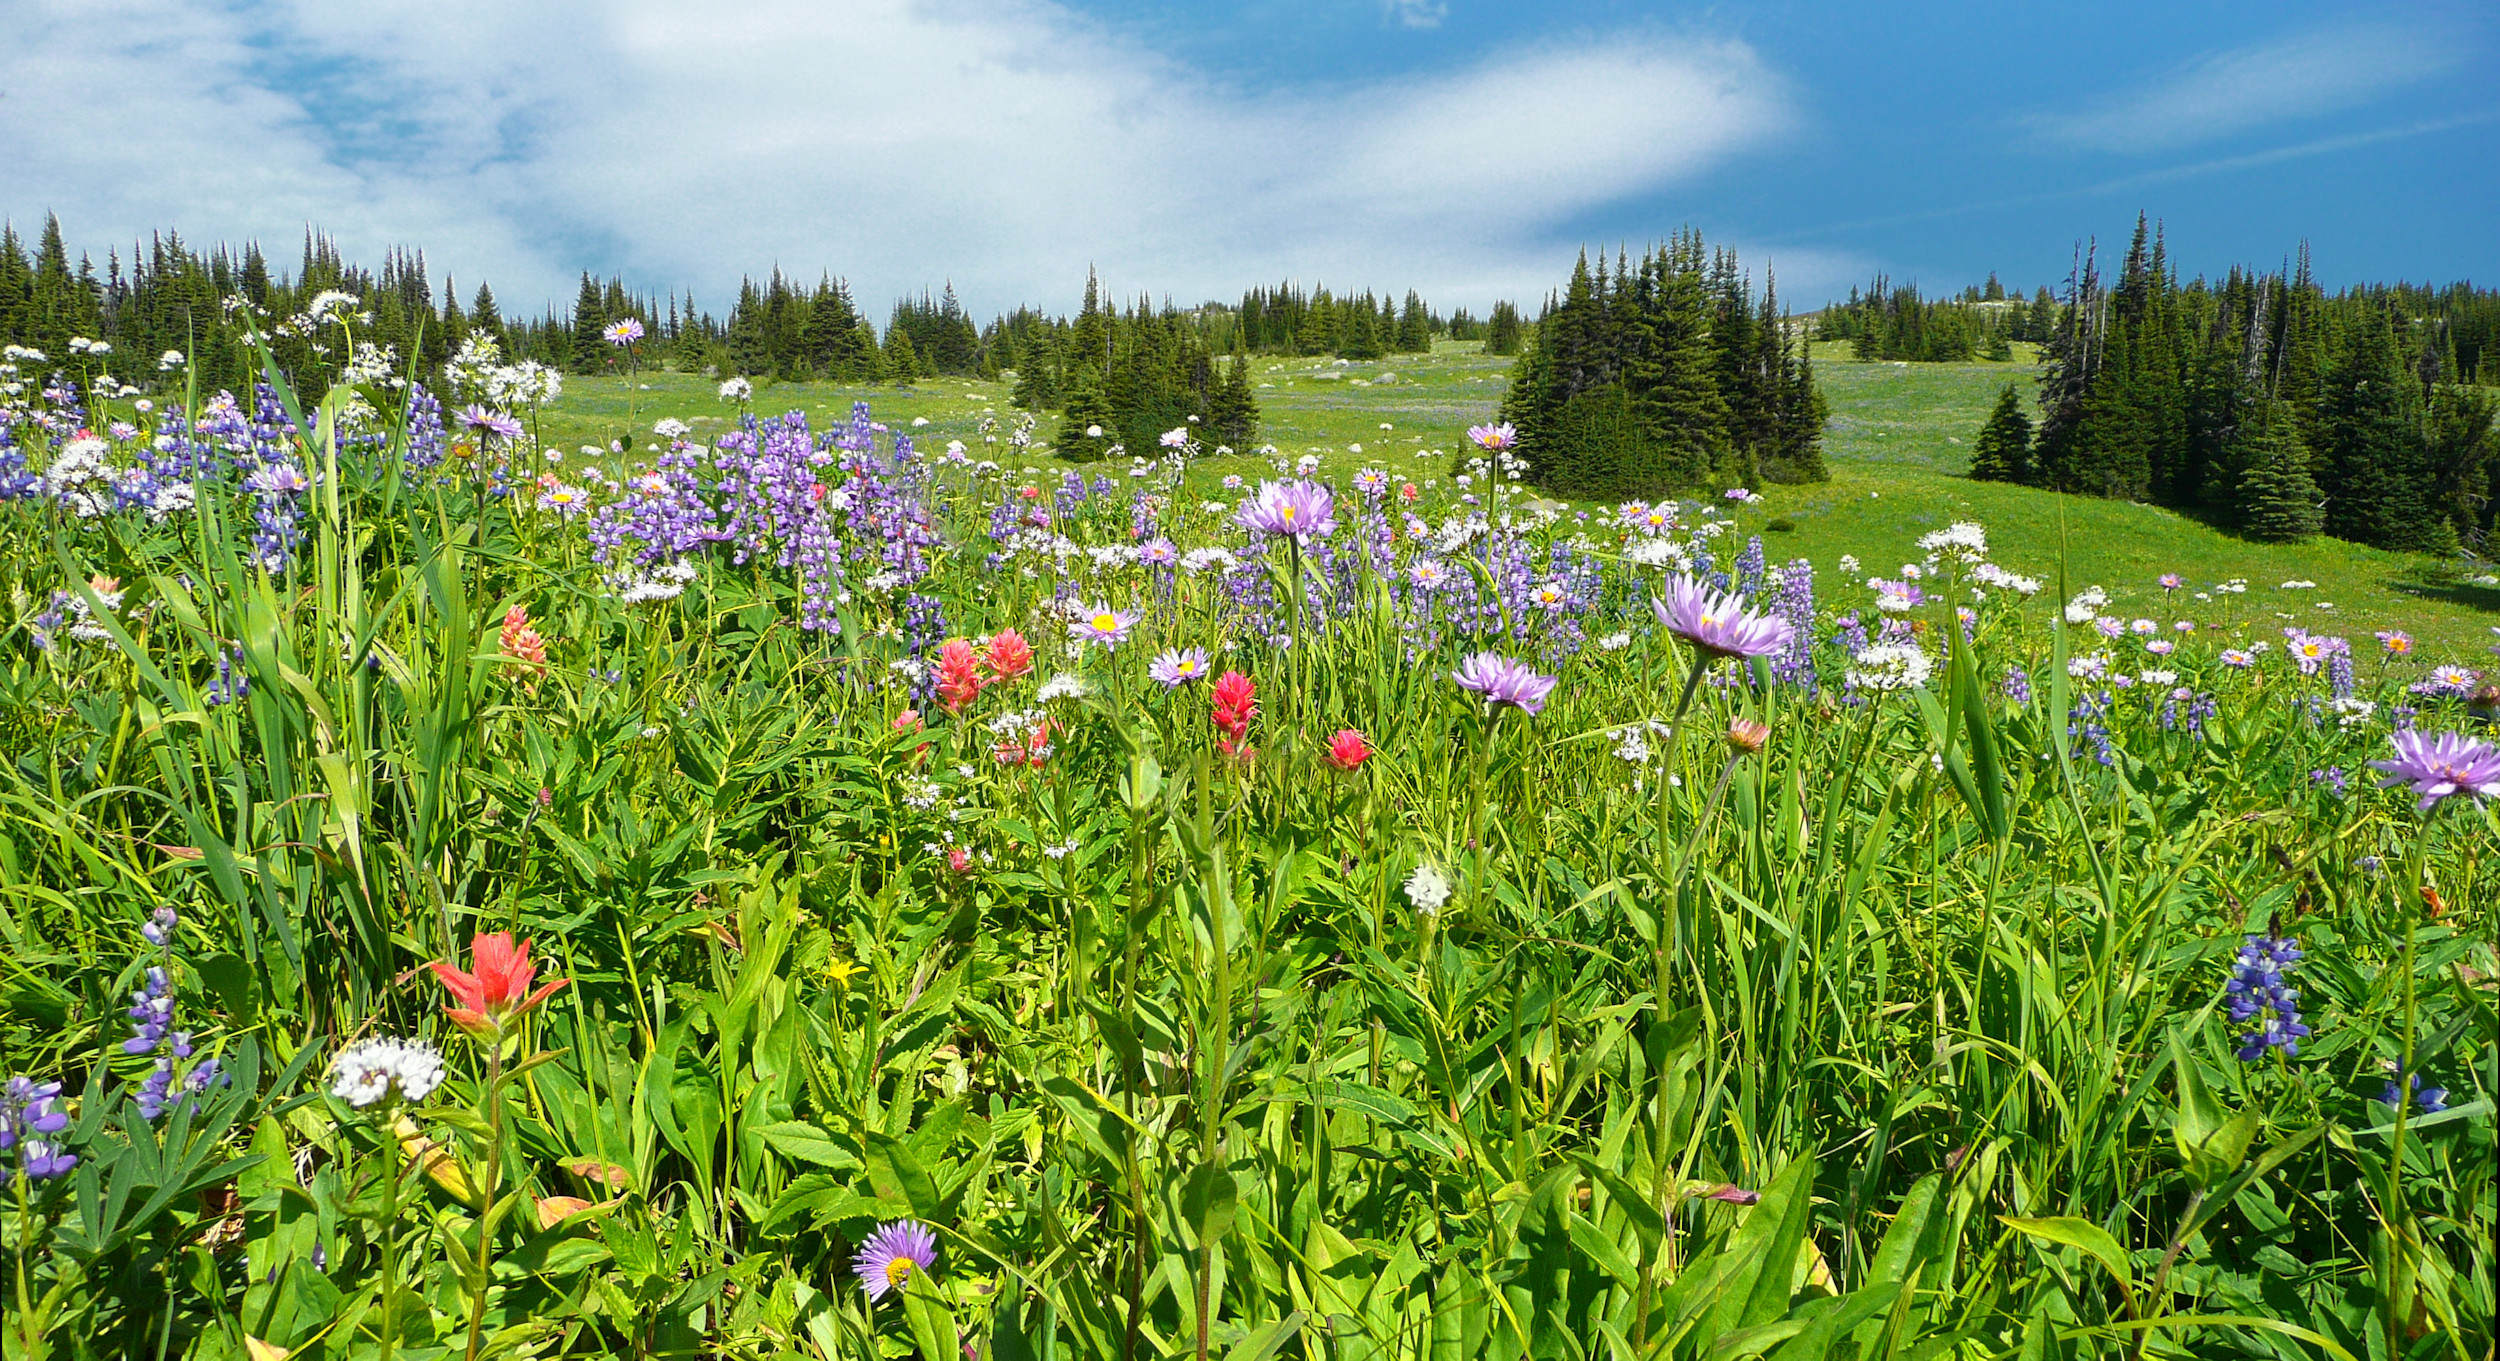
From the park road in Wells Gray Provincial Park, the 13 km long Trophy Mountain Access Road turns off just past the exit to Spahats Falls and switchbacks up to the Trophy Mountain trailhead at 1690 meters elevation. The famous Trophy Meadows are only a one-hour-walk away, uphill through the forest. It is usually in the beginning of August that the colourful summer bloom is at its peak. The exact time and extent of the bloom is largely dependent on the weather and varies each year. However, a visit to the meadows is always rewarding, even outside of the main bloom.
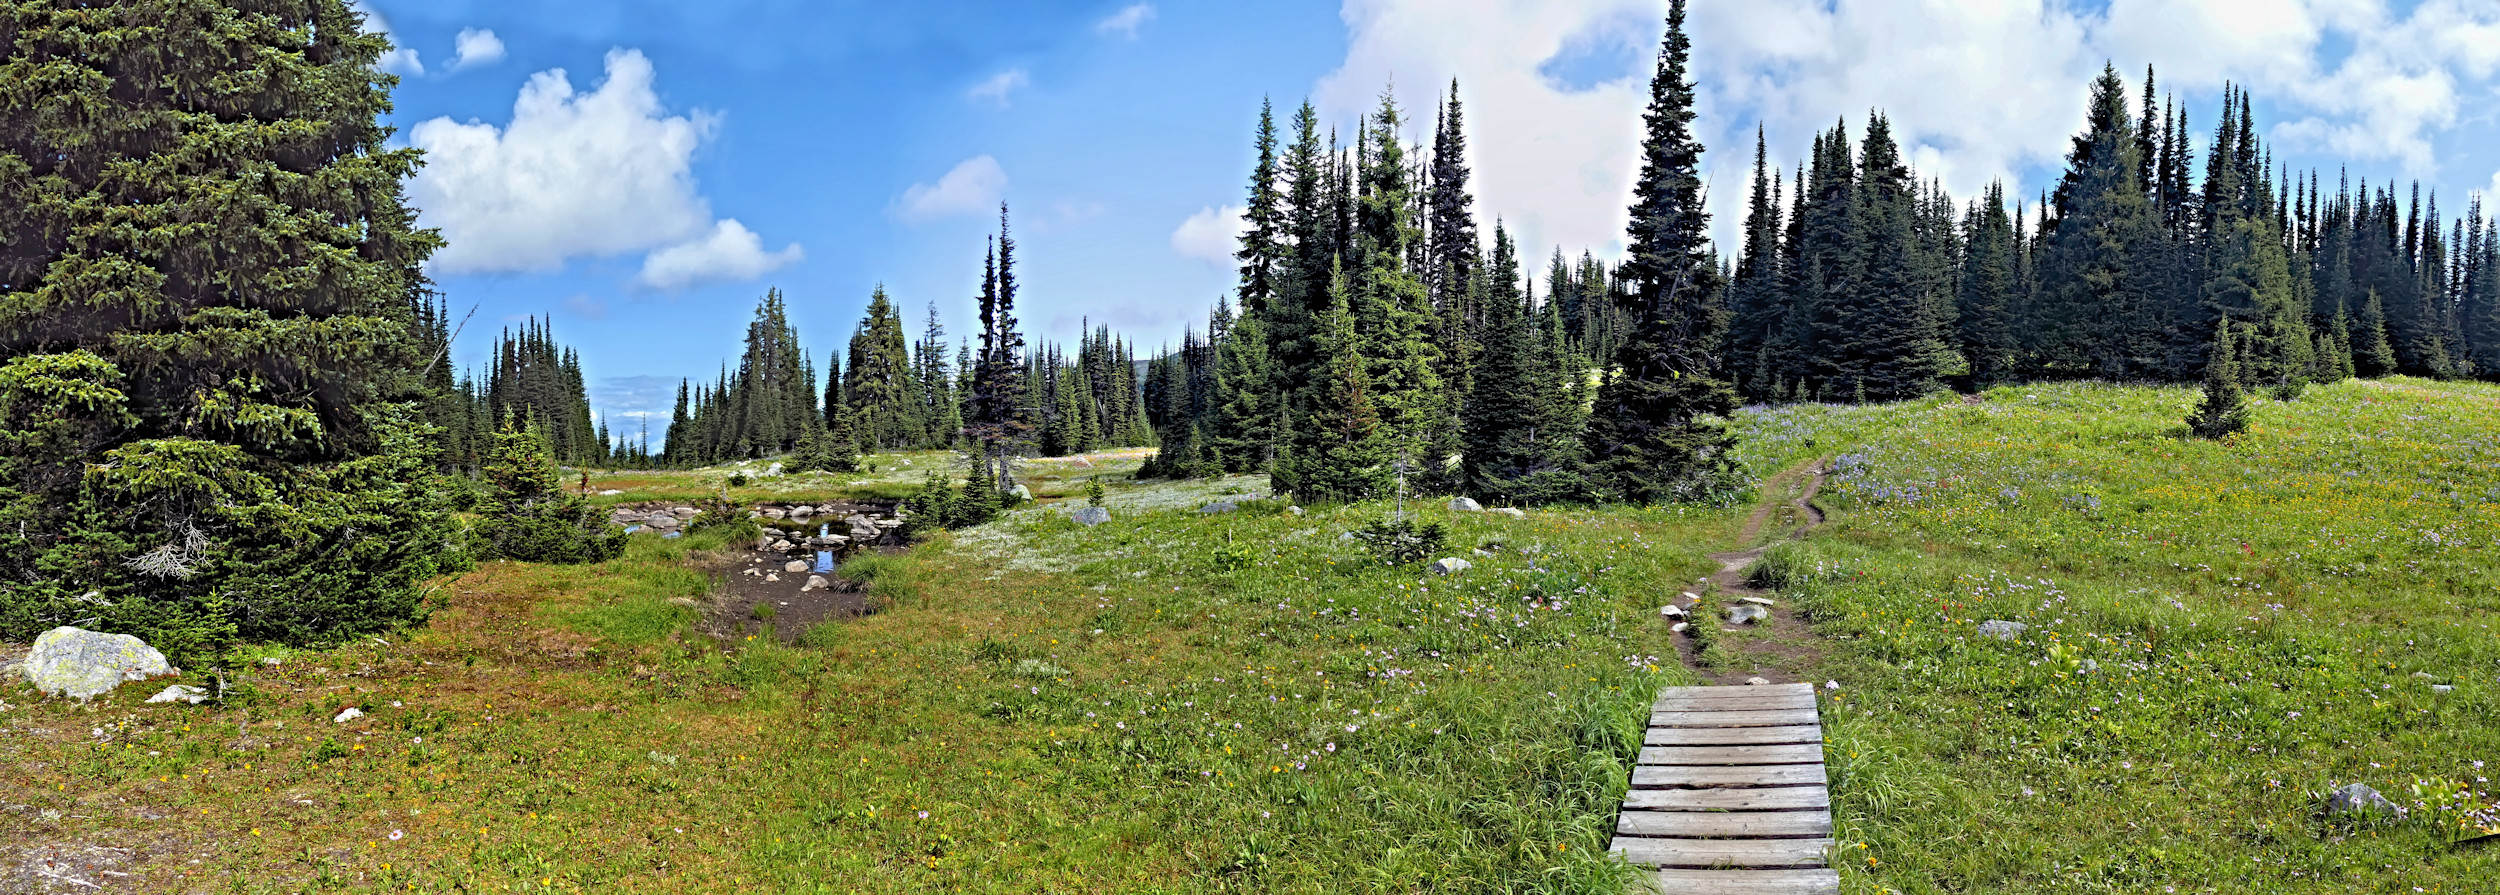
Boardwalk across the meadows
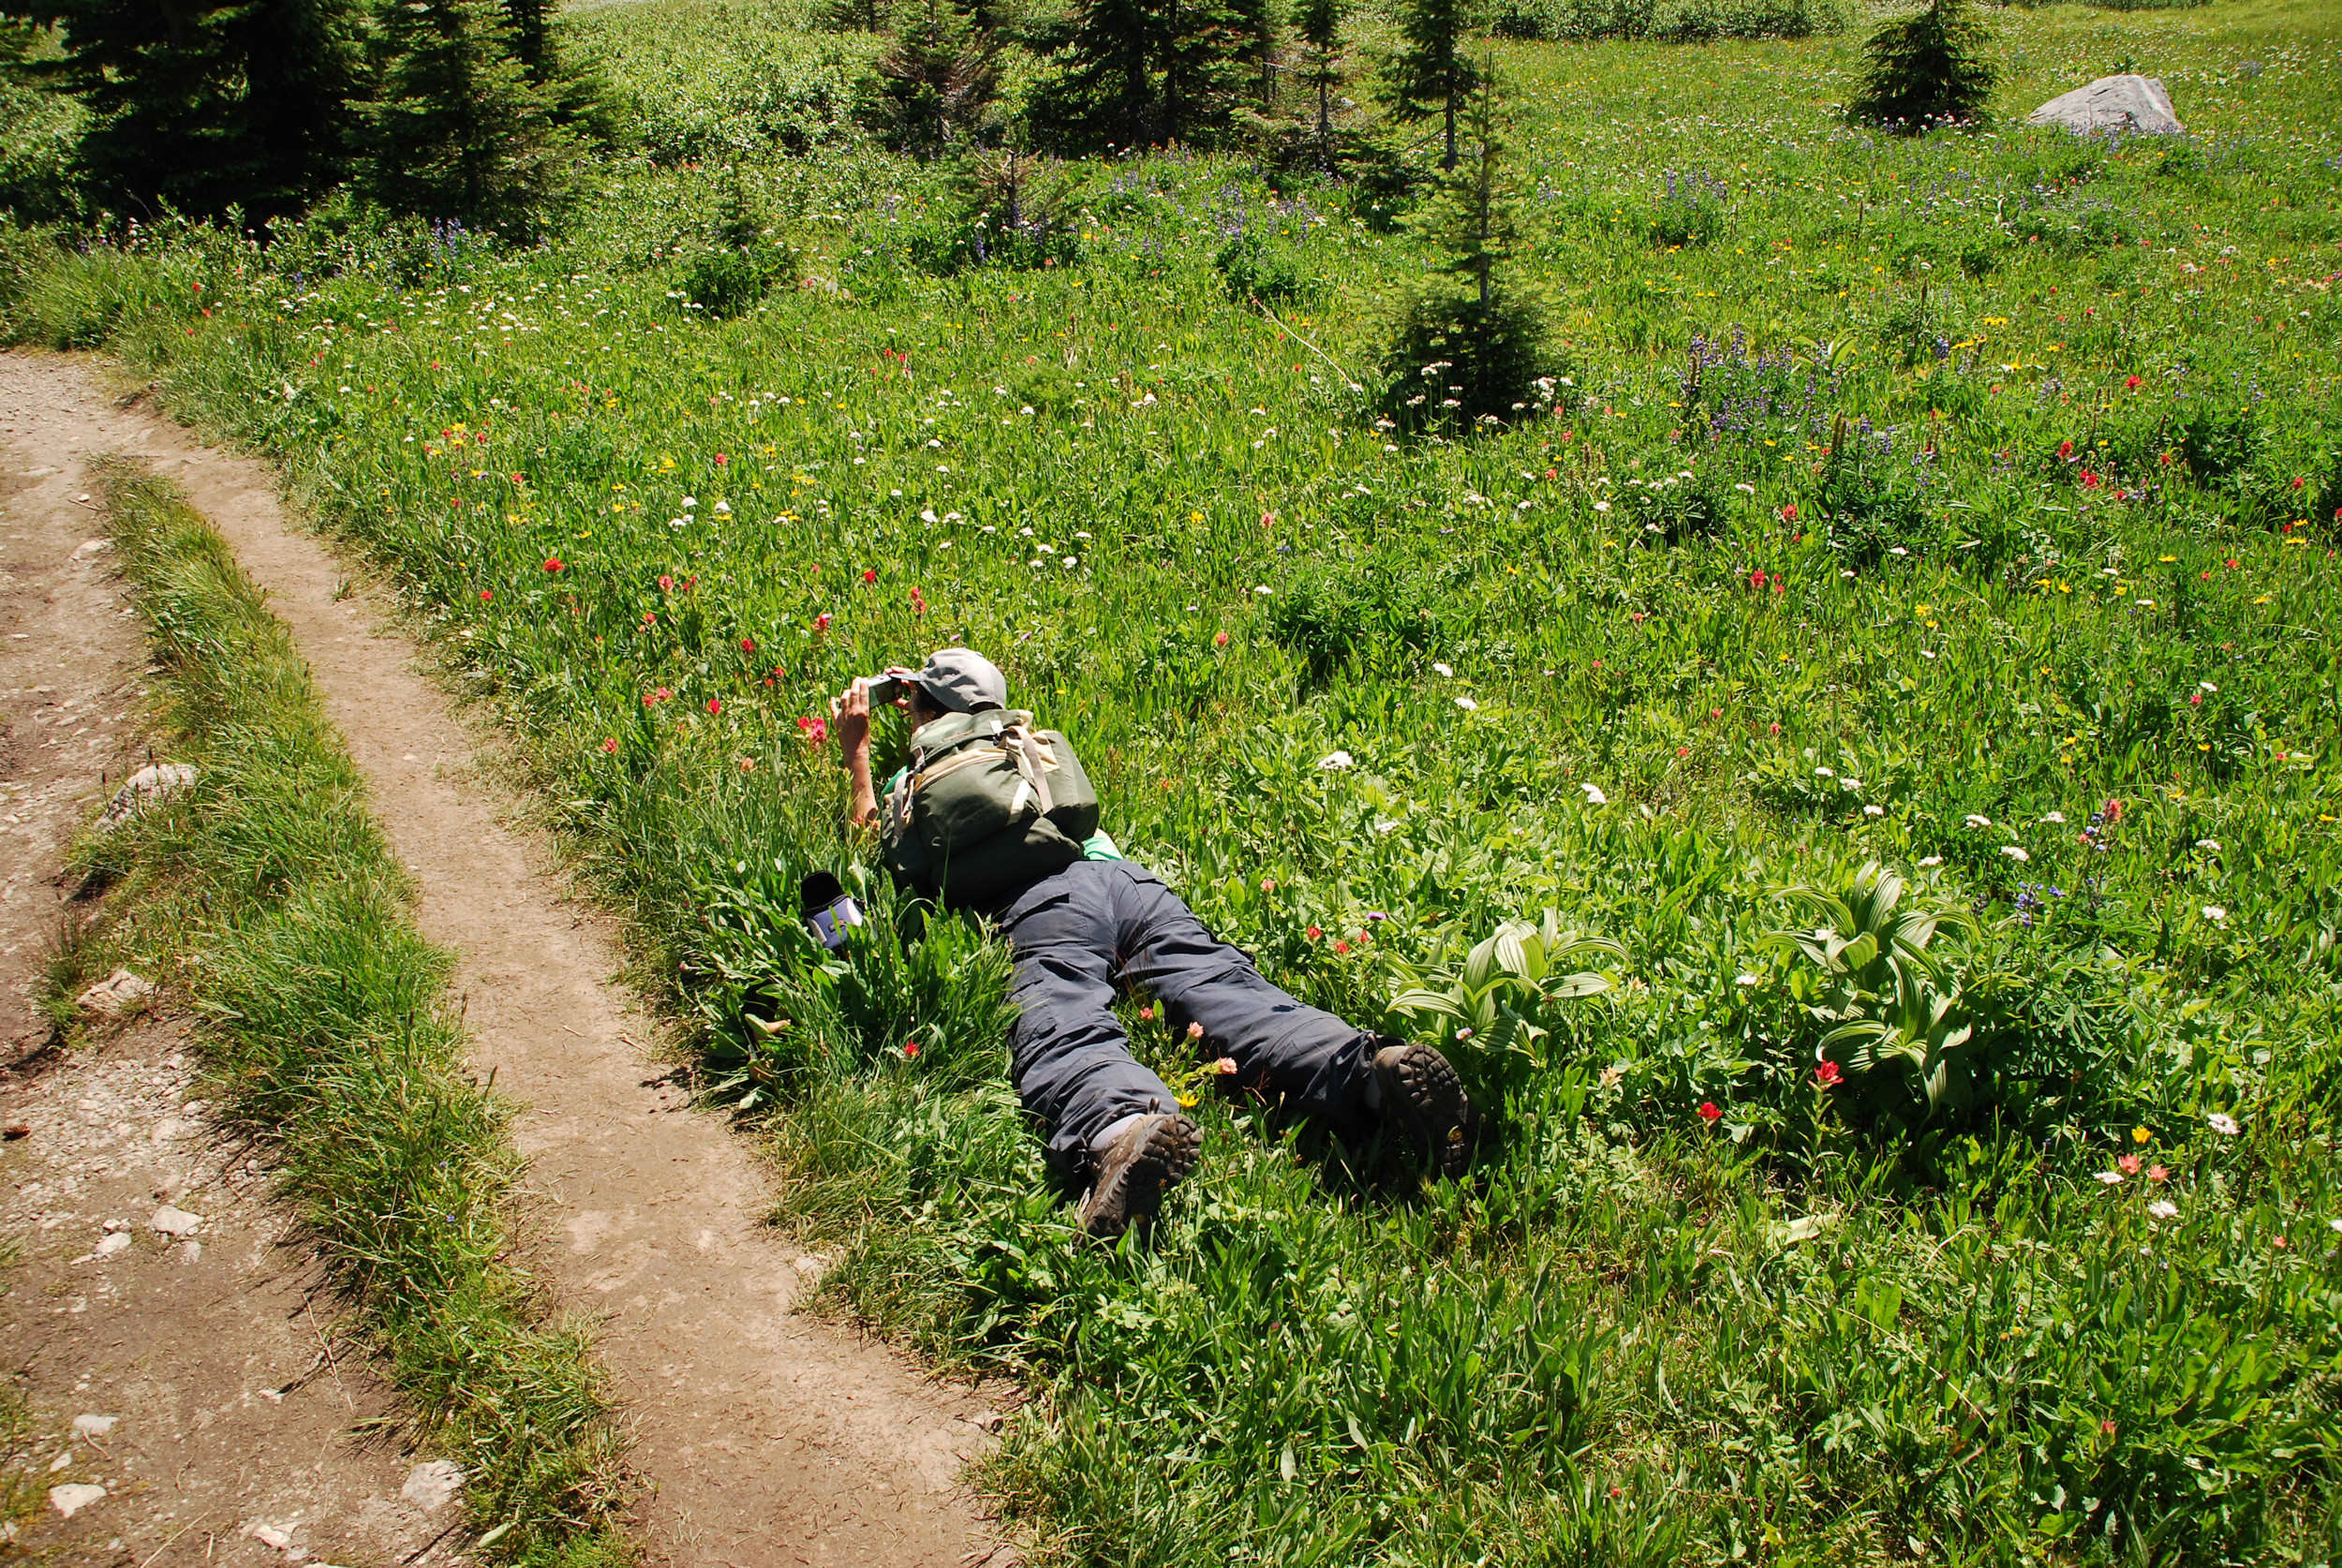
When the flowers are nice, a lot of time is spent in the meadows, just taking pictures. Instead of hiking all the way up into the alpine, a good way to extend a visit to the meadows is to hike a loop in the subalpine. The route leads up to Sheila Lake Lookout and Lunch Ridge (Little Hill), meanders through the Plateau of the Lakes and ends at Sheila Lake. From there it is only a short climb back to the main trail to close the loop.
The flower meadows spread over a range of elevations. If you are lucky enough to pick the right time, the upper and lower meadows are in bloom at the same time and a colourful carpet of flowers reaches from where you first leave the trees and enter the meadows, past the Shepherd’s Hut and far above.
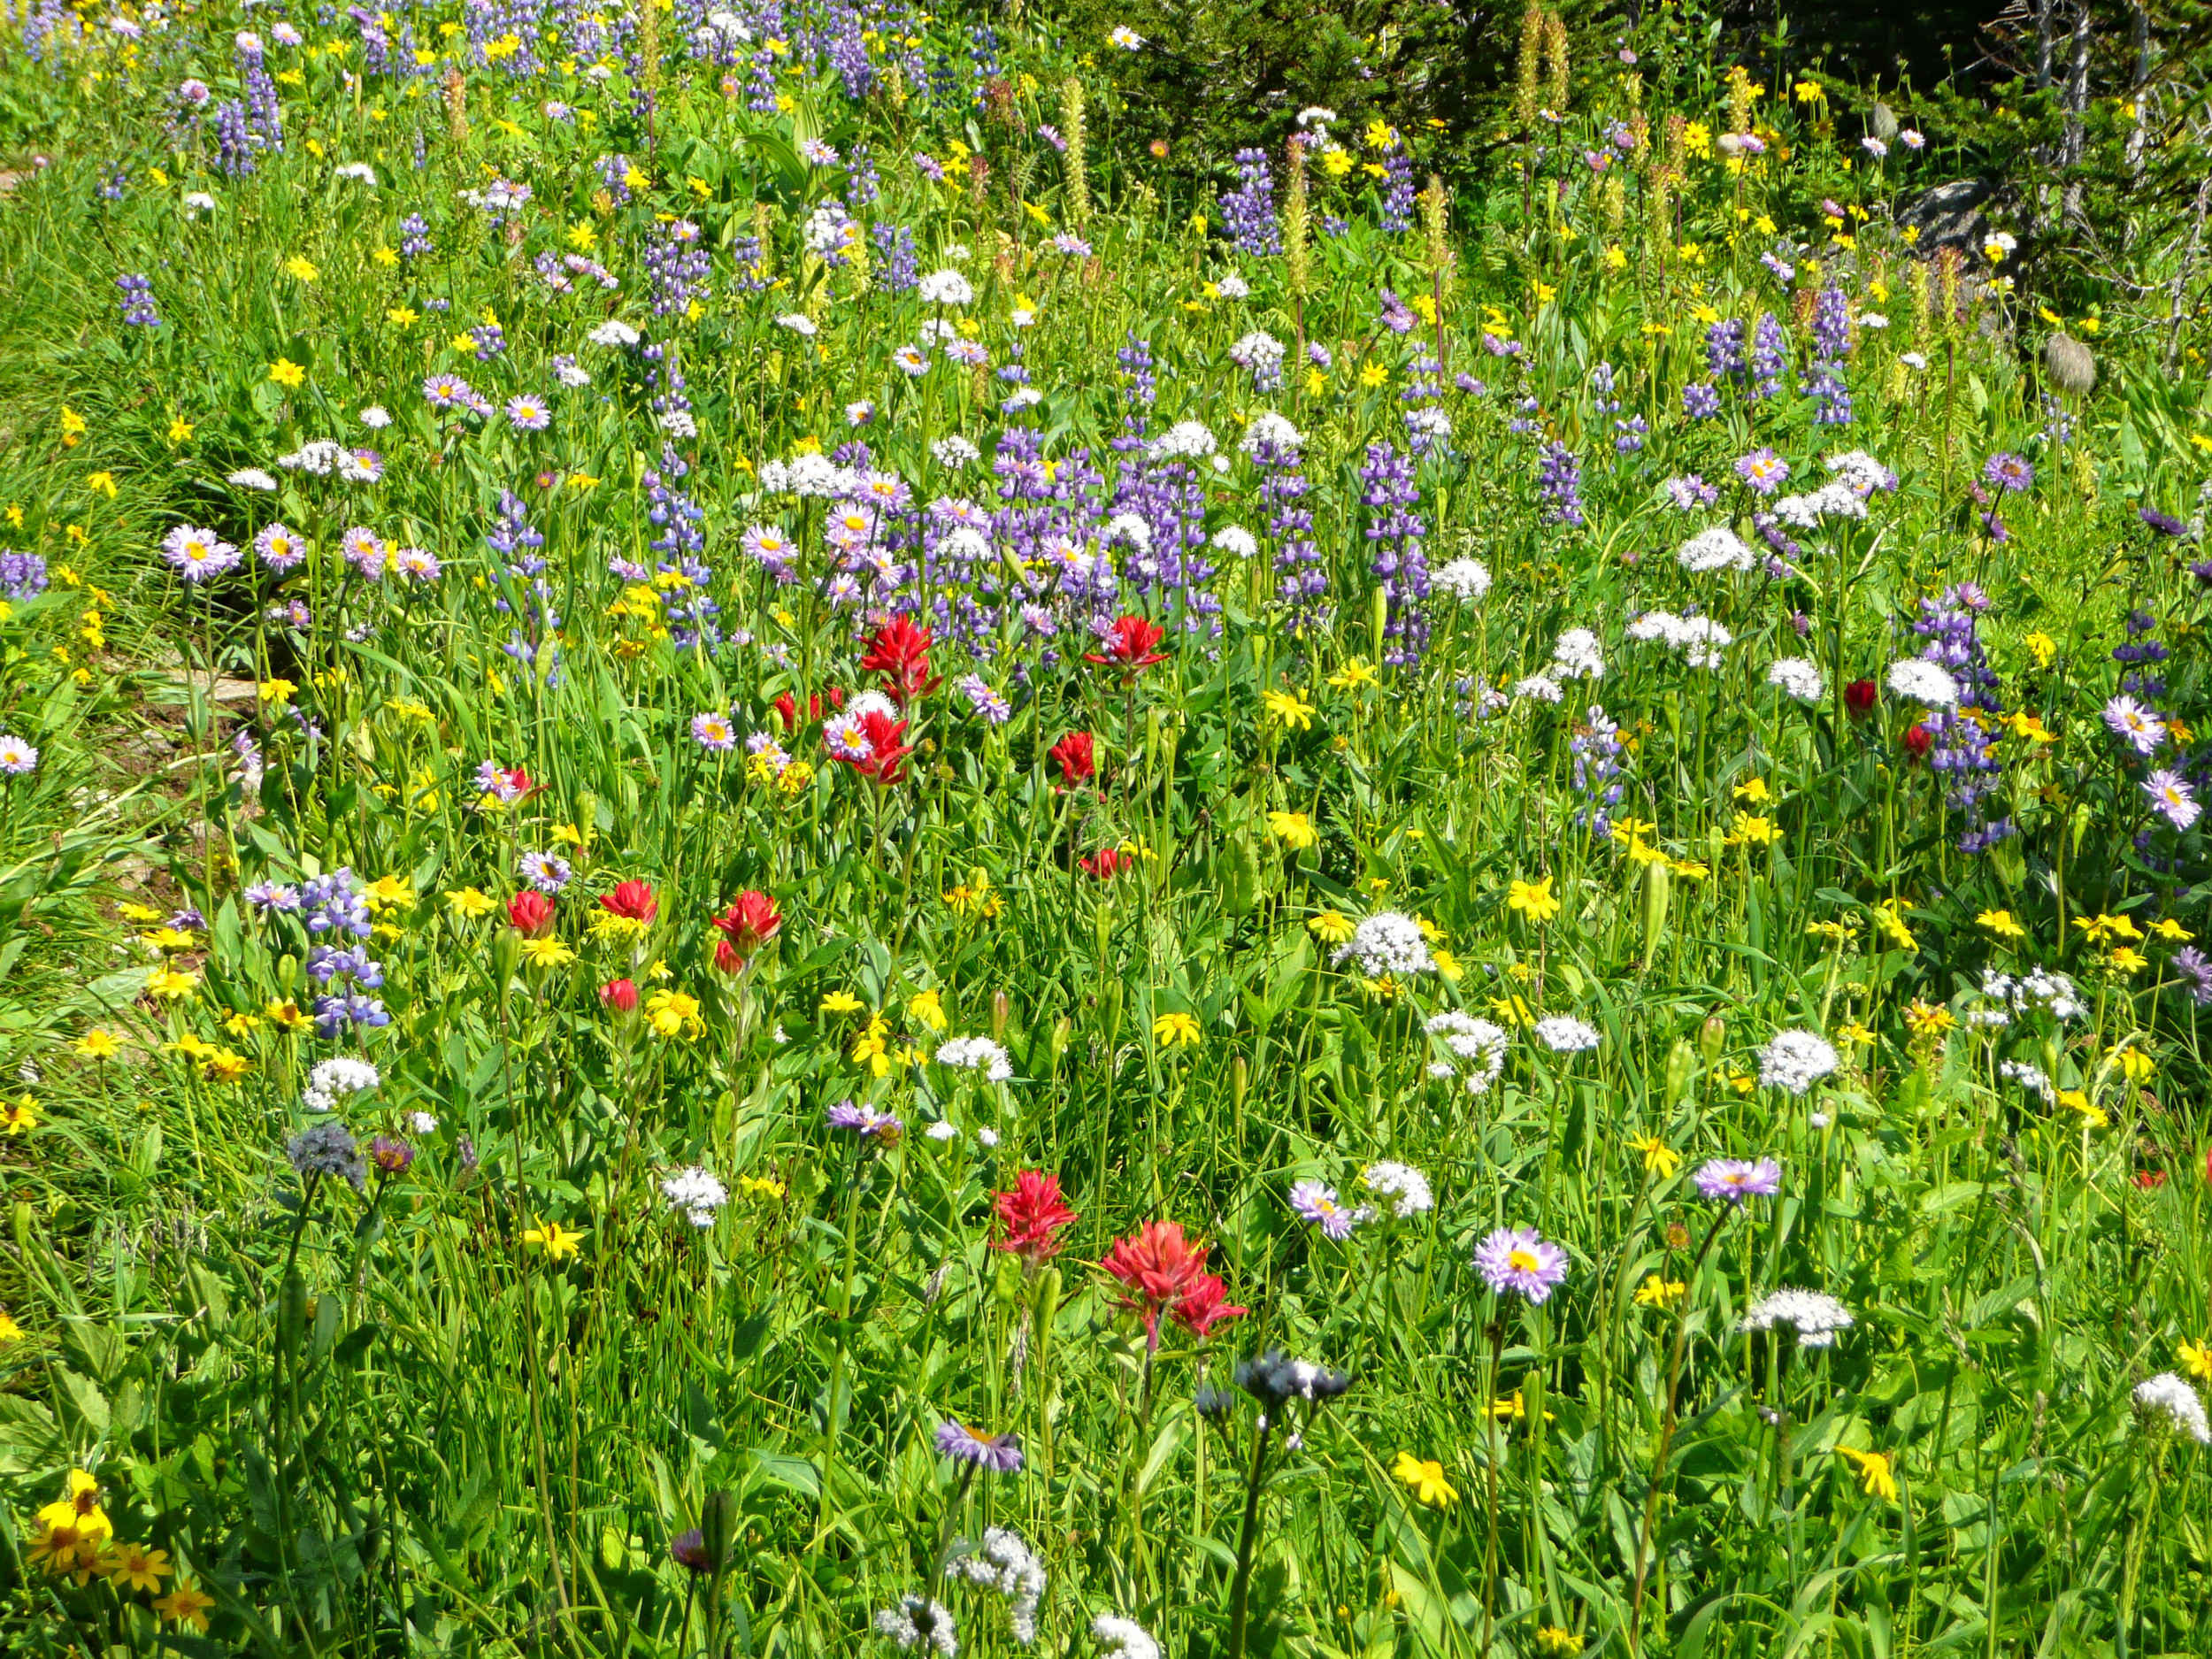
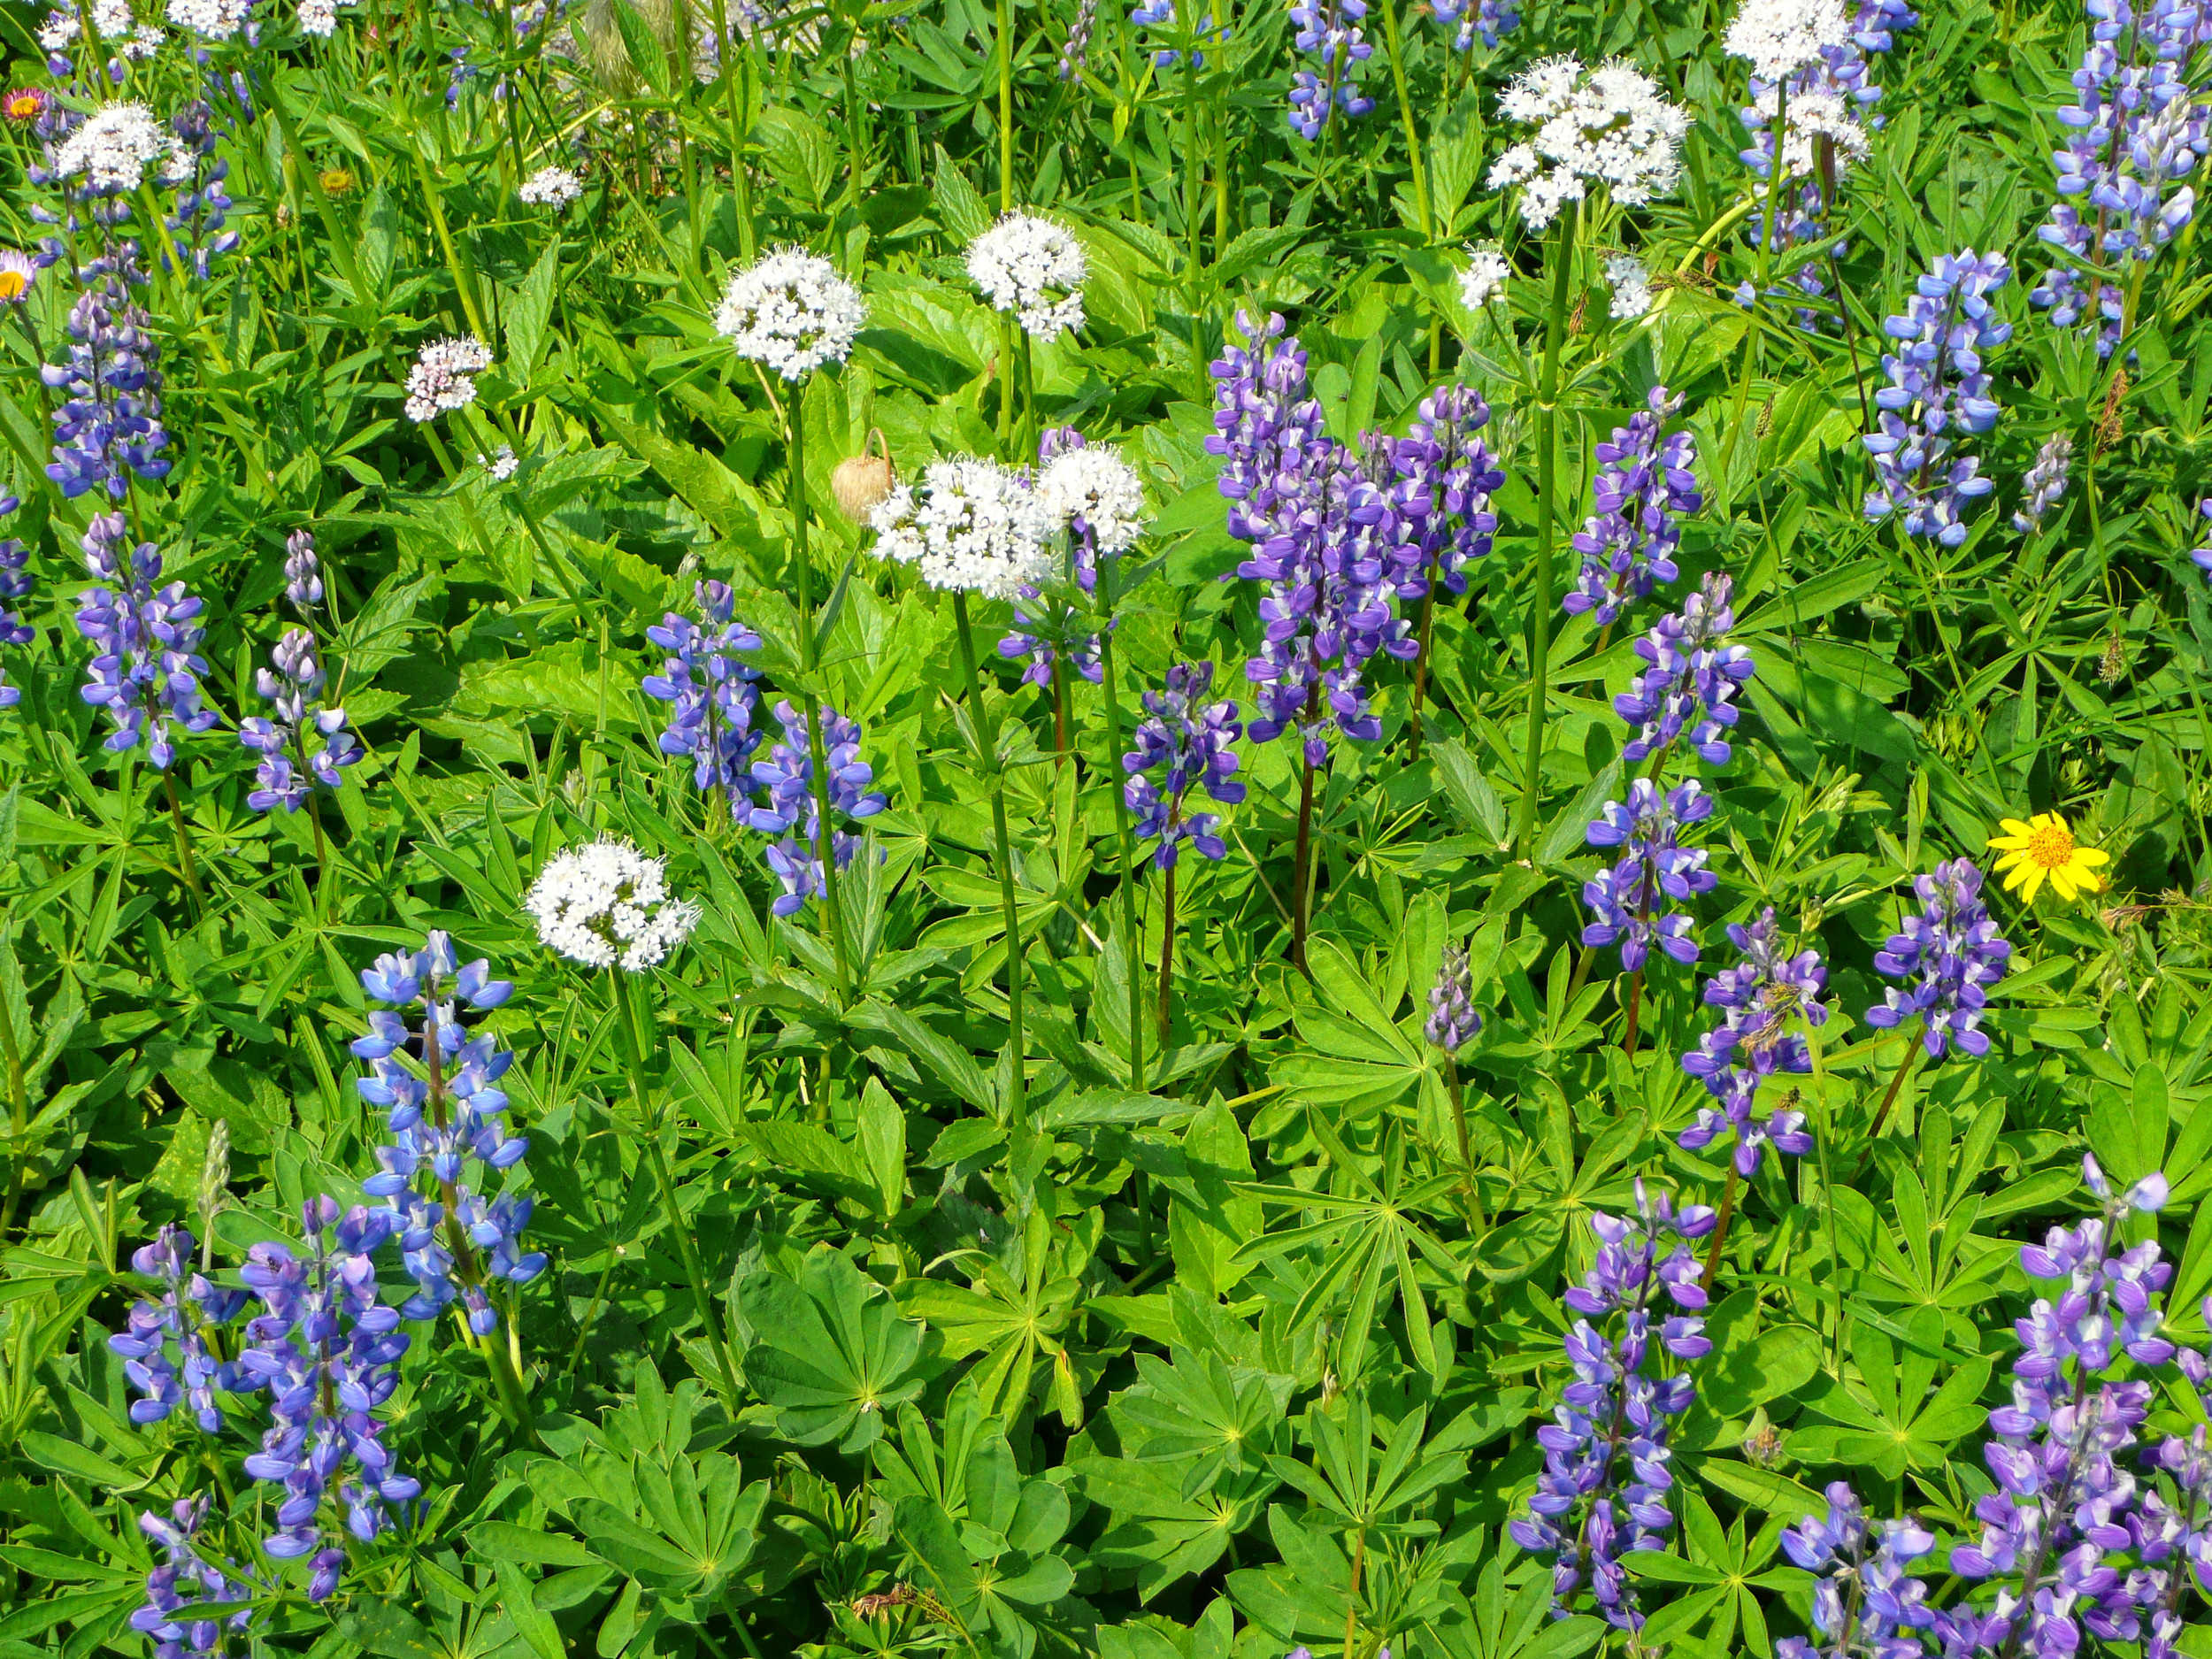
In the summer of 2011 the bloom was particularly rich, and August 13 was one of the best dates to enjoy it.
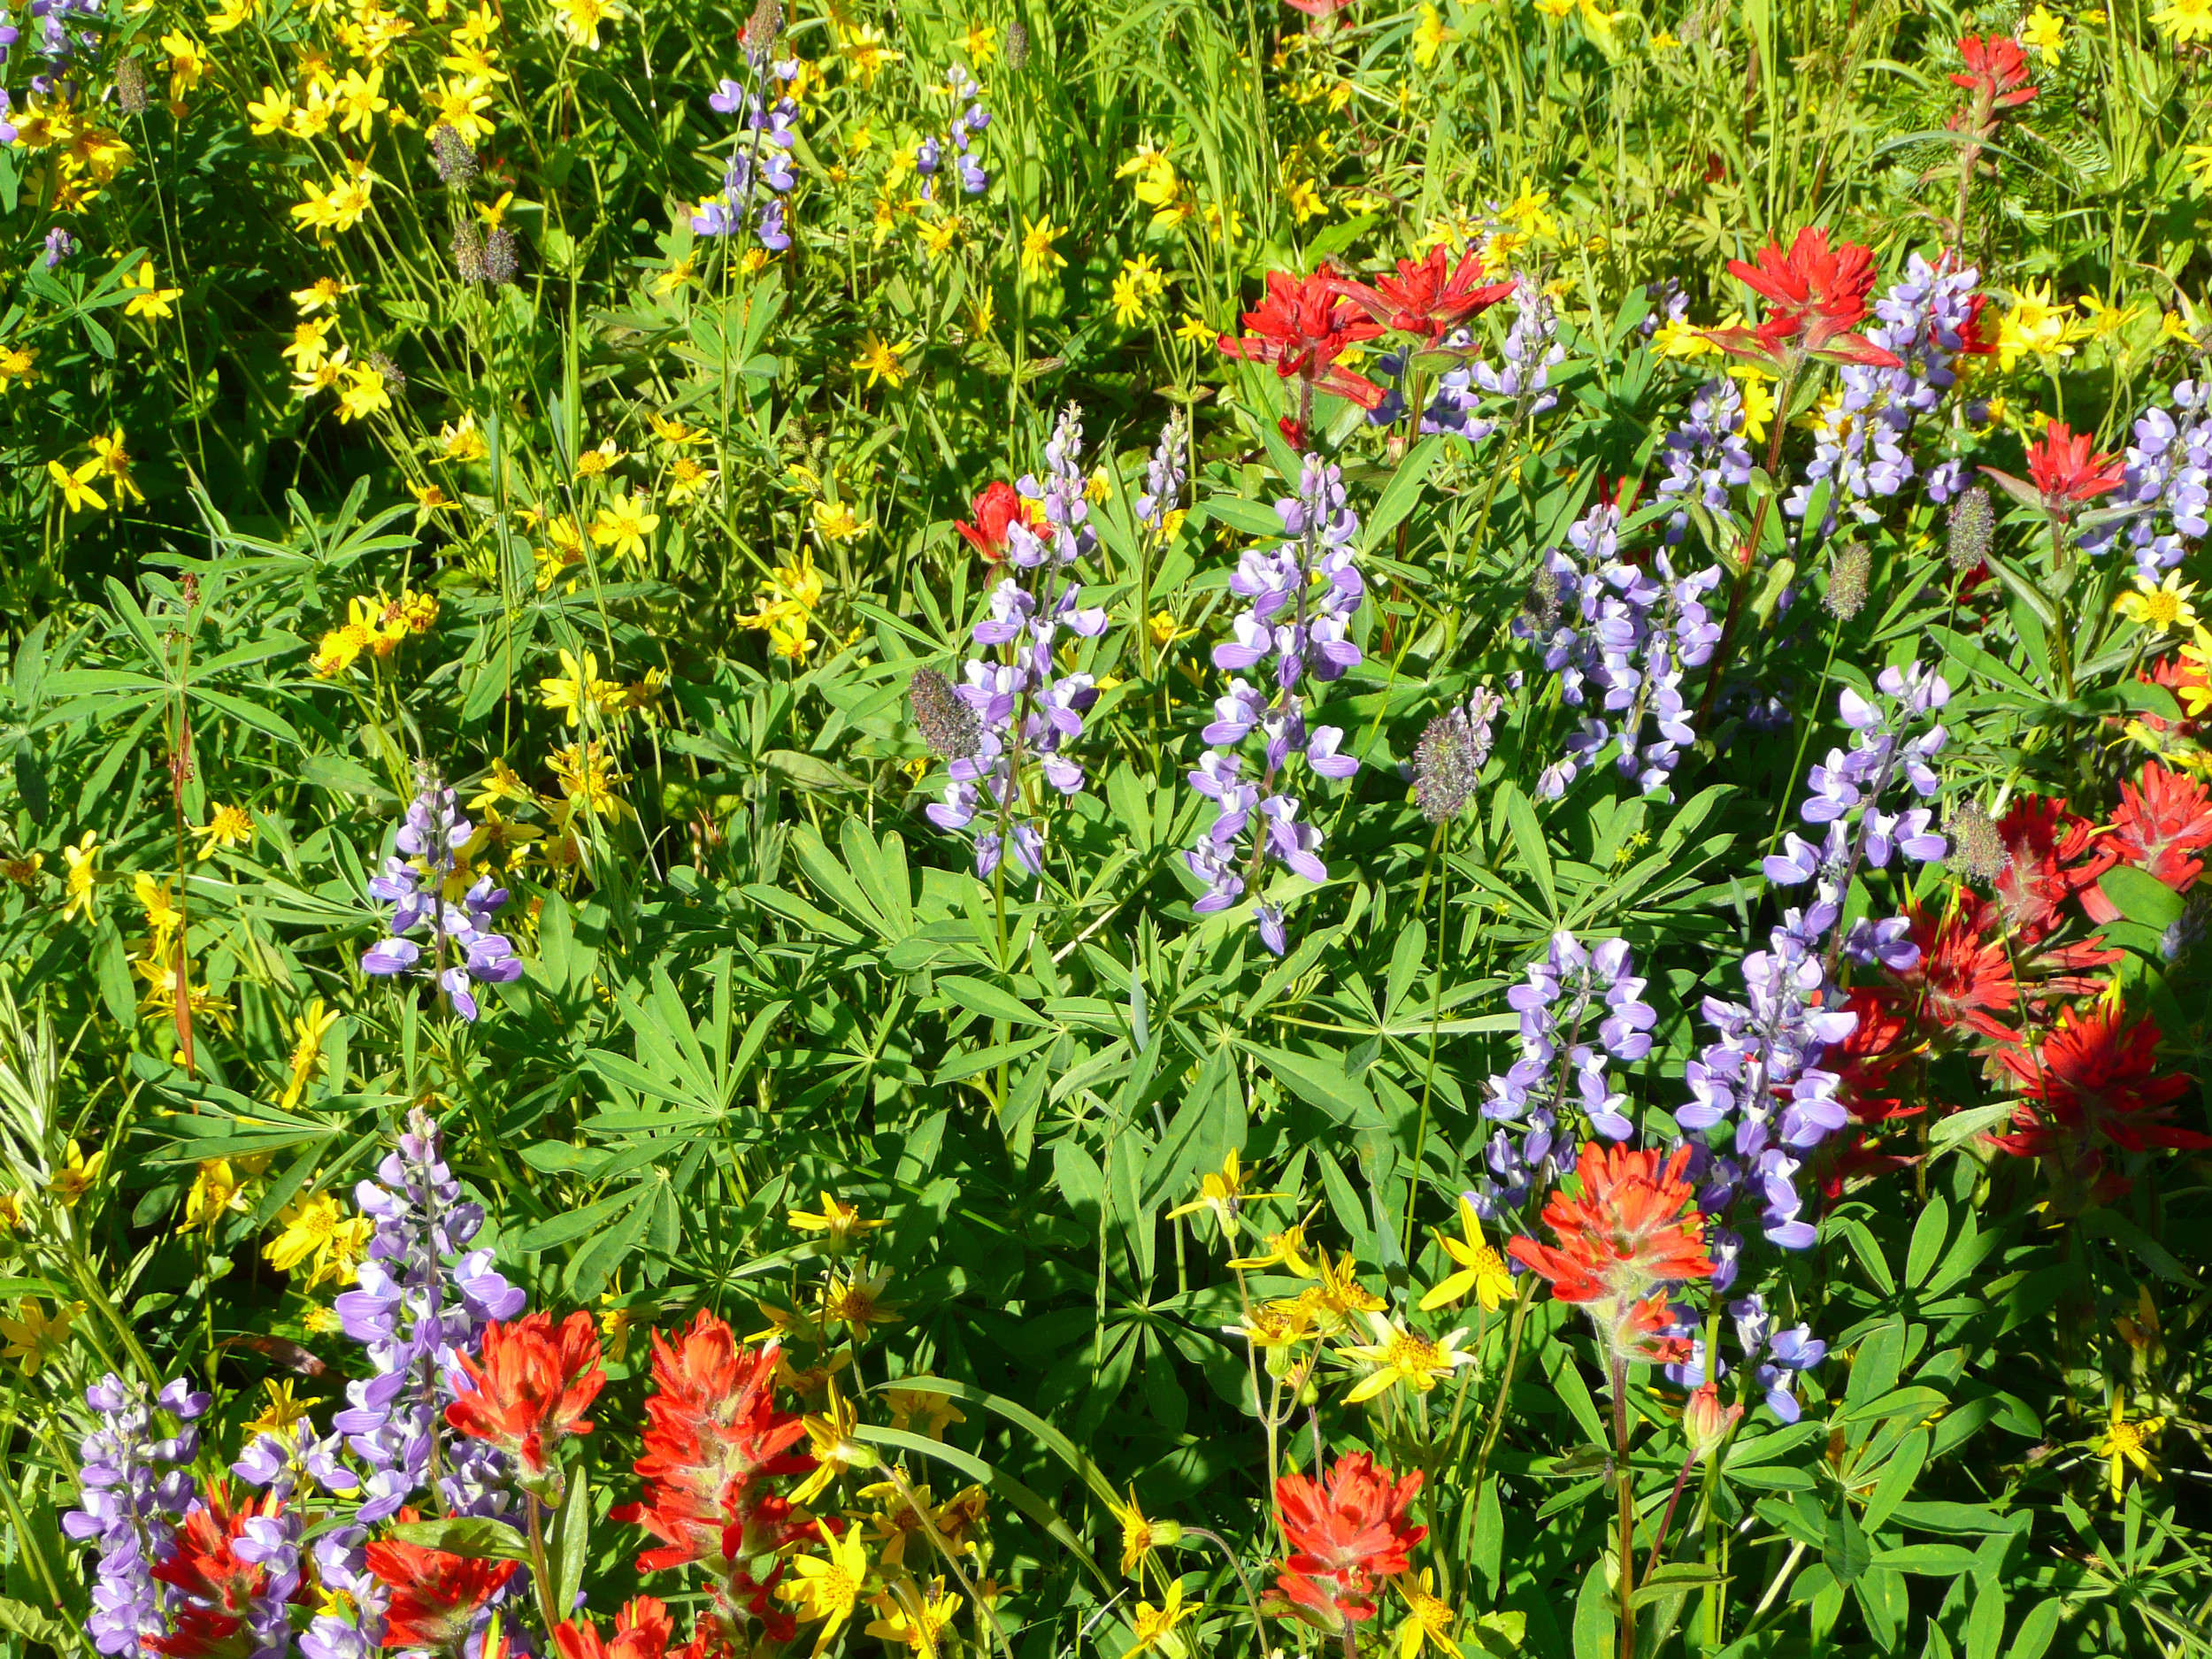
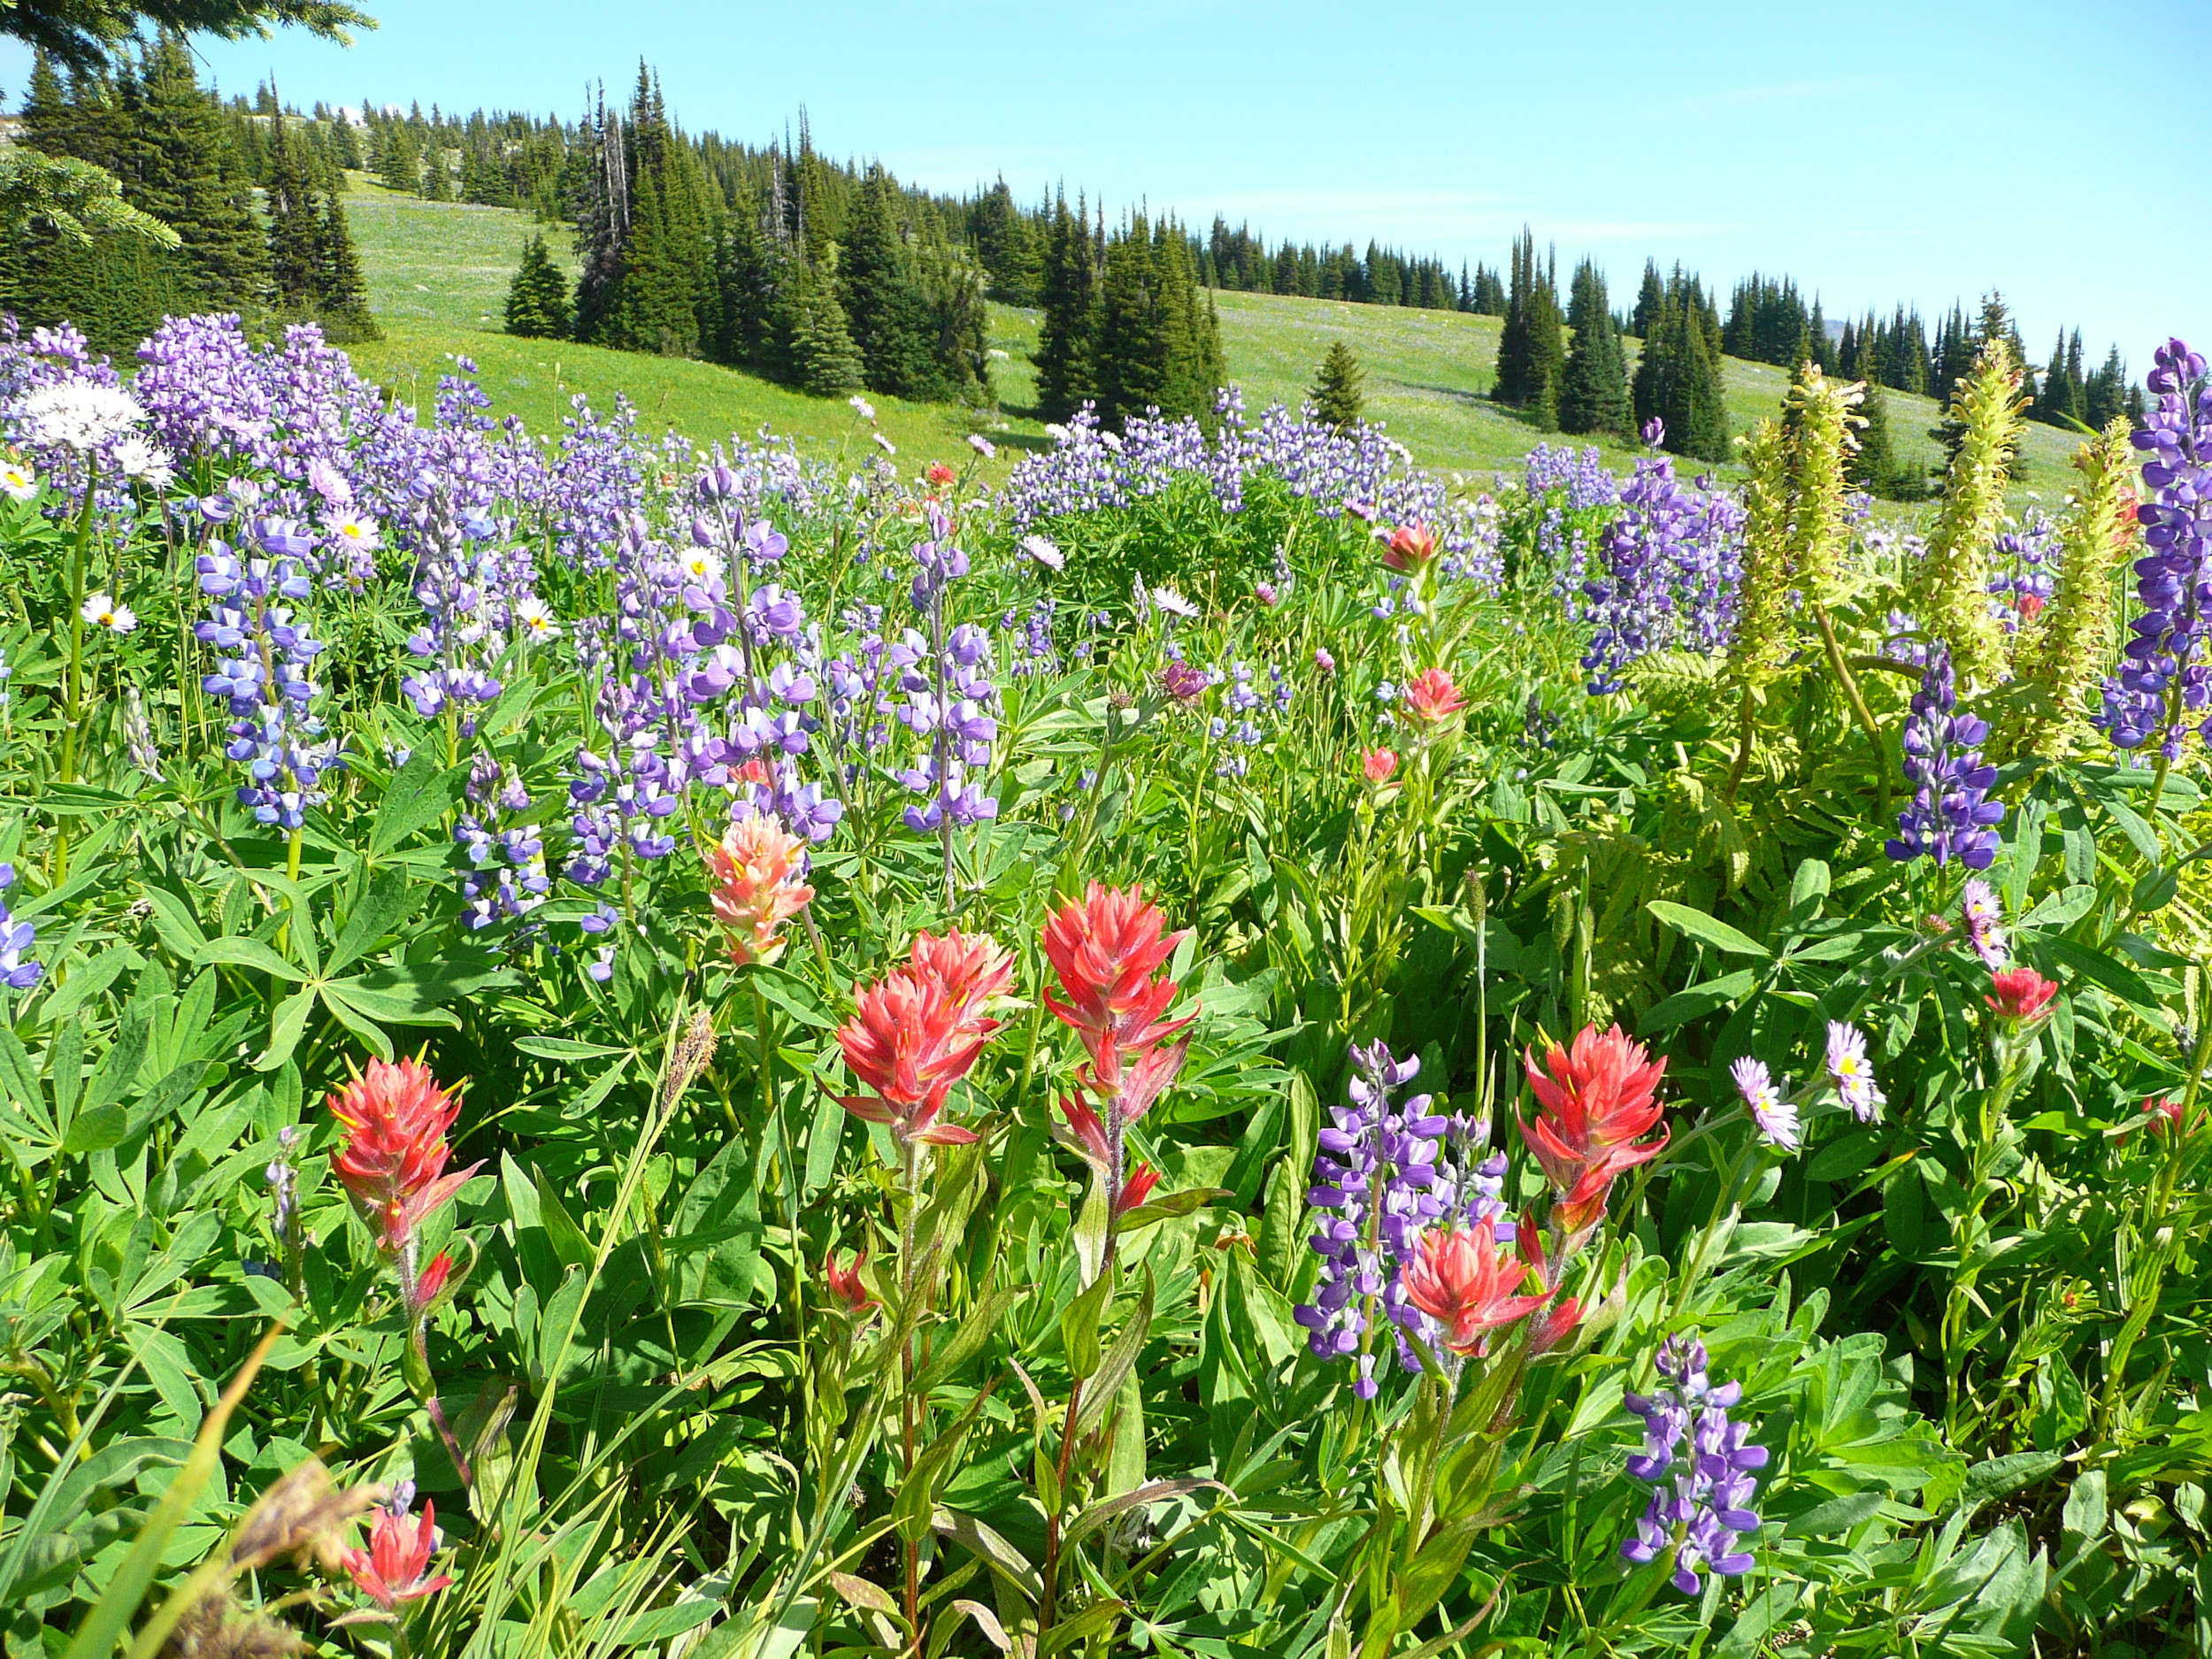
Lupins and Paintbrush
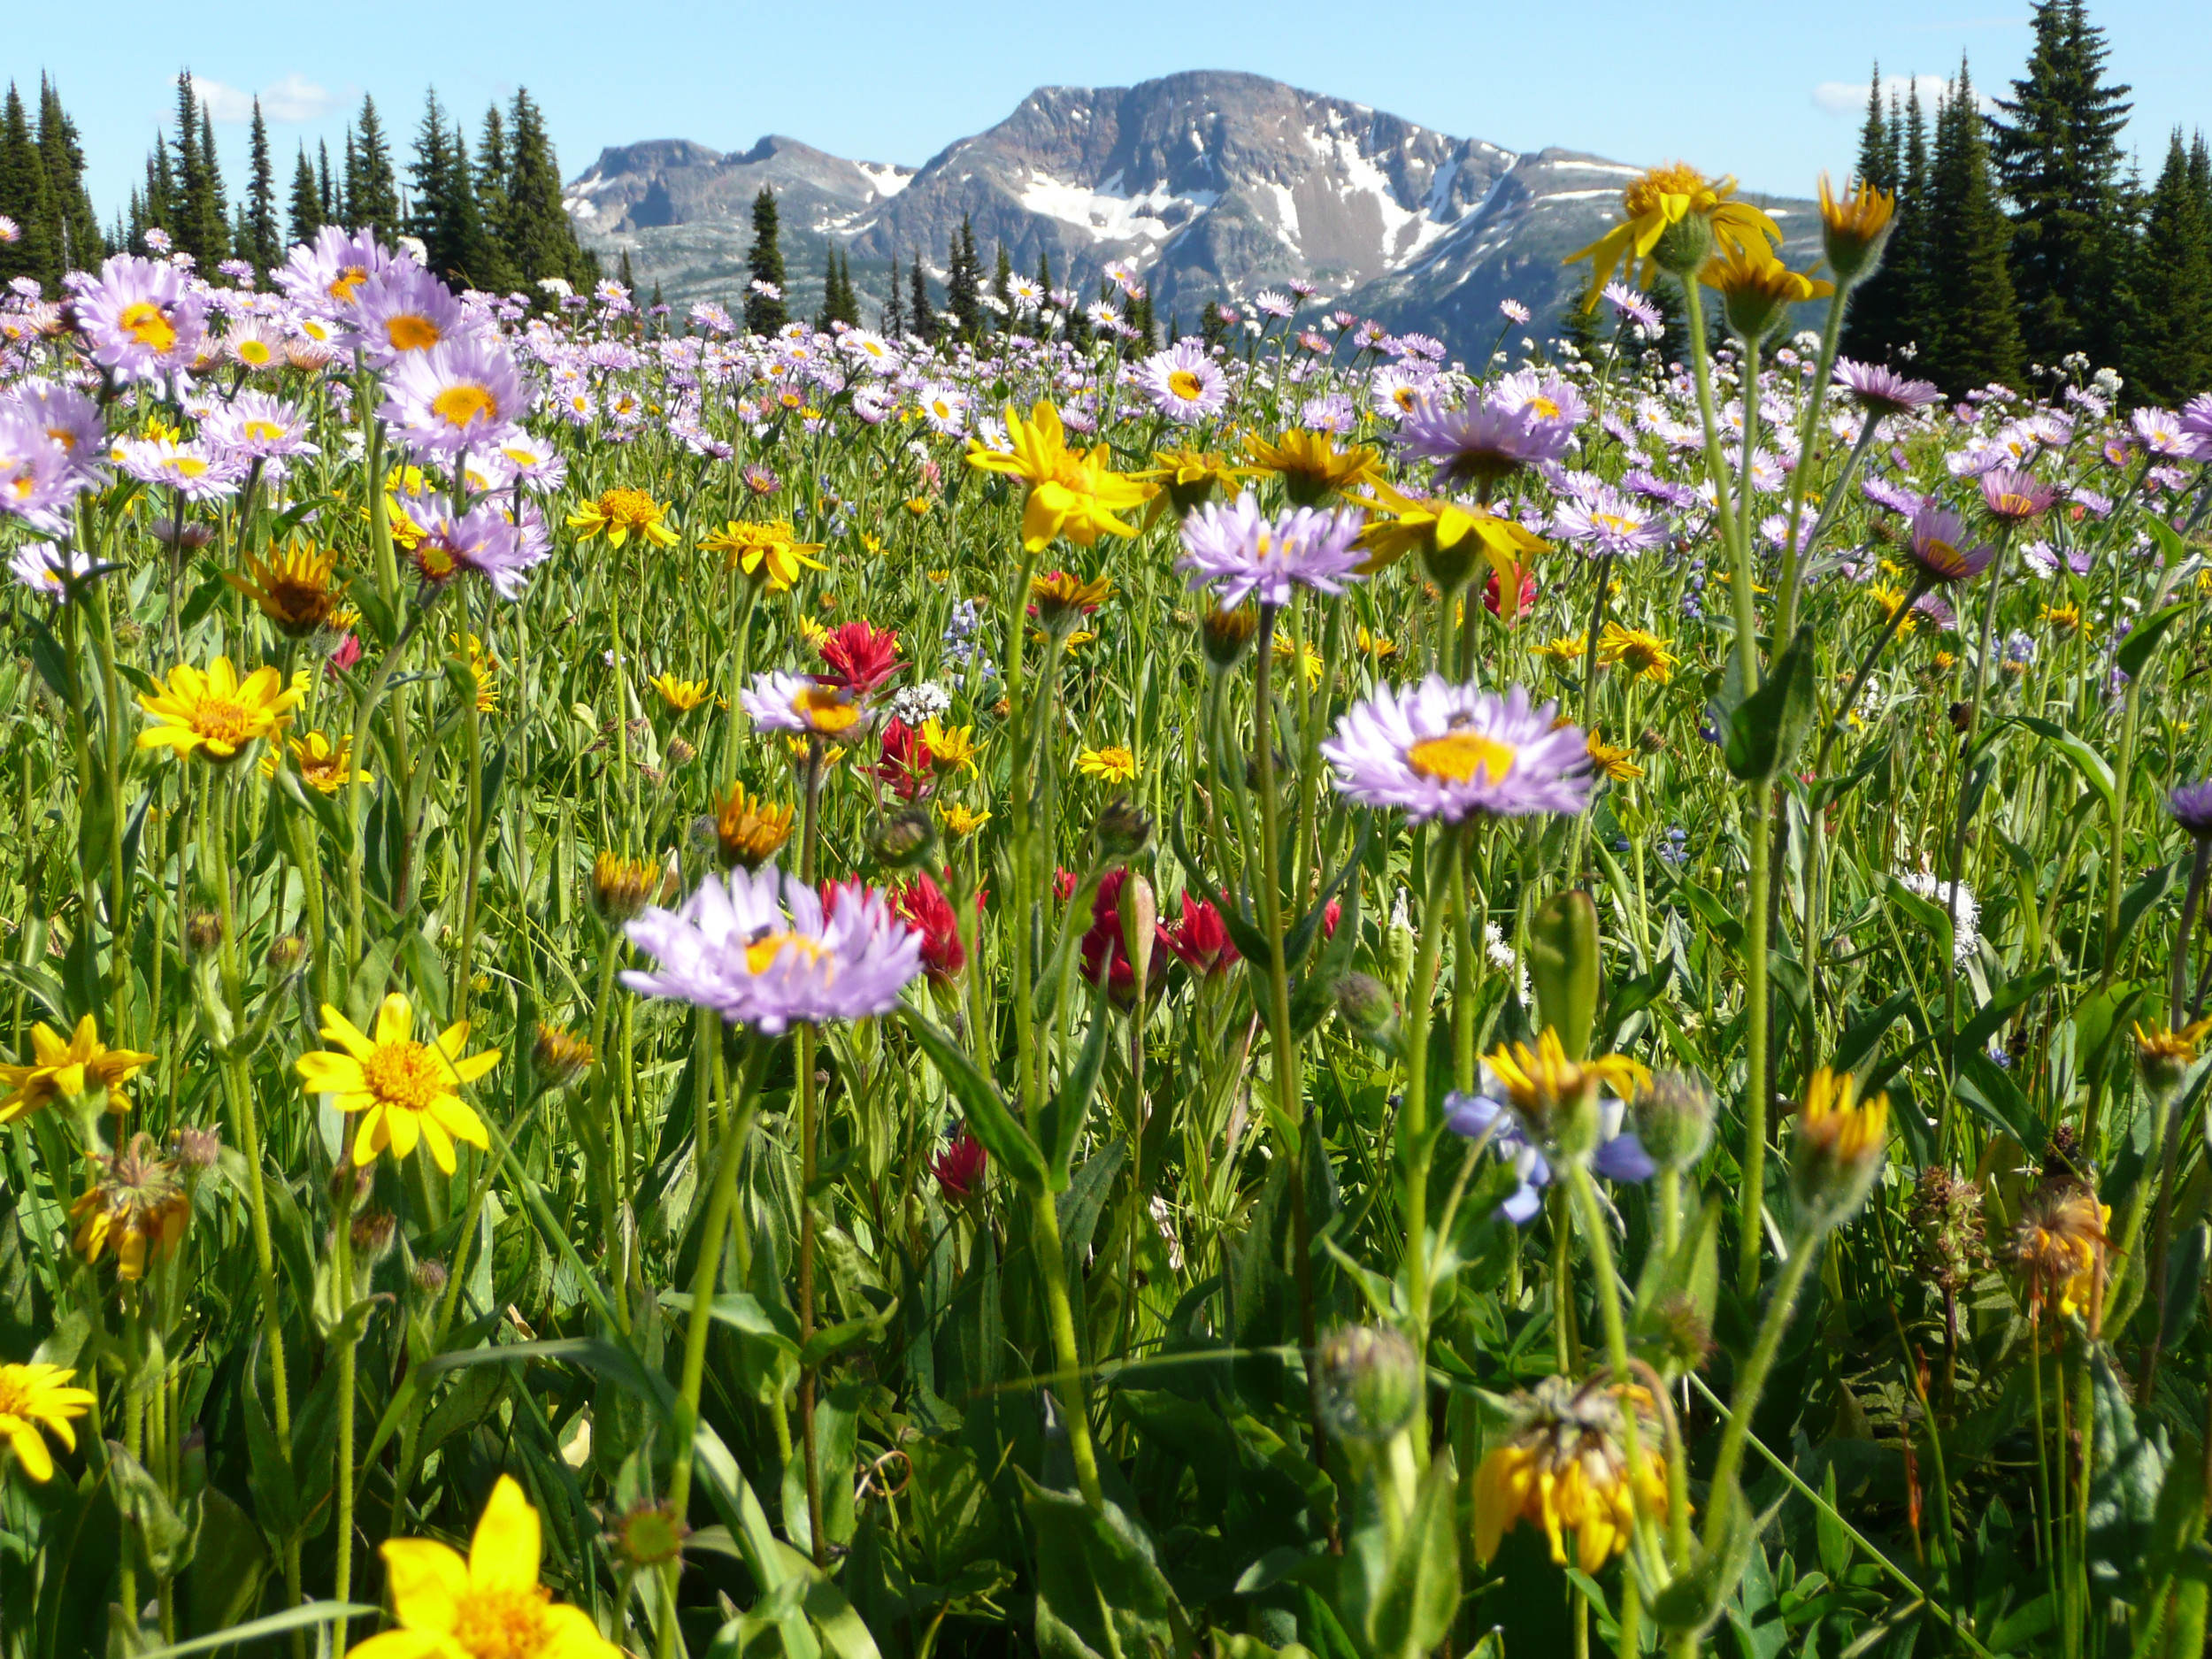
Flower meadow in front of Raft Mountain
Upper Meadows
After having spent a lot of time in the meadows I continue on my way. The trail becomes rocky and the vegetation changes. Different flowers bloom in the subalpine.

Western Anemones
Harebell
I reach the turnoff to Sheila Lake. From the sign it is only ten minutes downhill to the lake. However, I keep straight and aim for the 2115-meter-high Sheila Lake Lookout Rock, a huge boulder that allows a nice view all around. The rock and the lake are named after Sheila Leonard who visited the Trophies regularly up to her death in 1977.
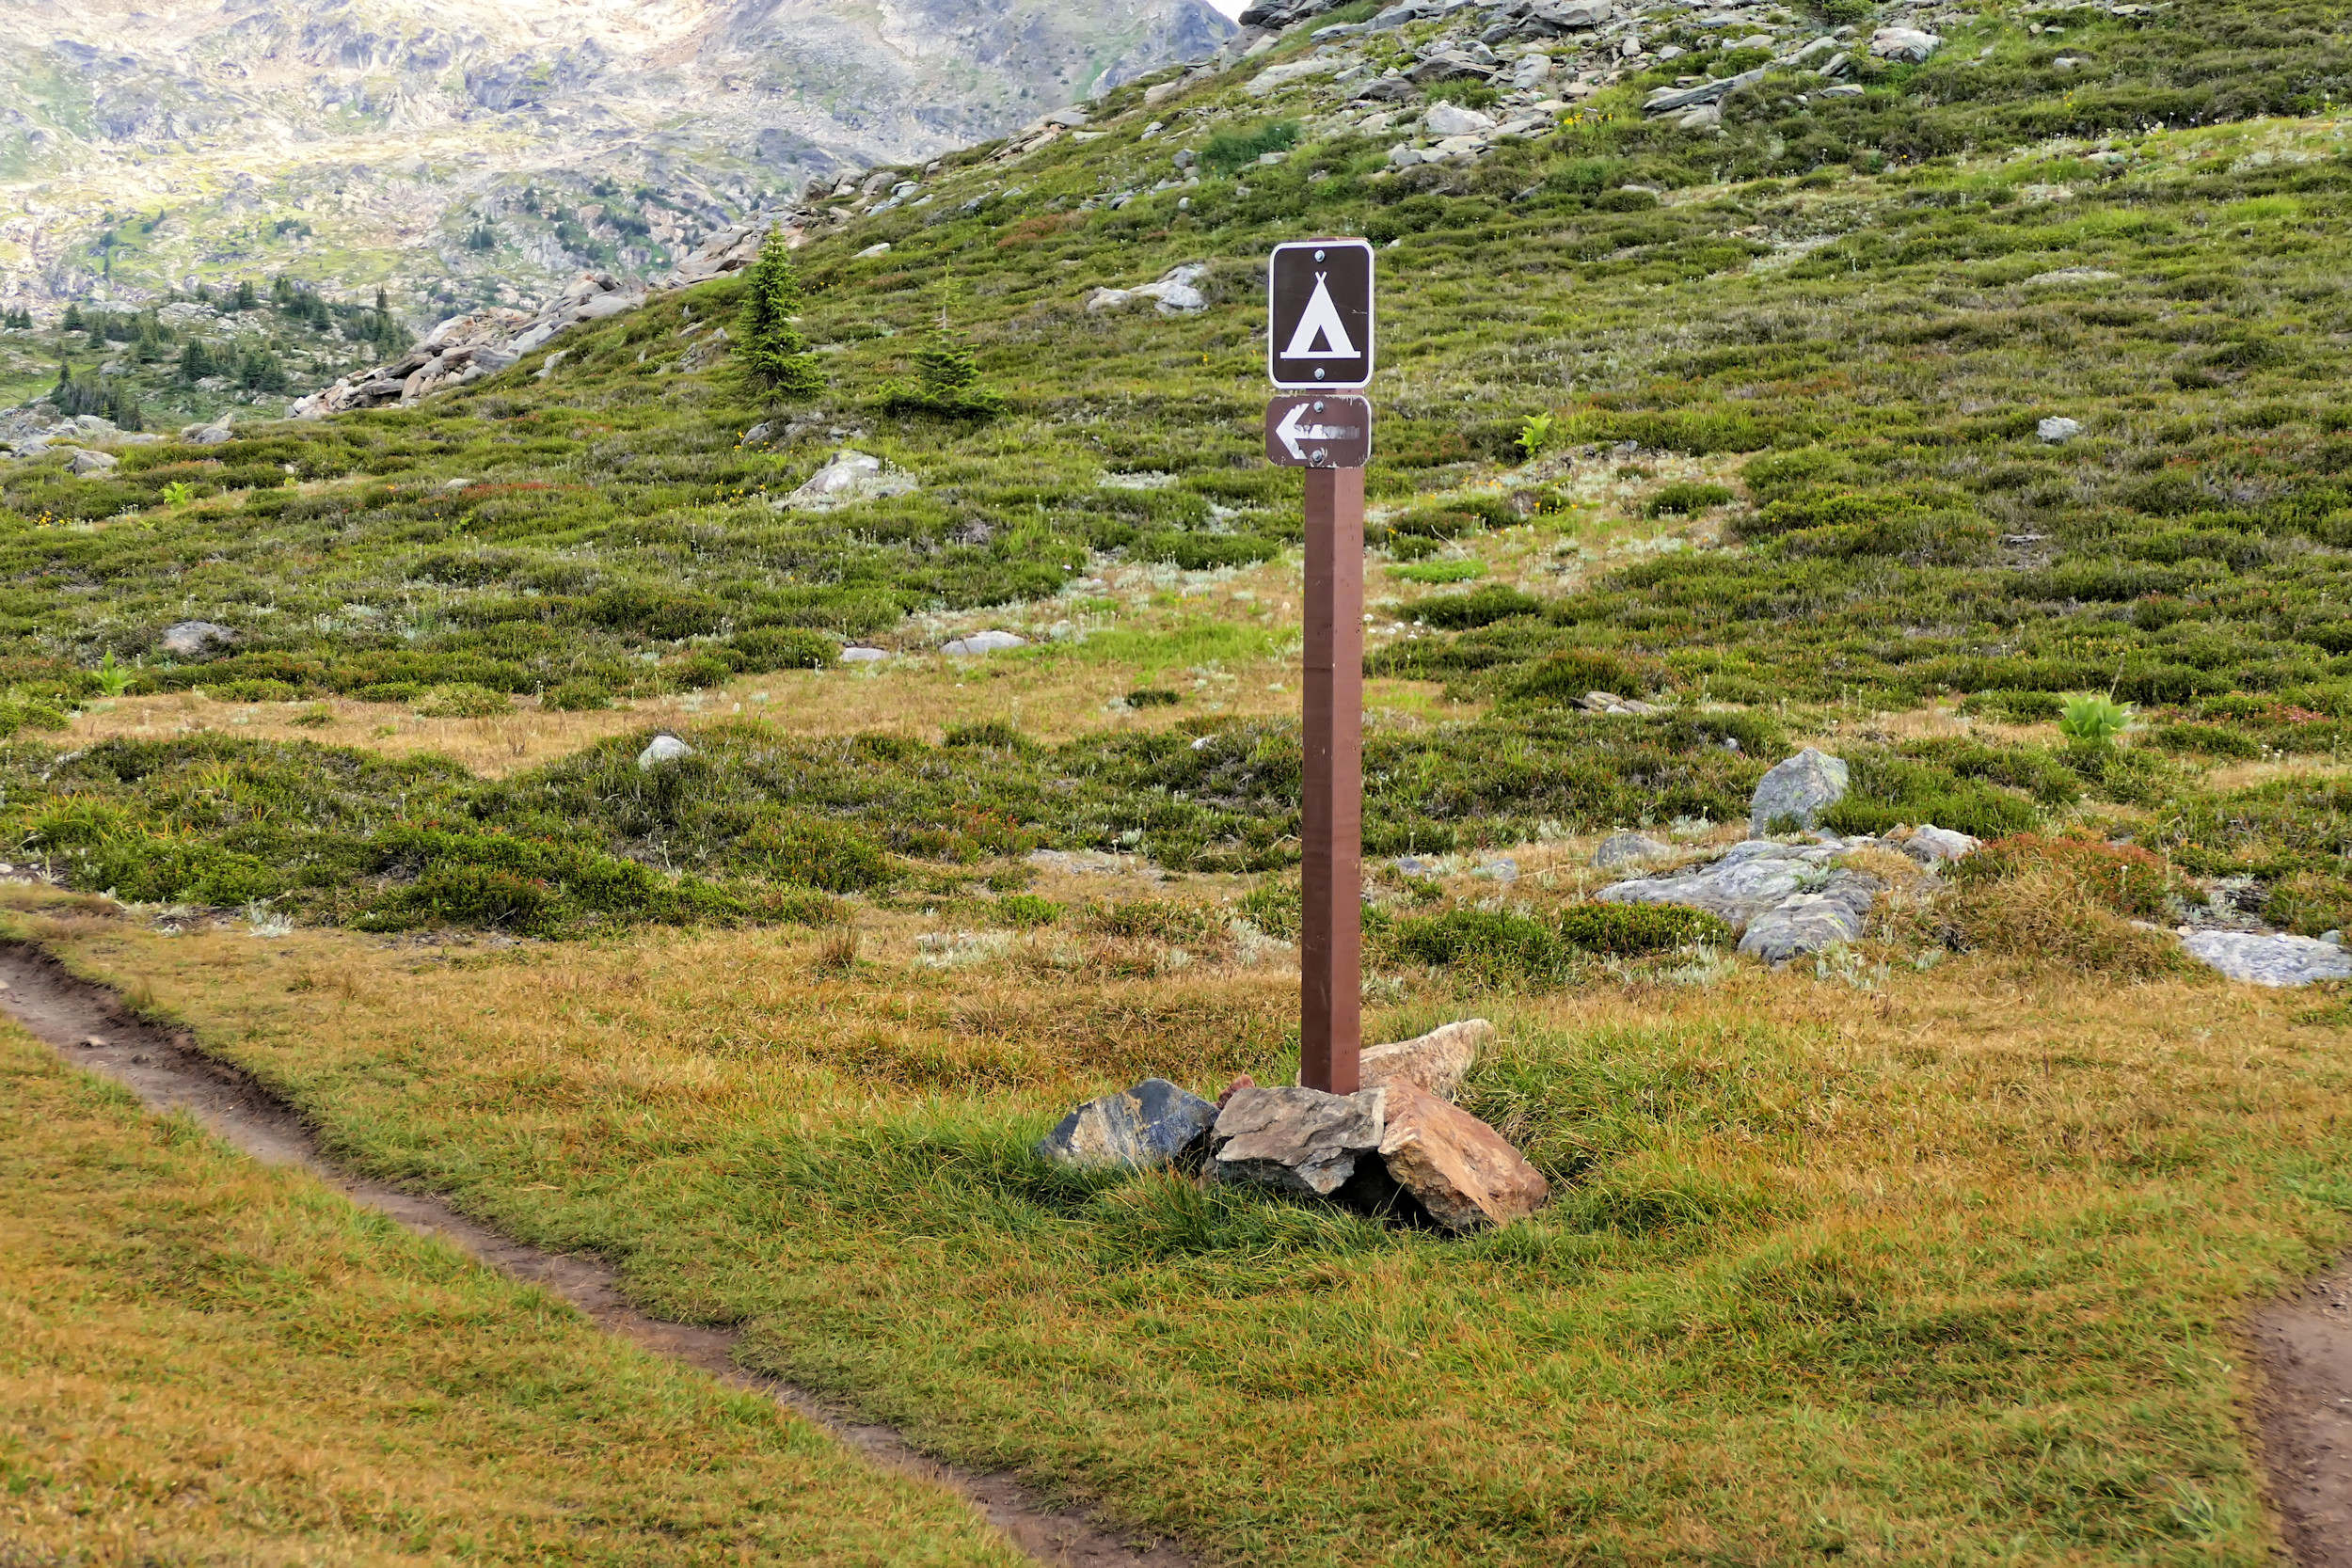
Turnoff to Sheila Lake
Ascent to Sheila Lake Lookout Rock and Lunch Ridge
Sheila Lake seen from the lookout
Trophy Mountain from the lookout
Little Hill (Lunch Ridge)
From the lookout I continue my hike climbing up to Little Hill, a ridge with a splendid view of the 2577-meter-high main peak of Trophy Mountain. To the other side, Raft Mountain and Dunn Peak become visible. Usually we arrive at the ridge when it is time for a bite to eat. Therefore we call it Lunch Ridge.
Trophy Mountain seen from Lunch Ridge
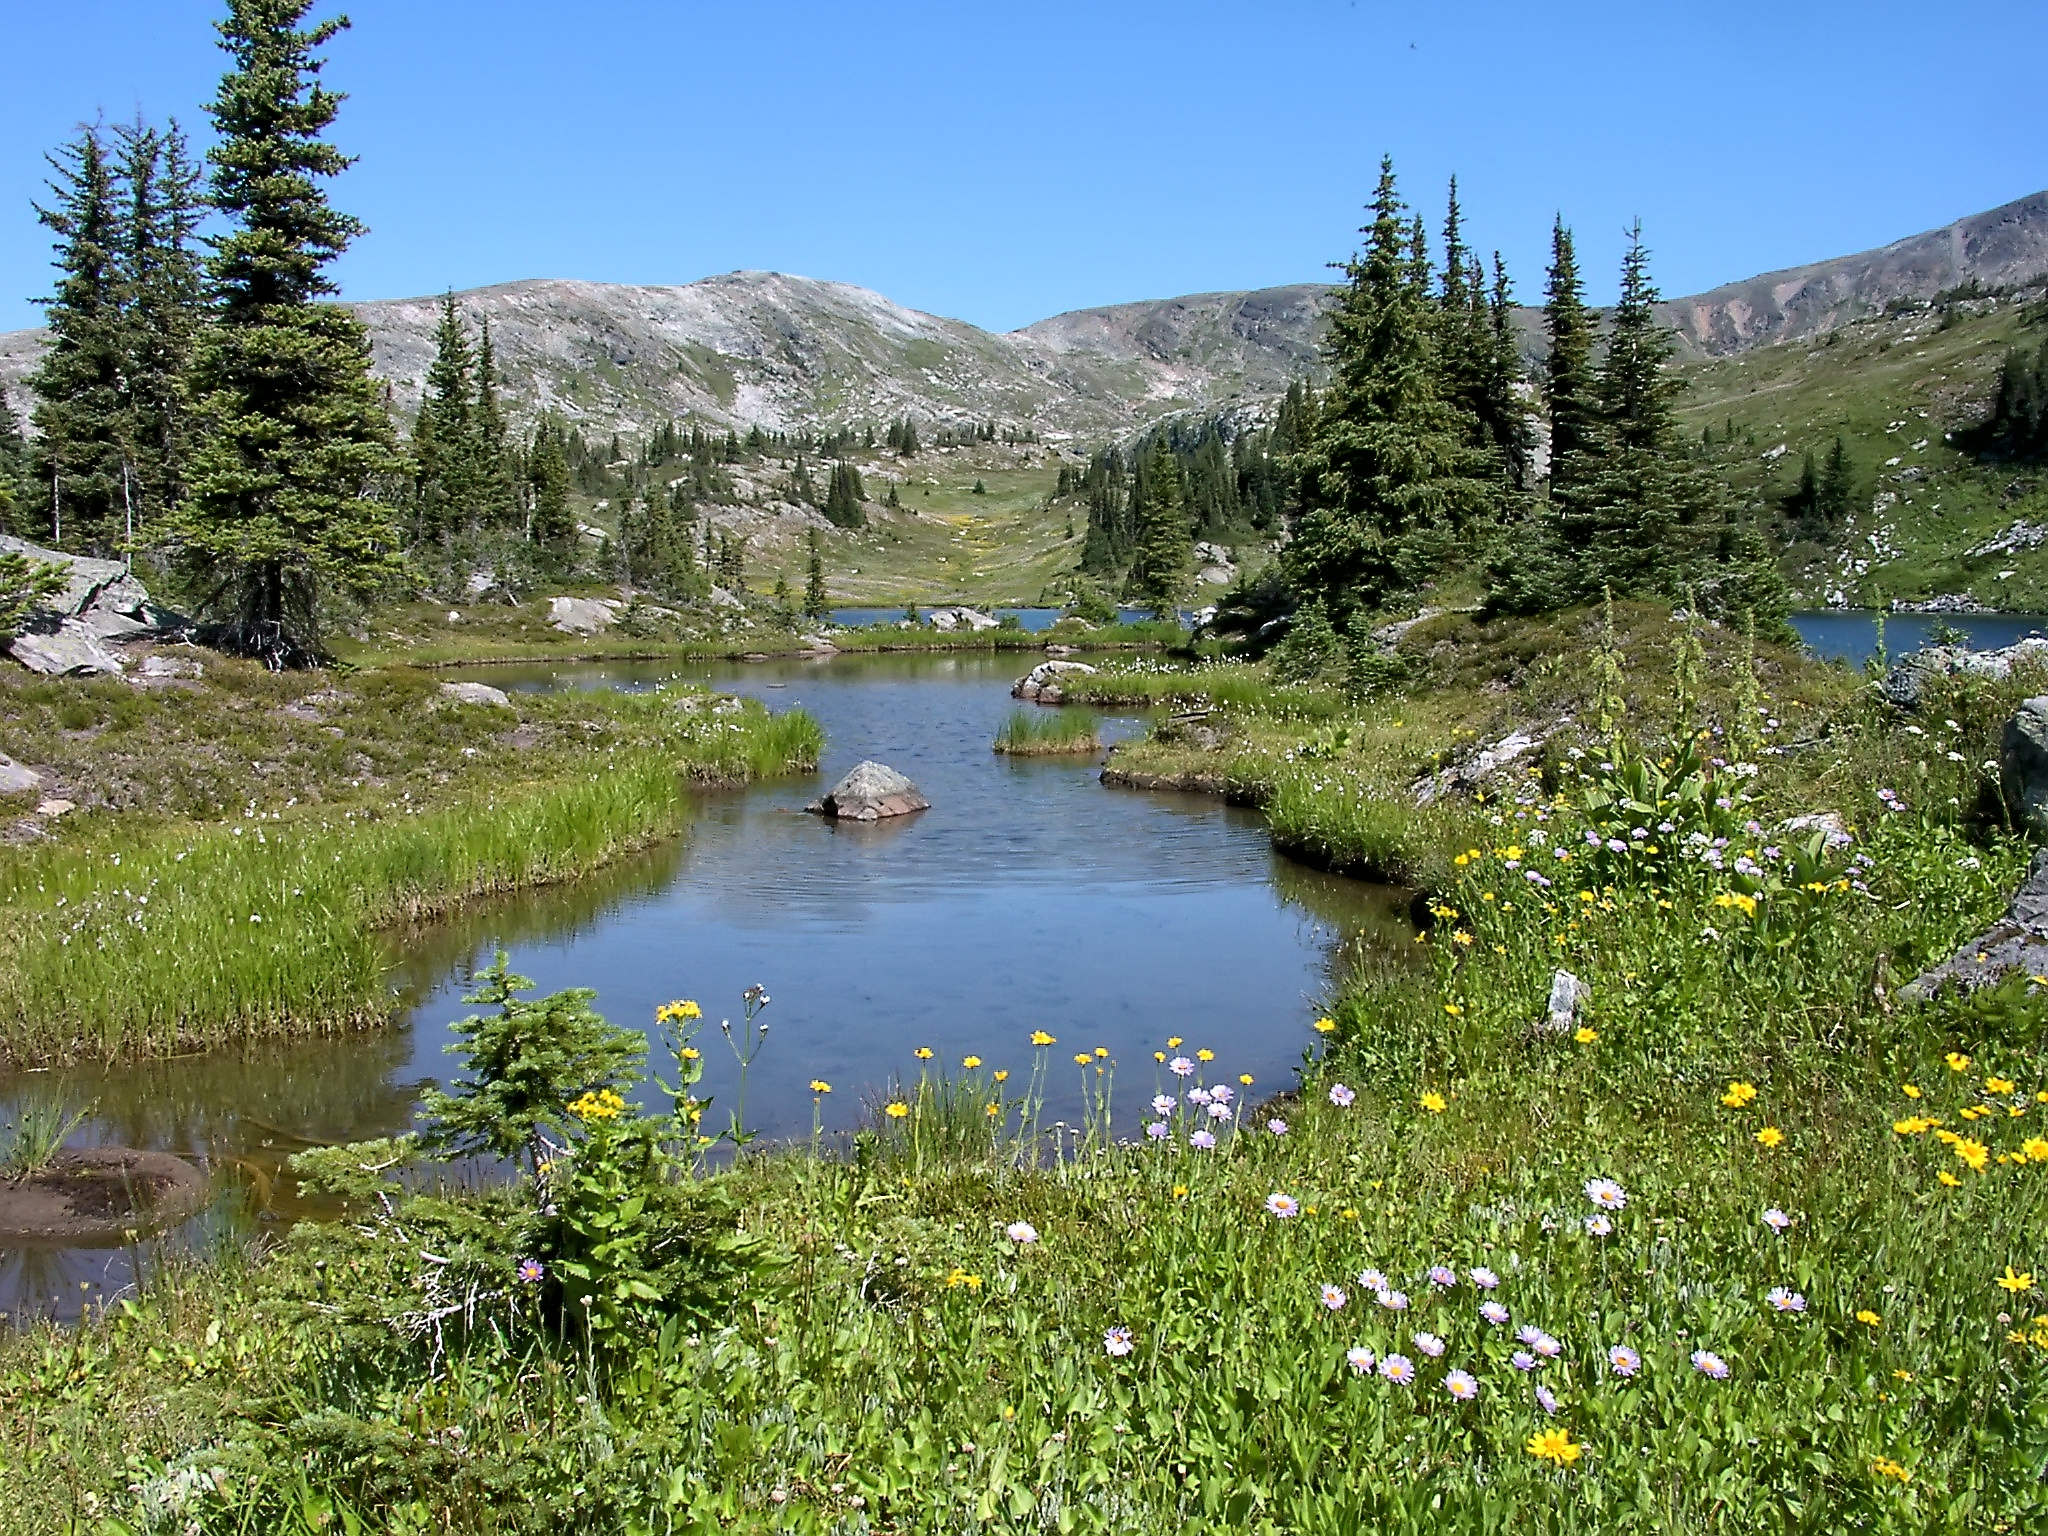
After my lunch break I follow the ridge north to descend onto the Plateau of the Lakes. The plateau was formed during the last ice age by the scouring of glaciers that left numerous rock piles and water filled hollows behind. There is no distinct trail here, over time the many hikers have made their own footpaths.
The view from above is deceiving: walking between the many lakes can be quite confusing as they are located on different levels, and hills obscure them from each other. Orientation is sometimes challenging.
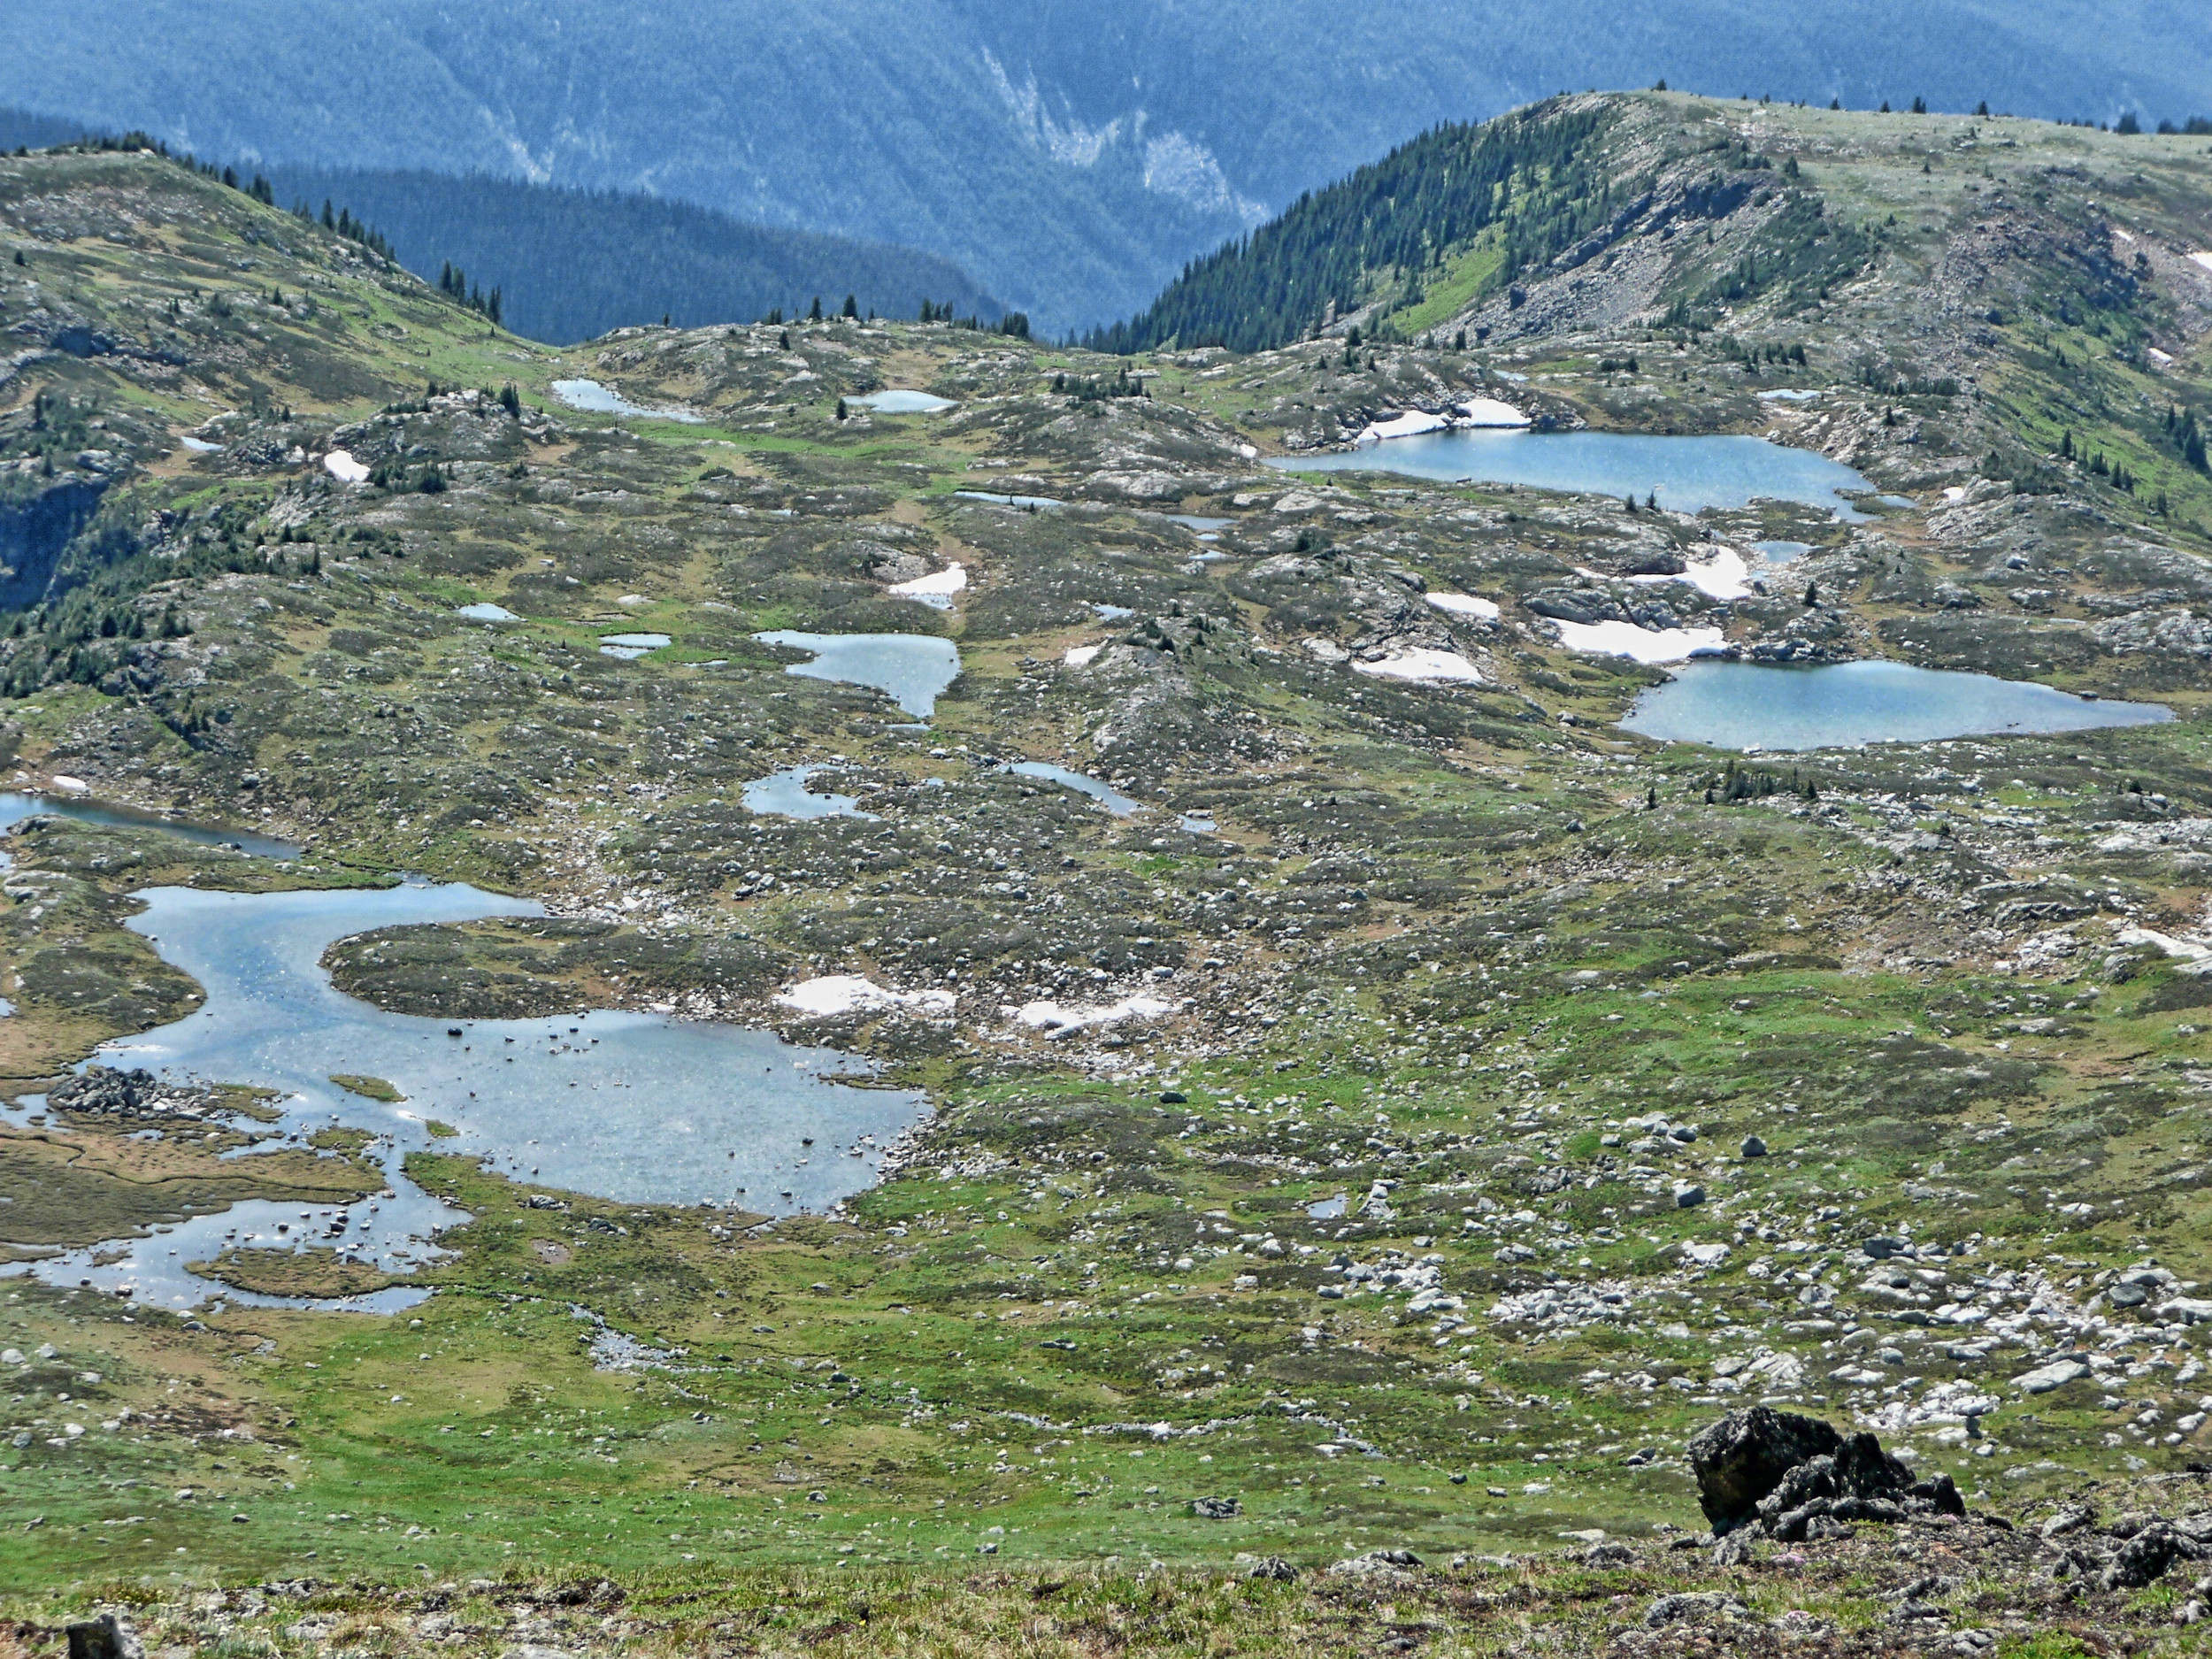
Plateau of the Lakes seen from the ridge
On the plateau, snow can linger until the end of July.
Looking back at Lake of the Rock
The feisty Hoary Marmot lives on the plateau.
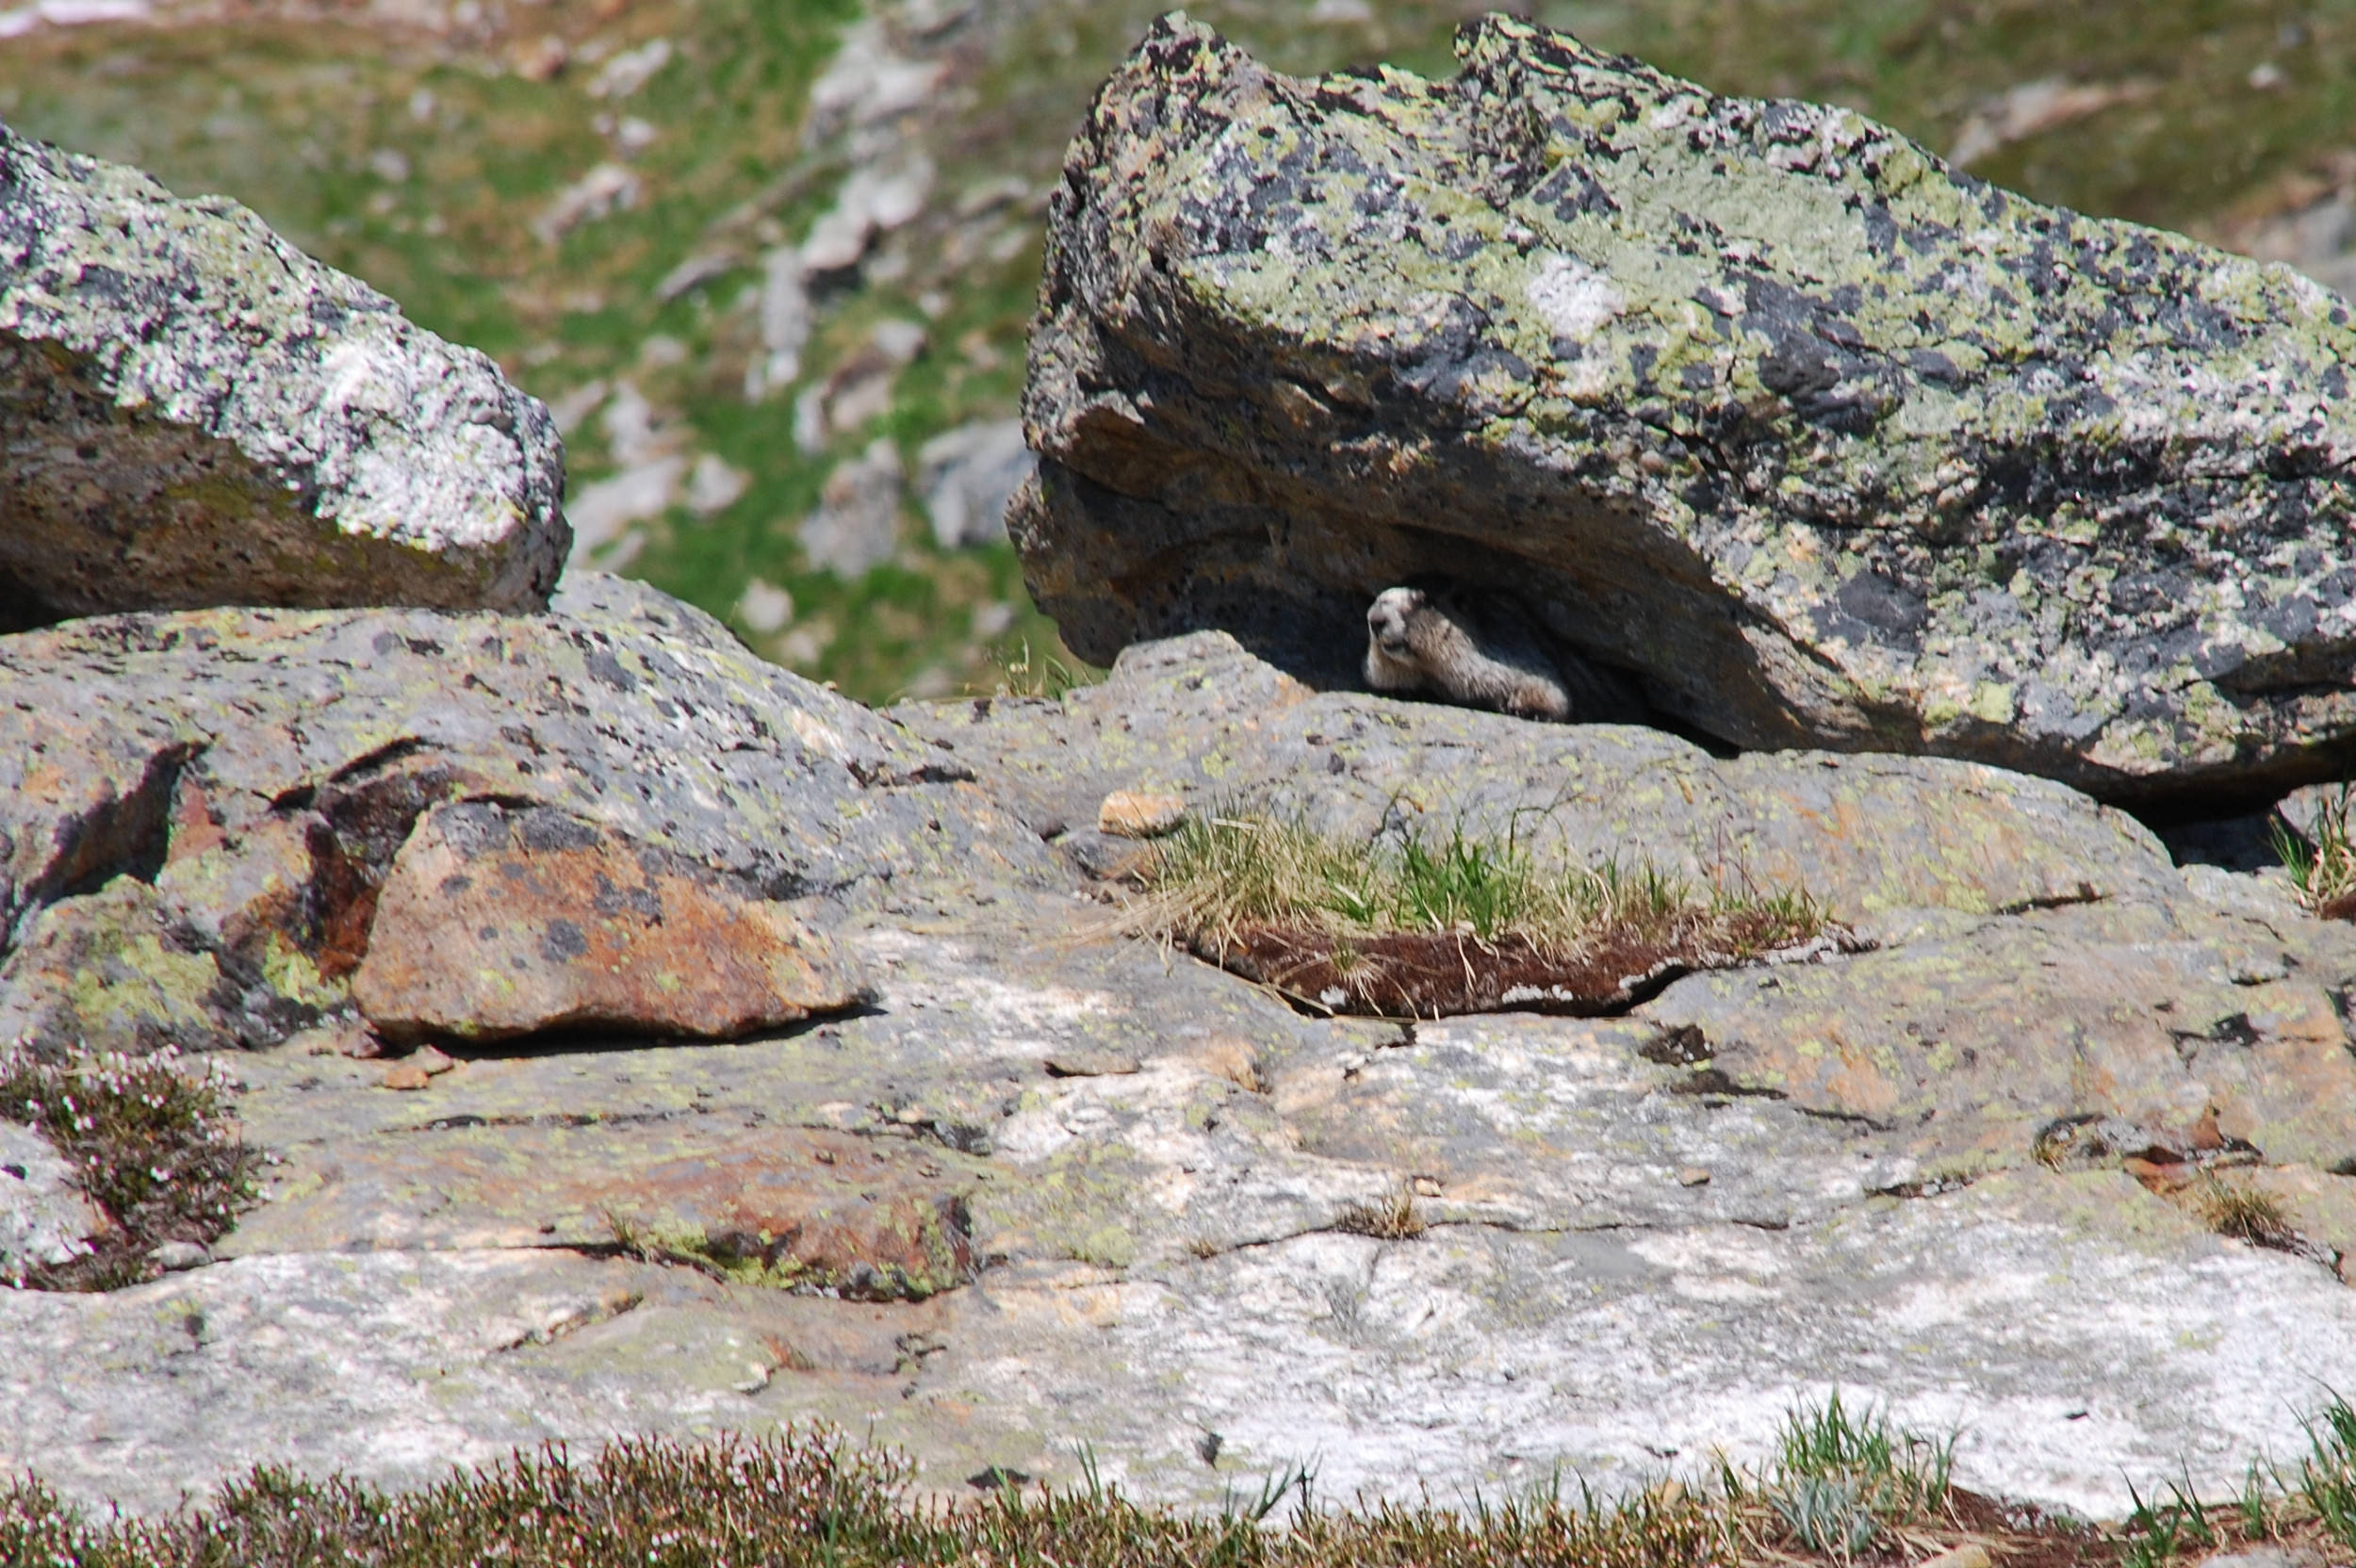
Hoary Marmot
Lake of the Rock
I finish my loop at Sheila Lake, the biggest lake on the plateau.
Sheila Lake
A picturesque unnamed lake is situated just below Sheila Lake and often confused with it.
Lake below Sheila Lake
Sheila Lake Outlet
Looking back at Sheila Lake
From Sheila Lake a path leads uphill and back to the signed turnoff on the main trail.
Soon I am back in the meadows. Once more I stop there to take even more pictures. The warm light of the late afternoon sun illuminates the colourful flowers even better.
| Distance from Sheila Lake sign | 10.1 km |
| Time | >3 hrs |
| Incl. Breaks | 4 ½ hrs |
| Min. Elev. | 2054 m |
| Max. Elev. | 2532 m |
| Ascent | 479 m |
| Cum. Ascent | 611 m |
| Cum. Descent | 611 m |
The trek along the Trophy Mountain Skyline, another name for the ridge between Long Hill and West Summit, can be done as a loop or as an out and back hike. Both include a steep ascent with sections of loose rocks. The hike should only be attempted in good weather in order to avoid slippery rocks or wet grass. On top of the ridge, a strong cold wind can be blowing on any given day.
The Trophy Mountain Skyline and West Summit
For a loop, it is advisable to start on the east side of the ridge (to the right) and to ascend directly to the 2532 high West Summit. This steep and rough eastern route is easier to scramble up than down. On the western end there are two alternate routes to descend, the West Col (2332 m) or the Long Hill Col (2293 m).
The description below is based on different hikes between 2011 and 2014, some of which I did with friends and some alone.
Approaching Sheila Lake Lookout Rock
The hike begins at the signed turnoff to Sheila Lake and continues straight and uphill to Sheila Lake Lookout Rock. It is always worthwhile to climb on top of the rock to enjoy the views.
View from Sheila Lake Lookout Rock
From the lookout we walk uphill to Little Hill and follow the ridge to the Plateau of the Lakes. The plateau spreads over one and a half kilometers to the foot of the West Ridge. It was formed during the last ice age by the scouring movement of glaciers. We pass Lake of the Rock on its eastern side and cross its outlet stream that drains into the deep and vast valley of the Silvertip Creek.
The Trophy West Ridge and the West Summit are directly in front of us. A creek cascades down over the rocky slopes. We follow it upstream on its right-hand side. We scramble up next to the waterfall and reach a pool above it. It is a quiet and serene place that invites to rest. In early September 2014 when I am accompanied by some friends, it is still sunny and warm here, whereas on a solo trip the next year the pool is already frosted over.
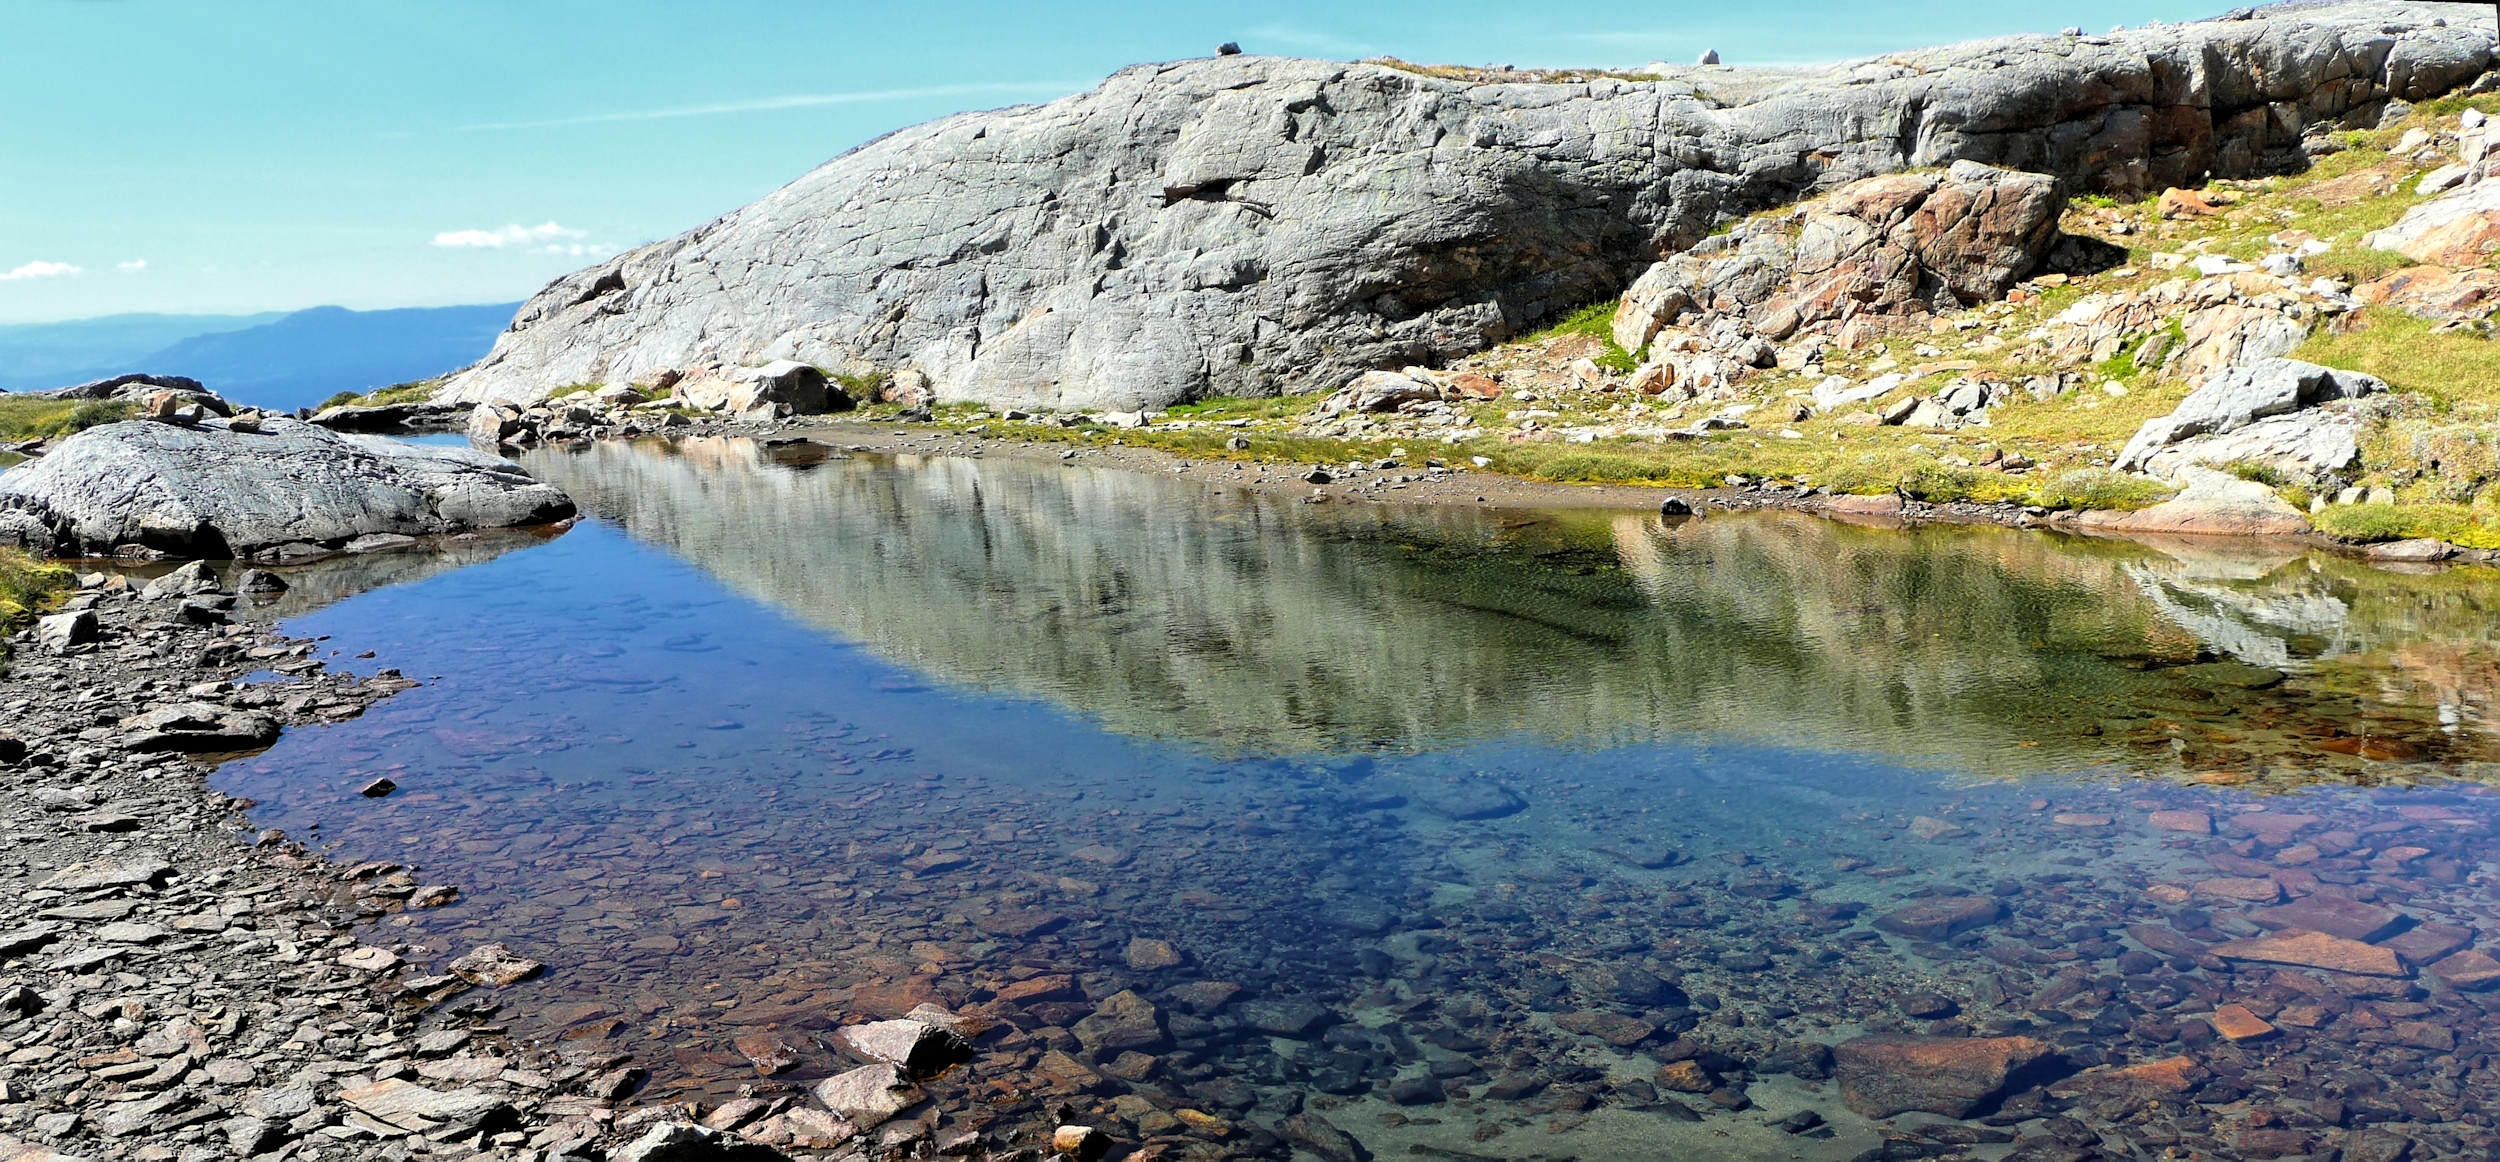
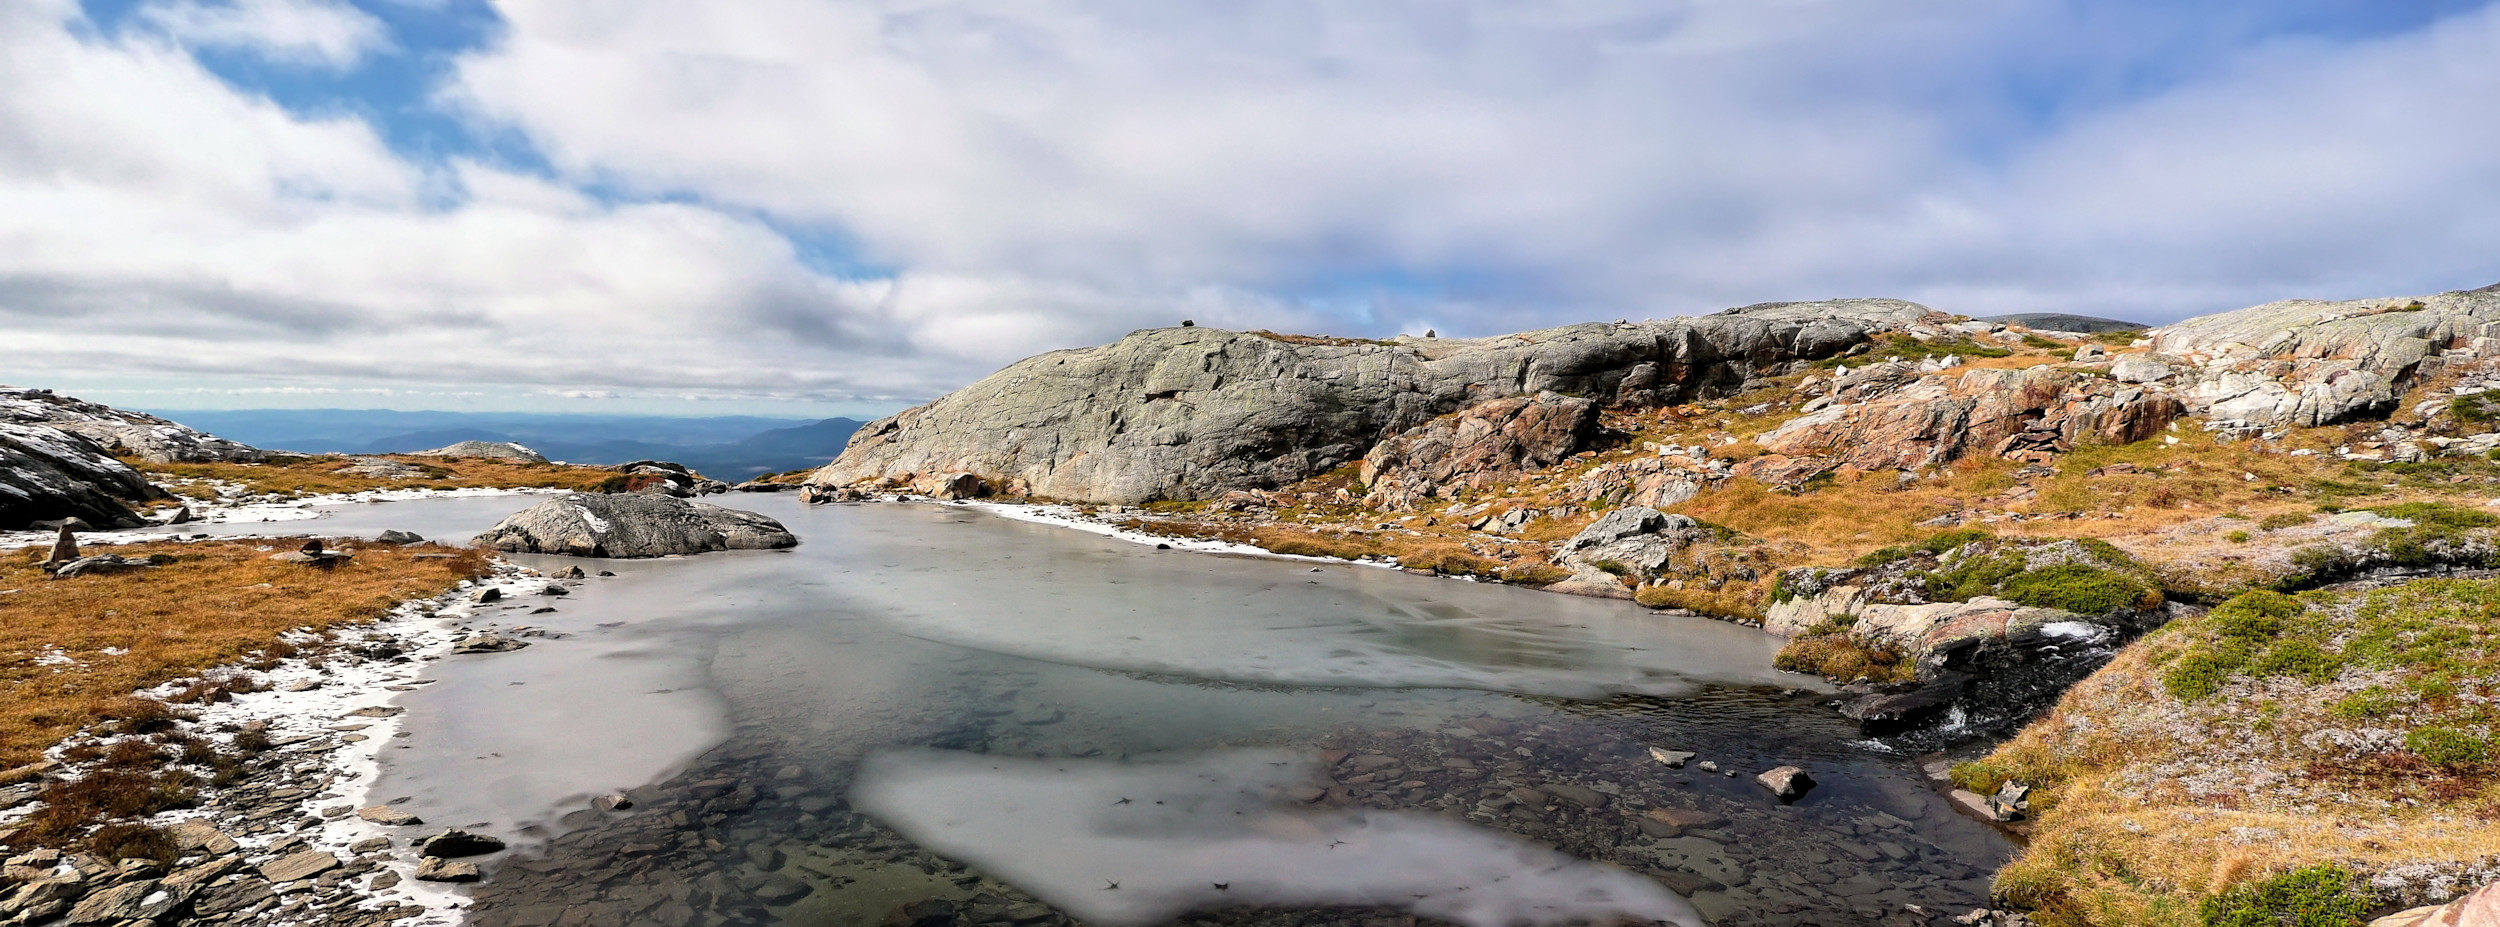
Pool with frost
The route continues along the turbulent creek. On the steep slopes, patches of heather and grass provide some foothold. We keep to the less steep left side of a massive cliff east of the tarn and thus manage to climb around it. From above I look at another pool in which the ice has formed the shape of a heart.
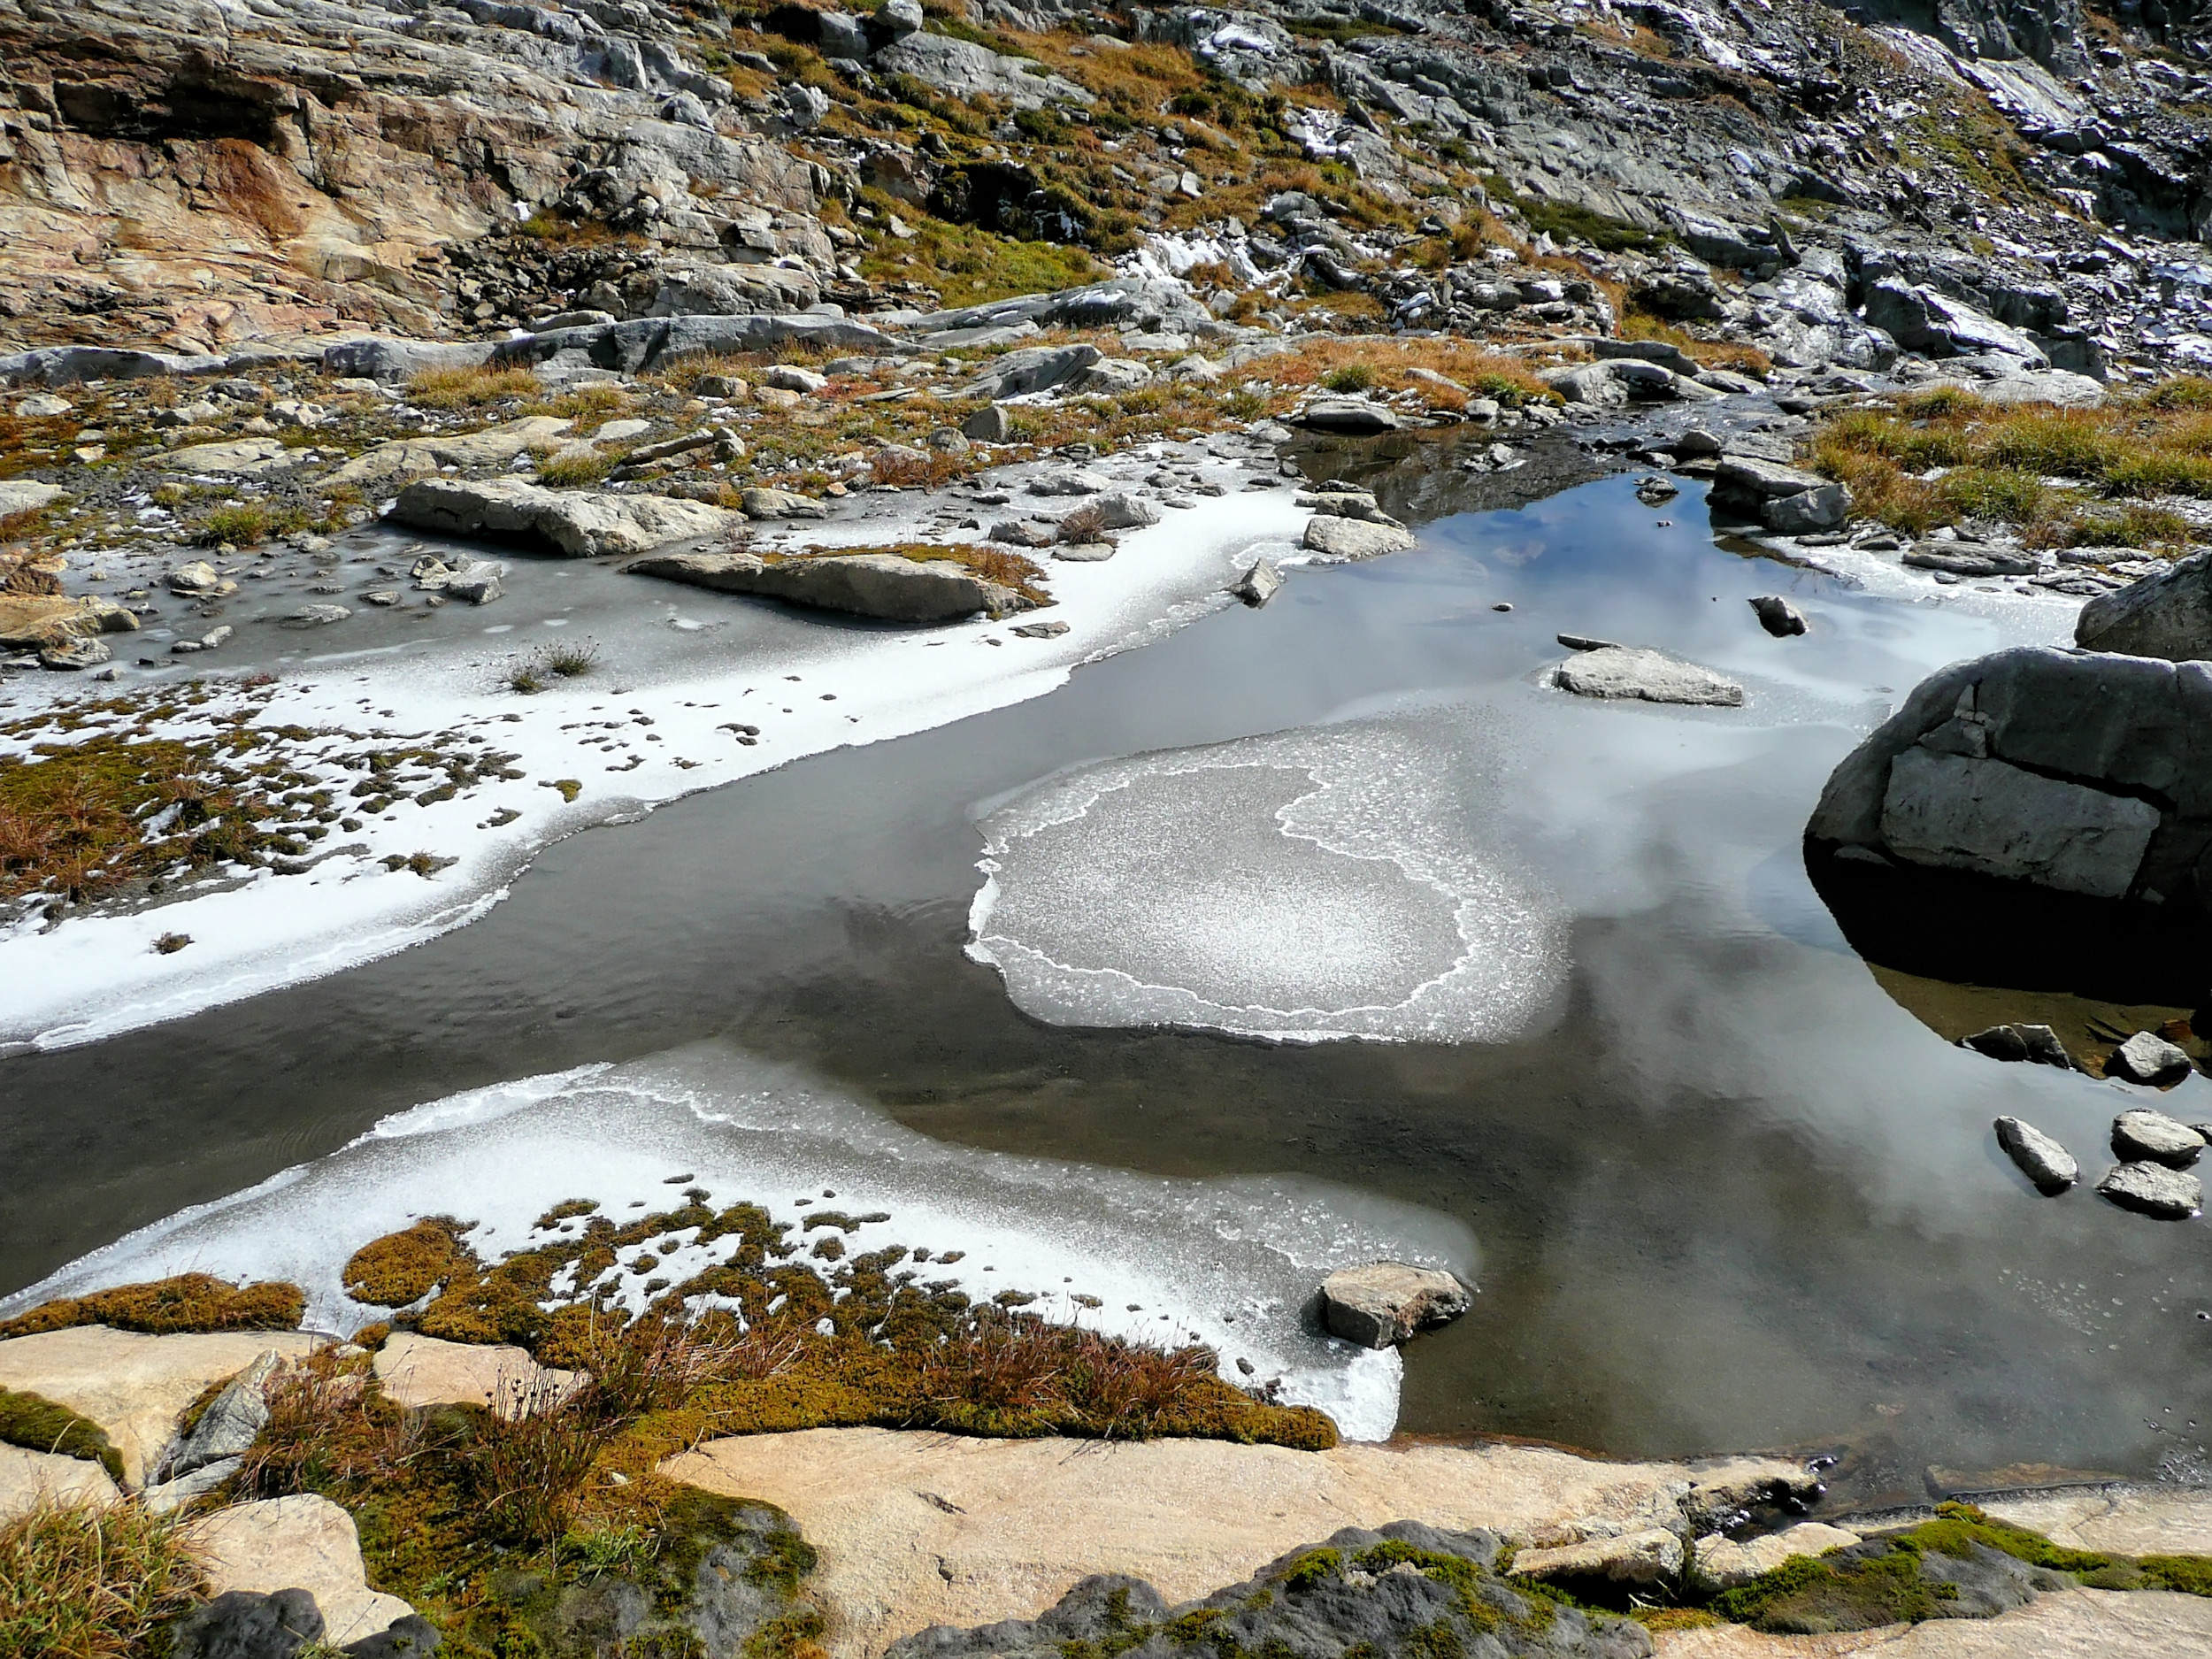
A heart of ice
At this altitude, the creek starts to freeze into sculptures.
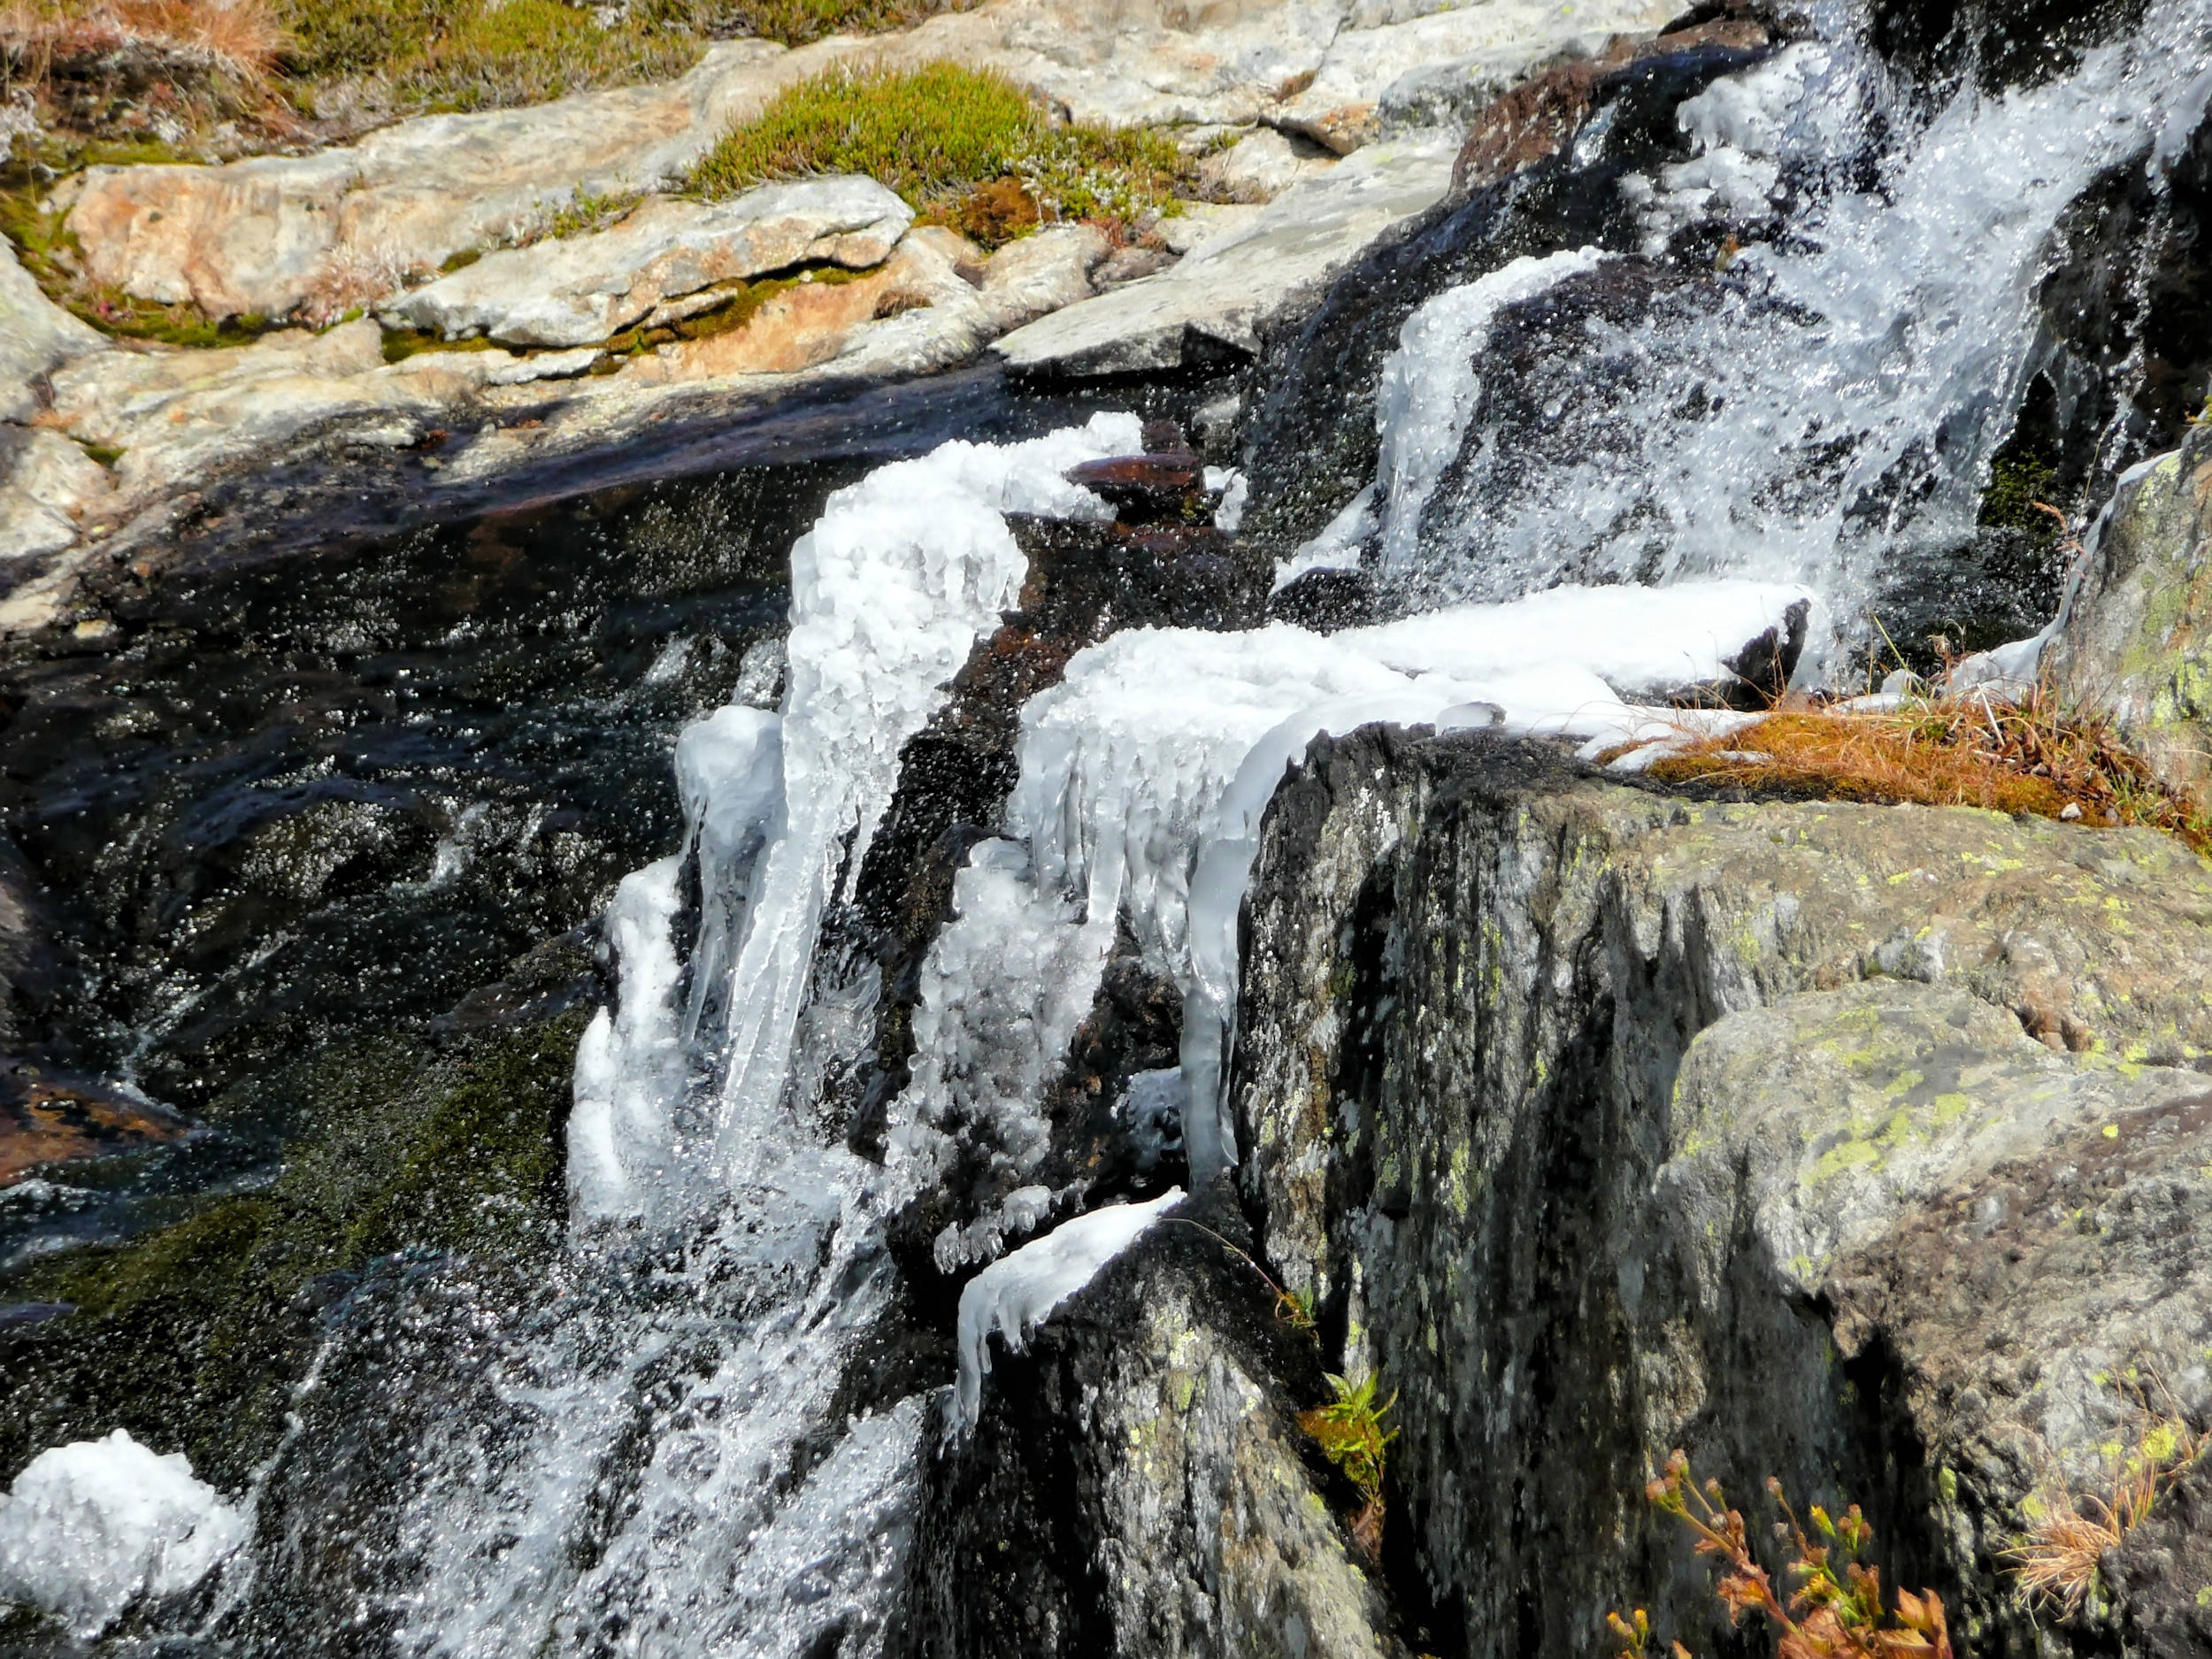
Freezing creek
From here we have a good view of the Plateau of the Lakes. In recent decades the Lake of the Rock has changed dramatically. Sediments have gradually filled it in and the rock it is named for is no longer surrounded by water.
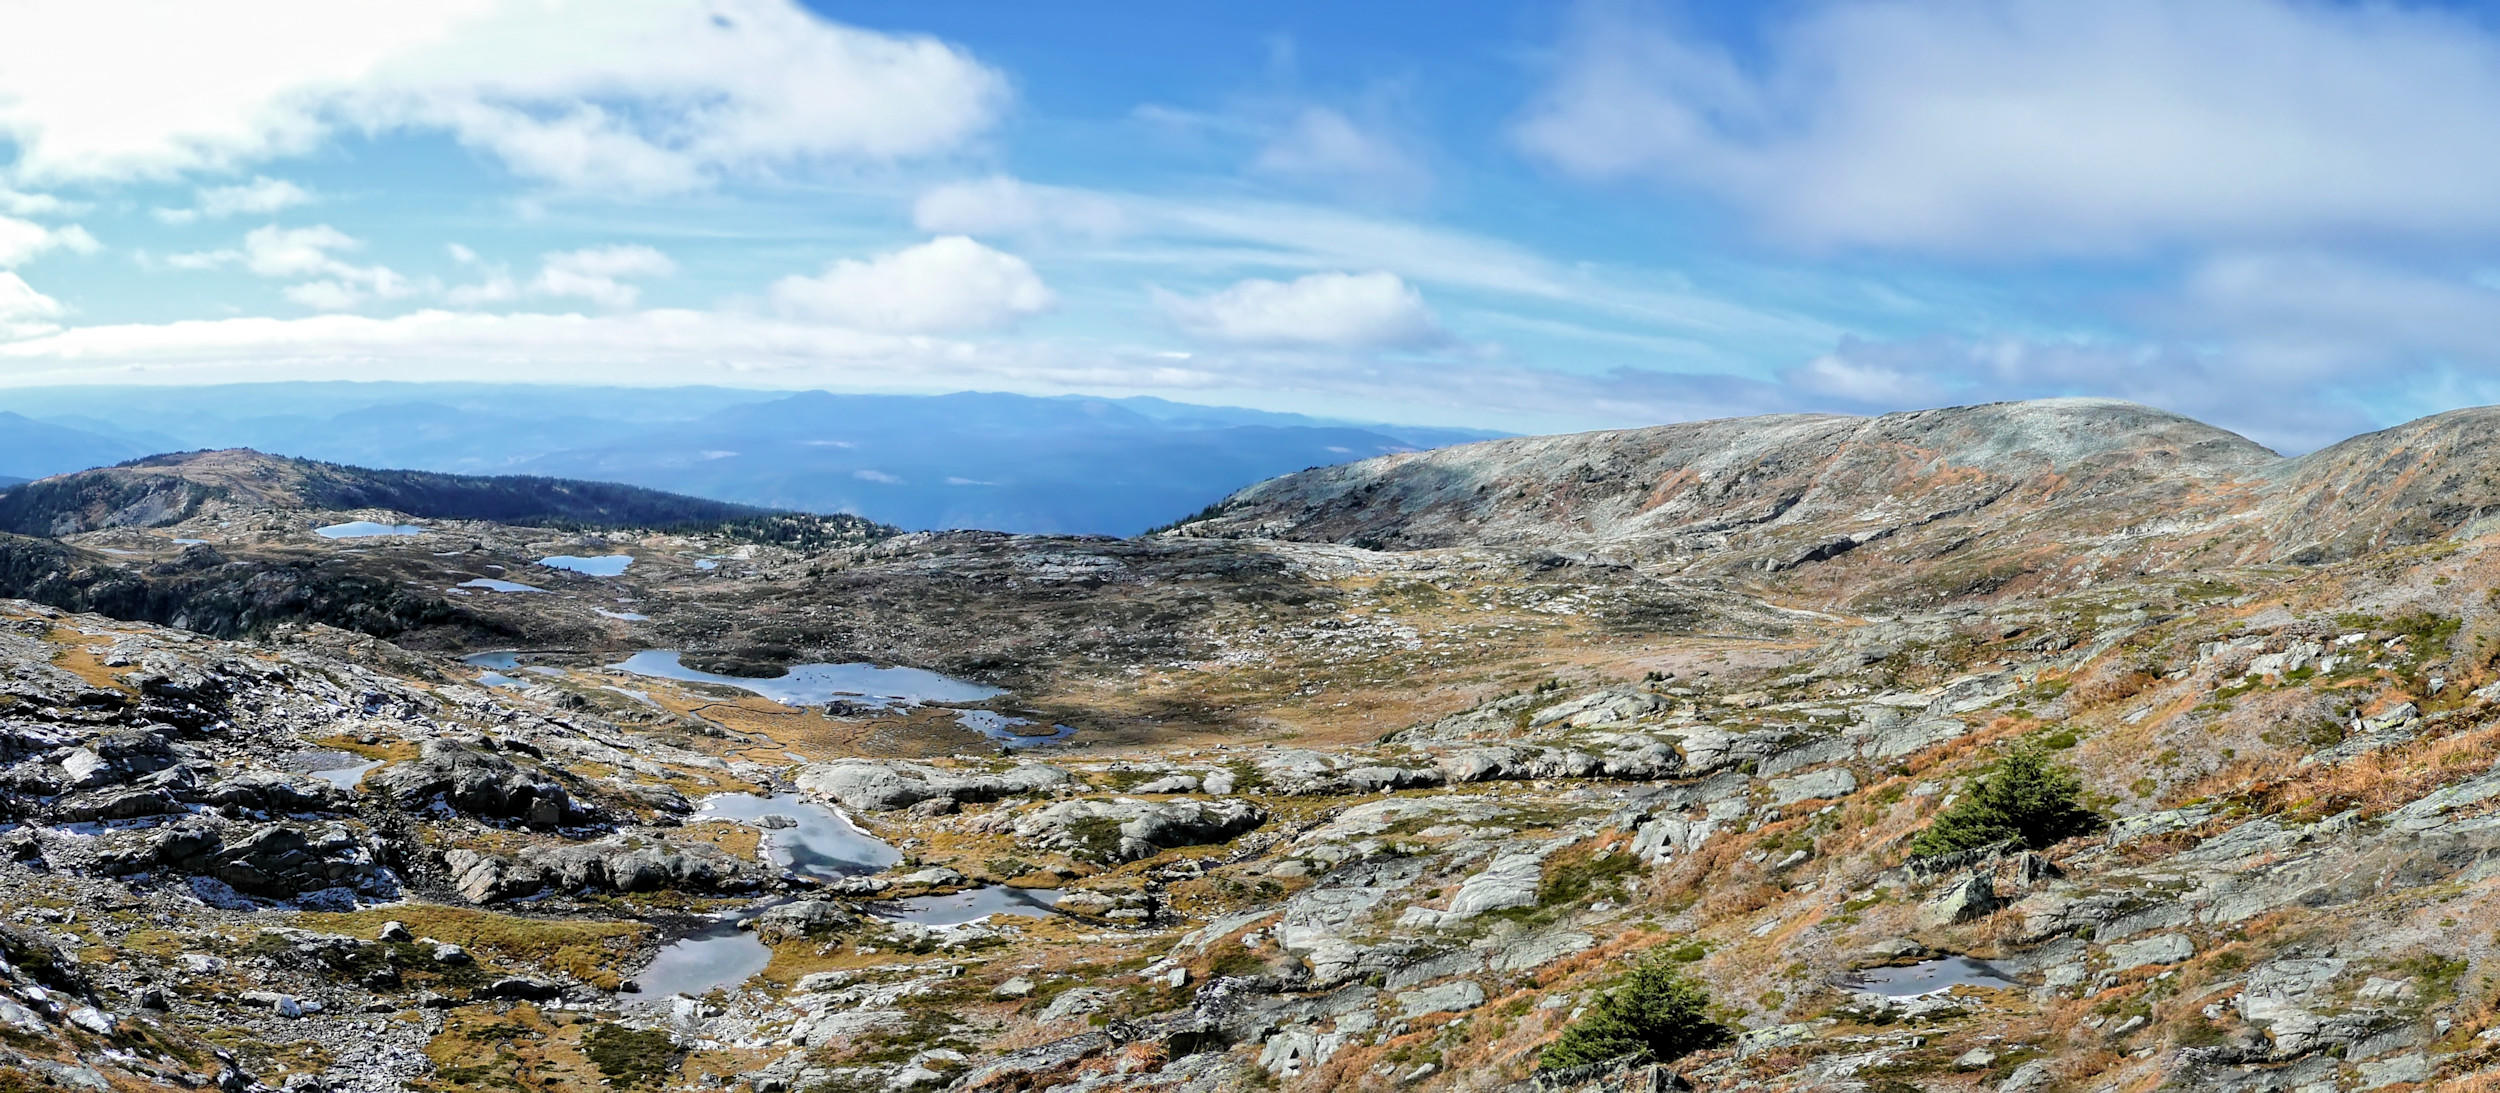
Plateau of the Lakes
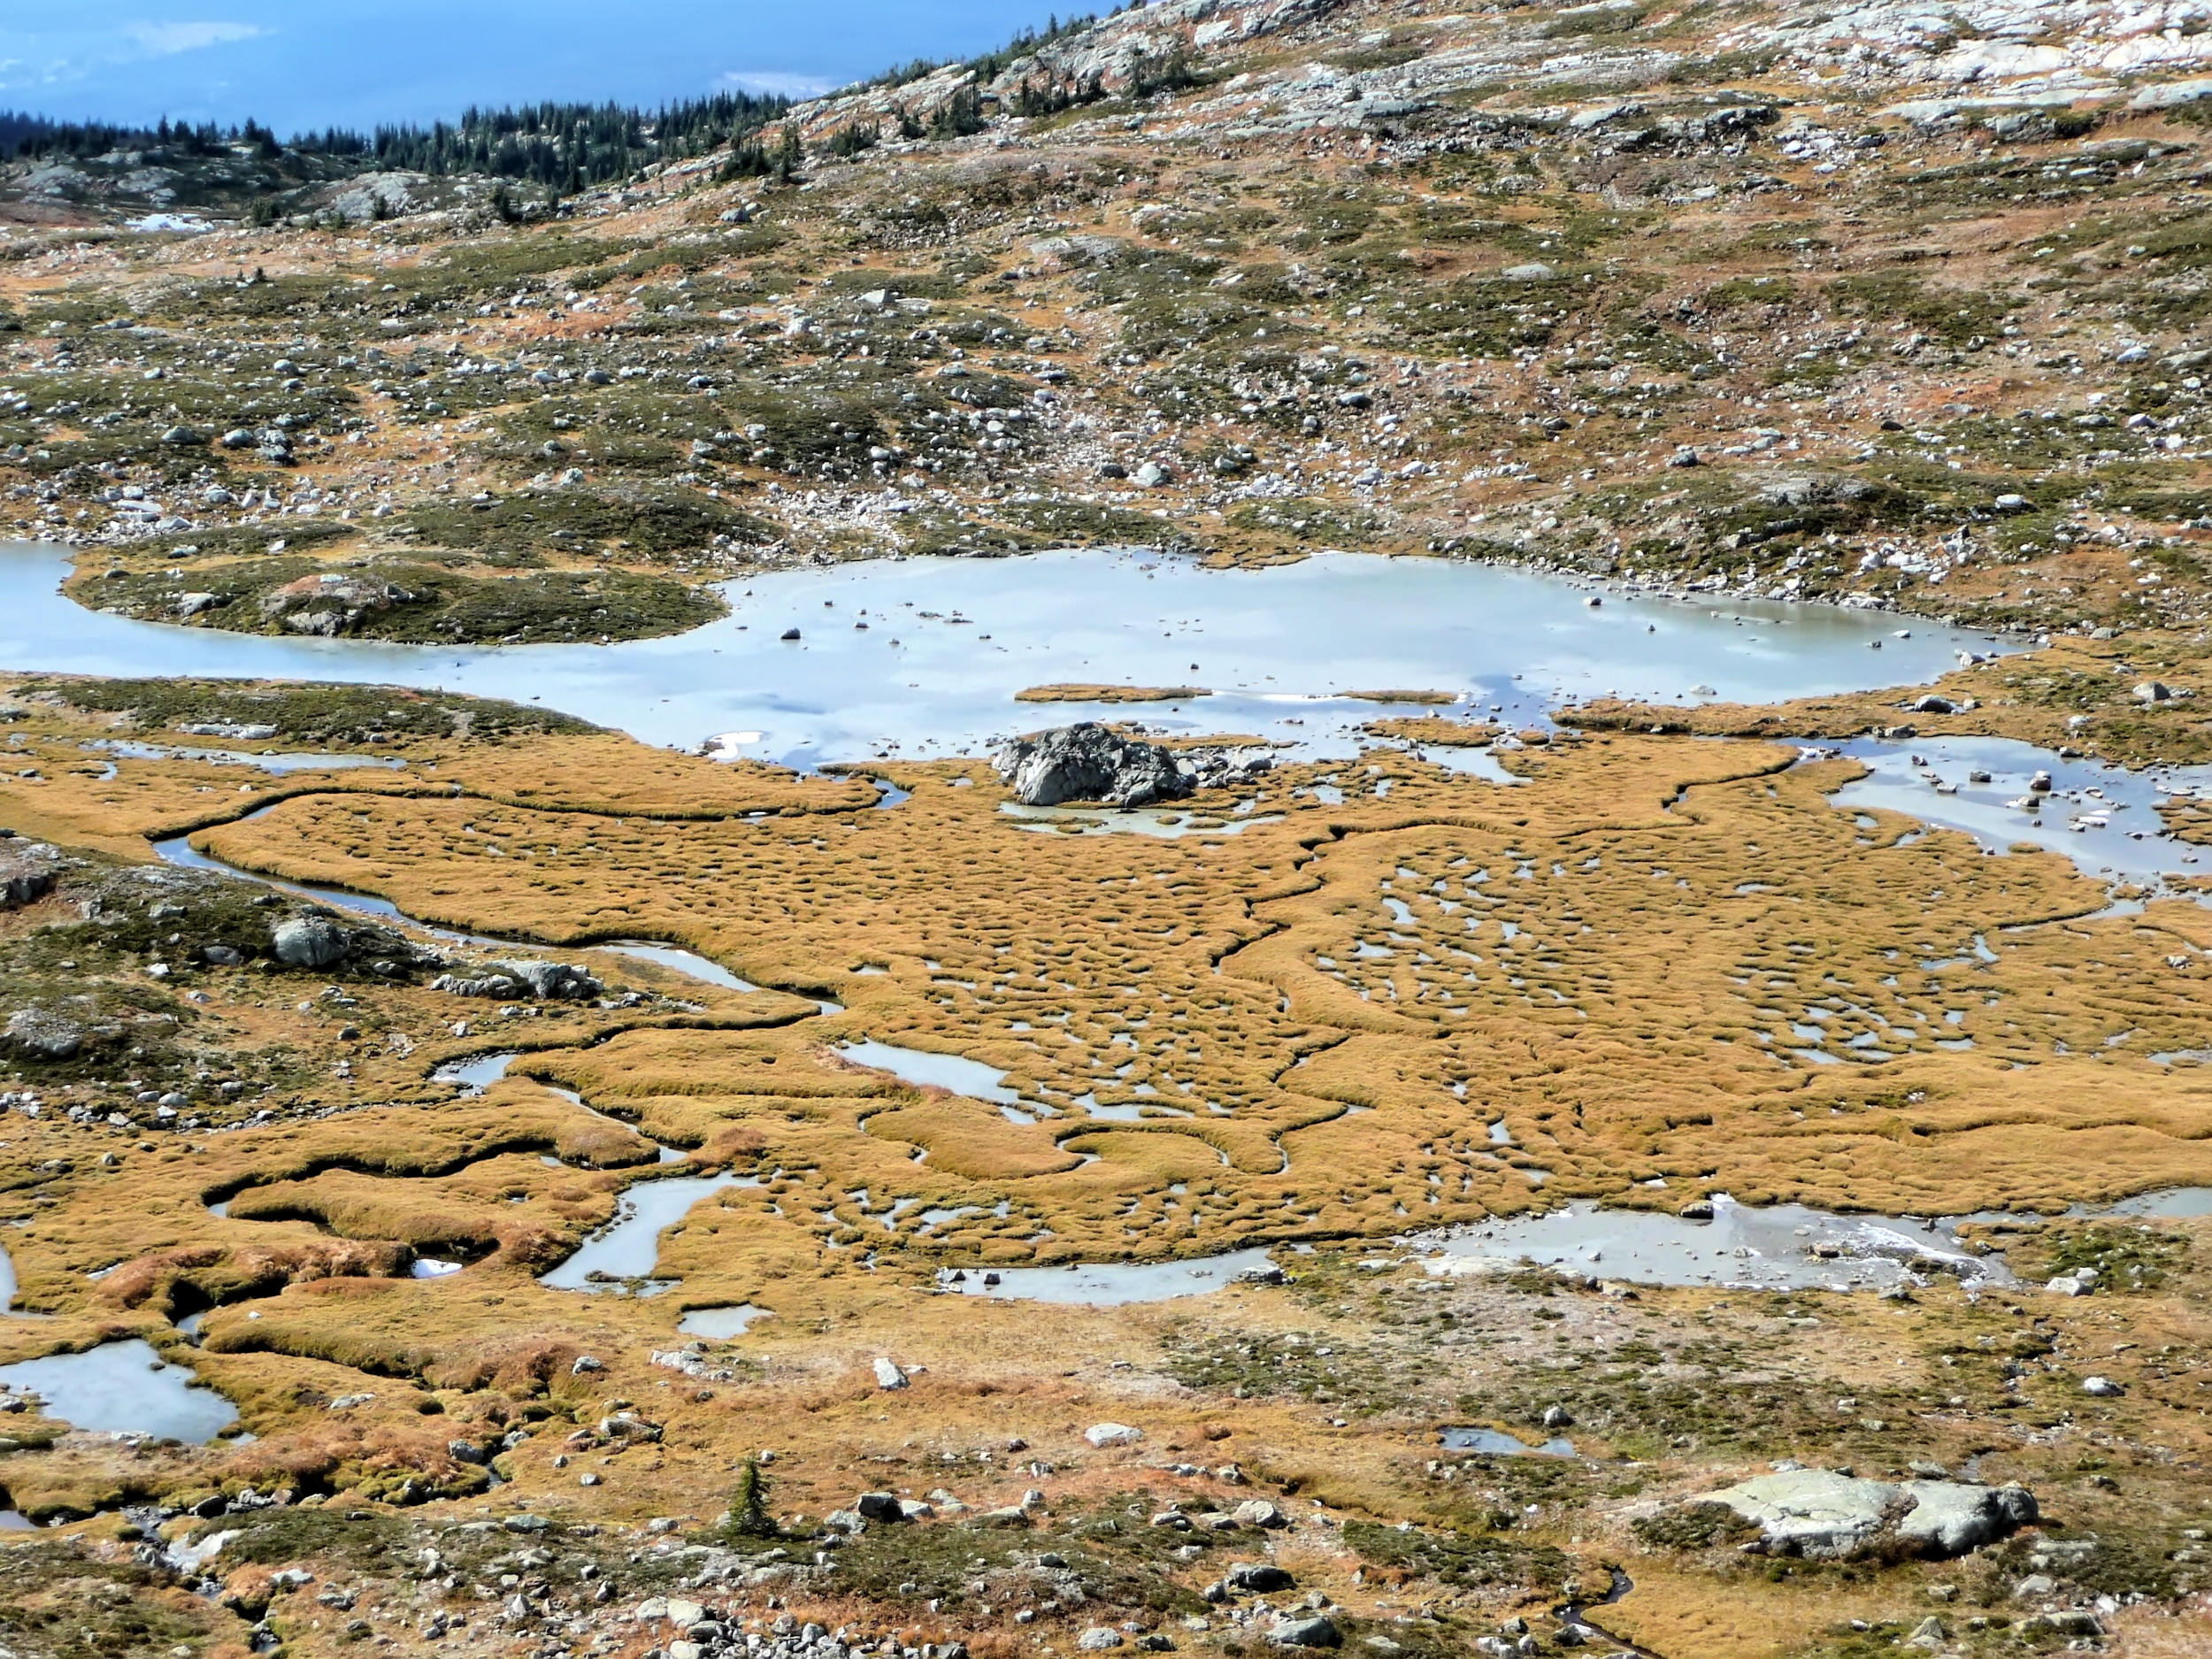
Lake of the Rock
At an altitude of 2330 meters we turn into a south-eastern direction in order to approach the summit along a southern outlier. To reach it, we have to scramble over a very rough 400 meter long stretch of loose rocks and boulders. On the other side is a deep drop-off. Fortunately, the spine of the outlier is wide enough so we don't feel intimidated by its height. We follow it uphill.
Climbing to the West Summit
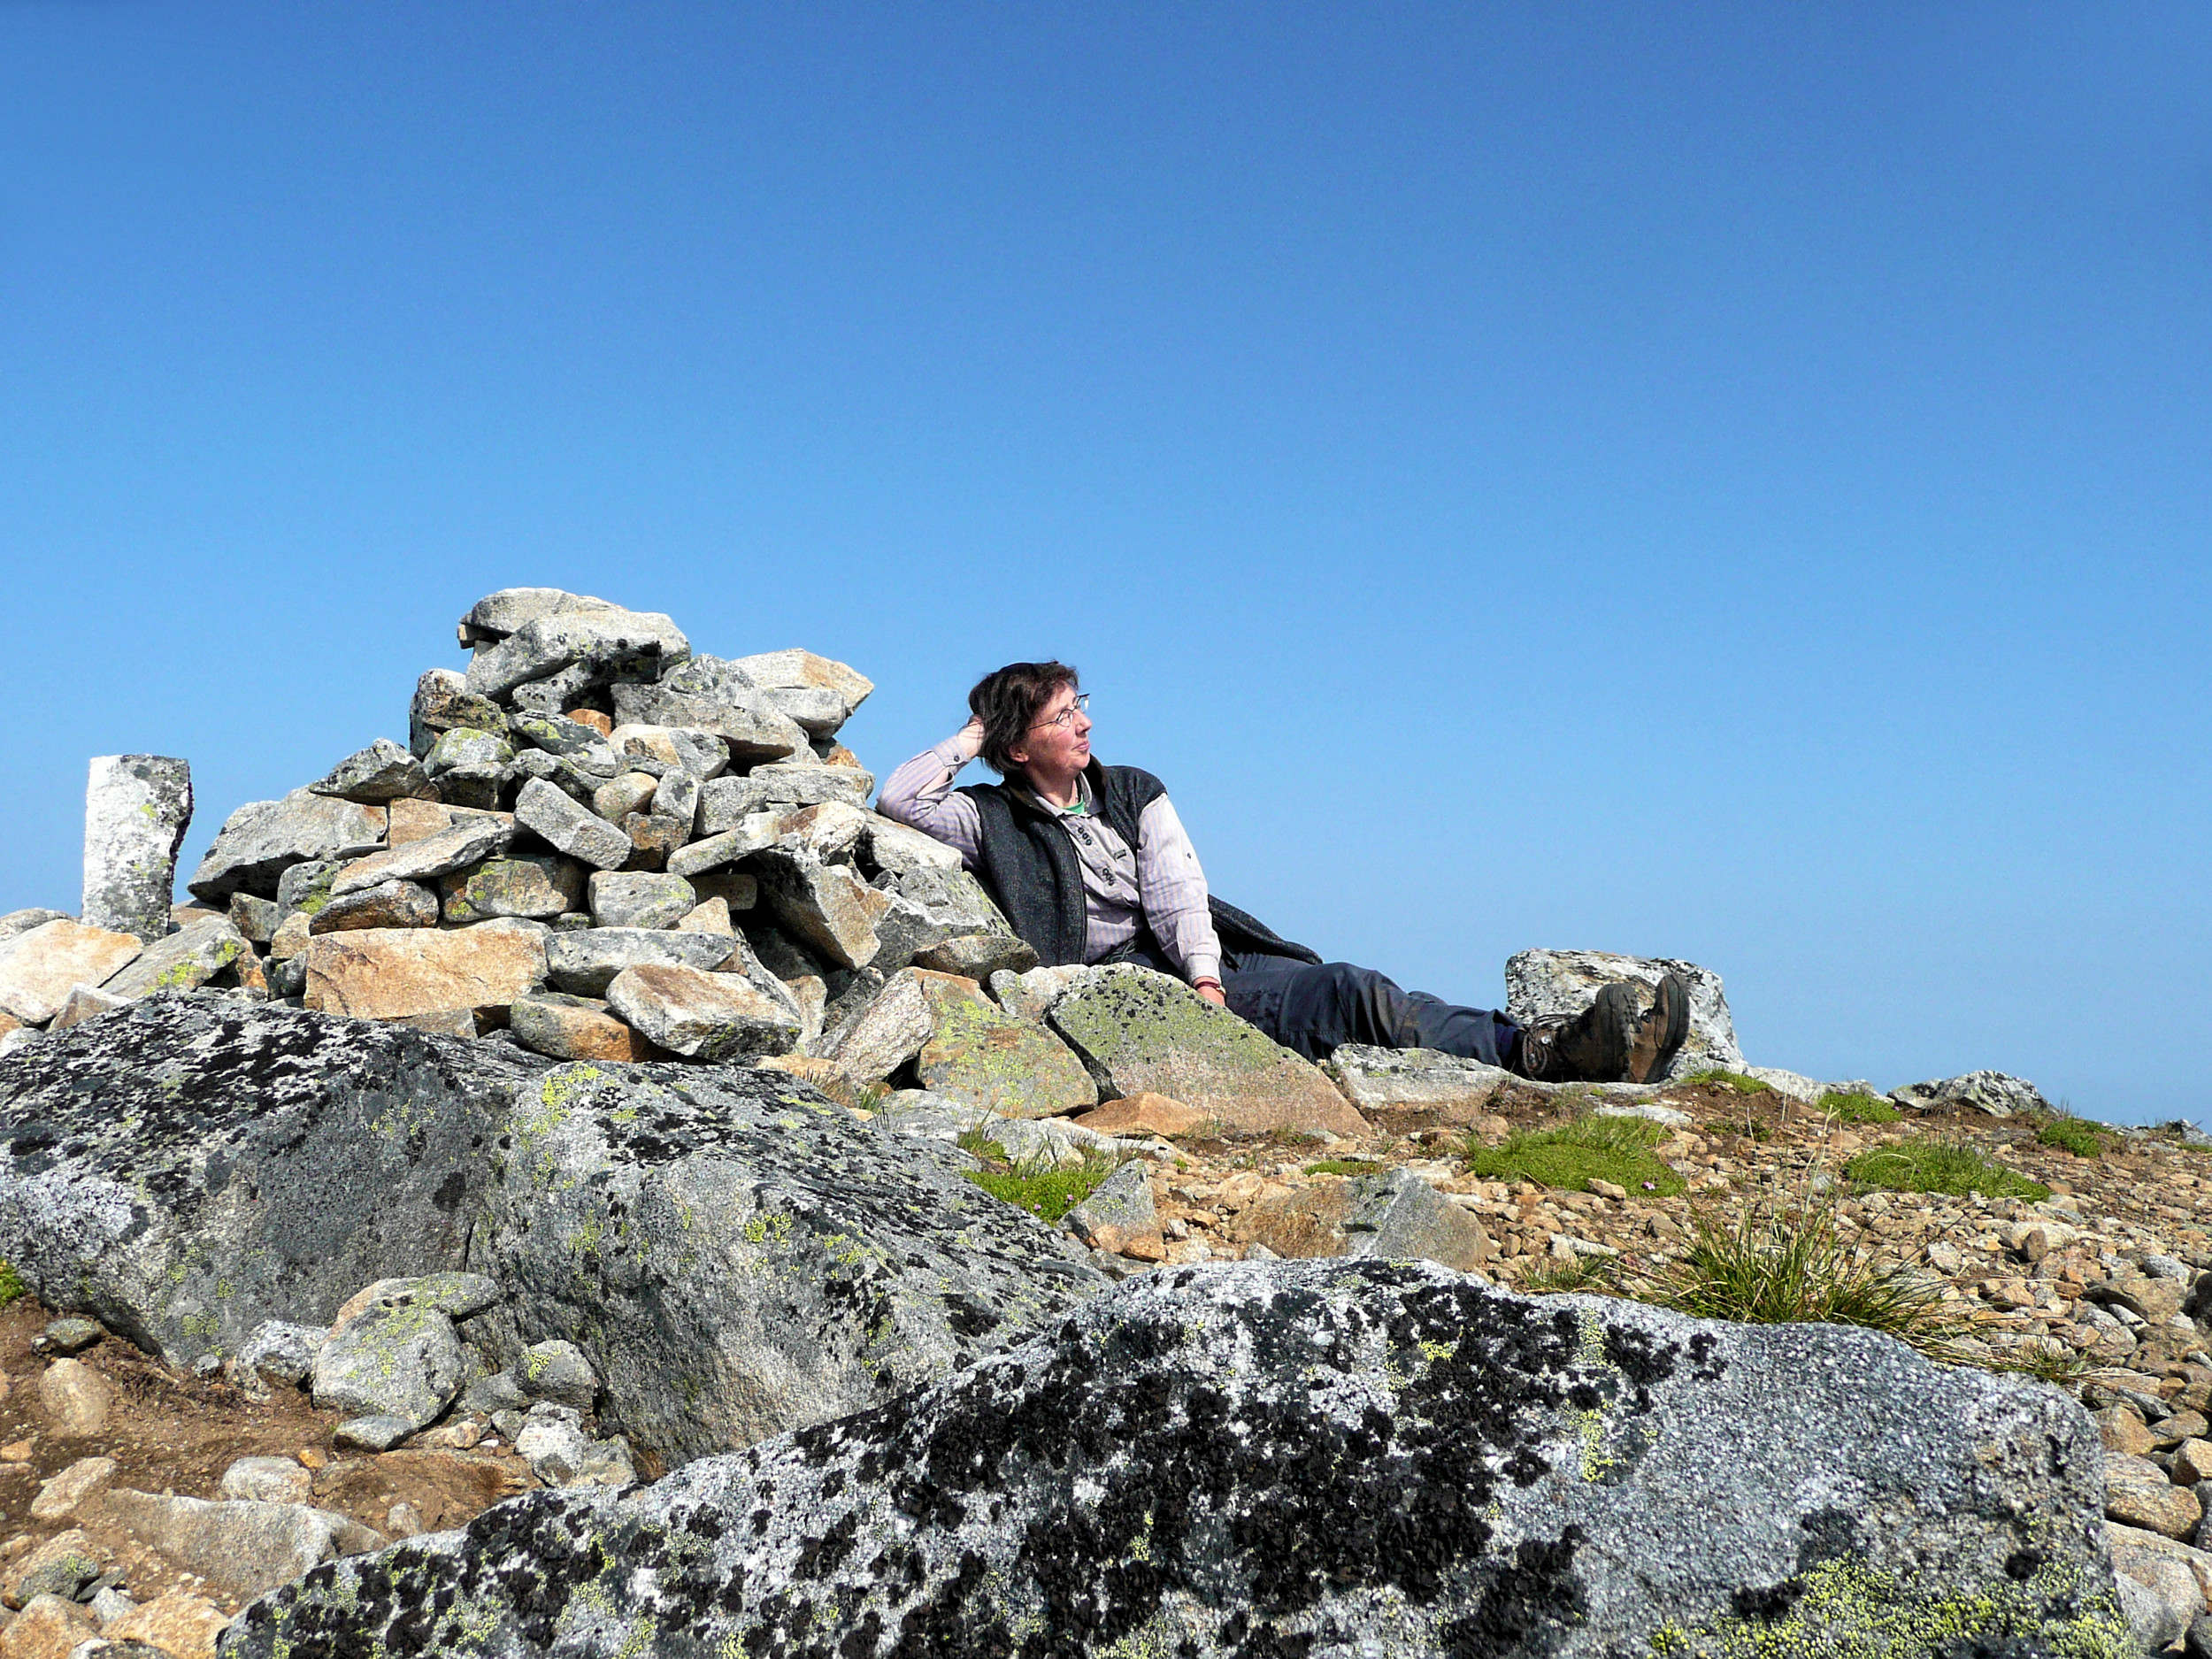
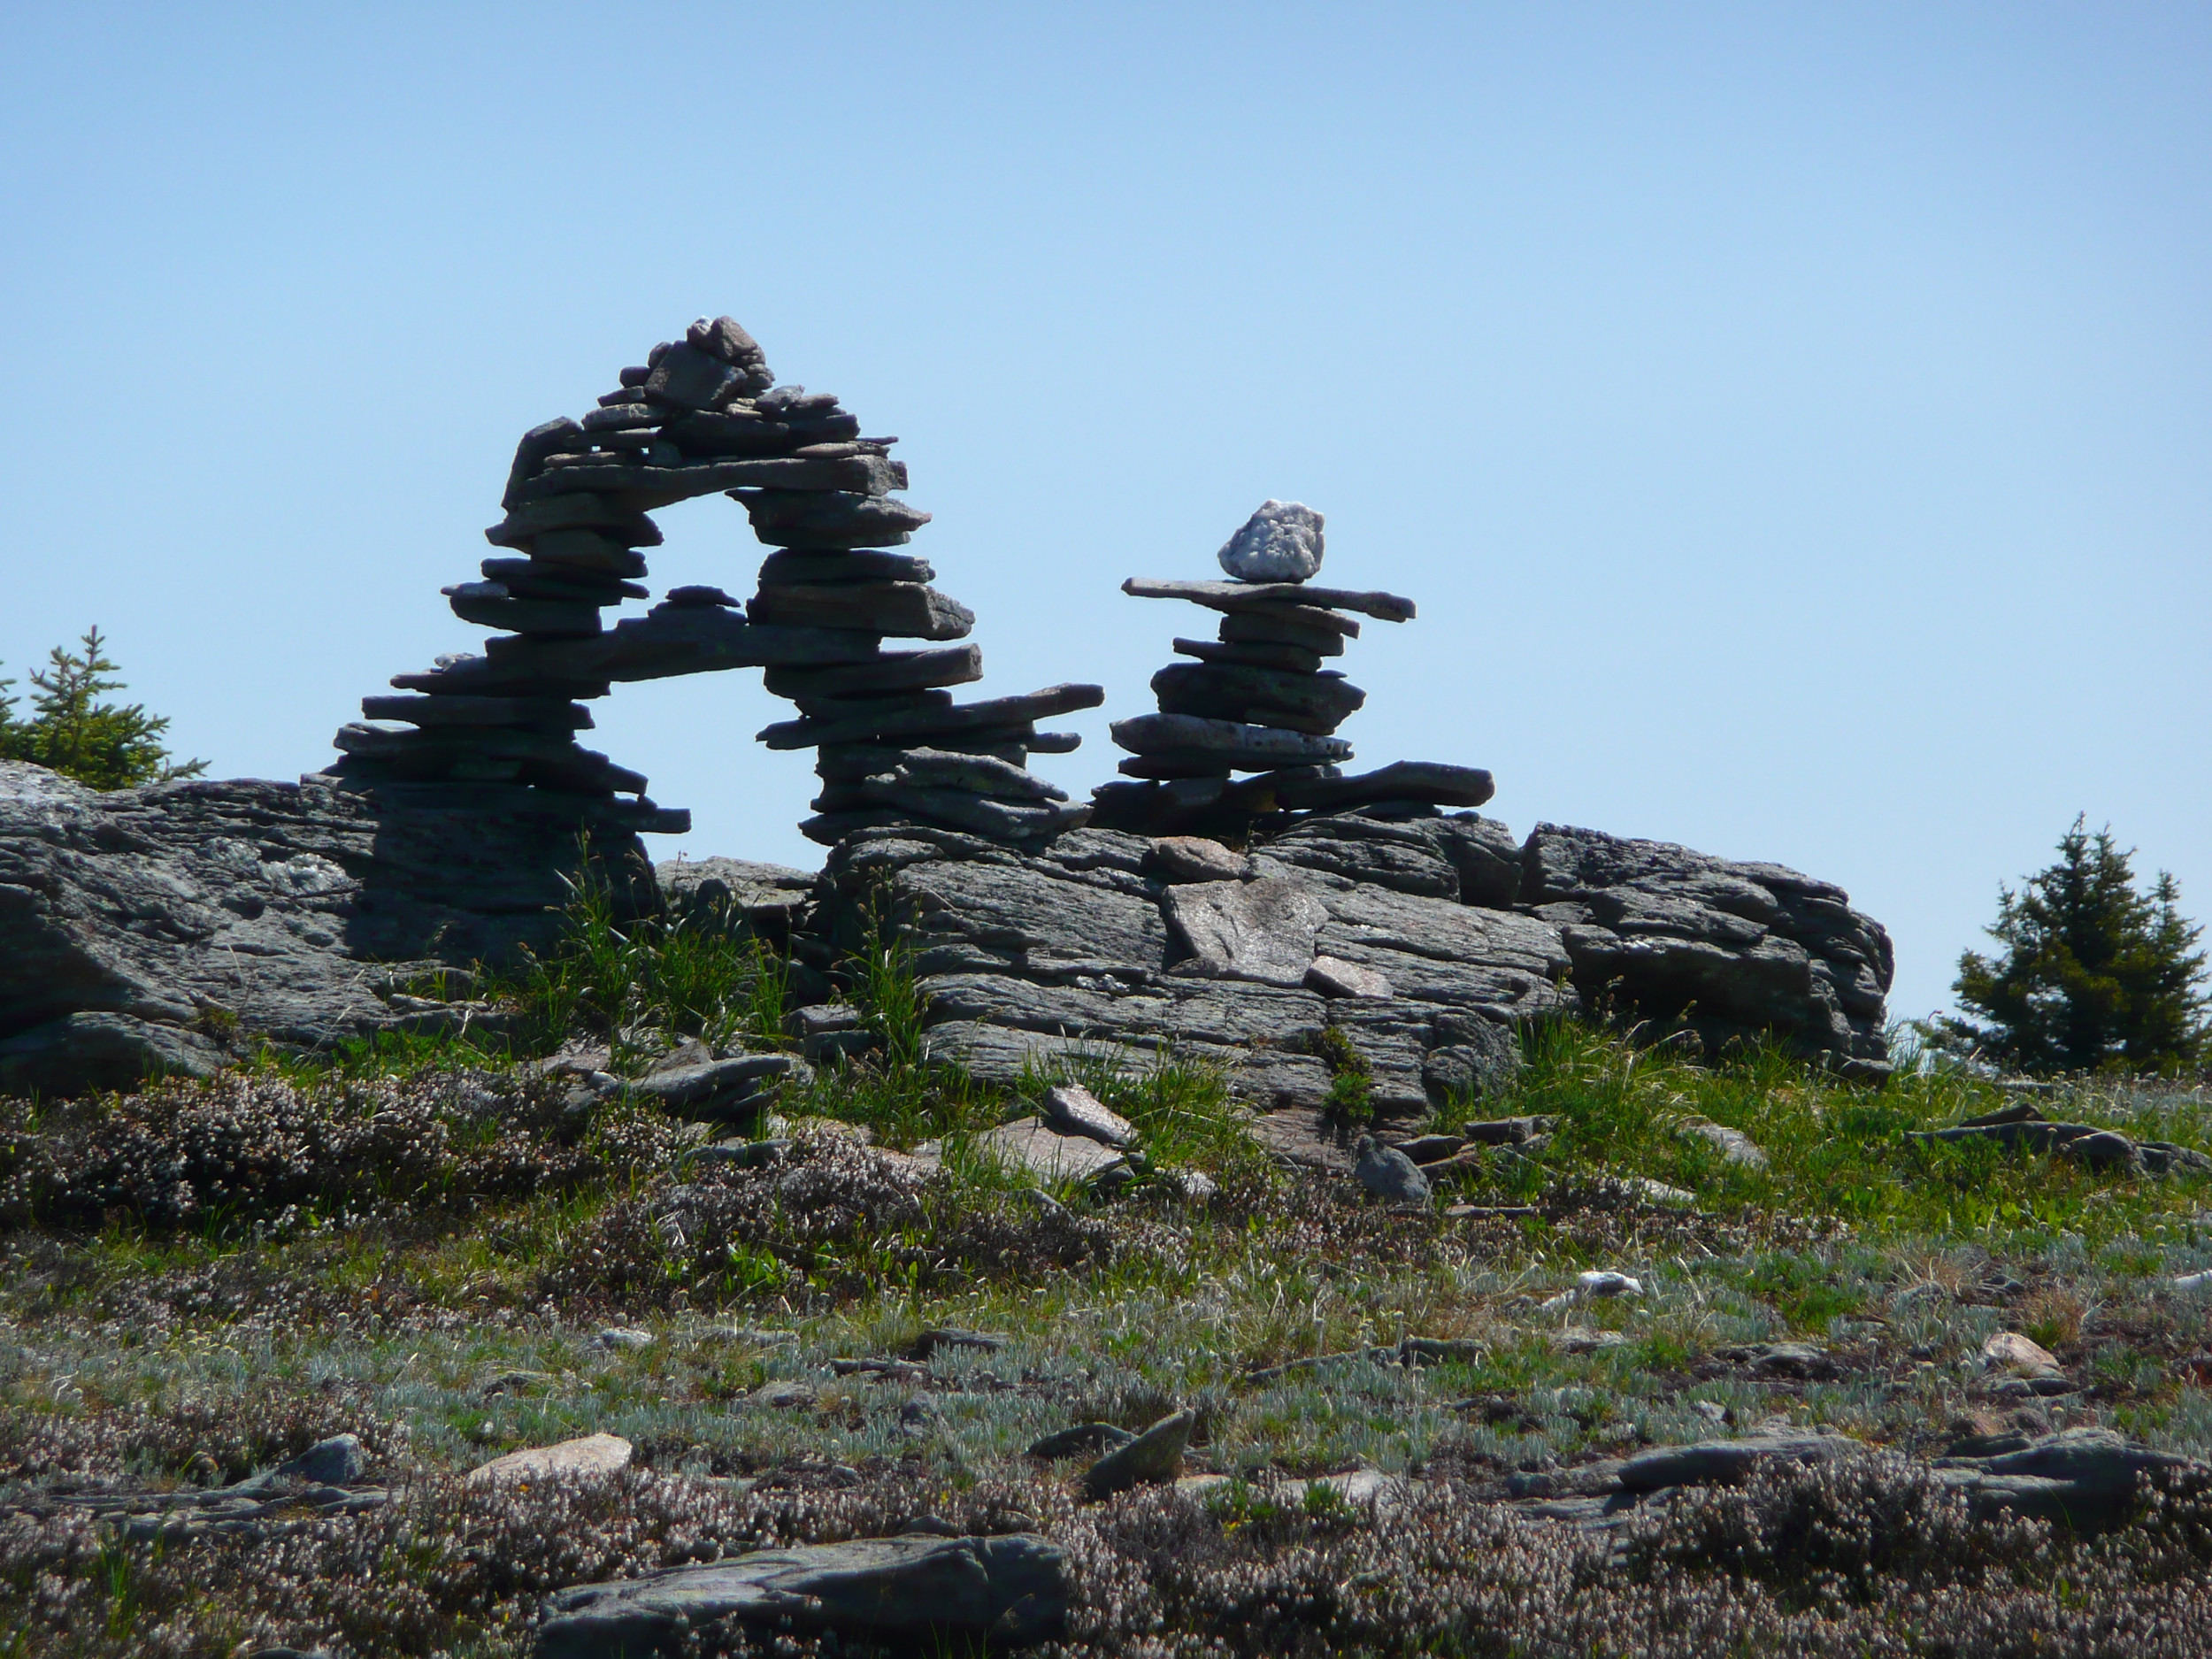
This is the steepest part of the route, and when we finally reach the West Summit at 2532 meters, we are panting. The summit is marked by two cairns and a shelter built from rocks that previous hikers have stacked as protection against the cold winds.
West Summit Cairn 2553 m
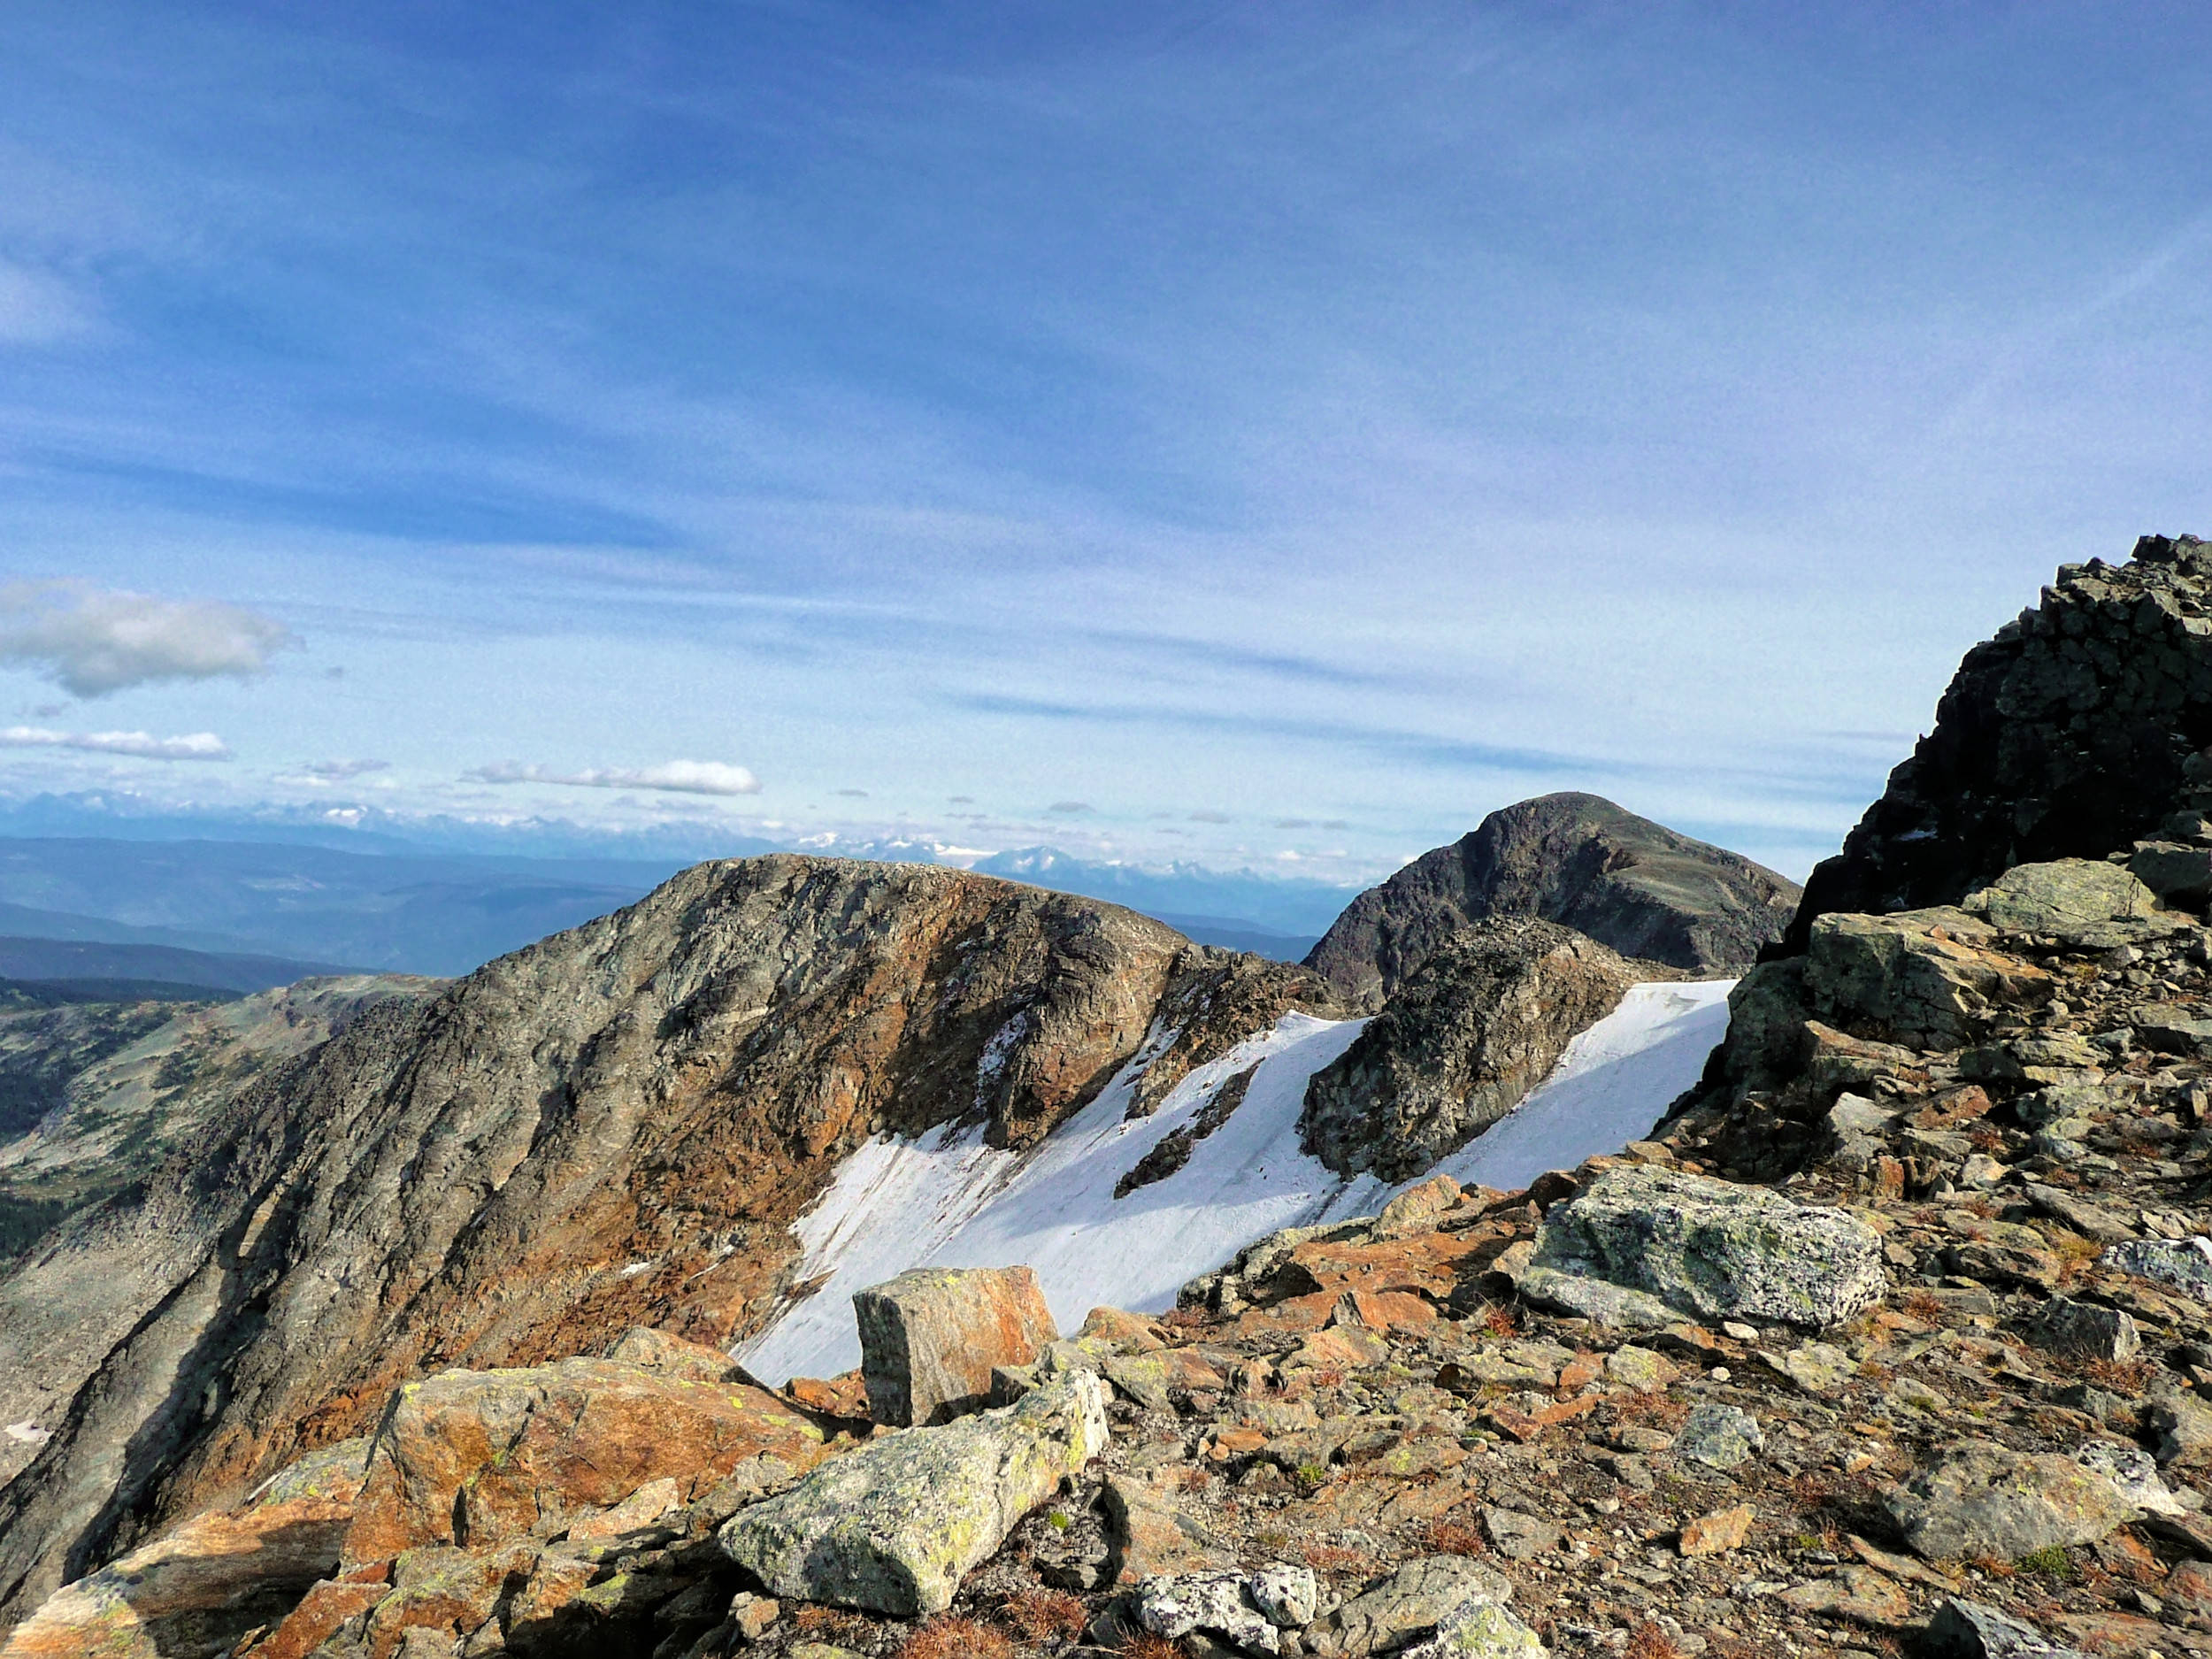
The views from the top are fantastic. From right to left:
Cwem Cwem Lake
Trophy Mountain Panorama
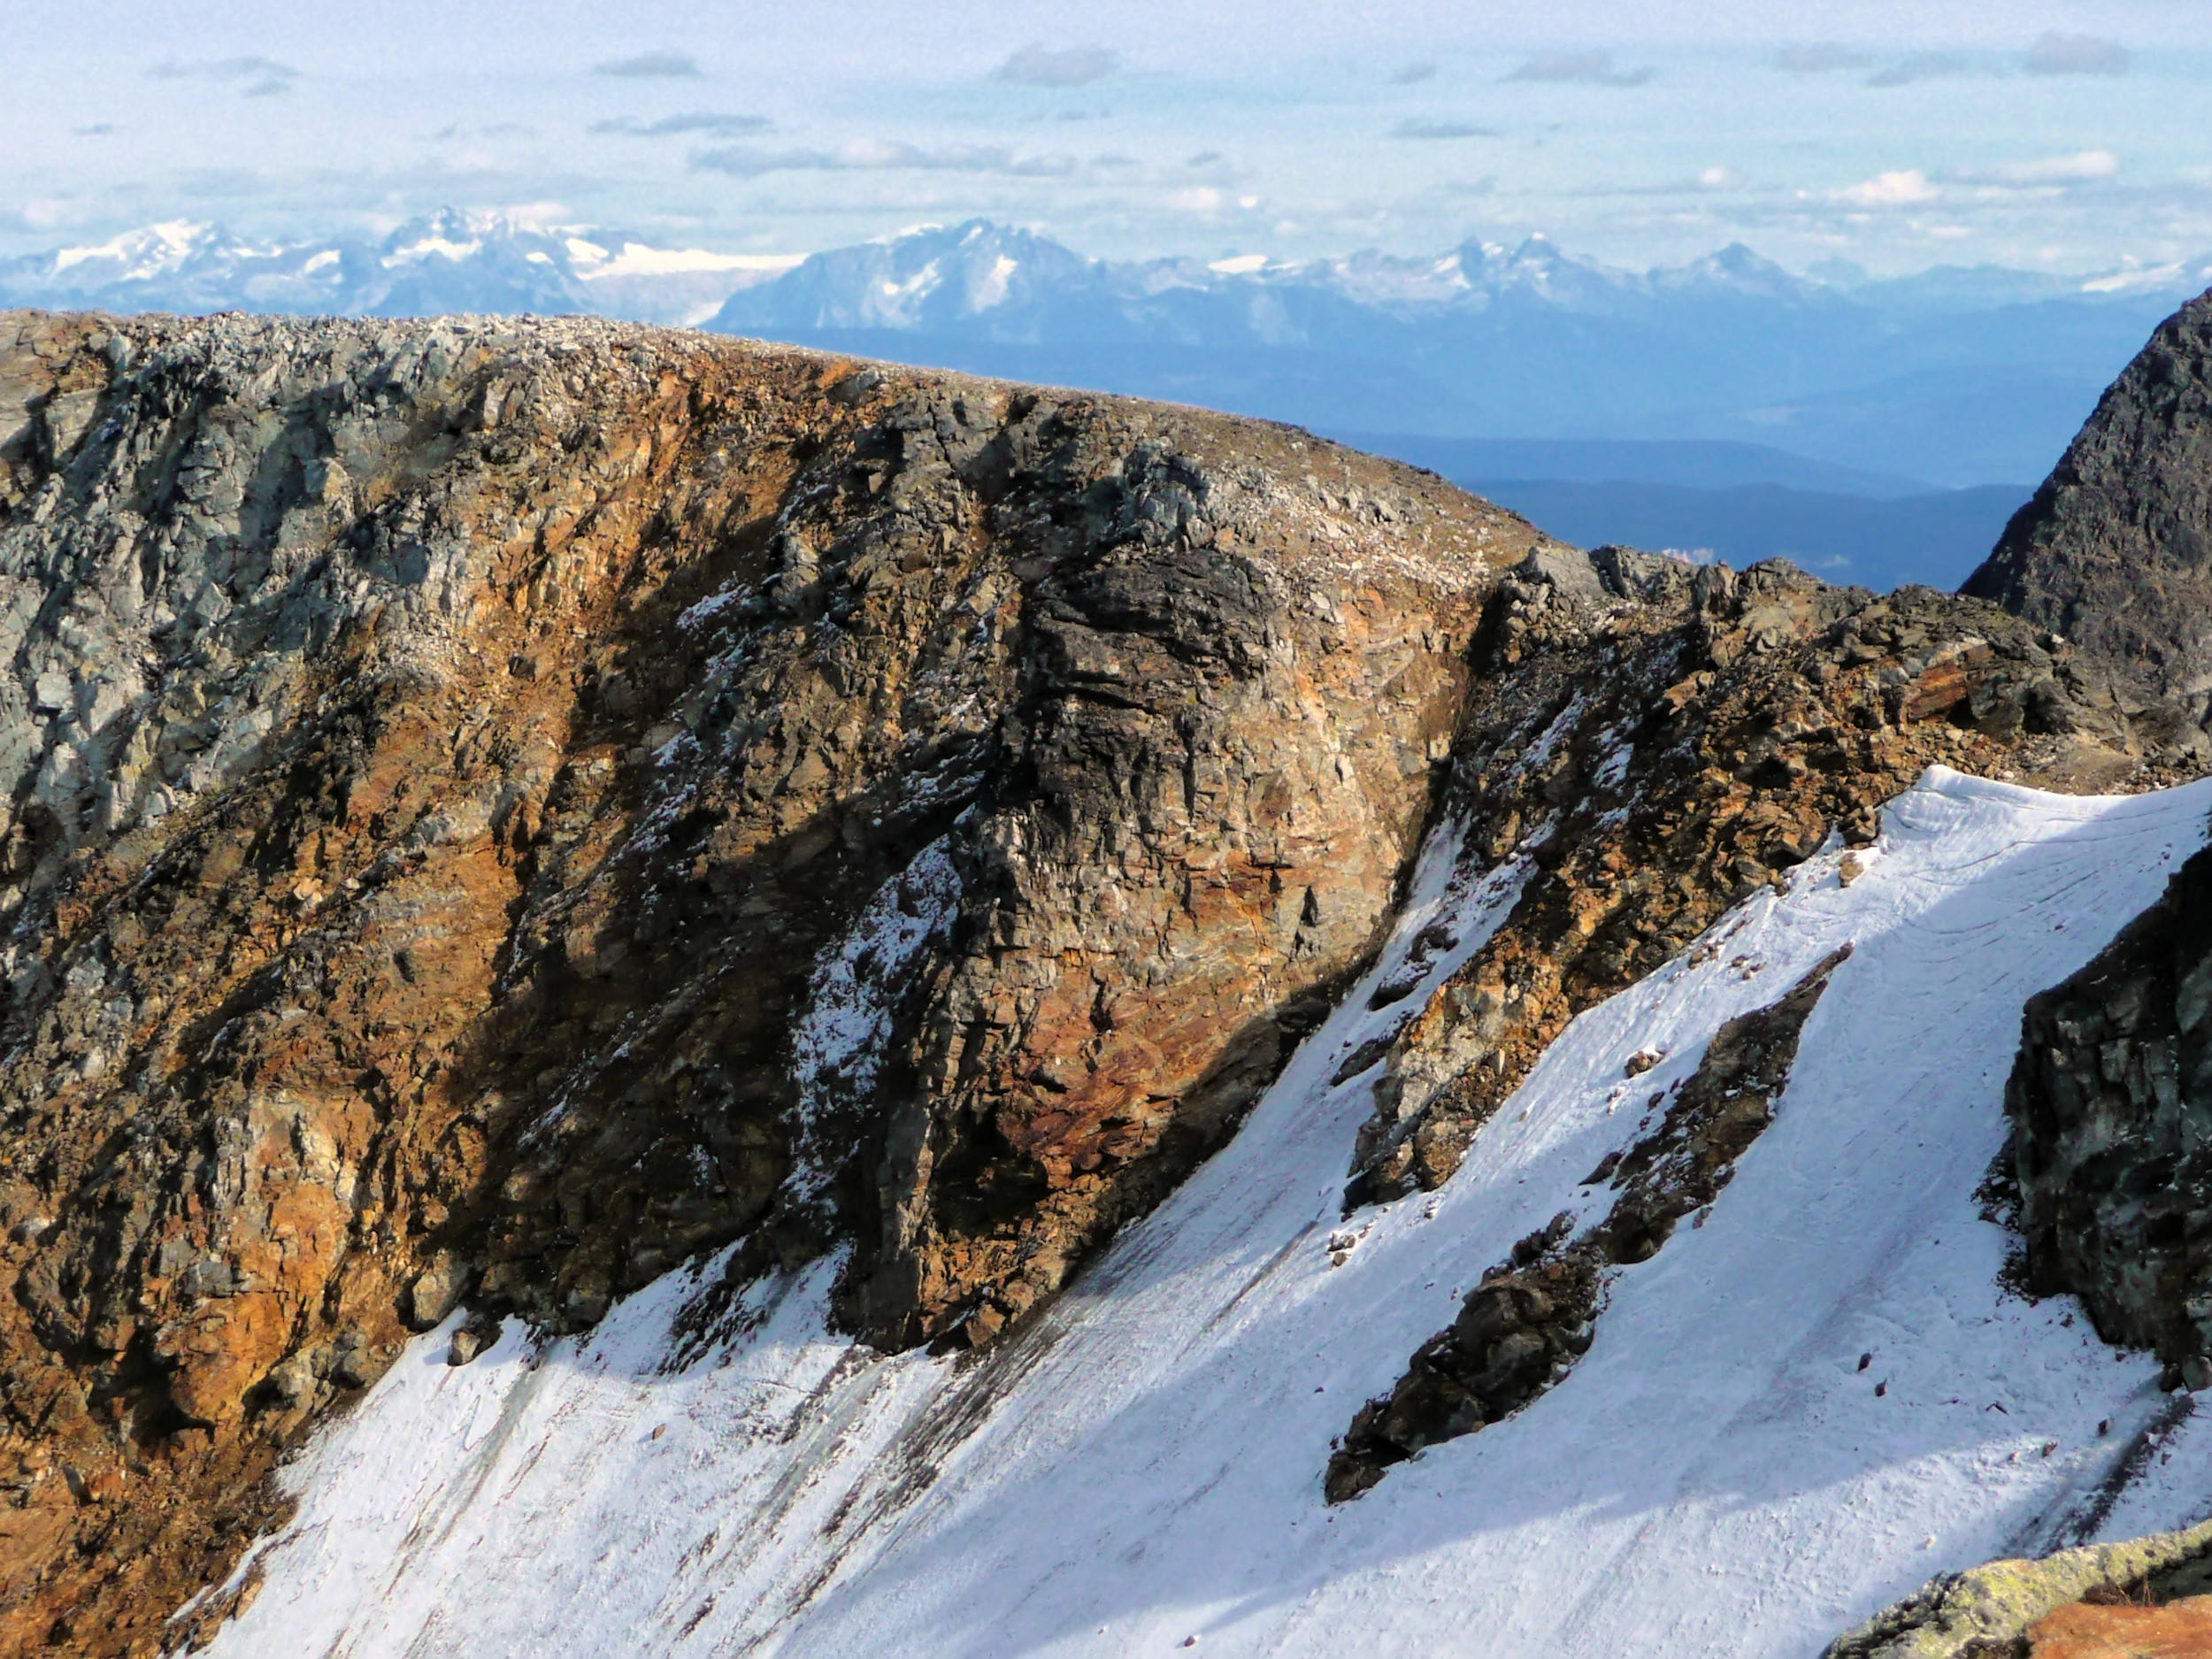
Ridge between West Summit and Trophy Mountain main summit

Eternal snow on the northern flank
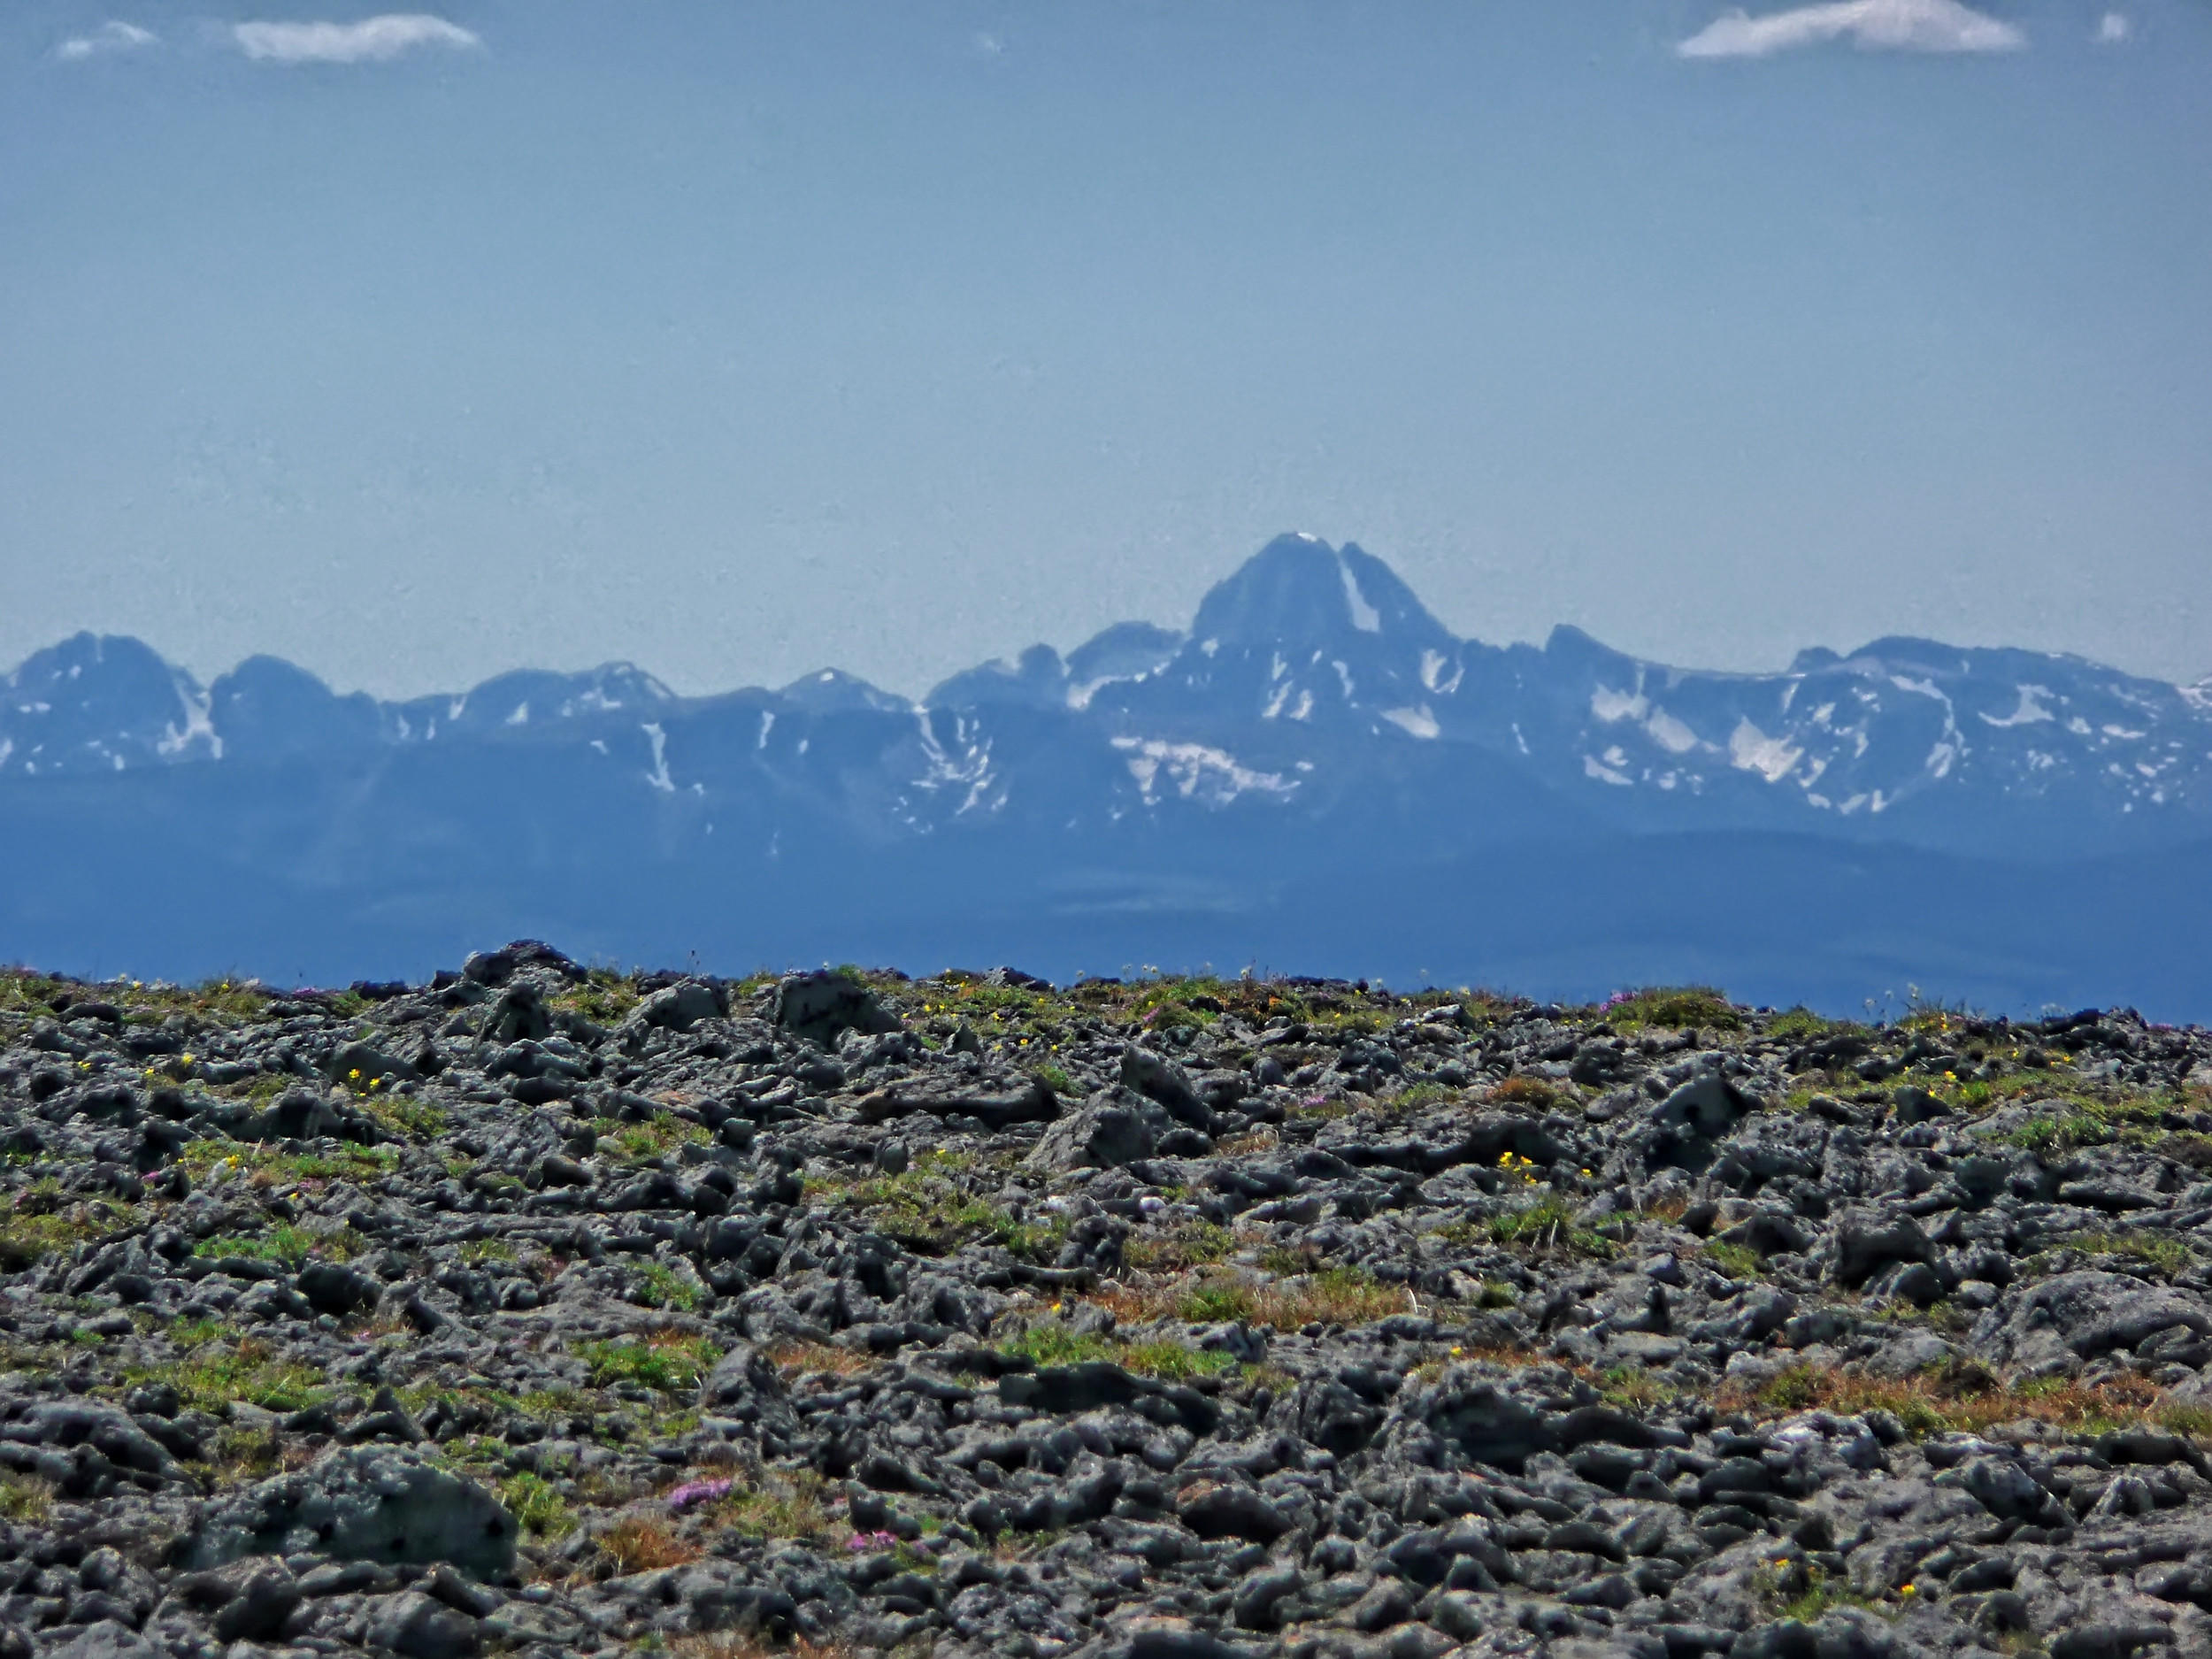
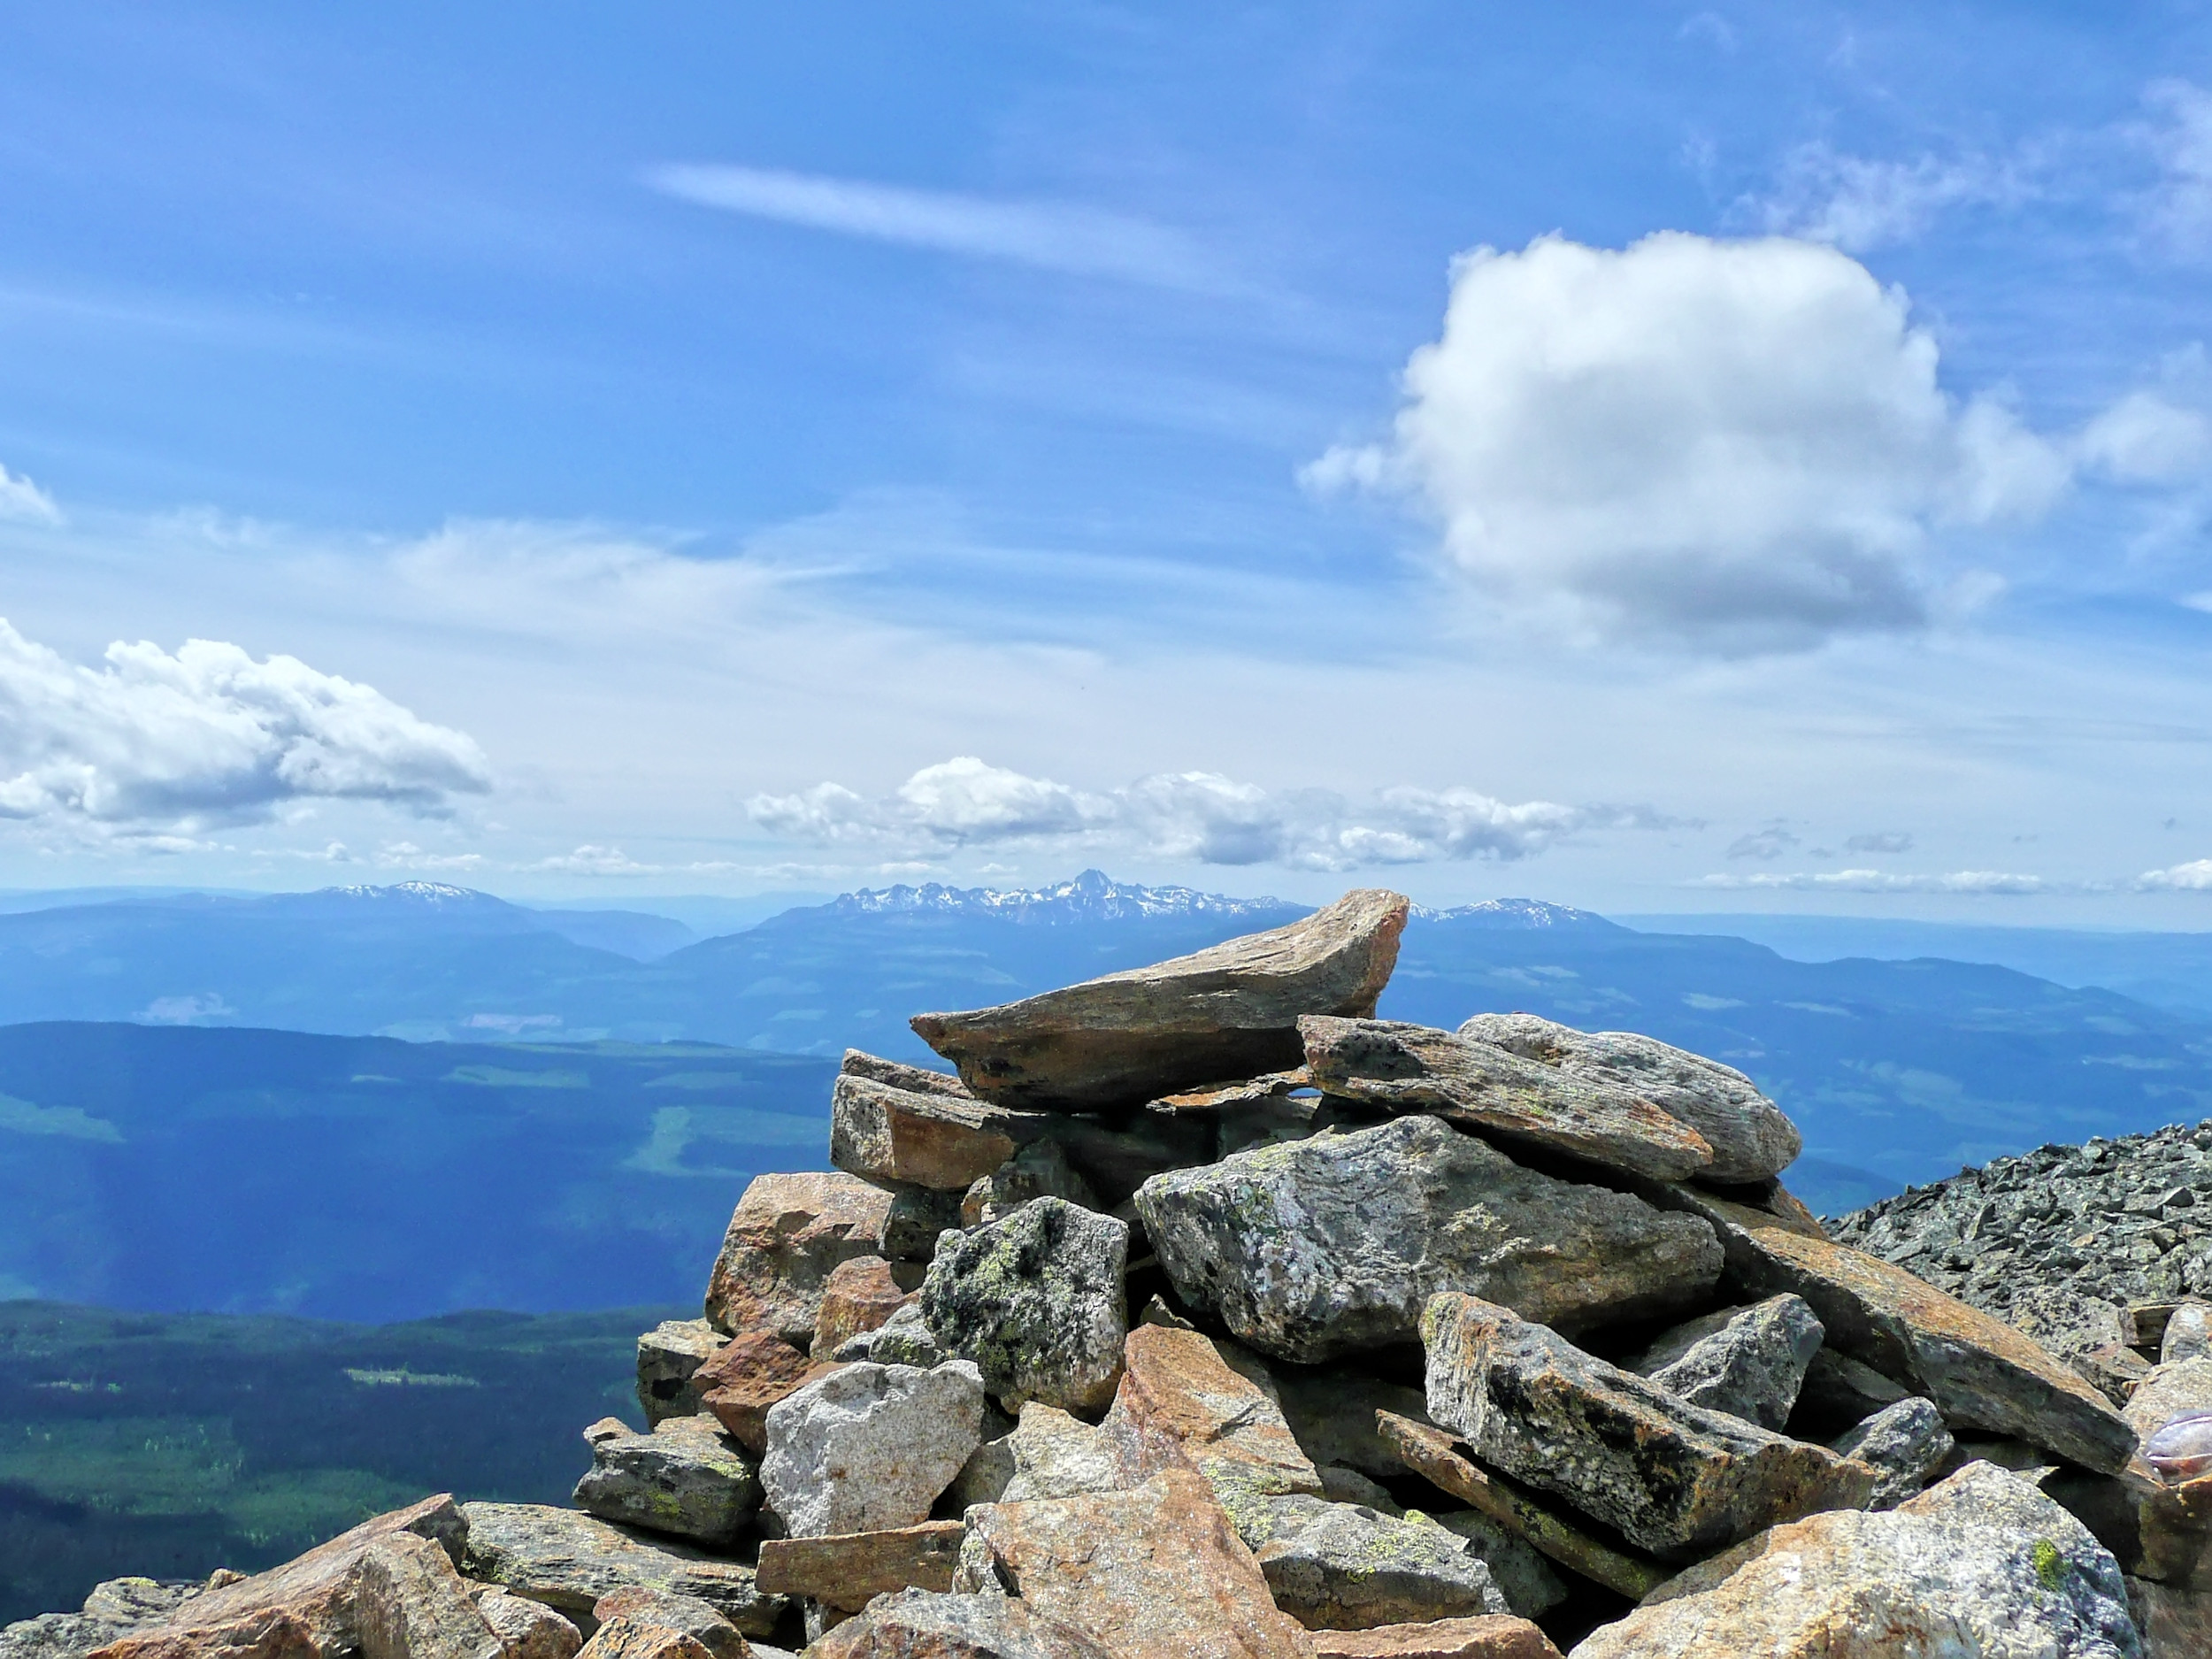
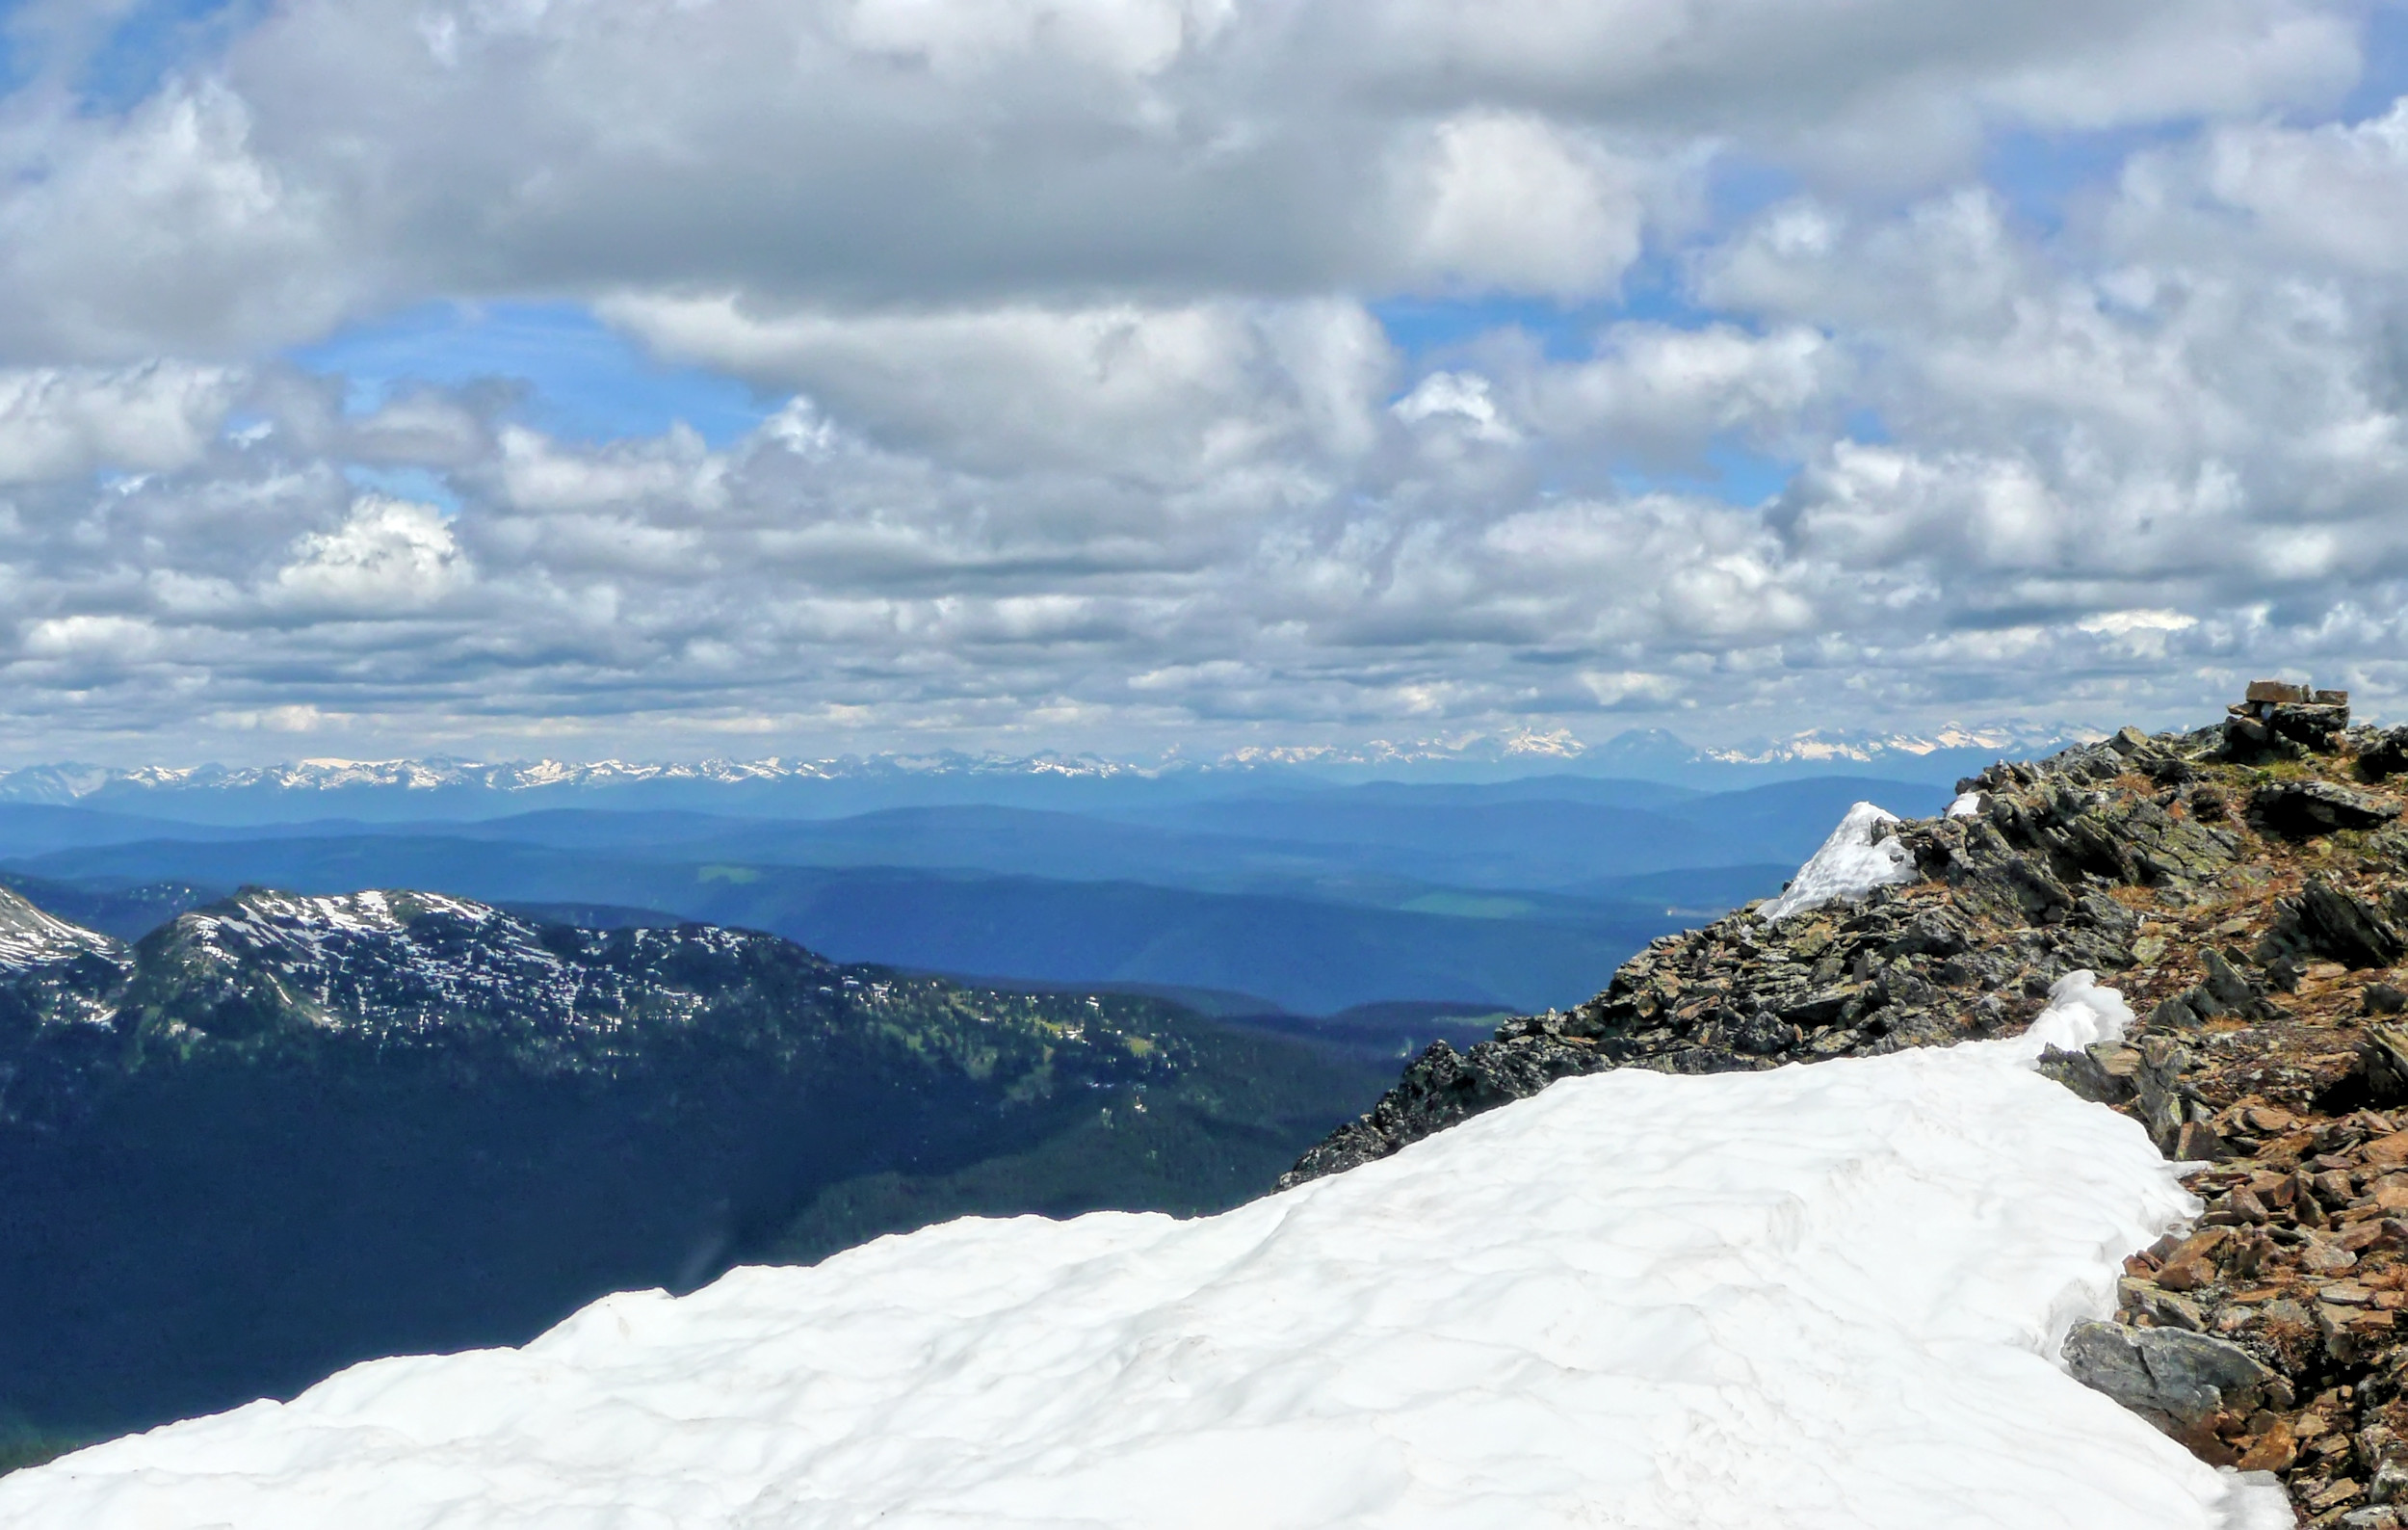
On this clear September day the visibility of the distant mountains to the north is remarkable.
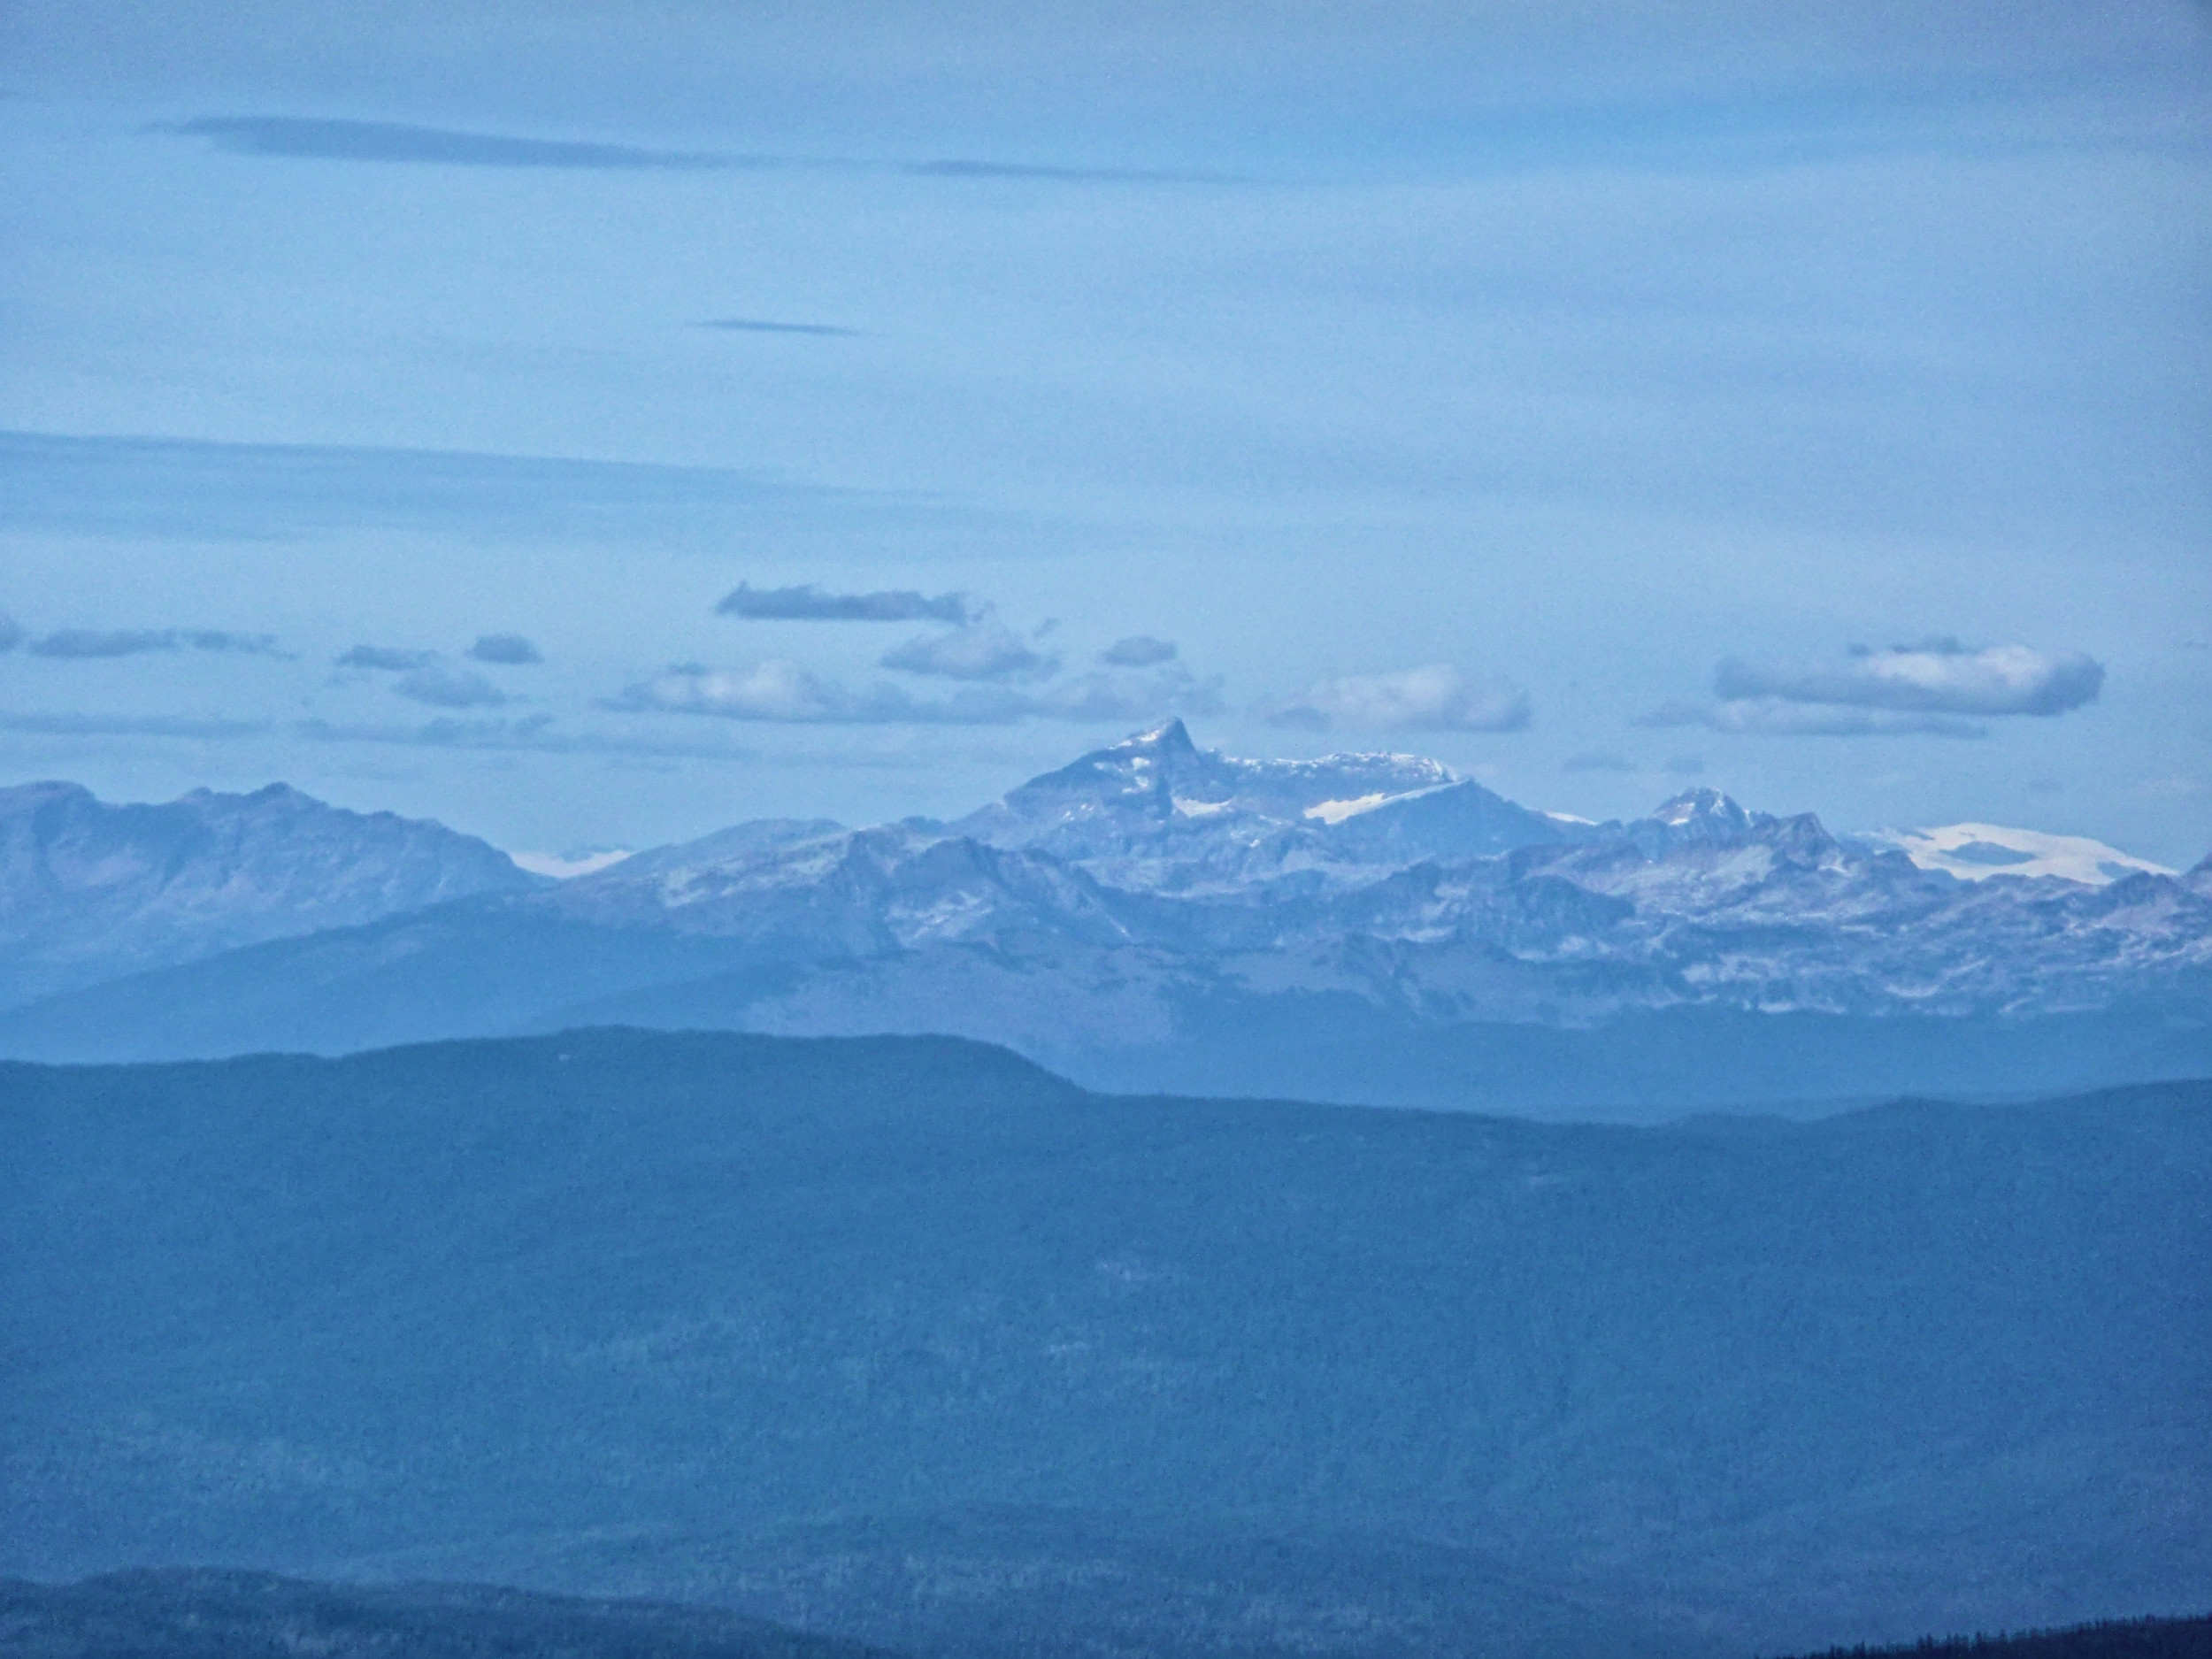
Garnet Peak 2876 m
Moul Lake, Table and Battle Mountains
Although it is nice and calm at the summit, we have to get moving because the return to the trailhead is a long one and we want to get there before darkness falls. We hike over the wide backbone of the West Ridge. The views remain spectacular but we also have to look down at our feet a lot, as there are many boulders to negotiate.

We hike past West Col and will descent from Long Hill Col.
West Col
Eternal ice on the northern slopes

Moss Campion
Dunn Peak 2636 m
Such a clear view of Dunn Peak is rare.
Long Hill is the highest point on the western edge of the ridge. From the saddle below it, we drop into the valley.
Looking towards Long Hill
The descent from Long Hill Col to the foot of the ridge is very steep, but in dry weather there is no problem to find good footholds.
Descent from Long Hill Col
We wander across the Plateau of the Lakes until we reach Sheila Lake. From there we follow the trail up to the signed turnoff and thereby close the loop. Including the way out to the parking lot, the Trophy Mountain Skyline hike is 19.2 kilometers long and takes at least 6 ½ hours.
| Distance from Sheila Lake sign | 6 km |
| Time | 2 ½ hrs |
| Incl. Breaks | 4 hrs |
| Min. Elev. | 2010 m |
| Max. Elev. | 2332 m |
| Ascent | 322 m |
| Cum. Ascent | 433 m |
| Cum. Descent | 433 m |
Long Hill is a continuation of the Trophy West Ridge to its western edge and can be regarded as part of the Trophy Mountain Skyline. It makes sense to either hike to the West Summit or to Long Hill, as it would be hard to hike the whole distance on a one-day trip.
On a fine day in September 2020, a few friends and I hike to Long Hill. We stop at Sheila Lake Lookout for the views and climb up to Lunch Ridge (Little Hill). We follow this ridge north to the Plateau of the Lakes. The plateau was formed during the last ice age by scouring glaciers that left numerous rock piles and water filled hollows behind. There is no distinct trail here; over time the many hikers have made their own footpaths. We pass the western shore of the Lake of the Rock. Up to the seventies the rock that gave the lake its name was still an island. Over time the lake’s northern end filled in with sediment and changed to its horseshoed shape of today.

At the Lake of the Rock
The Trophy West Ridge lies directly ahead of us. We pick the most north-western route for the ascent, a gully that will bring us to the saddle below Long Hill, the Long Hill Col.
Long Hill Col (C), Long Hill (L)
After about thirty minutes we arrive at a heart-shaped tarn that drains into the Lake of the Rock. From here the view of the Plateau of the Lakes is stunning. We spot Little Hill, and Raft Mountain sits in the background.

Plateau of the Lakes
From the south-western end of the tarn we climb up through the gully which offers patches of grass and heather to step on. After another thirty minutes we cross a very rocky area and reach the 2293 meter high saddle. It is only ten more minutes to the top of Long Hill at 2343 meters.
Long Hill Summit
The cairn serves as a tripod for a summit group photo. There are views in every direction and they include Raft Mountain, Dunn Peak, the North Thompson Valley and large areas of Wells Gray Park. Unfortunately it is too hazy today to take good pictures.
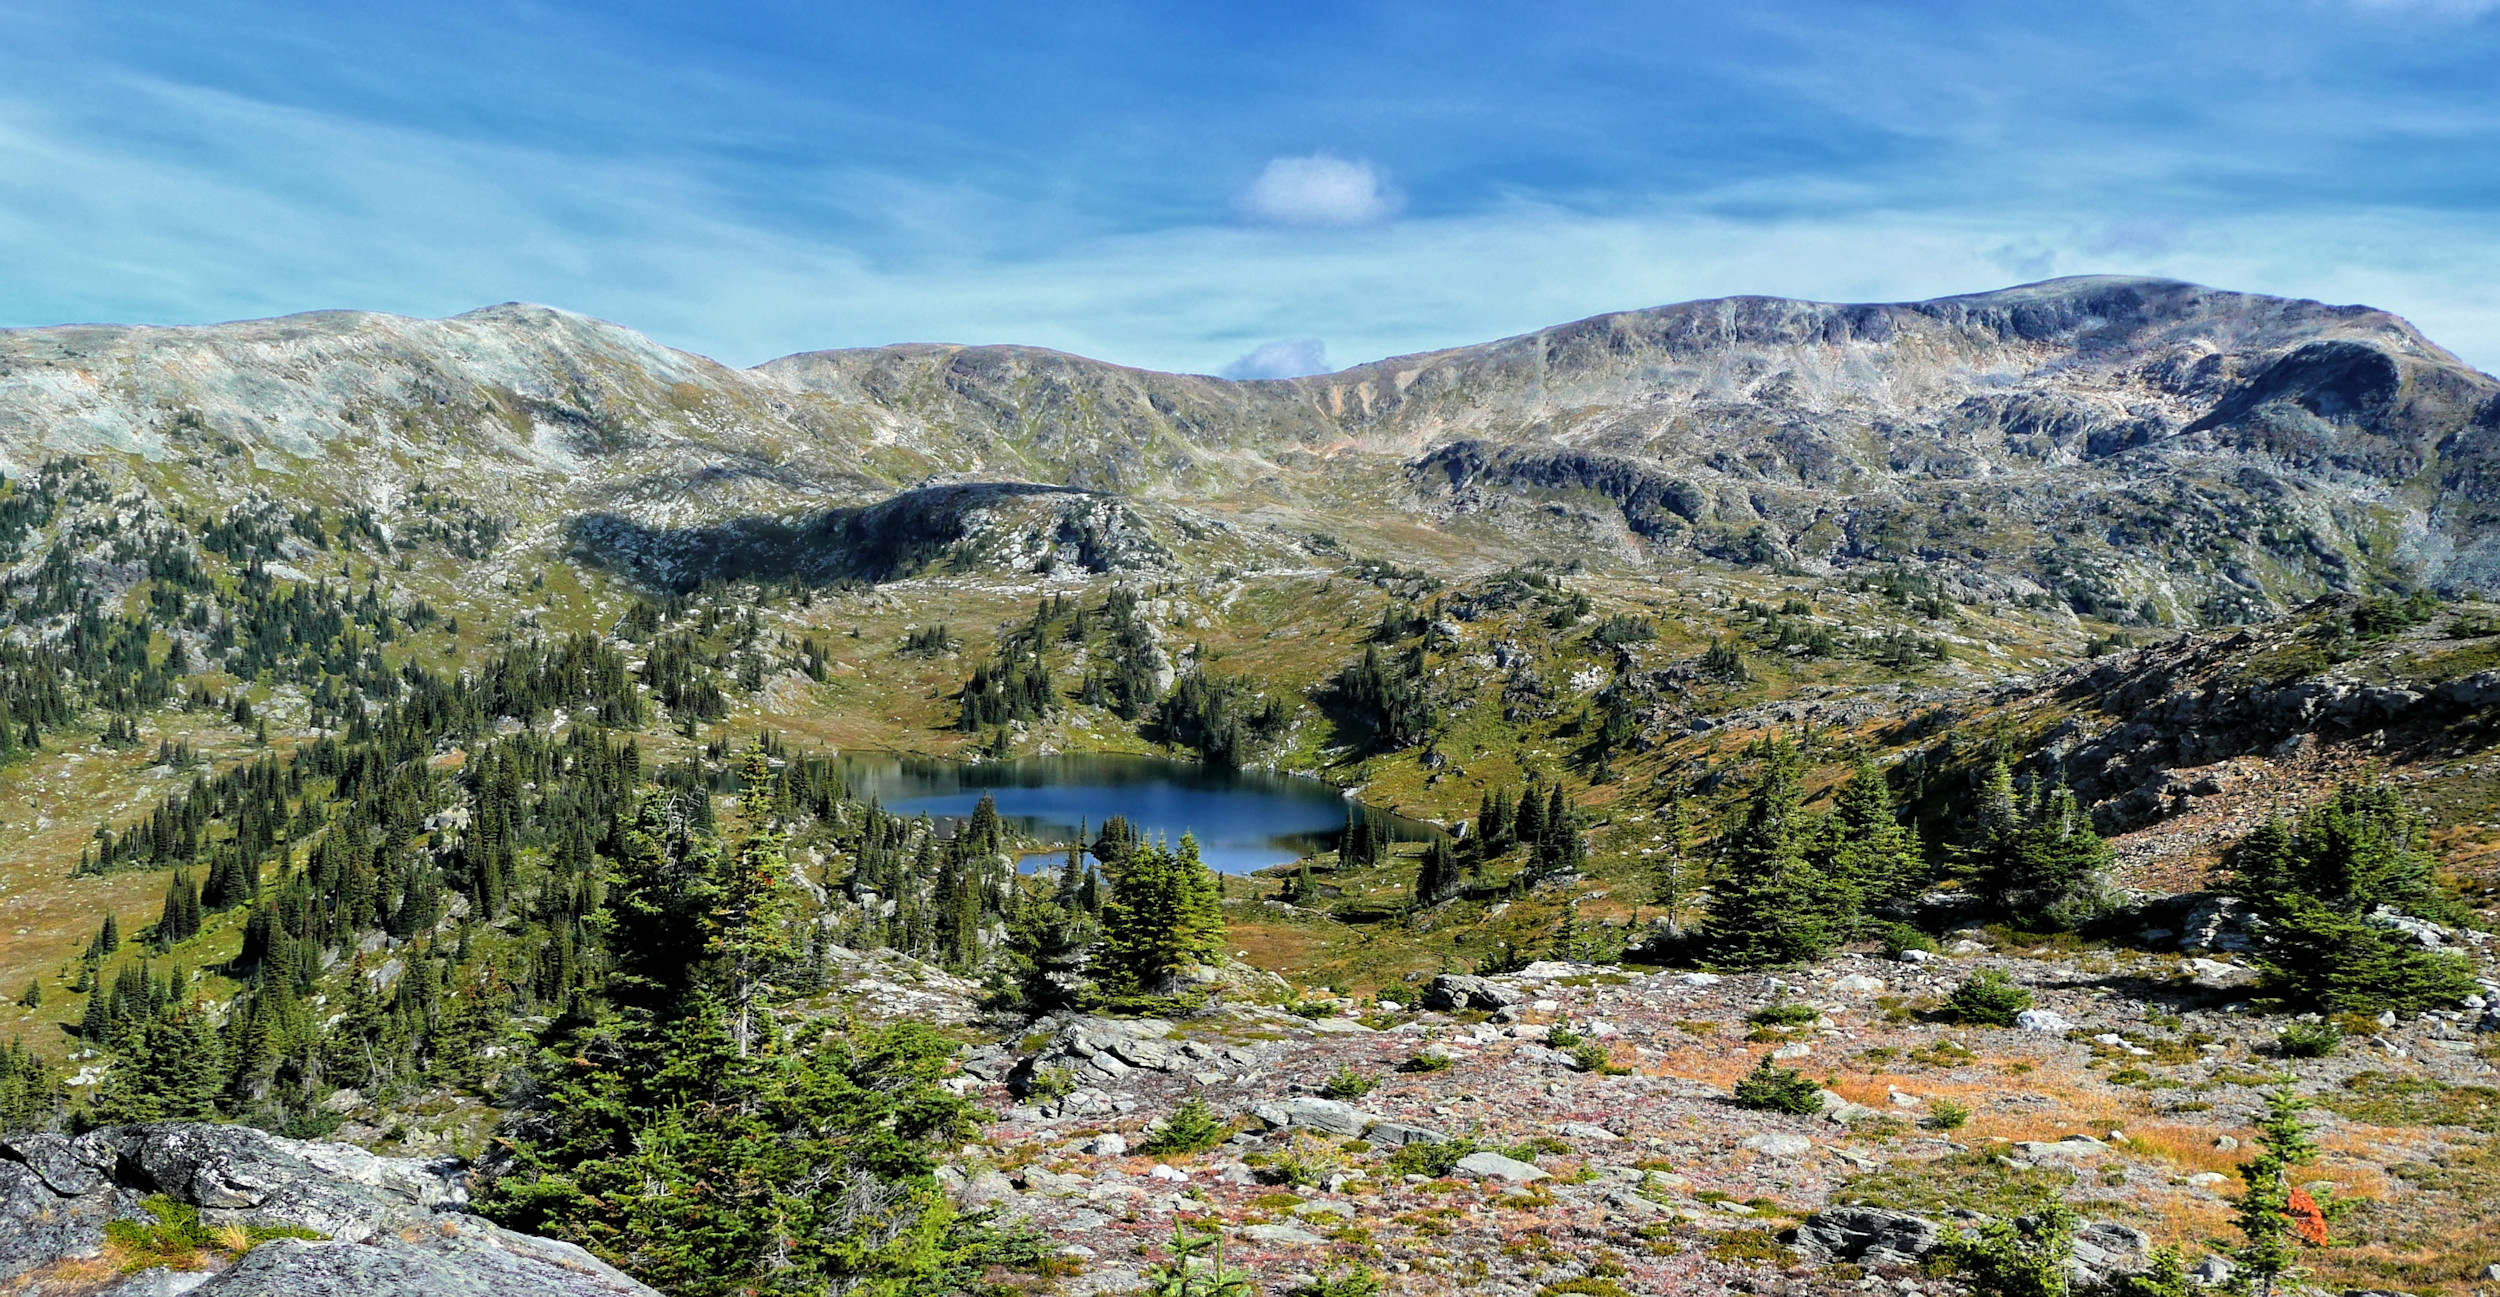
For our return, we follow the ridge even further to the west. From here, the Plateau of the Lakes presents itself from a different and interesting angle.
Looking at the Plateau of the Lakes from the west
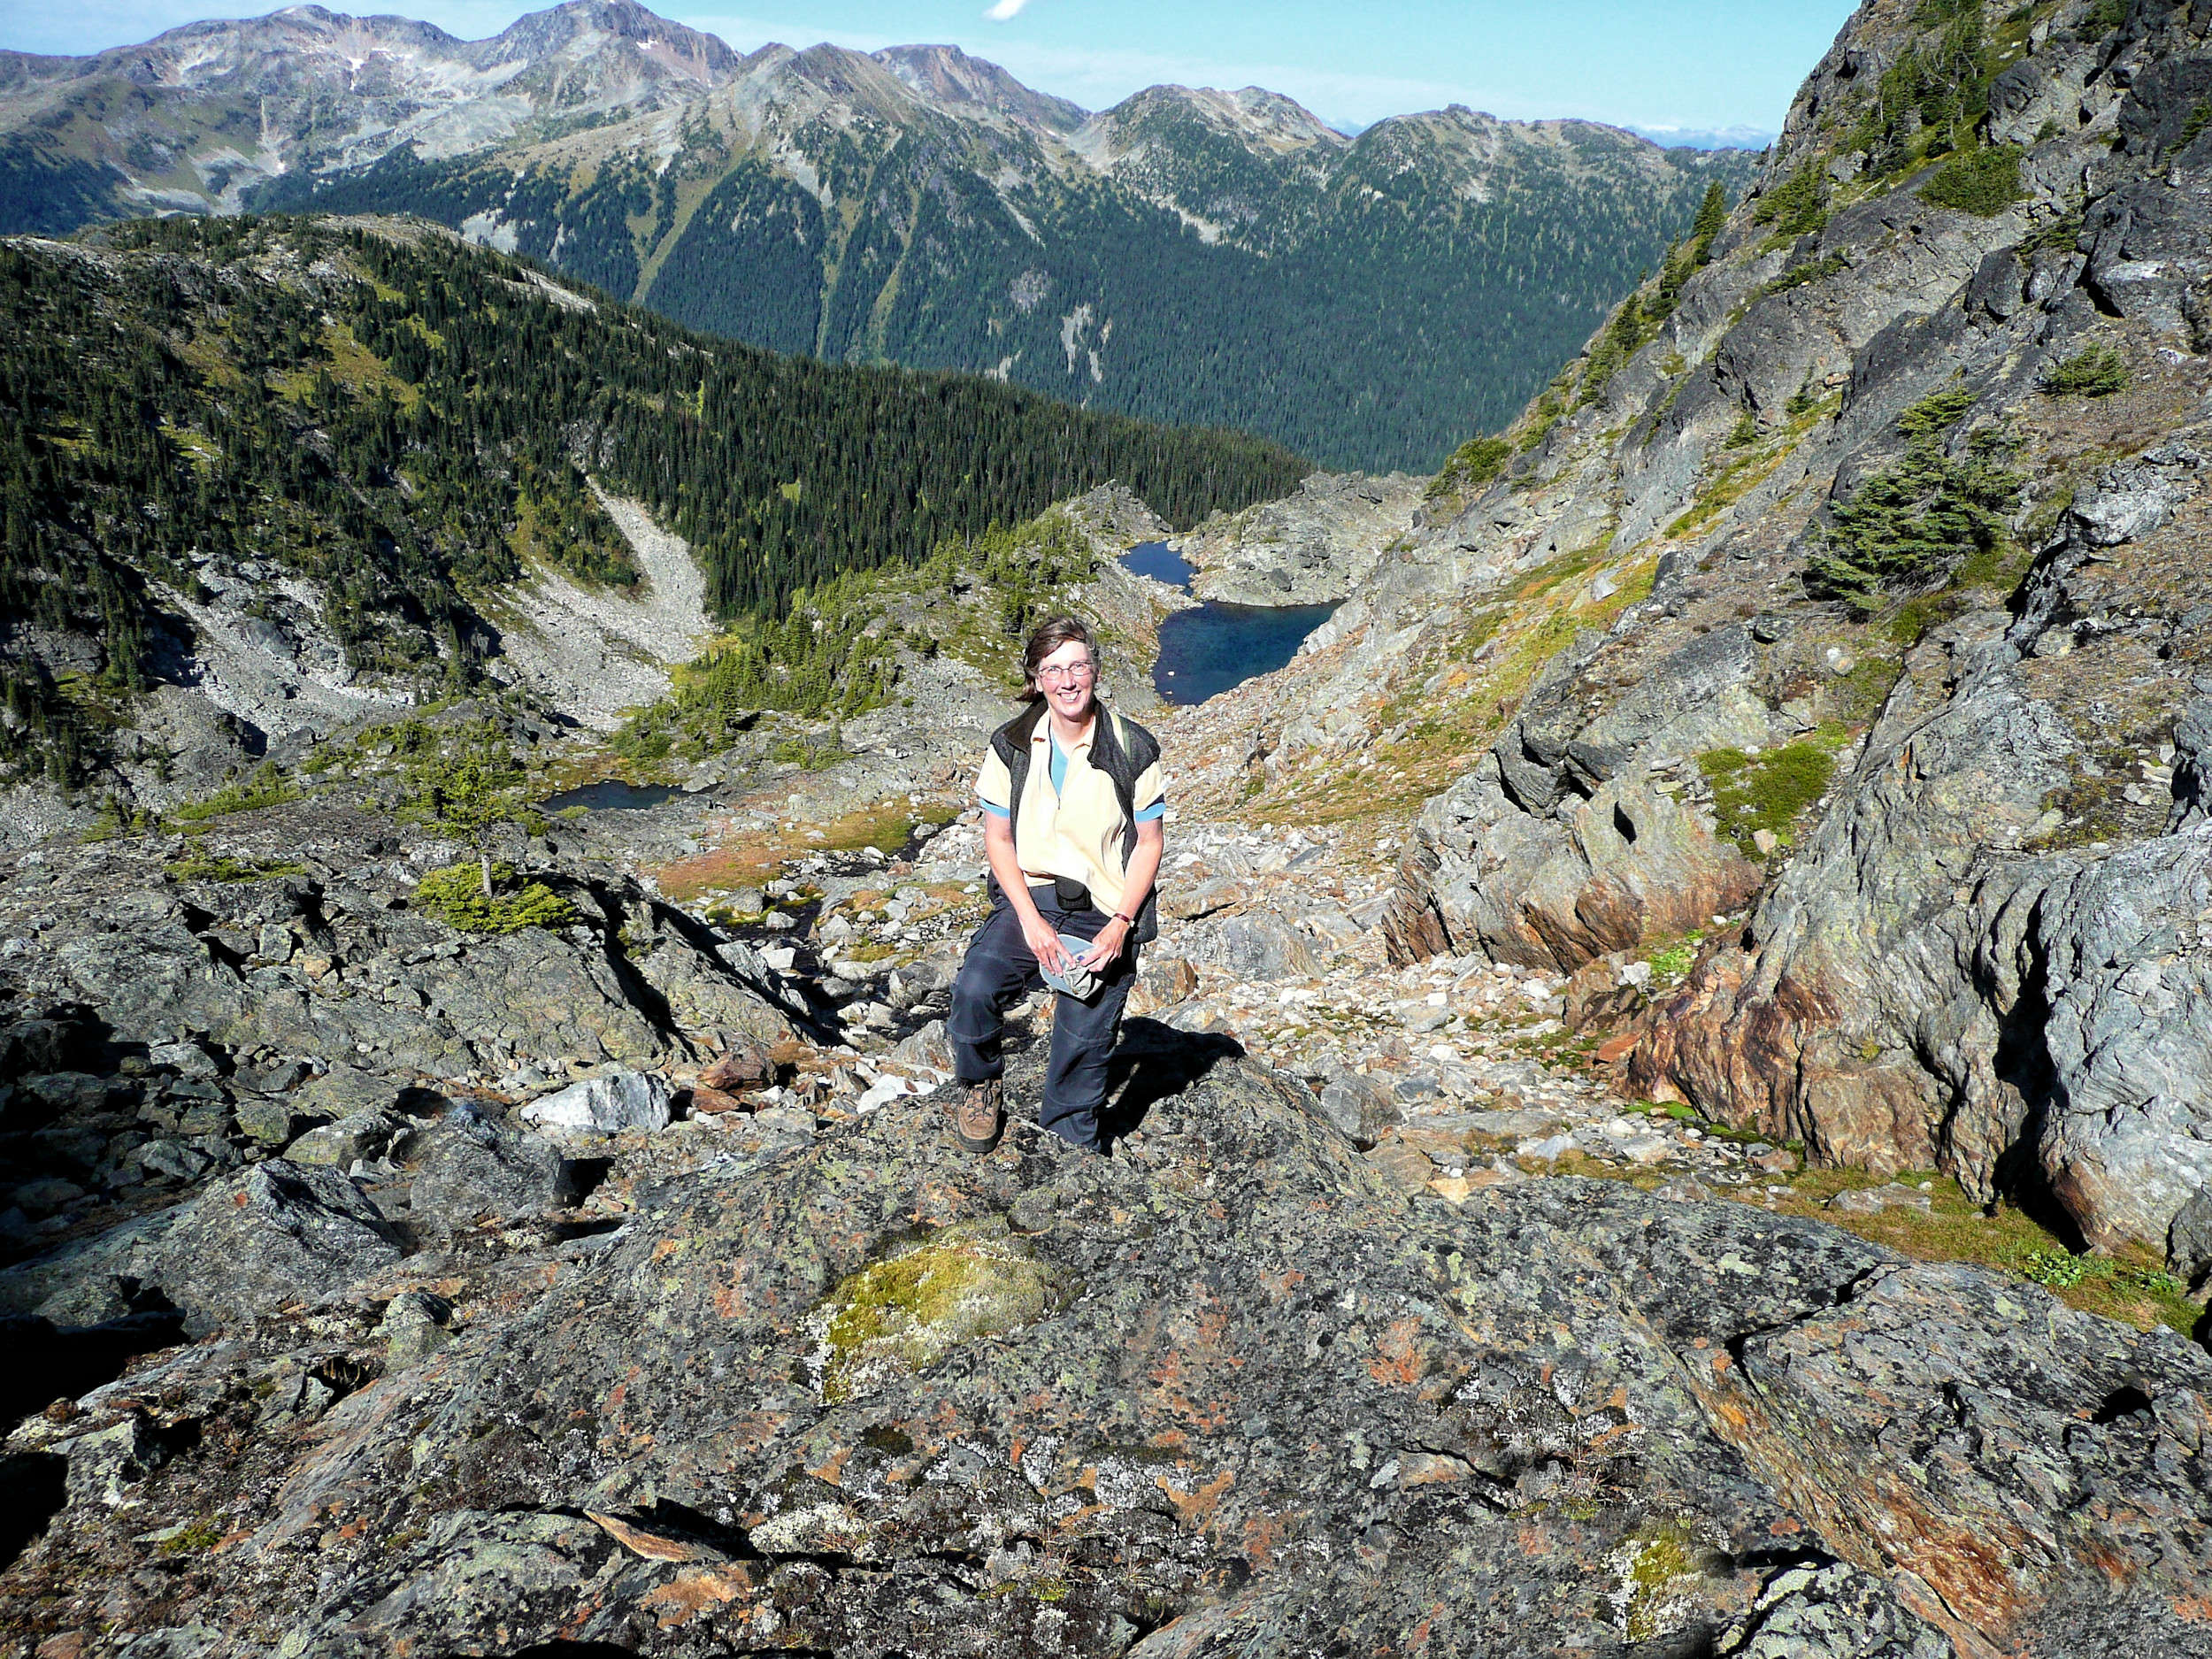
After a kilometer and about half an hour later, the ridge becomes narrow and we begin our descent into the valley. Three lakes lie ahead of us, tiered on different levels. Sheila Lake is the one in the center and this is where we are headed. We have to cross the valley below and climb up to its shores.
Descent to Sheila Lake (C)
Aiming for Sheila Lake, in the next twenty minutes we lose 160 meters of elevation.
Looking back at our route down
We reach the bottom of the valley. One day I will follow the small creek and check out the nameless lake at the end of this valley. Today we cross the creek and look for a good route up to Sheila Lake. Once at the lake, we hike along its western shore to the outlet. By the edge of the water, Cotton Grass is in bloom and its pretty white fluff gives the landscape an autumn-like feel.
From Sheila Lake we climb back up to the main trail. The distance between the signed turnoff and the parking lot is 4.6 kilometers and takes a little over an hour both ways. This needs to be added to the total mileage and time for the hike.
| Distance | 10 km |
| Time | 4 hrs |
| Incl. Breaks | 6 hrs |
| Min. Elev. | 1591 m |
| Max. Elev. | 2257 m |
| Ascent | 666 m |
| Cum. Ascent | 1026 m |
| Cum. Descent | 1026 m |
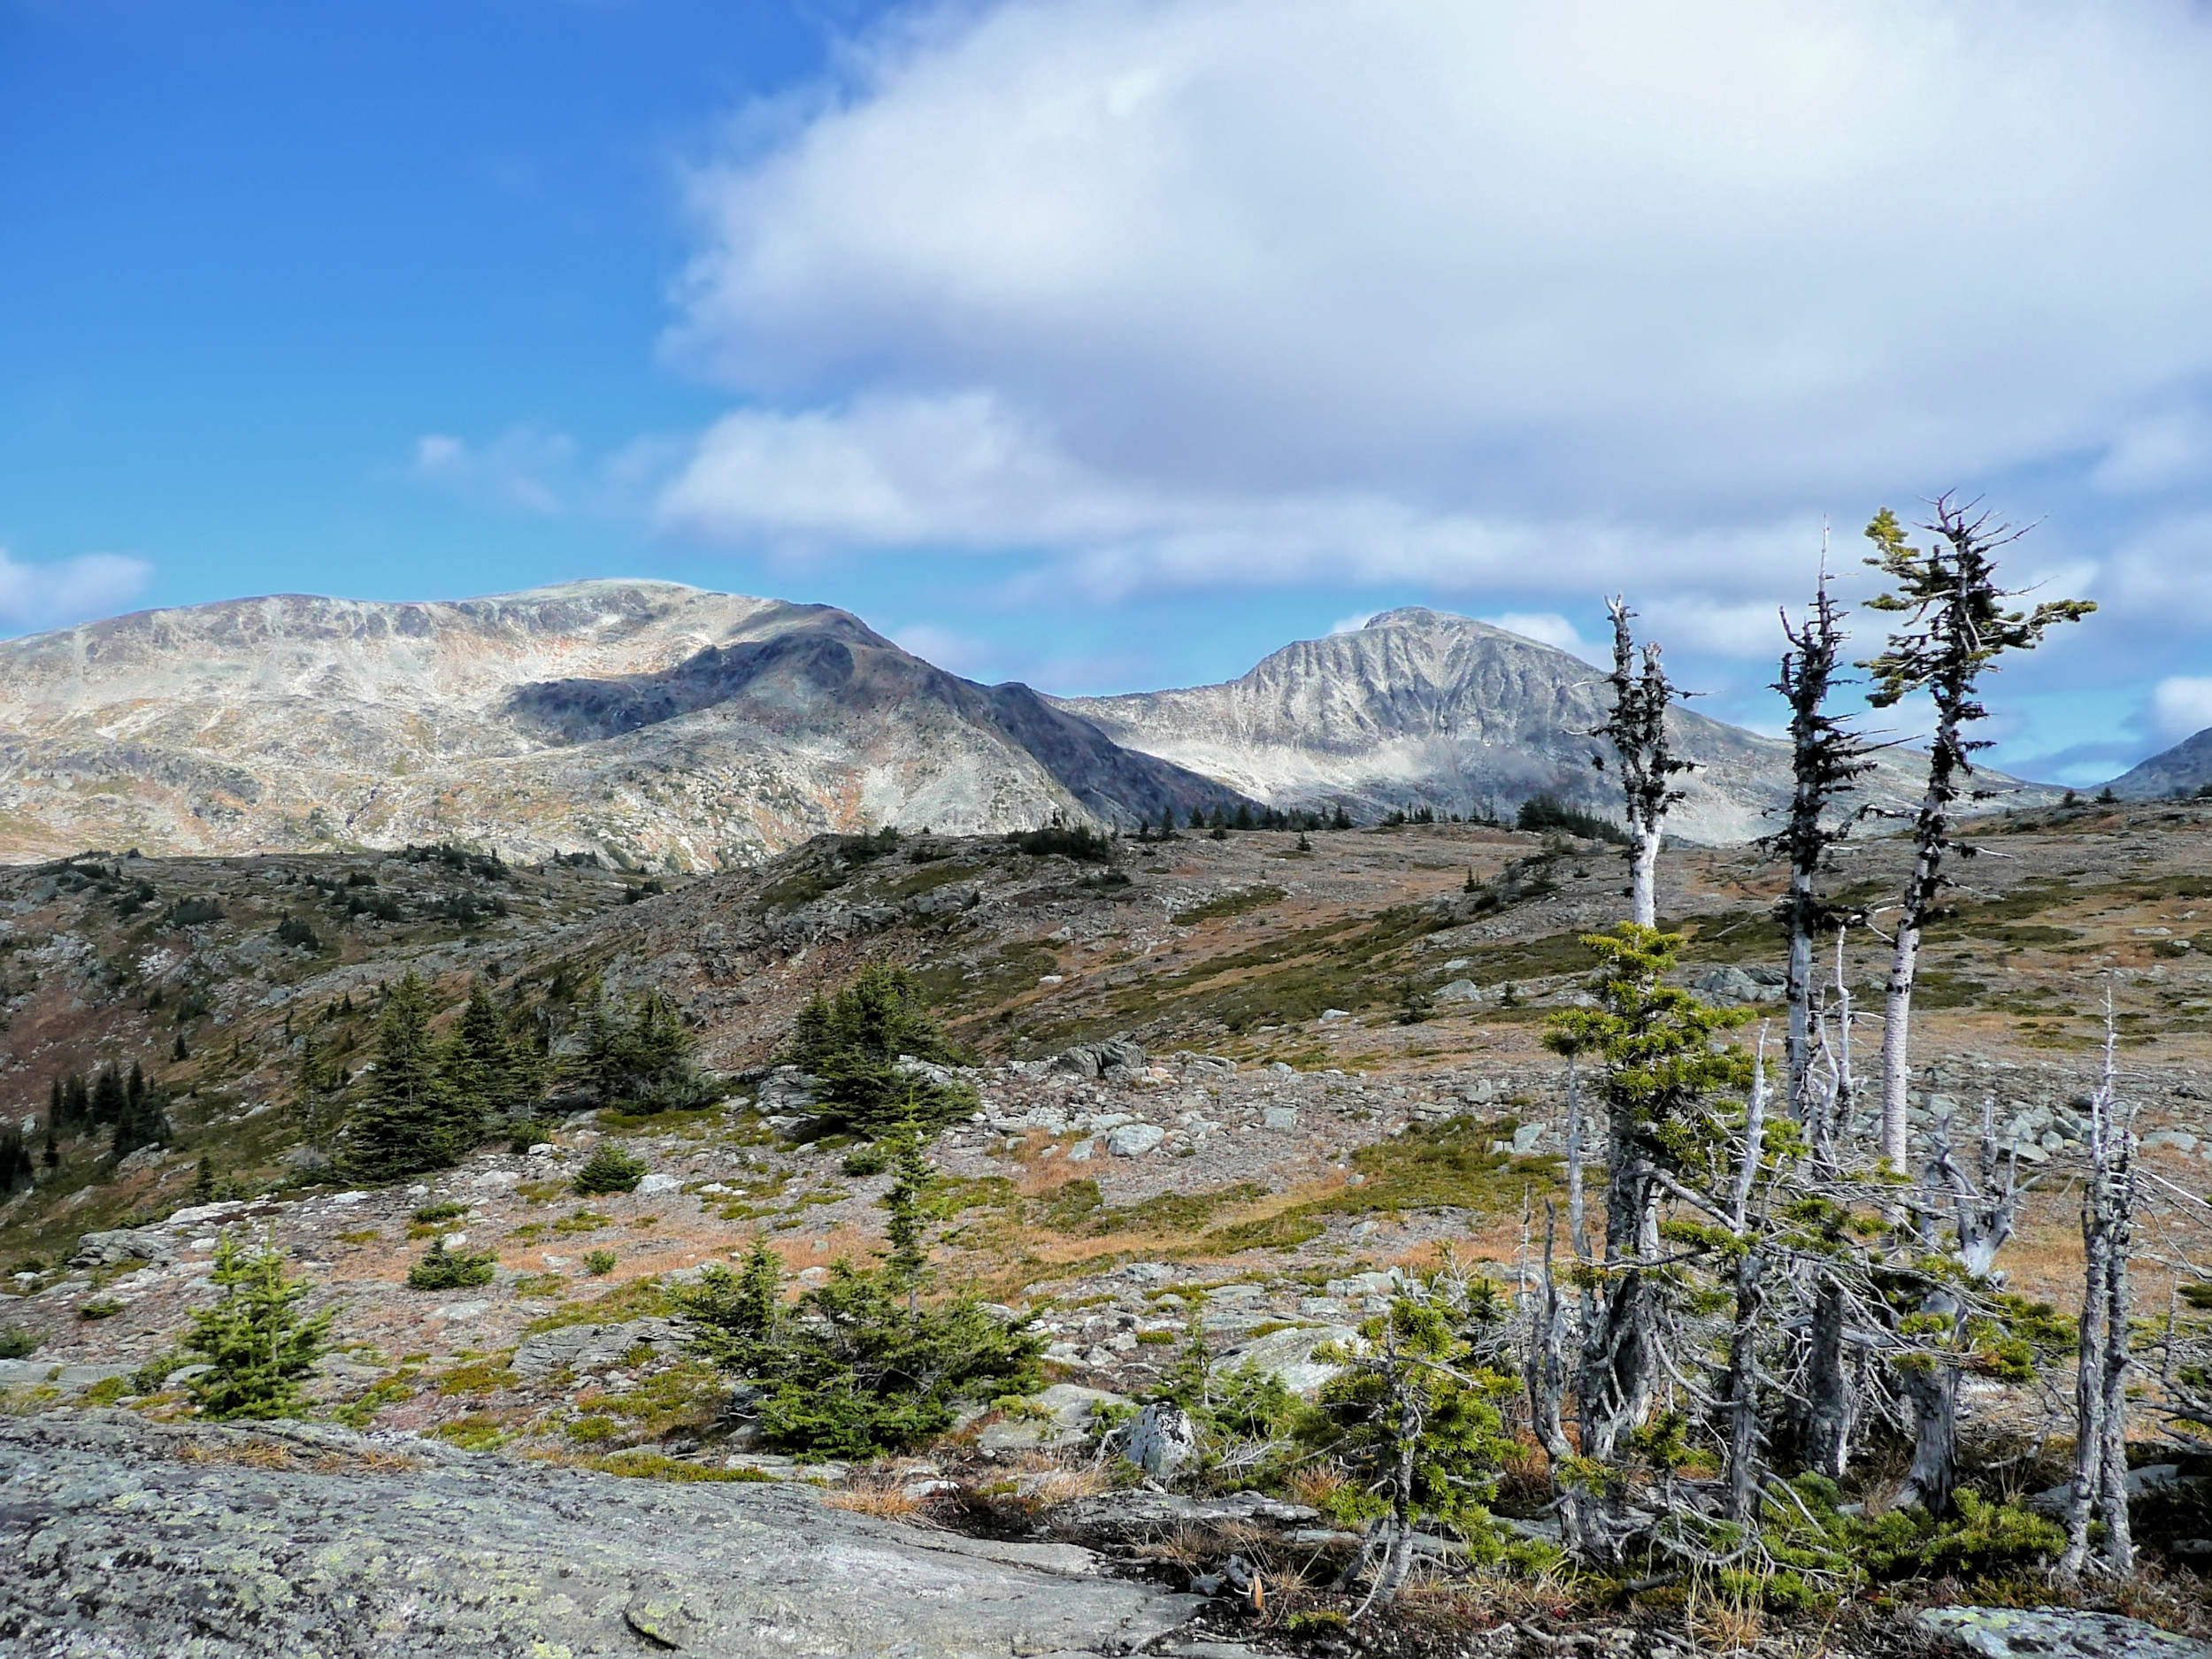
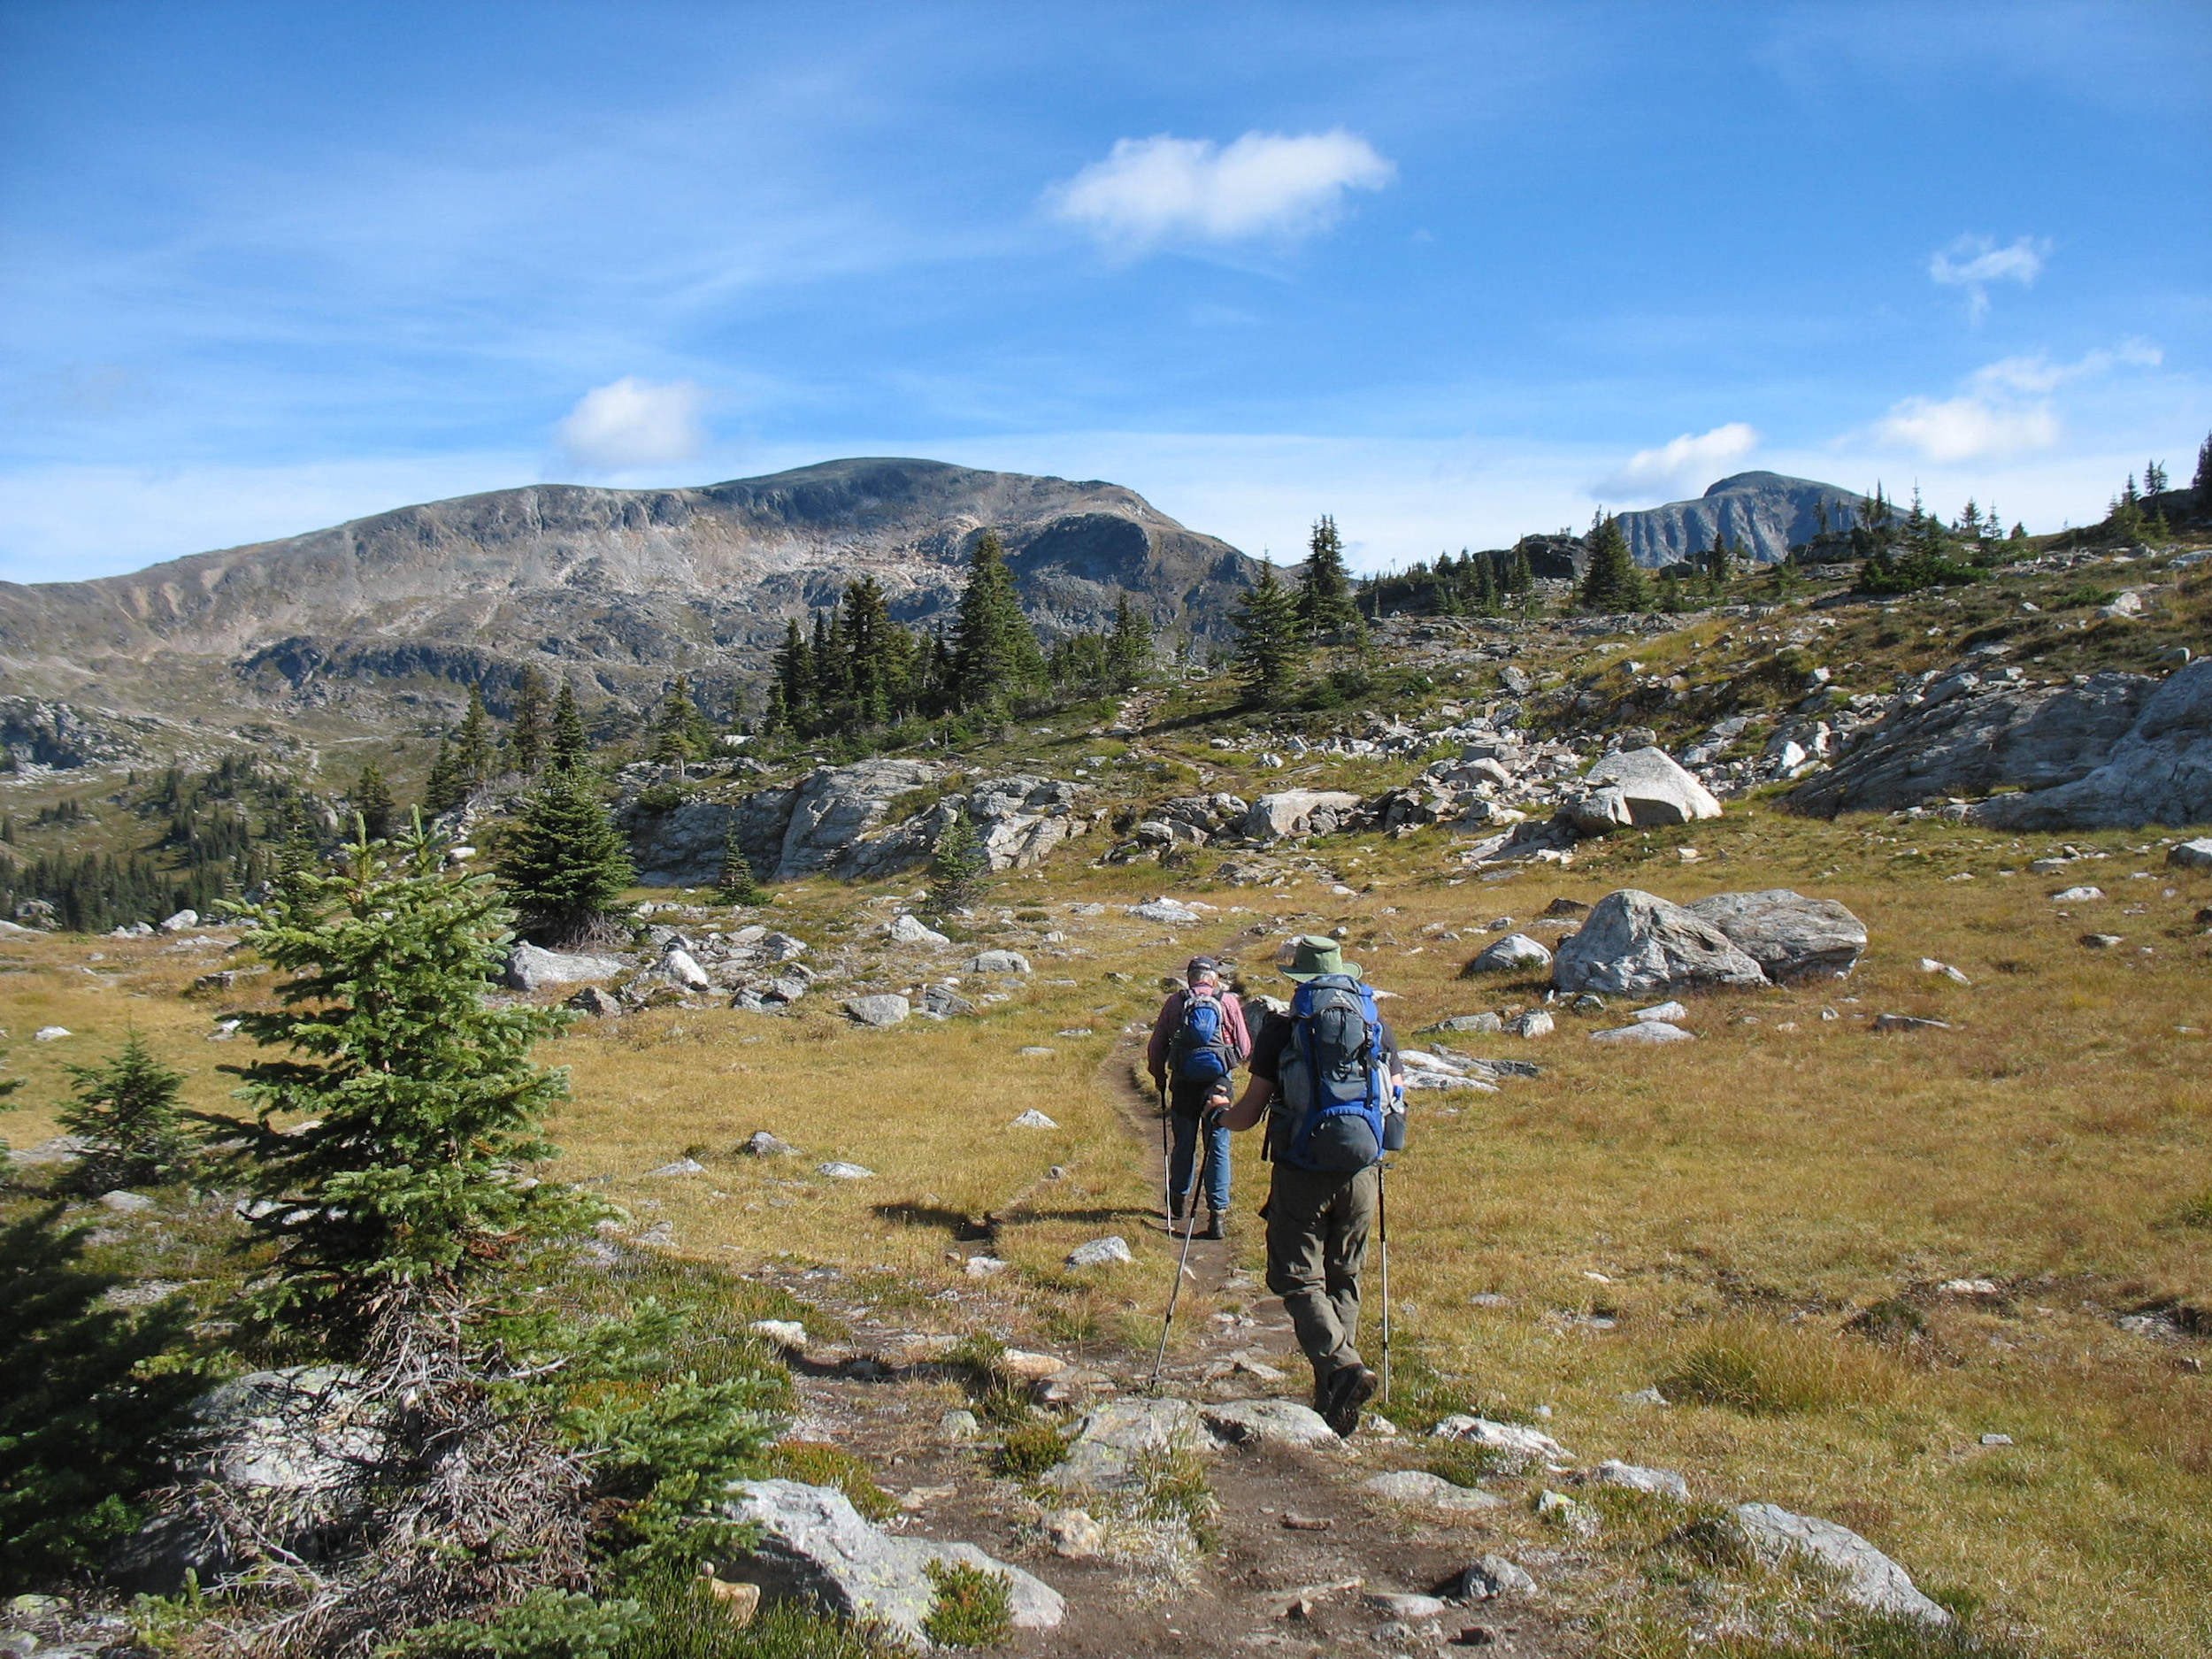
To get to the eastern slopes of the Trophy Mountain Range we take the Spahats Creek Road that turns off at kilometer 4.3 of the Trophy Mountain Access Road. Soon it becomes rough and a high clearance vehicle may be necessary. The hiking trail starts on the left-hand side at kilometer 12.8. It is the same trail that is used by the guests of Trophy Mountain Chalet. In the summer of 2009 I have visited this commercially operated backcountry hut on a tour which is described further above in this journal.
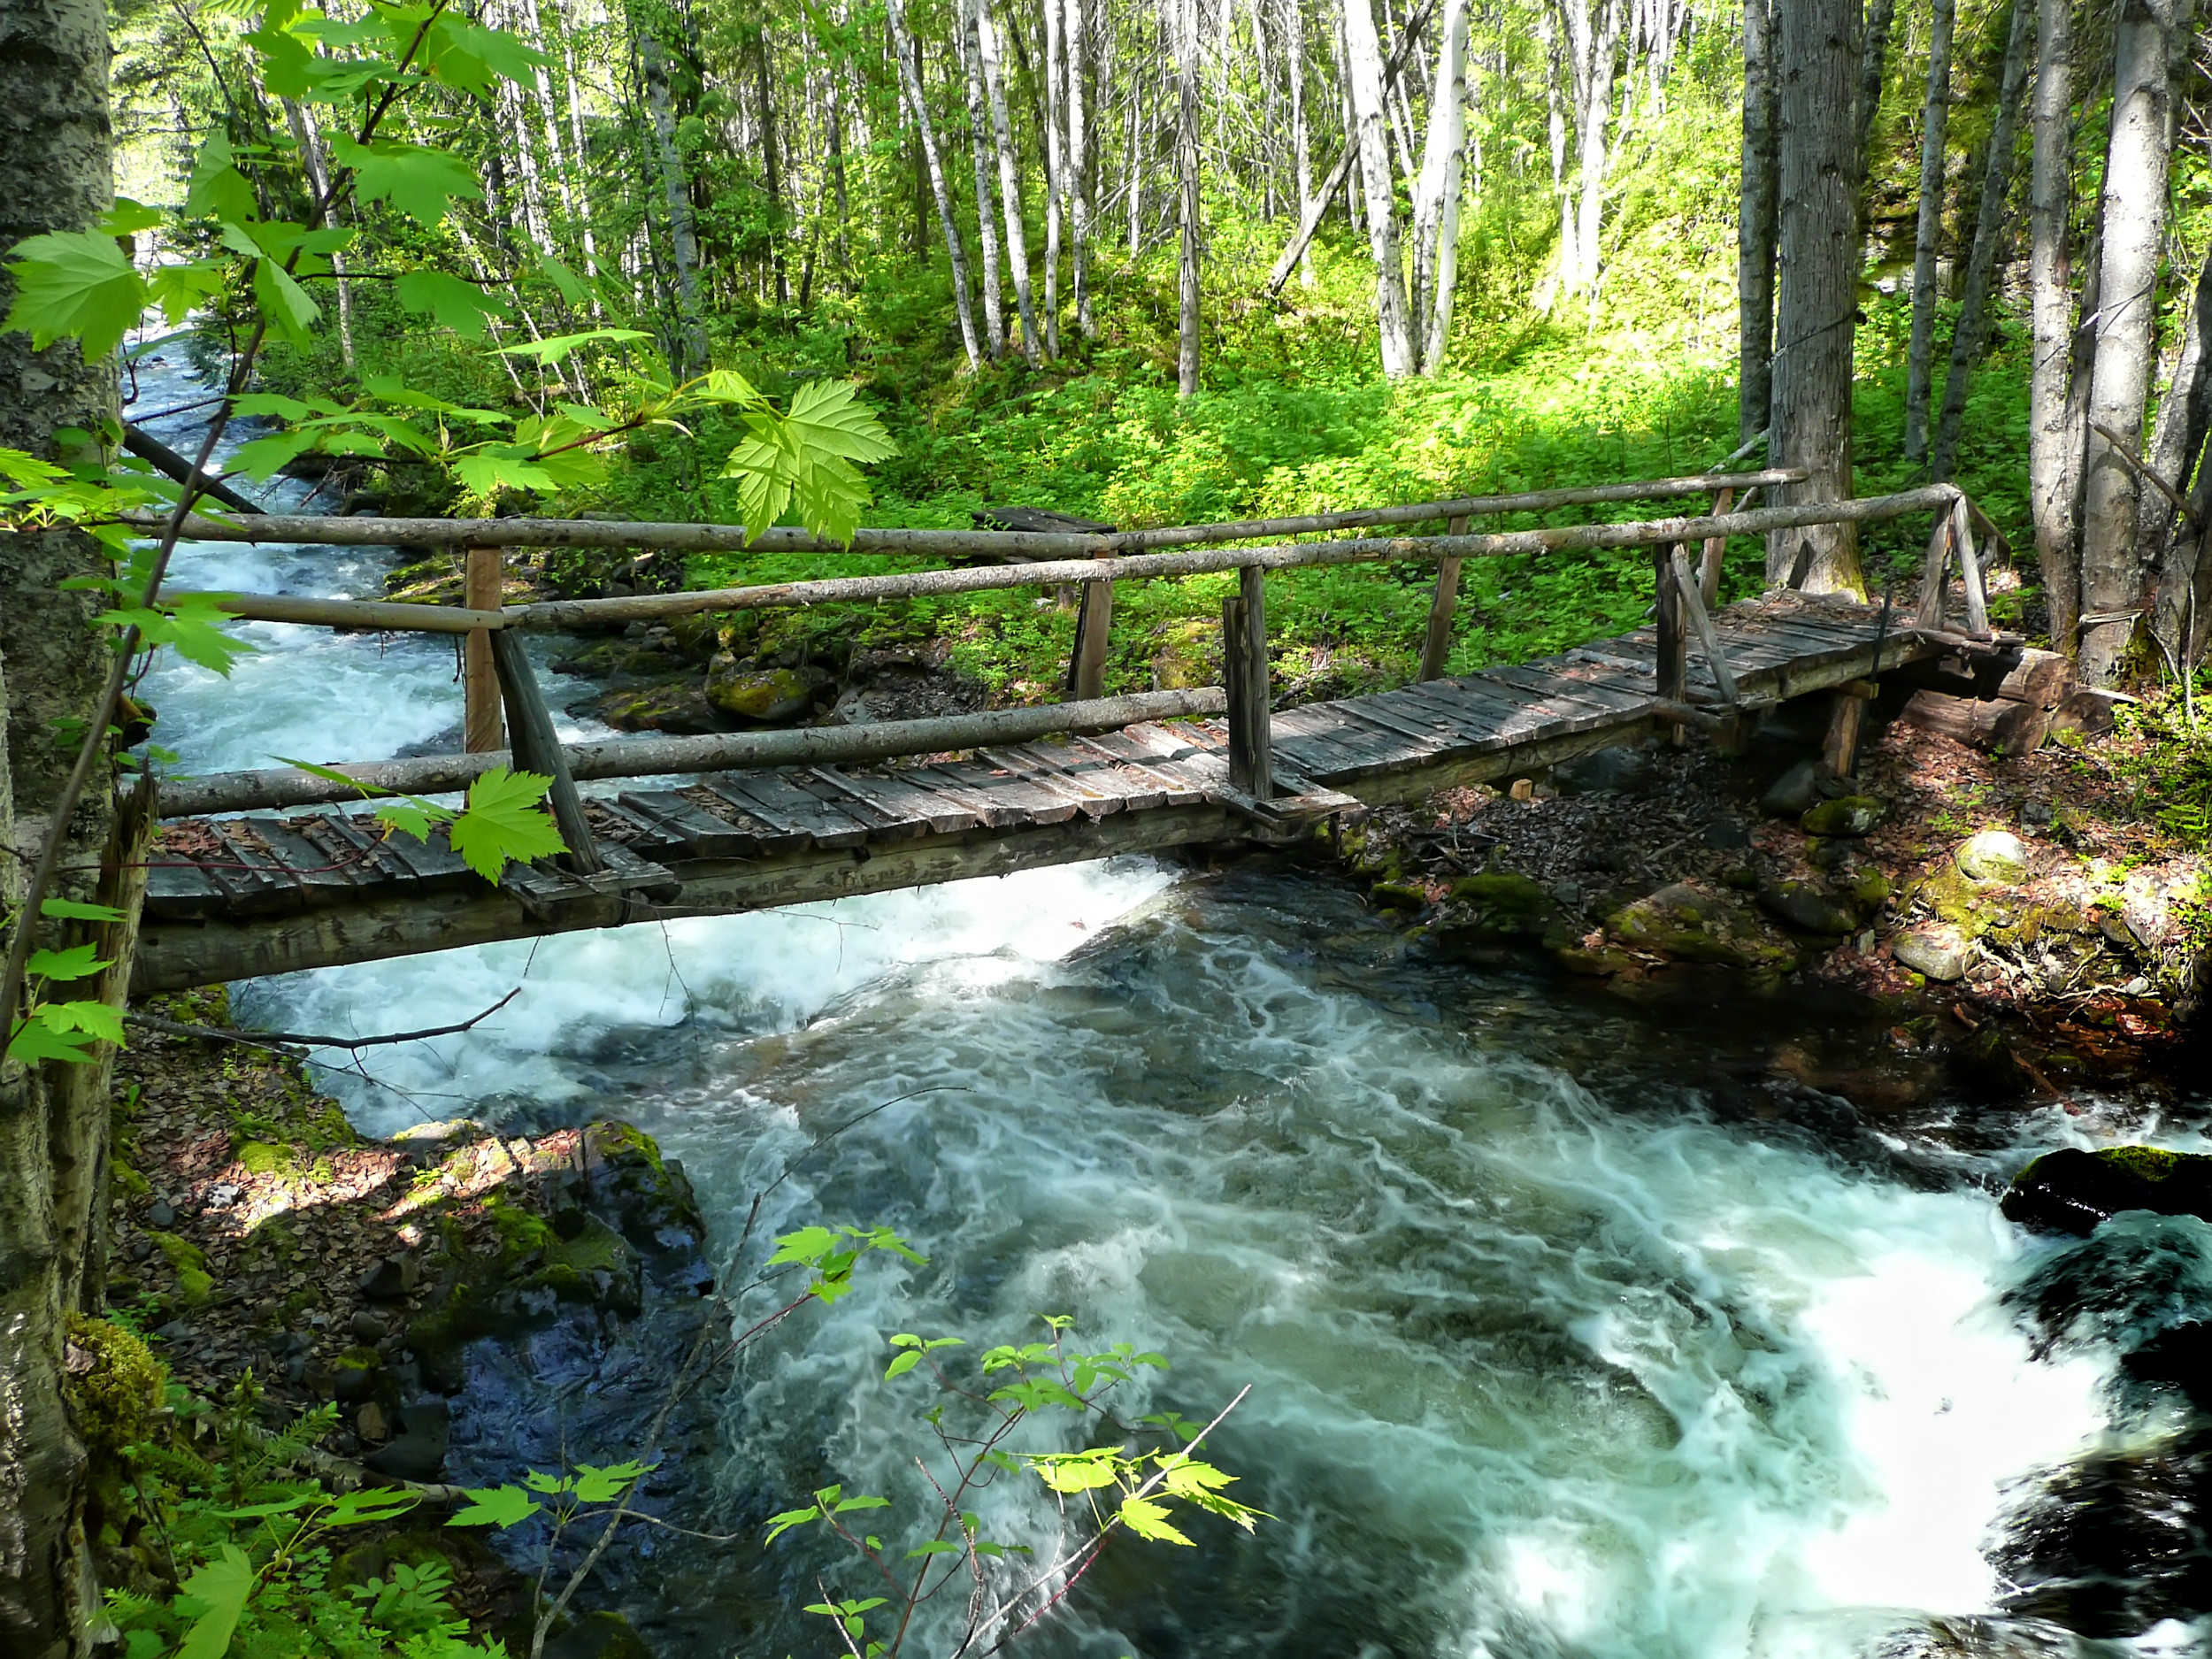
In September 2011, some friends and I explore Trophy’s eastern slopes on a day trip. The trail begins with a short downhill section to Spahats Creek, where a small bridge takes us to the other side. Then the trail winds uphill. The summer flowers are in full bloom. The meadows on this side of the Trophy range are not as extensive as those on its western flanks. The landscape is rougher and has its own beauty.
Behind us towers Raft Mountain bordering the southern side of the Spahats Creek Valley.
Raft Mountain
After an hour the trail levels and crosses Powder Creek. We have arrived in the subalpine zone and wander through subalpine forest and small meadows.
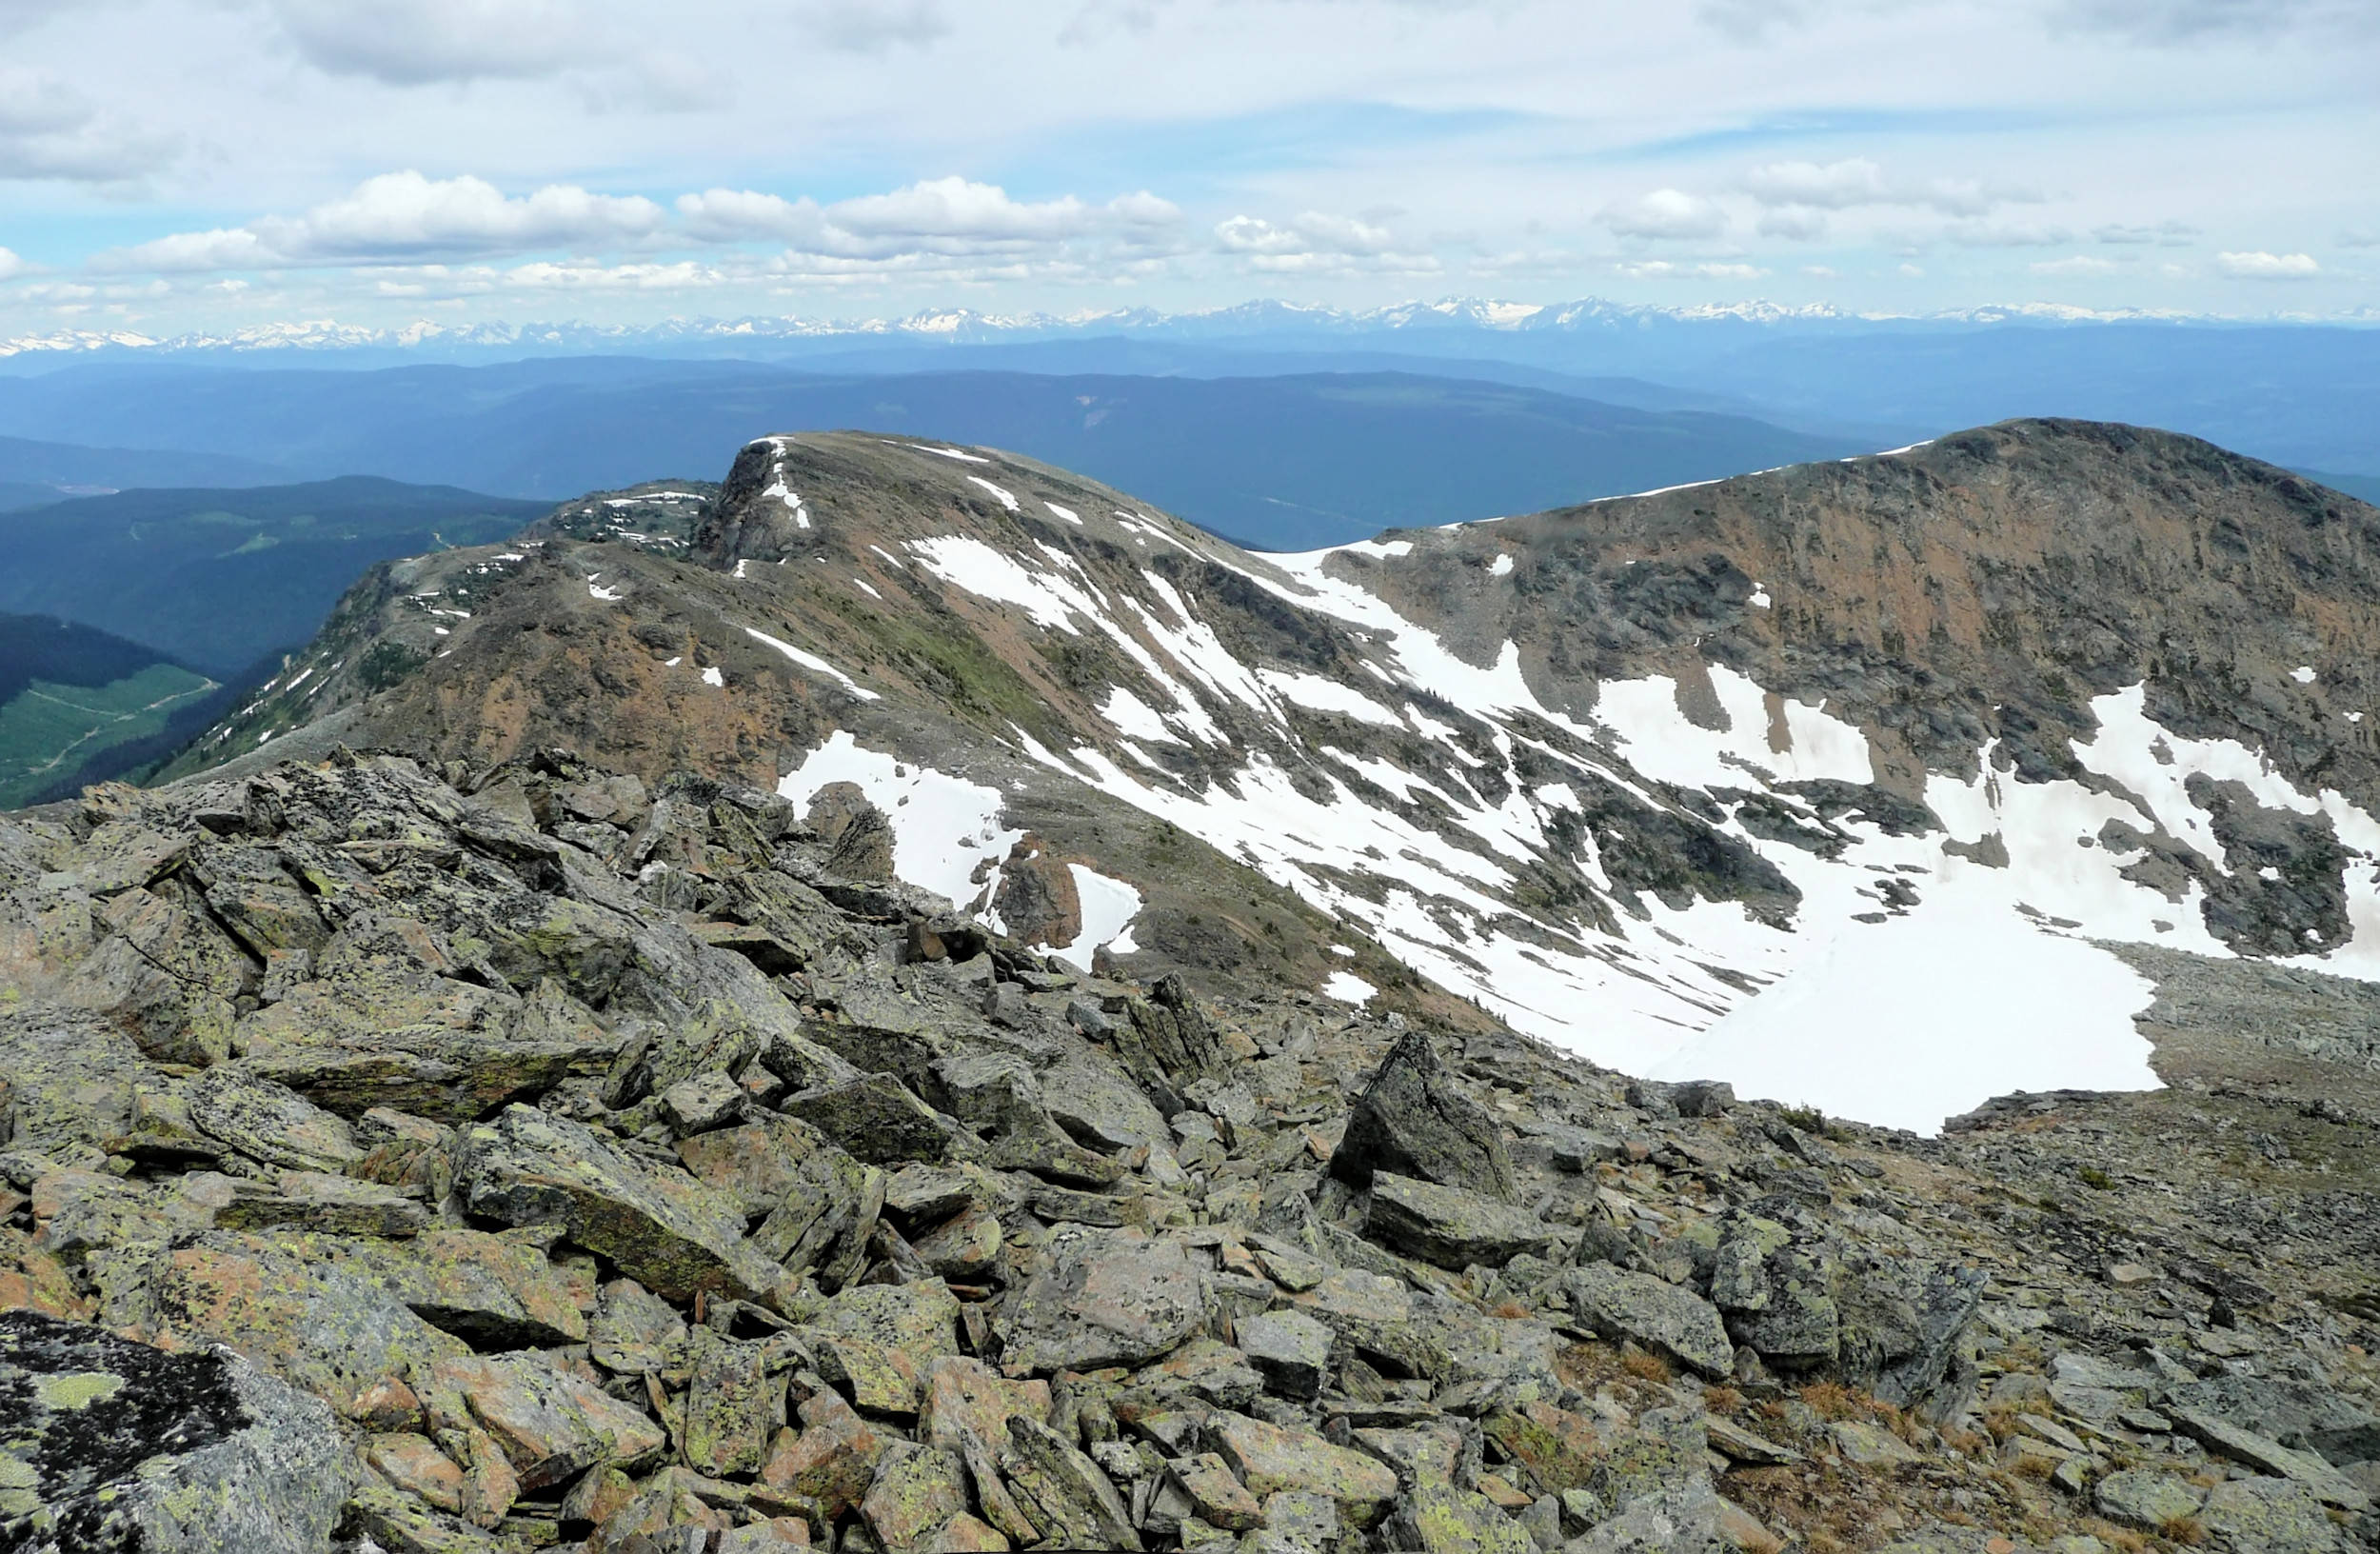
We pass the Trophy Mountain Chalet and hike up to the ridge behind it, the so-called Lookout Peak at 2154 meters. Thirty minutes further on we reach the crest of the next ridge. We follow it westward to a cairn that marks its summit at 2234 meters. We have a first good view of the main peak of Trophy Mountain.
Trophy Mountain 2577 m
There is a large tarn to the north, and Raft Mountain rises to the south.
Tarn
Raft Mountain 2450 m
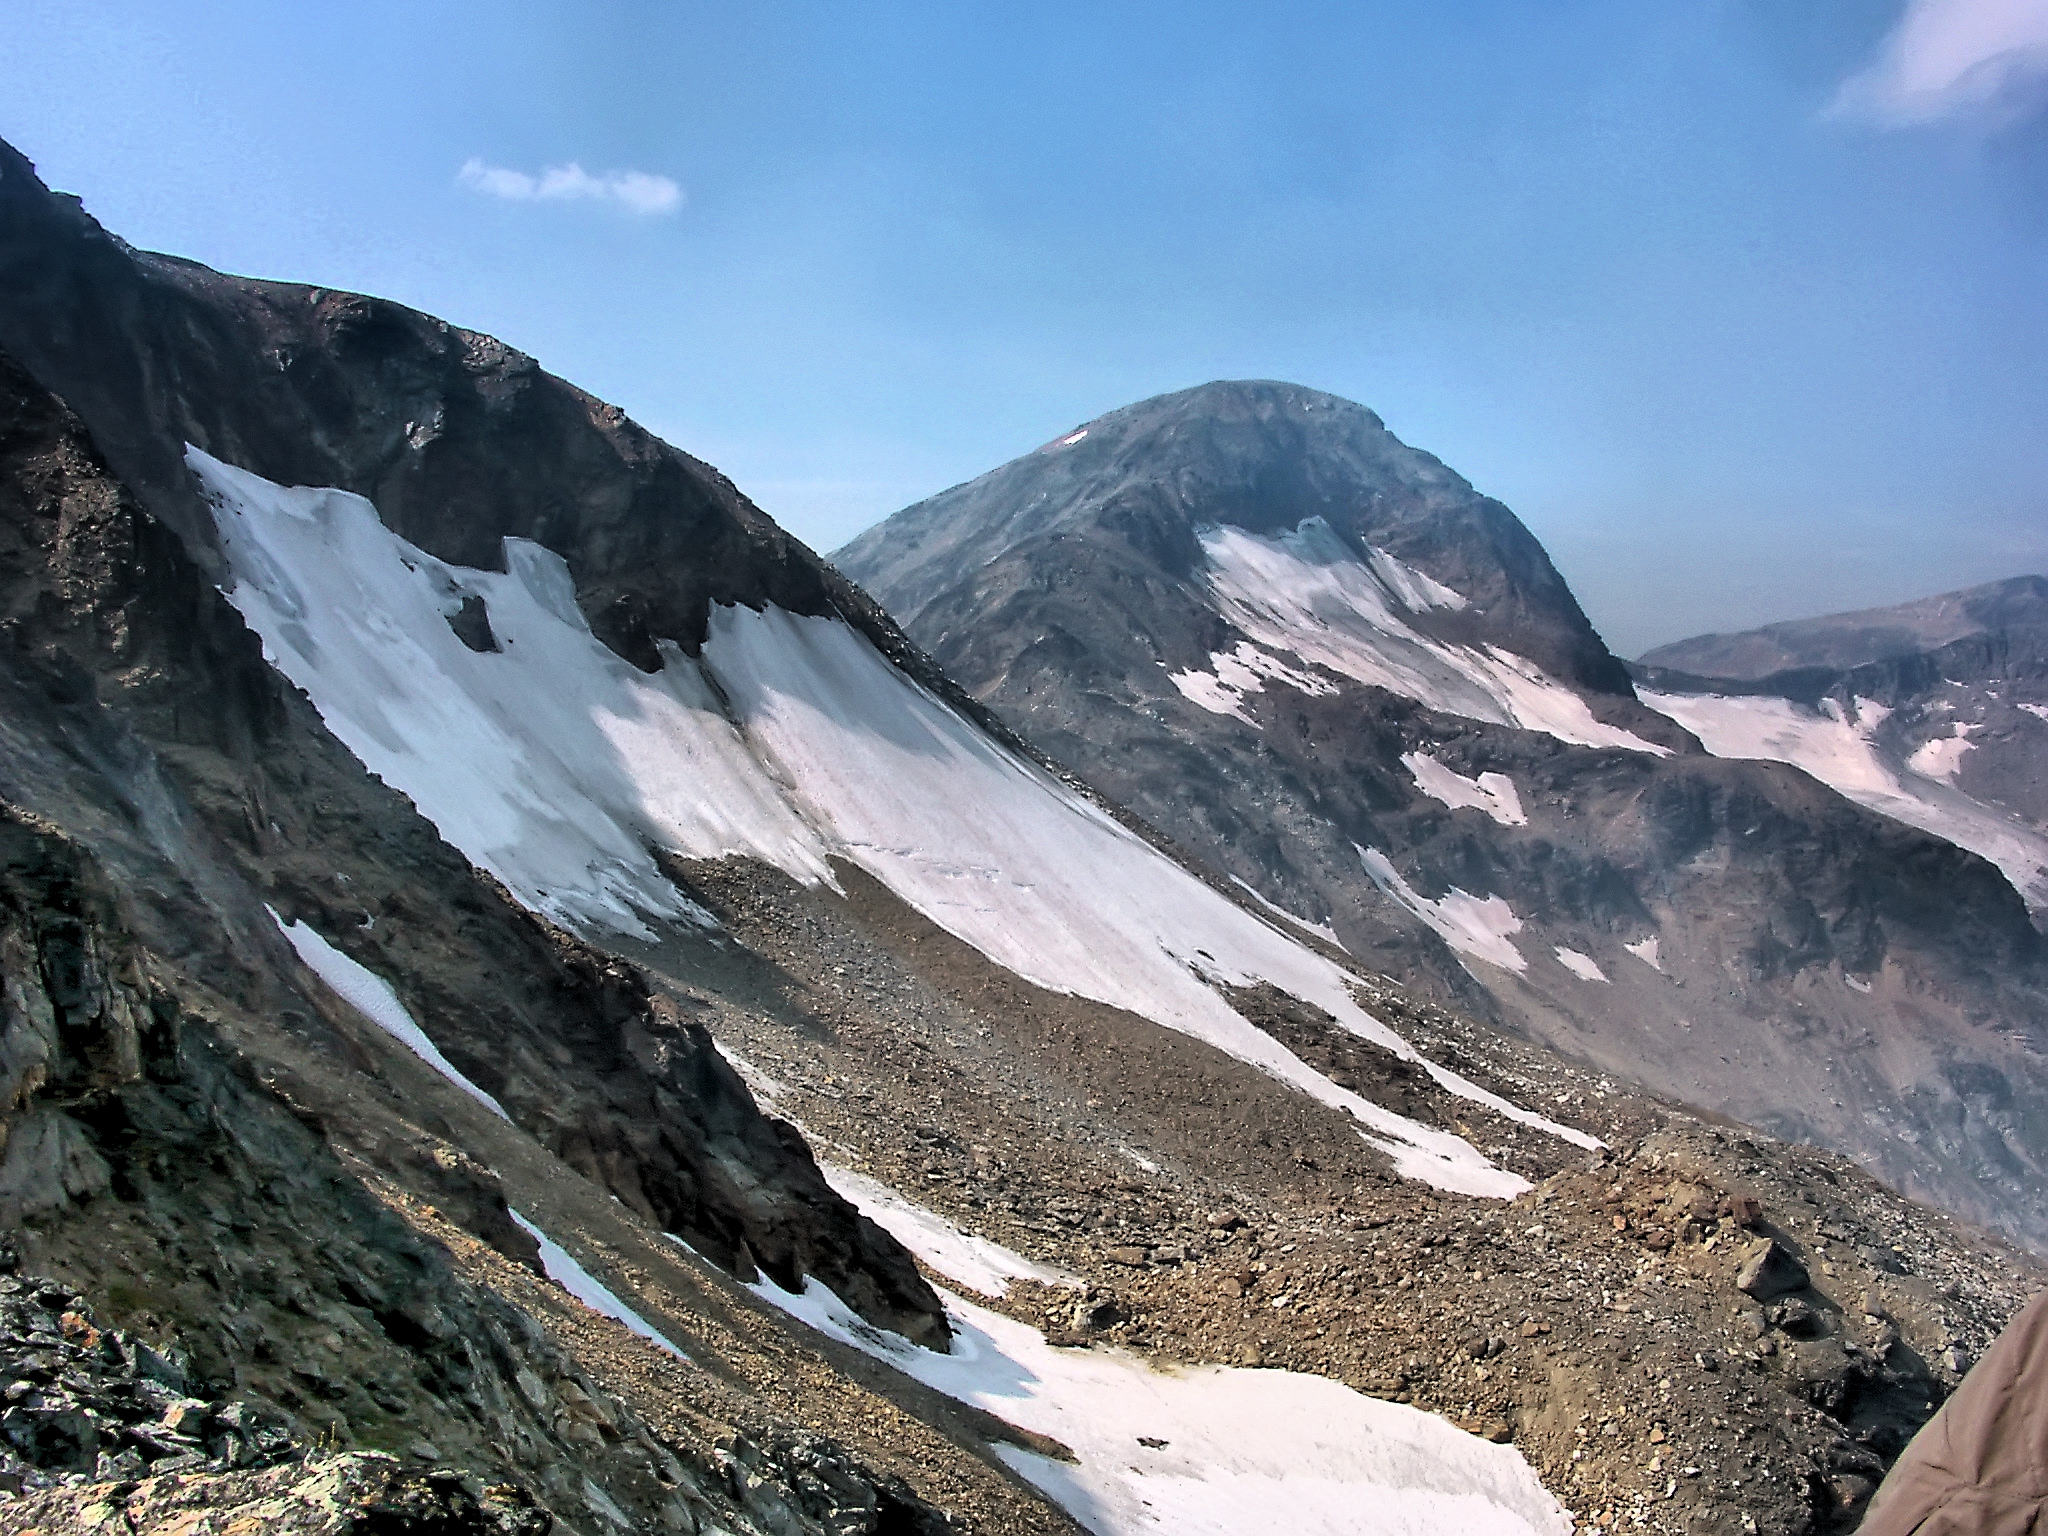
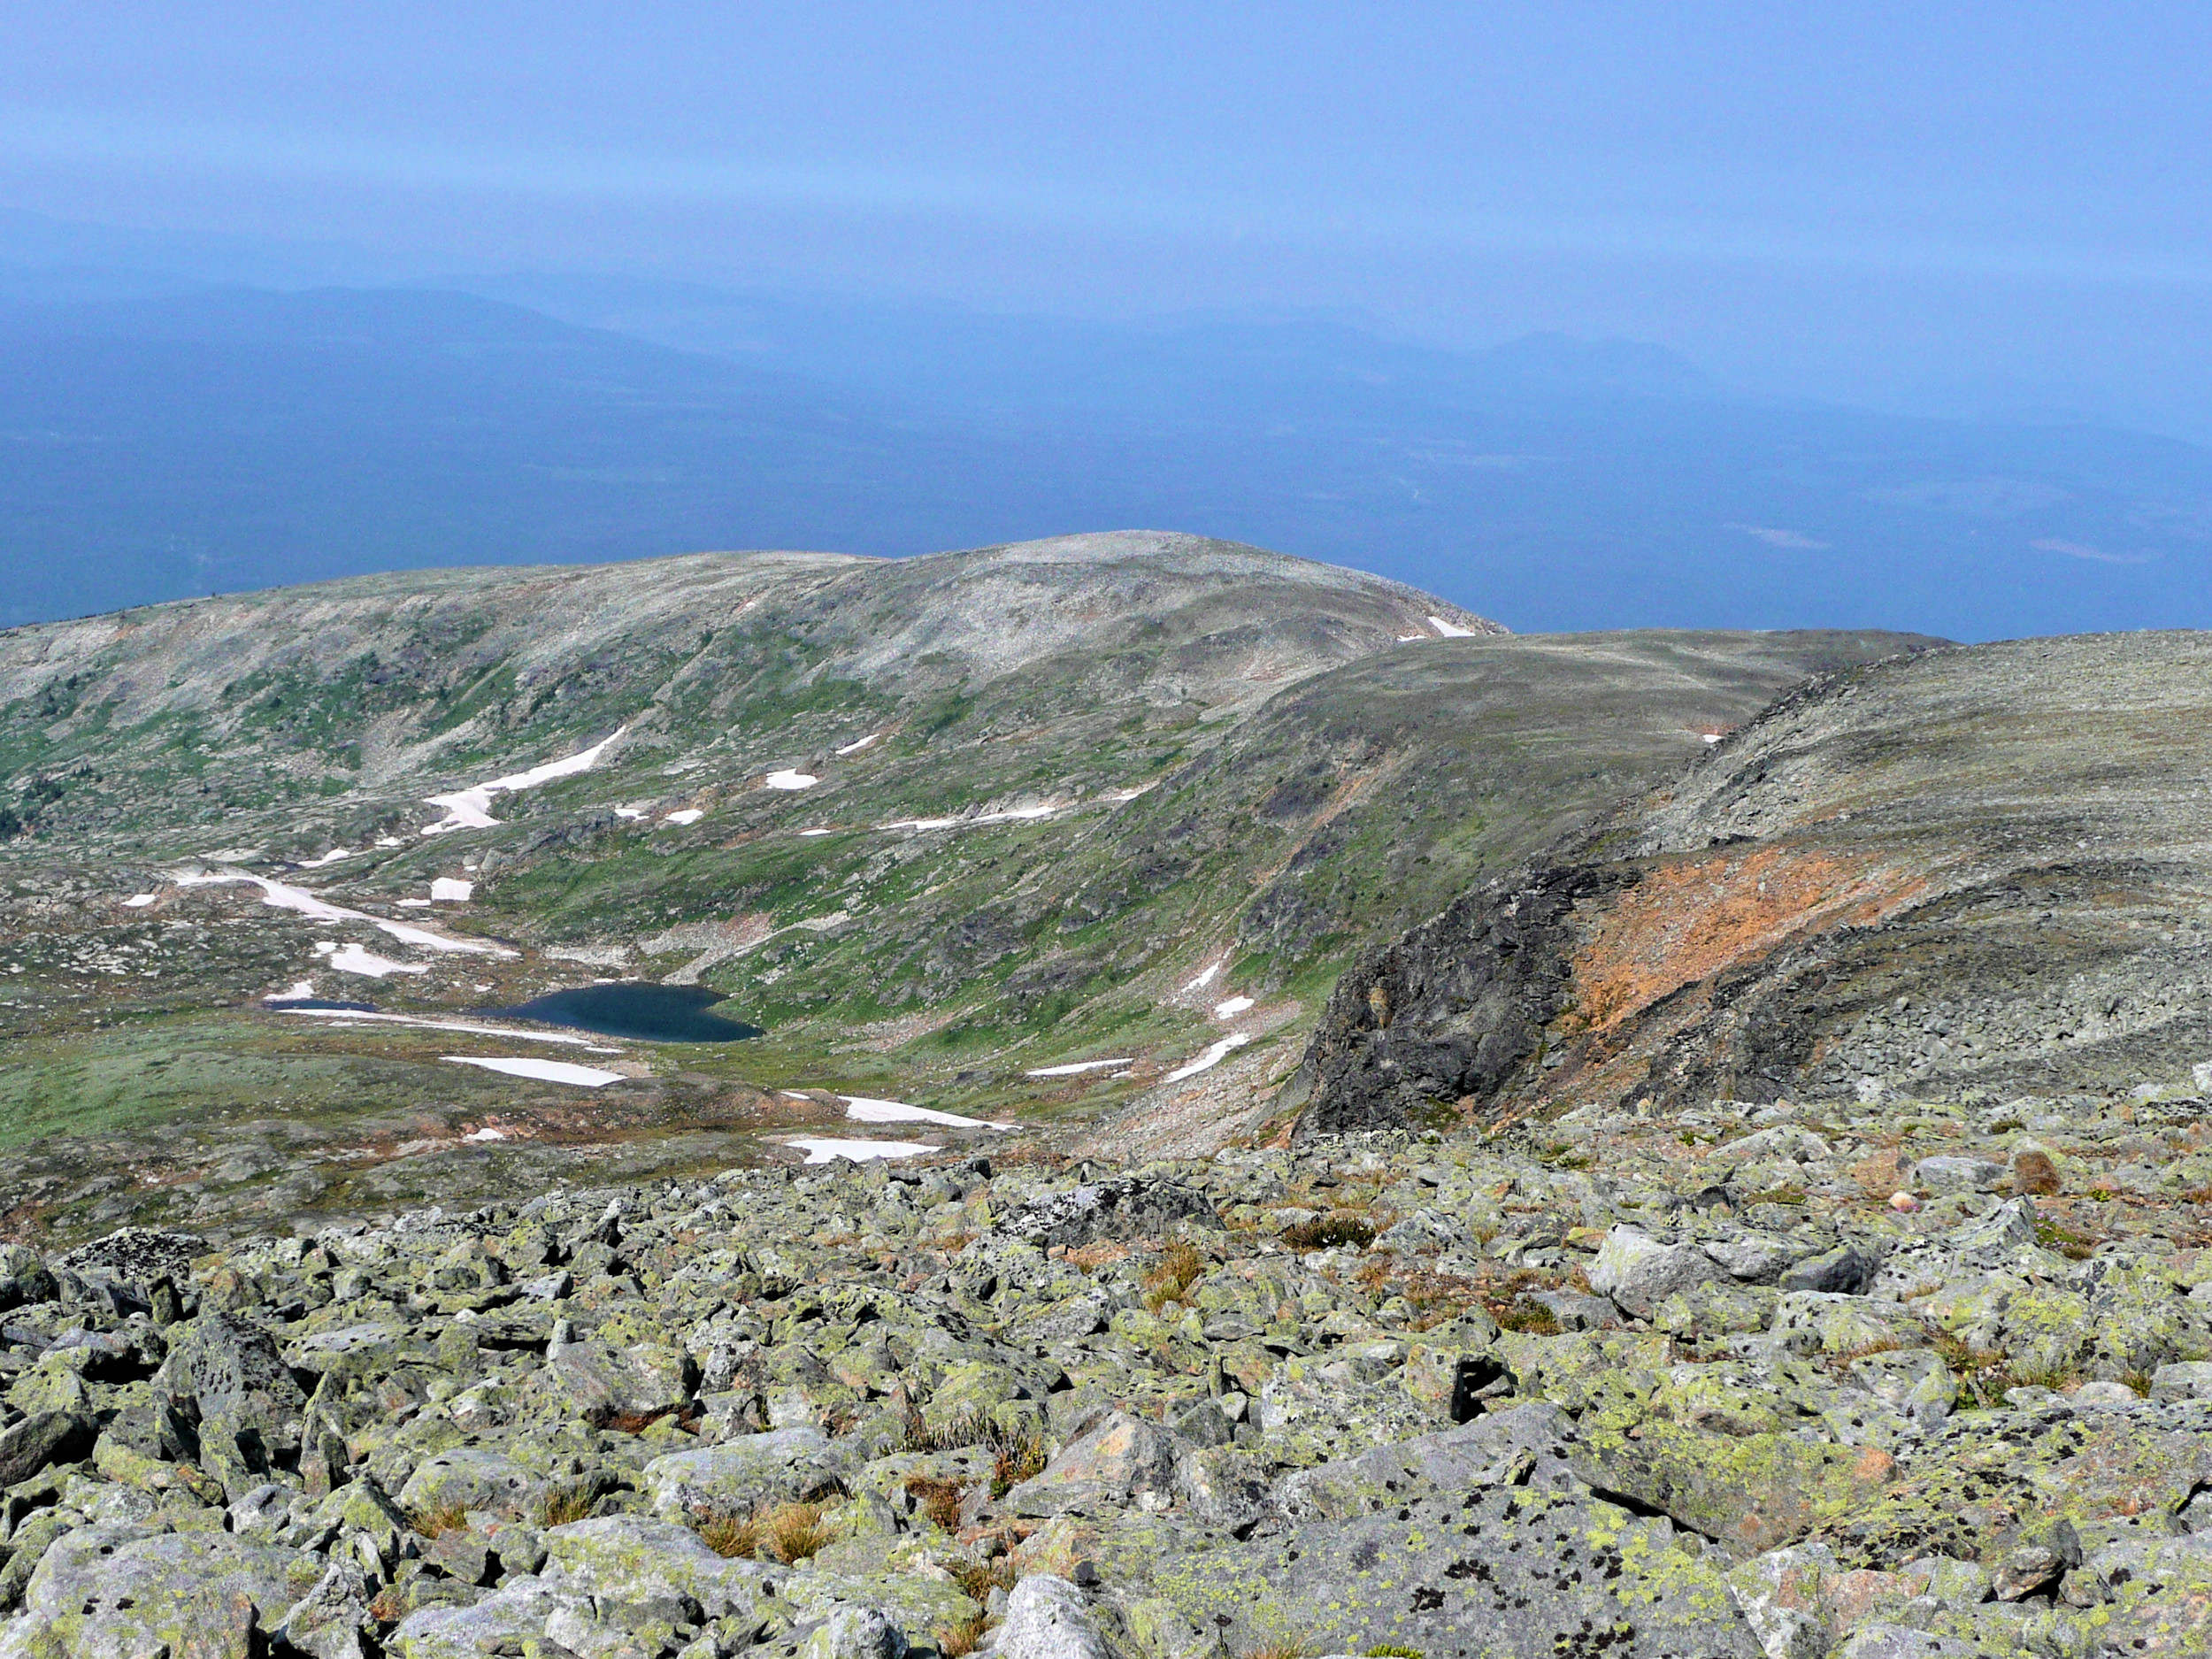
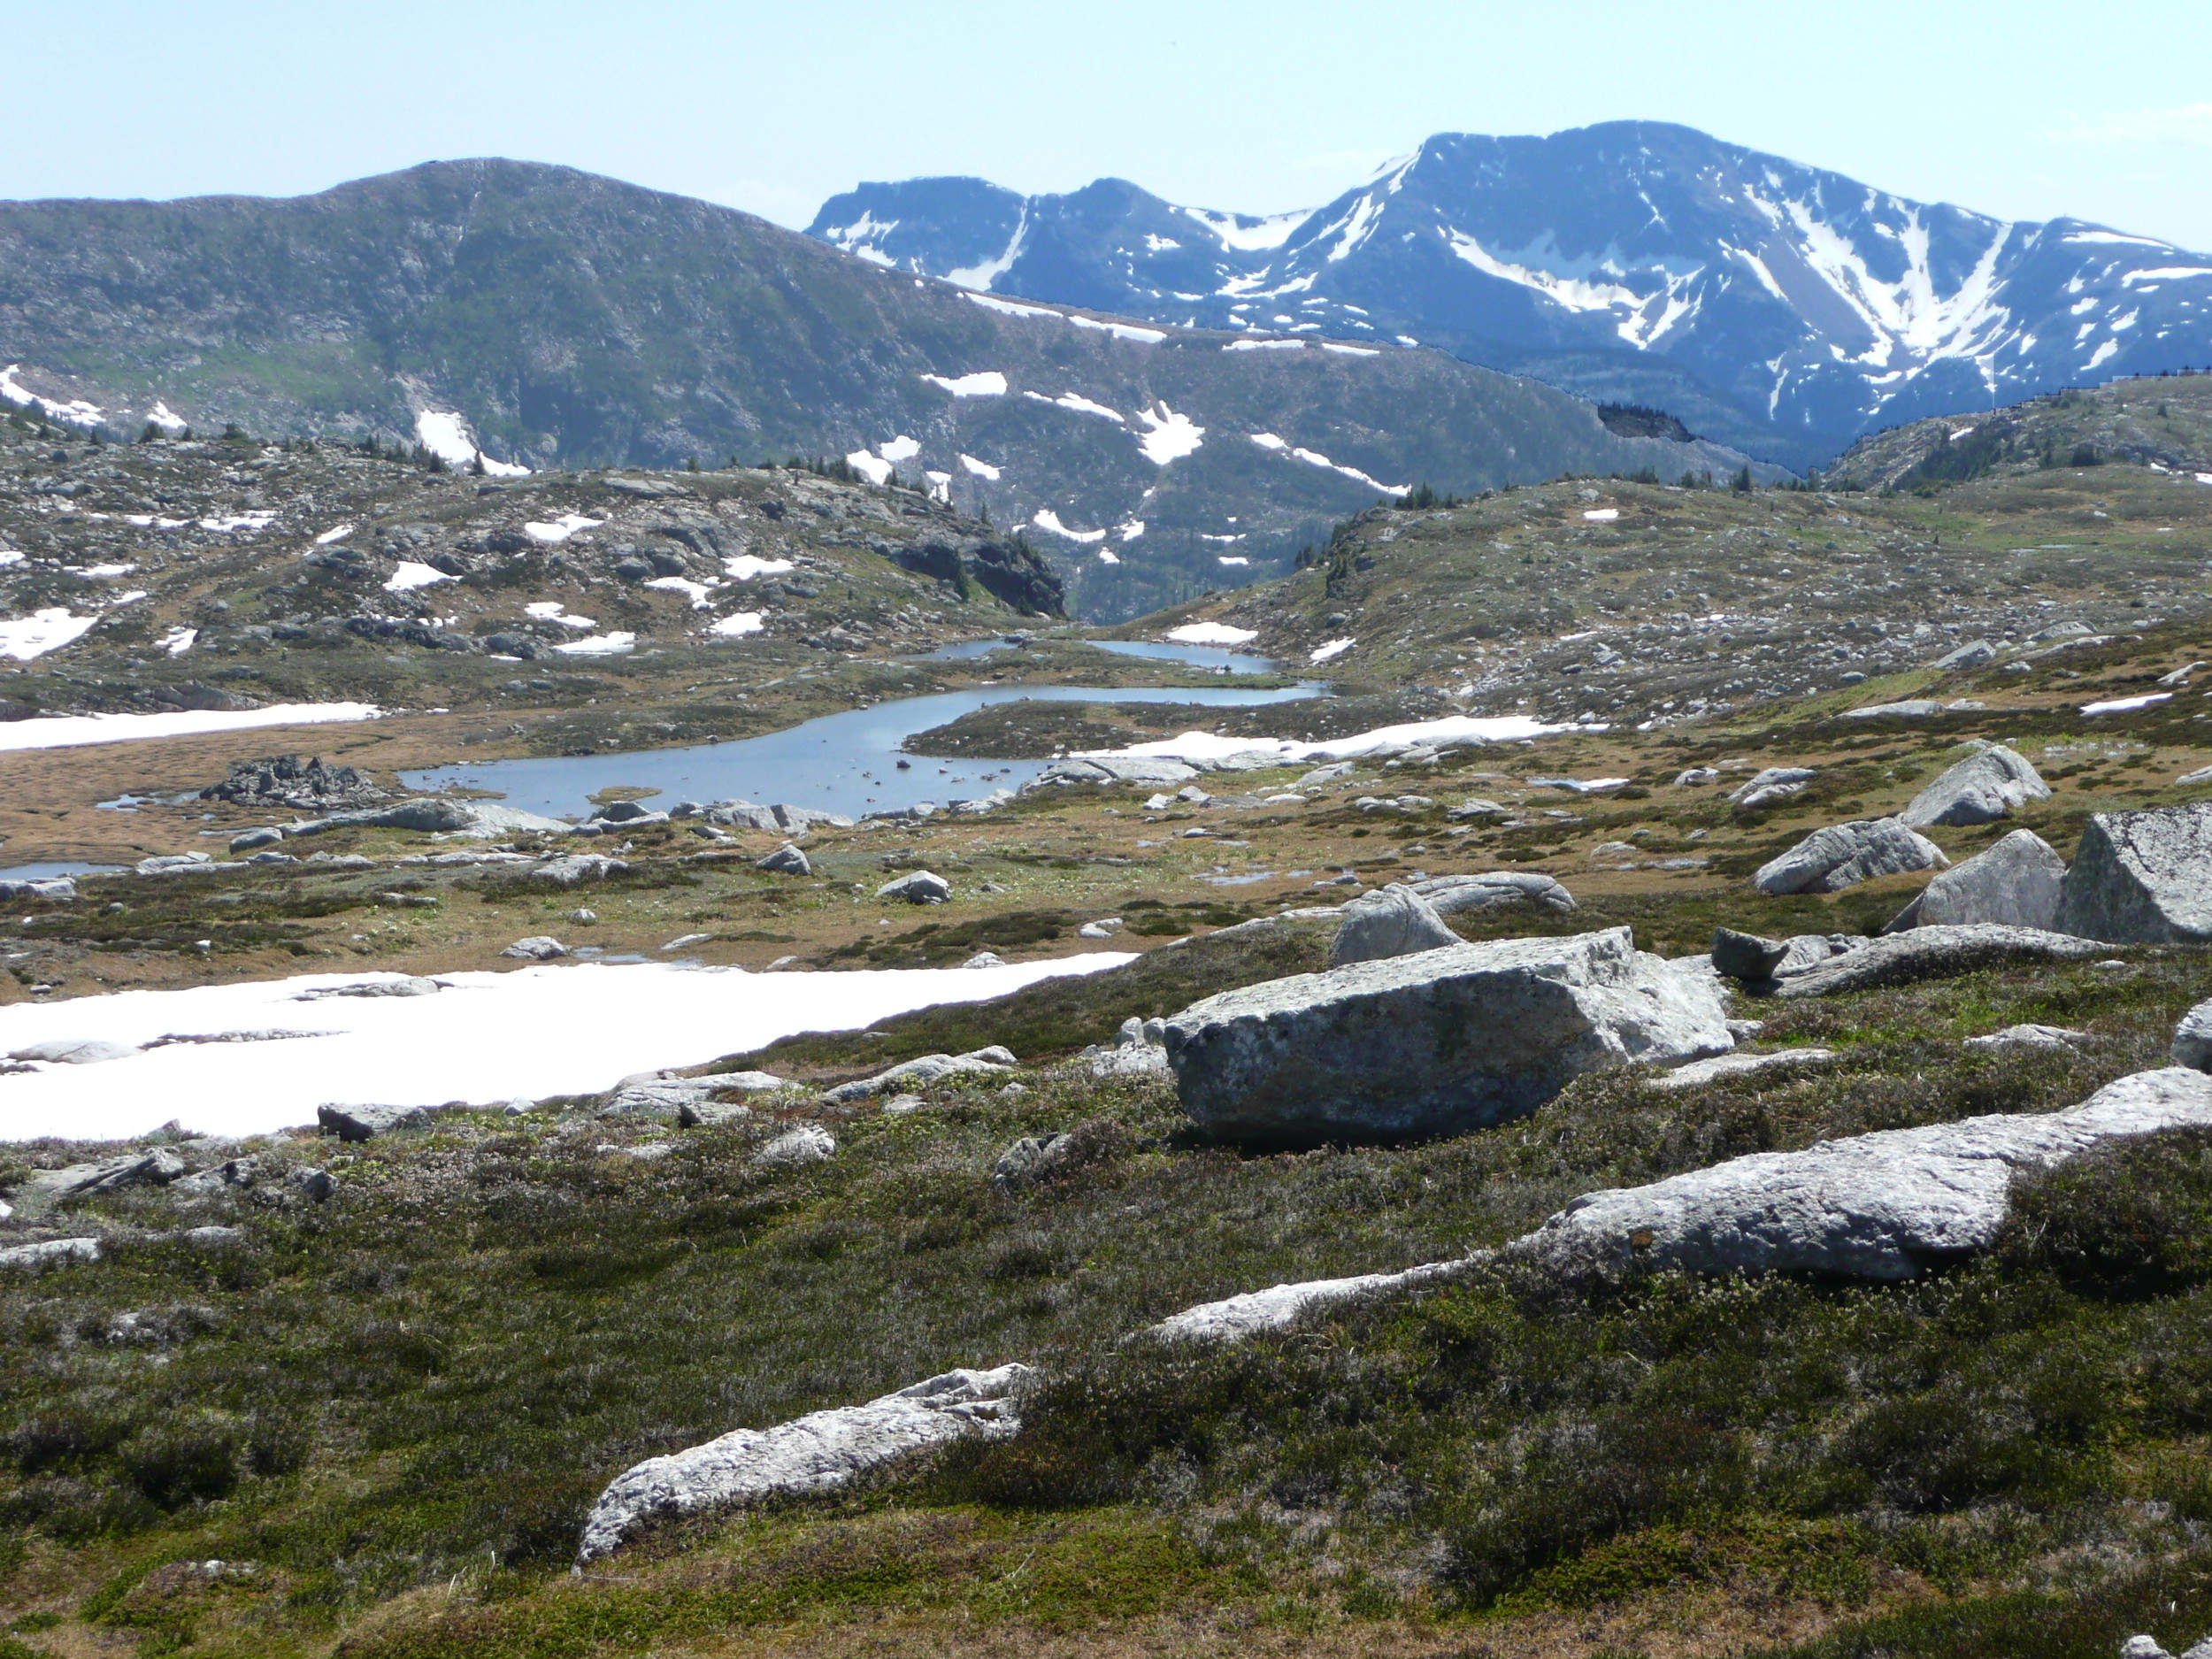
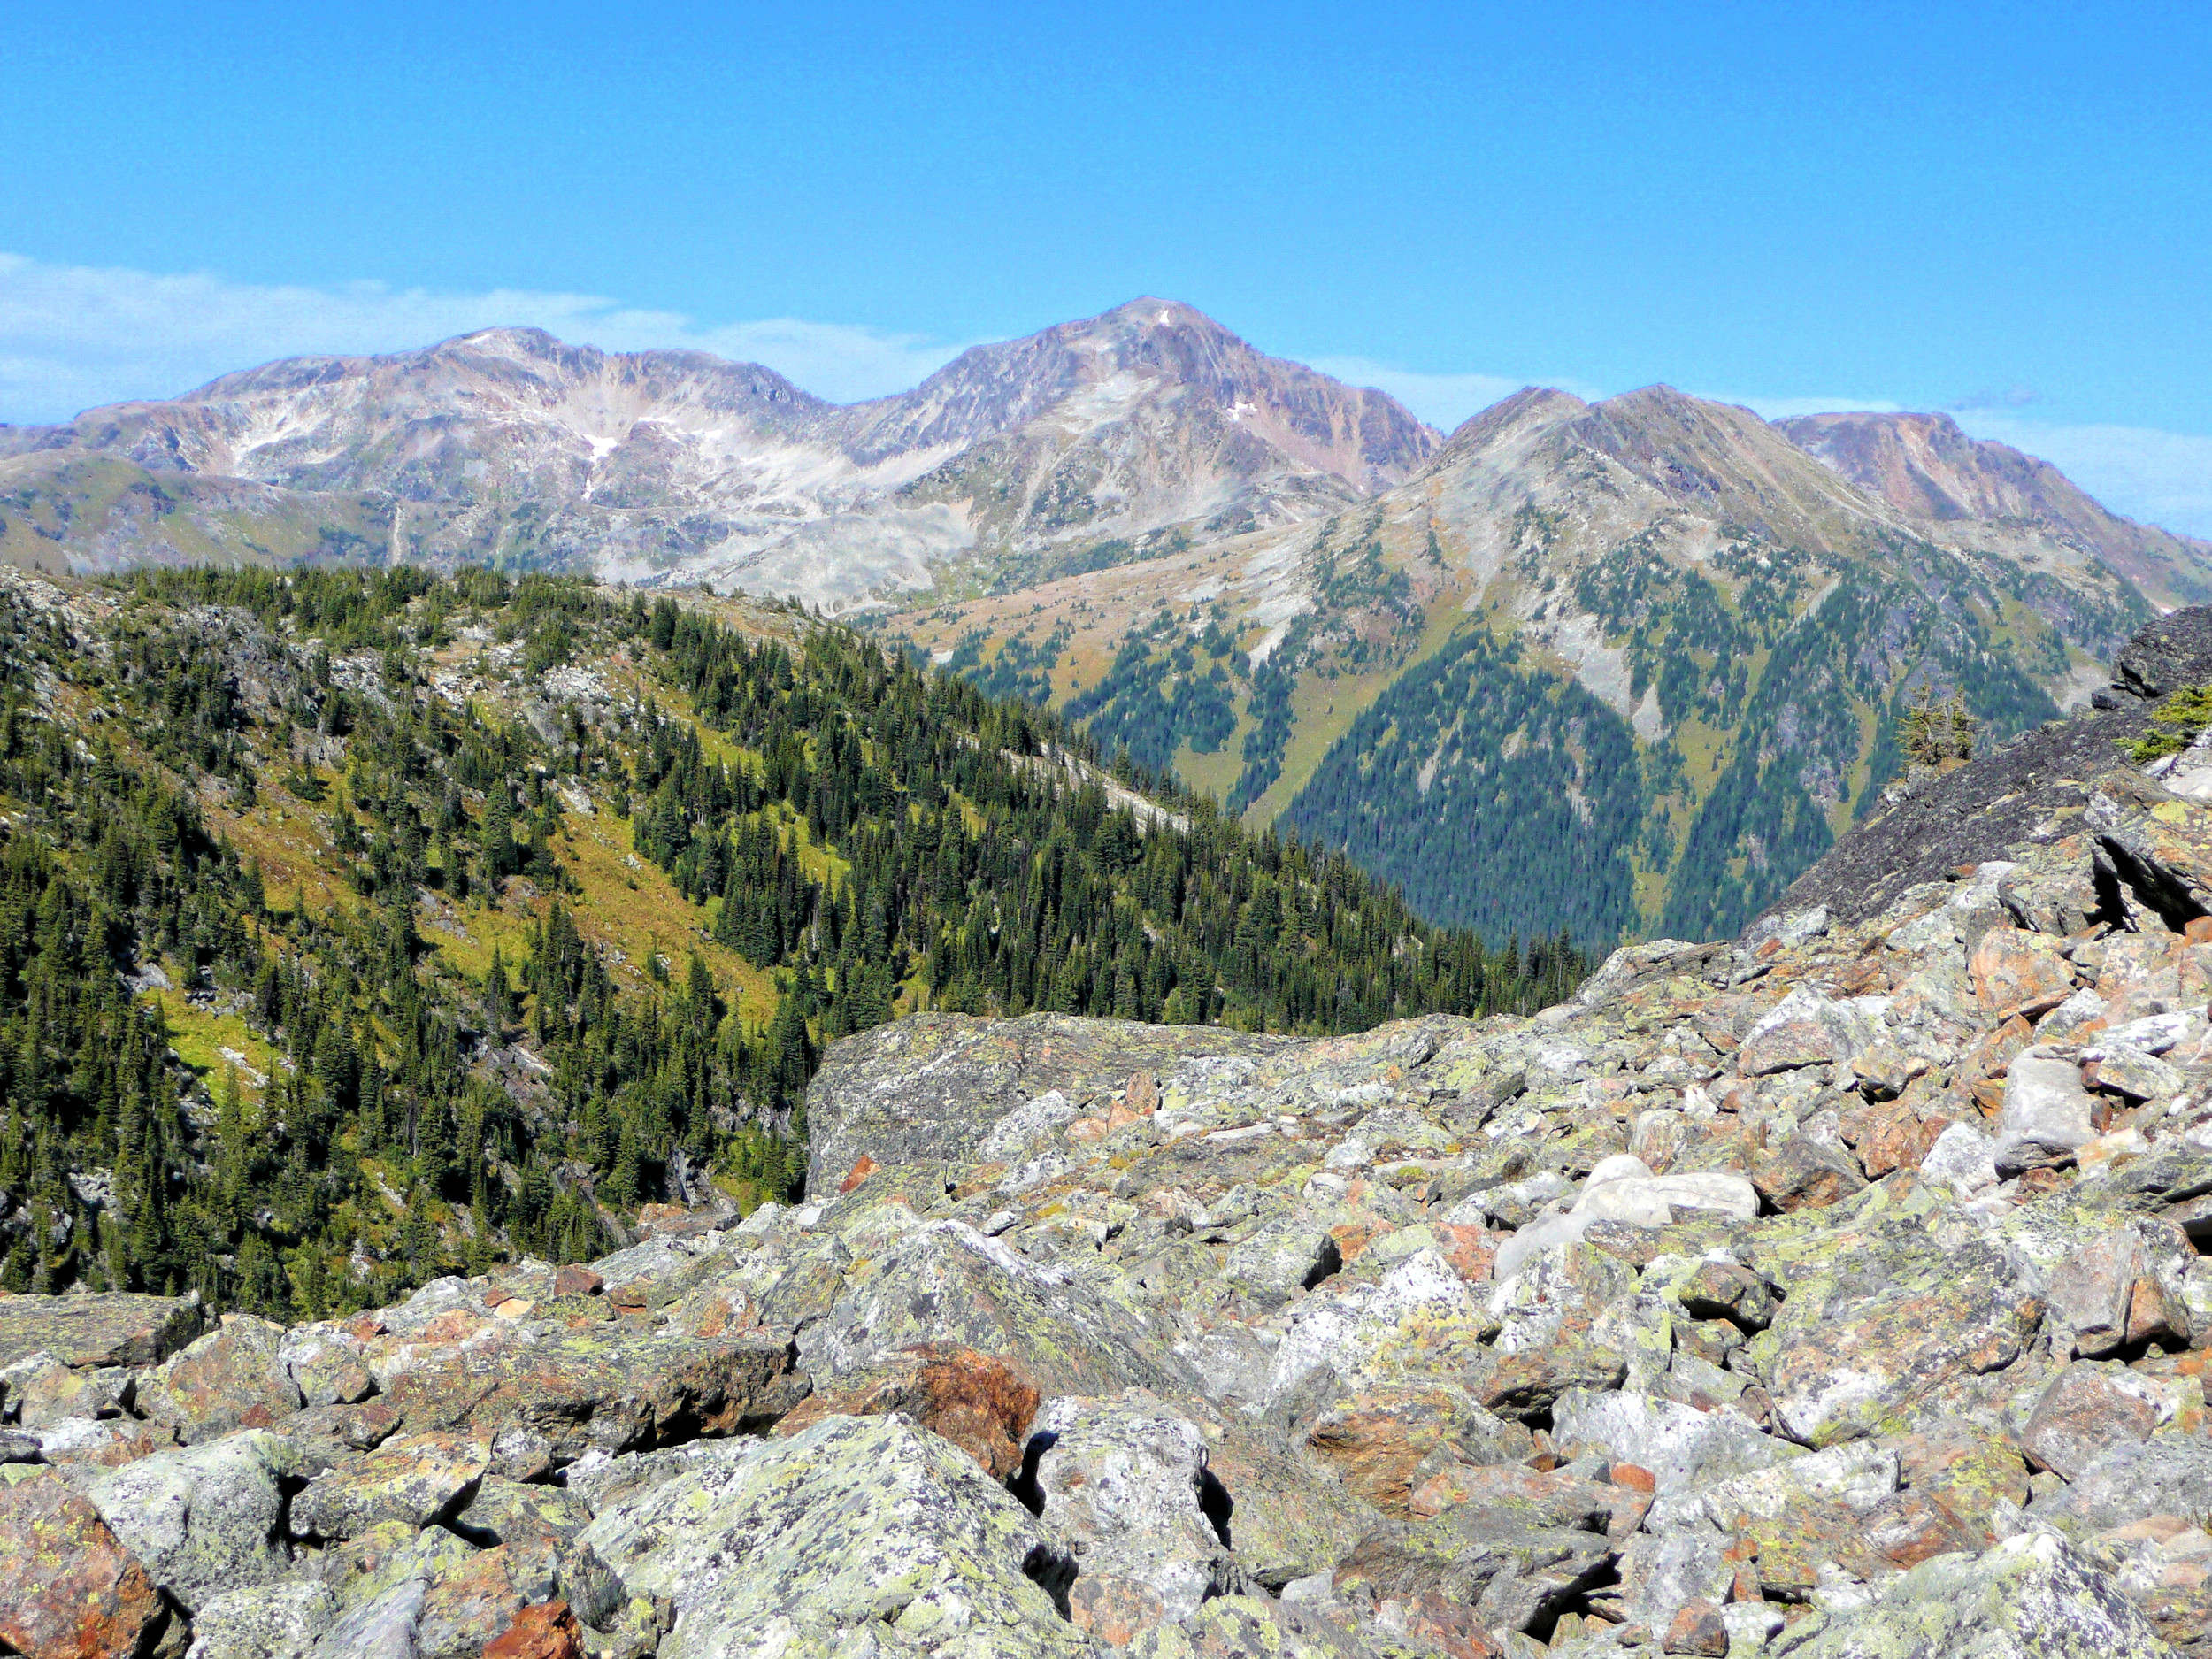
The third ridge is at 2285 meters elevation and offers the best view of Trophy Mountain and three tiered lakes in front of it.
East side of Trophy Mountain
Our return requires some route finding along the saddle between Wolverine Basin and the three lakes. We have to negotiate some loose boulders before we descend into the forest and follow some flagging tape on a path through the trees. Finally we arrive on the main trail and backtrack to our vehicles which are parked by the road.
| Distance | 10 km |
| Time | 3 hrs |
| Incl. Breaks | 5 ½ hrs |
| Min. Elev. | 1650 m |
| Max. Elev. | 2201 m |
| Ascent | 551 m |
| Cum. Ascent | 745 m |
| Cum. Descent | 745 m |
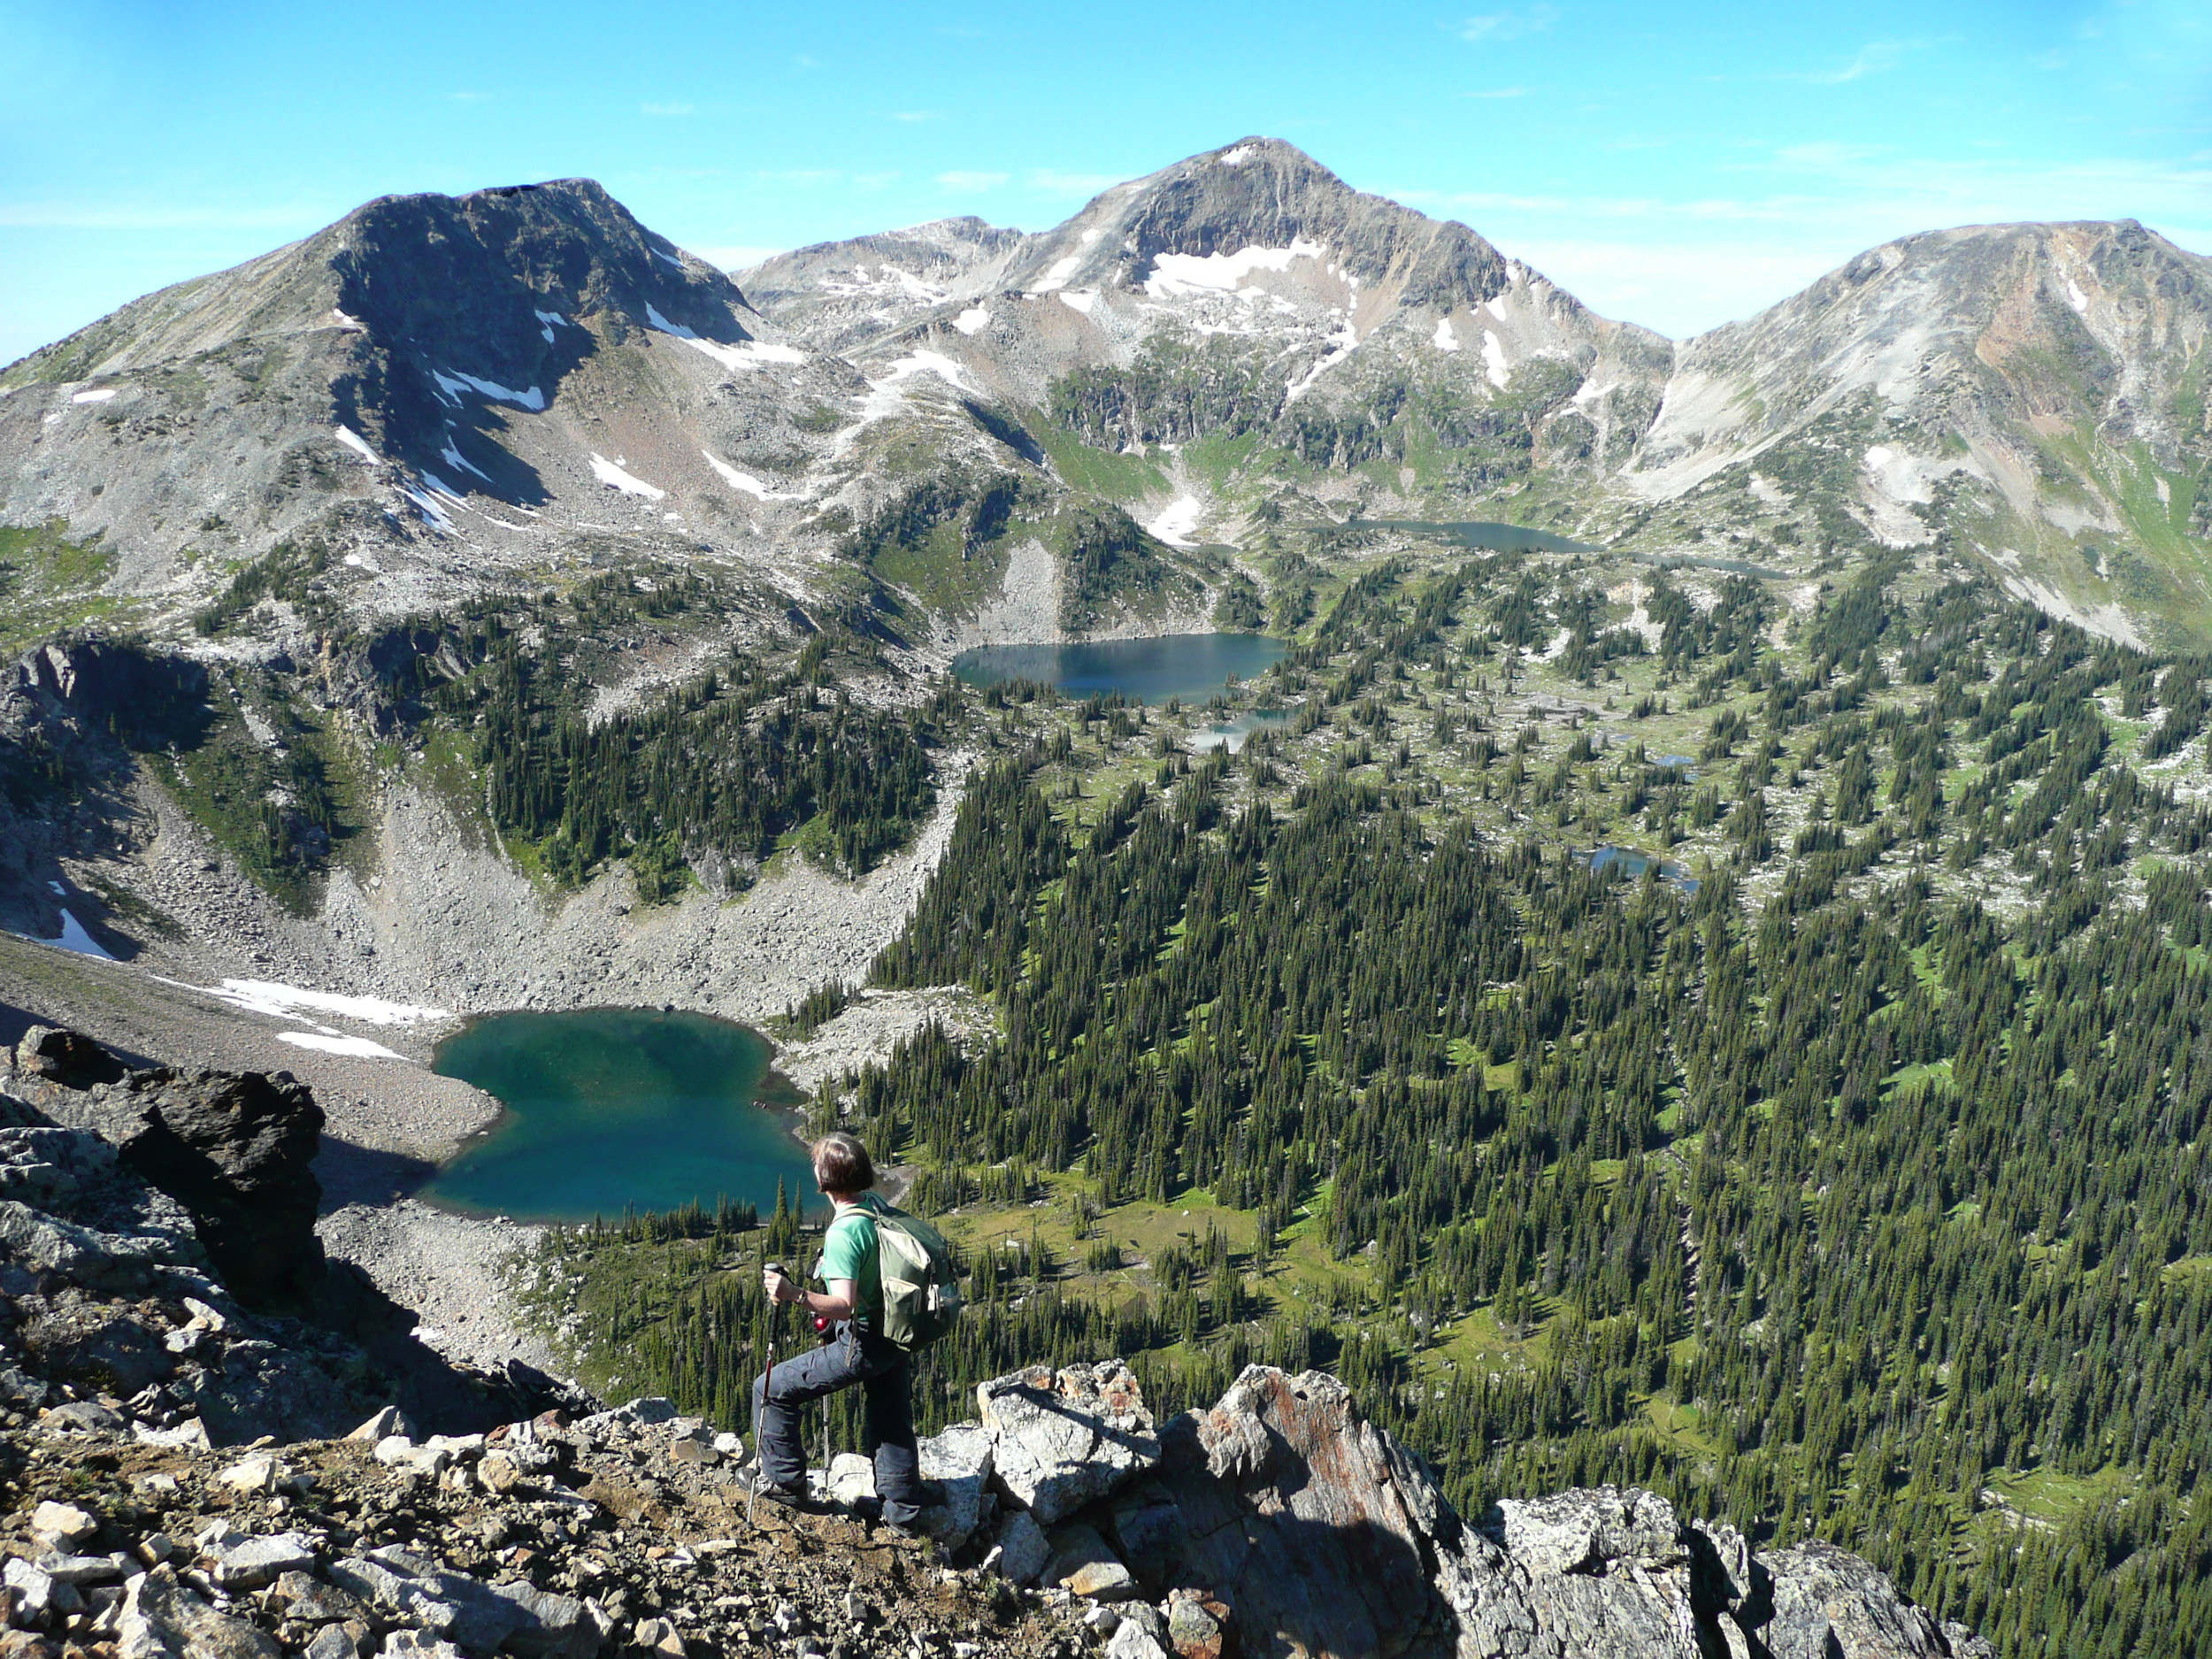
To the northeast of the village of Clearwater, the very distinctive 2450-meter-high main peak of Raft Mountain rises into the sky. The Raft Mountain Range has four other summits which form a U around Willis Lake to the south.
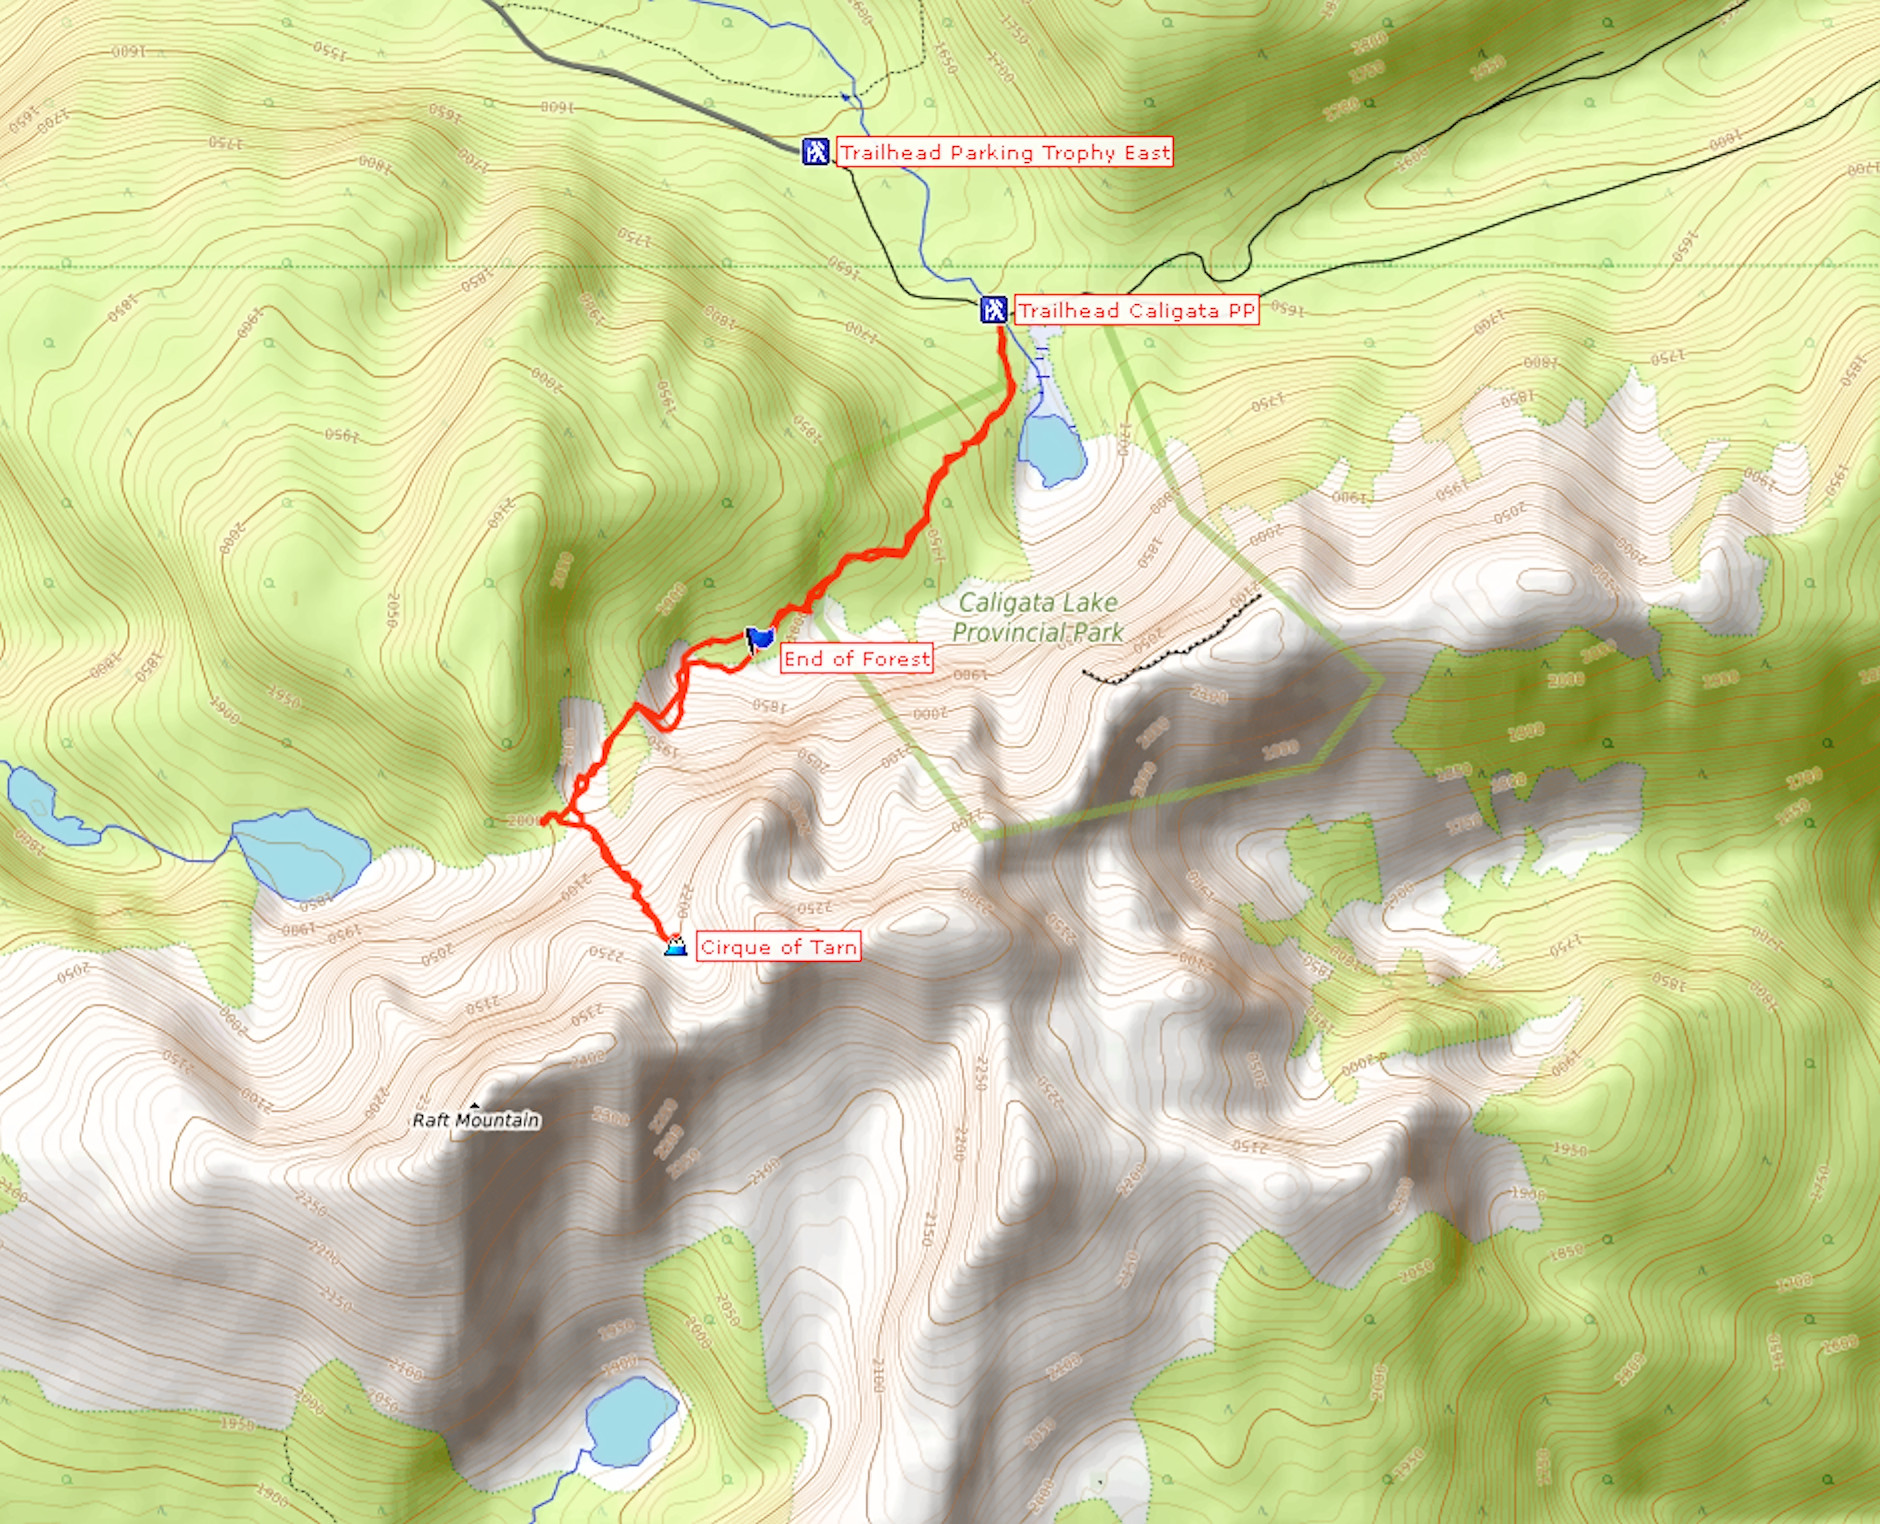
To access the Cirque of Tarns on Raft Mountain’s northern slopes we take the Trophy Mountain Access Road and at kilometer 4.3 we turn off onto the Spahats Creek Road. This road is quite rough and requires a high clearance vehicle most of the time. The hiking trail to the Cirque of Tarns leads through Caligata Lake Provincial Park and begins on the right-hand side of the road near the crossing of Caligata Creek at kilometer 13.8.
Next to the Provincial Park sign, we enter the forest and cross a very marshy area. For our hike we have waited until after the first frosts in September, hoping that they have killed off most of the mosquitos which are a pest here all summer long. We follow blue markings on the trees and some flagging tape. In 2011, the trail is not well marked and we have to look carefully for any signs of it. In the distance between the trees we spot Caligata Lake, but we forego the cross-country trek through the marsh that would be necessary to reach its shore. After forty minutes of wandering through the subalpine forest, we are rewarded with a first glimpse of Raft Mountain.
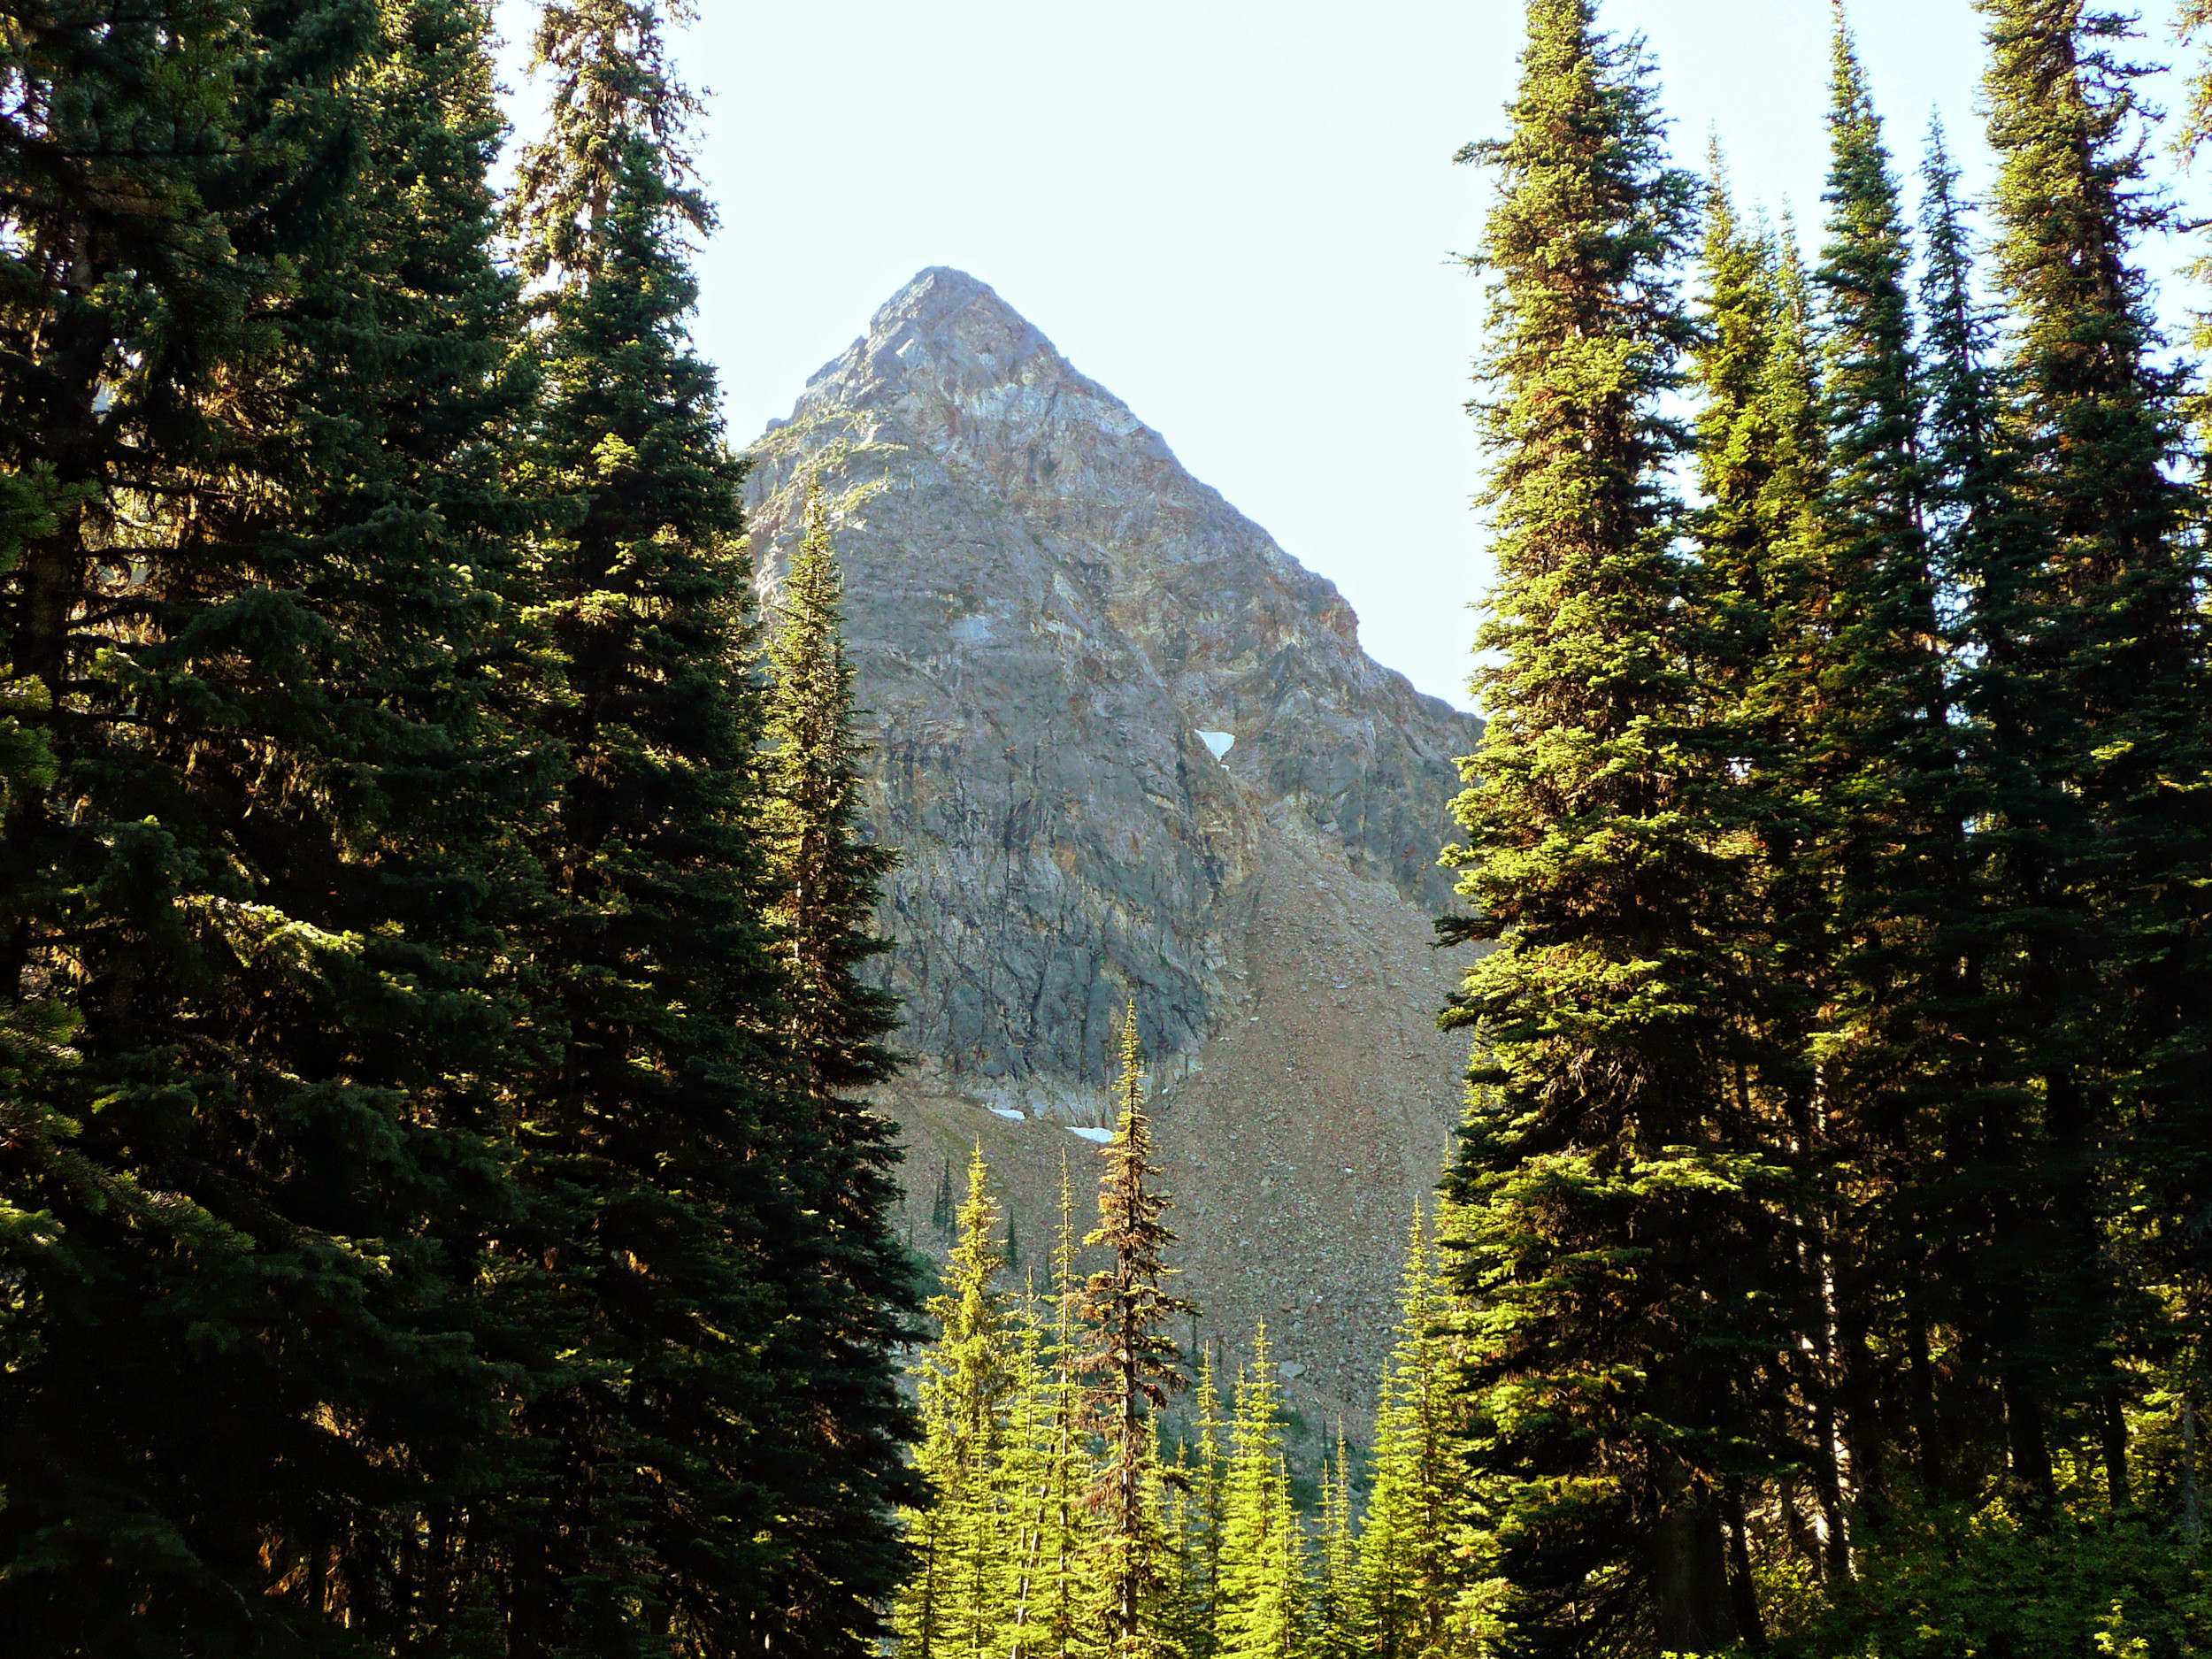
North face of Raft Mountain
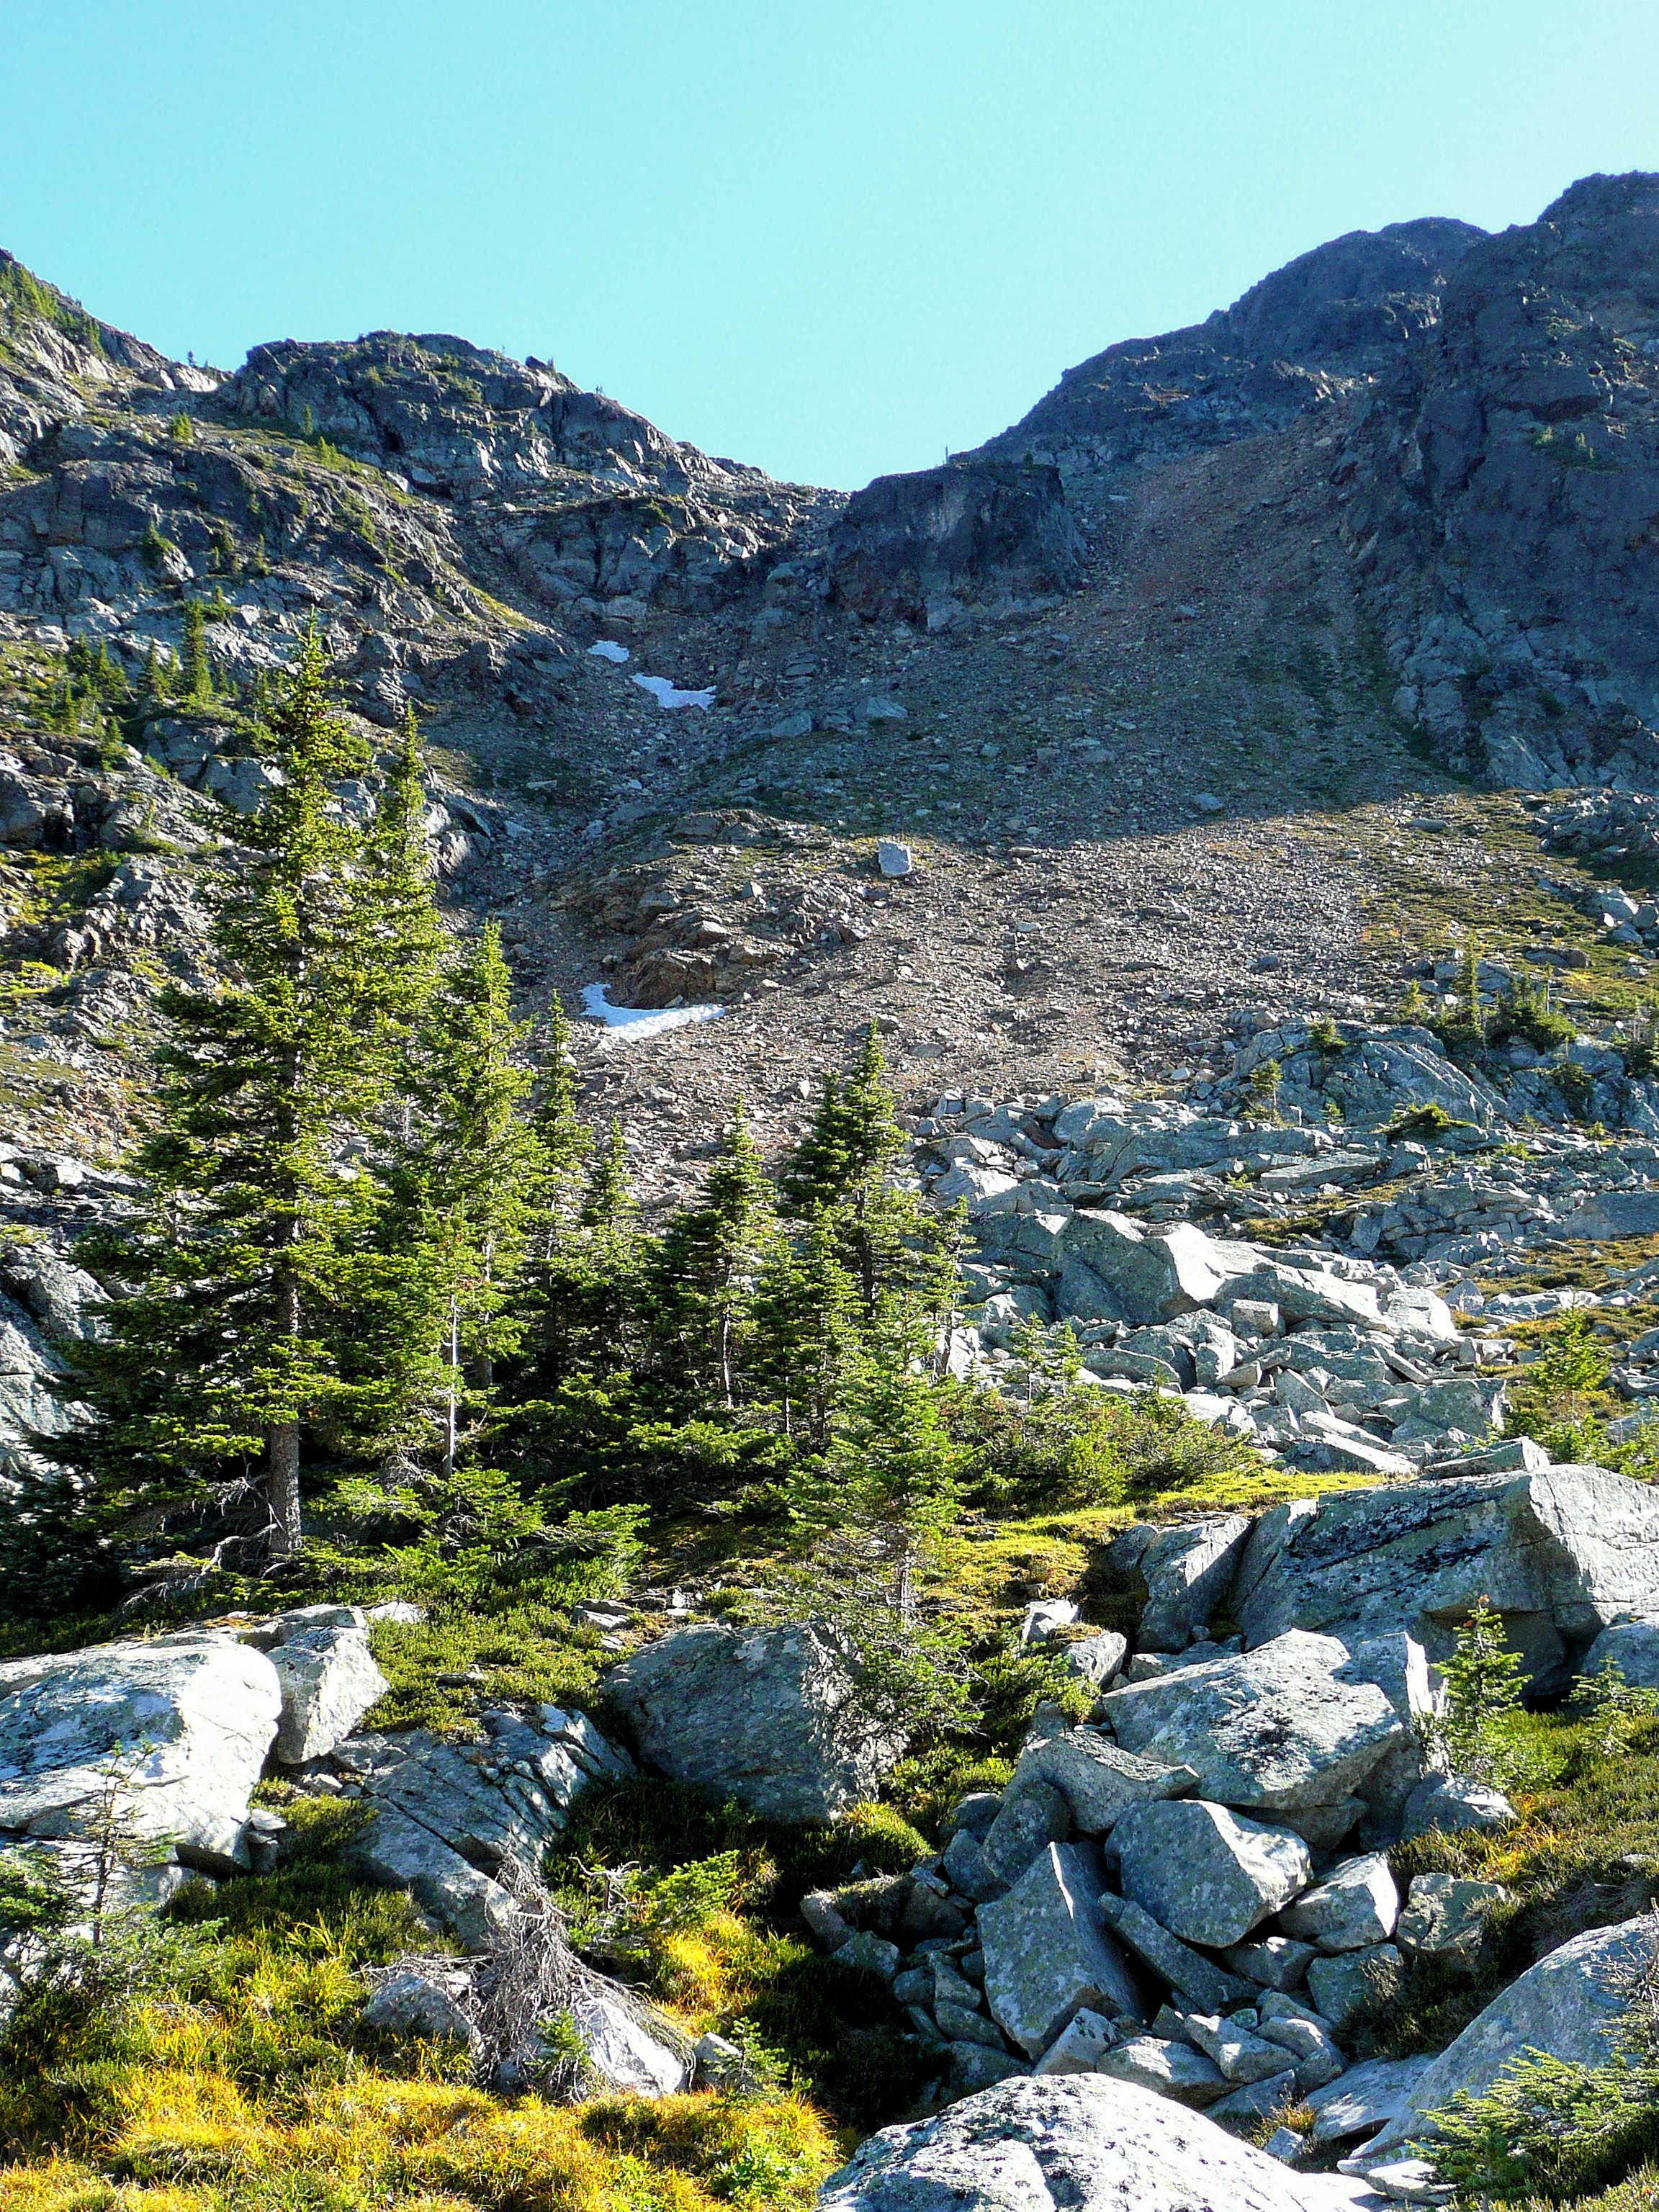
Another ten minutes further, the forest ends below a massive rock fall that separates us from the mountain itself.
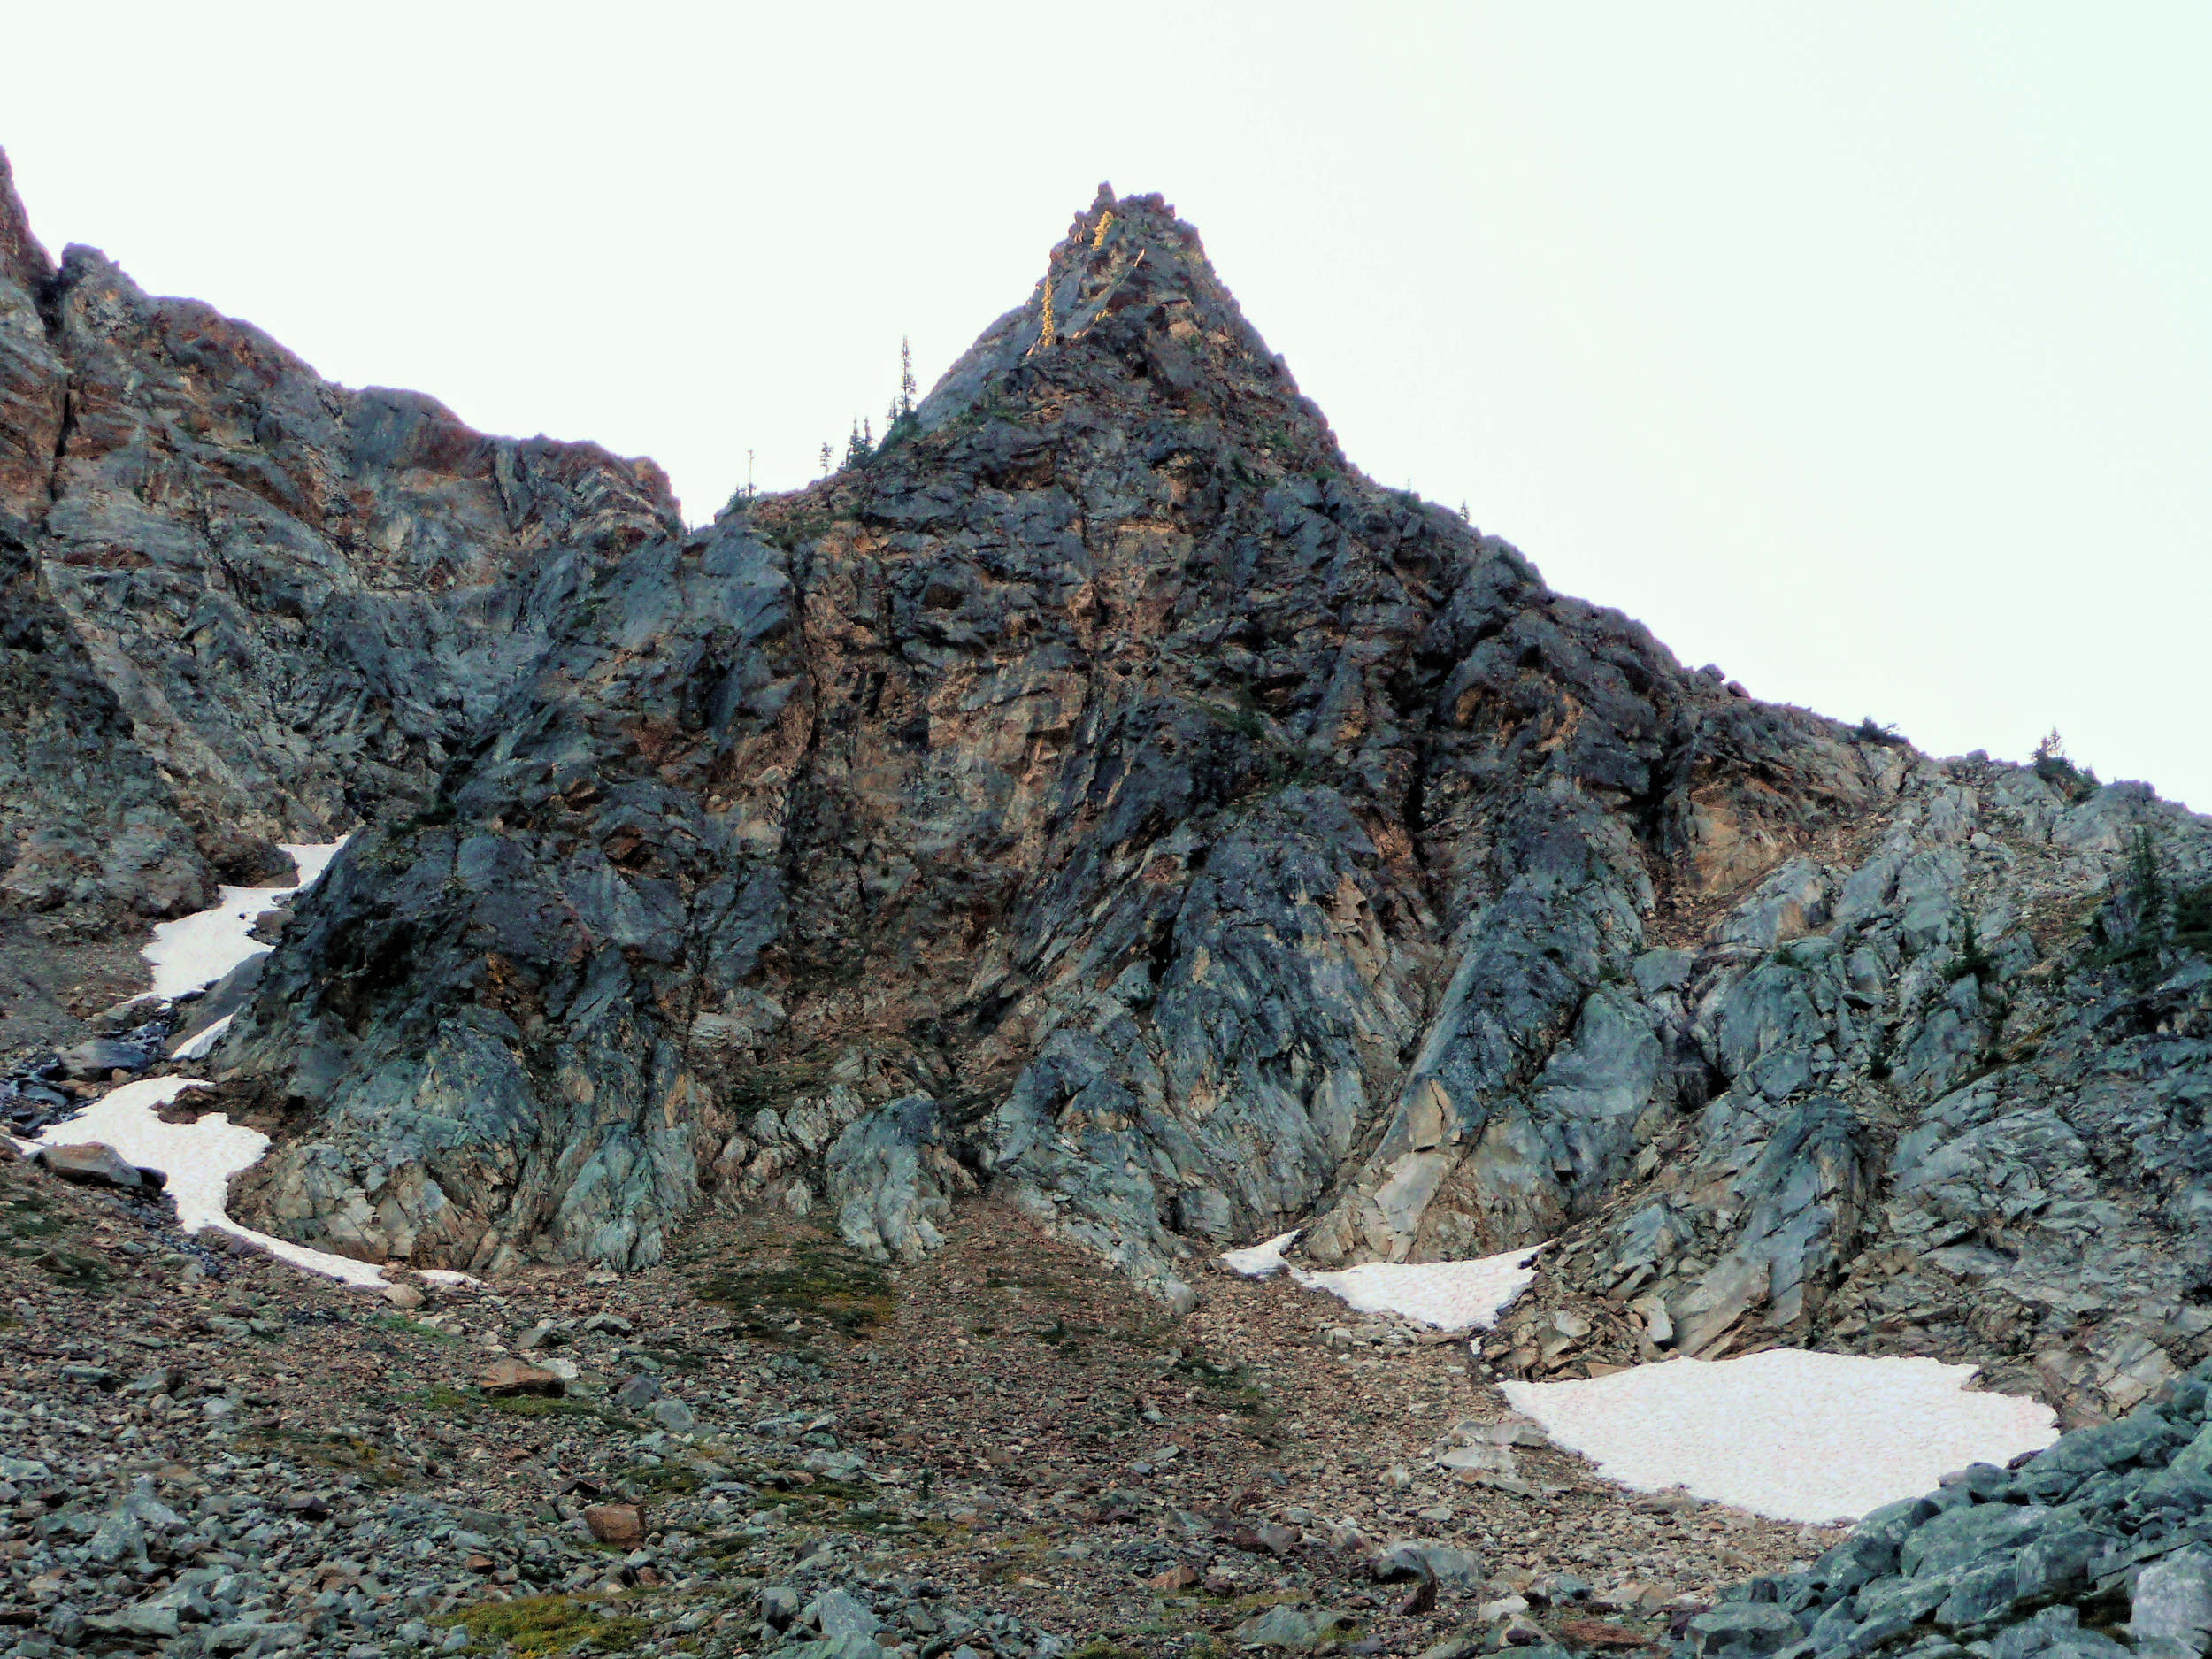
Rock fall
We follow the creek between the rock fall and the forest. Even in September there are still flowers blooming on the water’s edge.
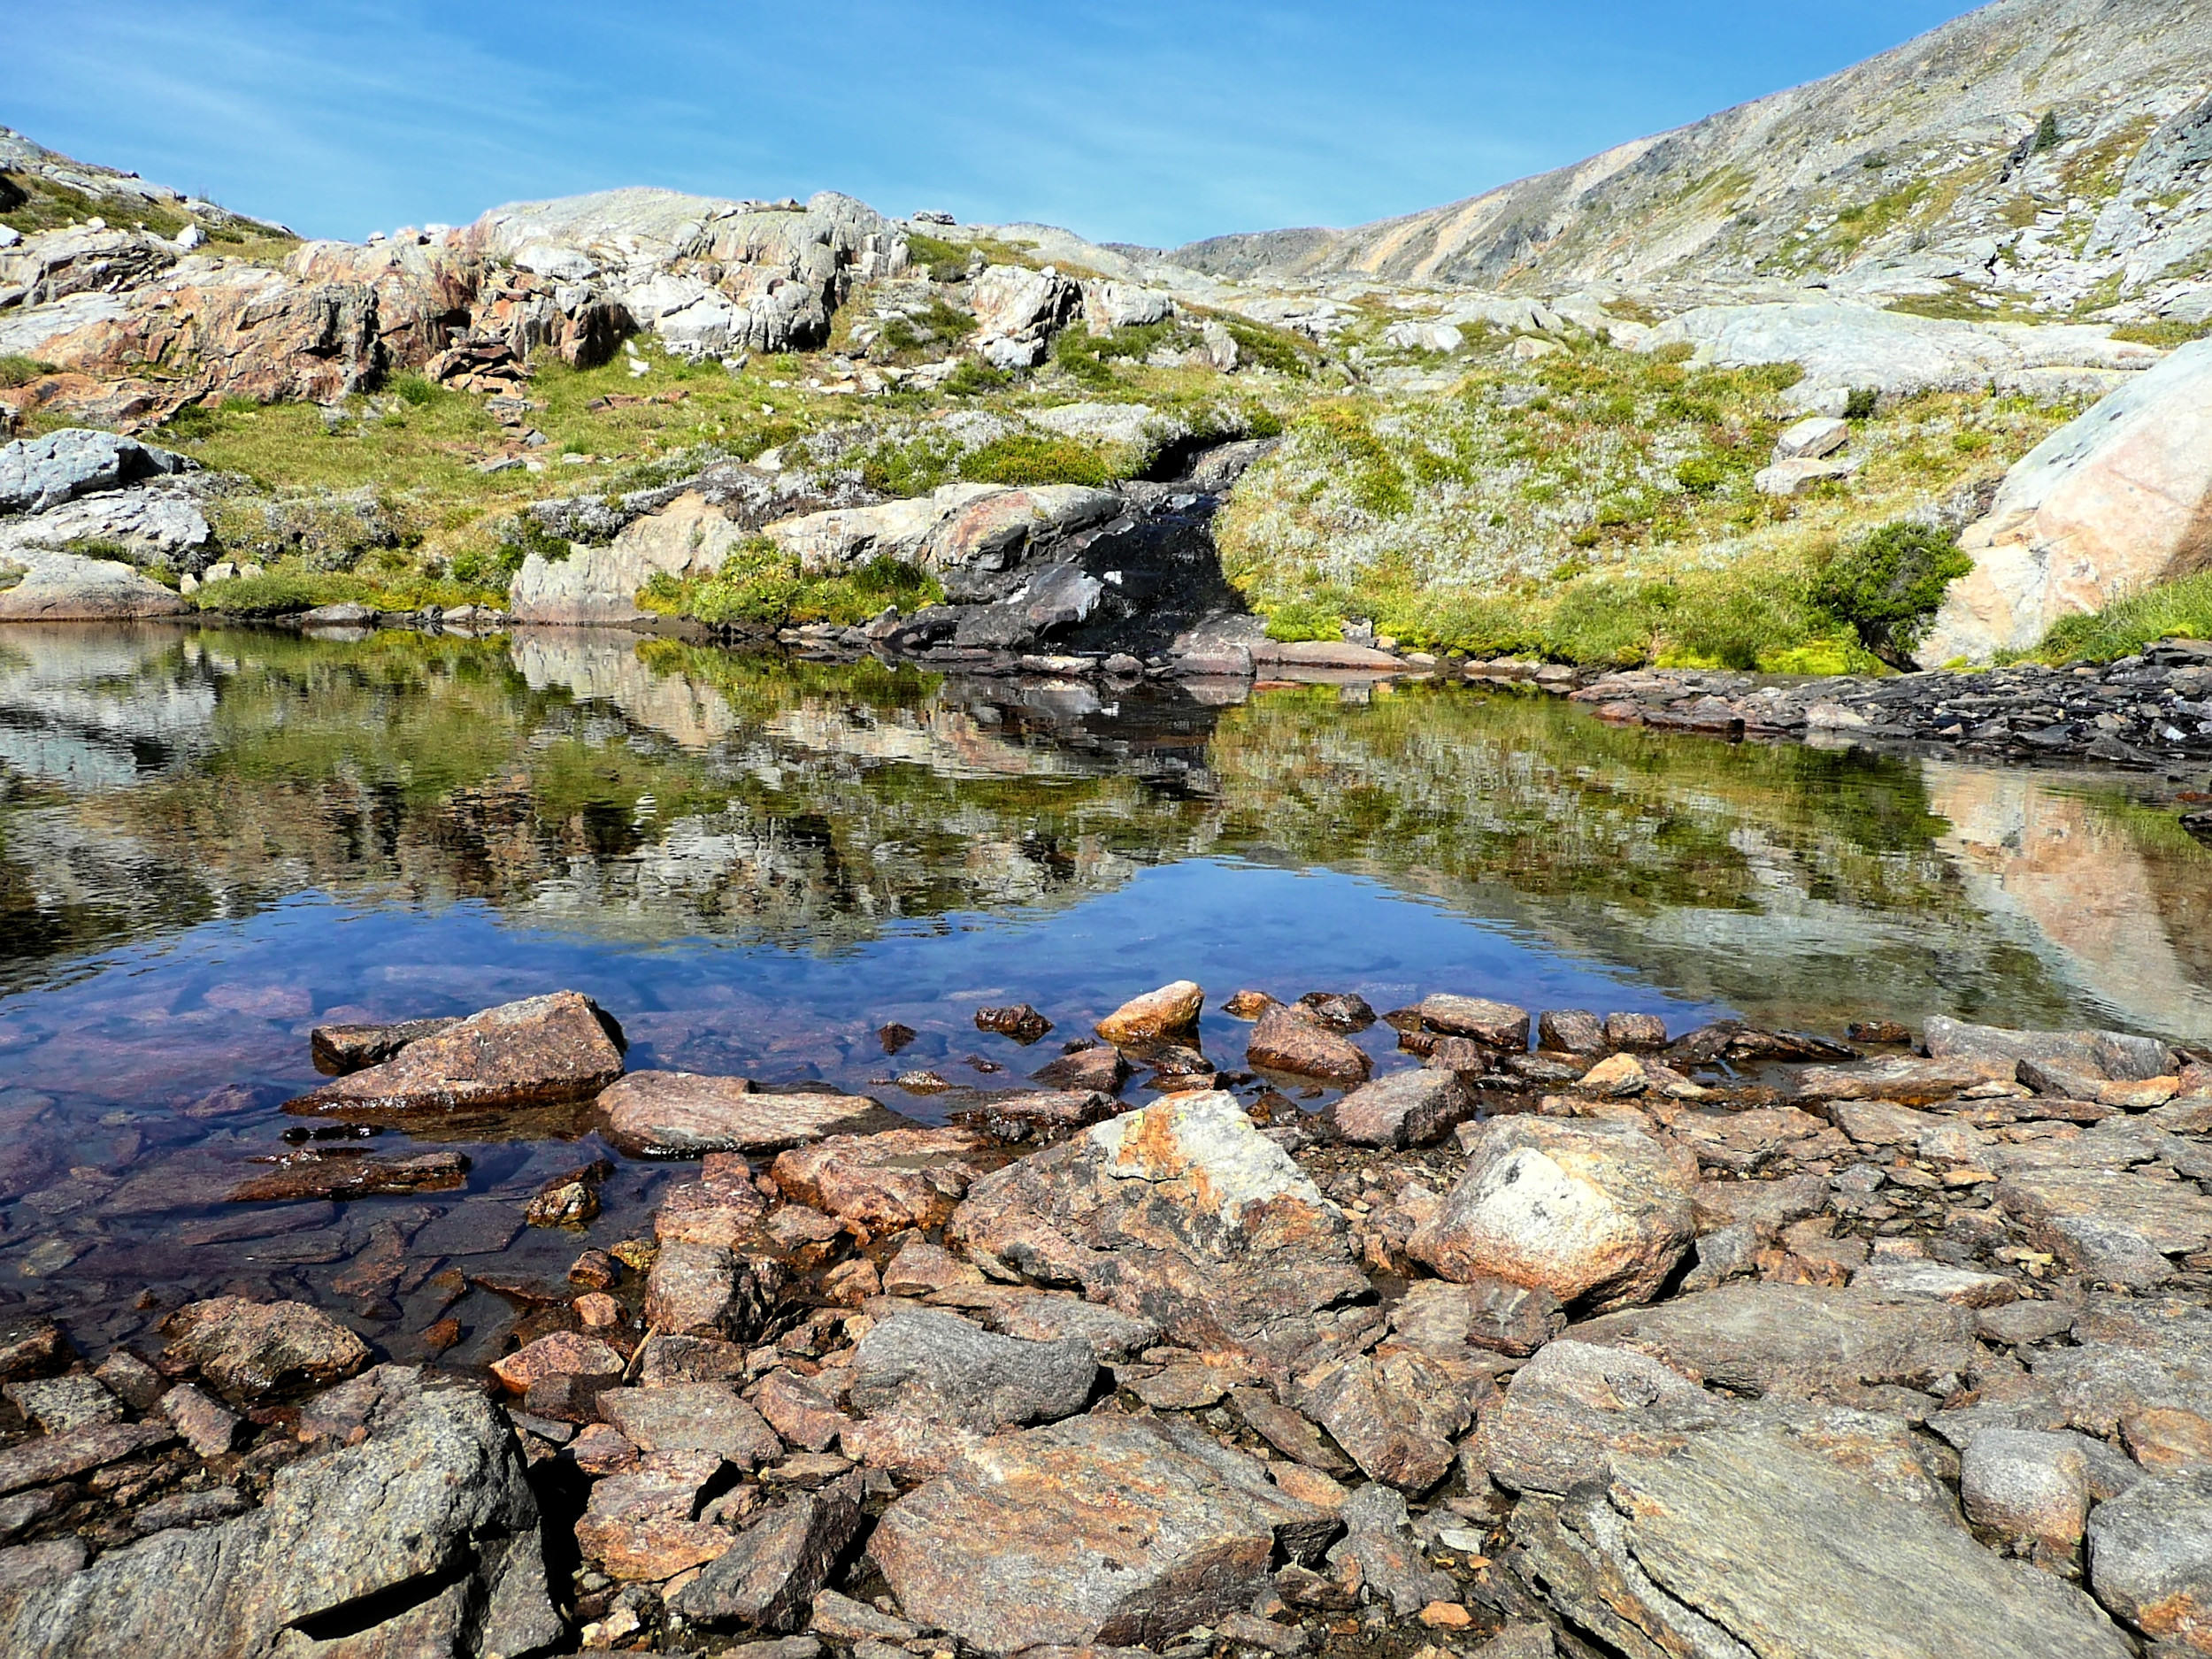
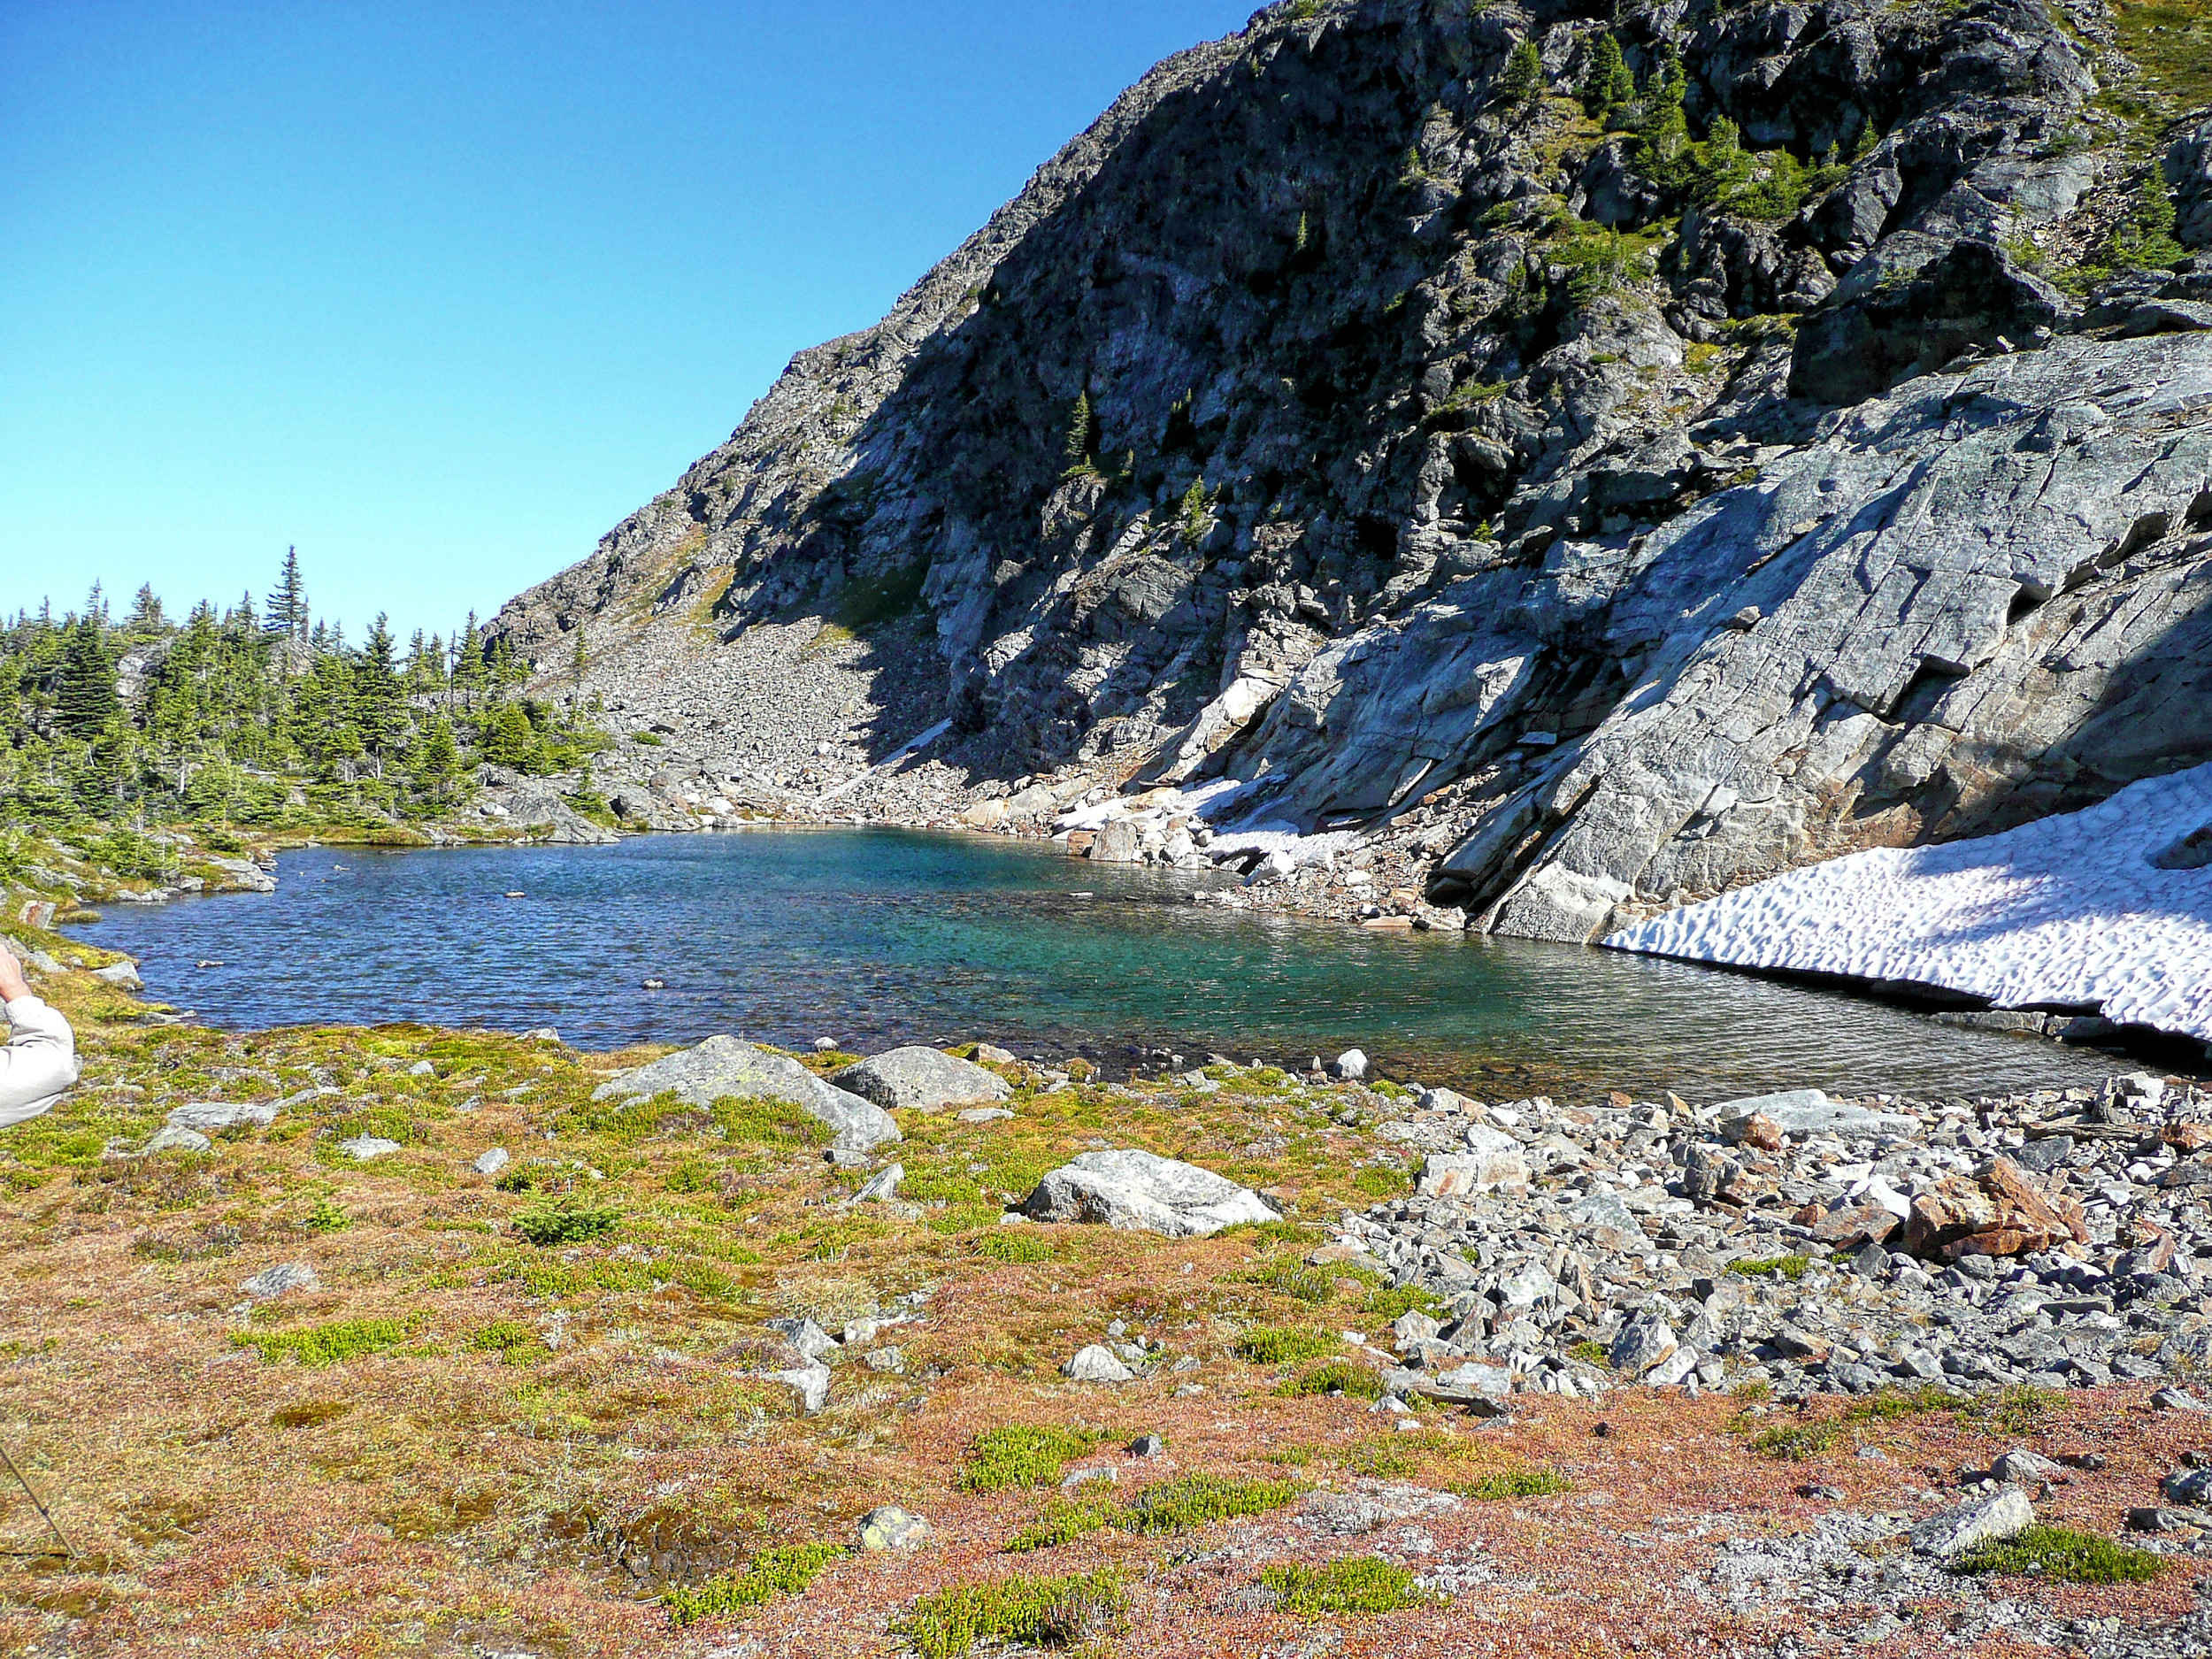
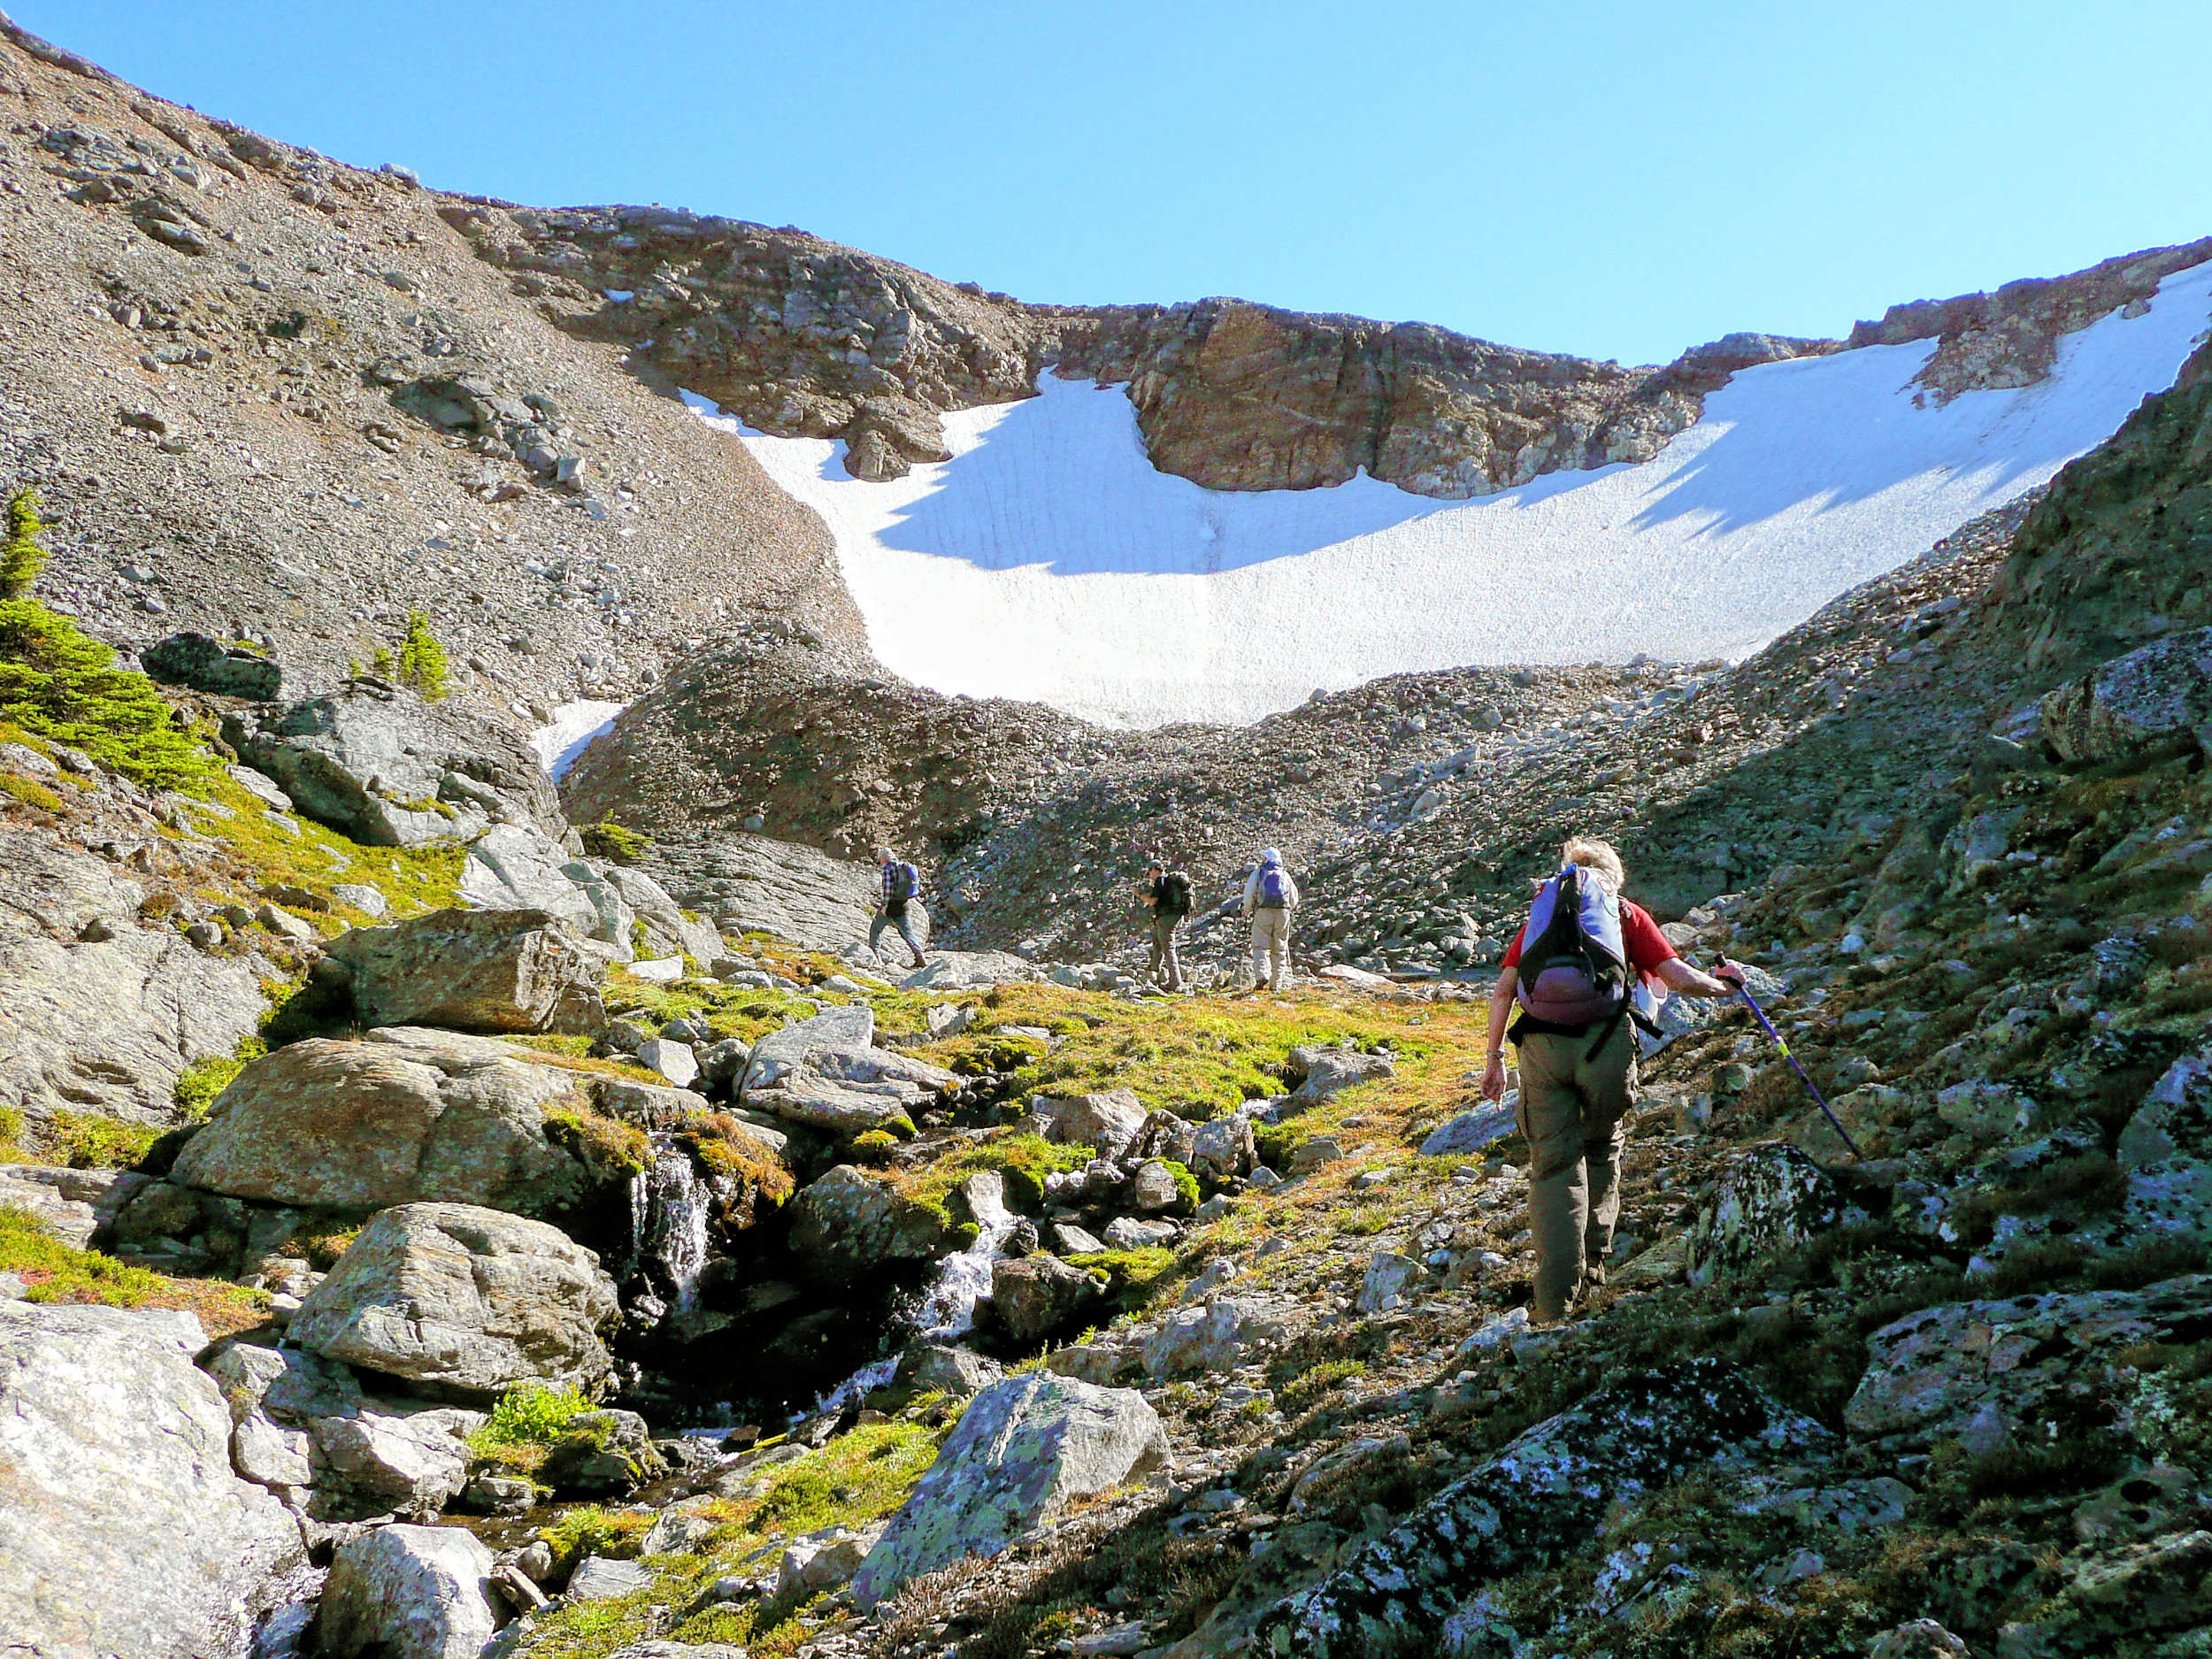
After another fifteen minutes we reach the end of the valley and start climbing up on the rock fall. Patches of heather and grass provide some footing, but often enough we have to scramble over loose rocks. We crisscross up the slope and arrive at 2008-meter-high Crystal Lake Pass. Since starting out we have gained 354 meters. We stop for lunch next to another creek. It drains into Crystal Lake, a pretty lake not far away from our route. The rocks above Crystal Lake make for an alternate lunch spot with a beautiful view.
After lunch we begin the steepest and roughest section of our climb.
We reach the first tarn at an elevation of 2151 meters.
Tarn #1
at 2151 m
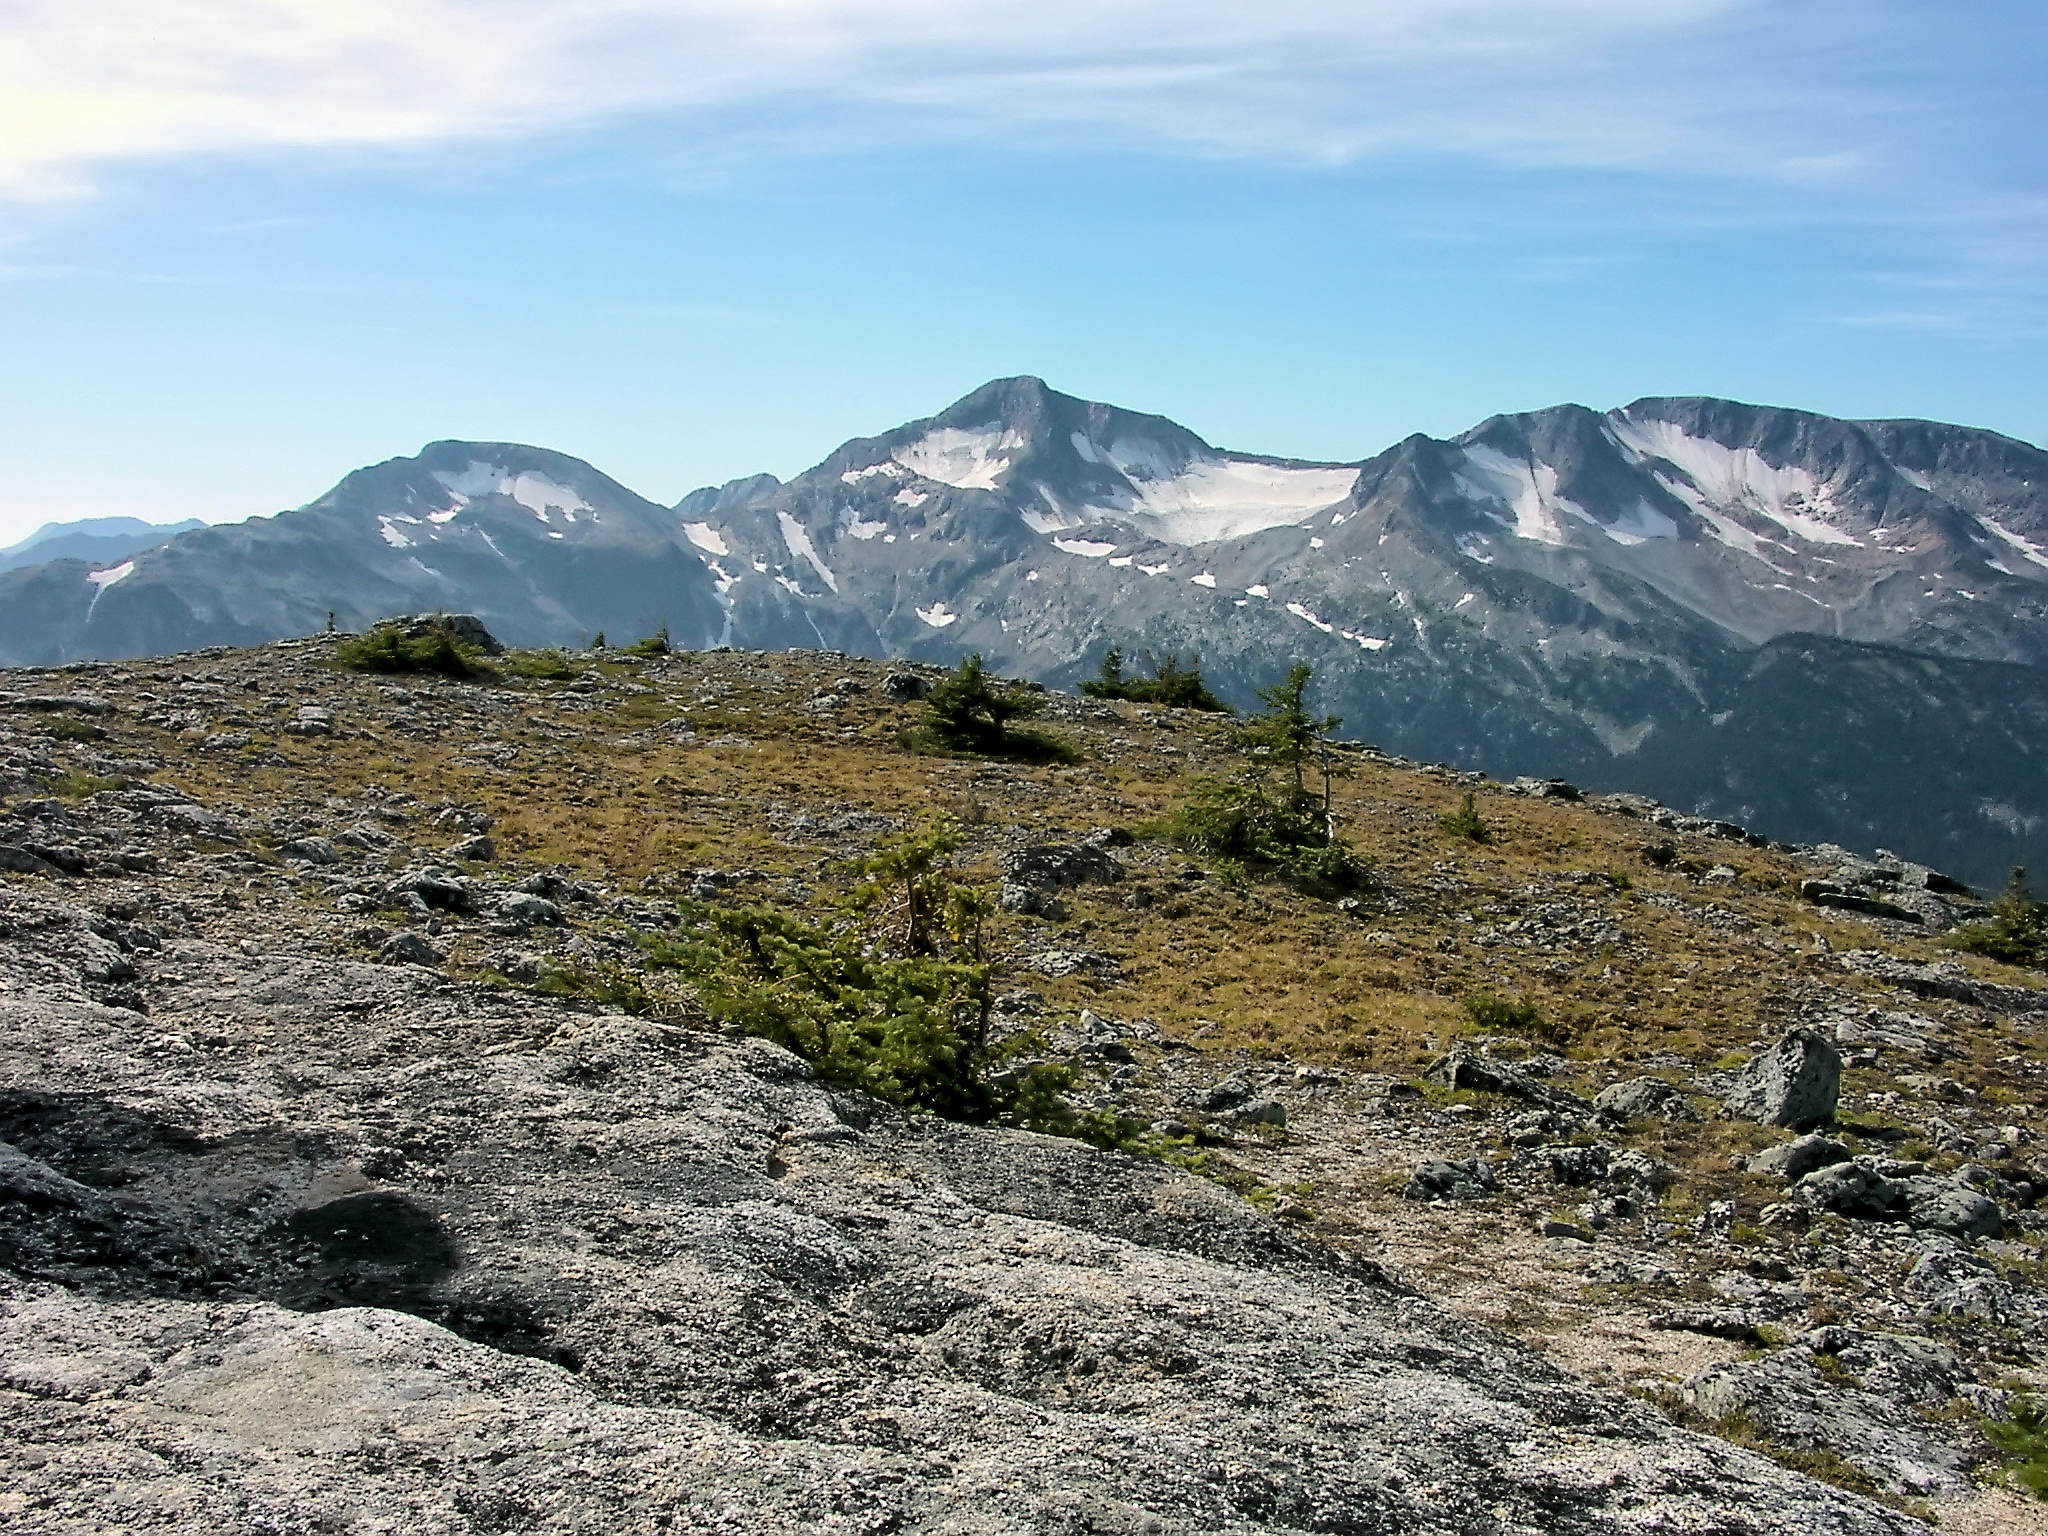
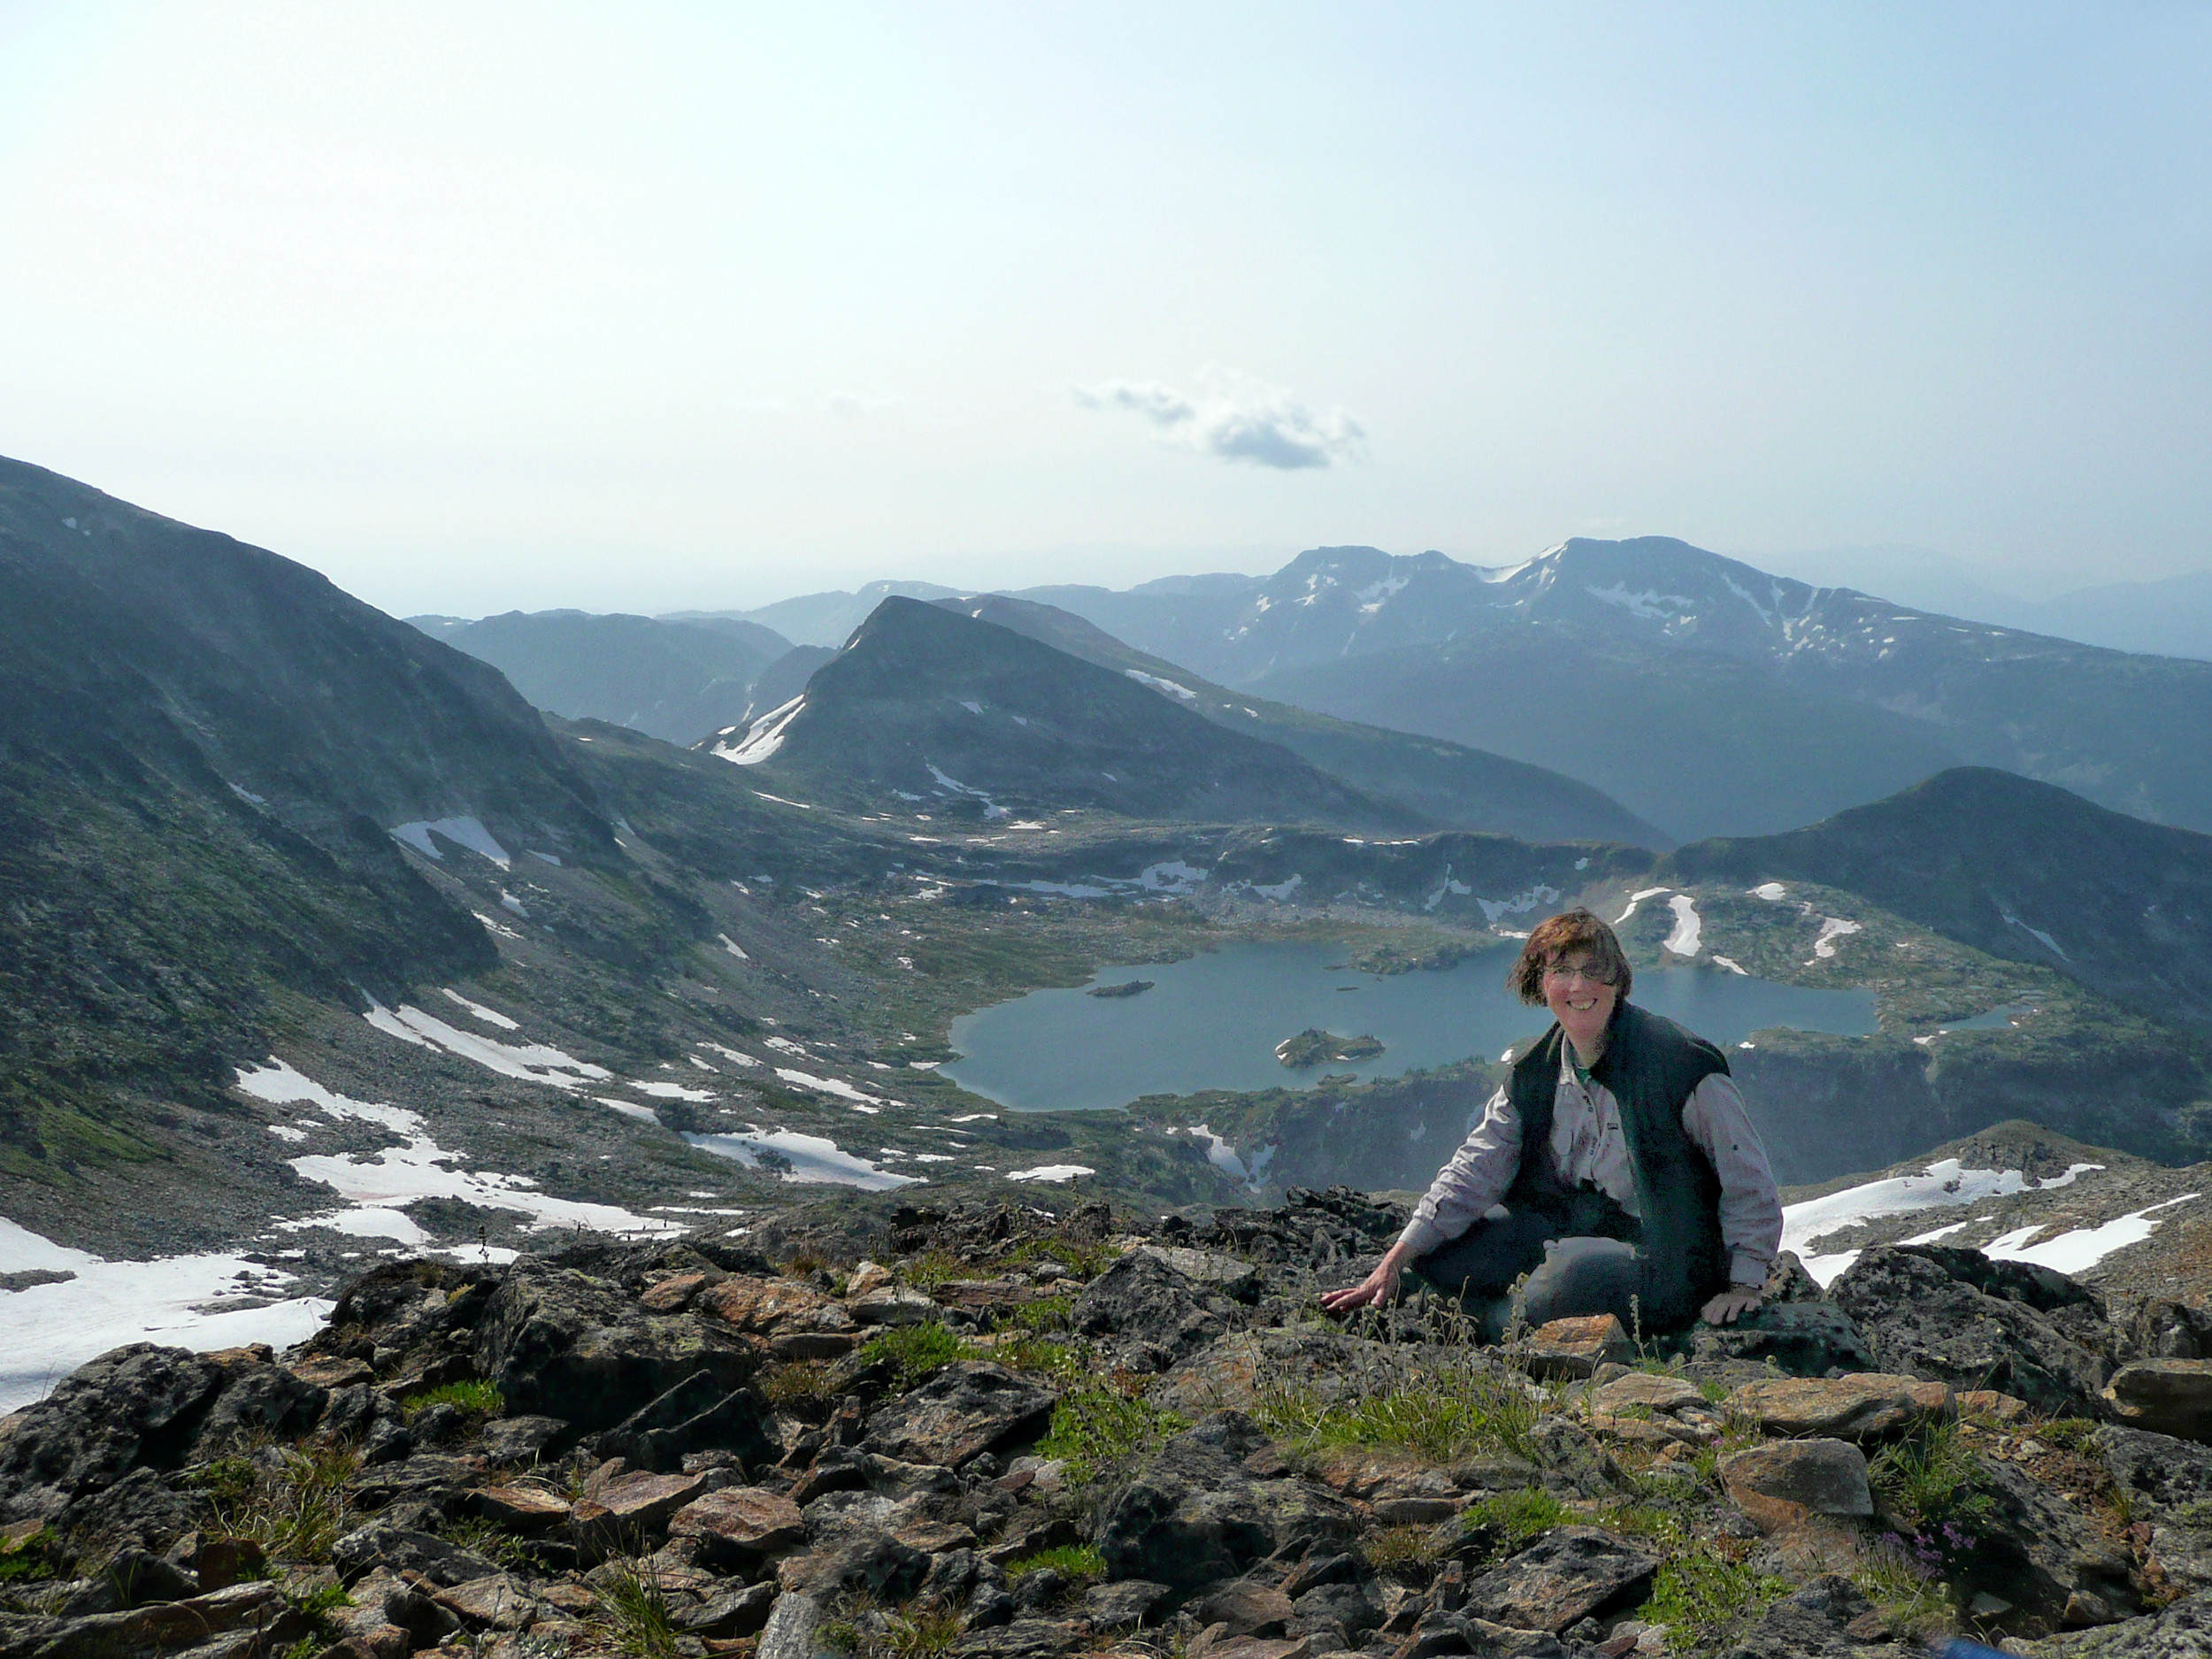
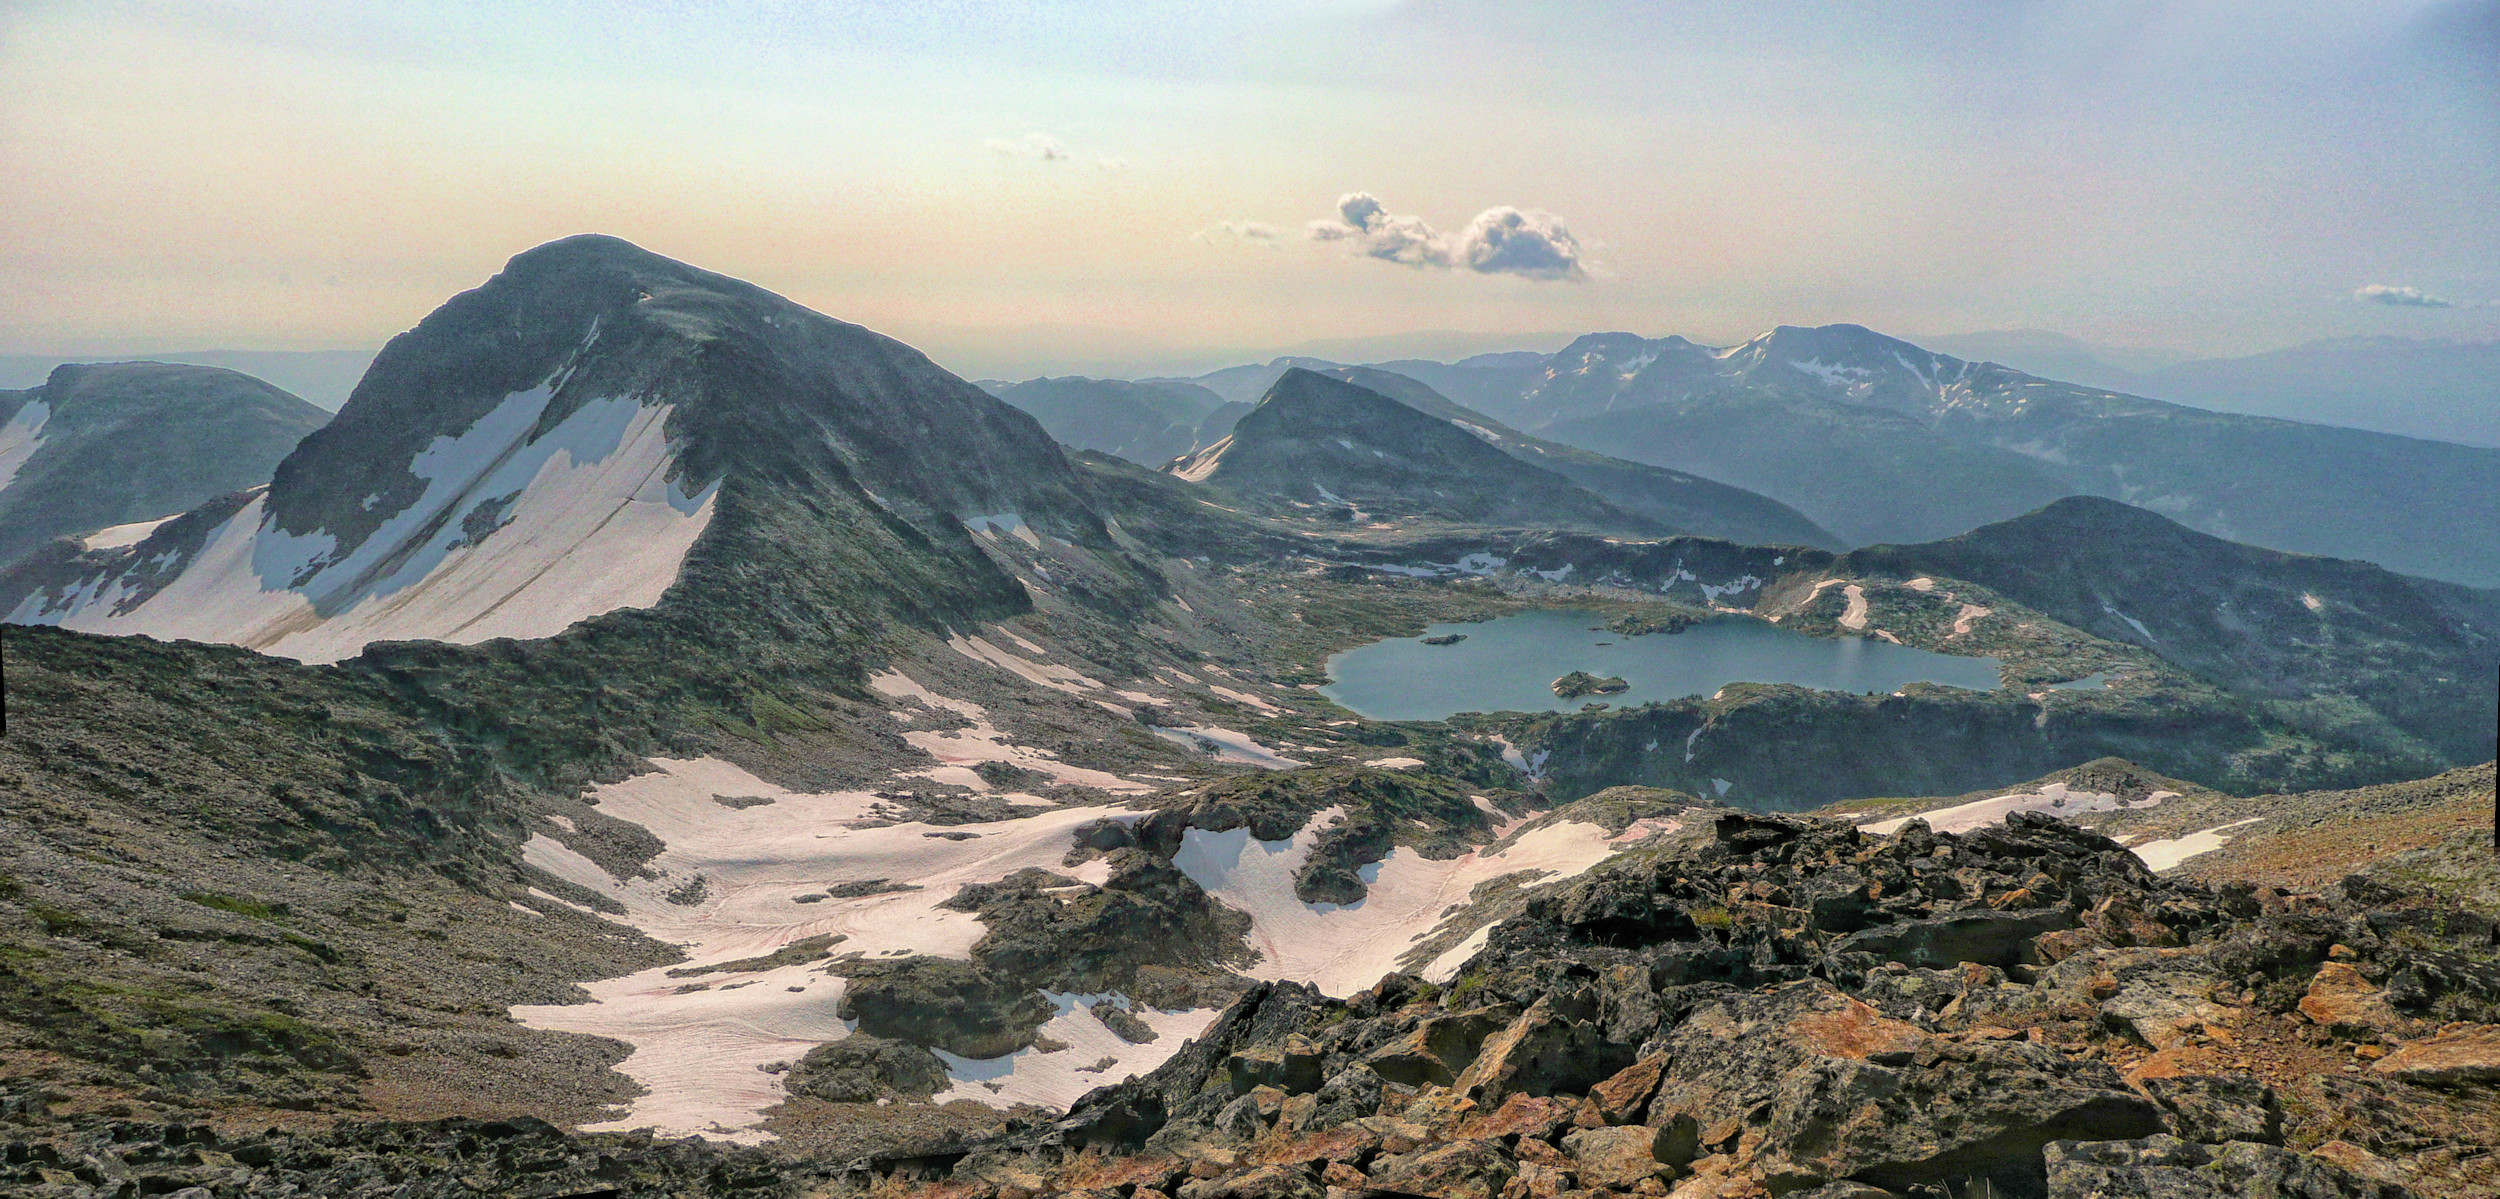
From above the tarn we look back onto the Trophy Mountain panorama.
Trophy Mountain Range
Two more tarns become visible to the east, they sit at a lower elevation than tarn #1.
Tarns #2 and #3
Ascent to tarn #4
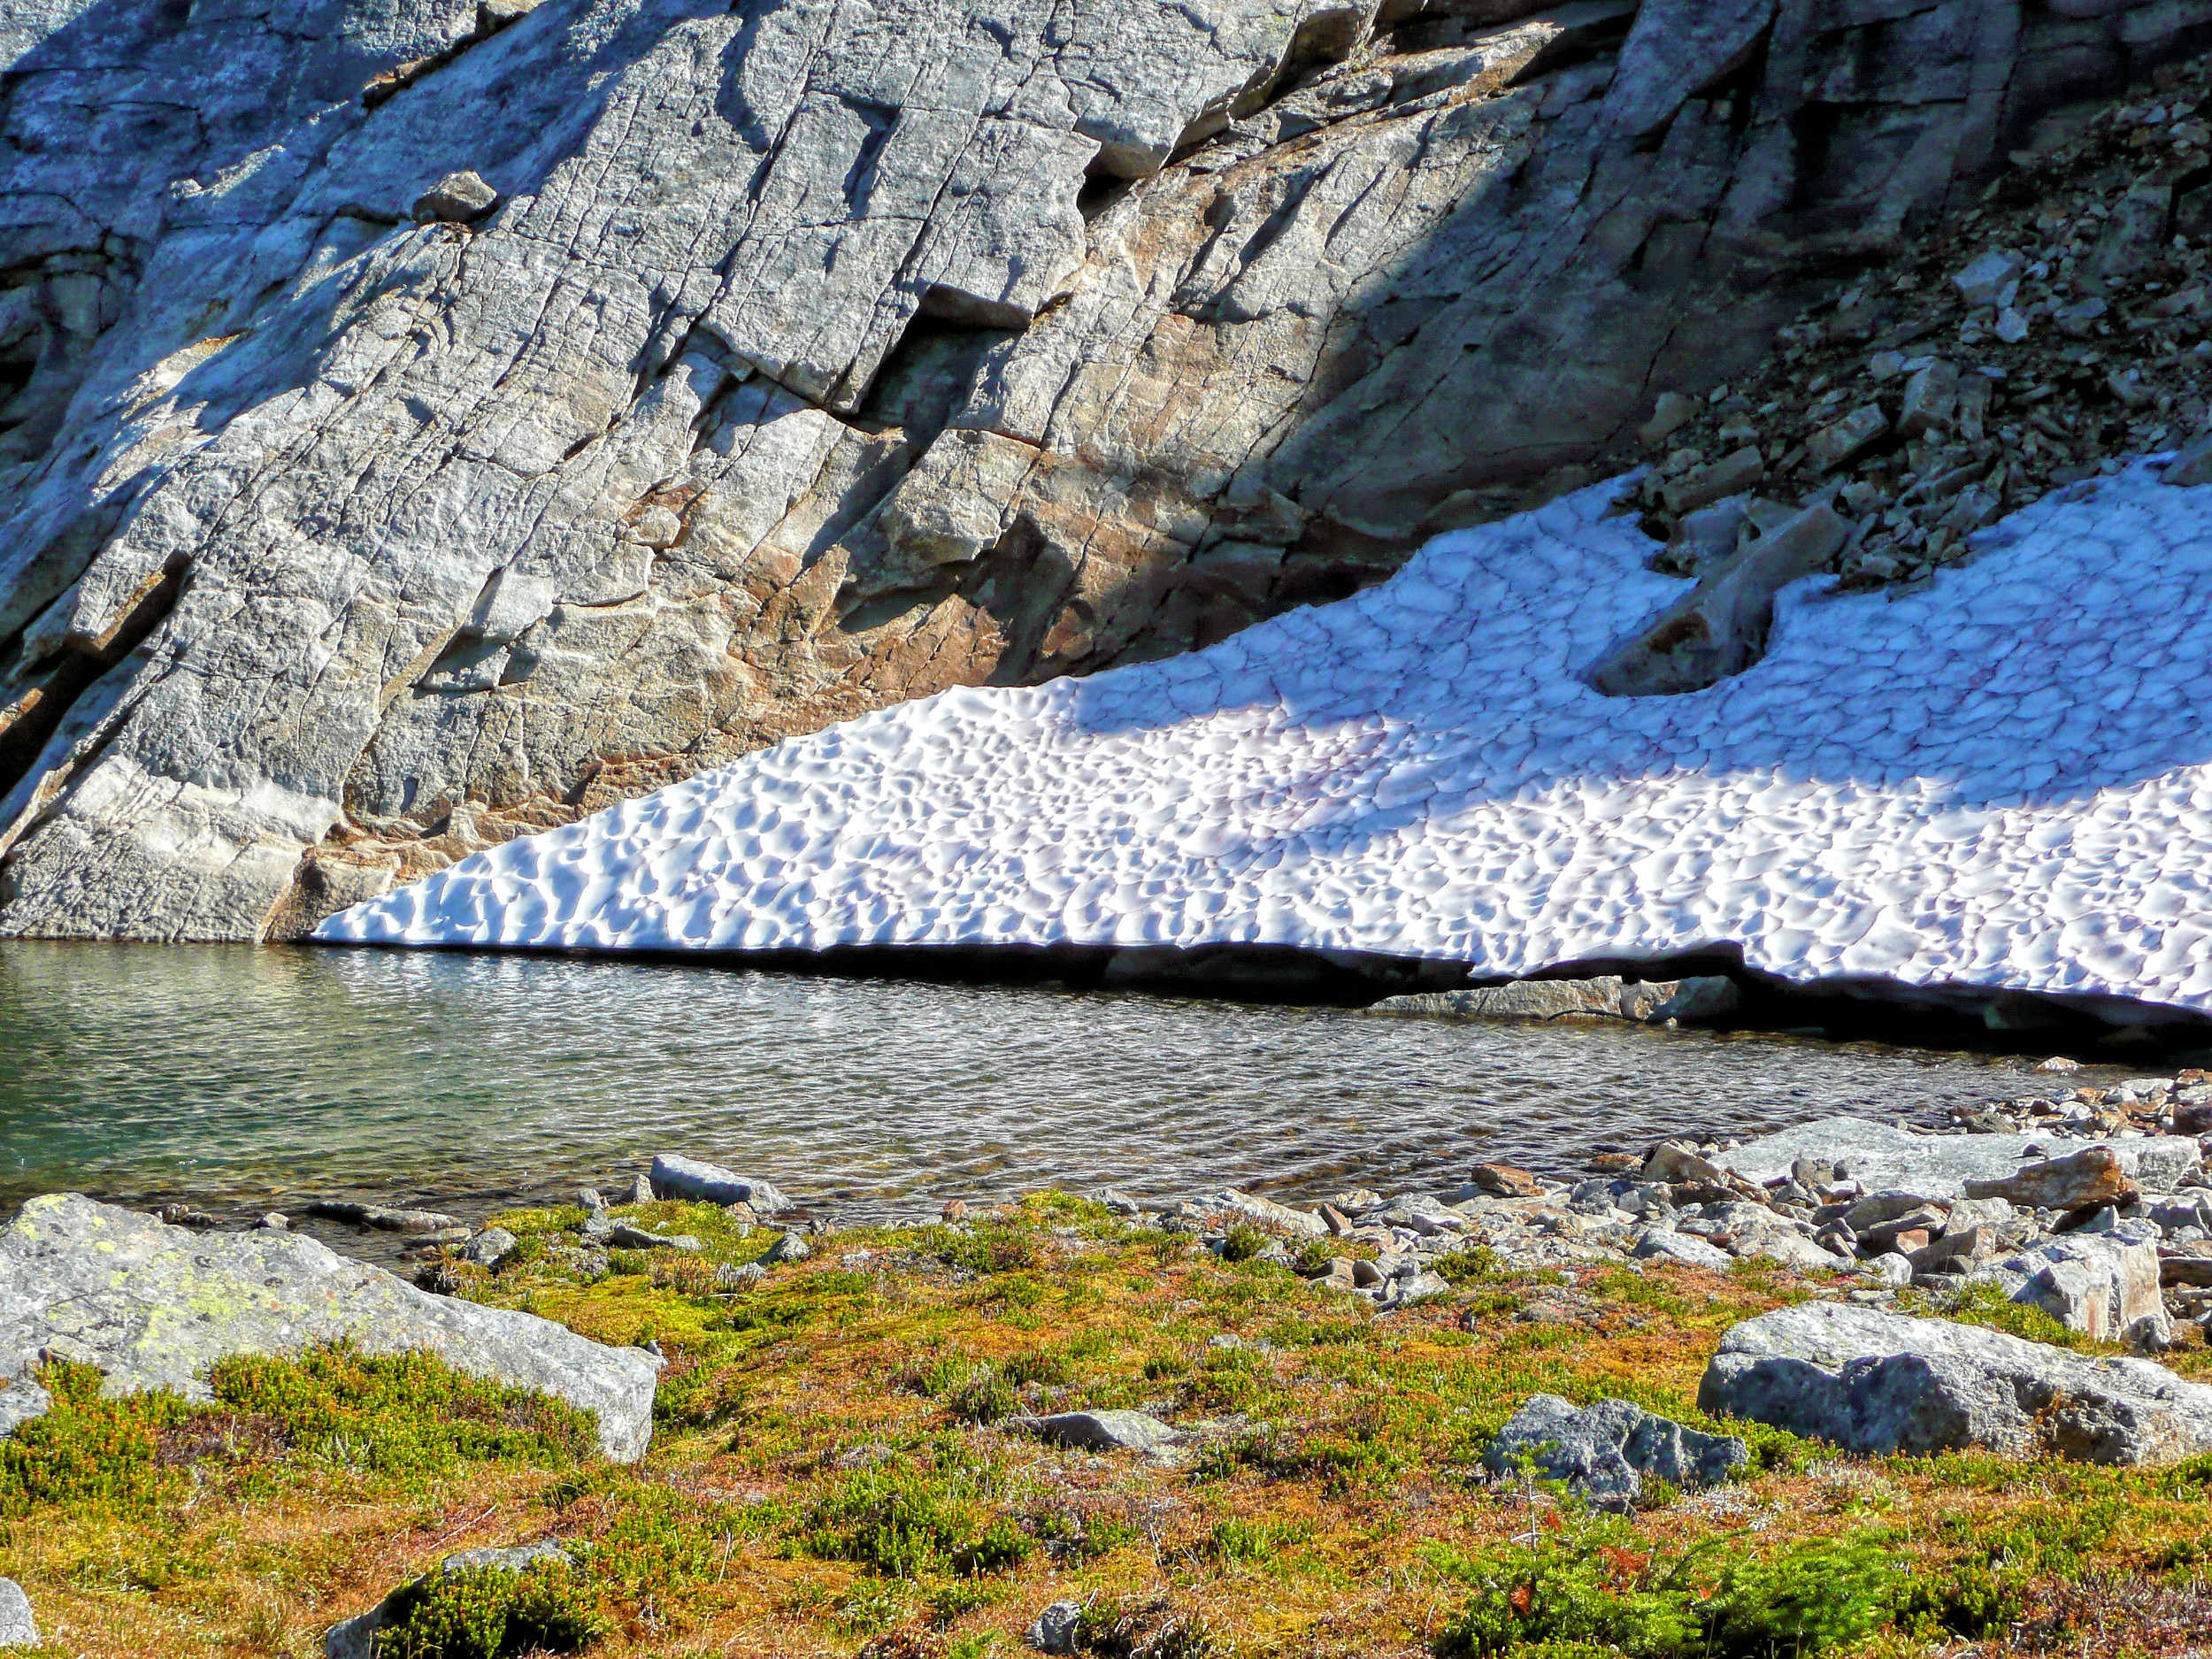
The fourth and largest of the tarns lies hidden in a basin that is surrounded by snow and rocks. We have to scramble for twenty minutes to reach the basin’s edge from where we can see tarn #4.
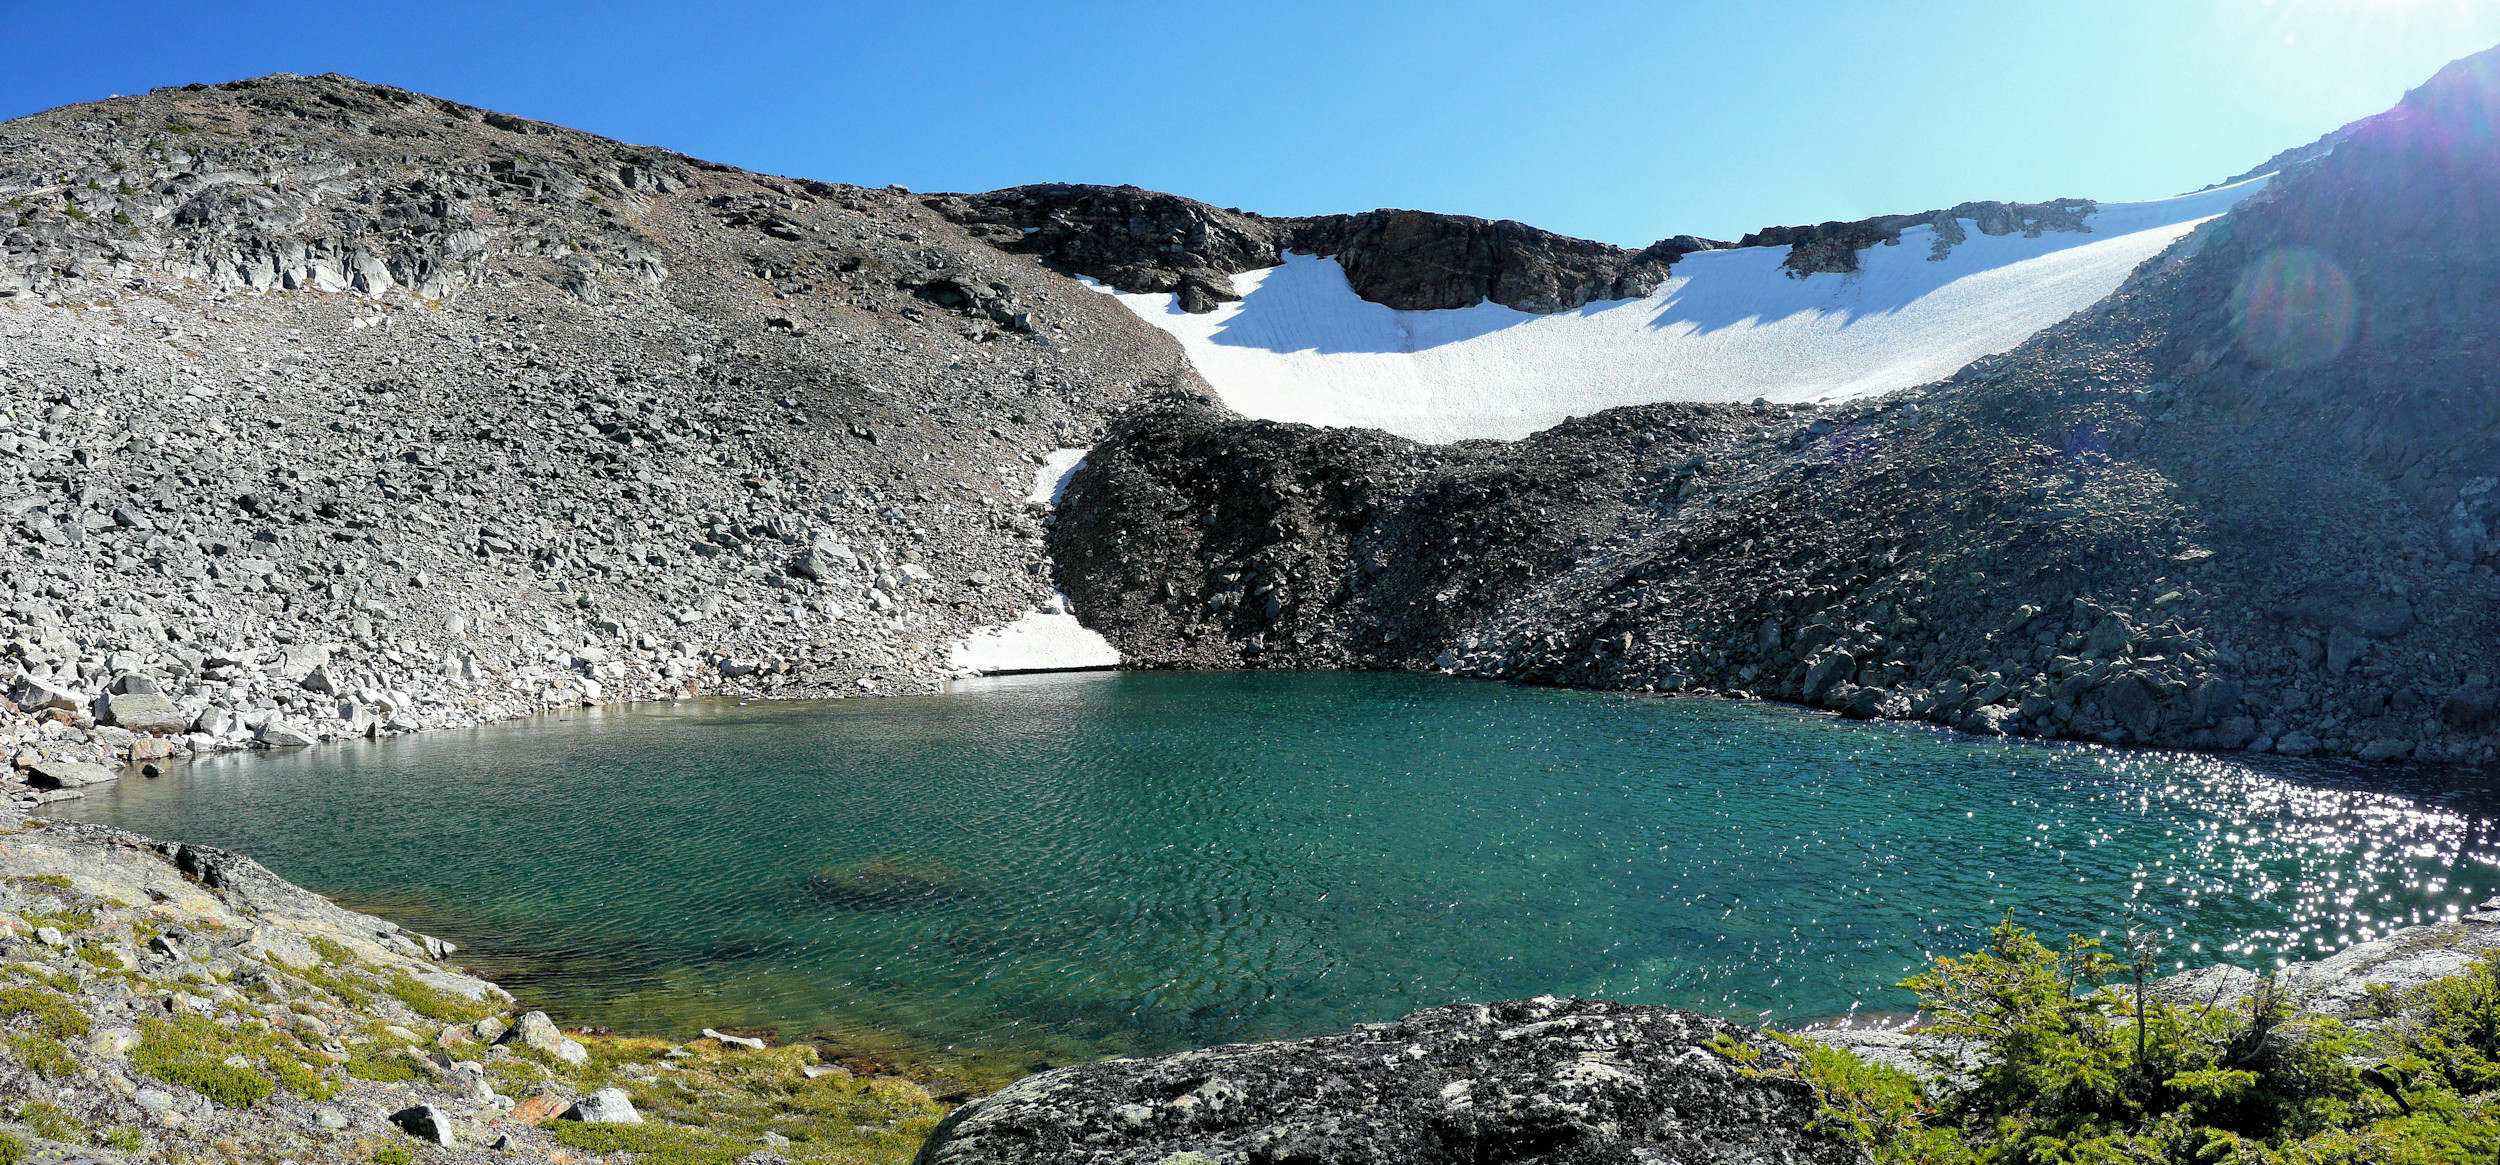
Cirque or tarn #4, 2211 m
Tarn #4 is the main tarn in the Cirque of Tarns. A cirque is a bowl-shaped, amphitheater-like depression that glaciers carve into mountains and valley sidewalls at high elevations. Often, the glaciers flow up and over the lip of the cirque as gravity drives them downslope. Lakes (called tarns) occupy these depressions once the glaciers retreat. It is an impressive sight.

From here it is possible to access Raft Mountain’s 2363-meter-high third summit. The return trip takes an additional one-and-a-half hours and starts by climbing the ridge east (to the left) of tarn #4.
I theory, two more peaks could be added, the fourth summit in another hour and the fifth in another two. For a day trip, however, this is almost too much, especially late in the season when the days are short. In any case, a Raft Mountain peak circuit that visits all five summits should be accessed and completed from the south side of the mountain range. A description can be found further below in this hiking journal.
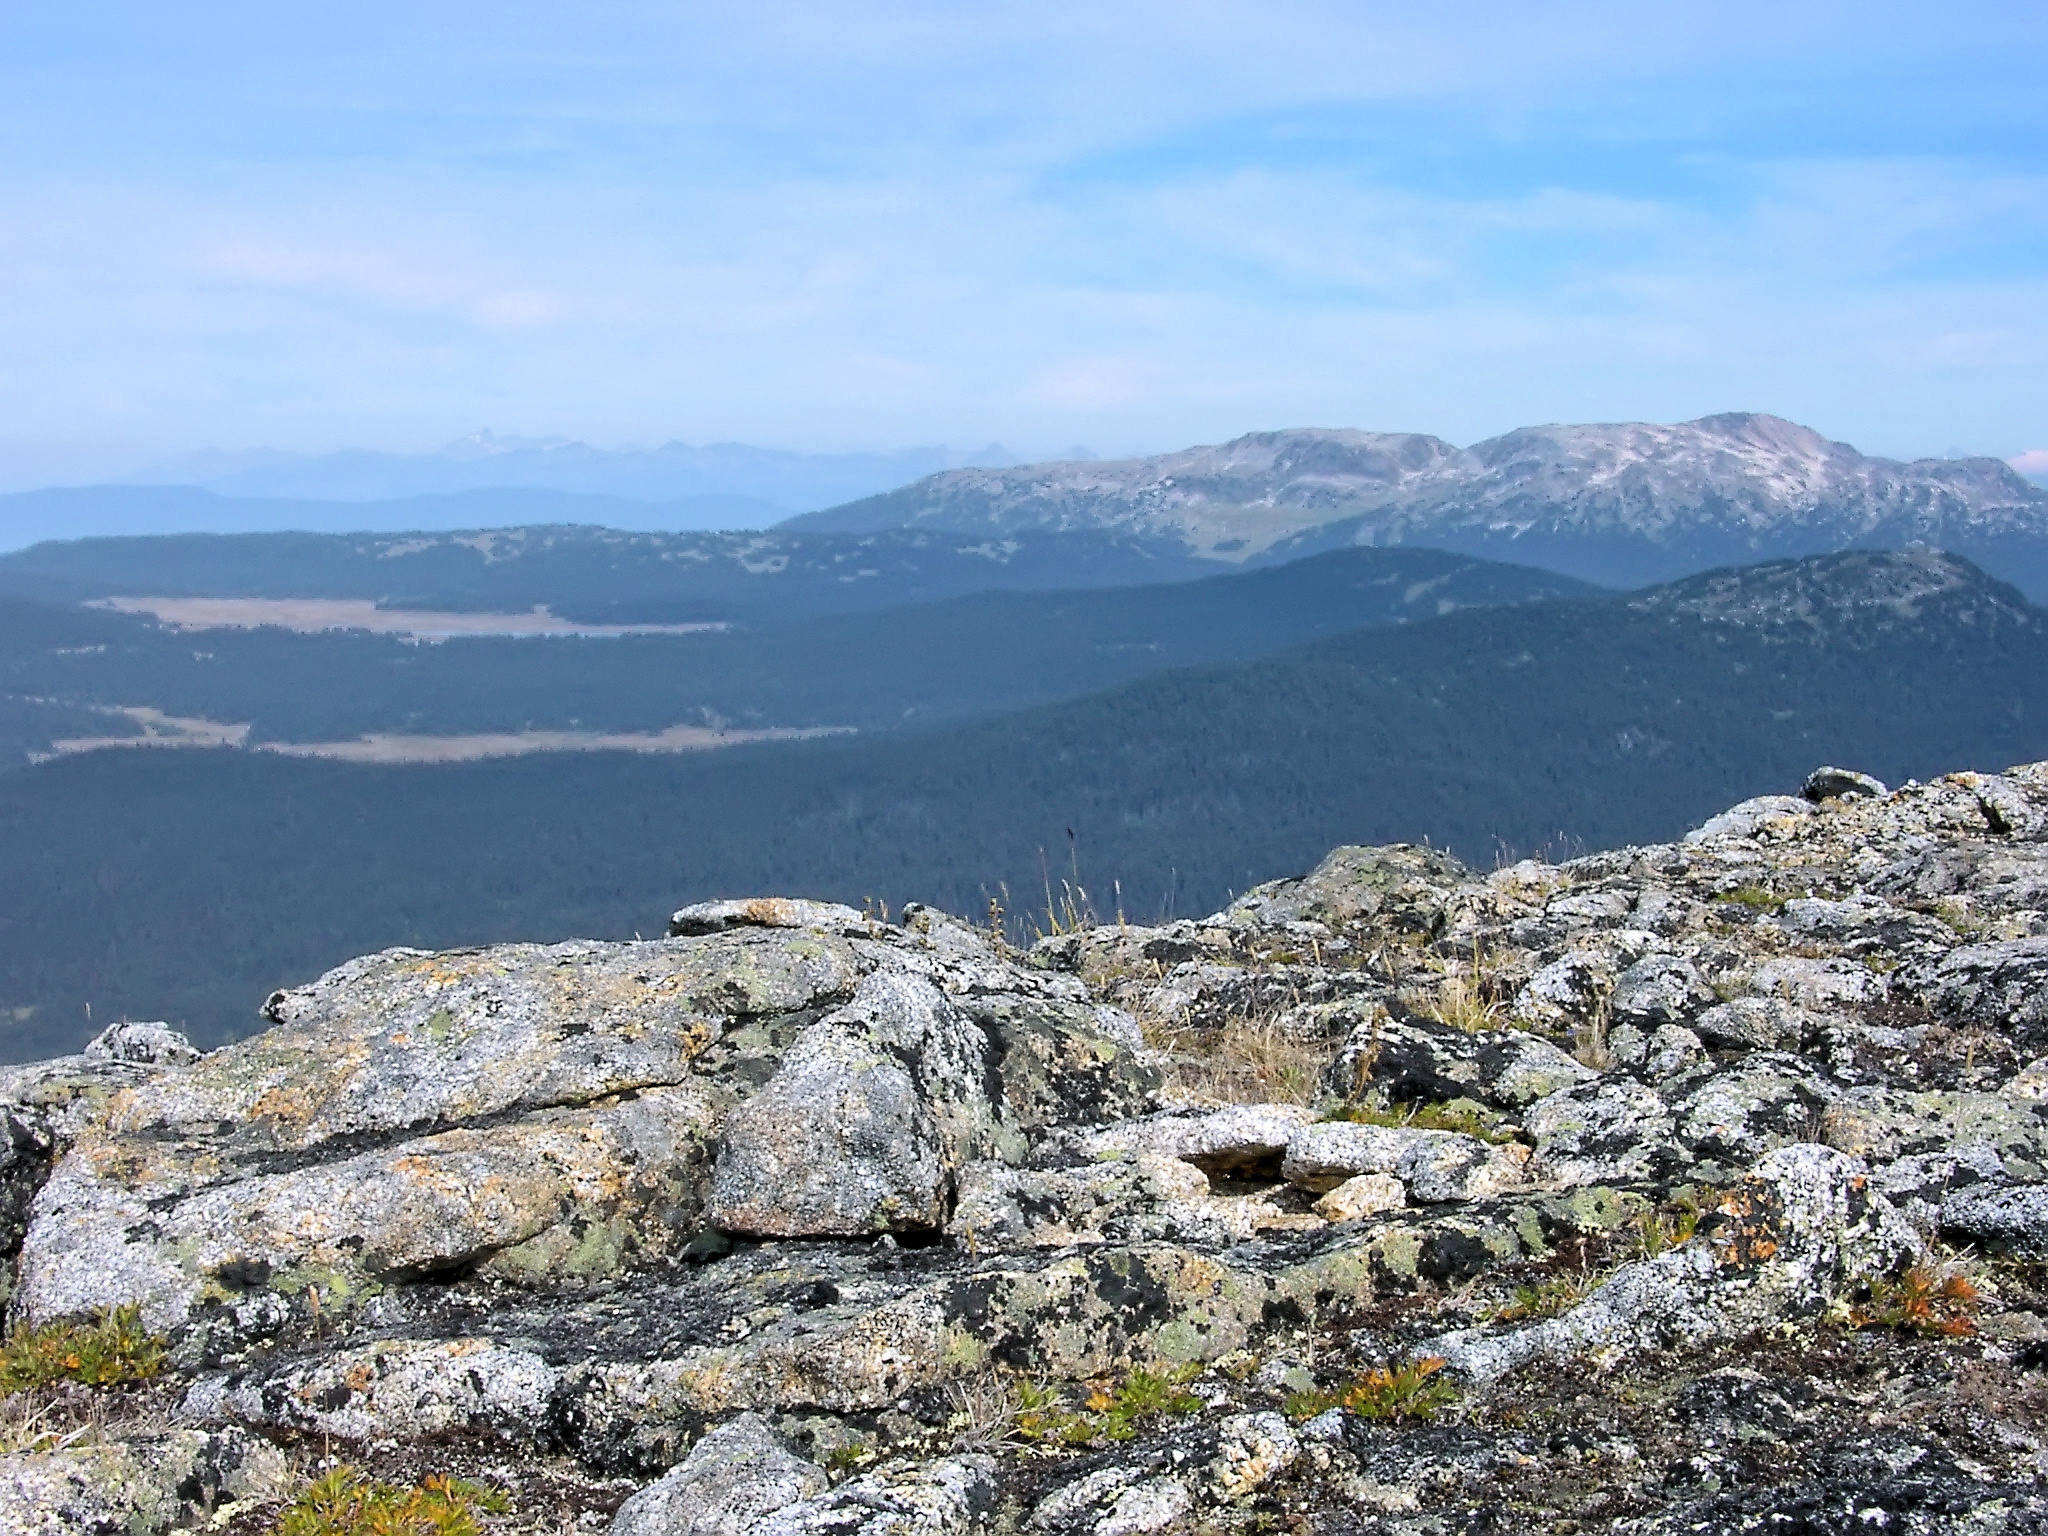
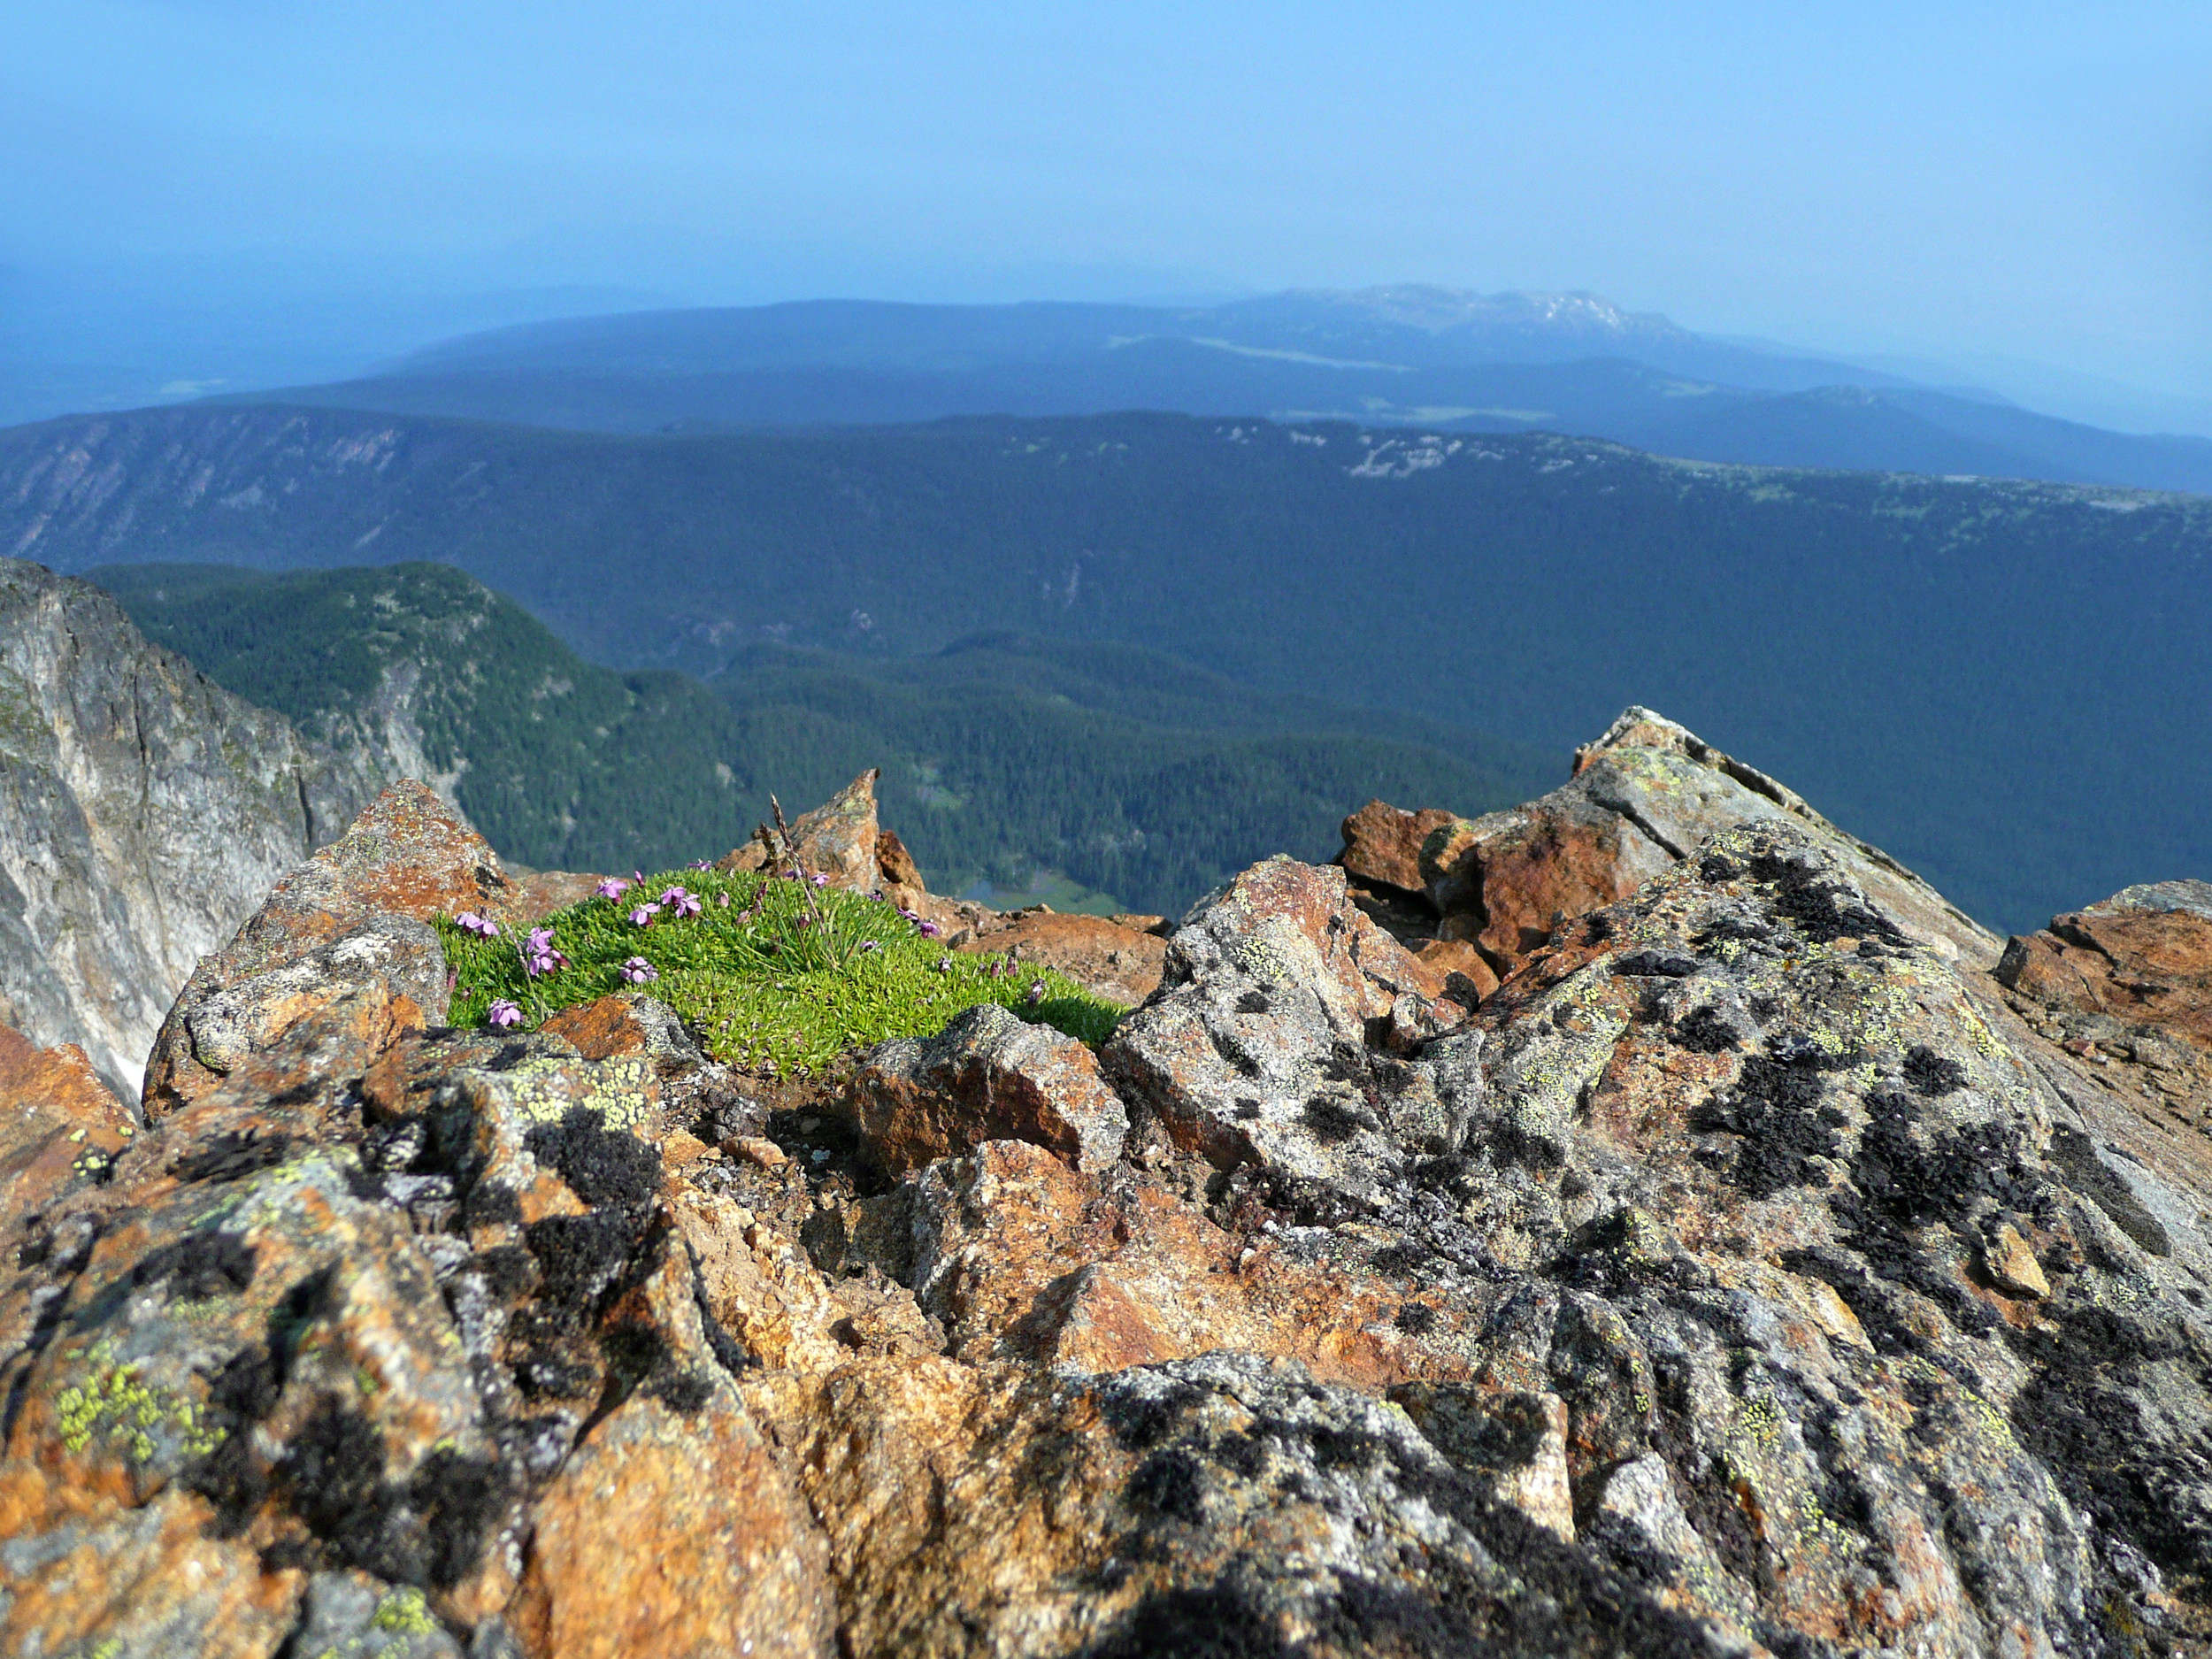
We descend the rock fall and stop for another break before the trail brings us back into the woods. We enjoy the panorama of the Monashee Mountains, clearly visible today. After the first frosts, the vegetation on the lower slopes nearby has turned into beautiful fall colors.
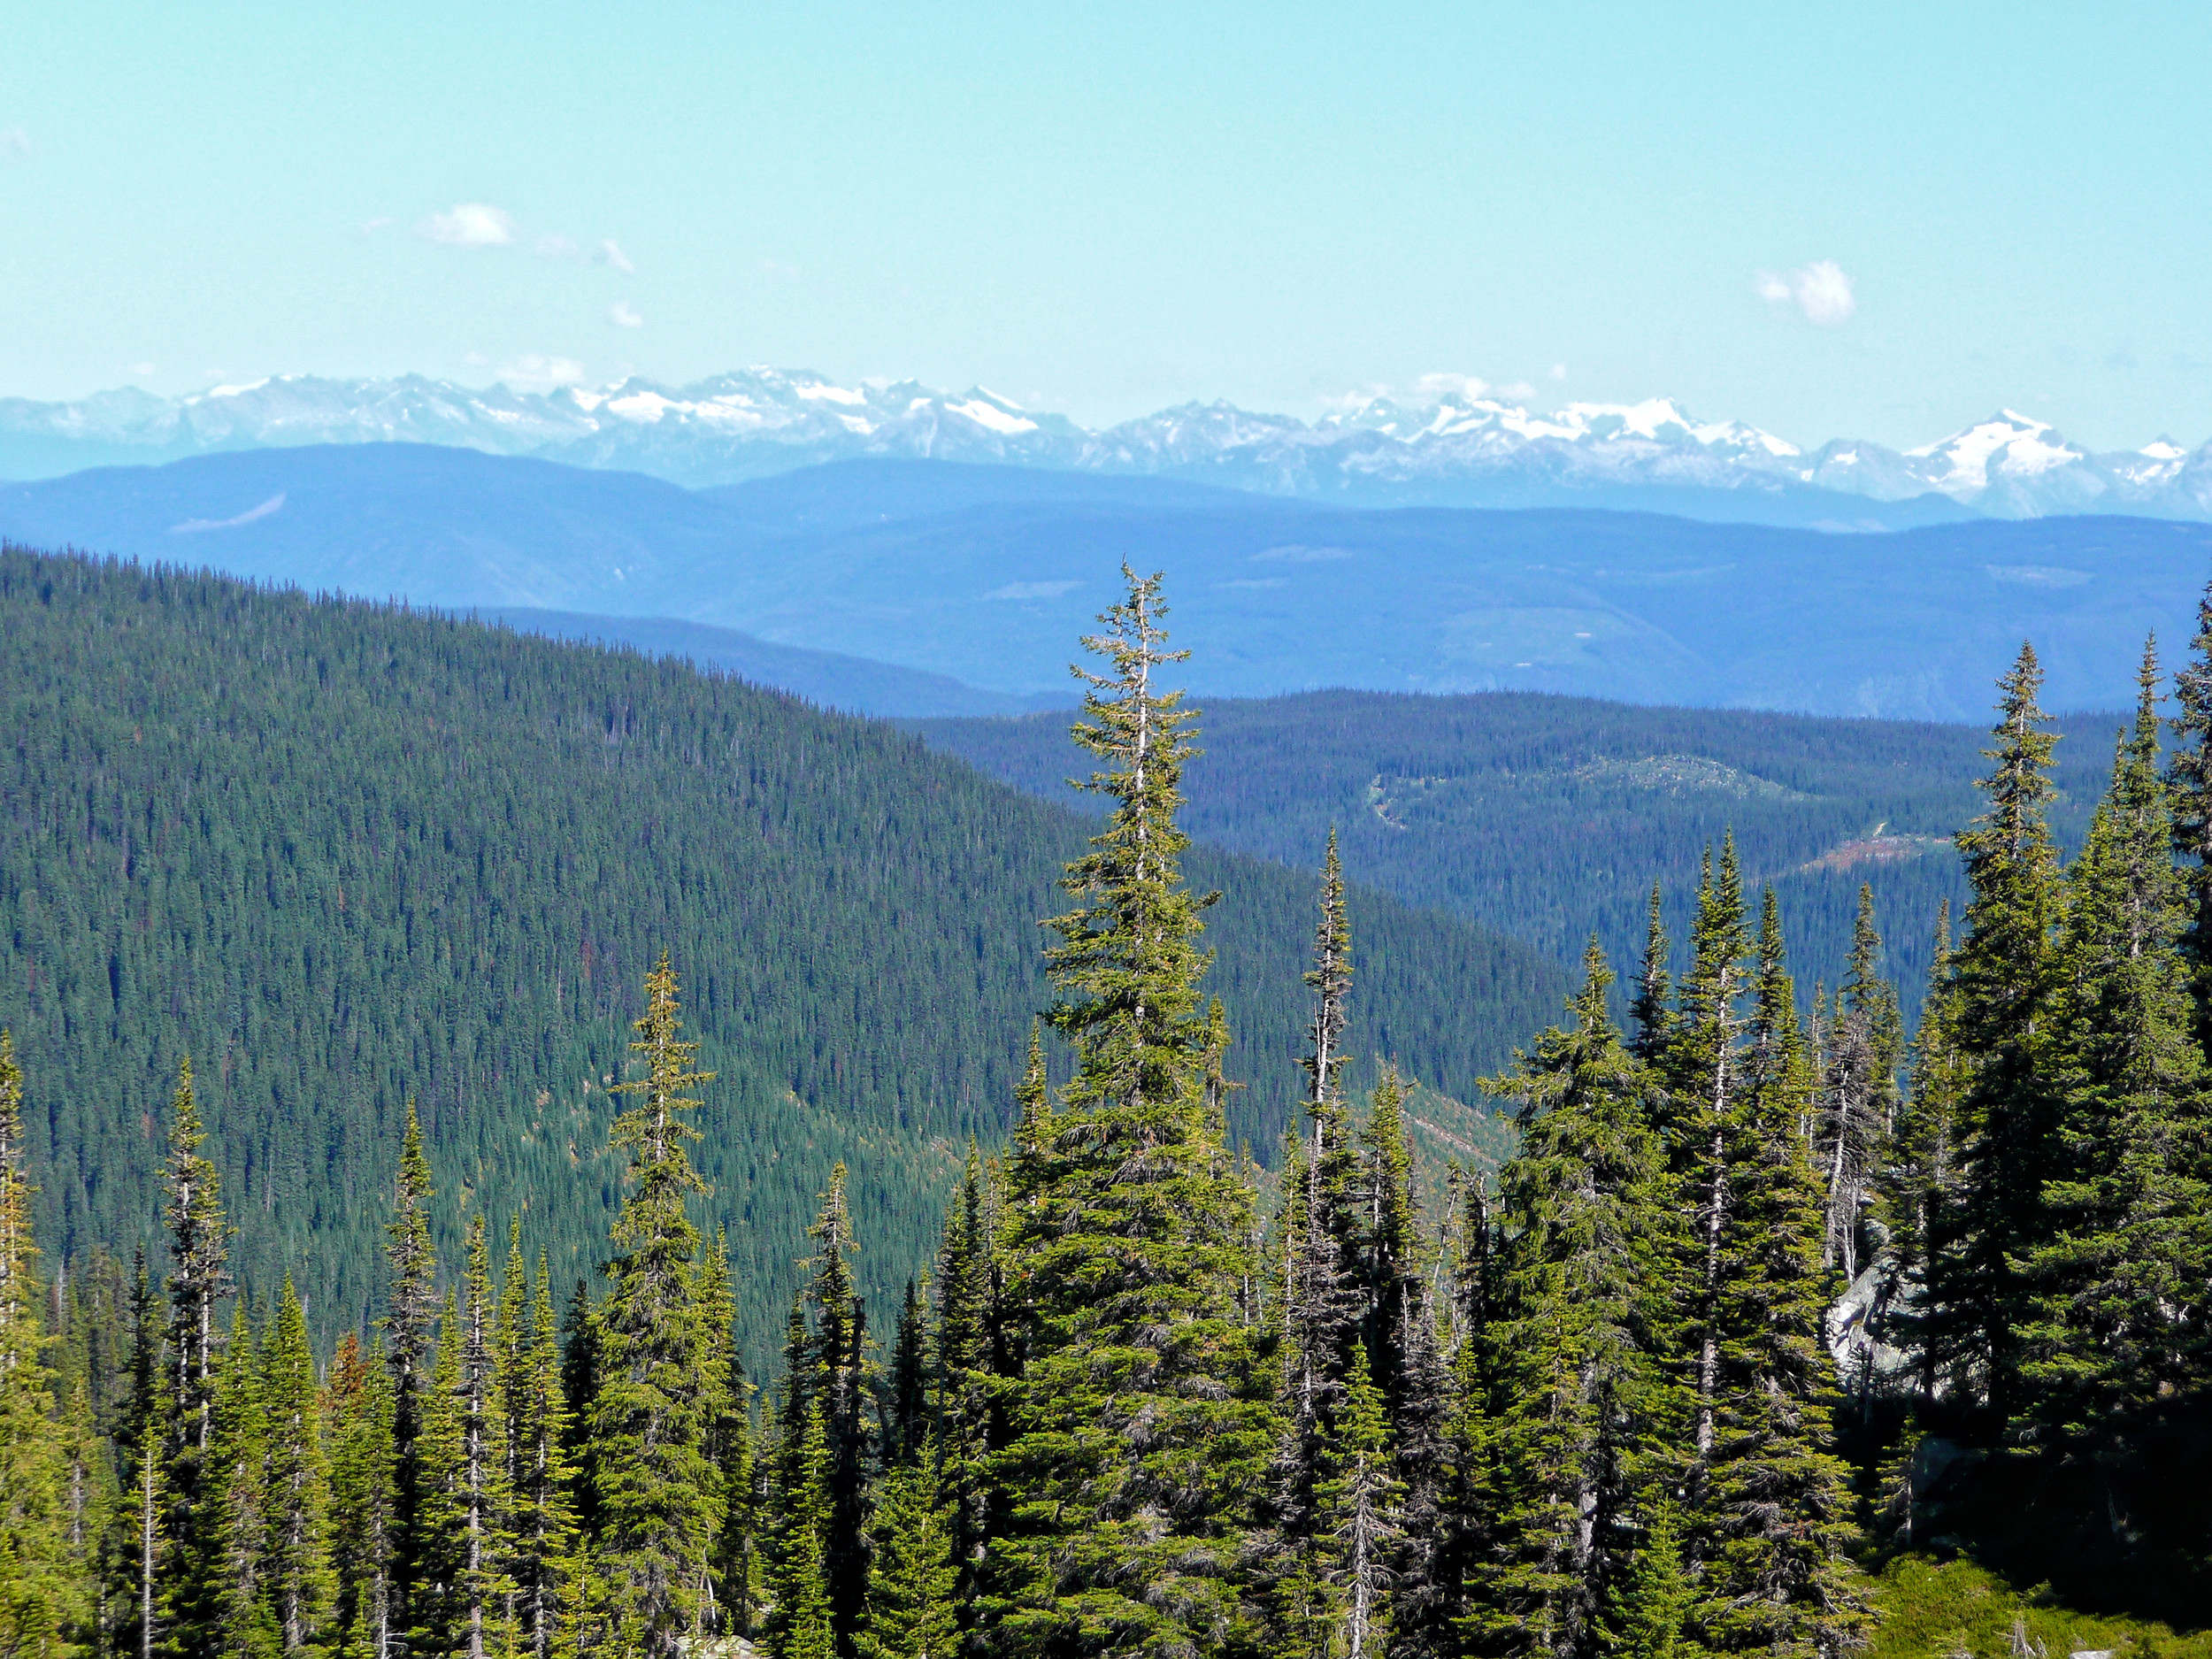
The Monashees in the distance
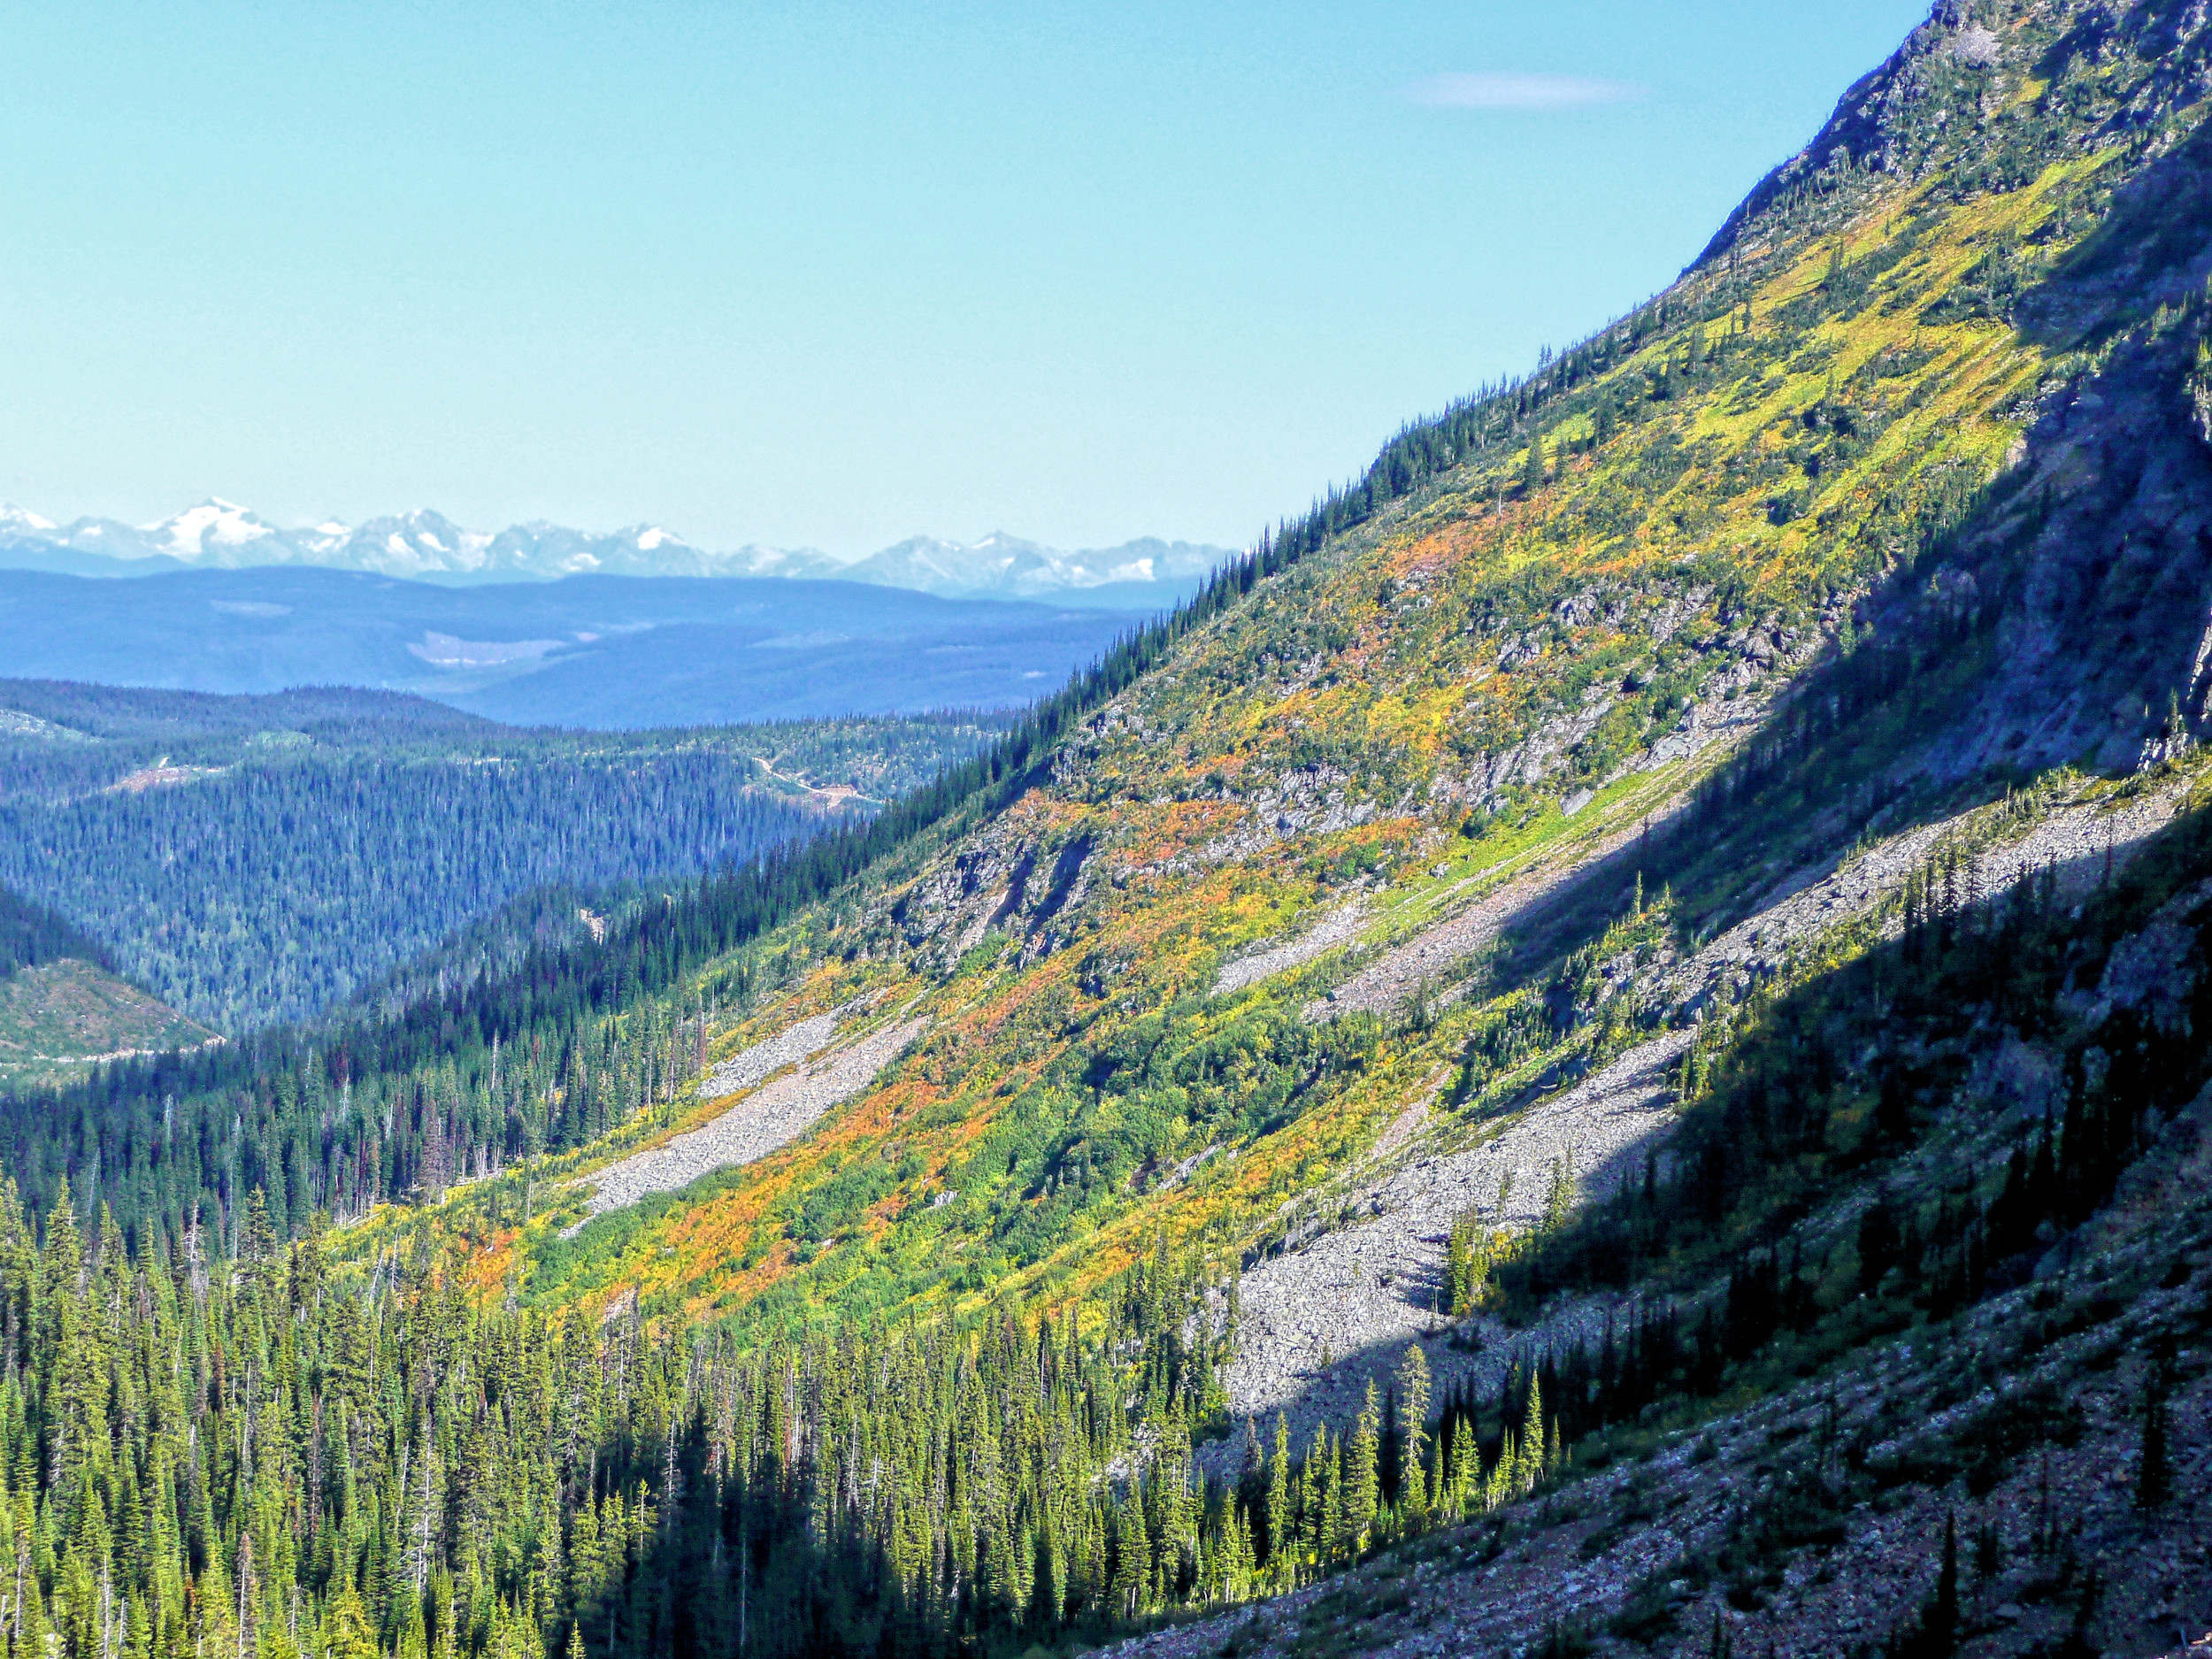
First fall colors
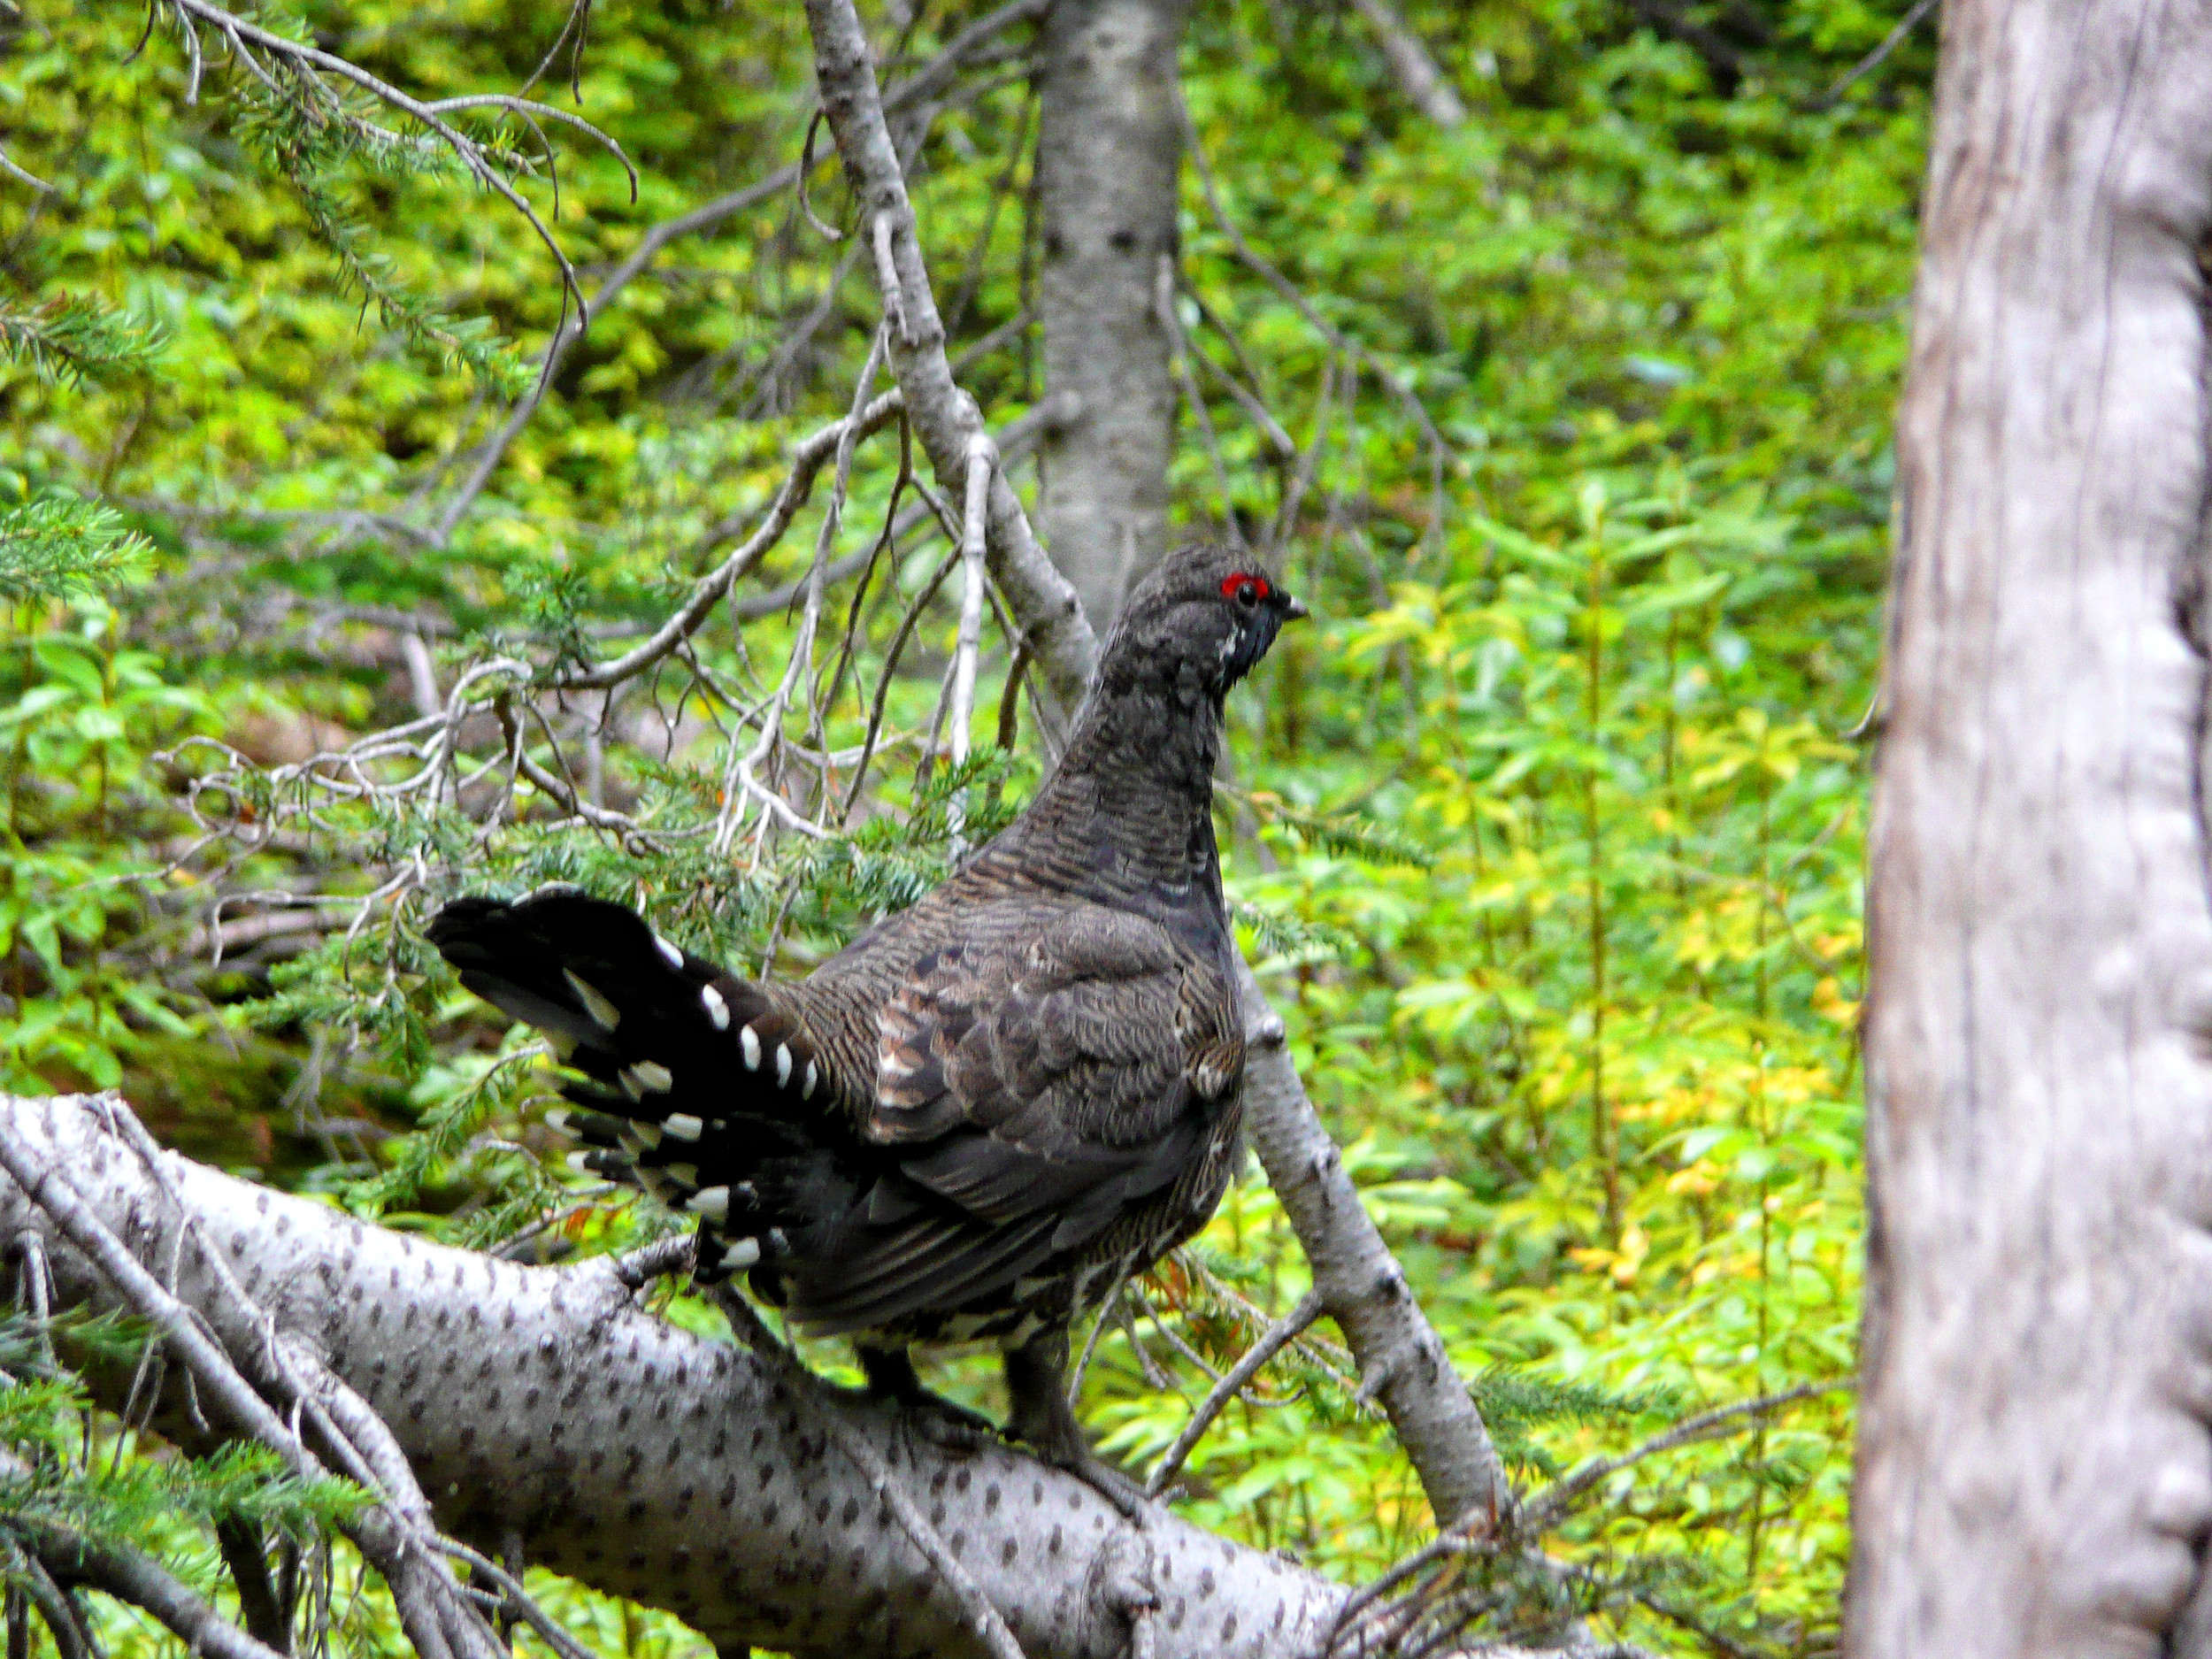
Grouse
Back in the forest, a grouse sighting makes a worthy finale for this spectacular and adventurous trip.
| Distance | 5.2 km |
| Time | 6 hrs |
| Min. Elev. | 1848 m |
| Max. Elev. | 2450 m |
| Ascent | 602 m |
| Cum. Ascent | 649 m |
| Cum. Descent | 685 m |
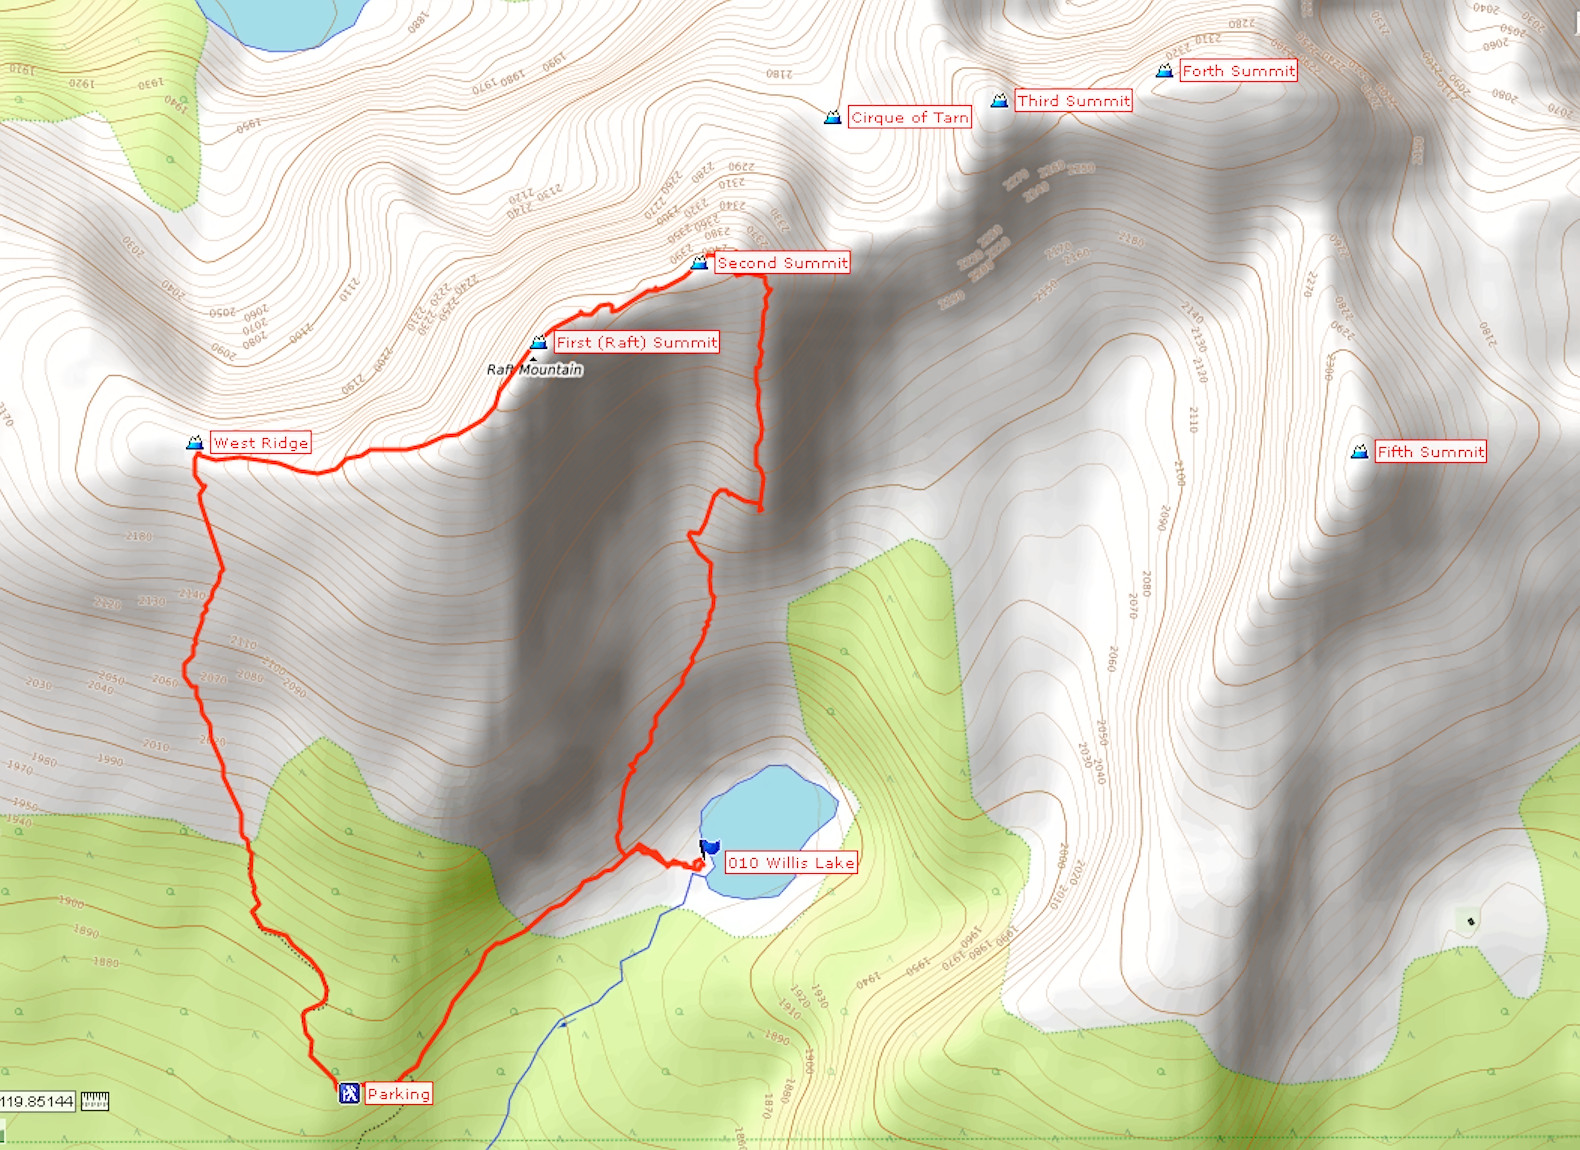
The main summit of Raft Mountain is 2450 meter high and a very distinct landmark near the village of Clearwater. The main summit and the four others peaks of this mountain range can be visited on a circuit hike.
In the beginning of July 2014, a group of friends and I start out on a hike to some of the Raft Mountain summits. There are seasoned hikers among us who know the area well. The Raft Mountain circuit is a difficult hike that follows jagged ridges and involves scrambling and some exposure.
We access our hike from the south over the Raft Mountain Forest Service Road which starts at Highway 5. We are lucky that our guide is familiar with the maze of logging roads and knows which turns to take. The last two kilometers are very rough and not suitable for all vehicles. Our 4x4 pickup truck, however, brings us right to the trailhead at 1865 meters.

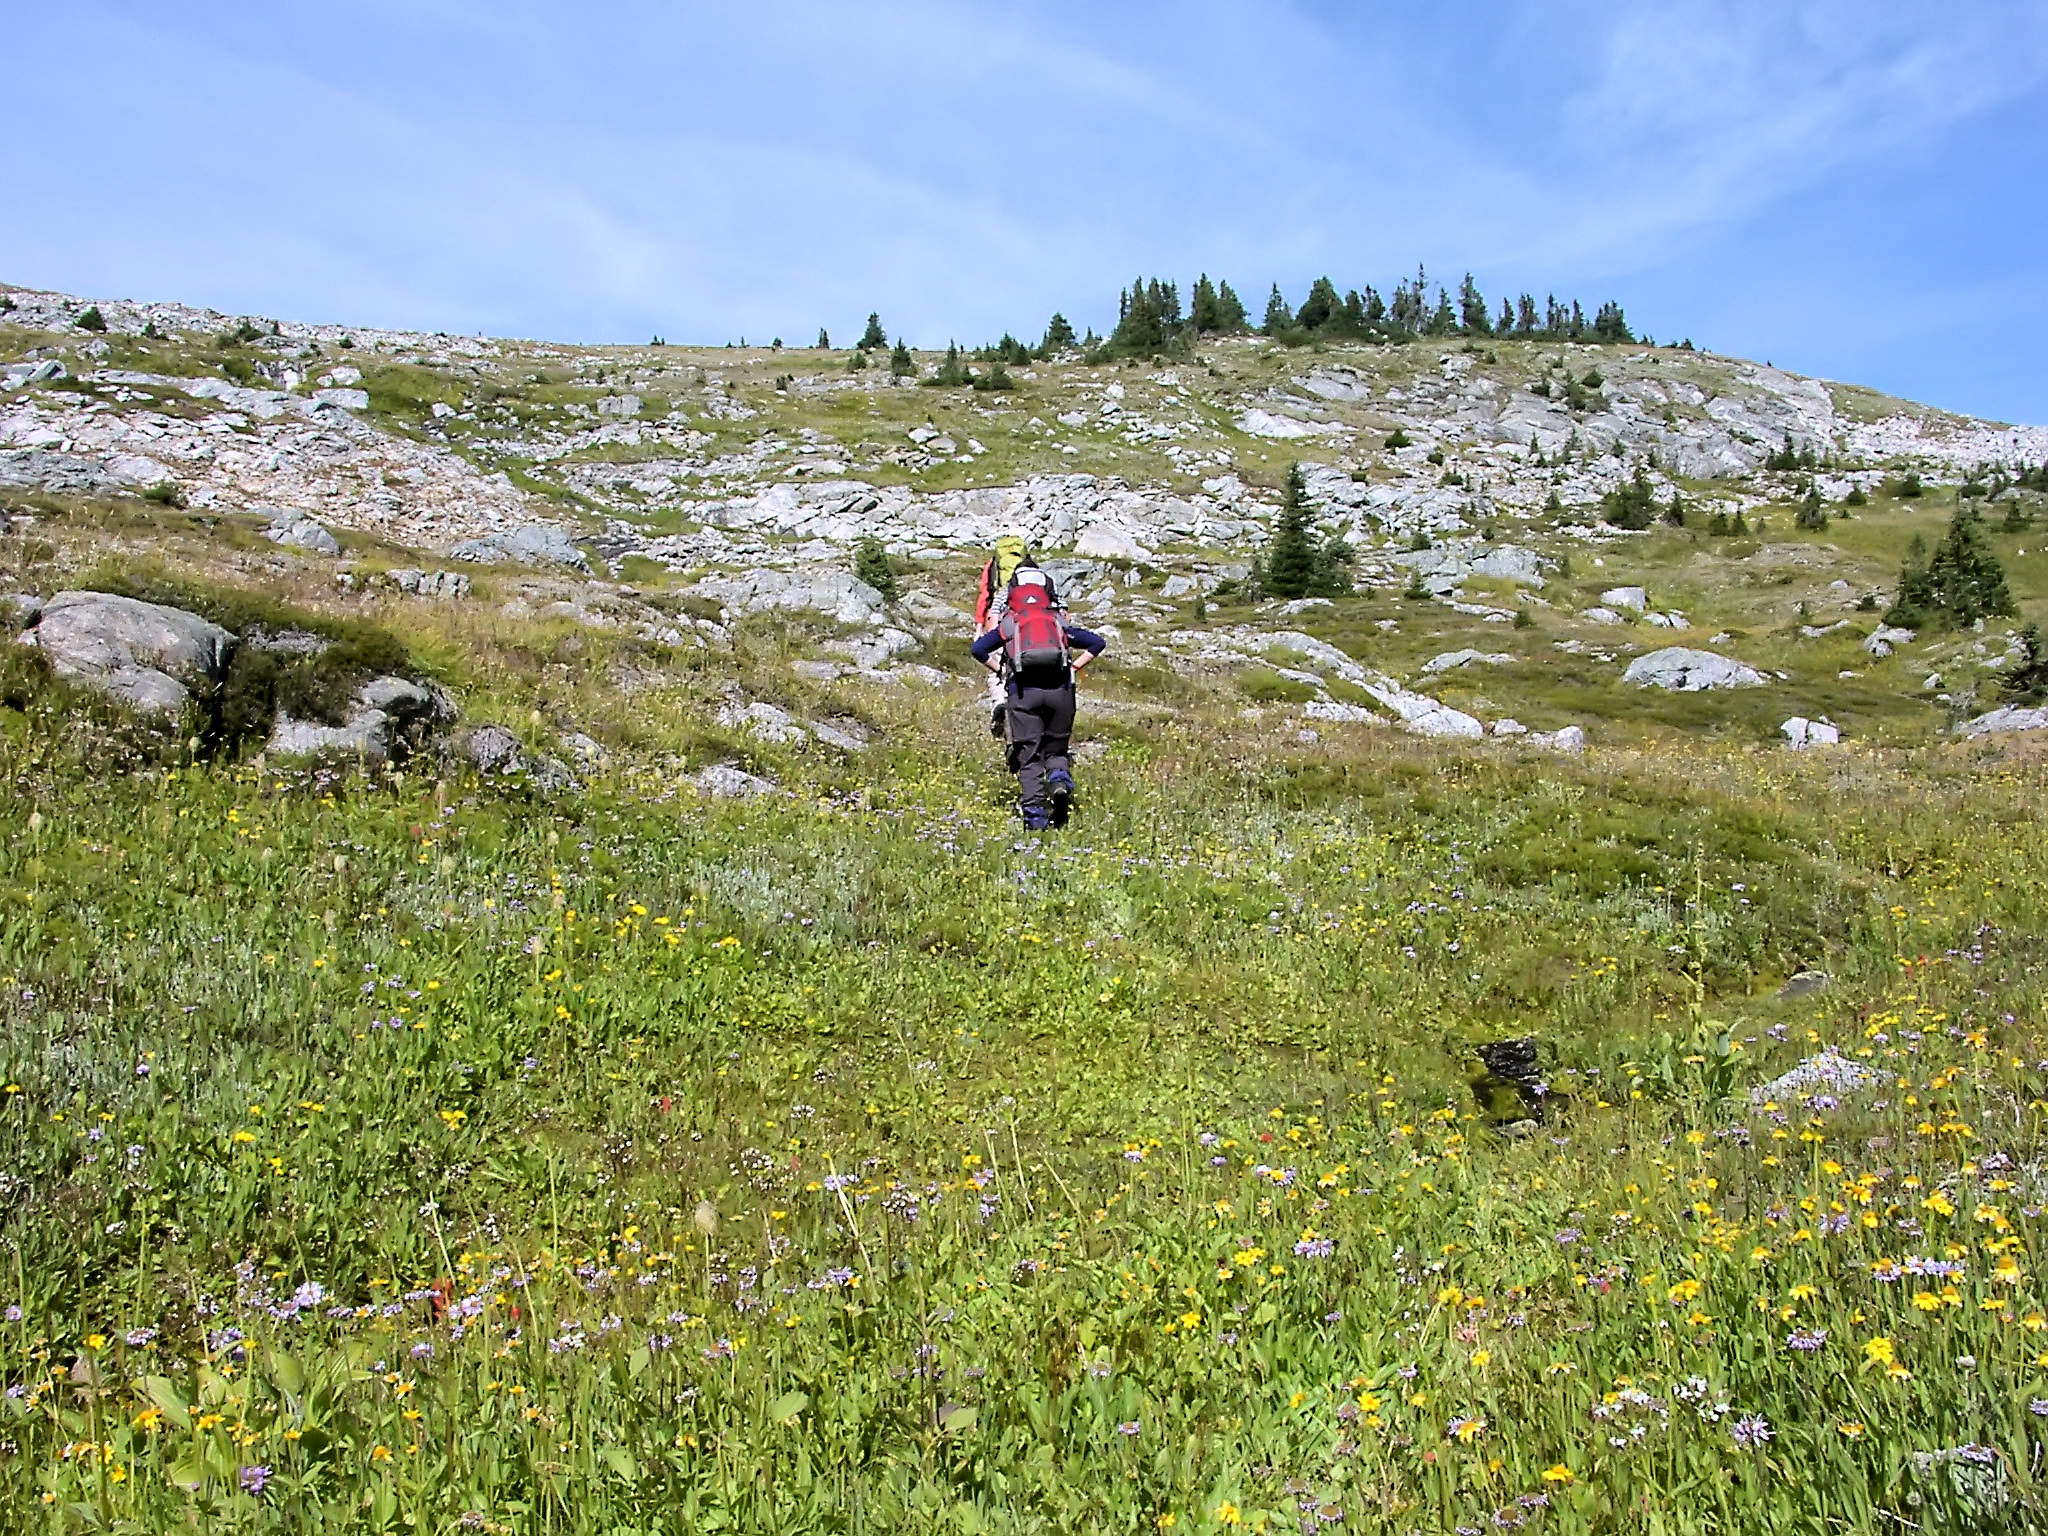
On the way to the first summit
From the parking area, a hiking sign points up an old narrow logging road. In the forest the trail is marked by flagging tape and brings us to the first outliers of the meadows. This early in the season, the Glacier Lilies are still in full bloom. Beautiful yellow flowers carpet the ground as far as the eye can see. Looking back, we admire a clear view of Dunn Peak in the distance.
Glacier Lily meadows in front of Dunn Peak
Dunn Peak
While crossing the meadows, we try to follow the signs that once were roughly 100 meters apart from each other, but many of them have fallen down. We aim for a distinct rock outcrop that becomes visible on the ridge ahead of us and keep to the left of it. After about one-and-a-half hours we arrive at the saddle of the Raft West Ridge, the West Col, at 2241 meters elevation.
Just ahead of us the mountain drops as a sheer 200-meter-high cliff down to a field of talus and boulder piles. Crystal Lake lies 400 meters below, and the Trophy Mountain Range towers beyond the narrow Spahats Creek Valley.
Crystal Lake and Trophy Mountain Range
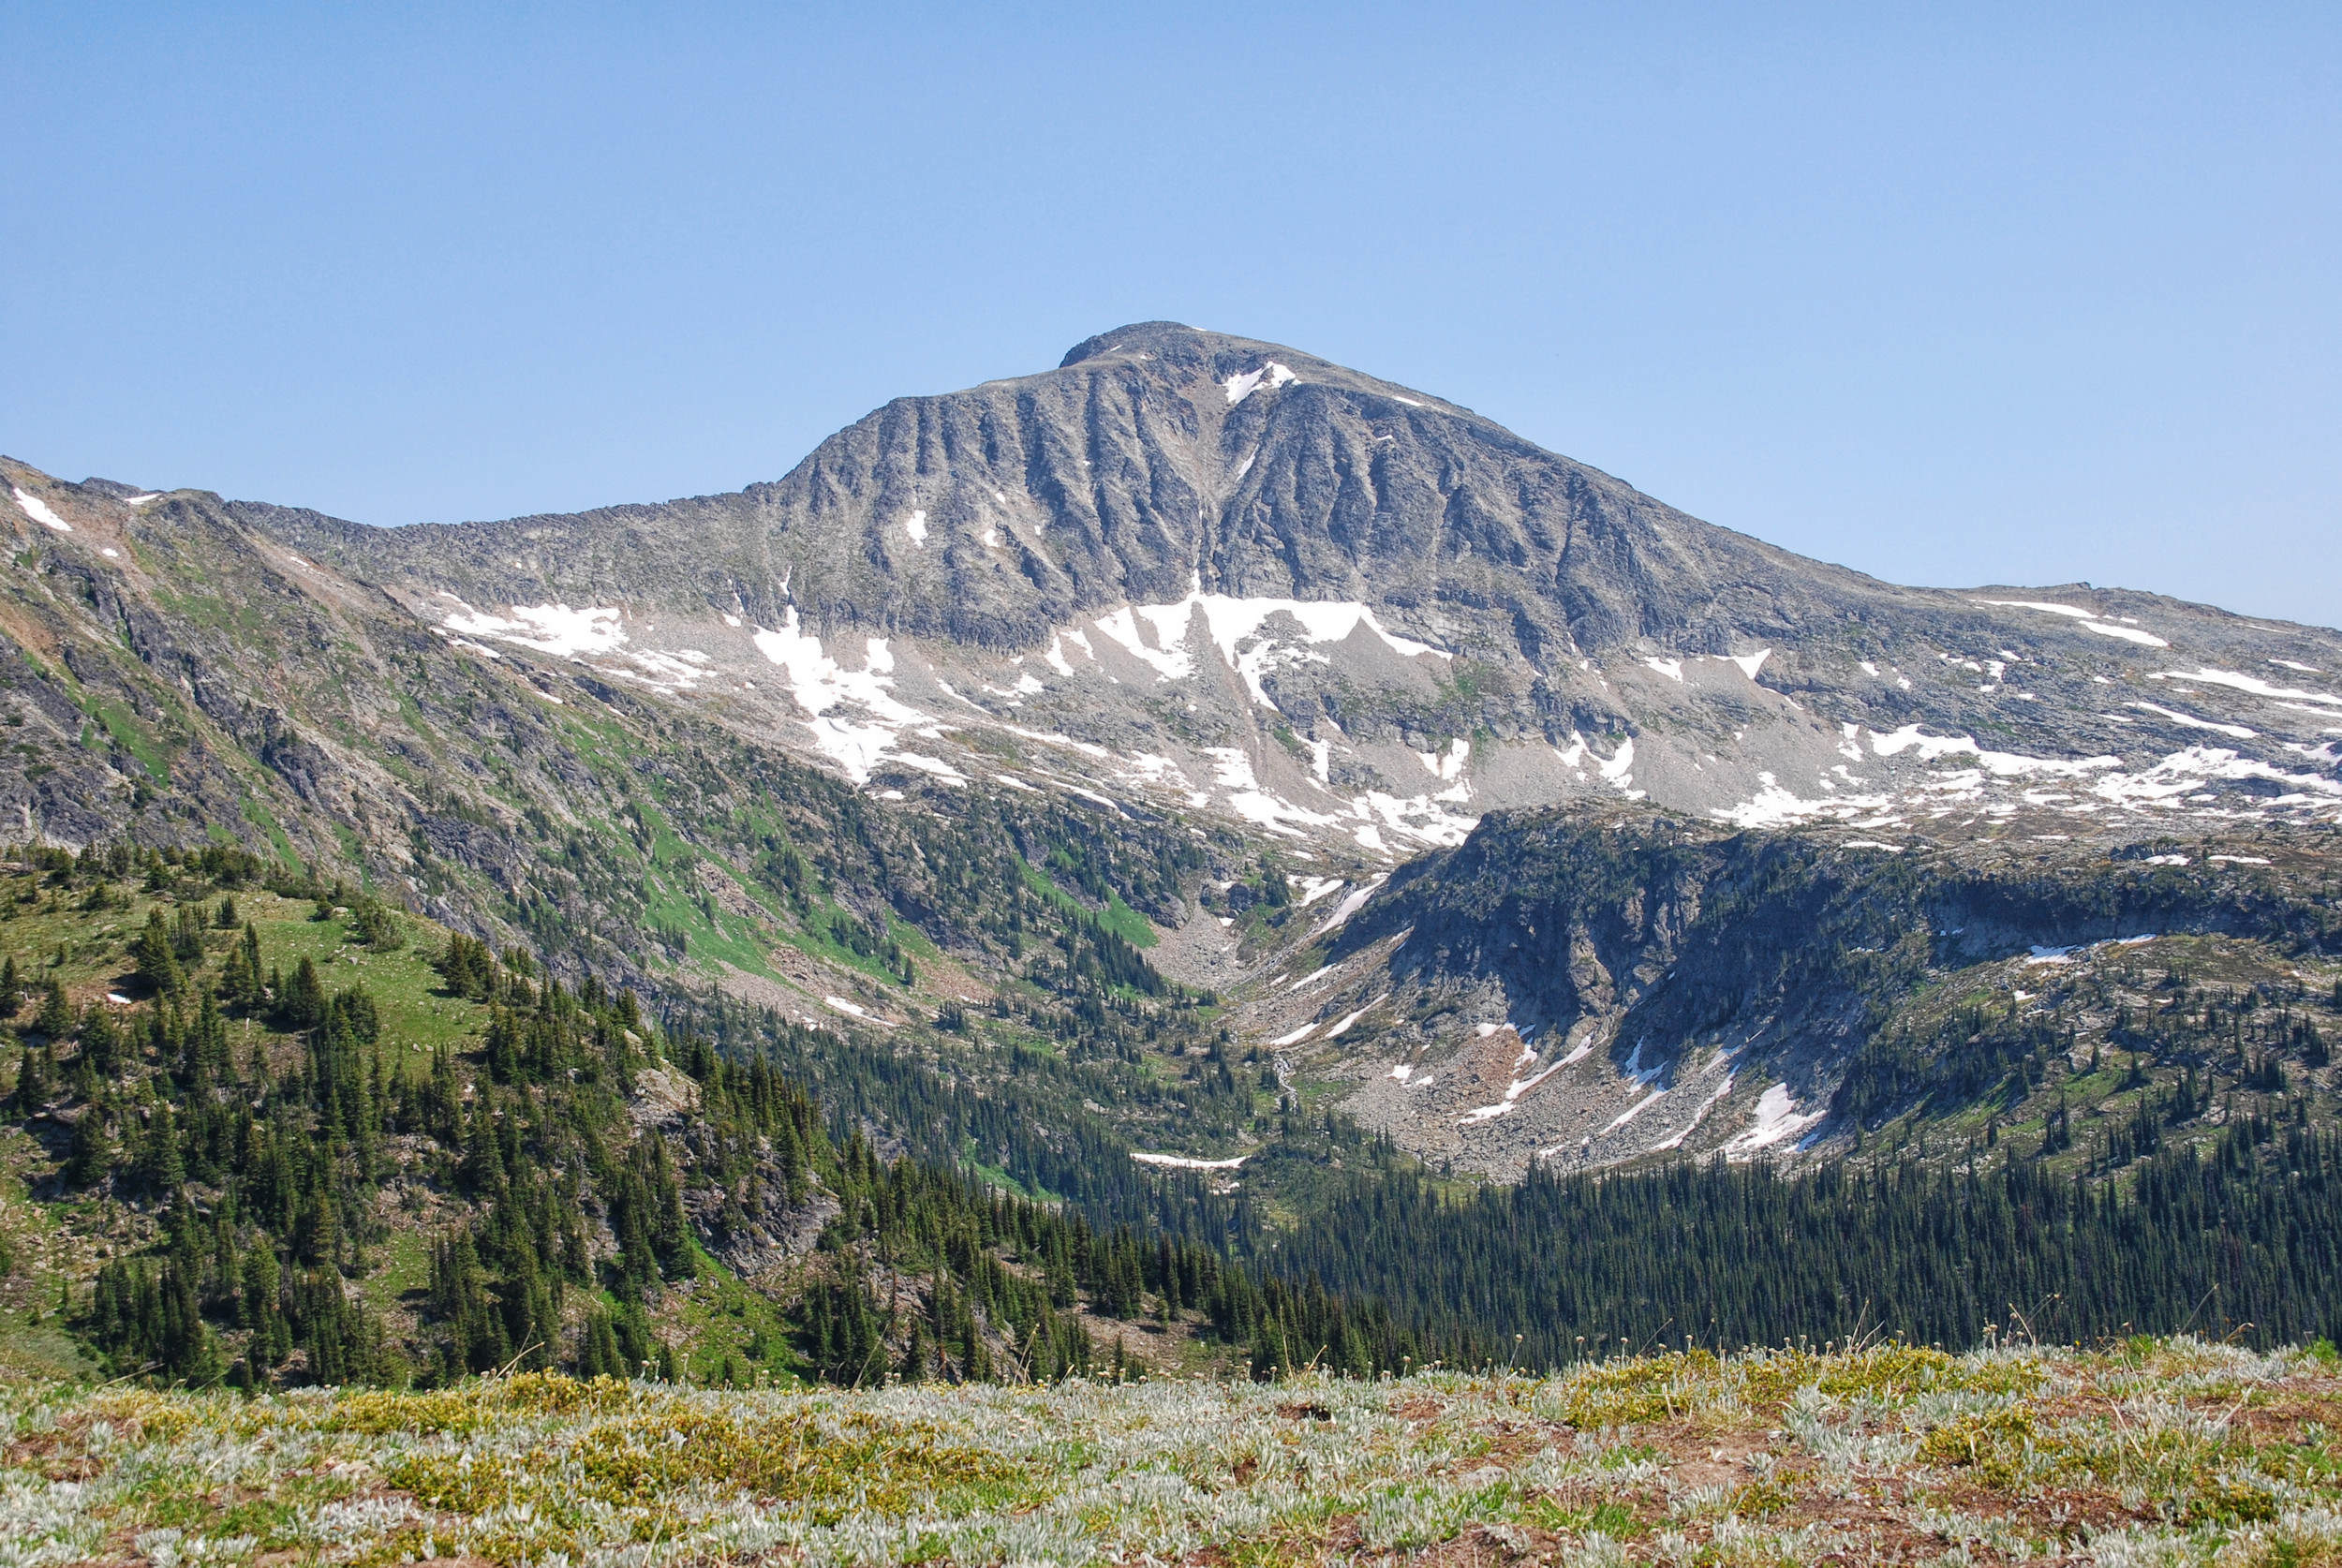
To the east, we look at the main summit of Raft Mountain, 200 meters higher than the saddle.
Raft Mountain 2450 m
The western ridge up to the main summit looks daunting, but - the exertion aside - is unexpectedly easy to walk on.
Western ridge to the summit

Ascent to the summit
After about 45 minutes we reach the 2450-meter-high main summit of Raft Mountain. The views are superb on all sides. To the south, we look over the North Thompson Valley towards Dunn Peak.
Summit cairn with Dunn Peak in the background
To the east rises the 160 km long chain of the Monashee mountains.
Monashee Mountains
To the north, the Trophies tower over the Spahats Creek Valley.
Trophy Mountains
Continuing on our way to the second summit of Raft Mountain, we follow a jagged ridge to the east.
I feel still quite confident even though the ridge starts looking dicey.
"Airy Step"
The route between the first and second summit is not for hikers who feel nervous about heights. Without the help of my friends I never would have made it over the jagged knife edge ridge that connects the two peaks. More than once we have to scramble on all fours without seeing where our feet need to go. At the narrowest point of the ridge there is a crack that you have to step over while looking into the abyss of several 100 meters below: the so called airy step.
Half an hour later we arrive at the second summit, with 2436 meters only a little lower than the main summit.
Looking back from the second summit to the main peak
Below us on the northern flank lies the Cirque of Tarns: four bowl-shaped depressions that the glaciers have carved into the valley sidewall and that are now filled with water. The tarns make for a great hike from the northern side of the Raft Mountain range. We did it in 2011 and it is described further above in this journal.
In early July there is still a lot of snow on route to the third summit. We do not even make an attempt to reach it, as the current conditions would require crampons and ice axes. One would follow a cornice and cross a slope of loose boulders down to the saddle at 2292 meters and then regain 71 meters to arrive at the third peak.
Route to the third summit
Instead we look for a suitable route down the mountain that brings us to Willis Lake. Not an easy task, as it is extremely steep here. Usually one descends not before but behind the third summit or one hikes out over the easy and wide ridge of the fifth summit. It takes us quite a while and some backtracking before we come out just above Willis Lake. We pay this pretty lake a short visit.

Willis Lake

Glacier Lilies at Willis Lake trail
From the lake, a trail leads back to the parking area. Because of the time-consuming descent from the second summit, we have spent six hours for a distance of 5.2 kilometers today. The circuit including the fourth summit is 9.5 kilometers and - in the right conditions - takes about six hours as well. Add the fifth summit, and it is 11 kilometers in 7.5 hours.

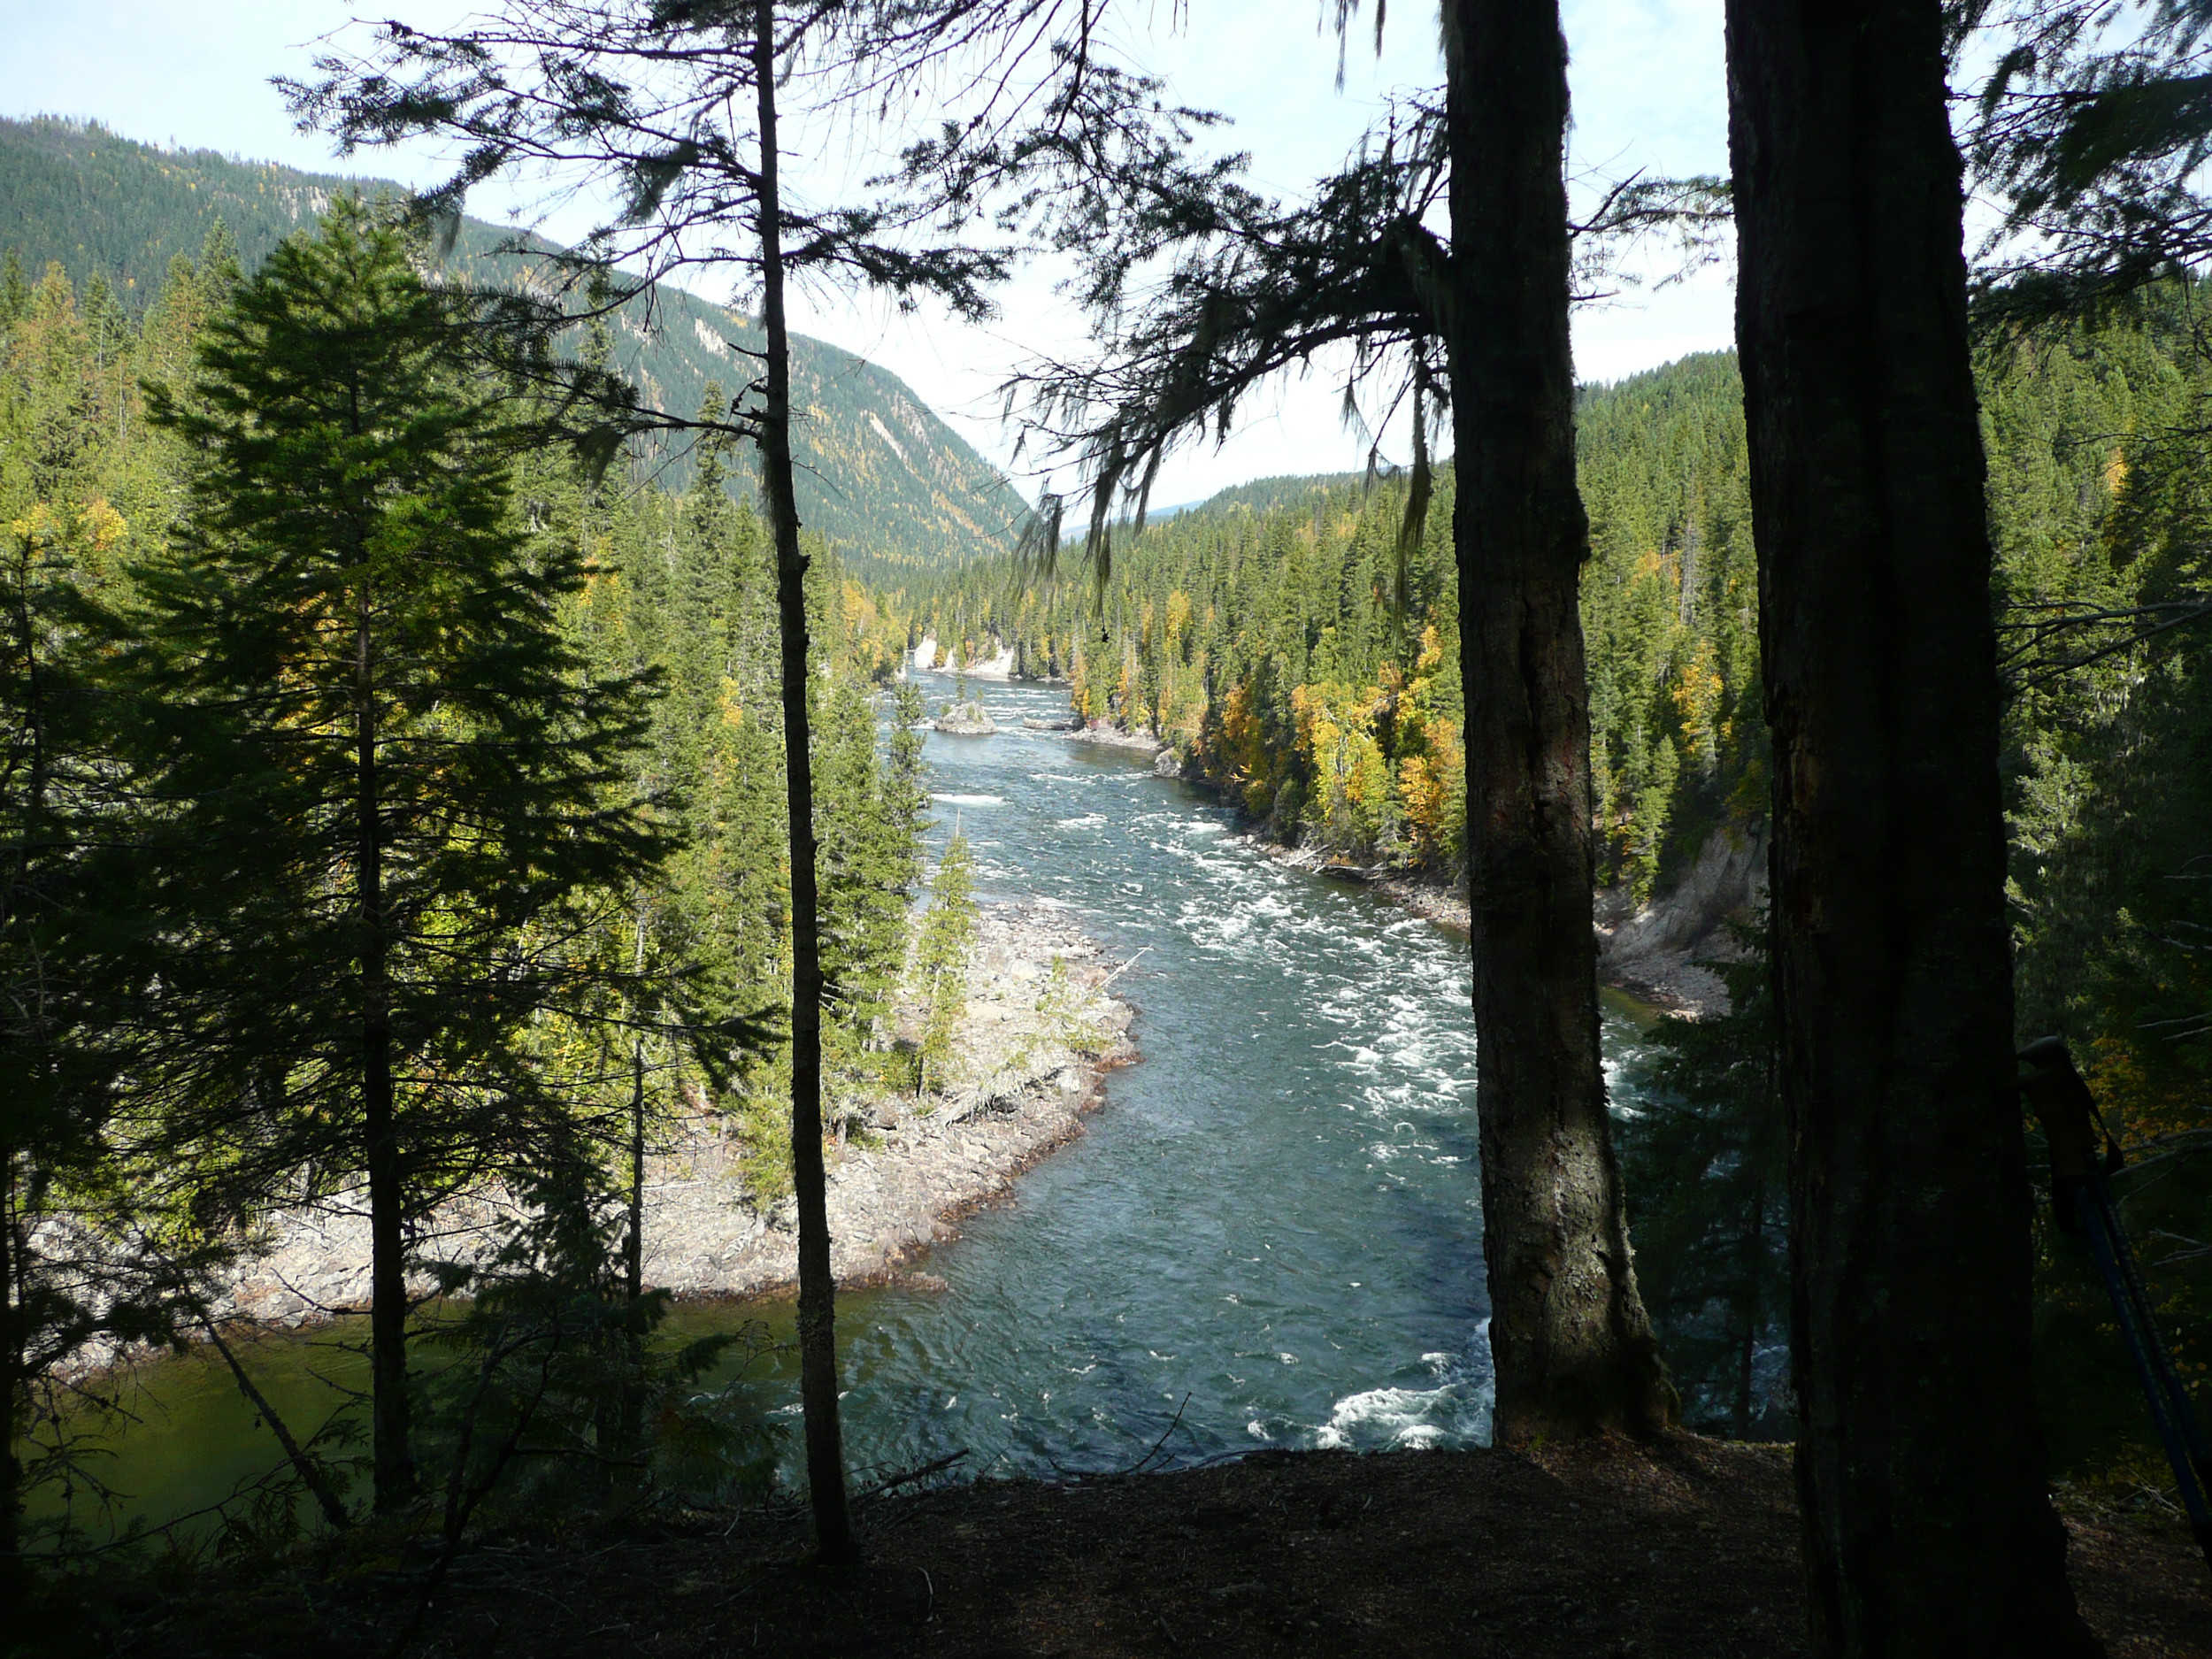
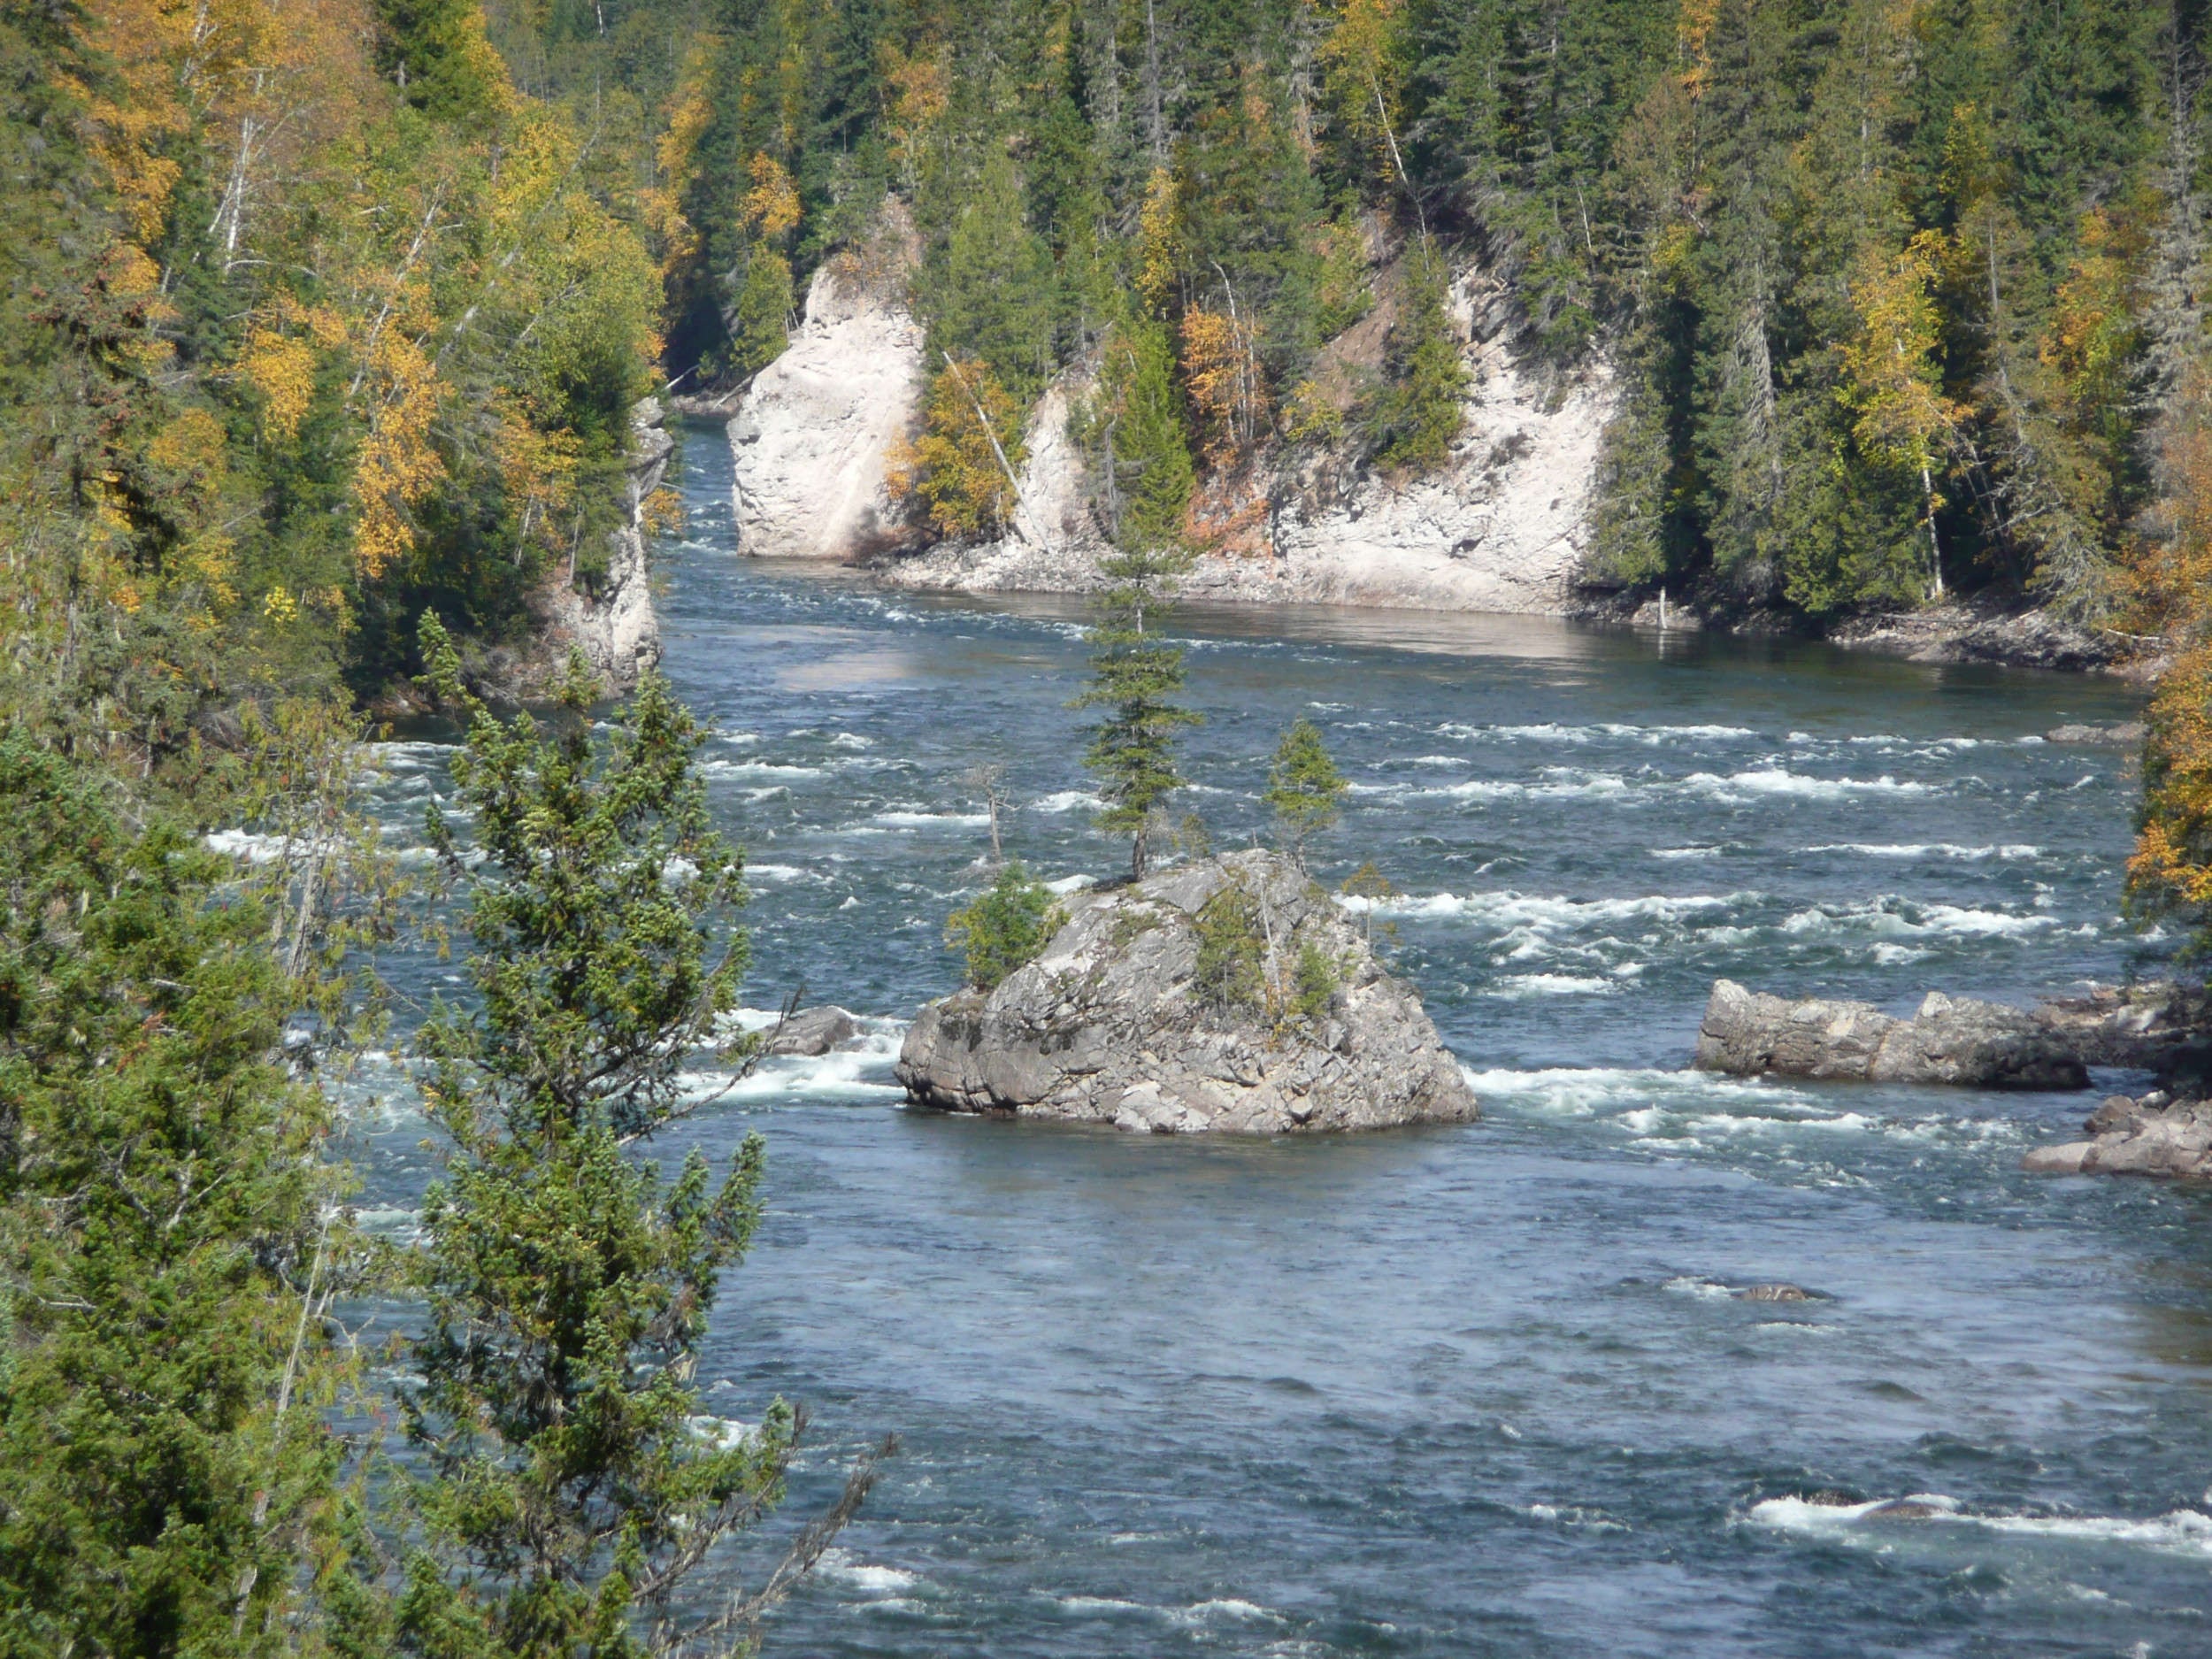
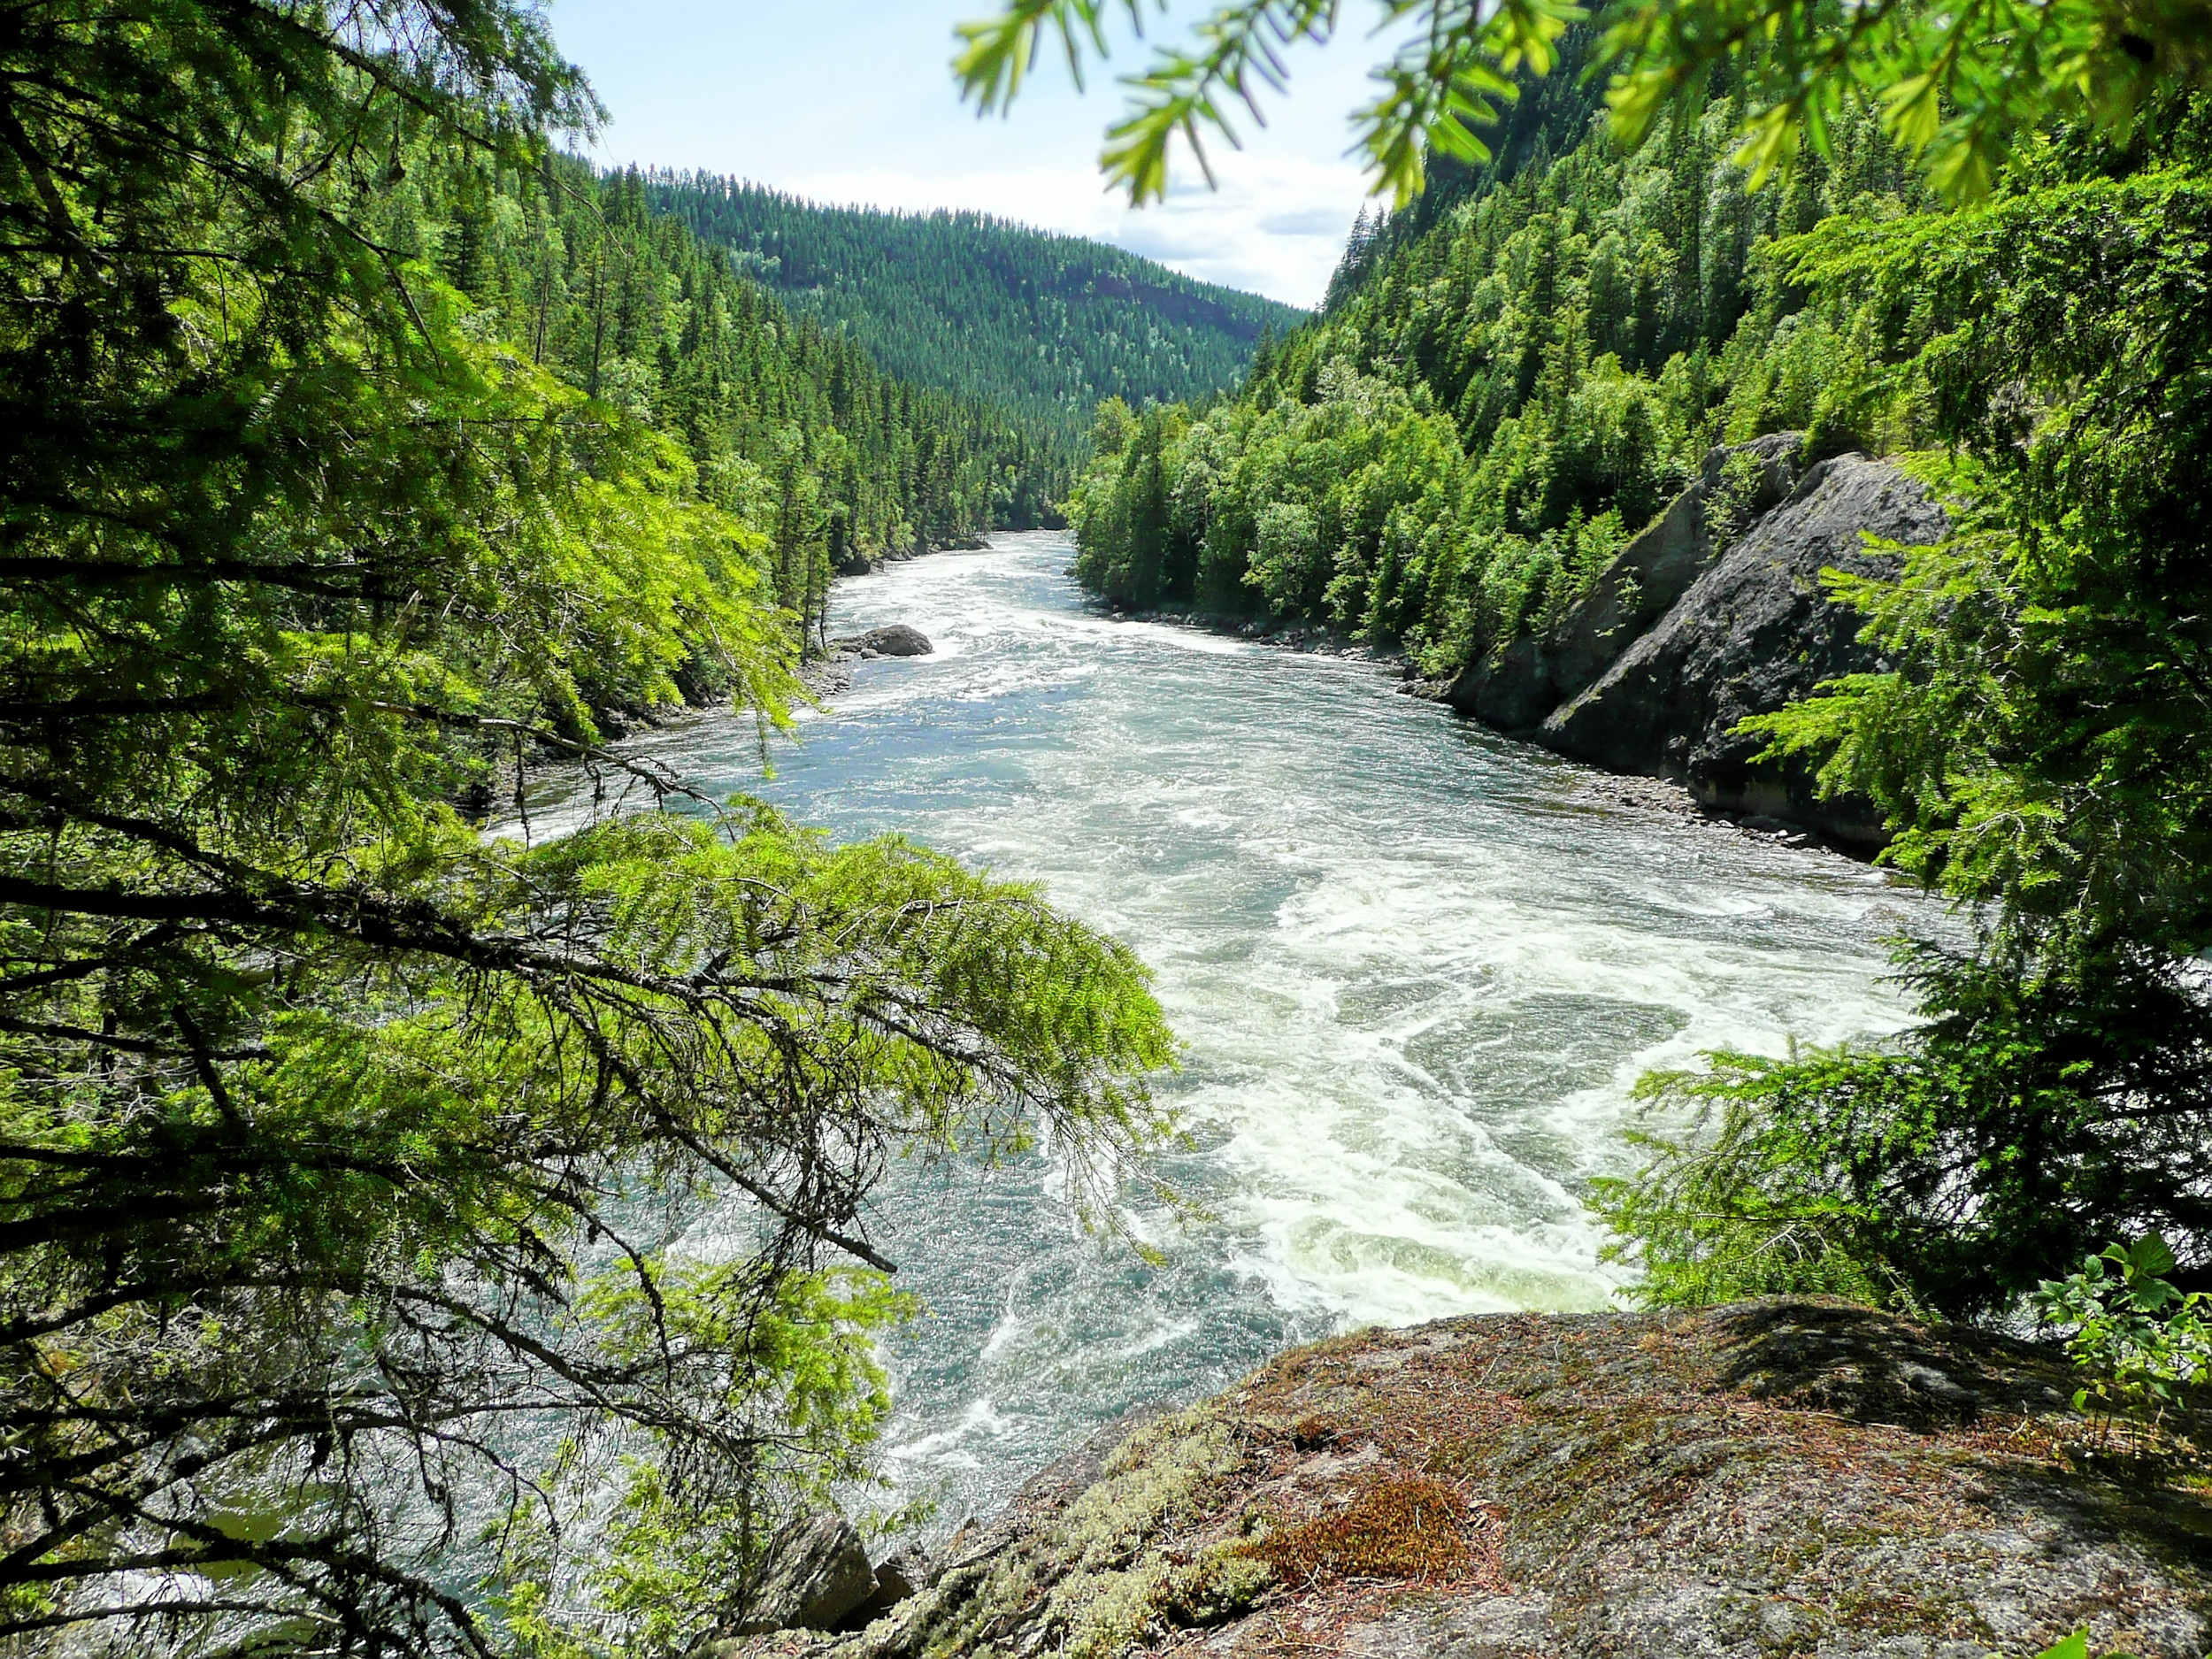
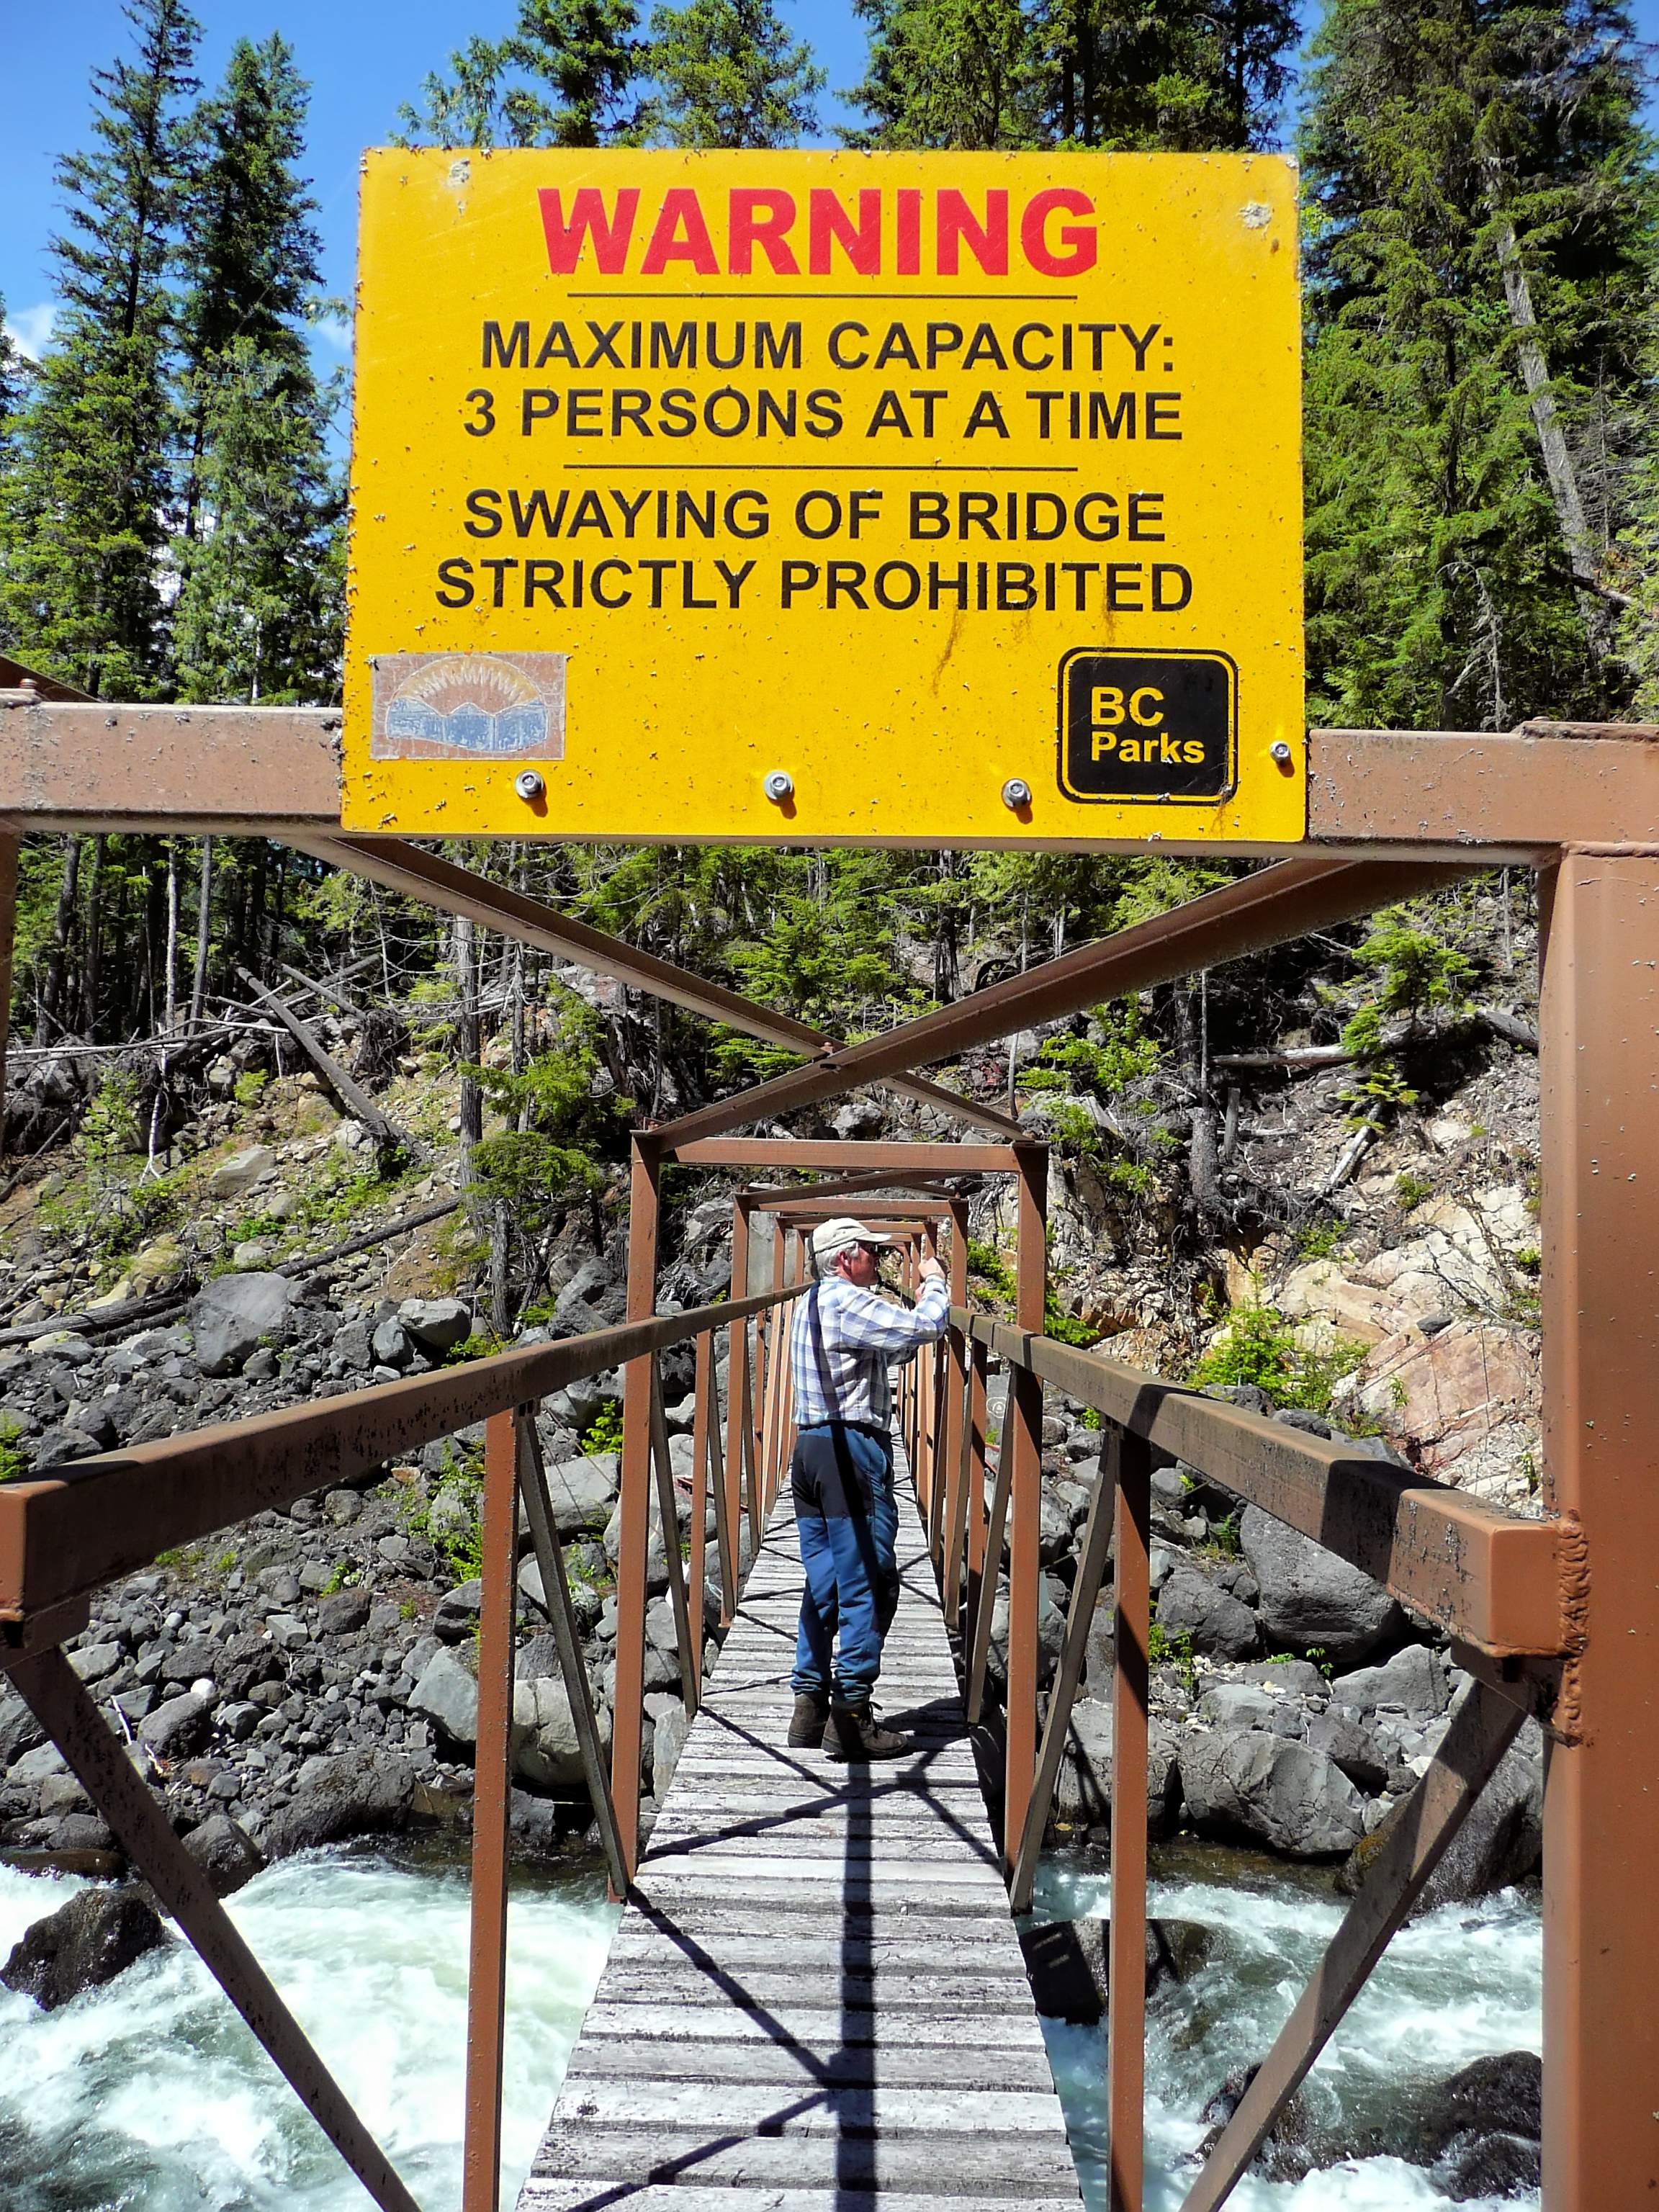
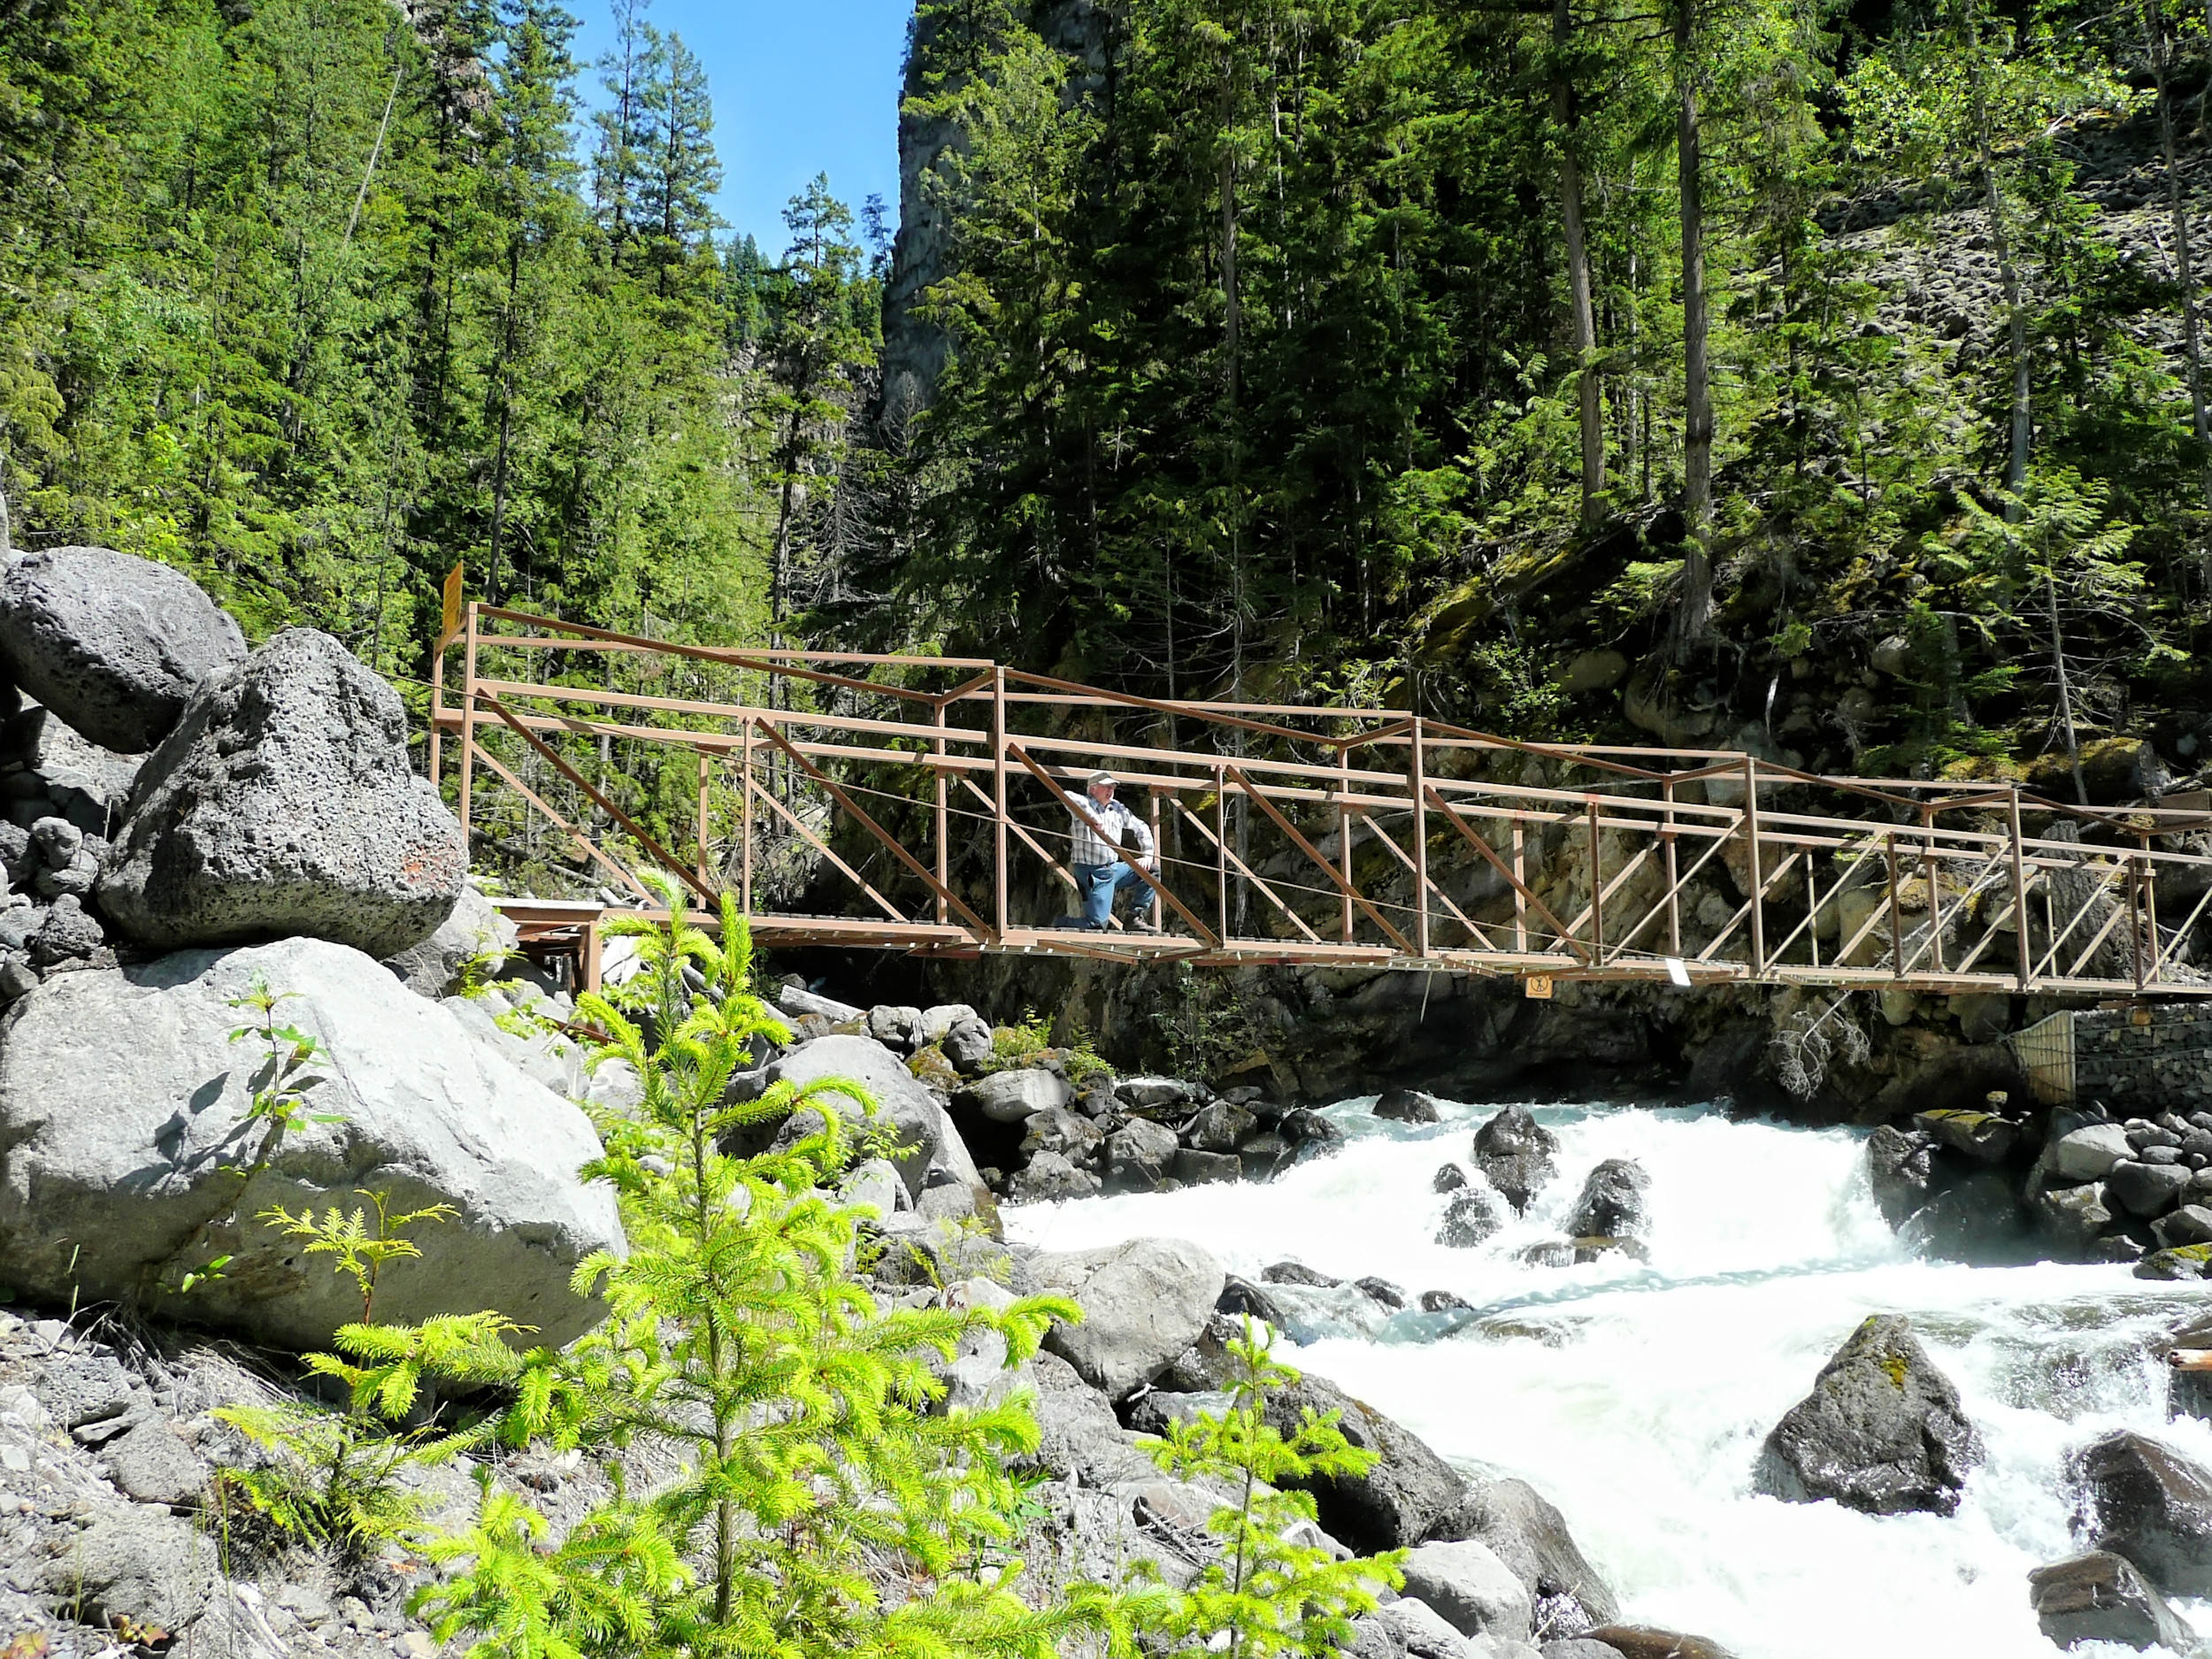
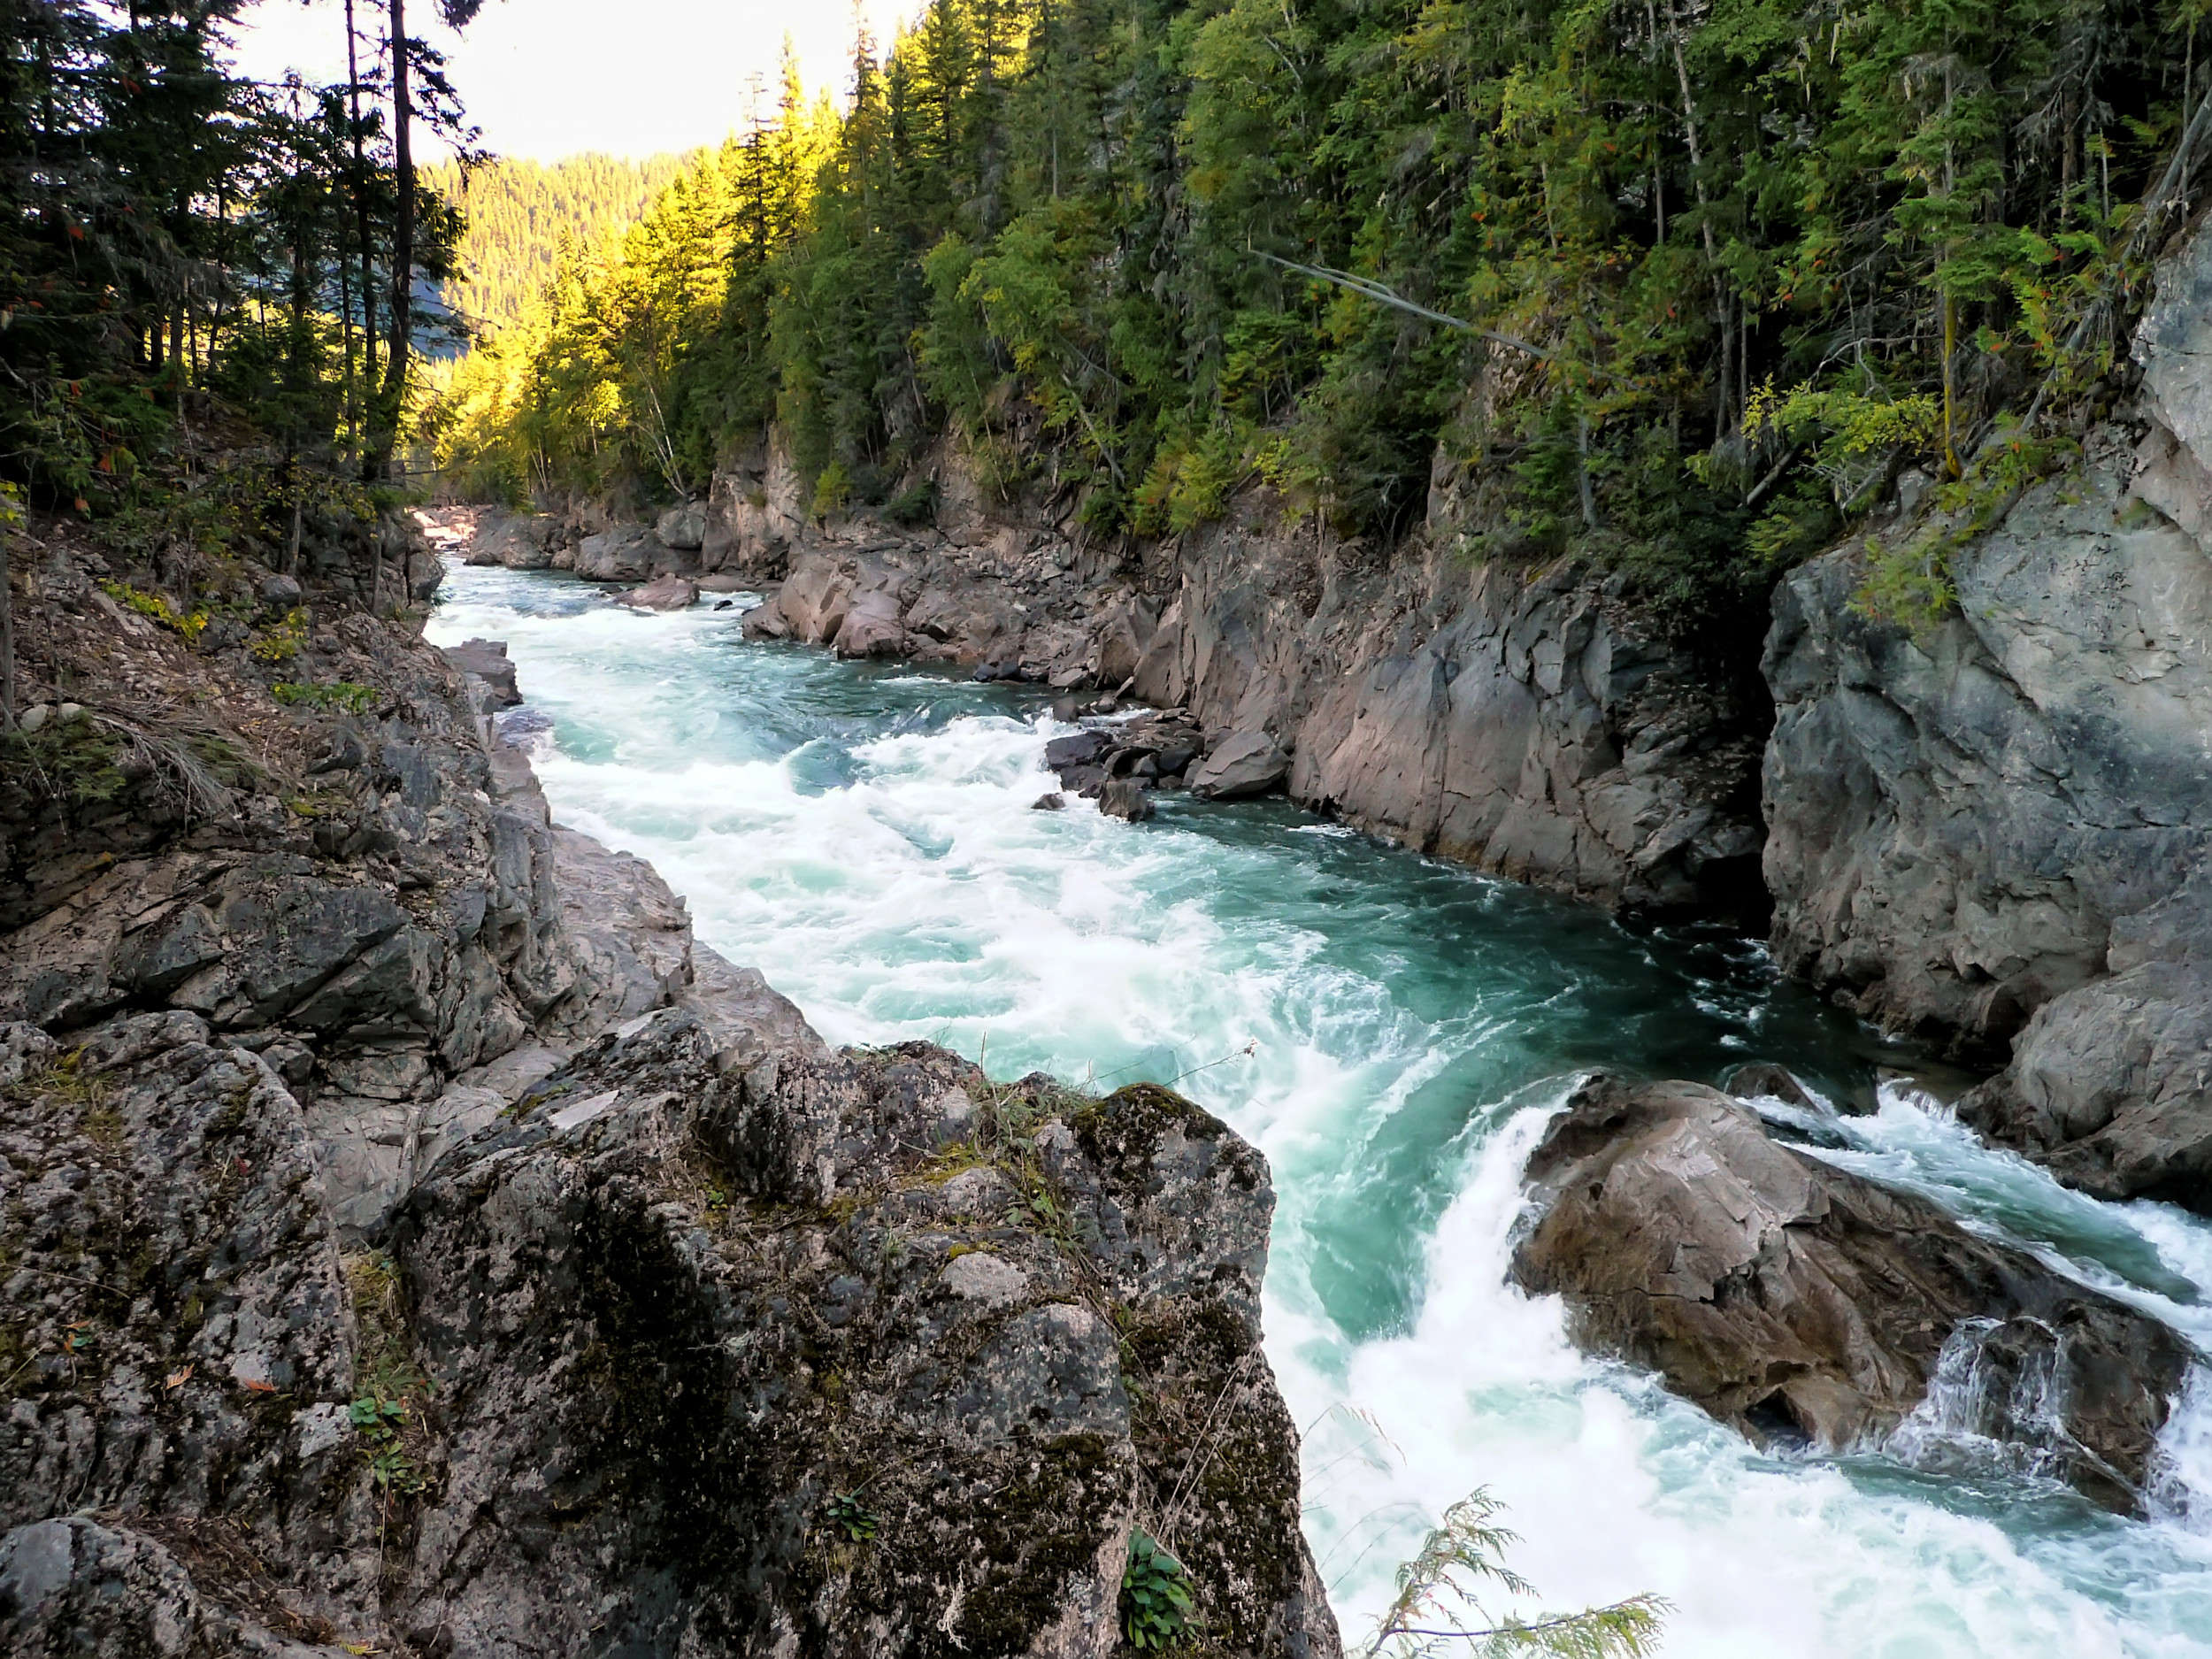
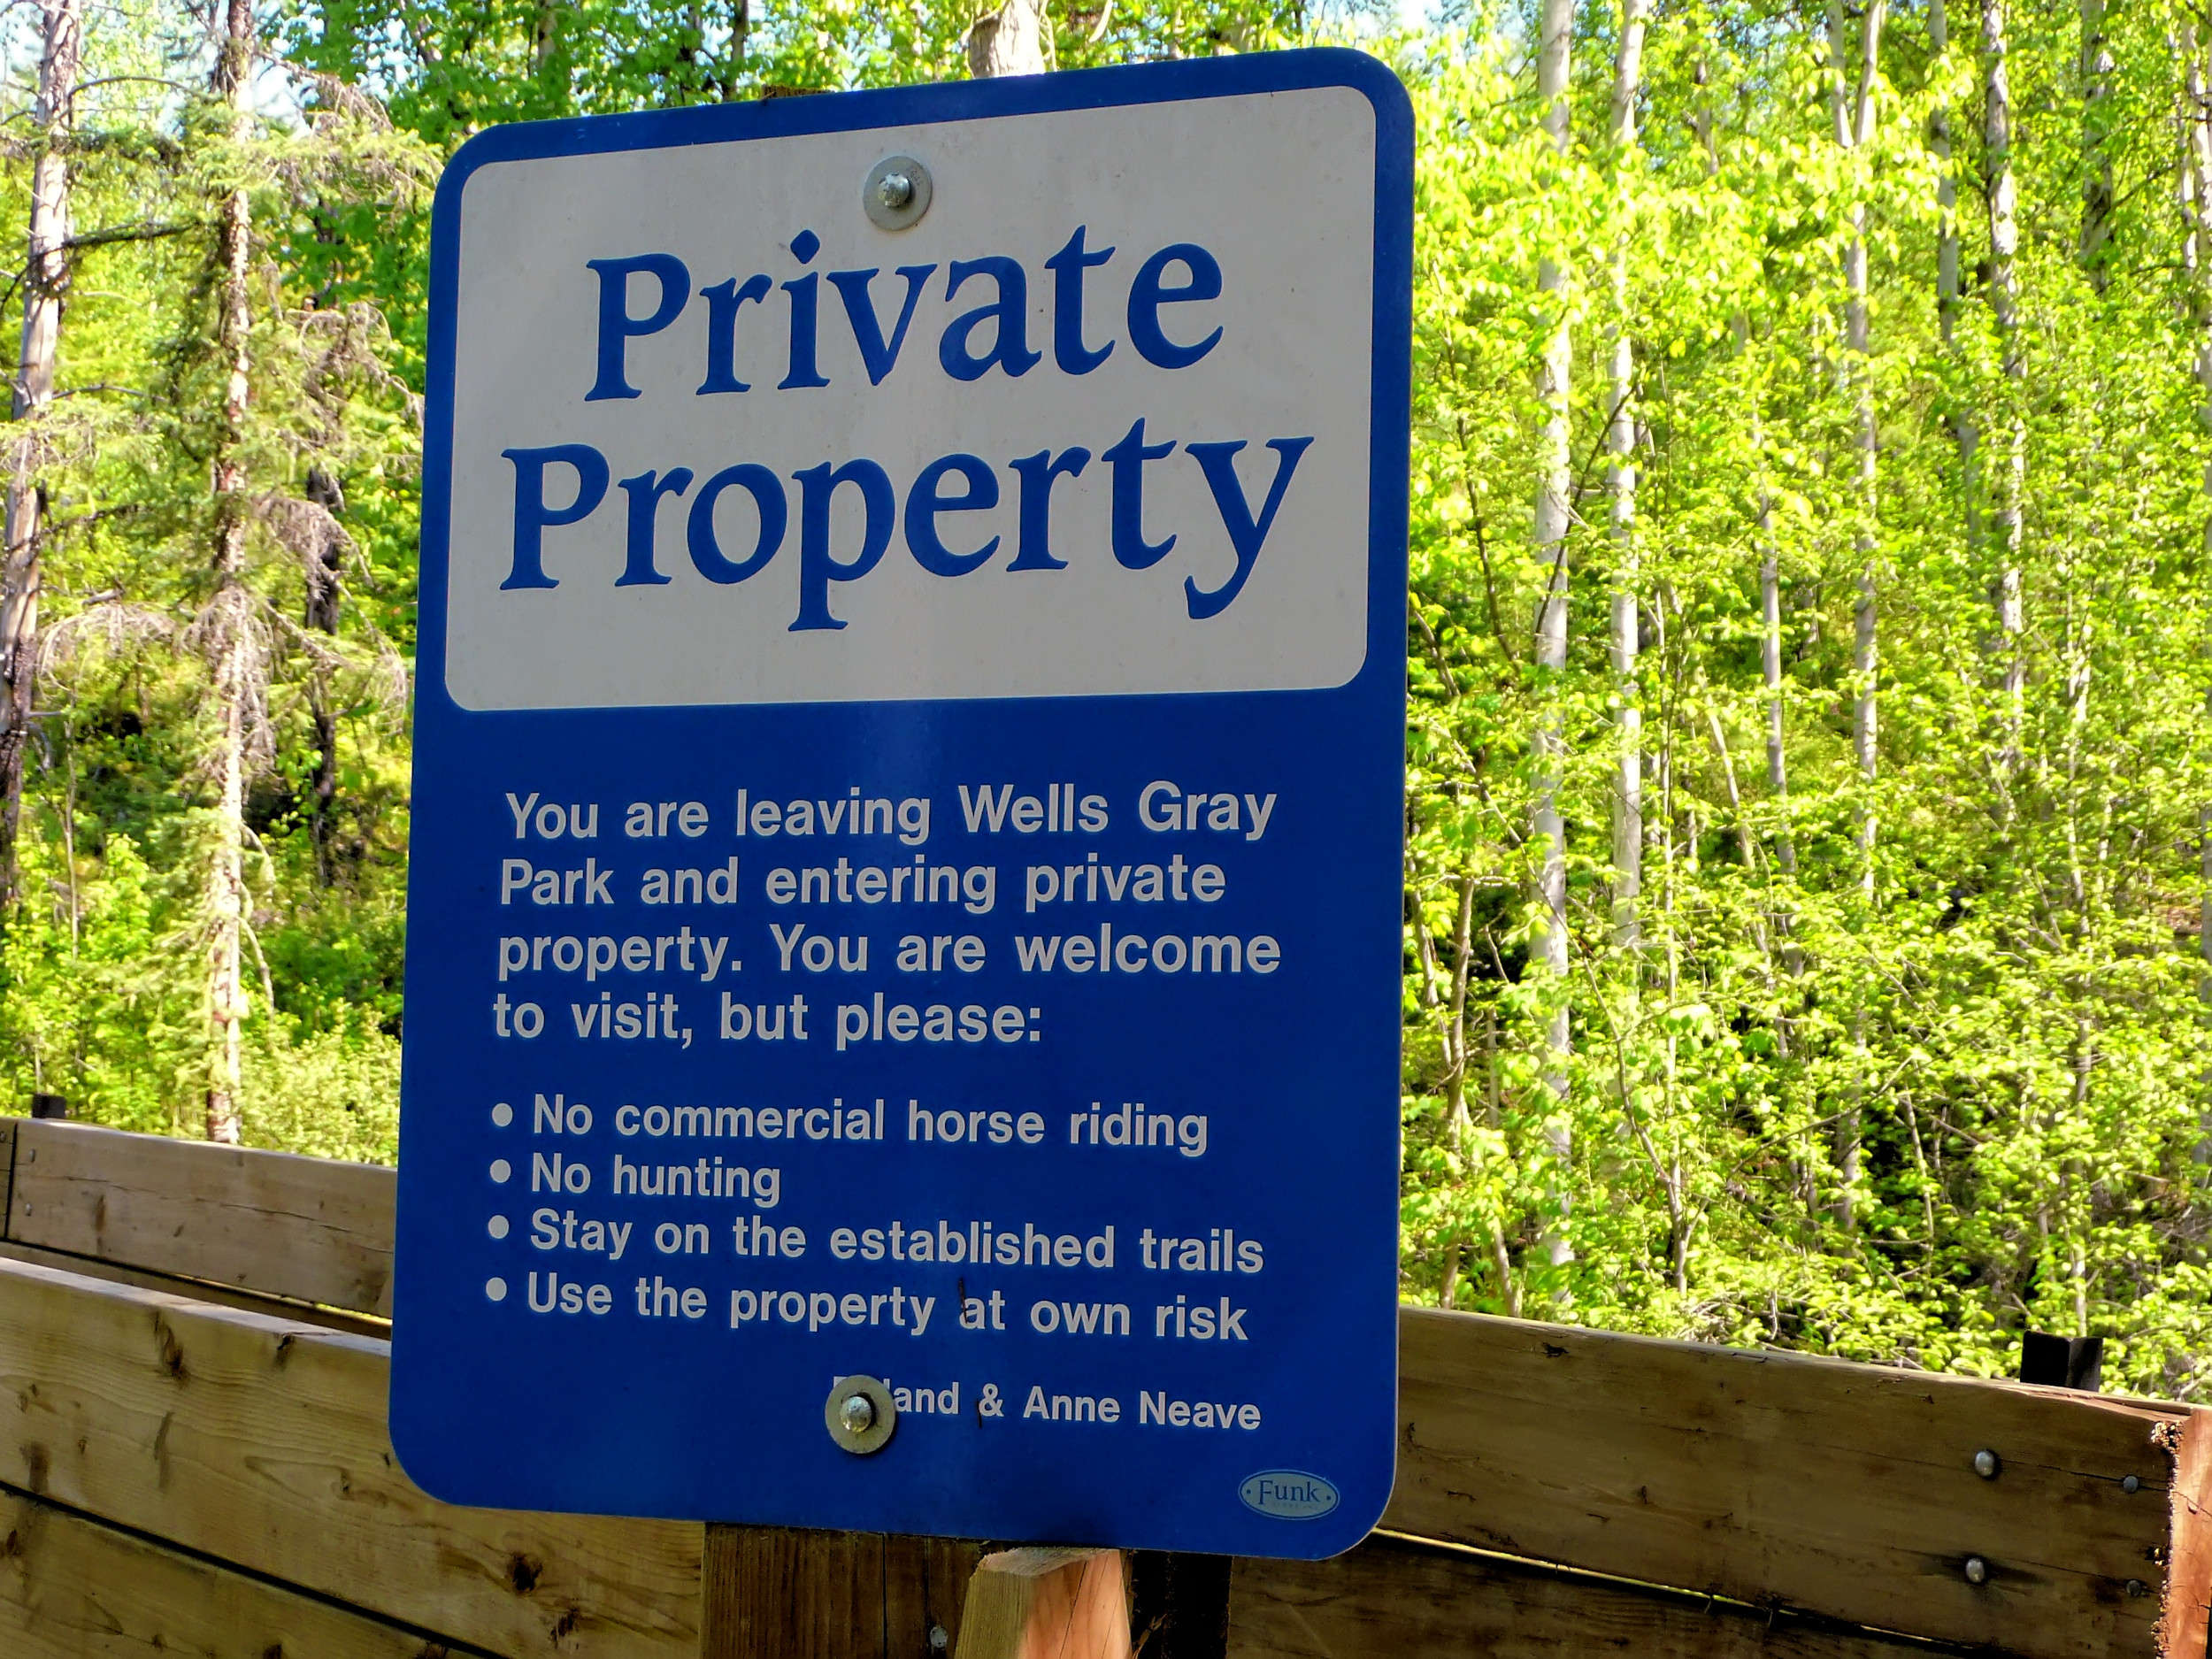
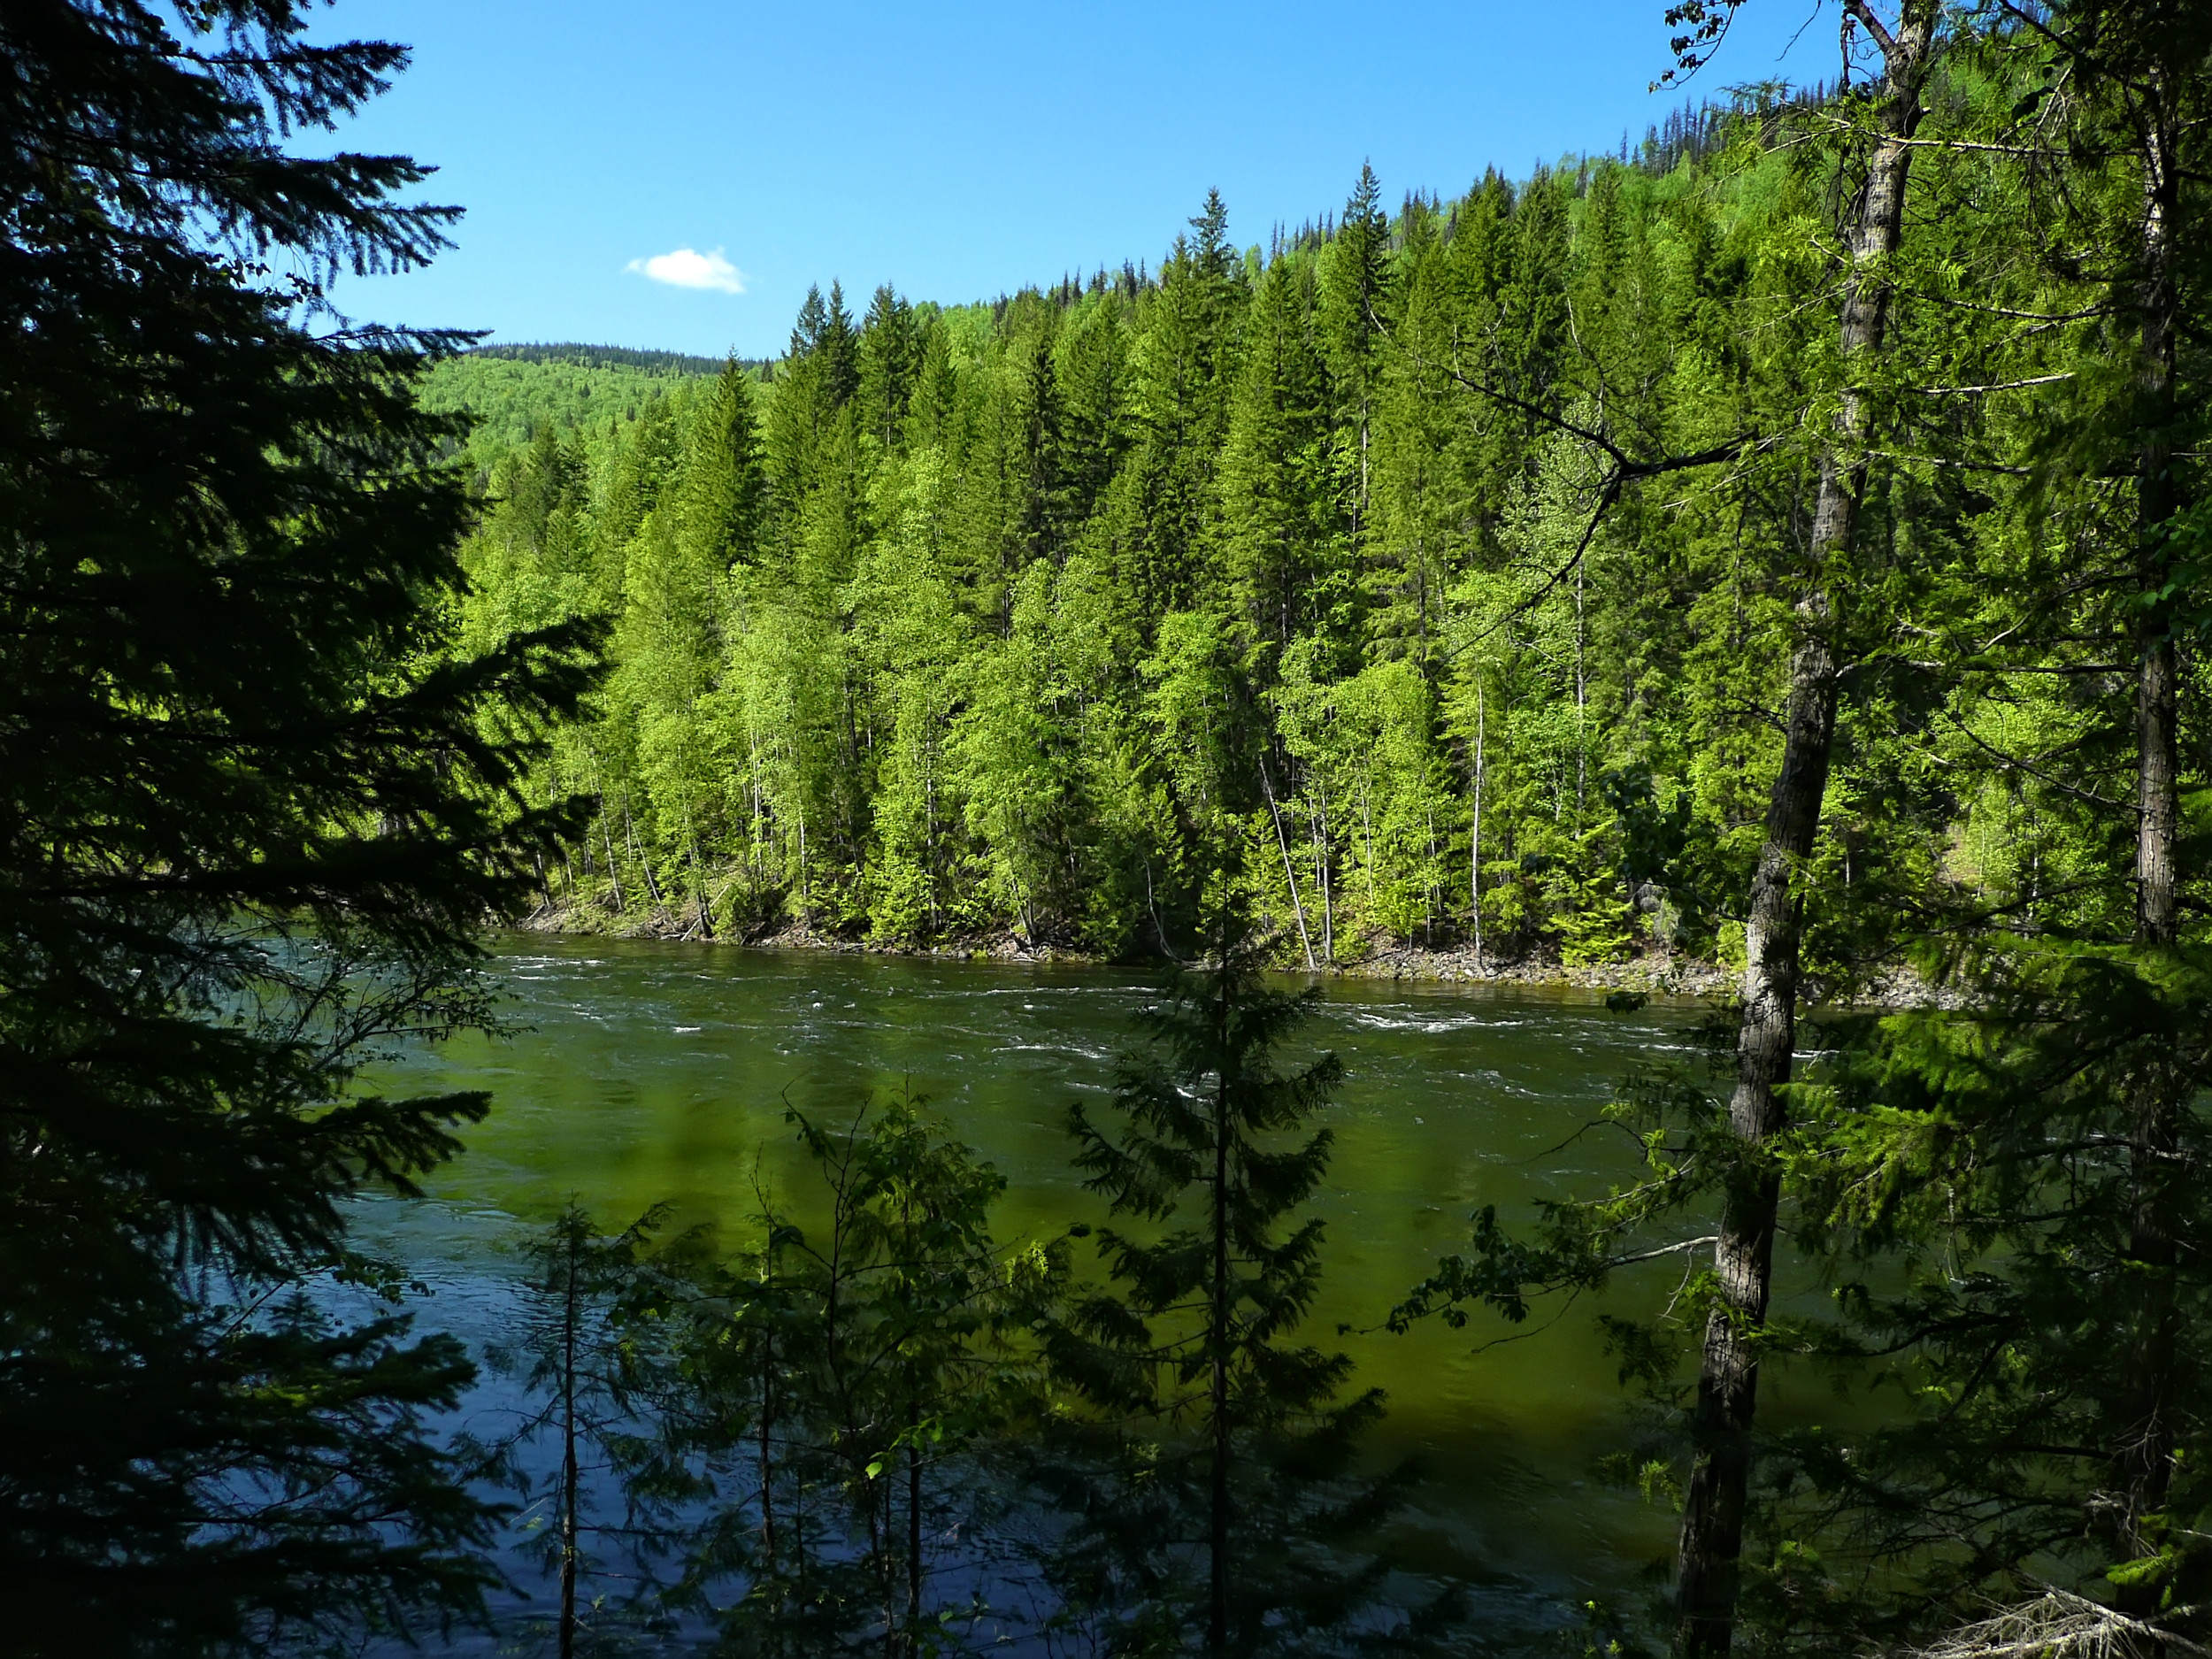
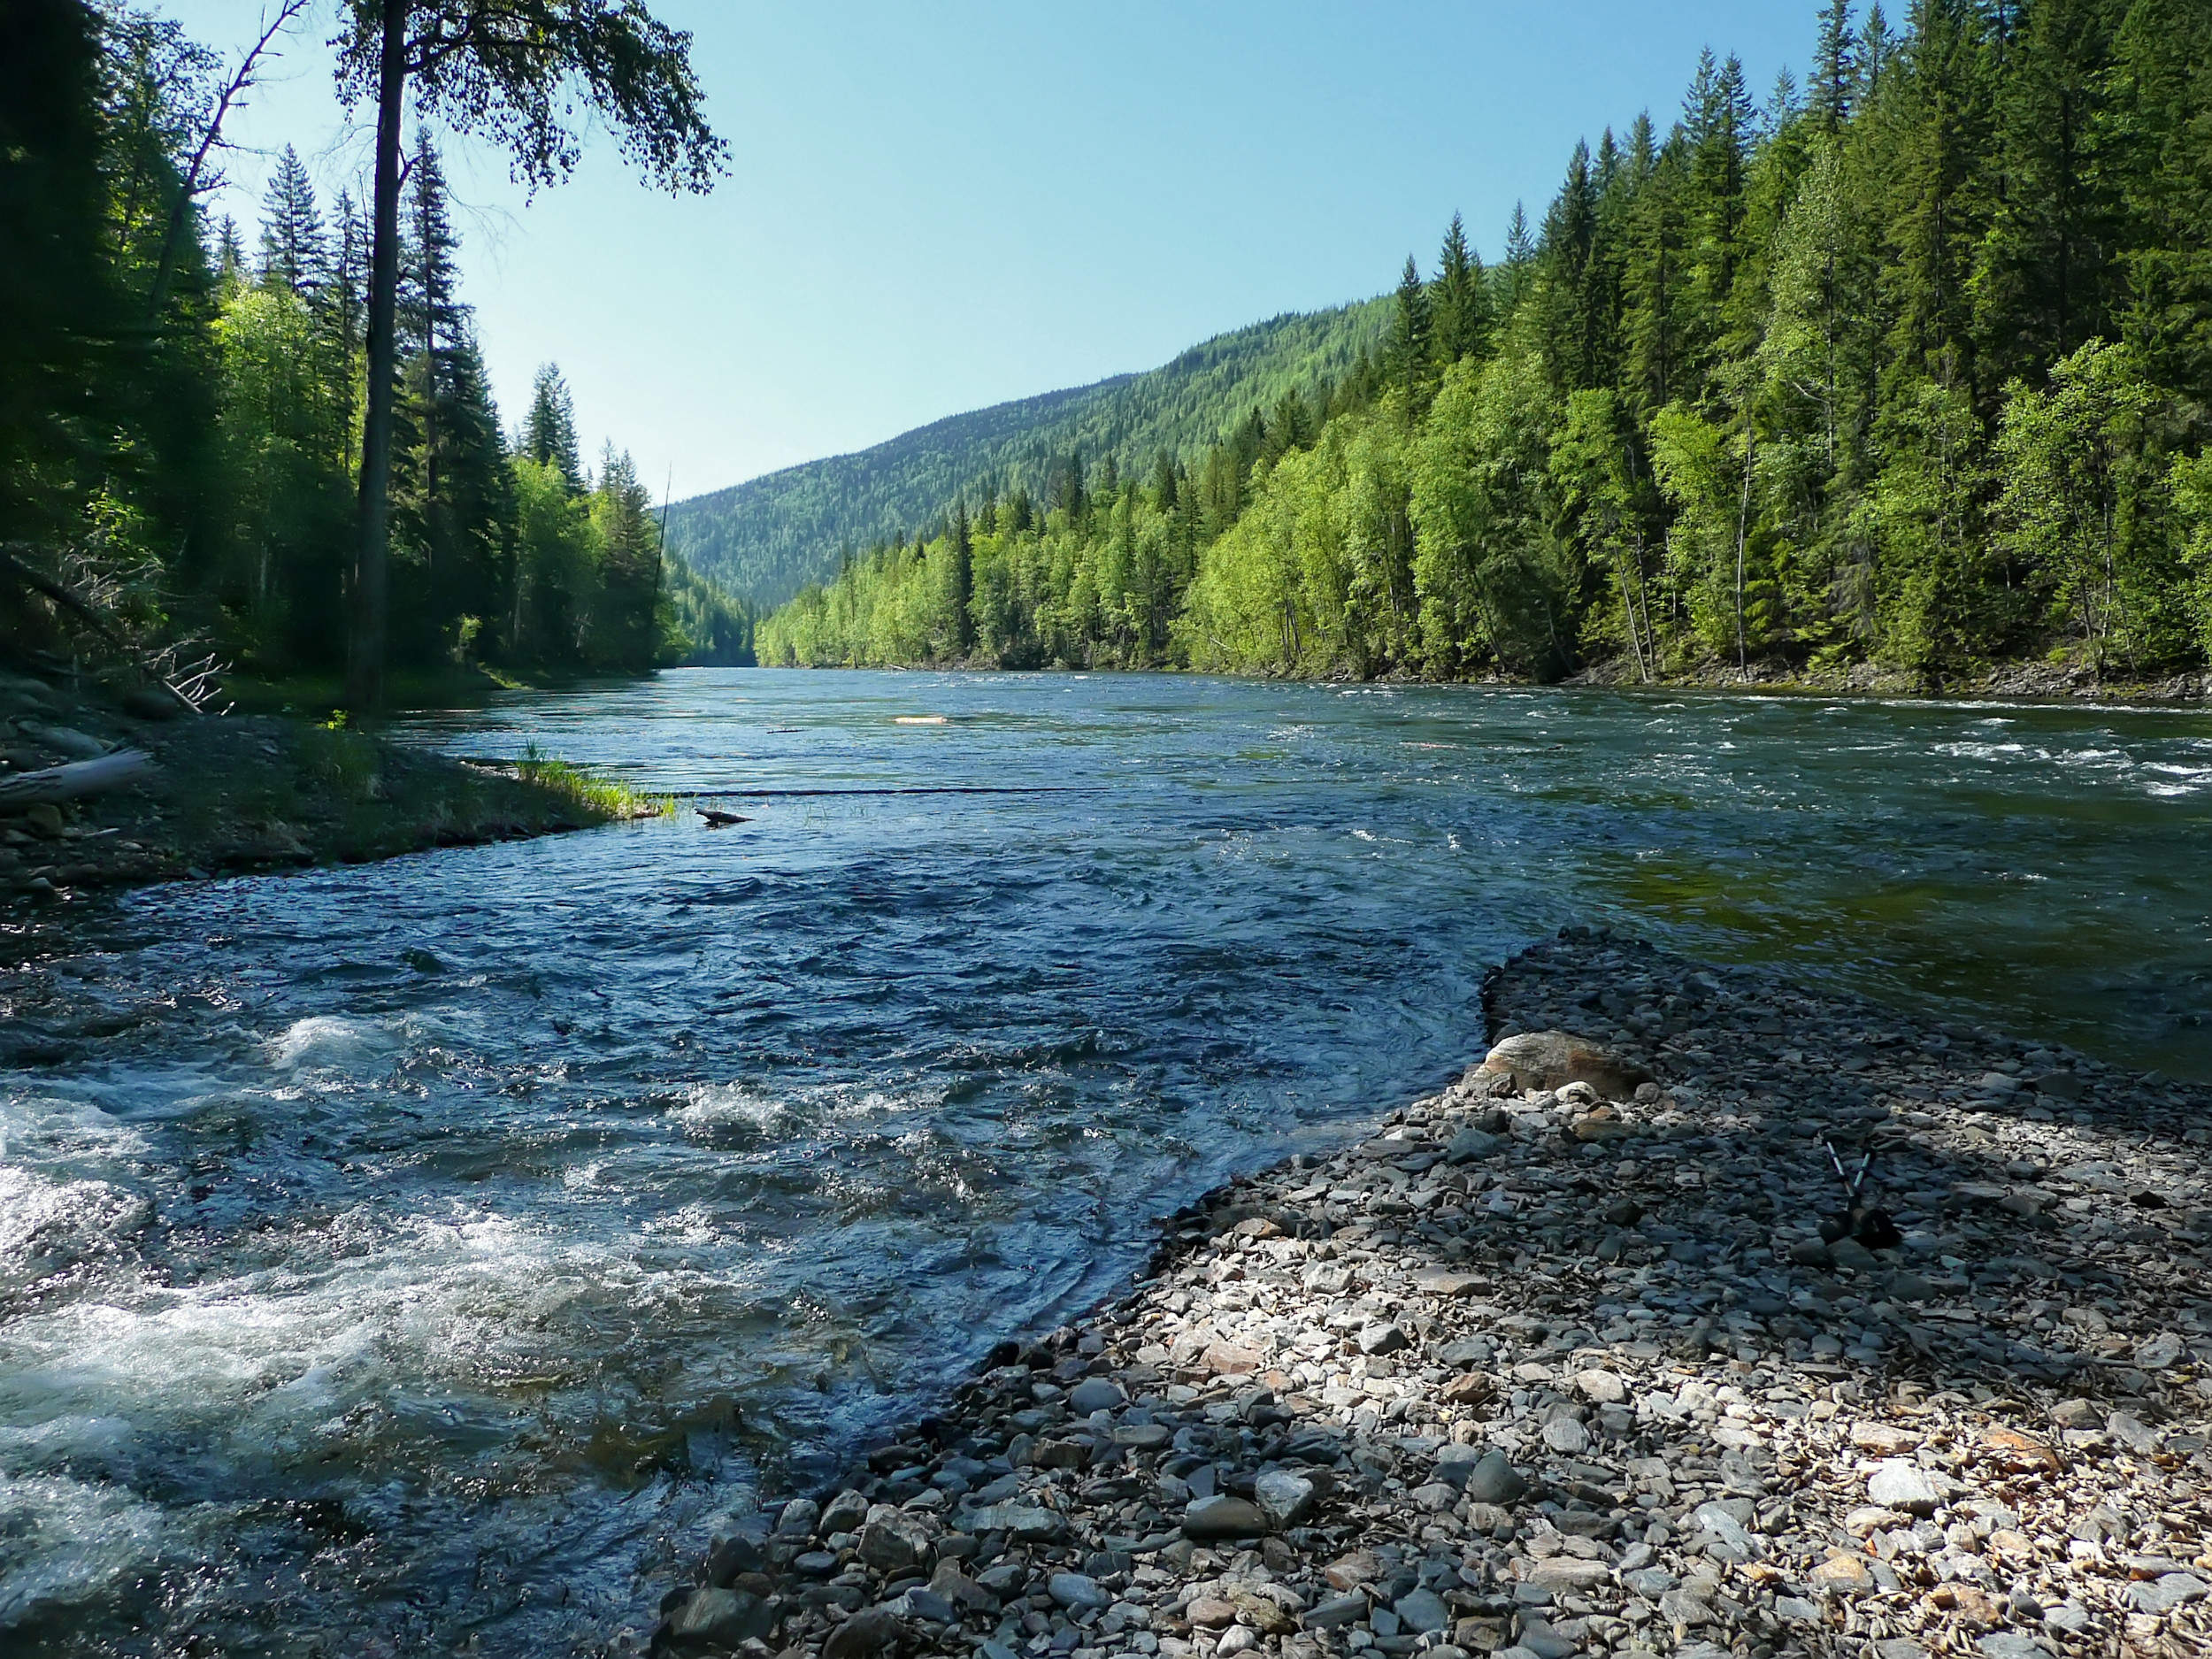
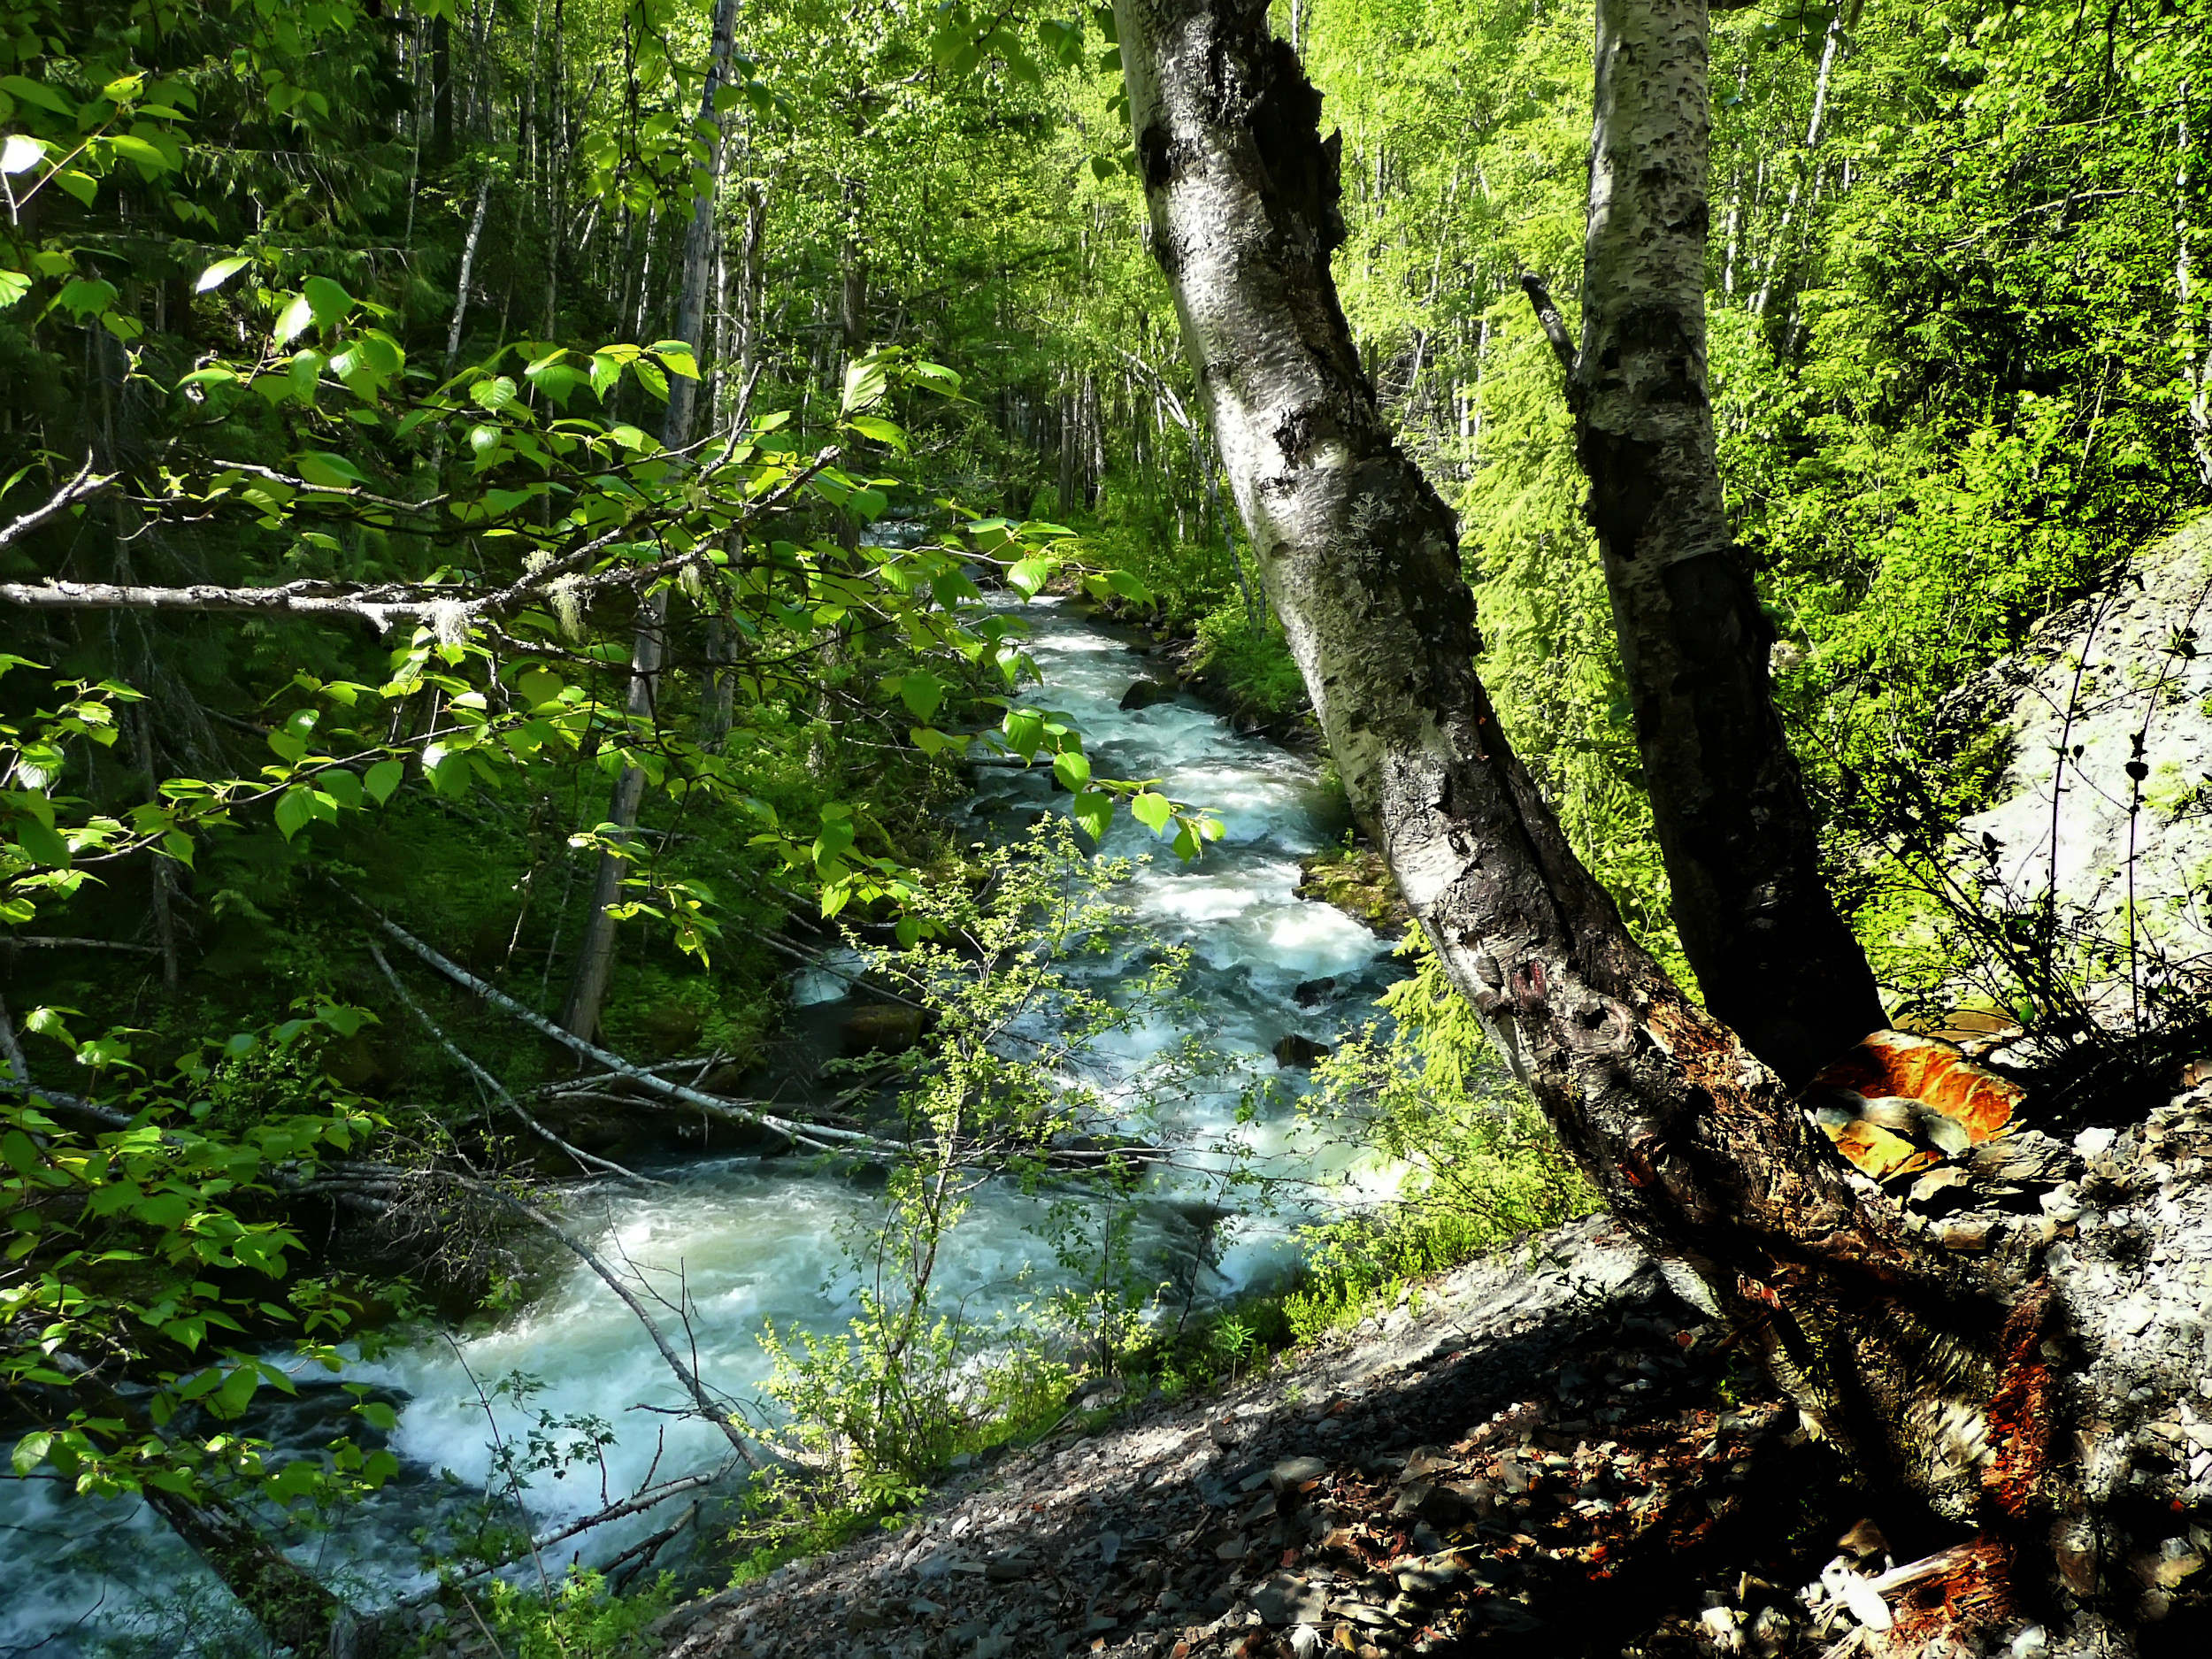
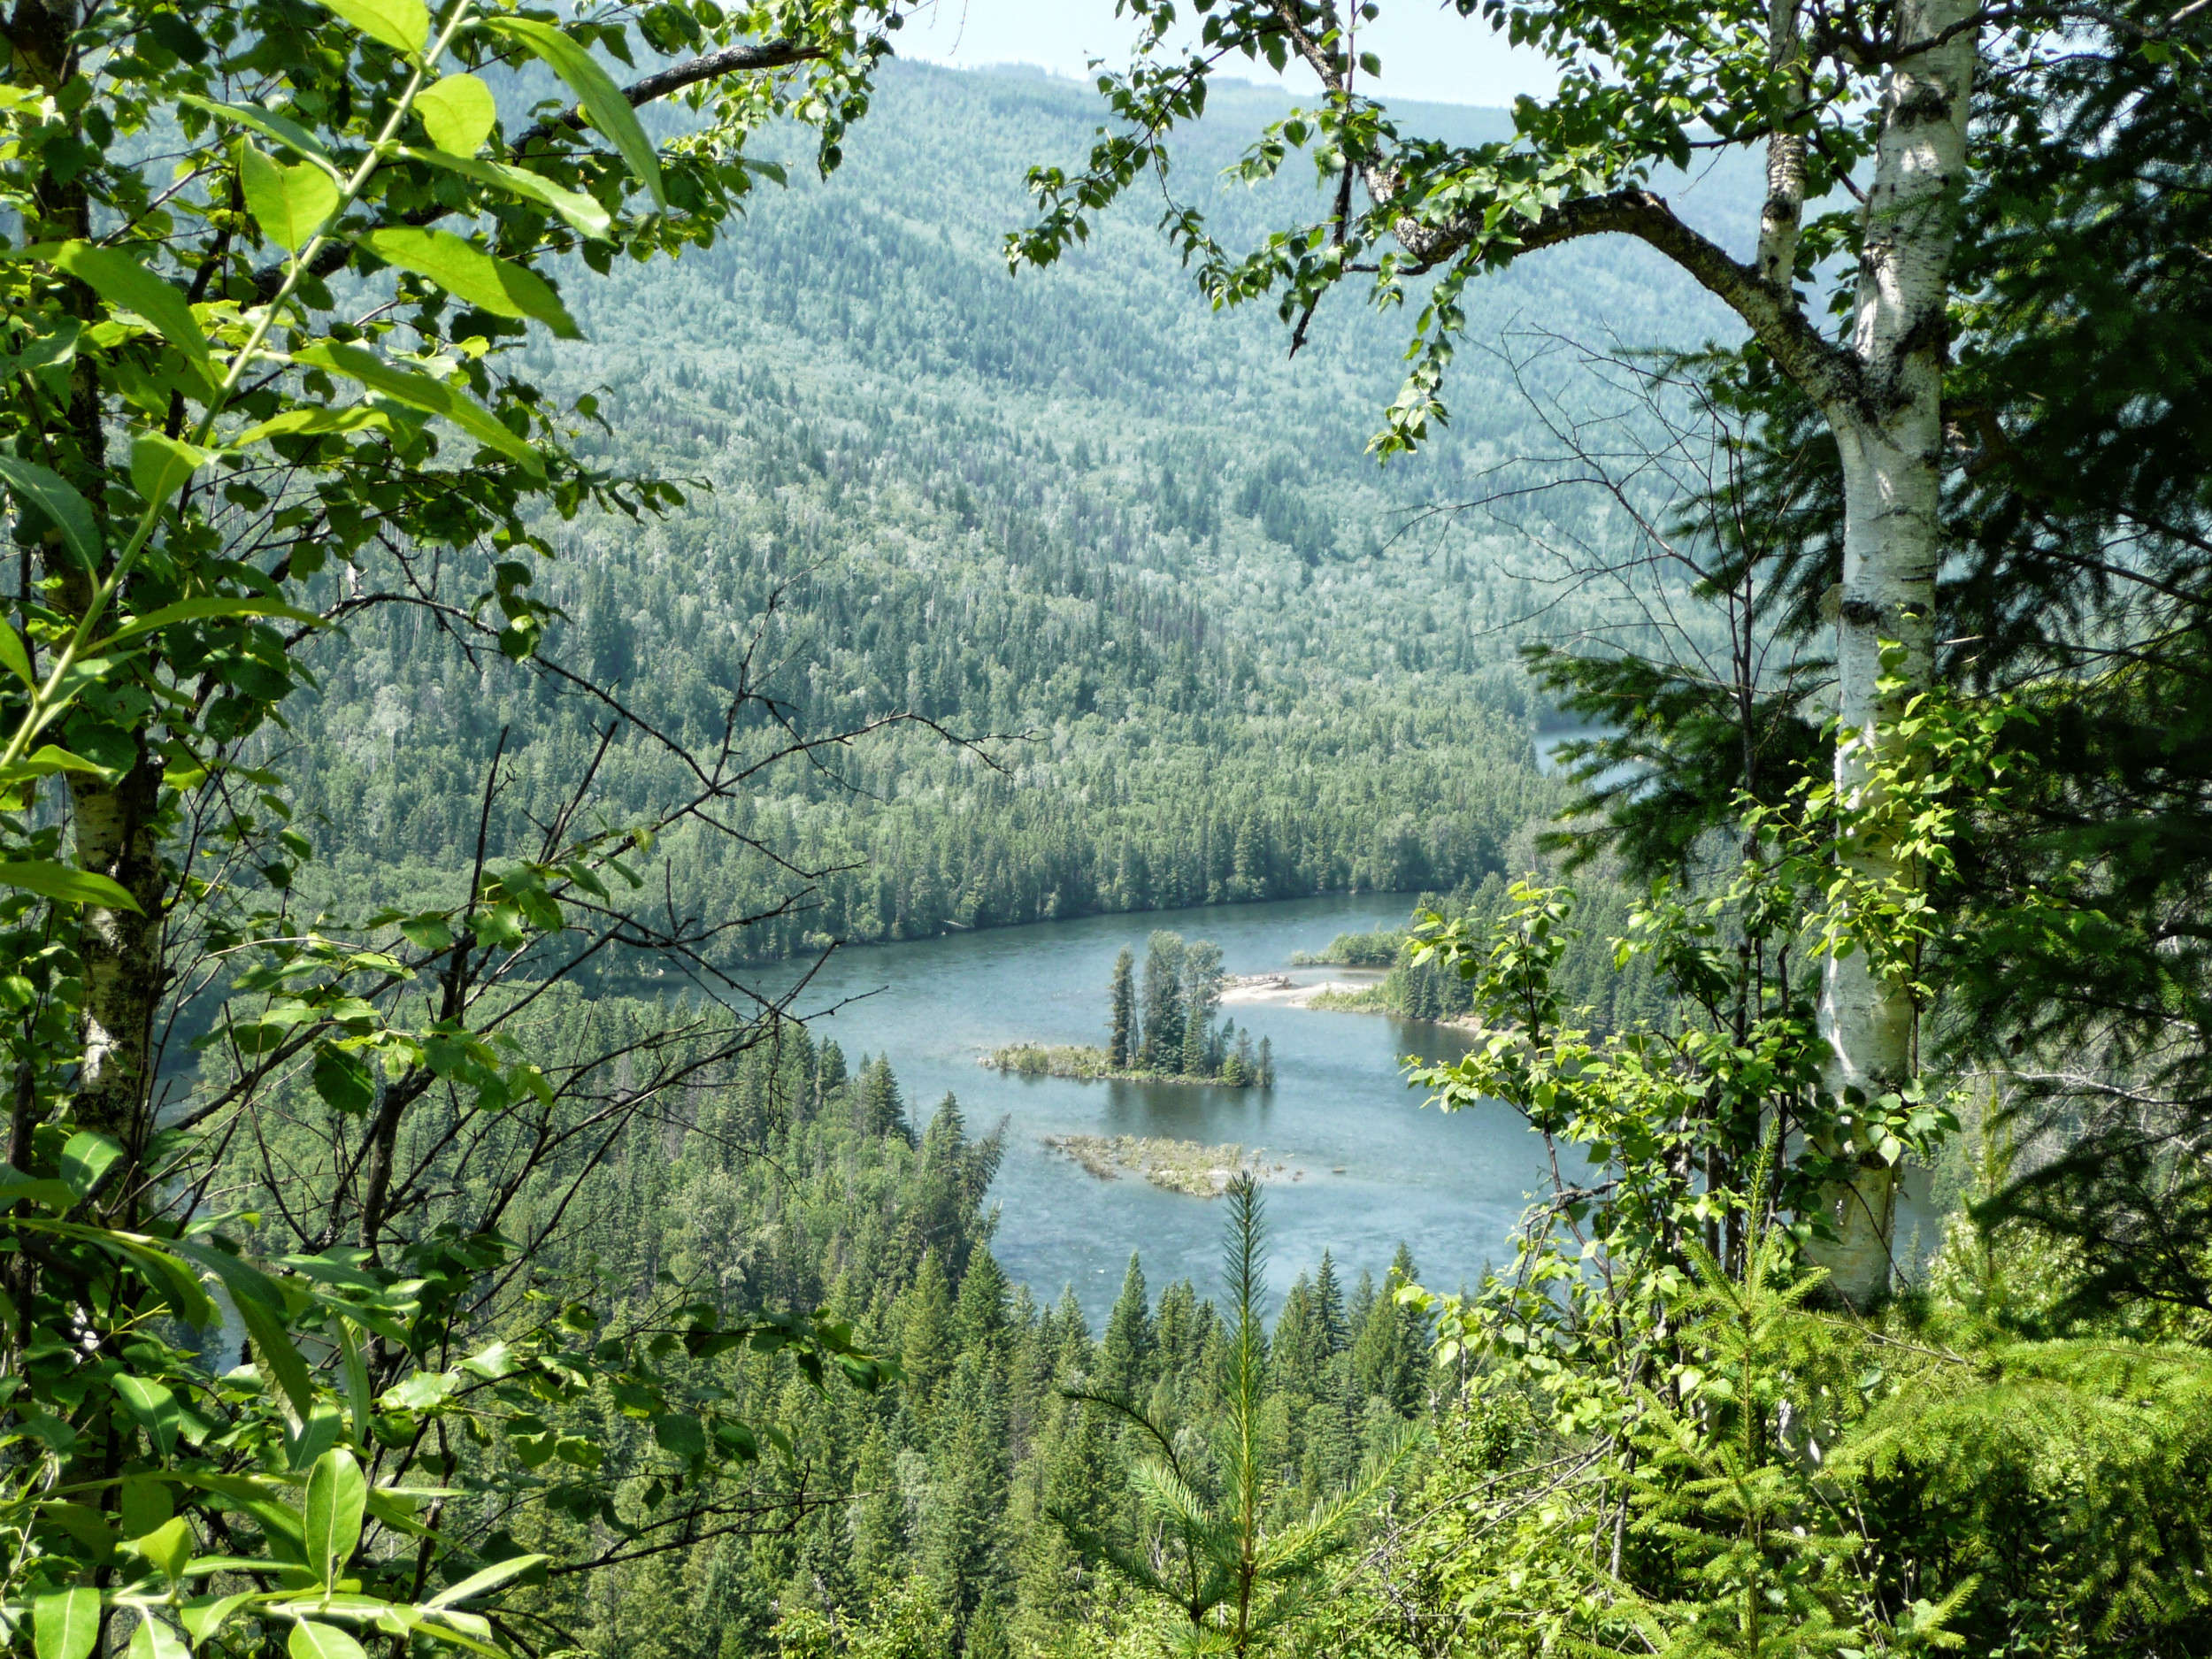
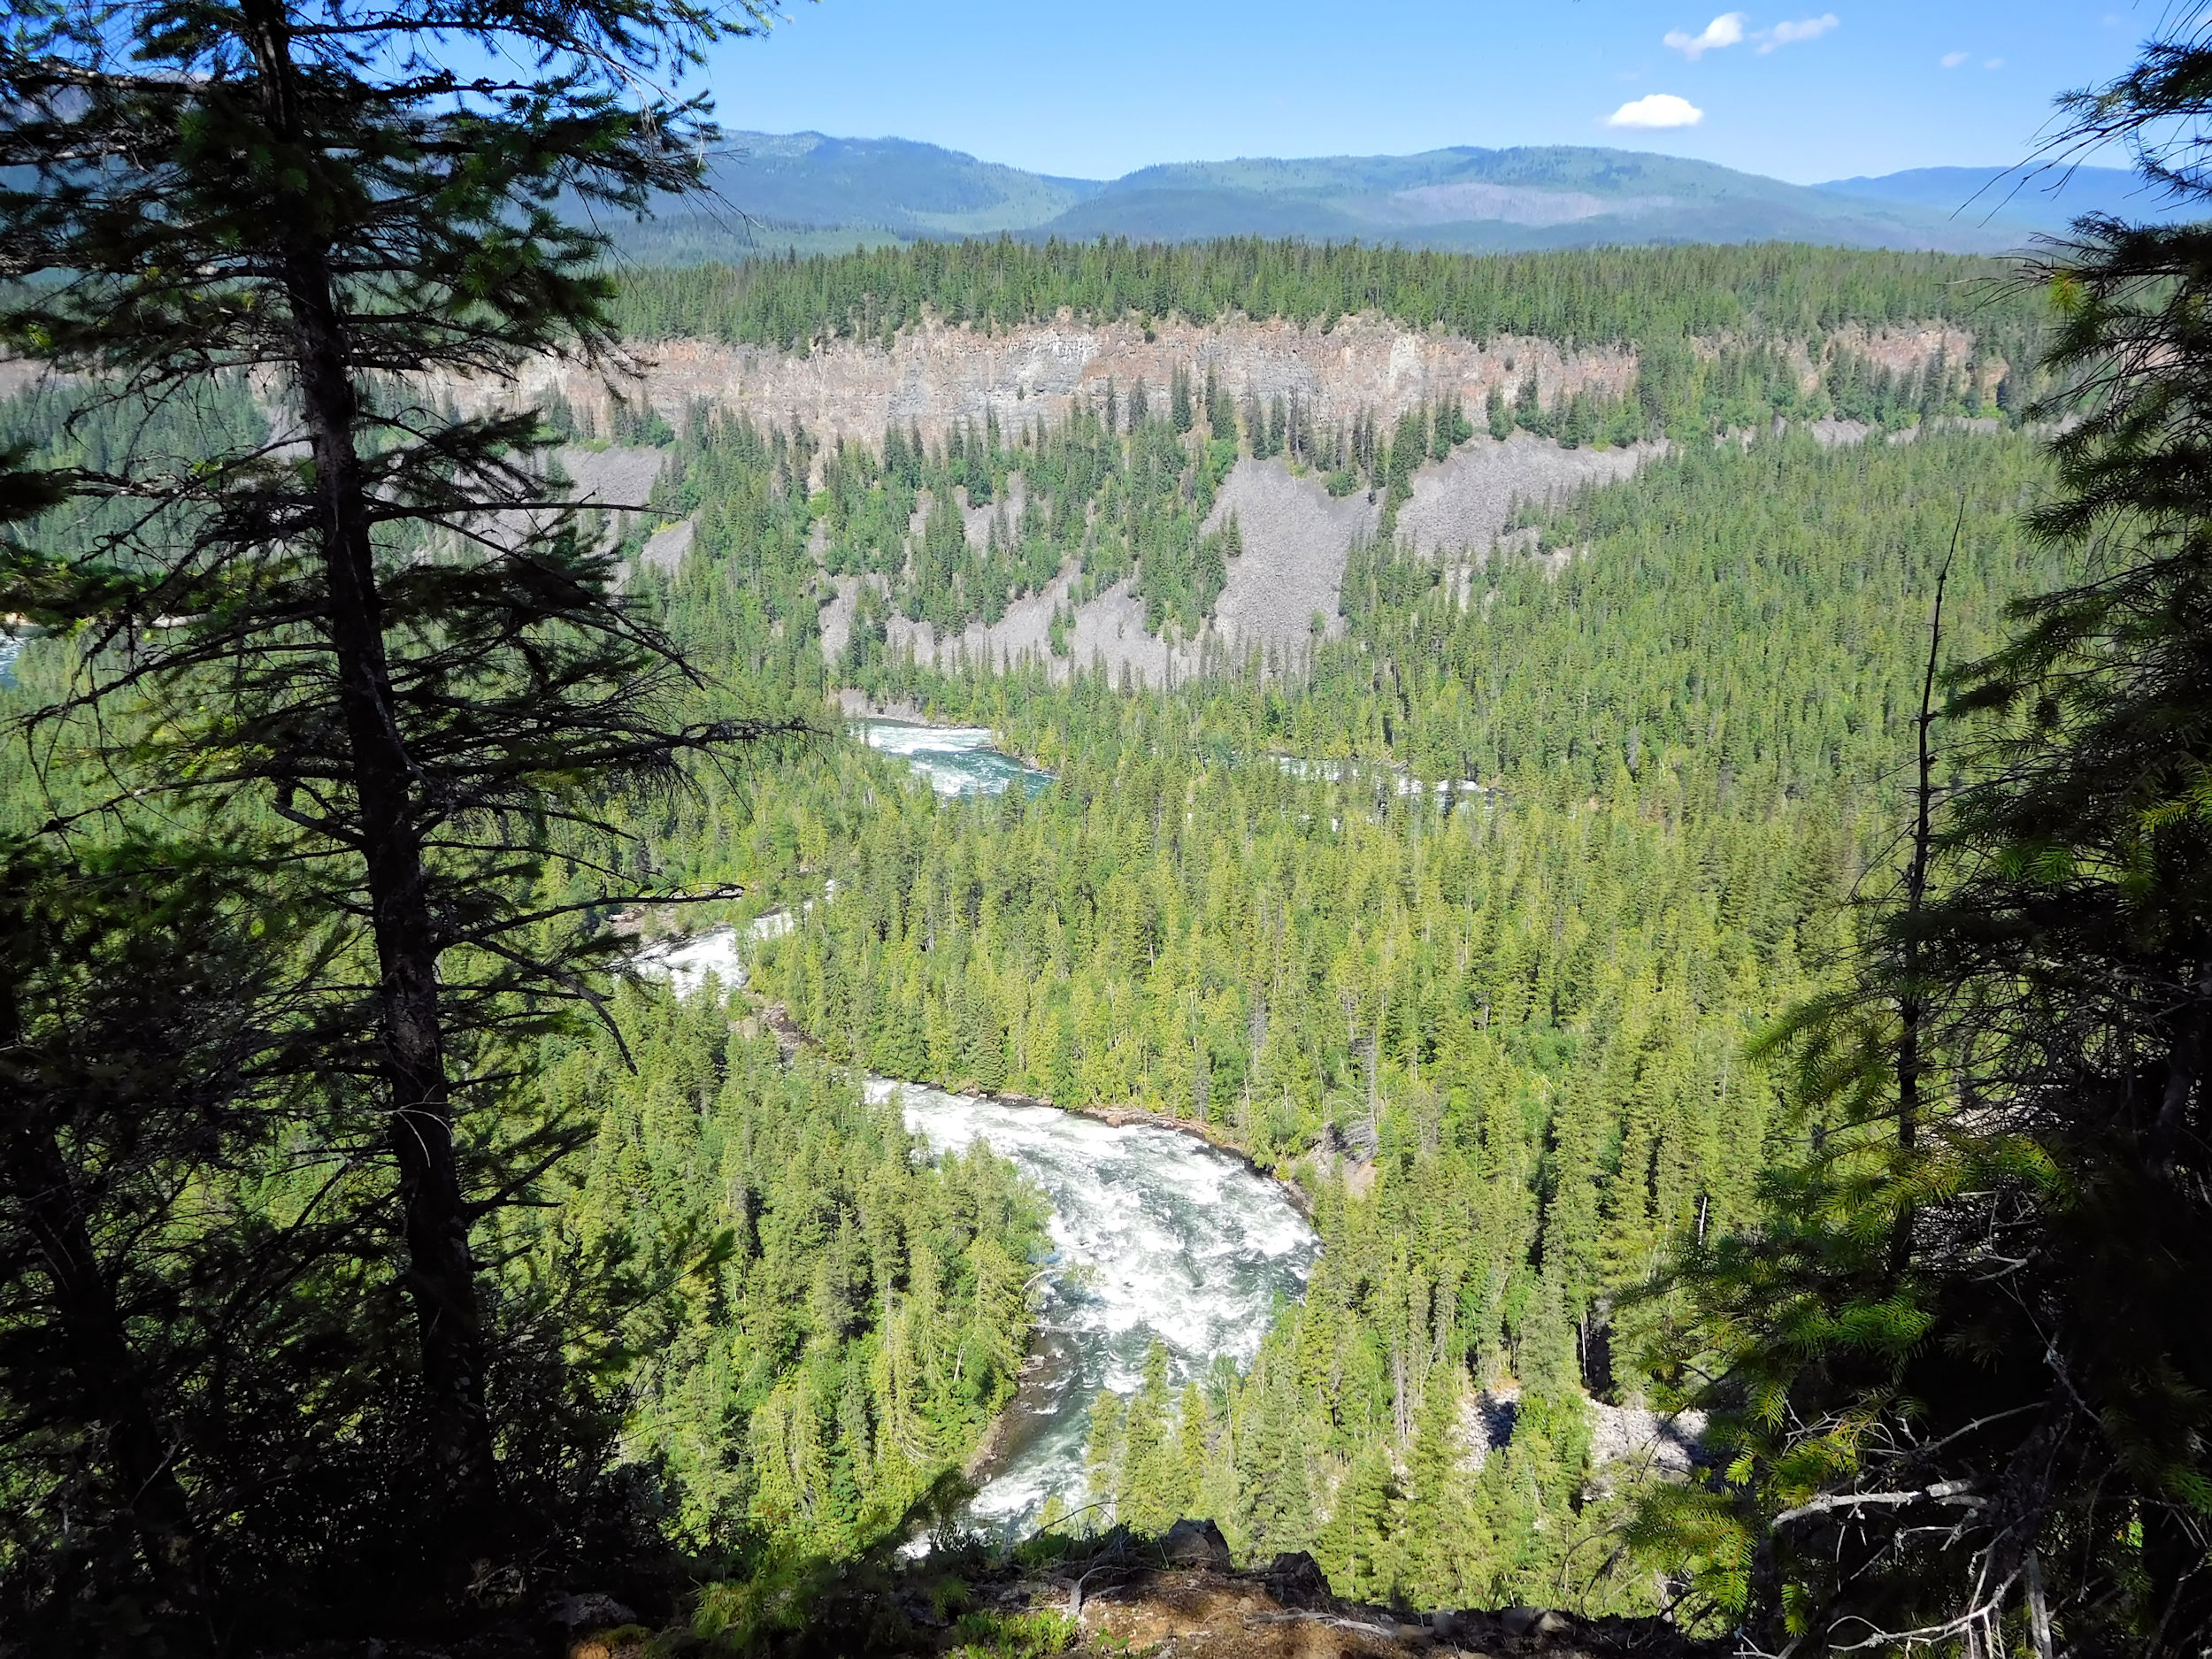
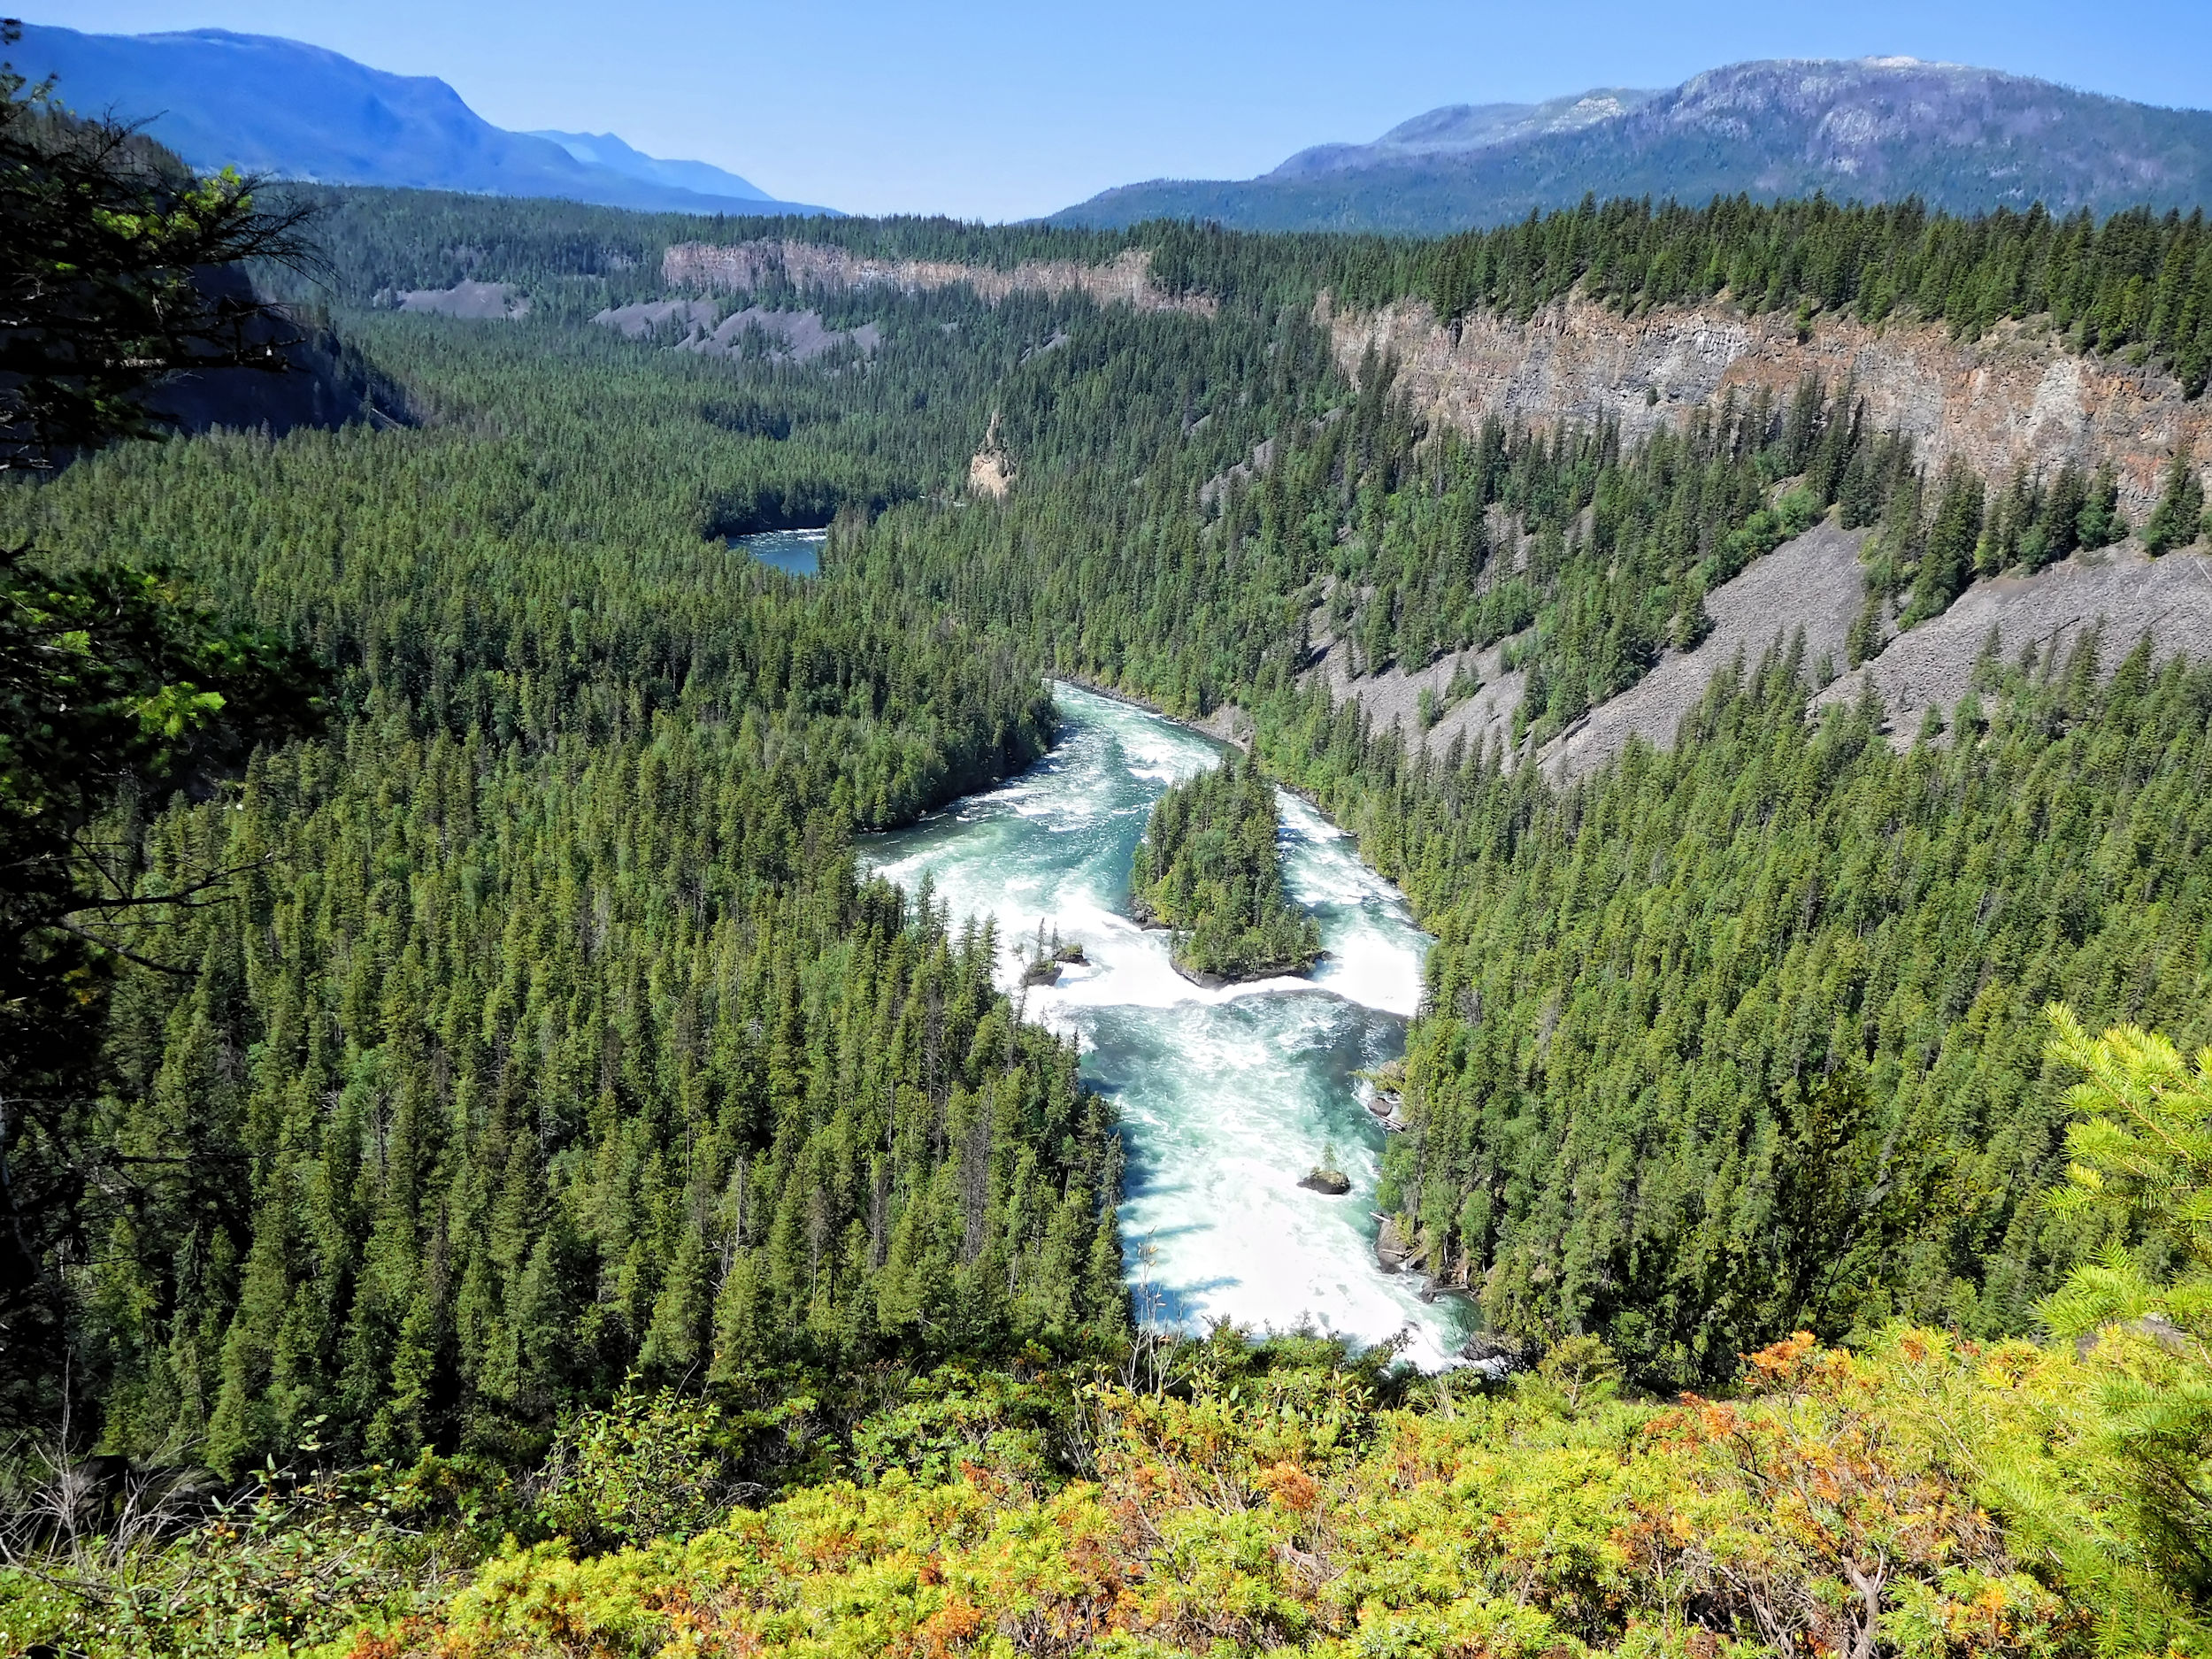
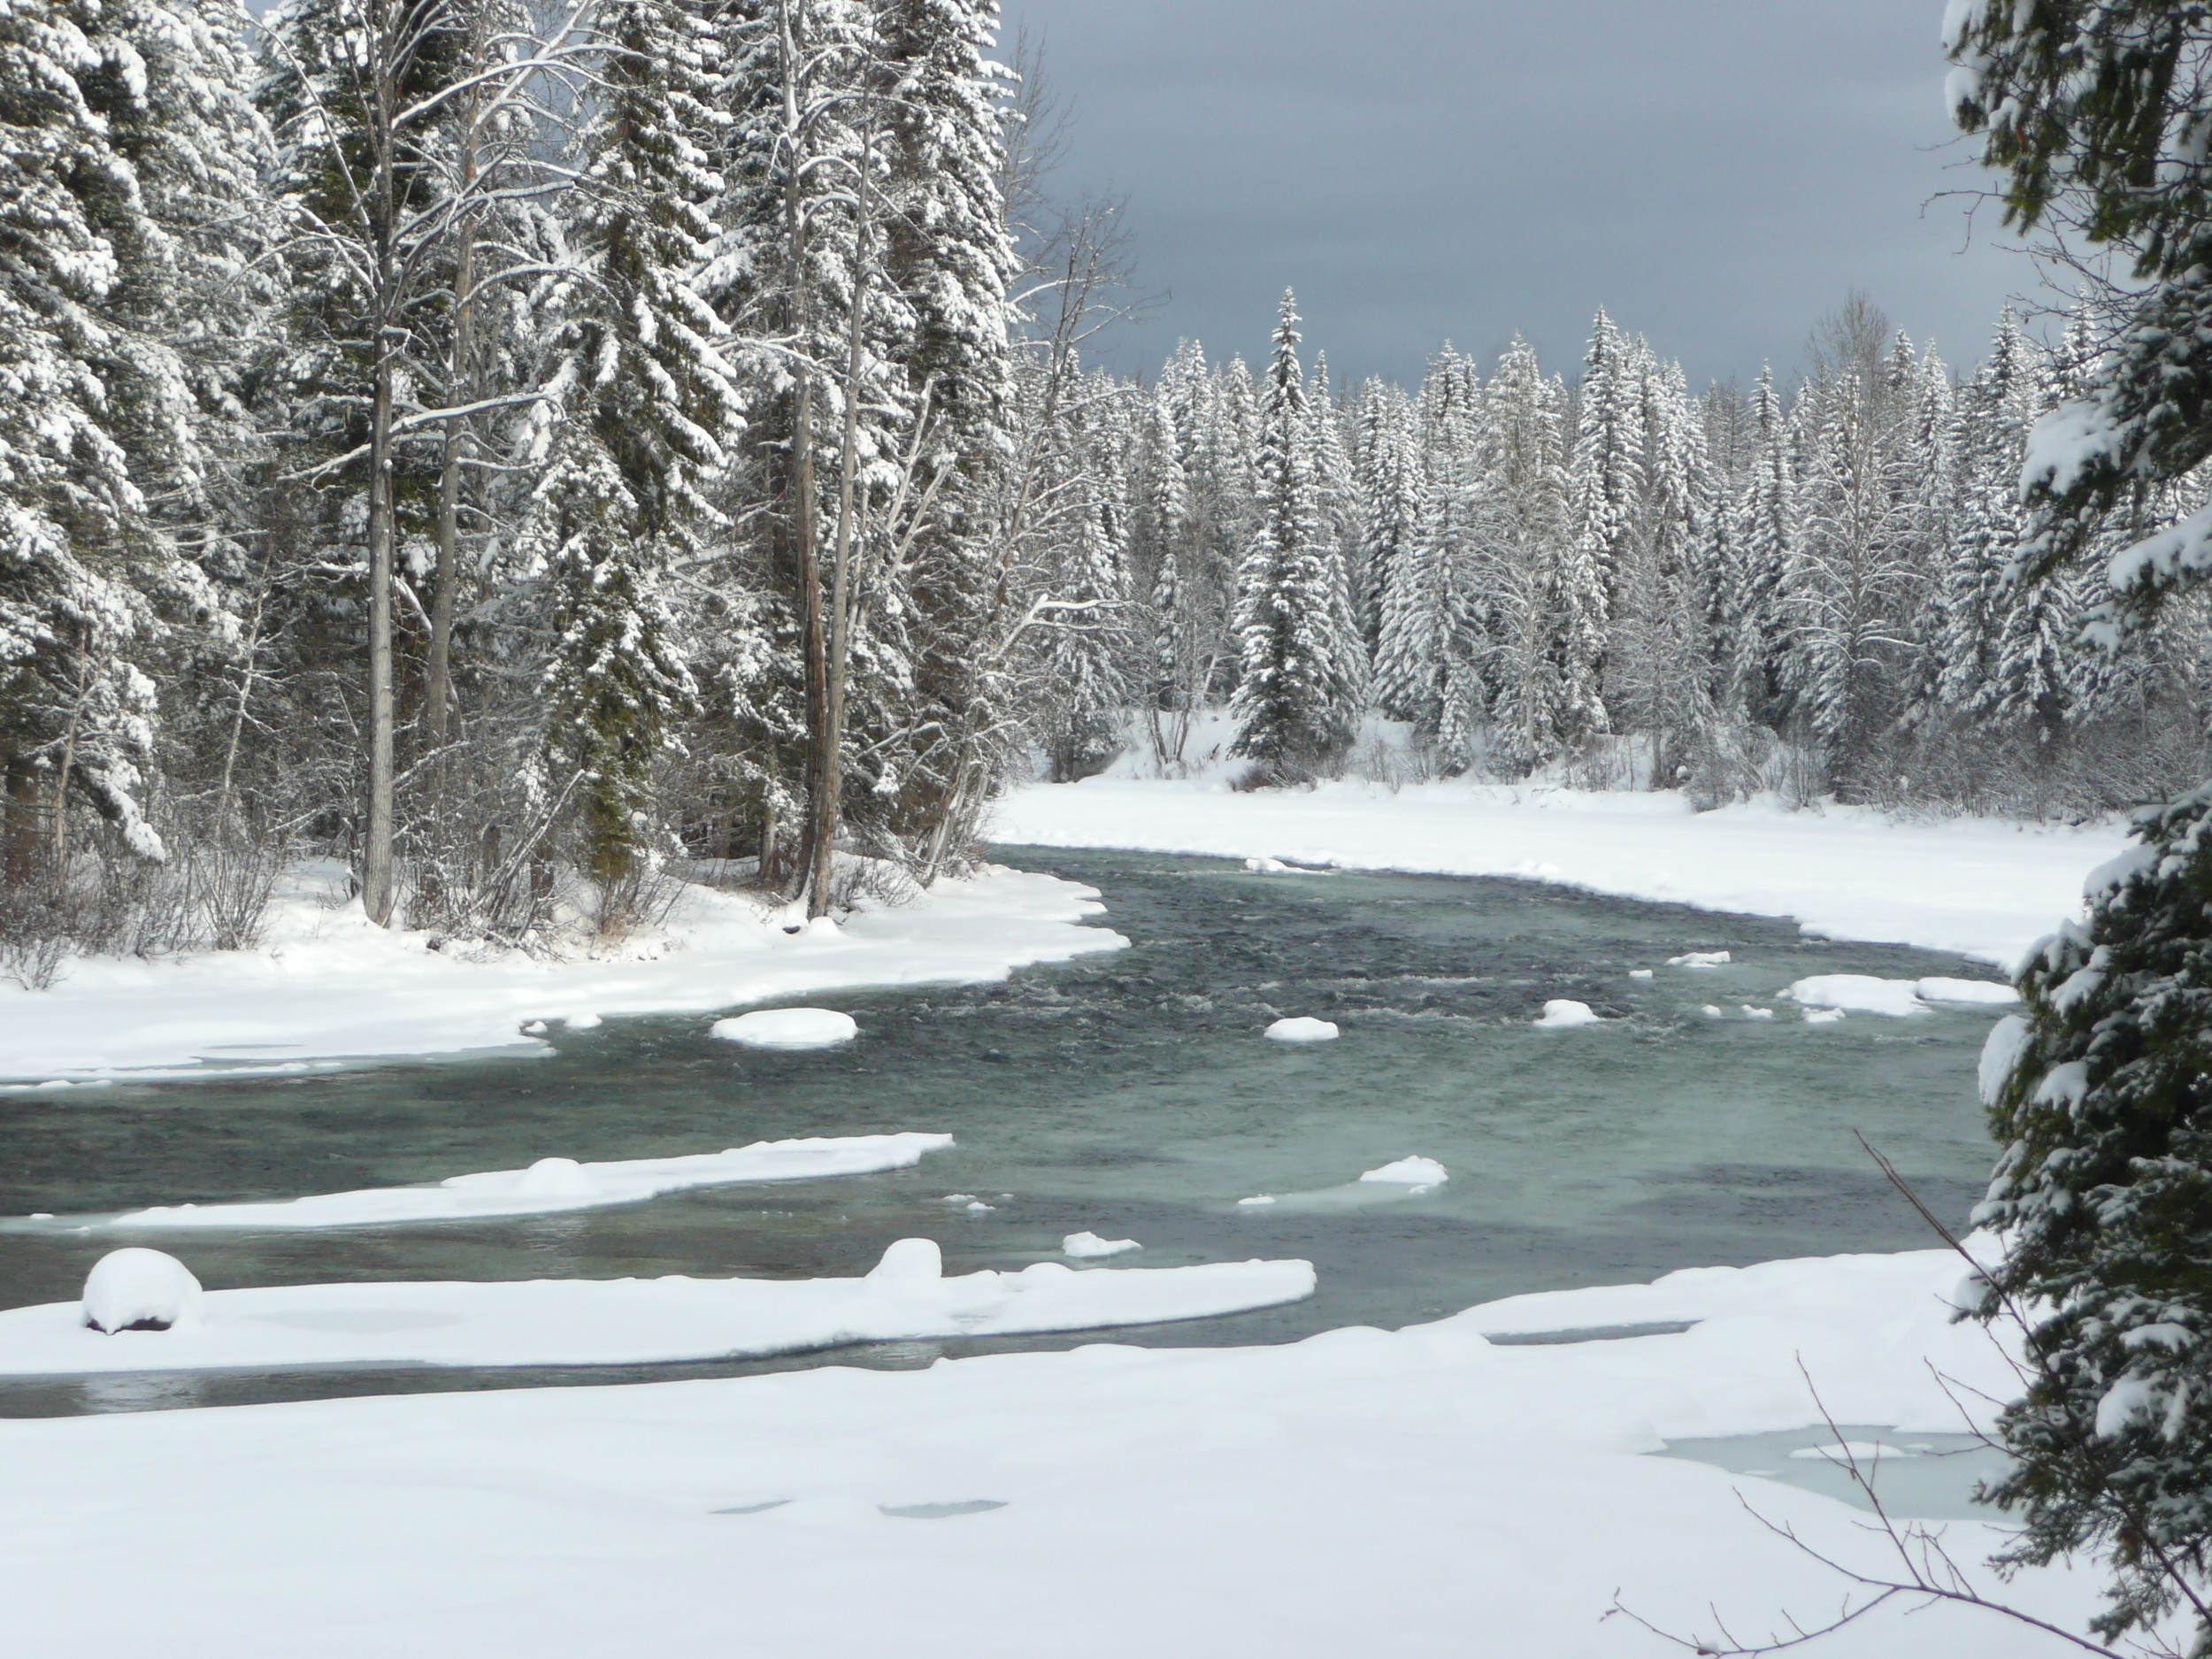
Clearwater River in Wells Gray Provincial Park
From its source in the Cariboo Mountains, the Clearwater River flows 200 kilometers southward to its confluence with the North Thompson River near the village of Clearwater. Almost its entire course is located within Wells Gray Provincial Park. In the north of the park the Clearwater River flows through two large lakes, Hobson and Clearwater Lake. Some of its many tributaries are Hobson Creek, Azure River, Murtle River, Mahood River, Hemp Creek, Grouse Creek and Spahats Creek.
The Clearwater River Trail follows the river’s eastern shore and is easily accessible from the Clearwater Valley Road, the well maintained road through the park. The trail is quite steep at times because of the cliffs that the river cuts through. Other trails further north in the park lead to the river as well.
The western shore of the Clearwater River can be accessed on a rough gravel road. It offers entry points for white water rafting on the turbulent river. The road ends at the deactivated bridge across the Mahood River near kilometer 38. From here you can hike to Mahood Lake and visit some waterfalls on the way. The Clearwater River Road is very rough at best and often damaged by spring floods and falling rocks. Thanks to the rafting companies it gets fixed once in a while. Since a mayor washout in 2020 it has been closed and its future remains uncertain.
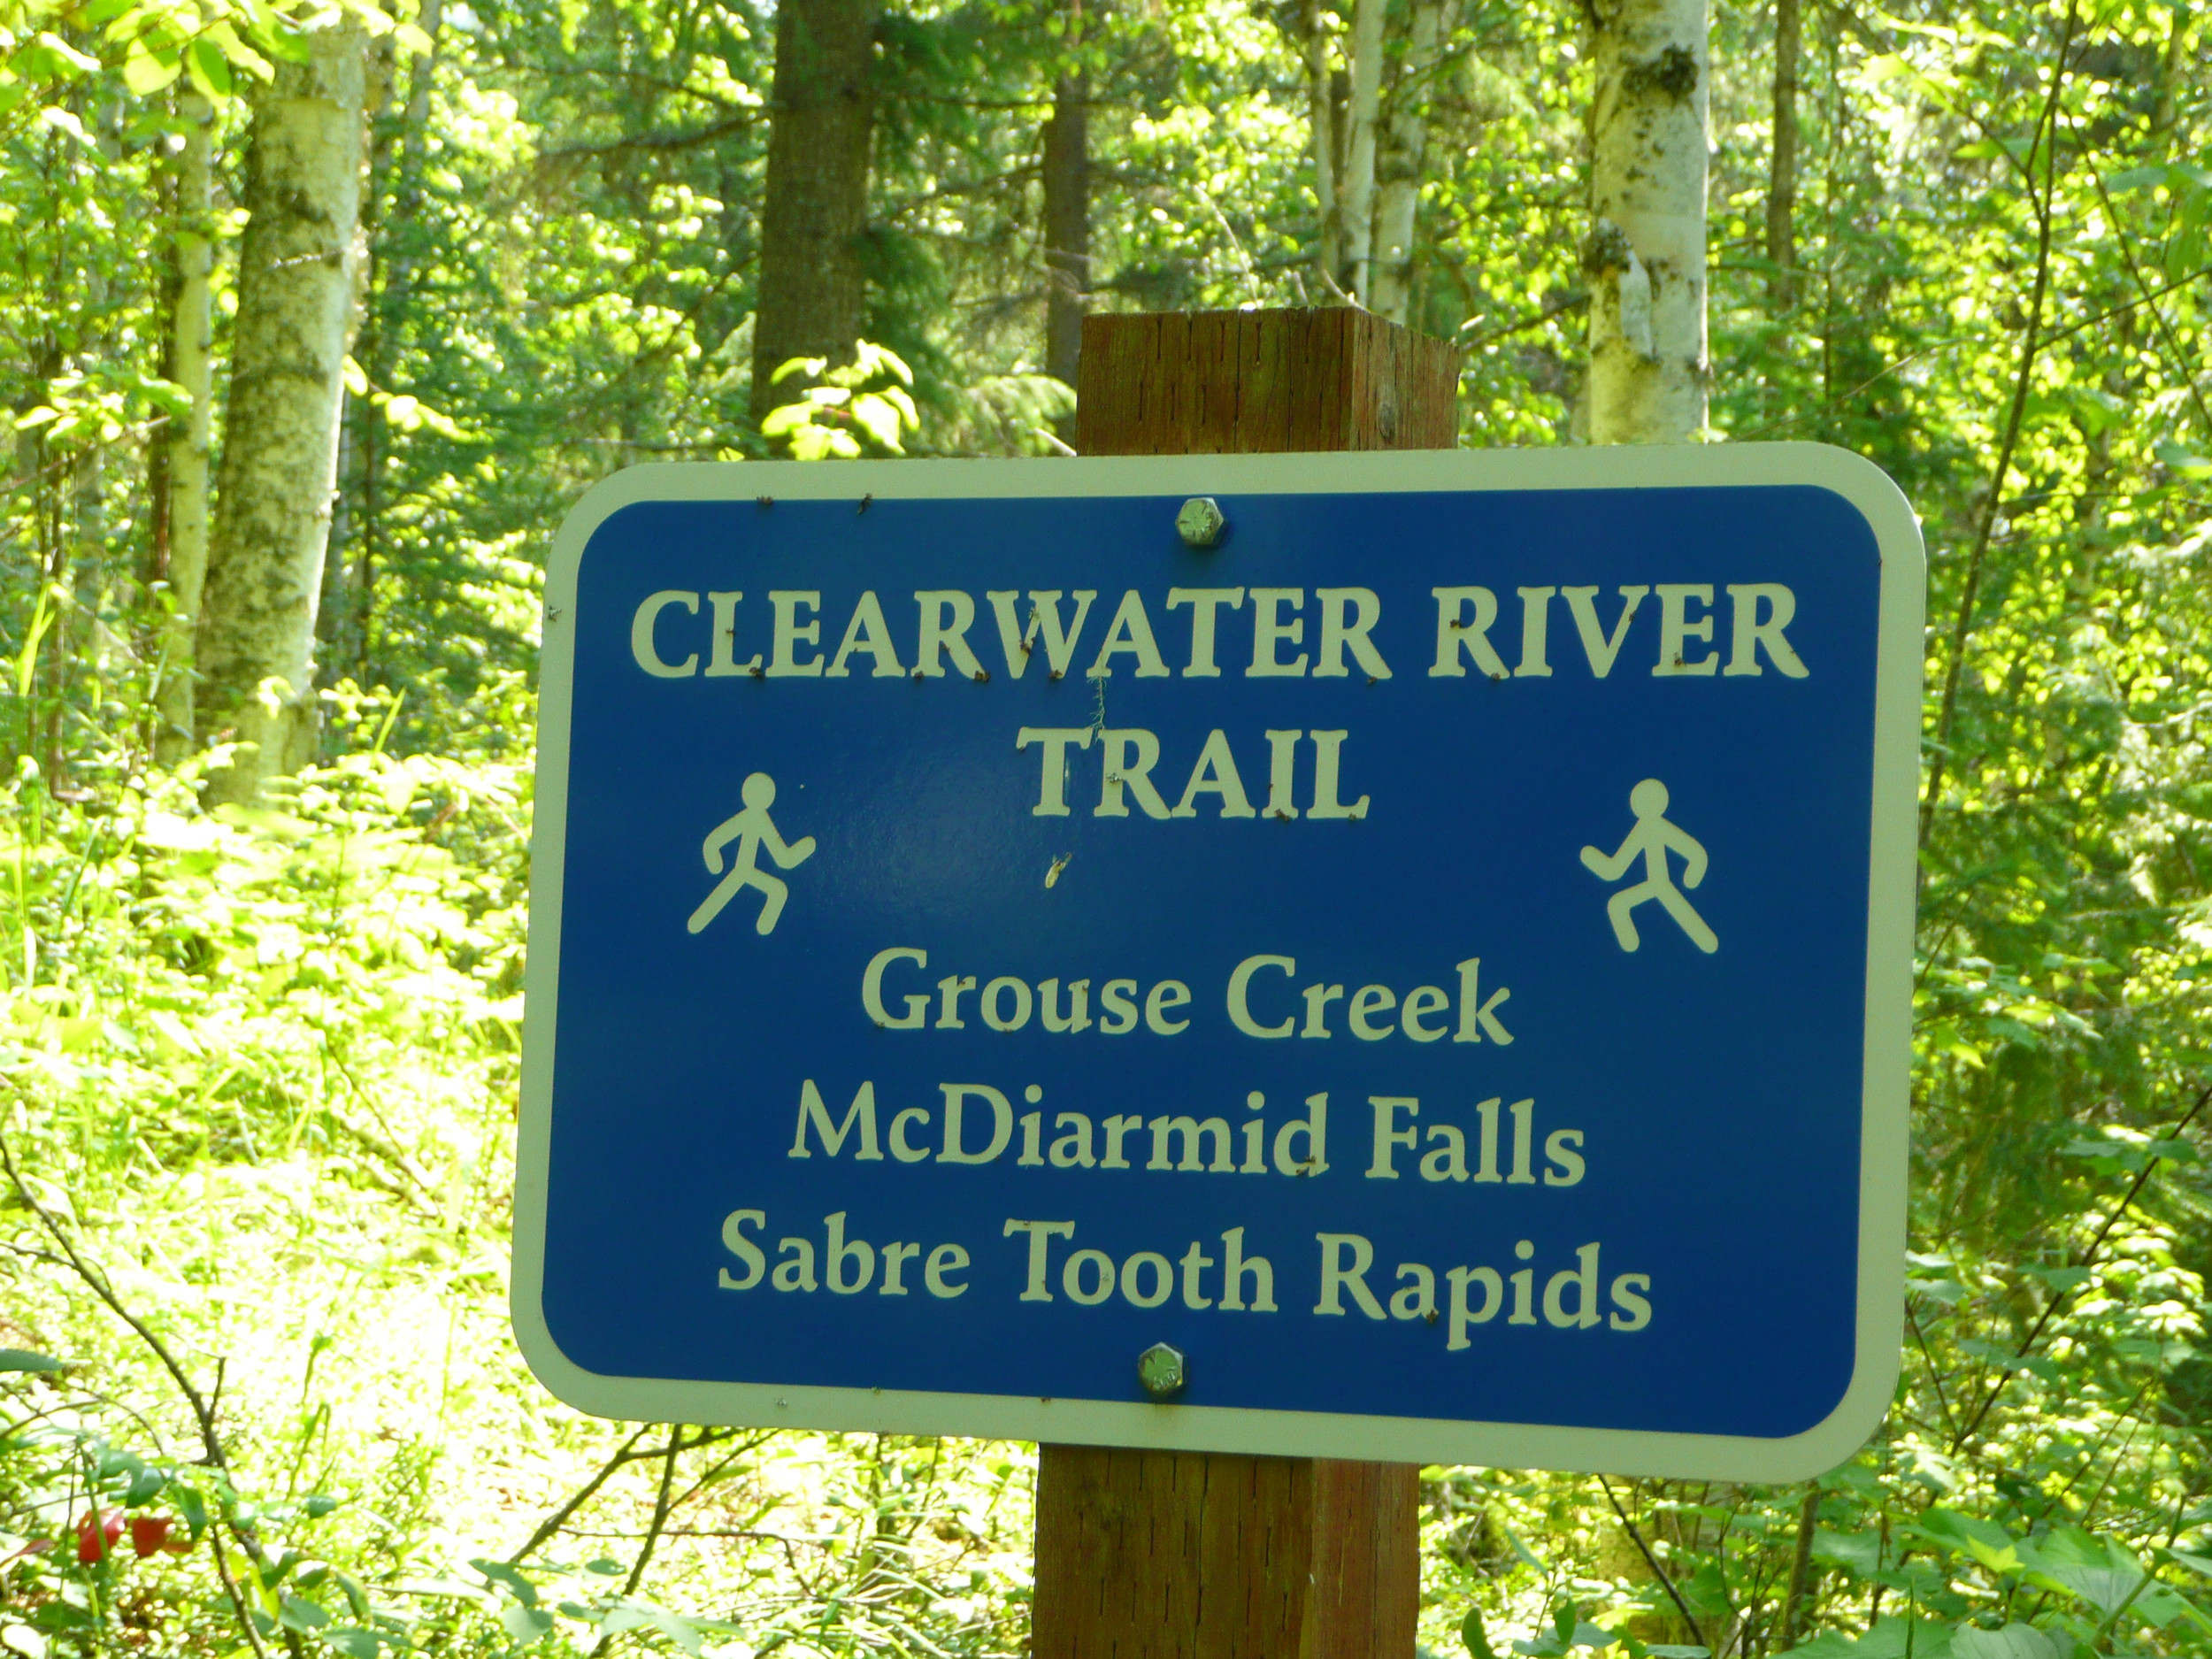
The Clearwater River Trail follows the eastern shore of the Clearwater River. The trail has several access points along the Clearwater Valley Road. In the early 1990s it was possible to hike the entire 17 kilometers from Dutch Lake in the village of Clearwater to Third Canyon. However, some sections have become impassable since.
| Distance | 7.4 km |
| Time | 2 ¼ hrs |
| Incl. Breaks | 3 hrs |
| Min. Elev. | 422 m |
| Max. Elev. | 659 m |
| Ascent or Descent | 237 m |
| Cum. Ascent or Descent | 399 m 618 m |
| Dates | 29/9/2010 03/8/2014 |
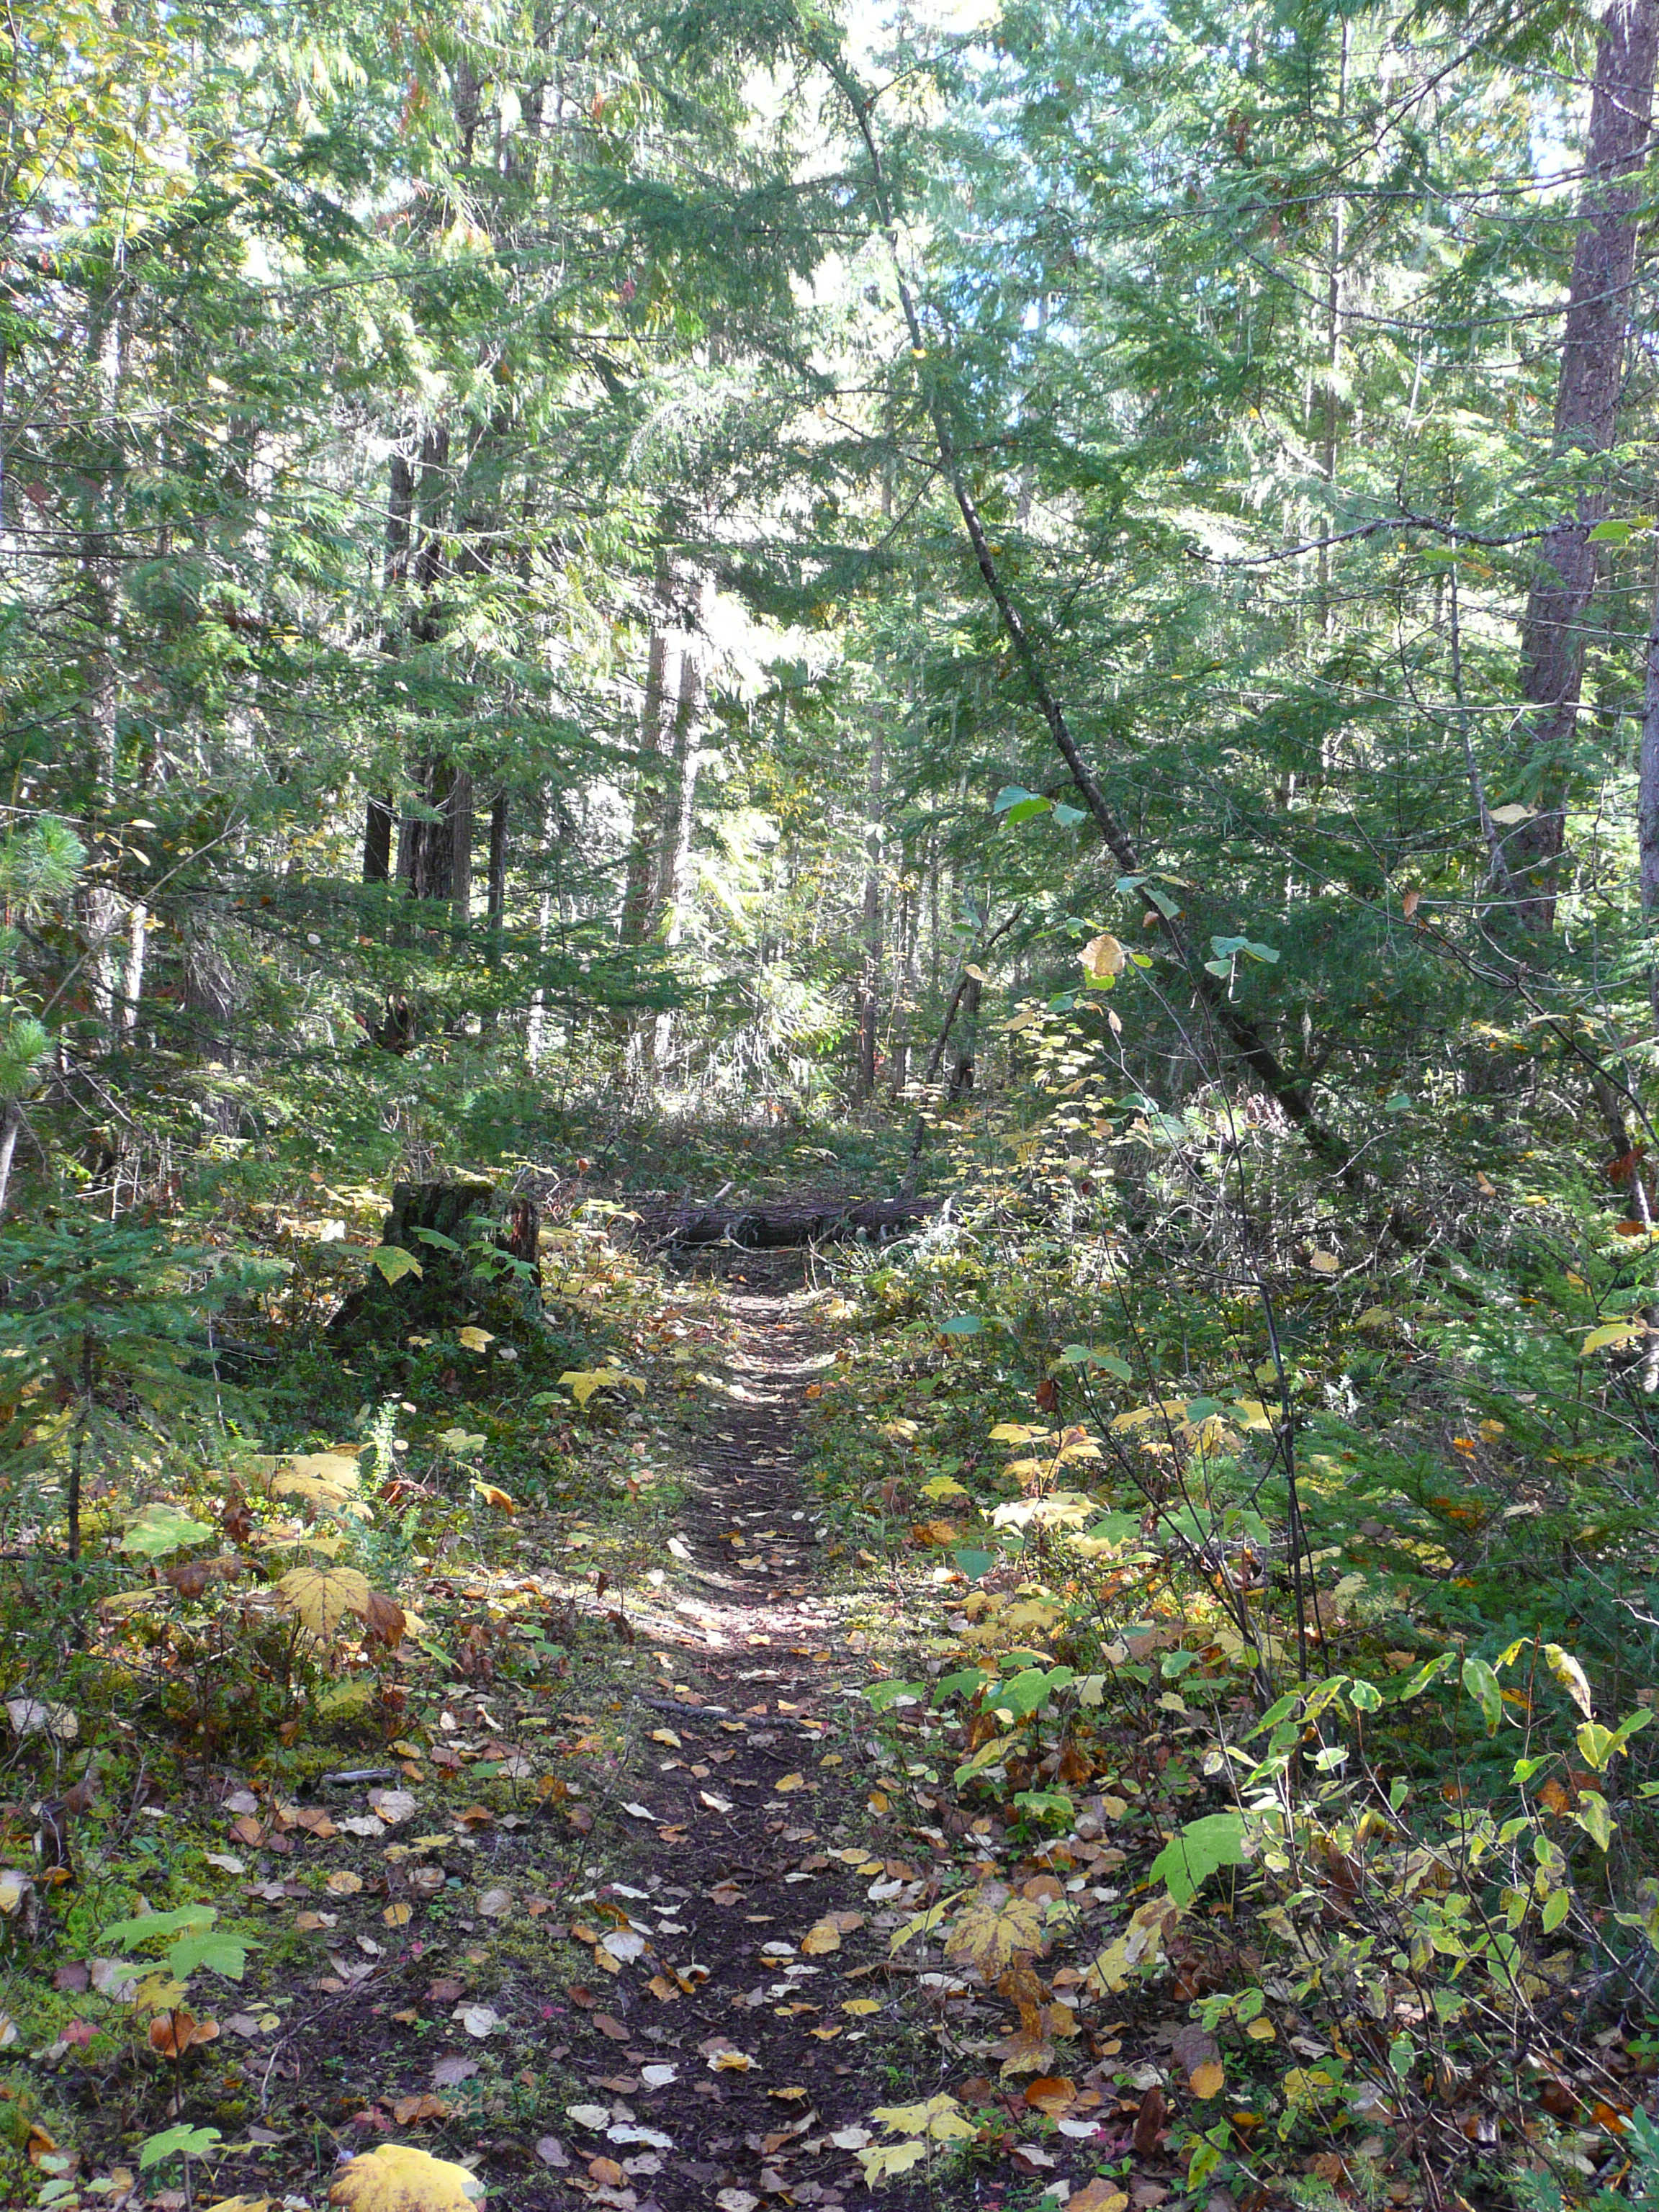
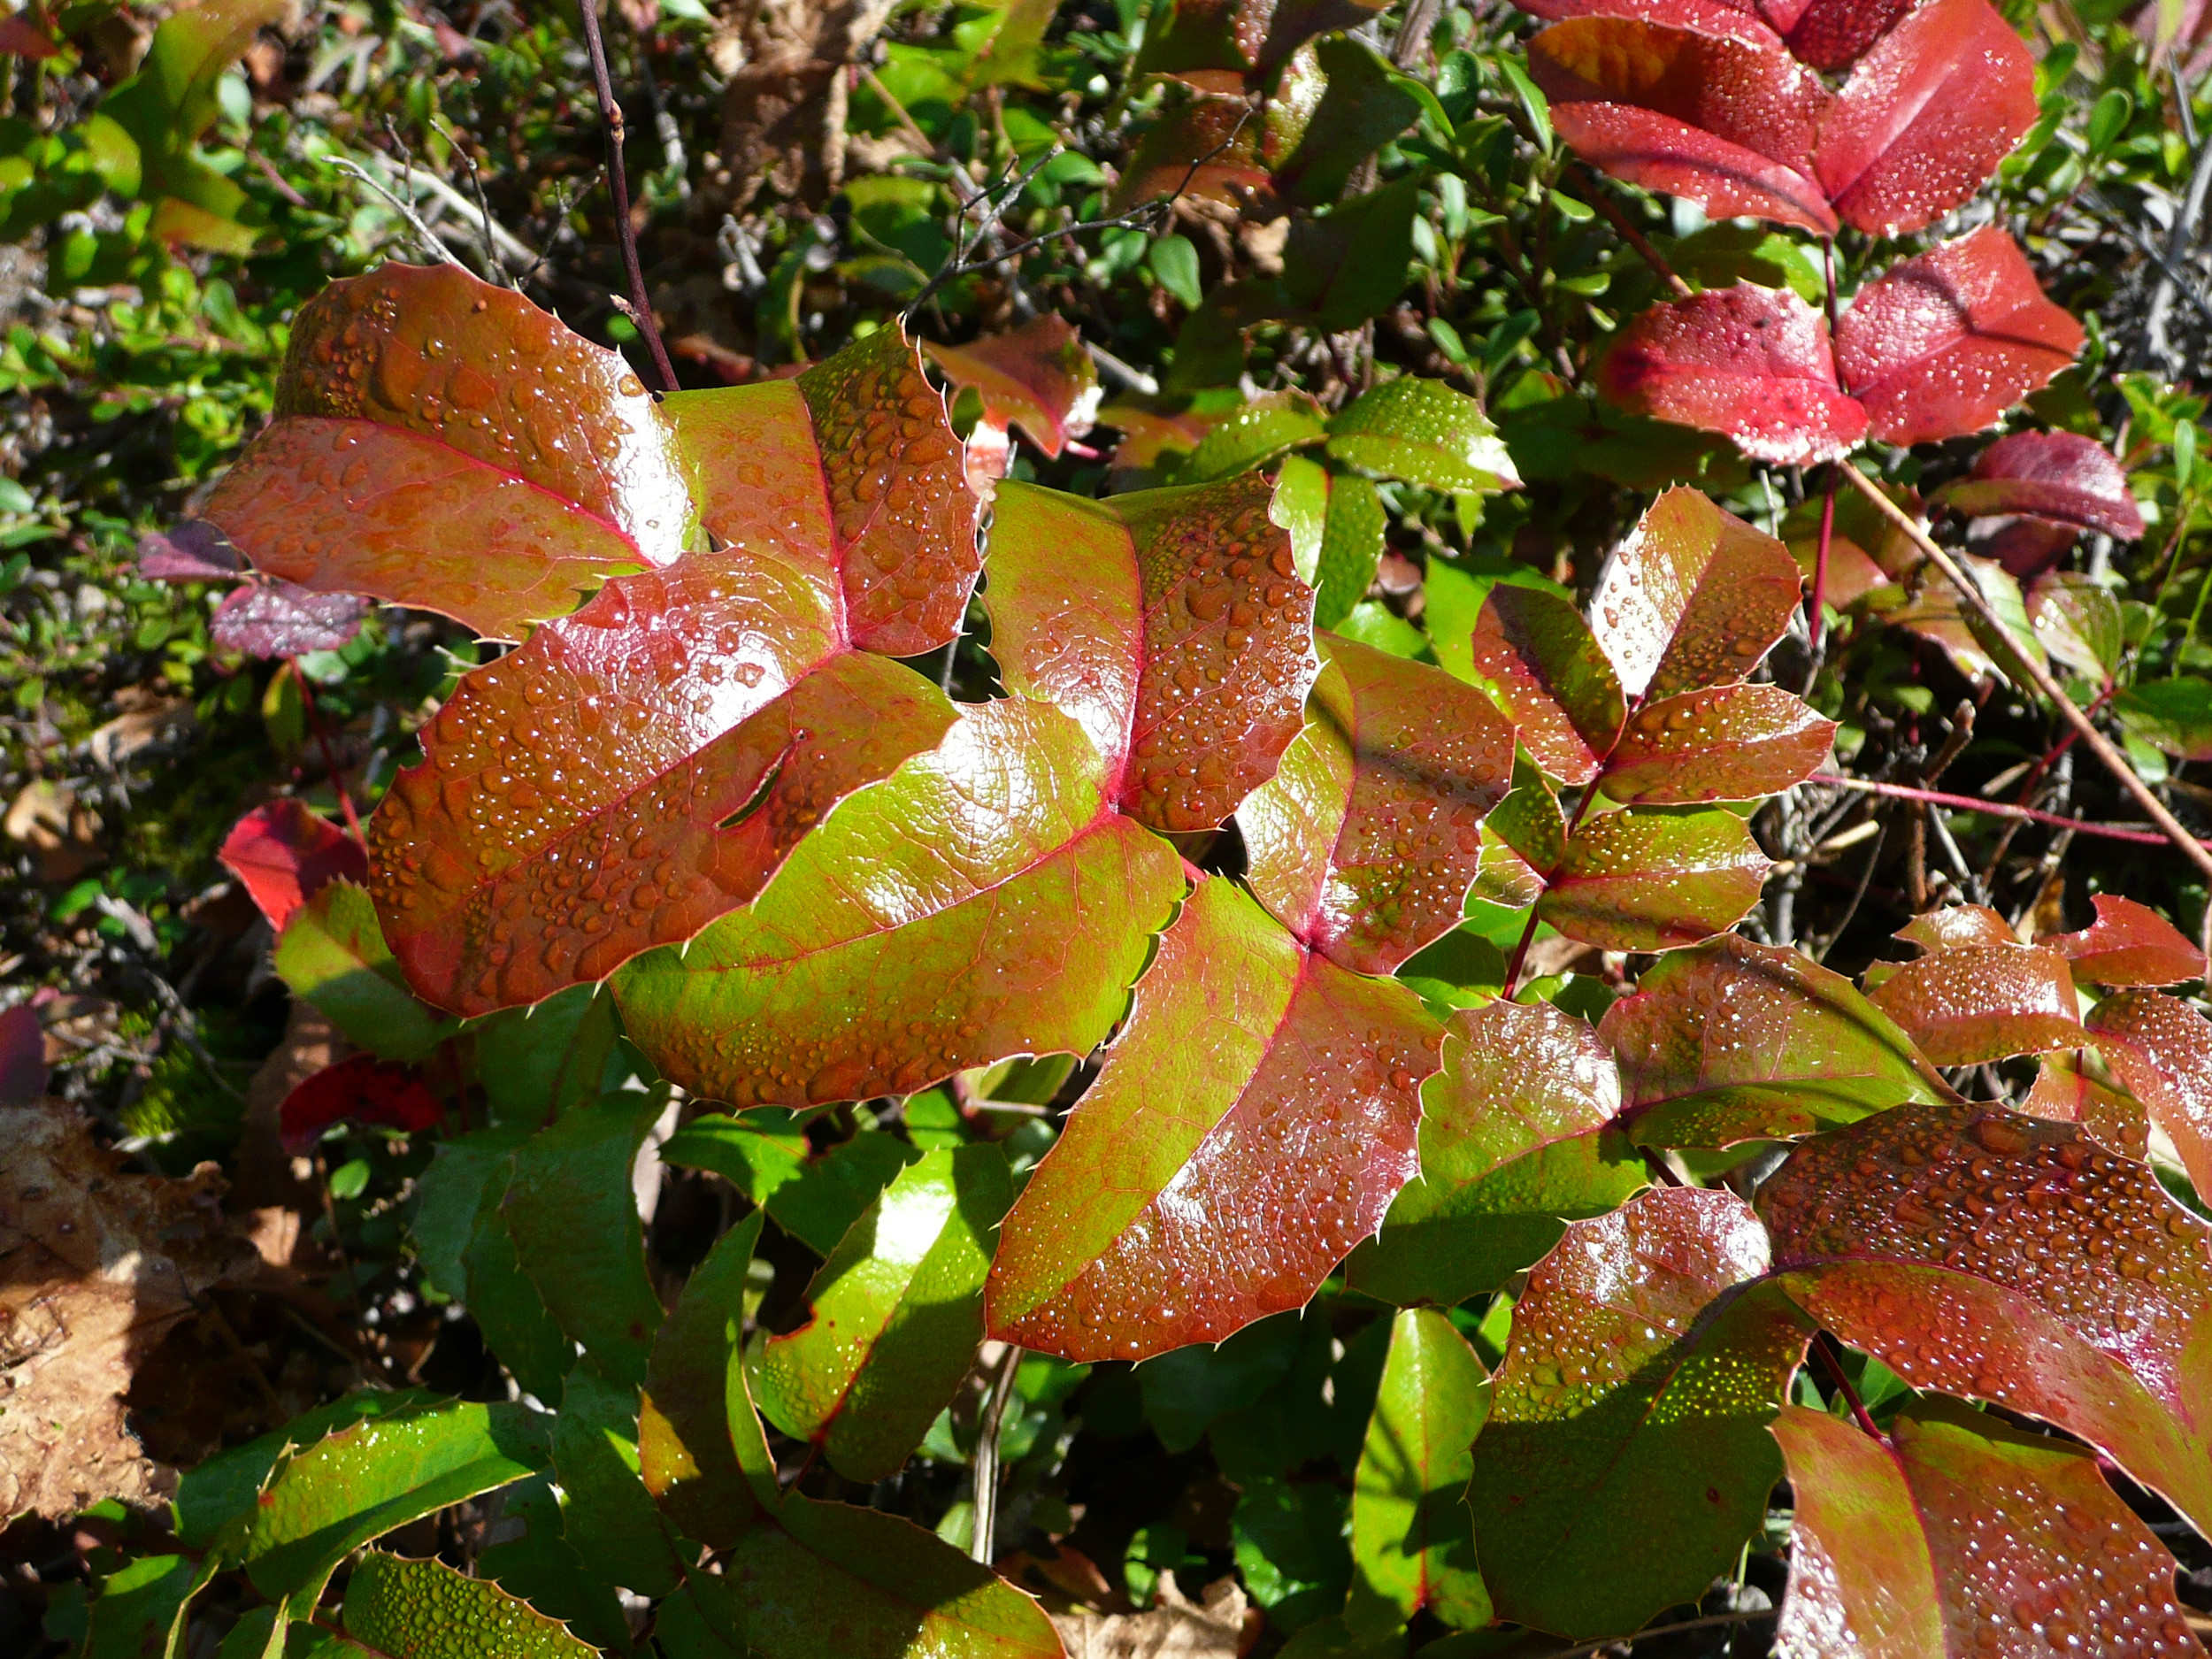
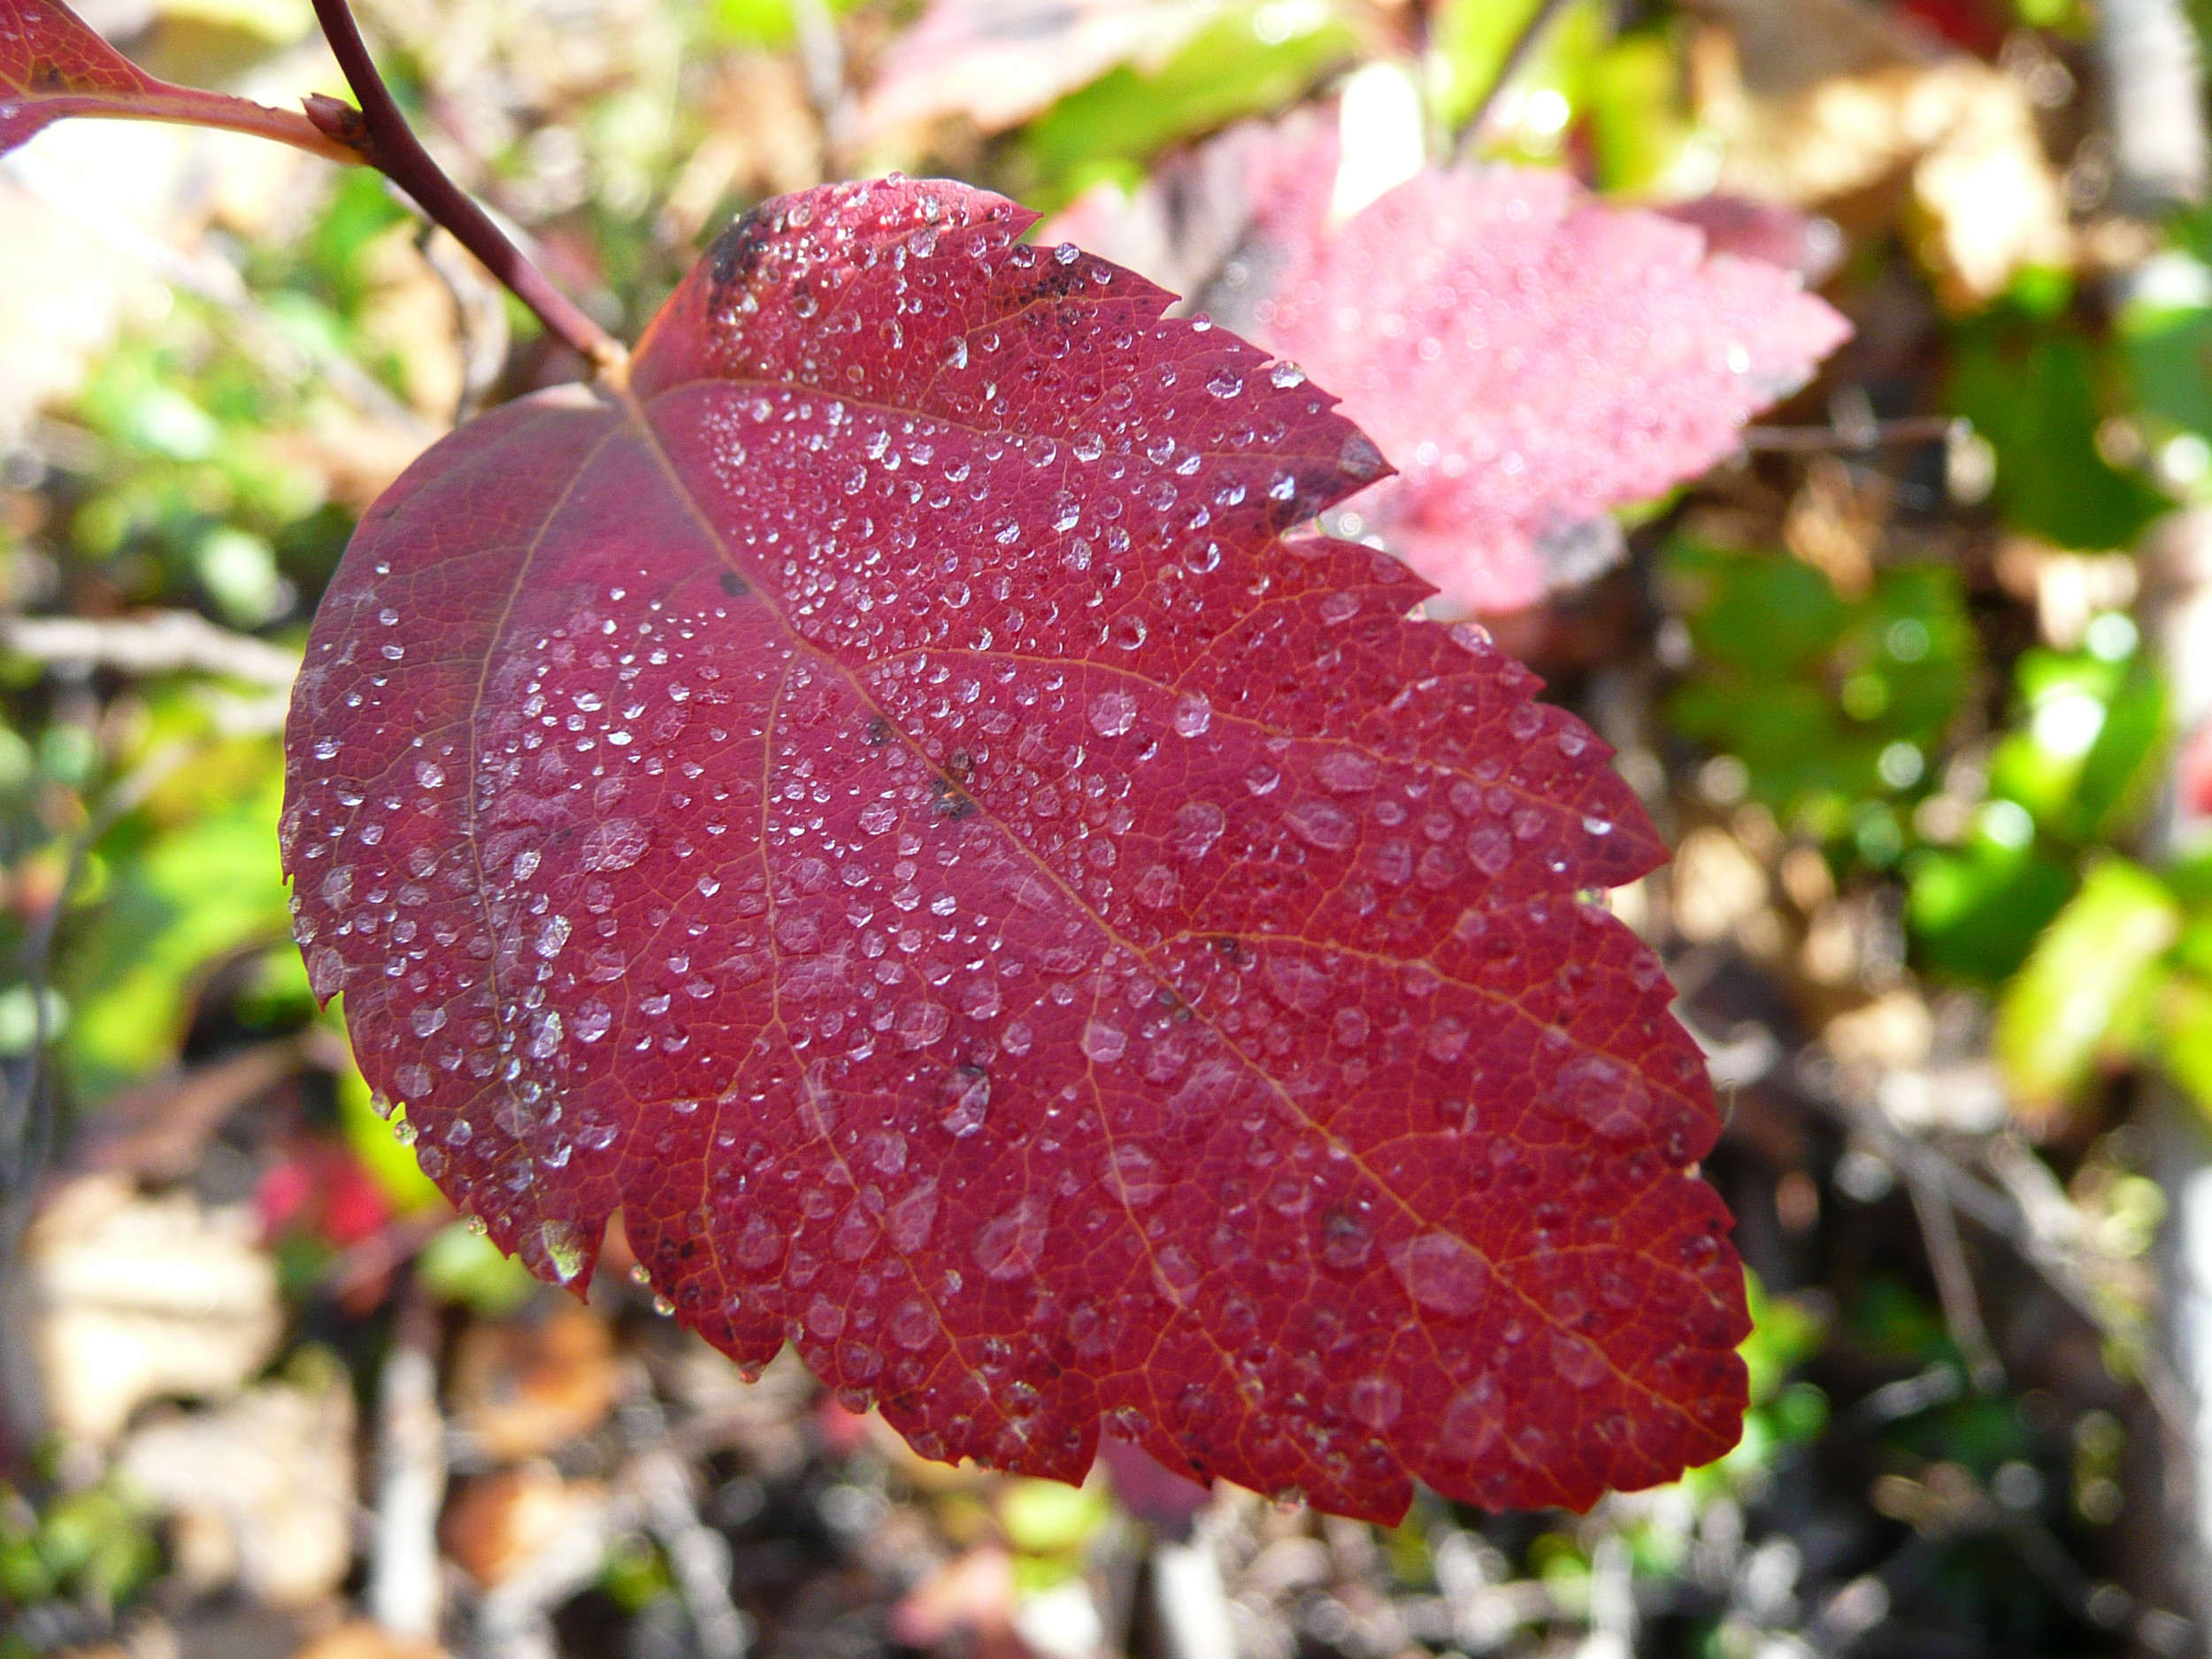
Fall foliage along the Clearwater River
This section of the Clearwater River Trail is quite popular and hiking here is particularly nice during the fall season when the colours have turned. In late September 2010, I park my car at the Dutch Lake Road trailhead in Clearwater and start hiking upriver.
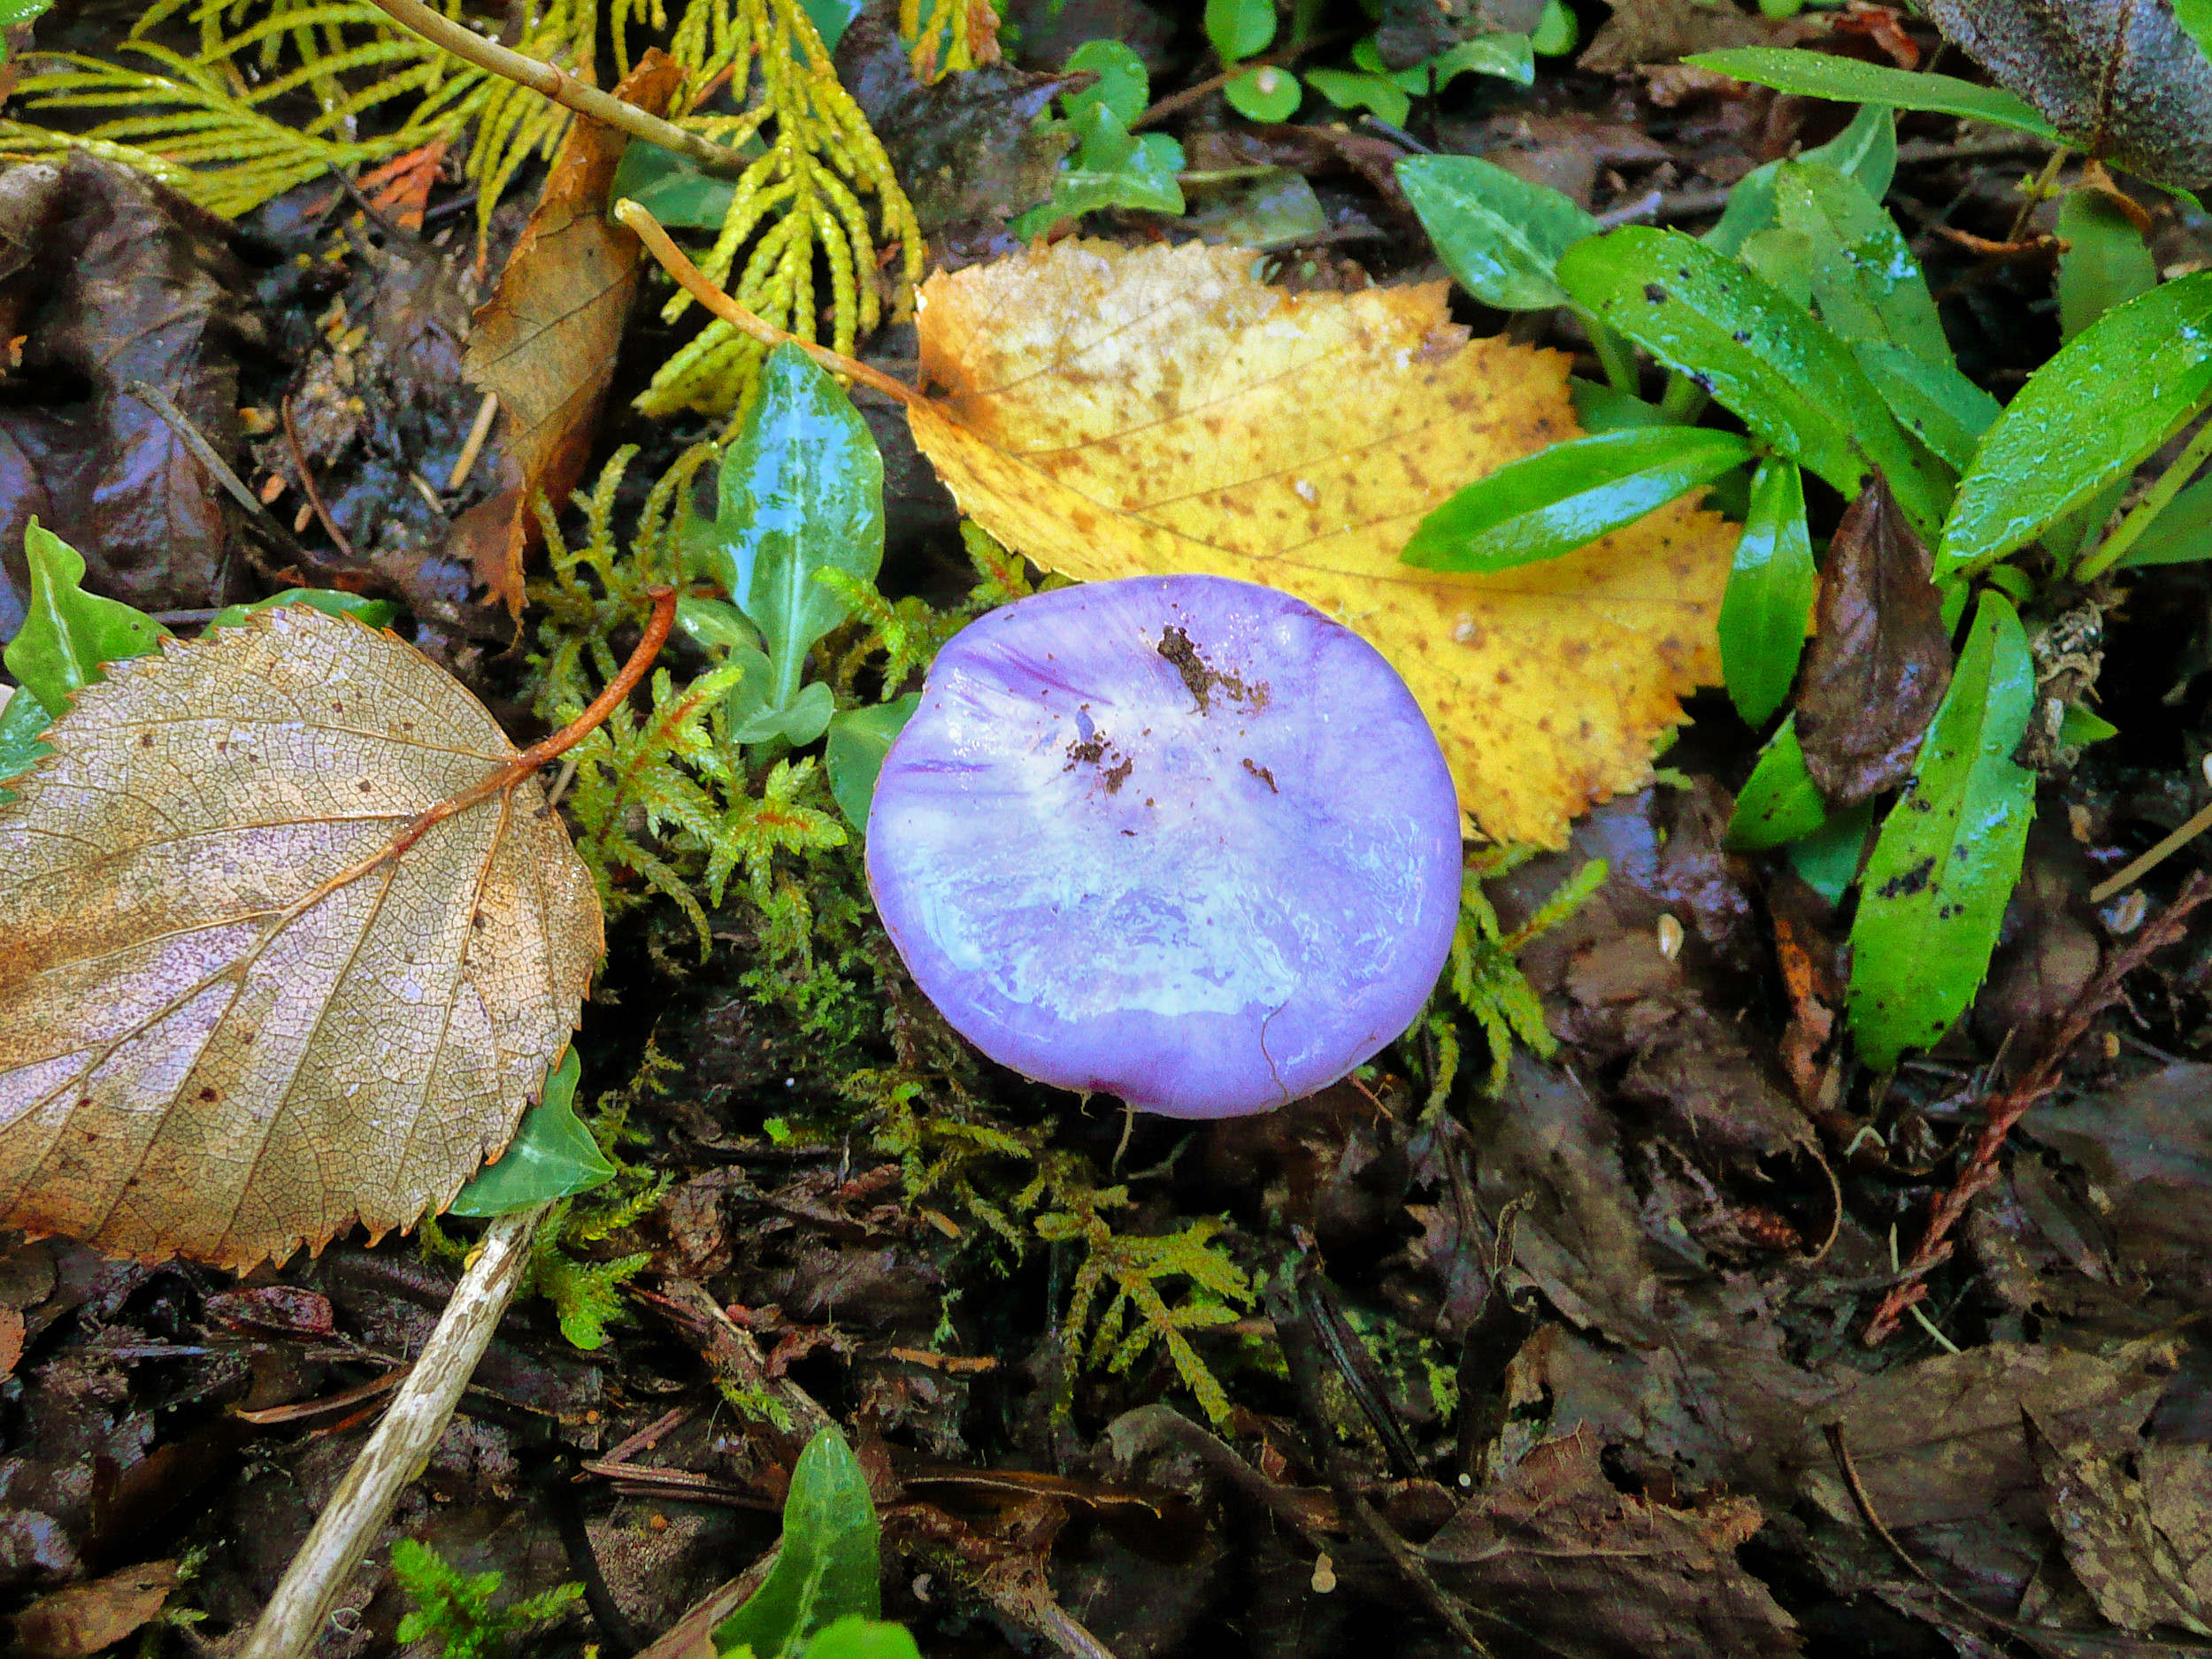
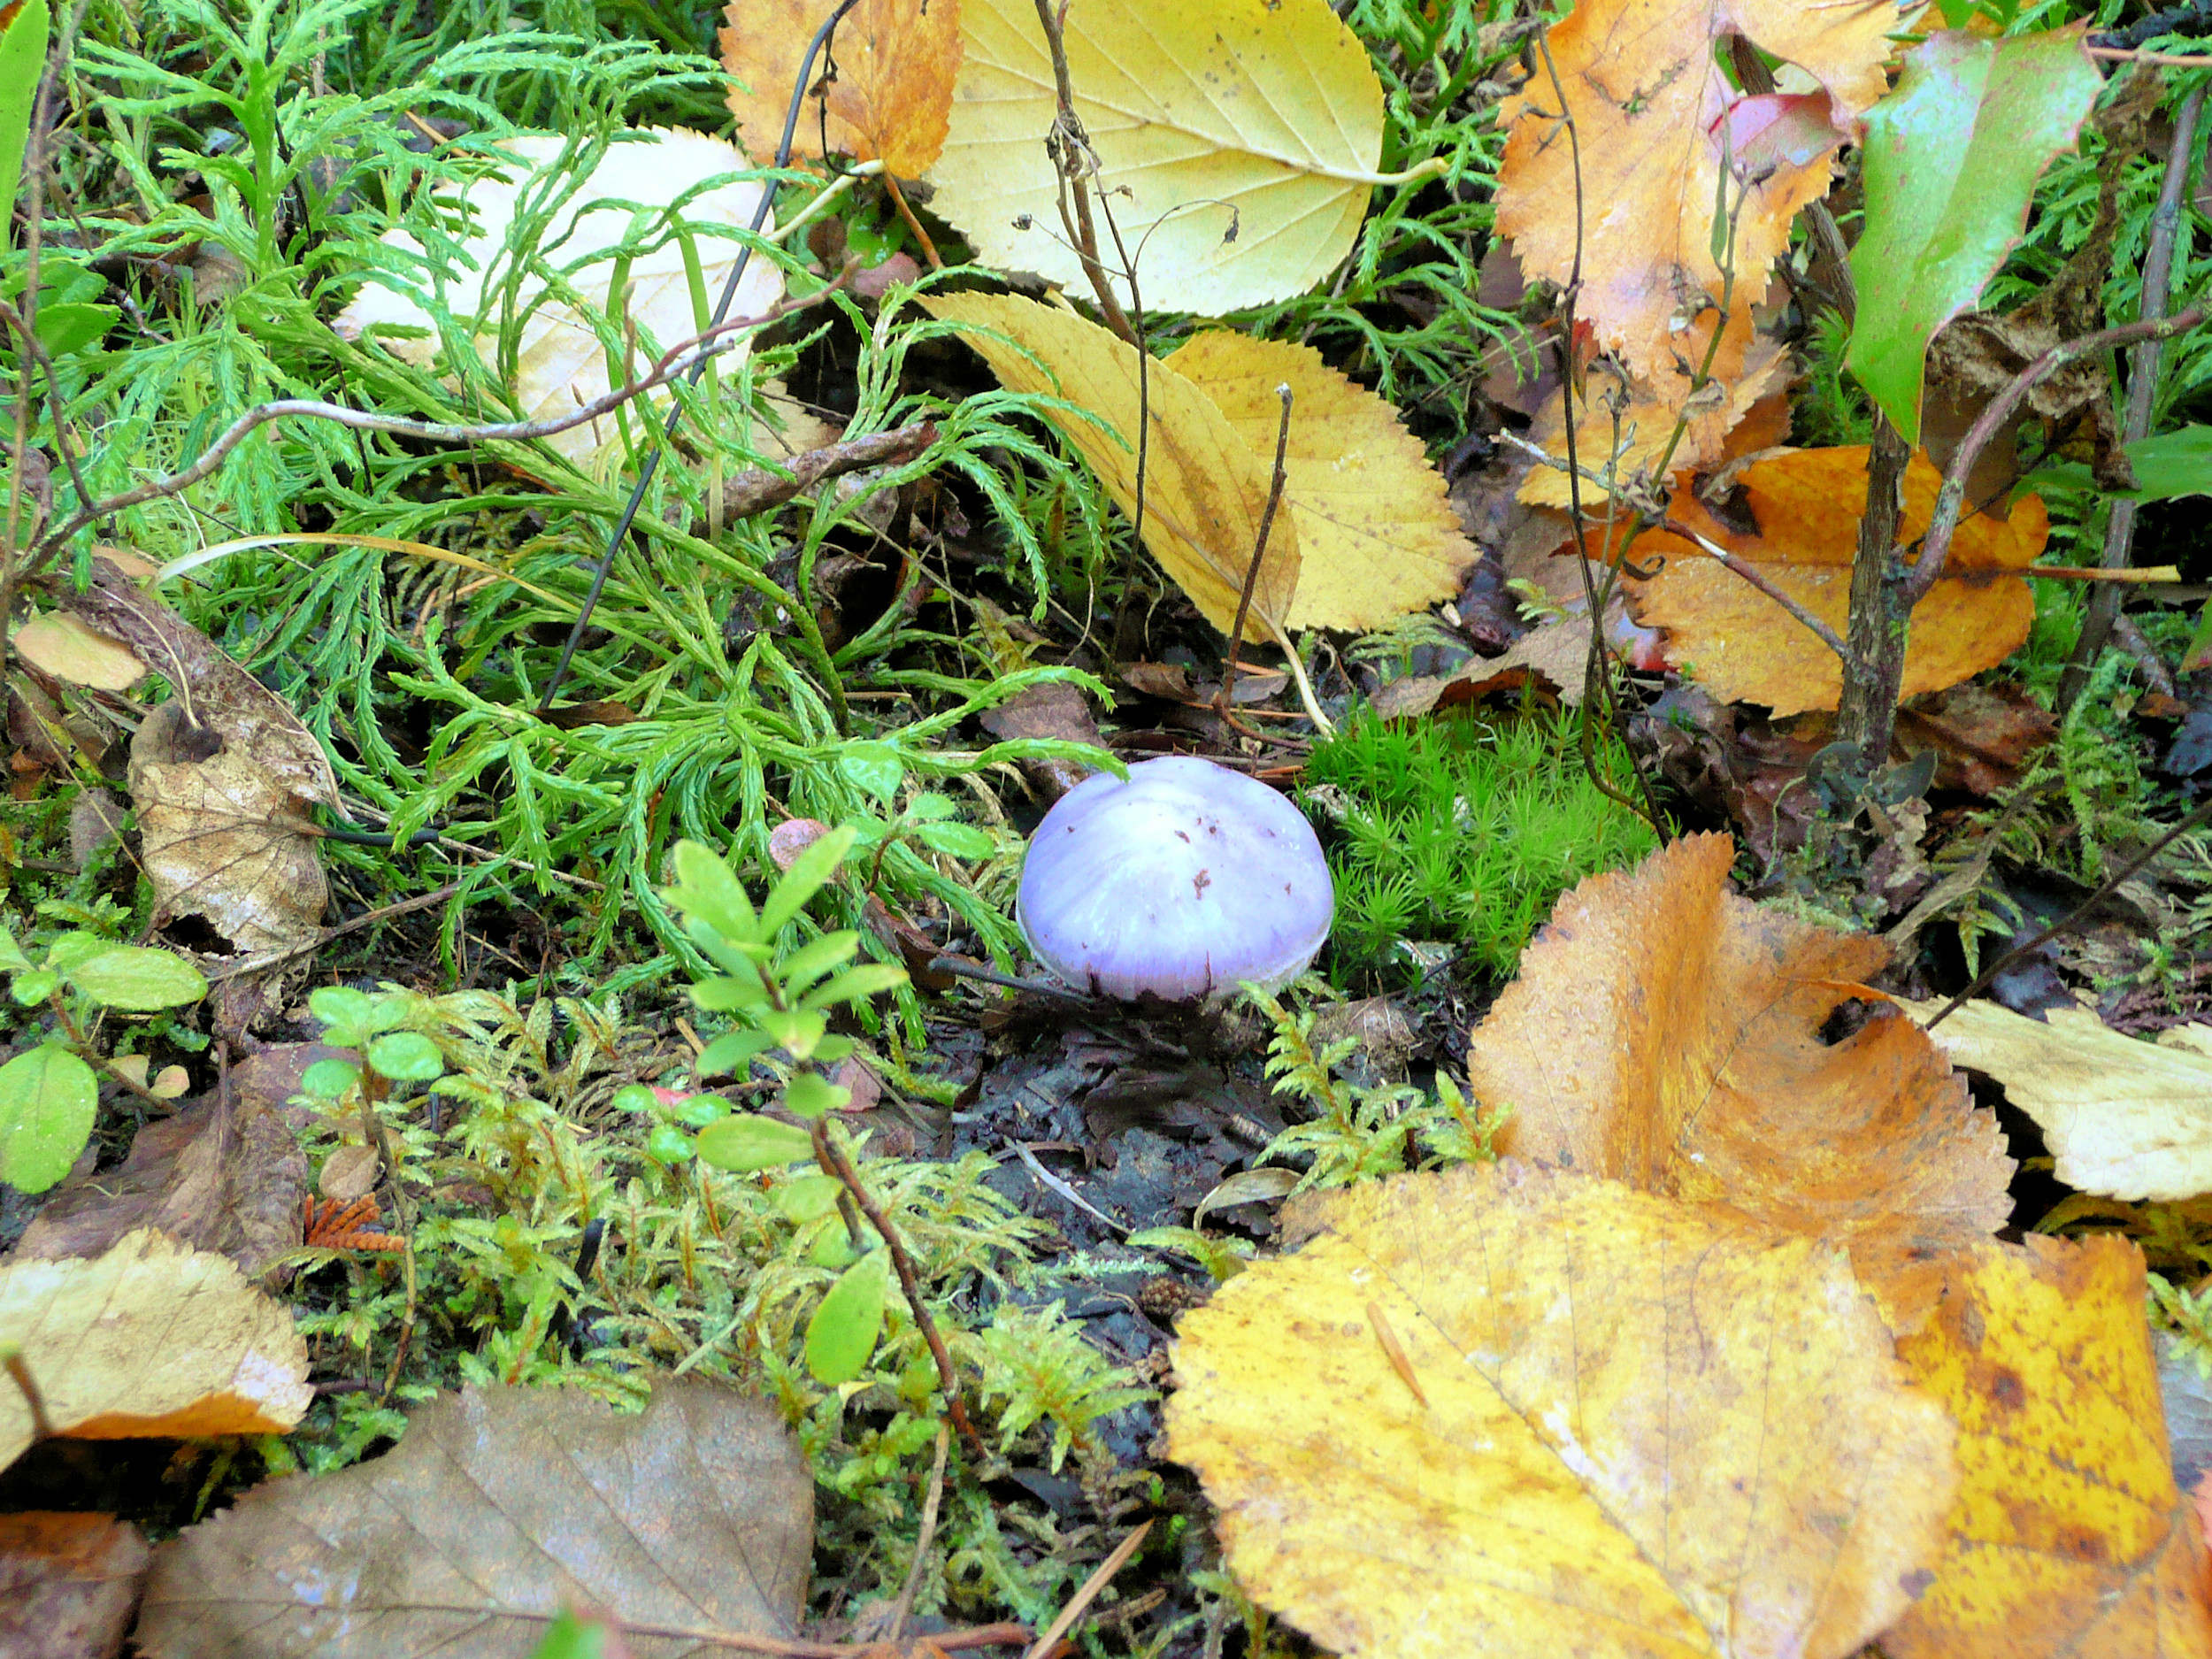
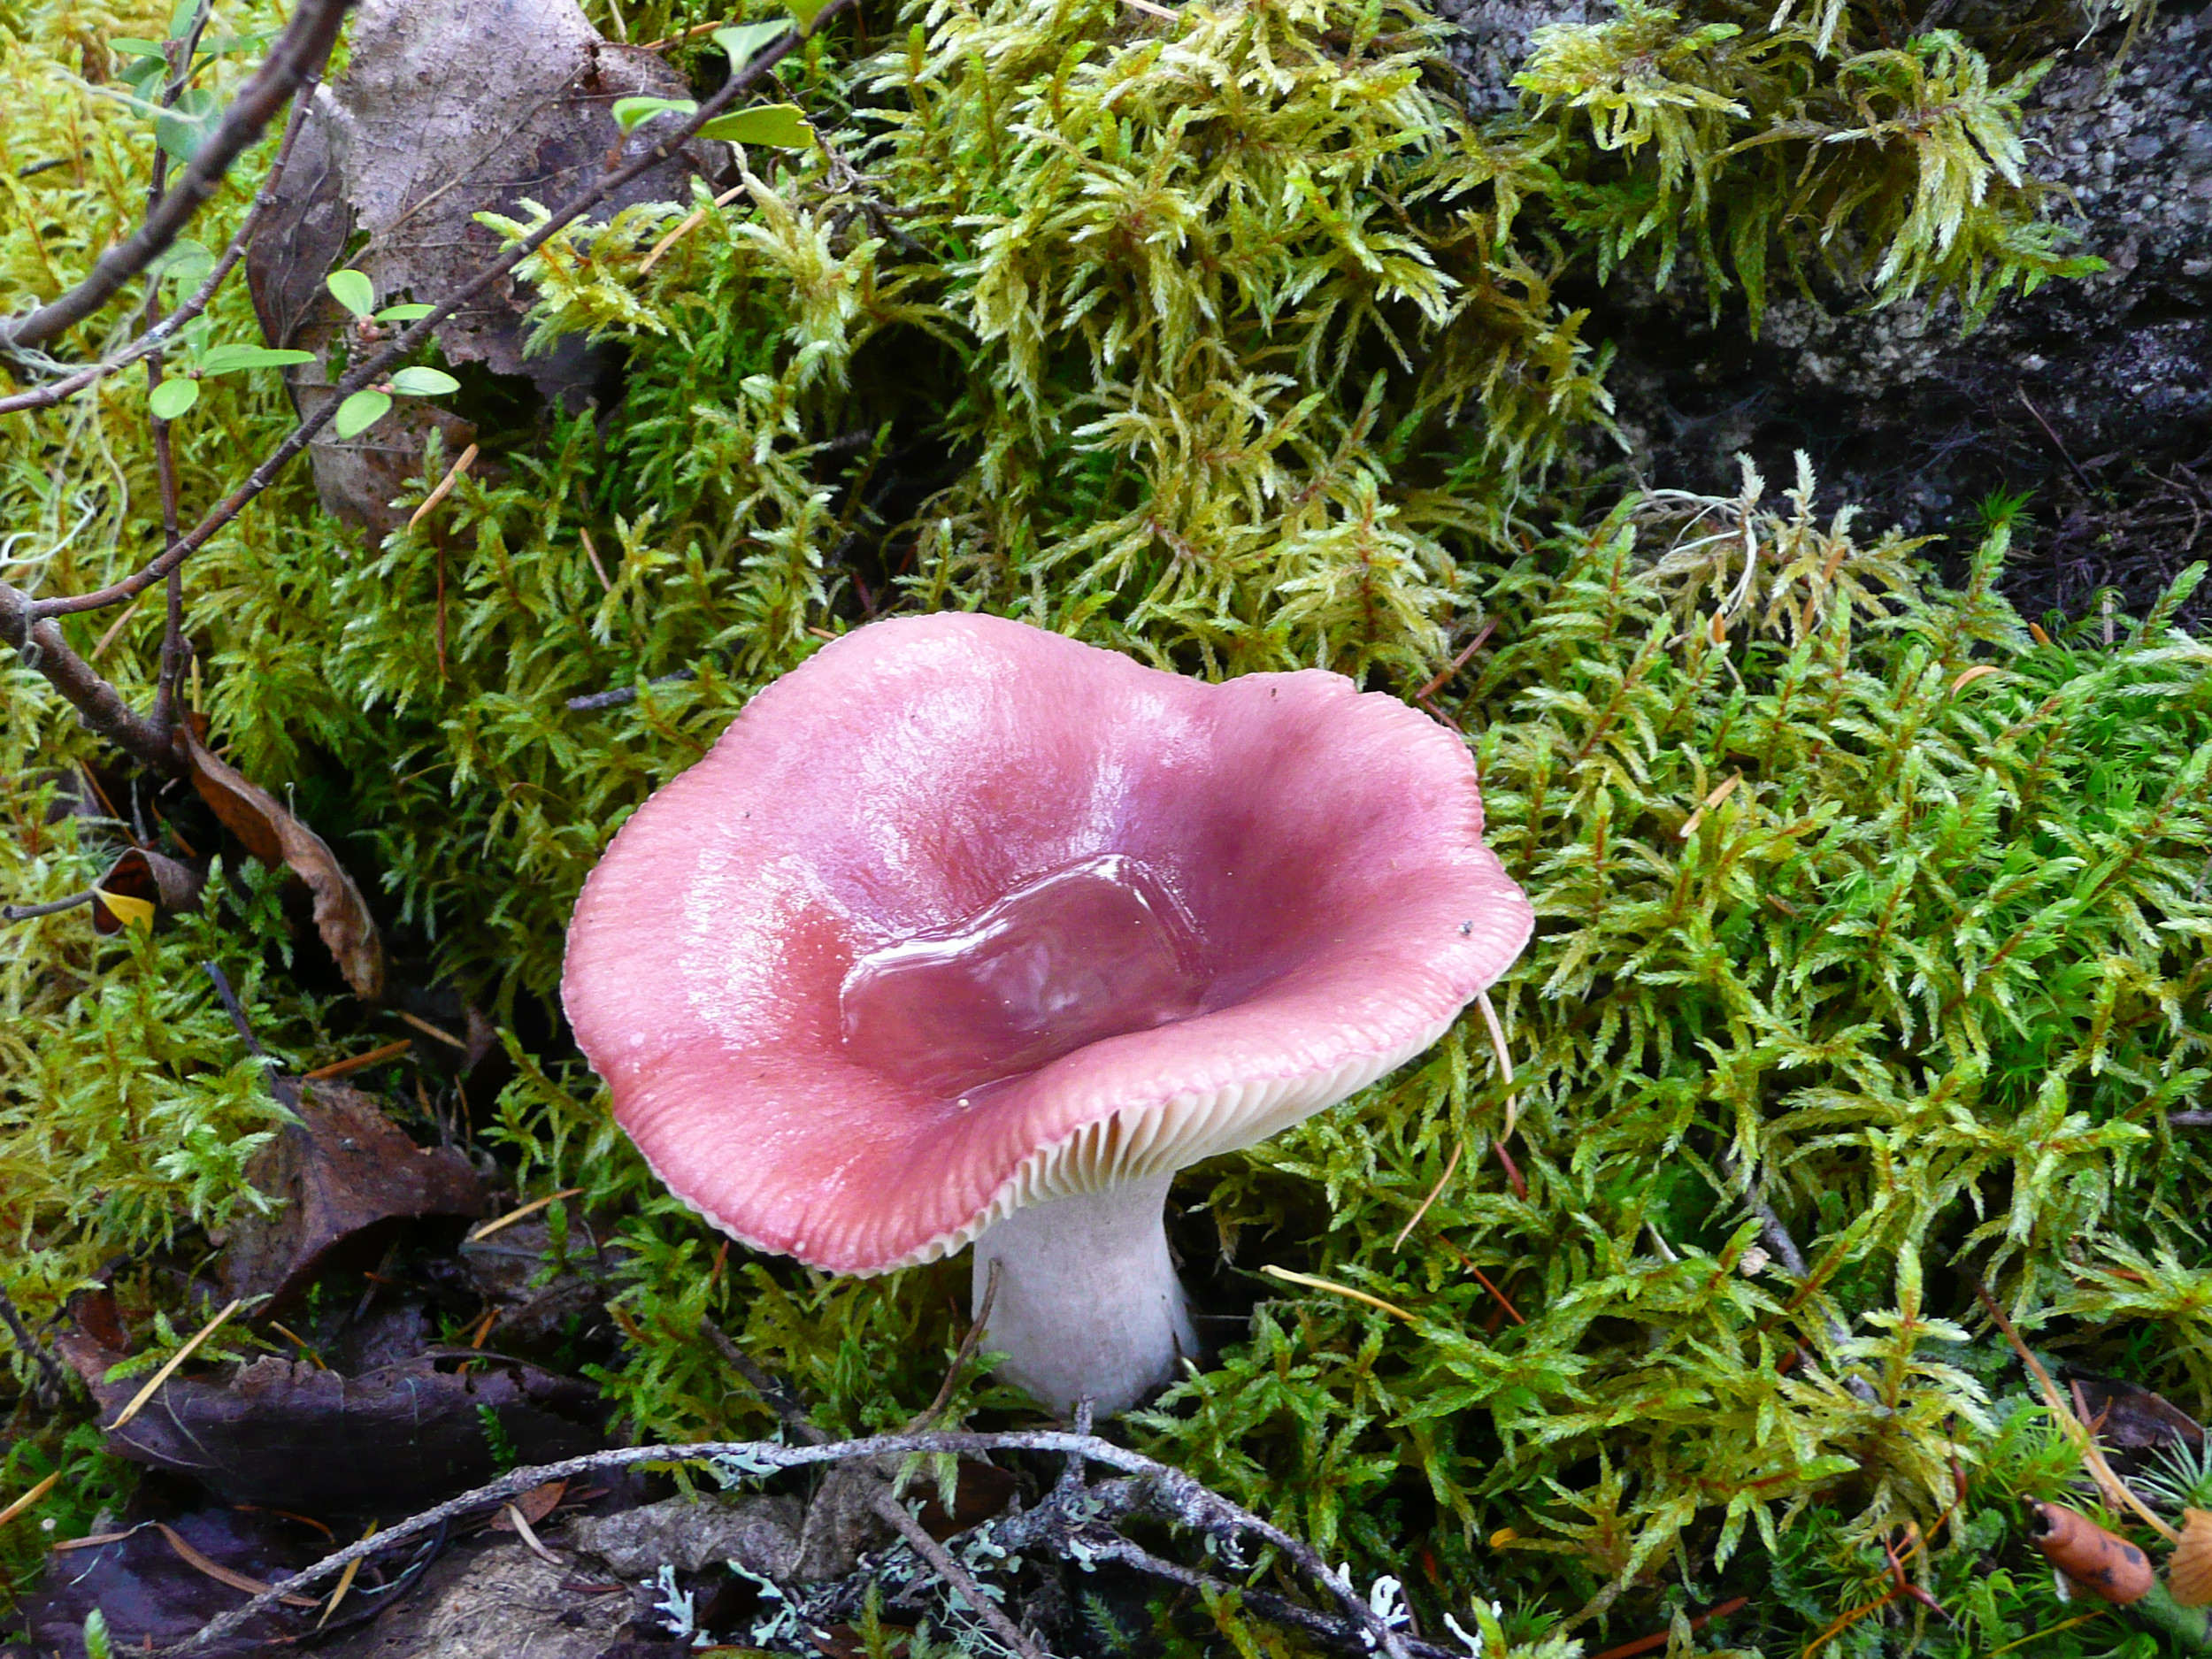
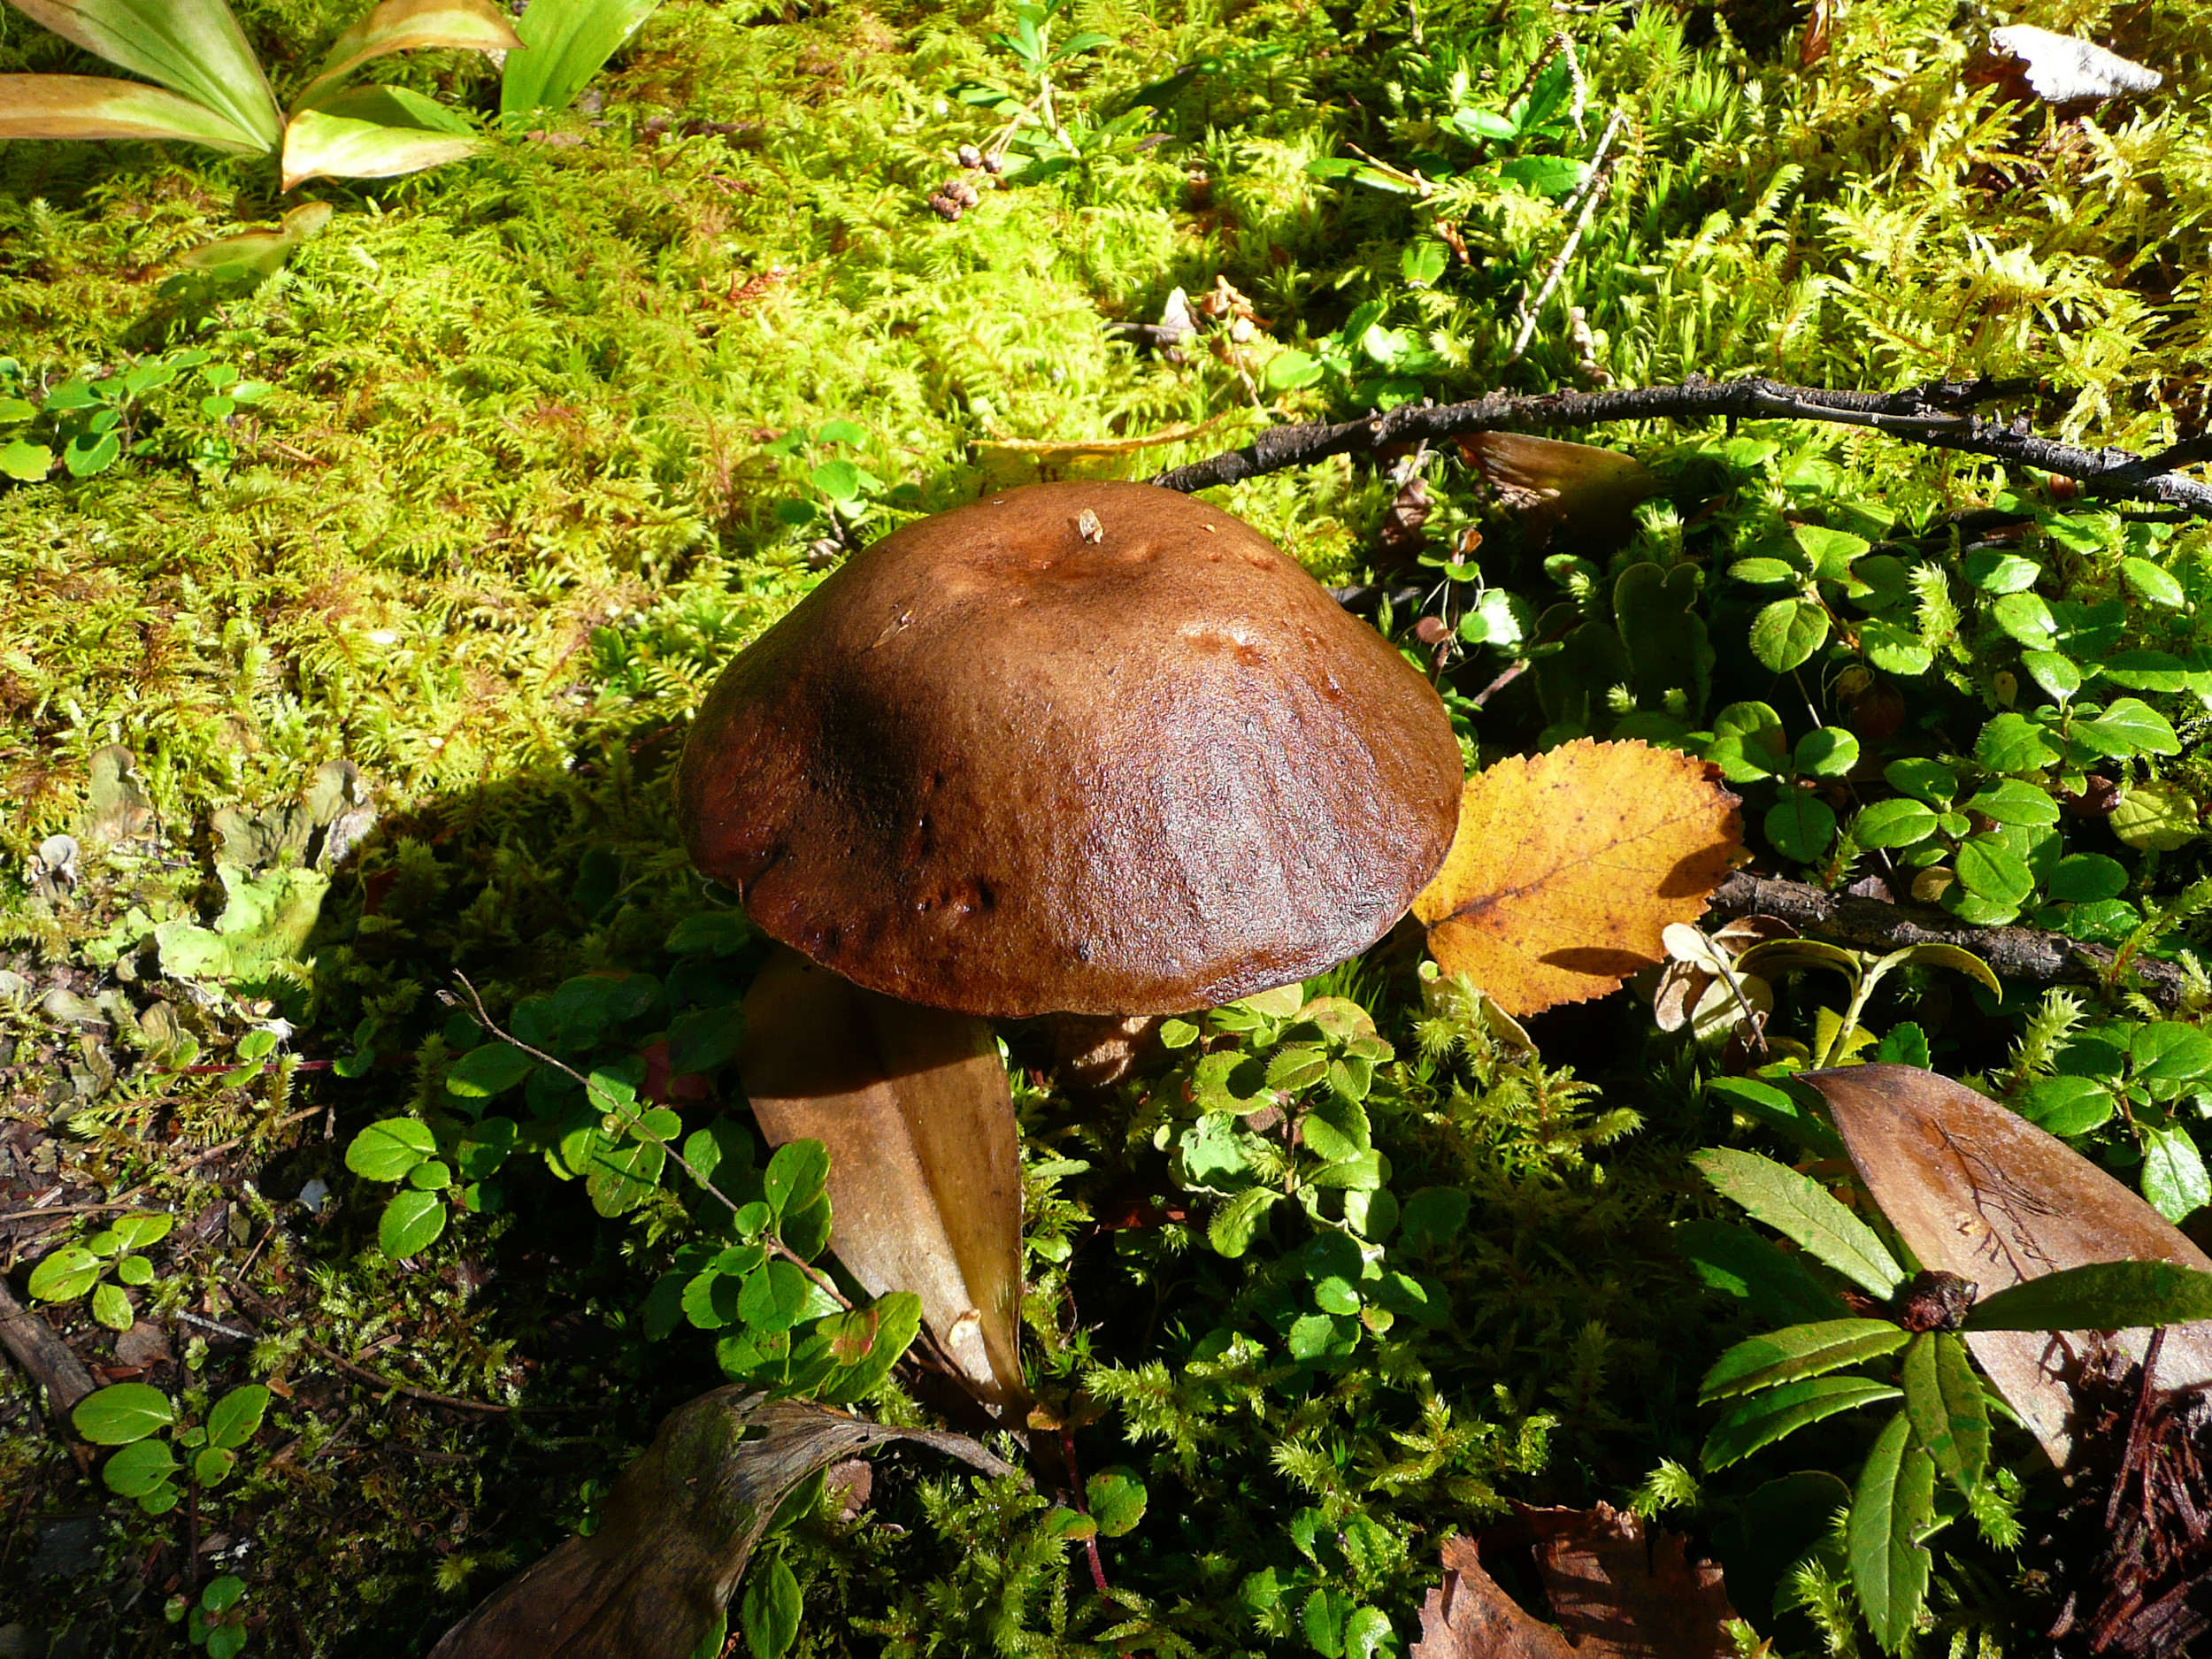
In the beginning the trail follows the river closely. Last spring’s flooding has washed out some stretches, but it remains passable everywhere. This time of the year, the foliage of the trees is colorful and leaves have started falling. Mushrooms sprout from the ground.
The most dramatic part of the trail meanders over a slope of lava rocks and then along the bottom of a 100-meter-high basalt cliff. The trail becomes so steep and narrow here that a rope has been attached to the wall to help hikers along.
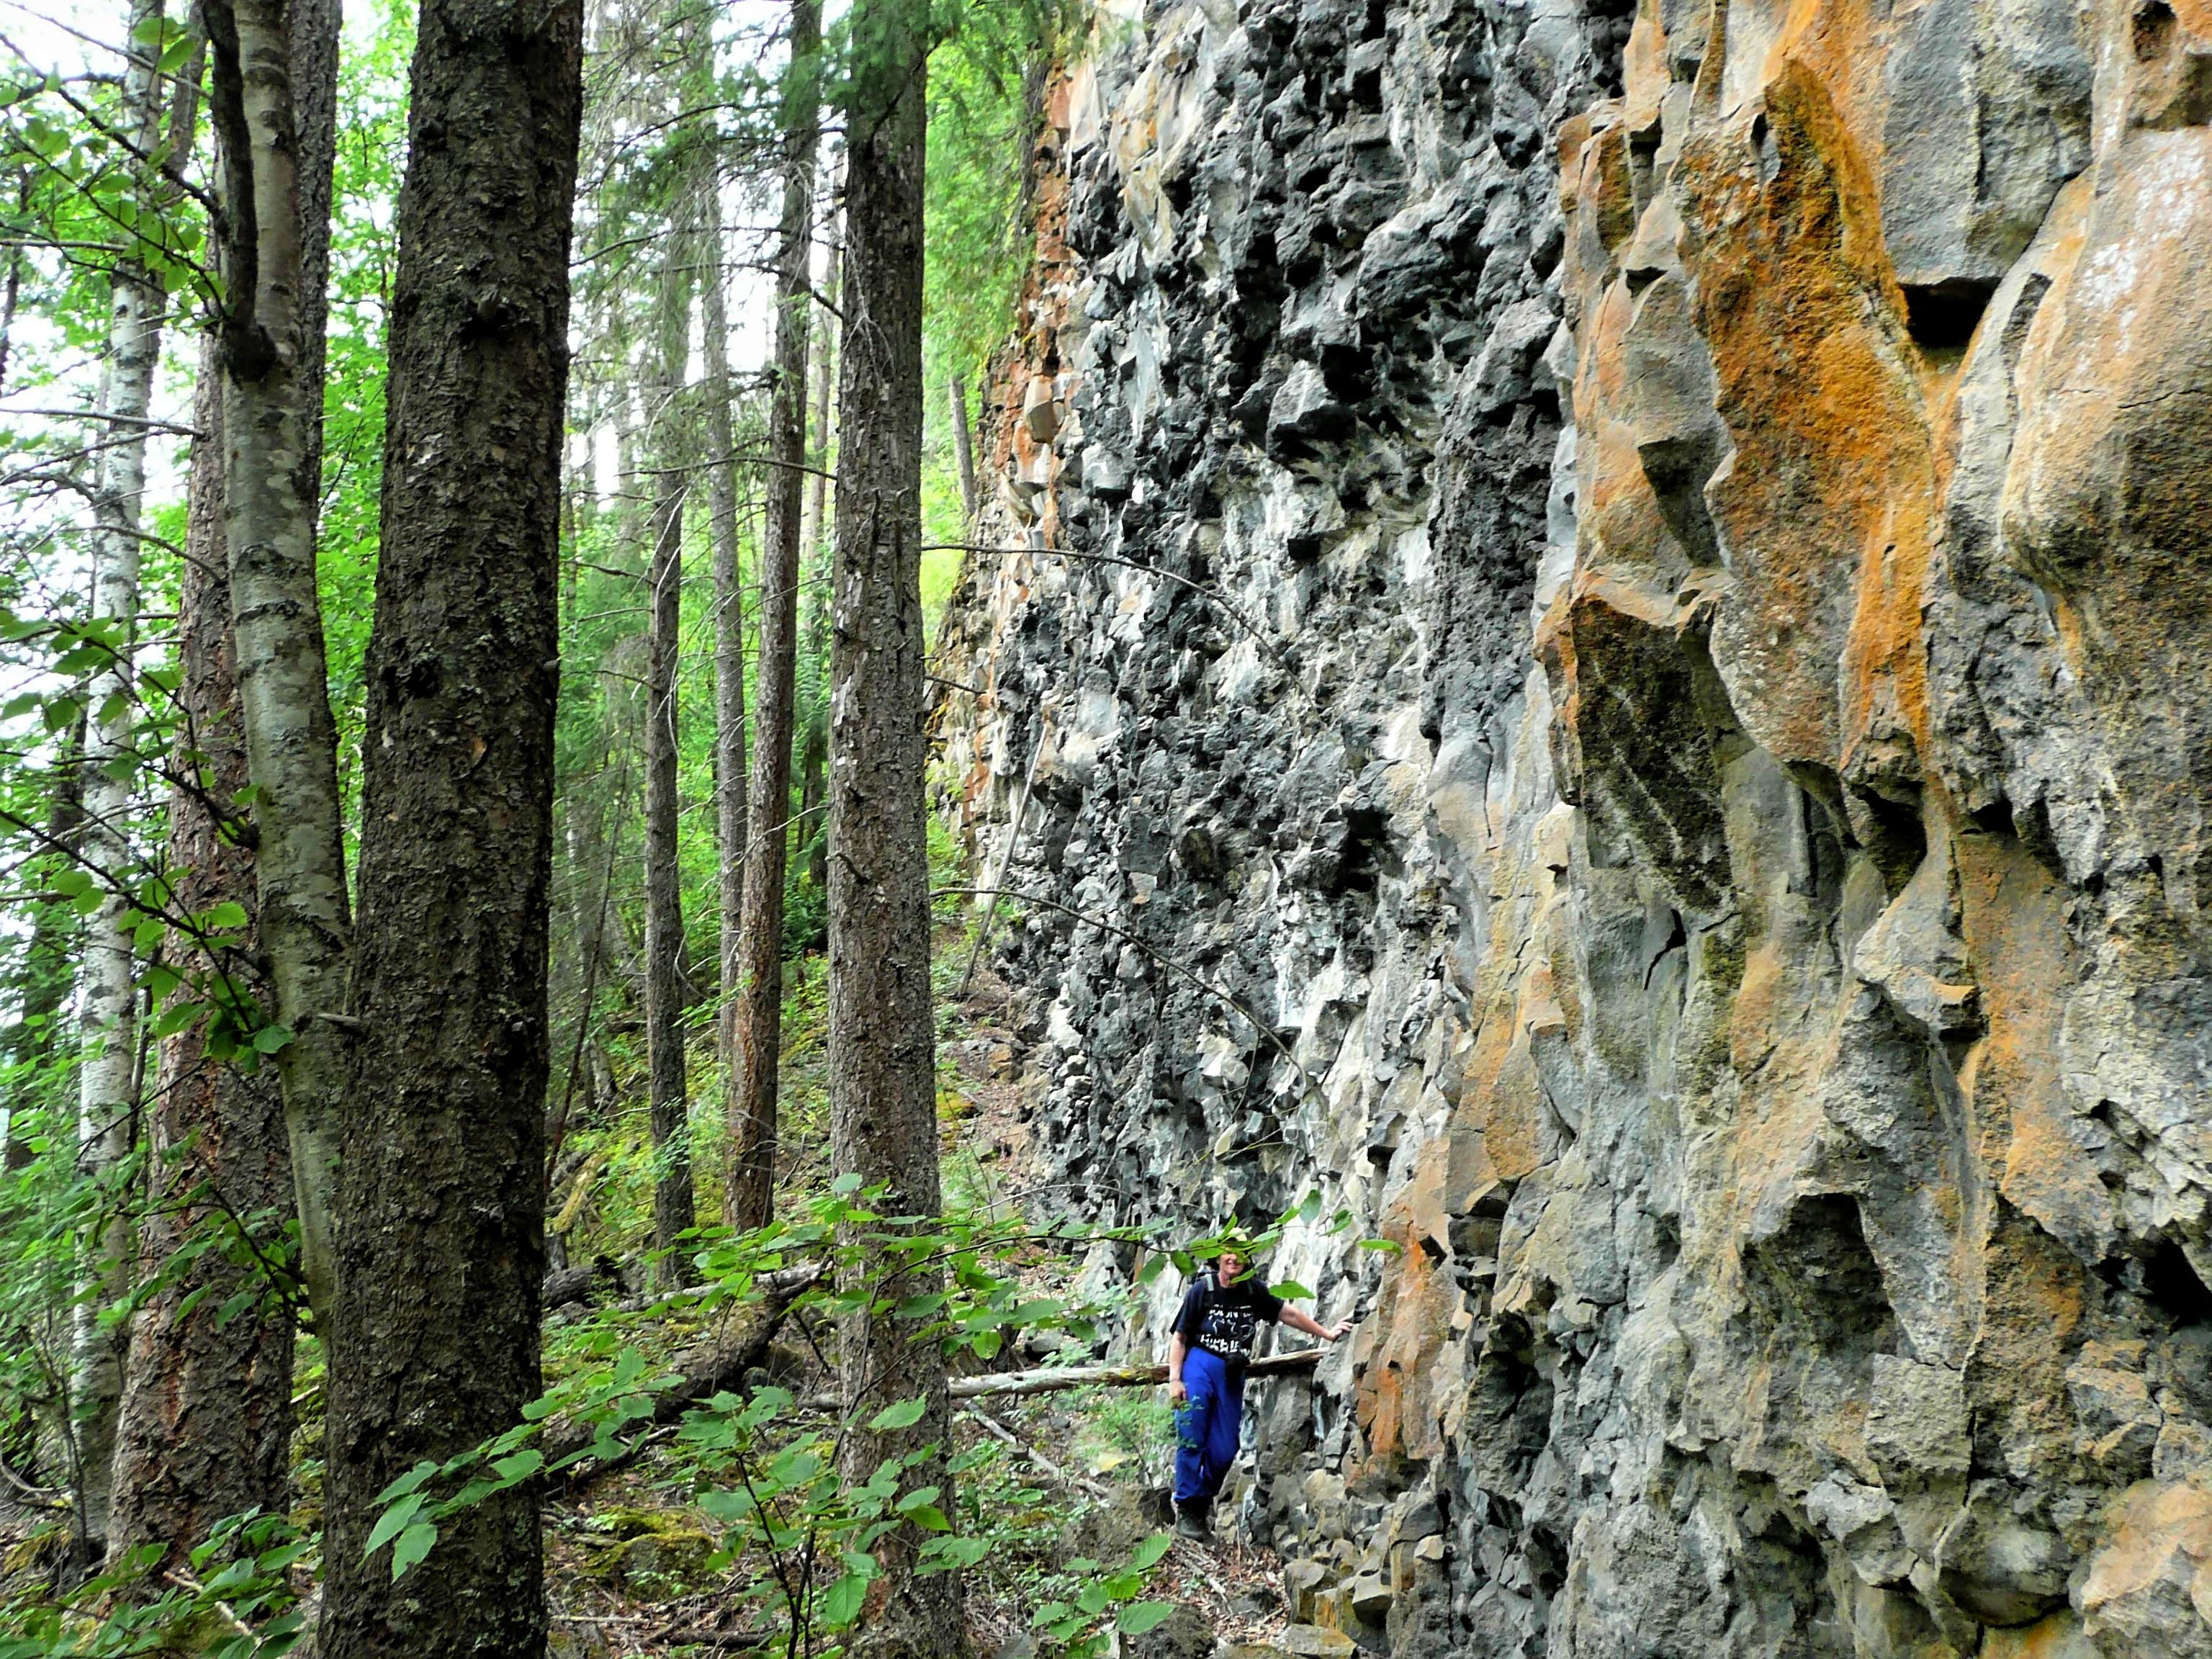
Basalt cliffs
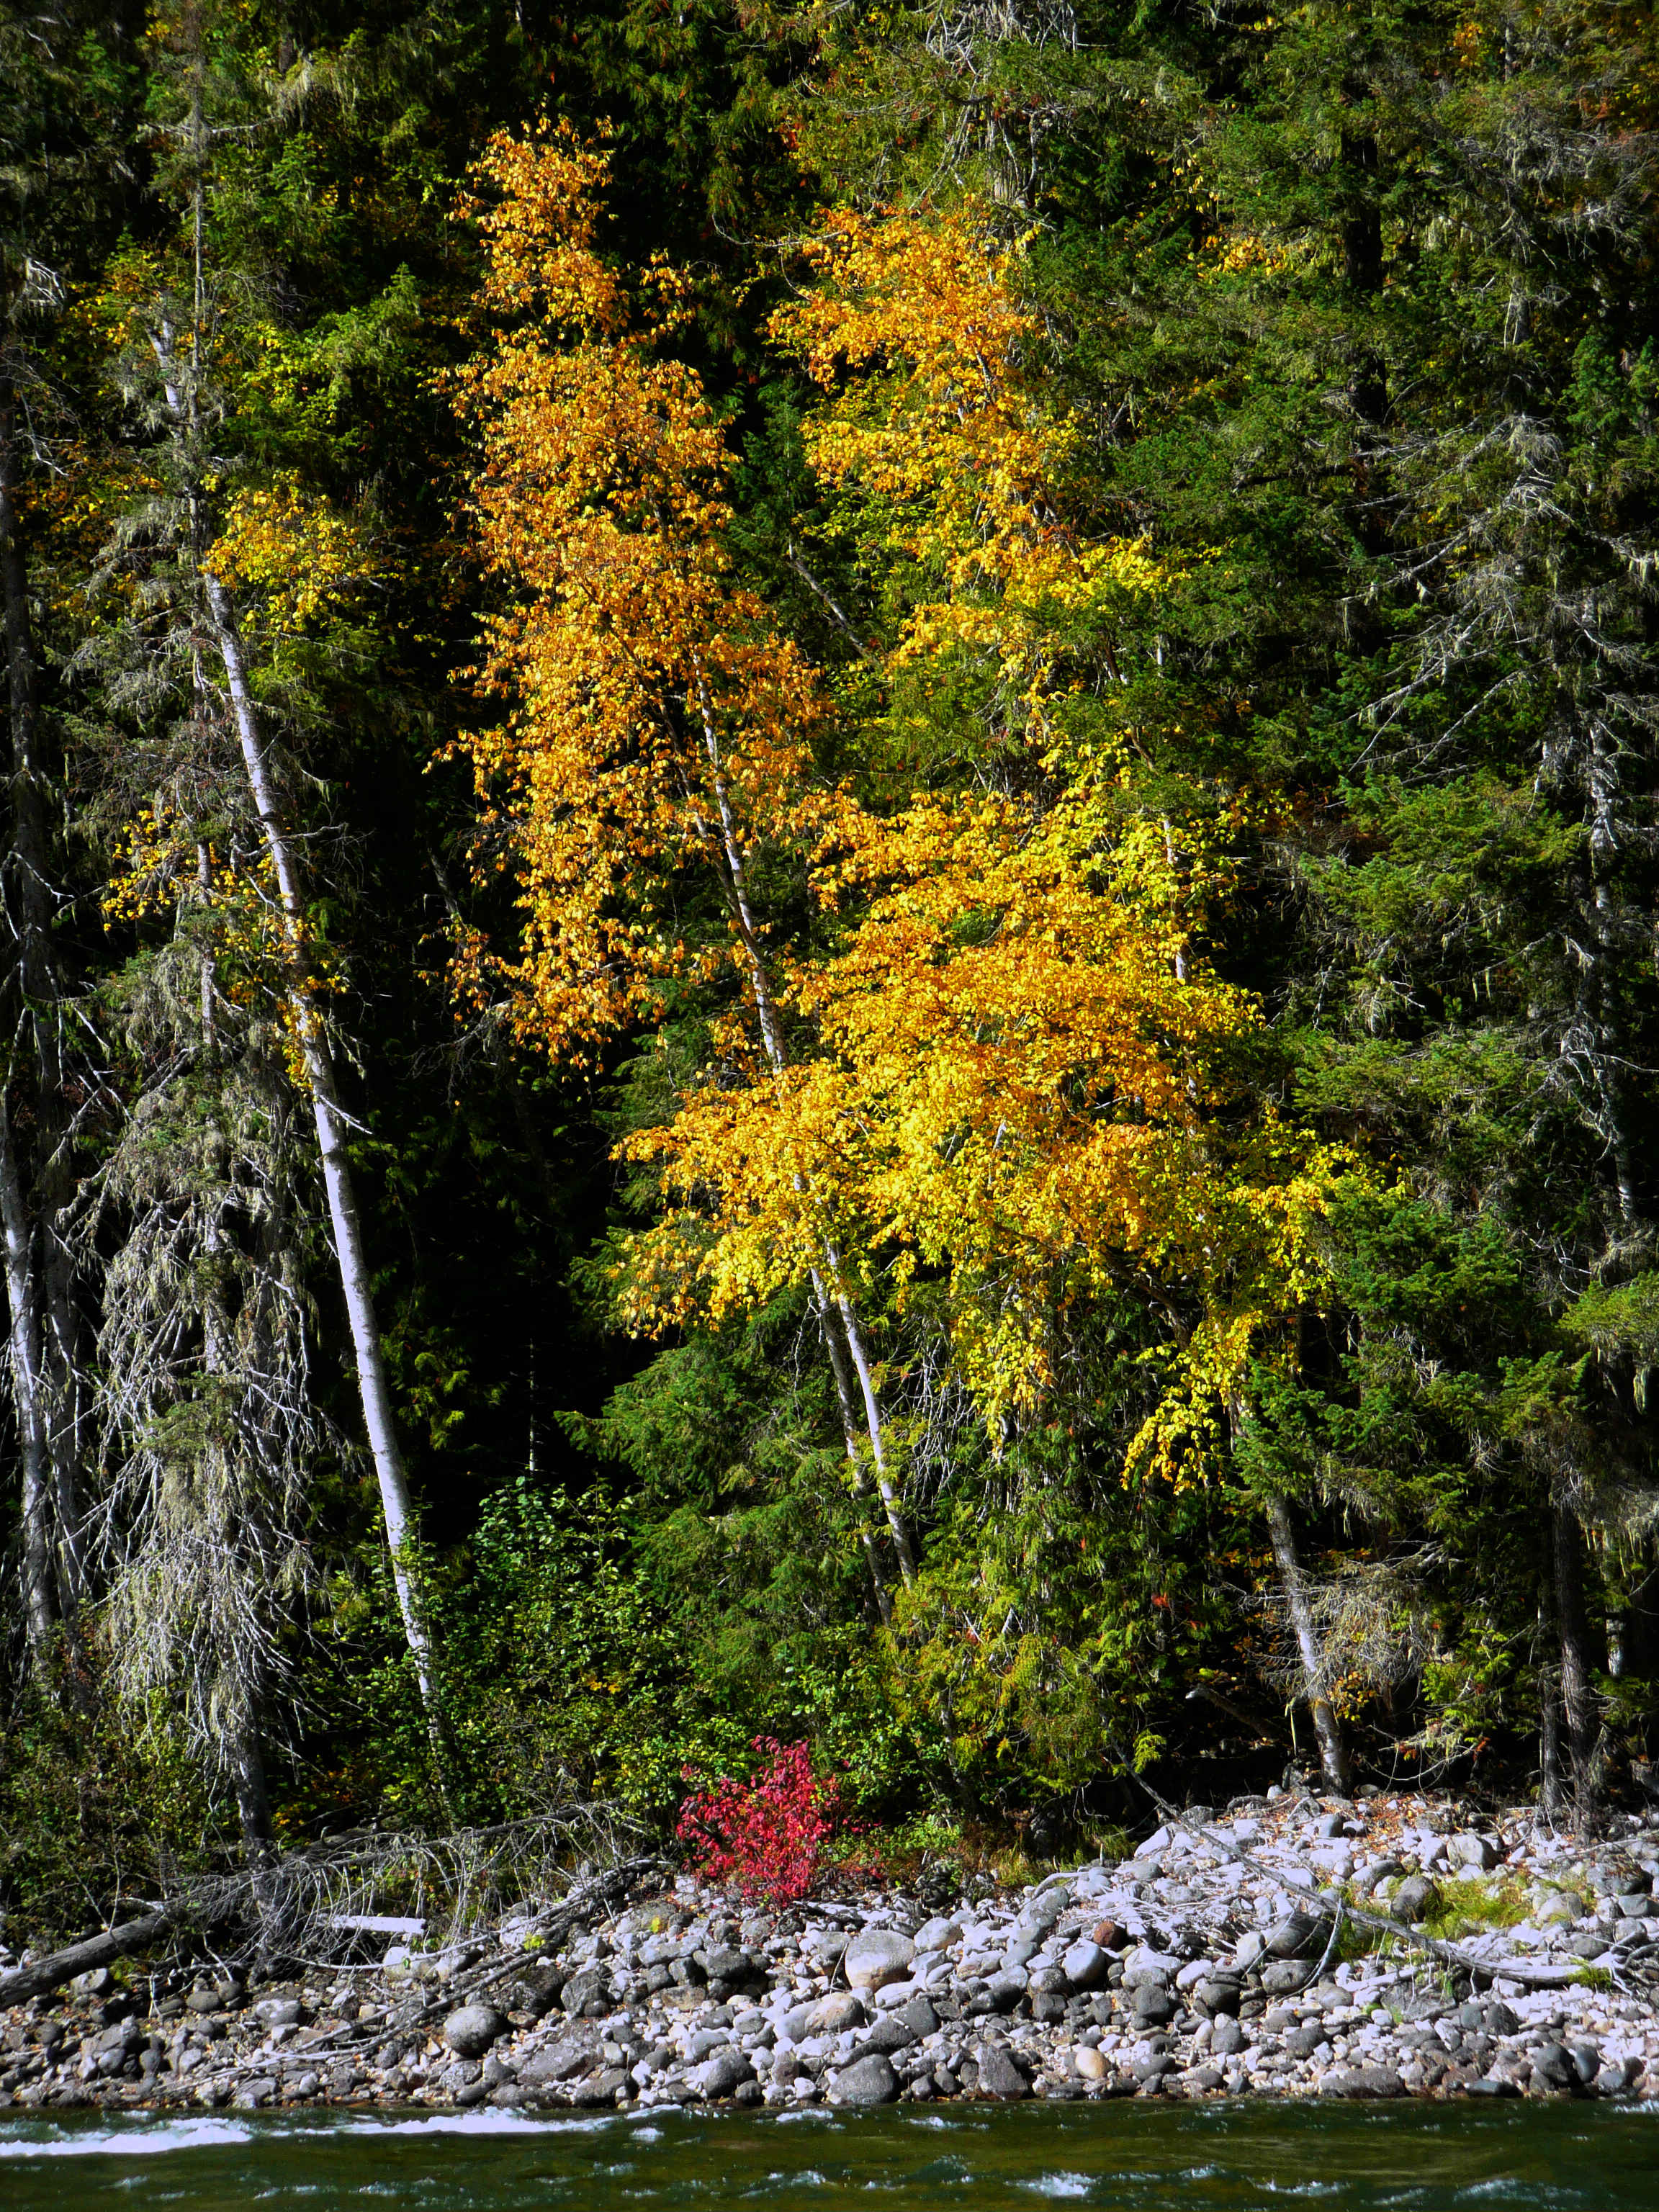
Fall-colored trees by the river
The Clearwater River is a rafter’s dream. Close to the confluence of Candle Creek and Clearwater River a side trail leads down to the water. There is a calm spot for rafters to land and visit the Candle Creek Falls.
The 10 m Candle Creek Falls are one of the many waterfalls in Wells Gray Park.
Bridge over Candle Creek
A tree stump near the falls has obviously served many generations of woodpeckers well.
Candle Creek
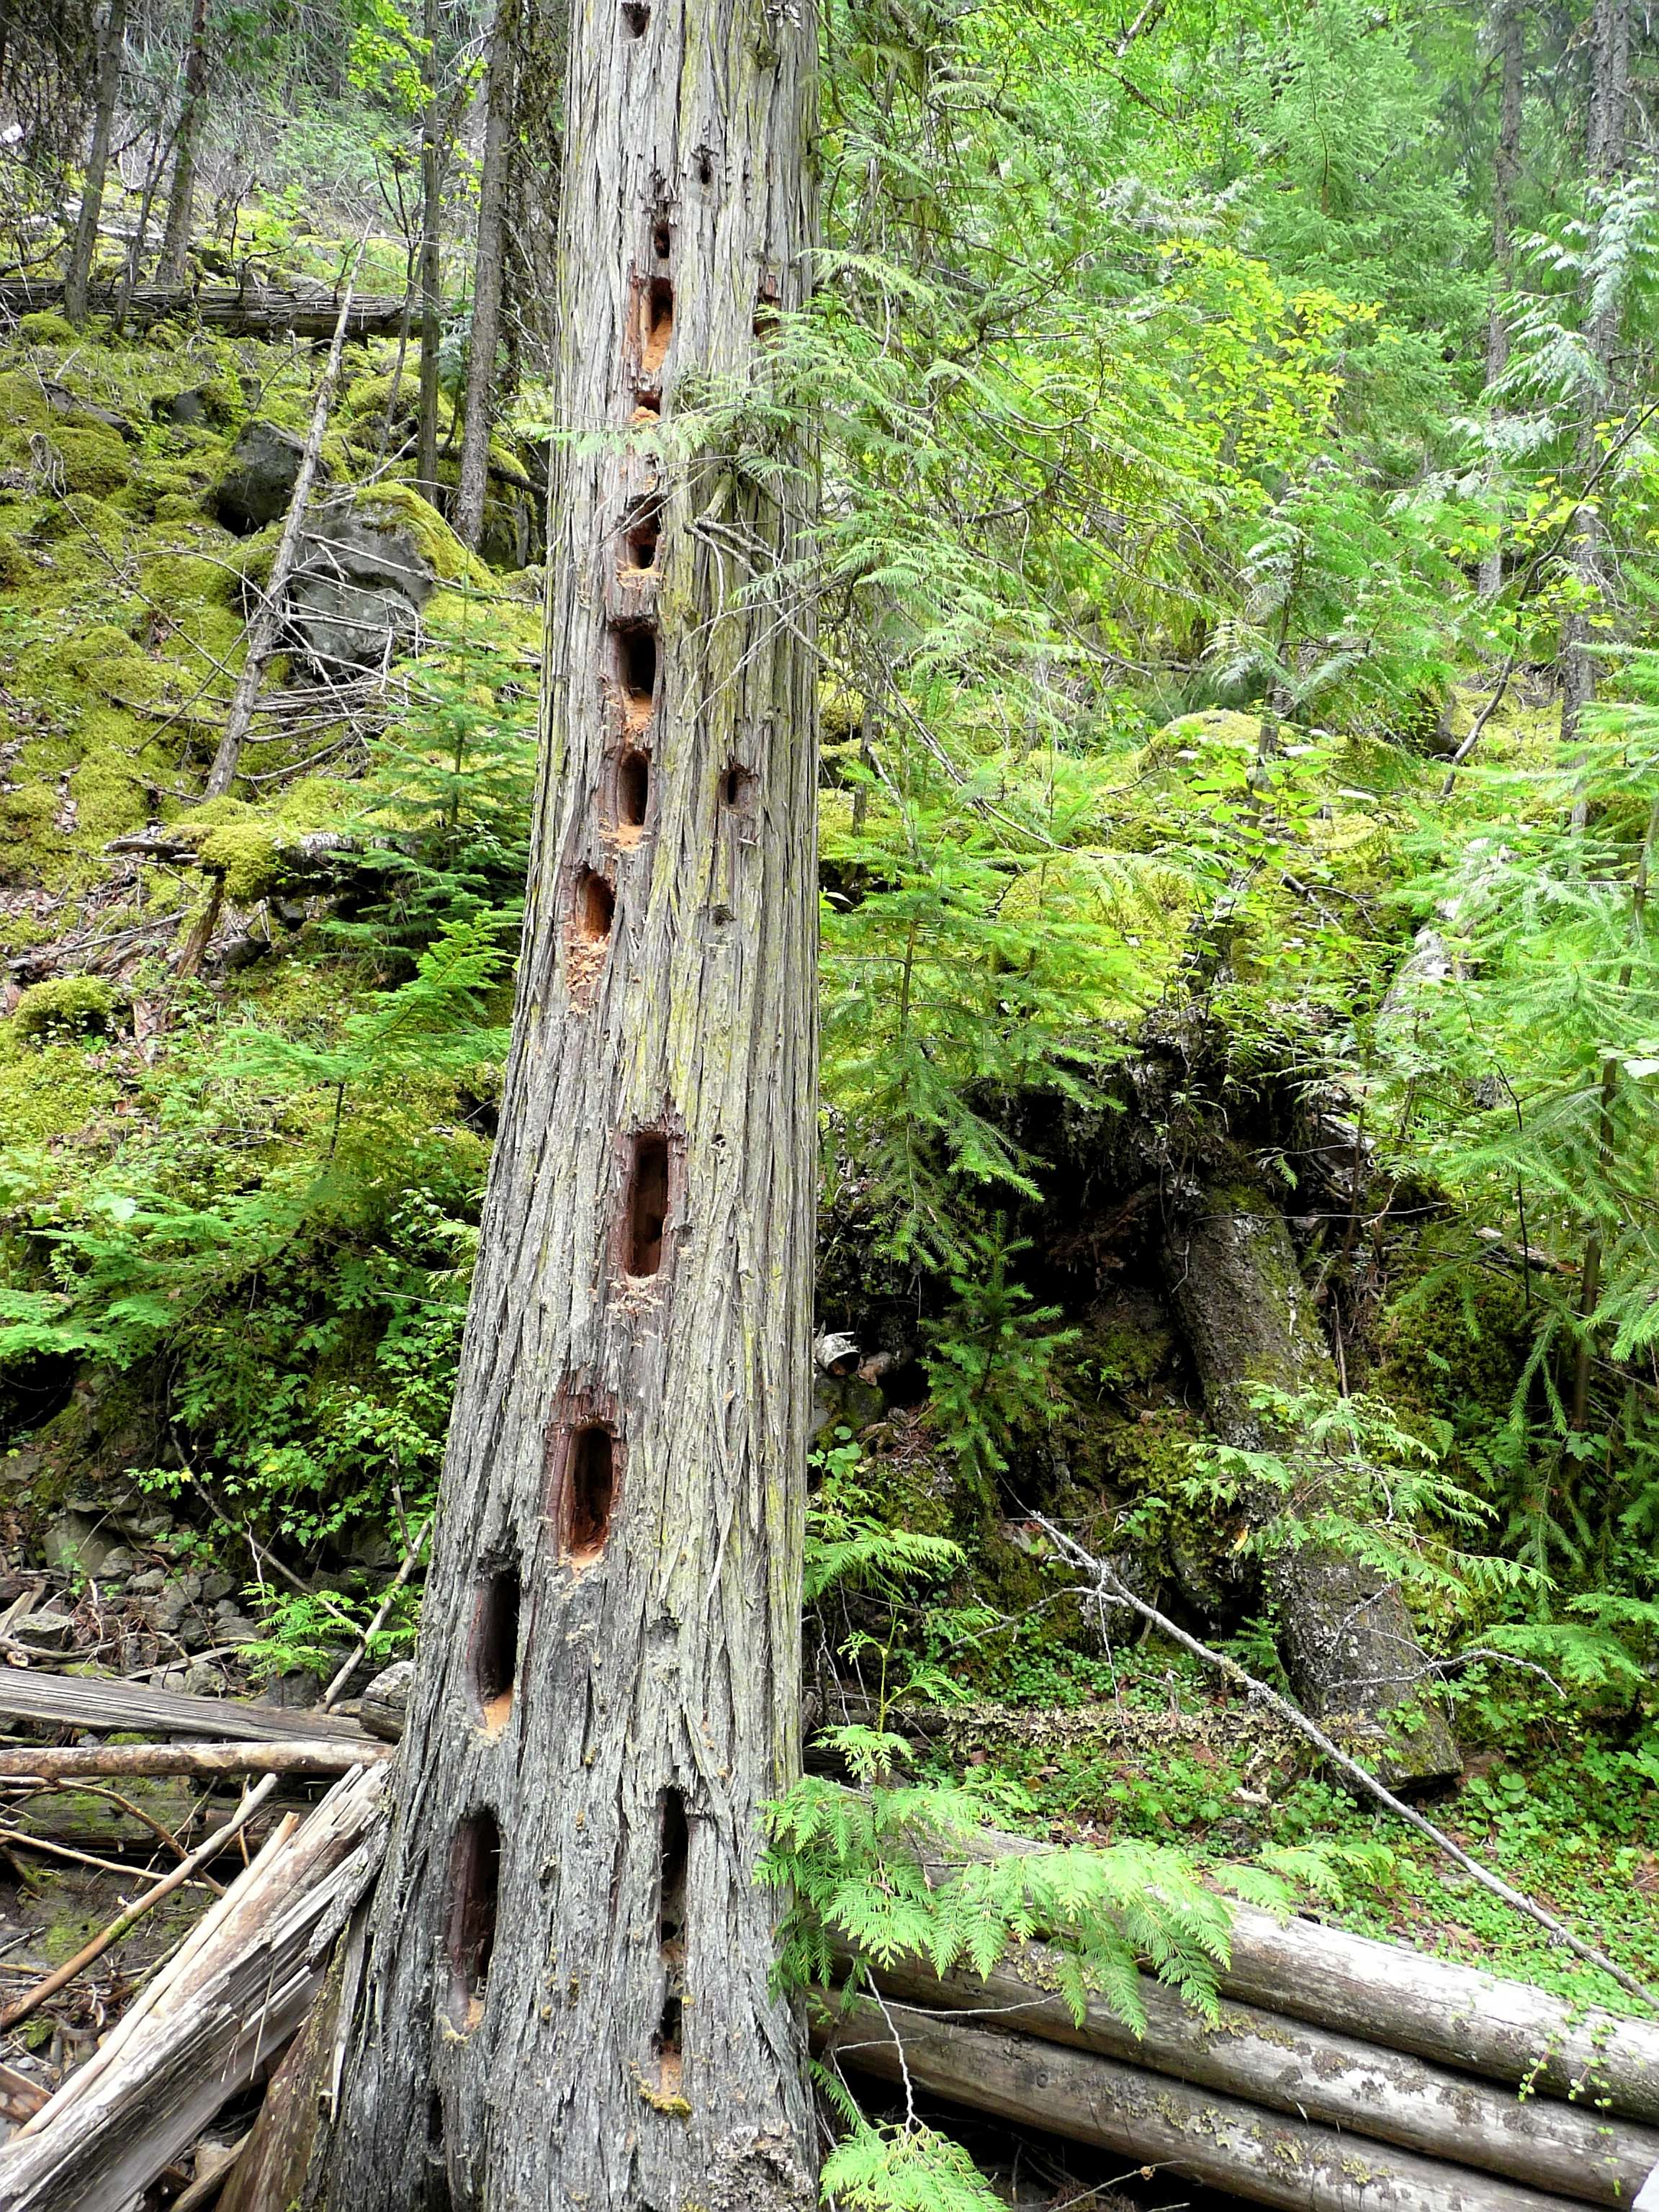
Woodpecker Tree
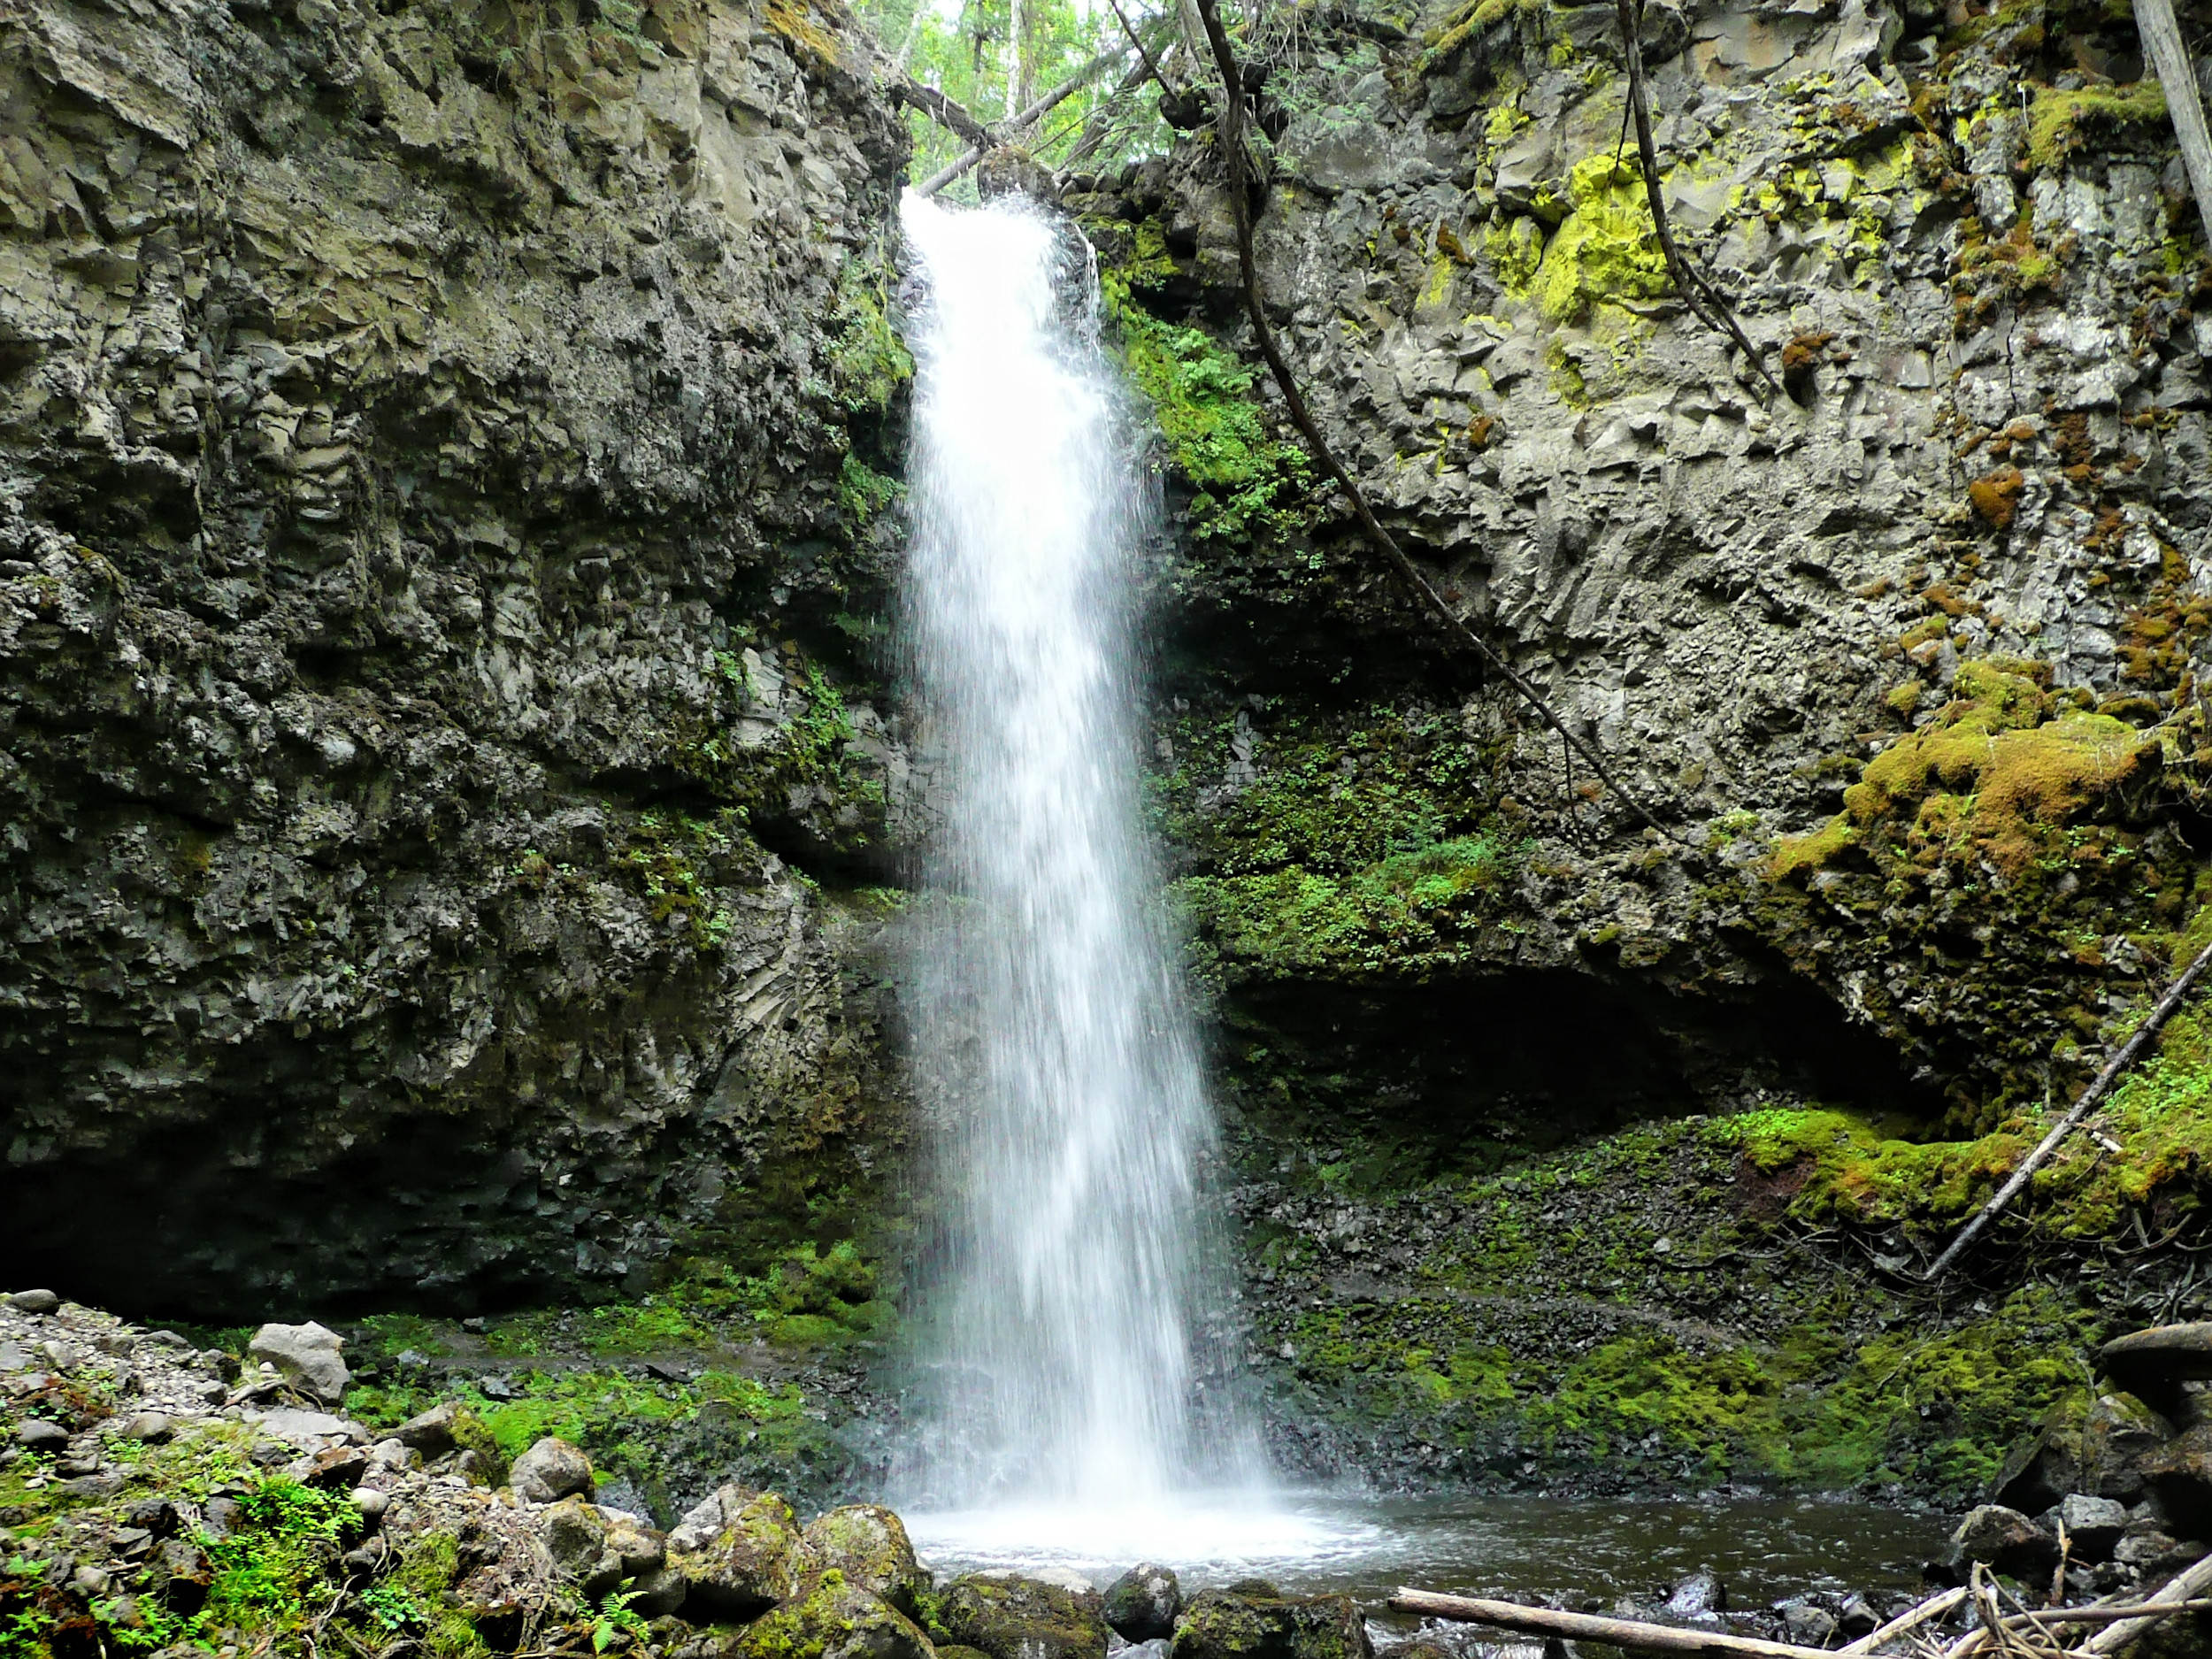
Candle Creek Falls
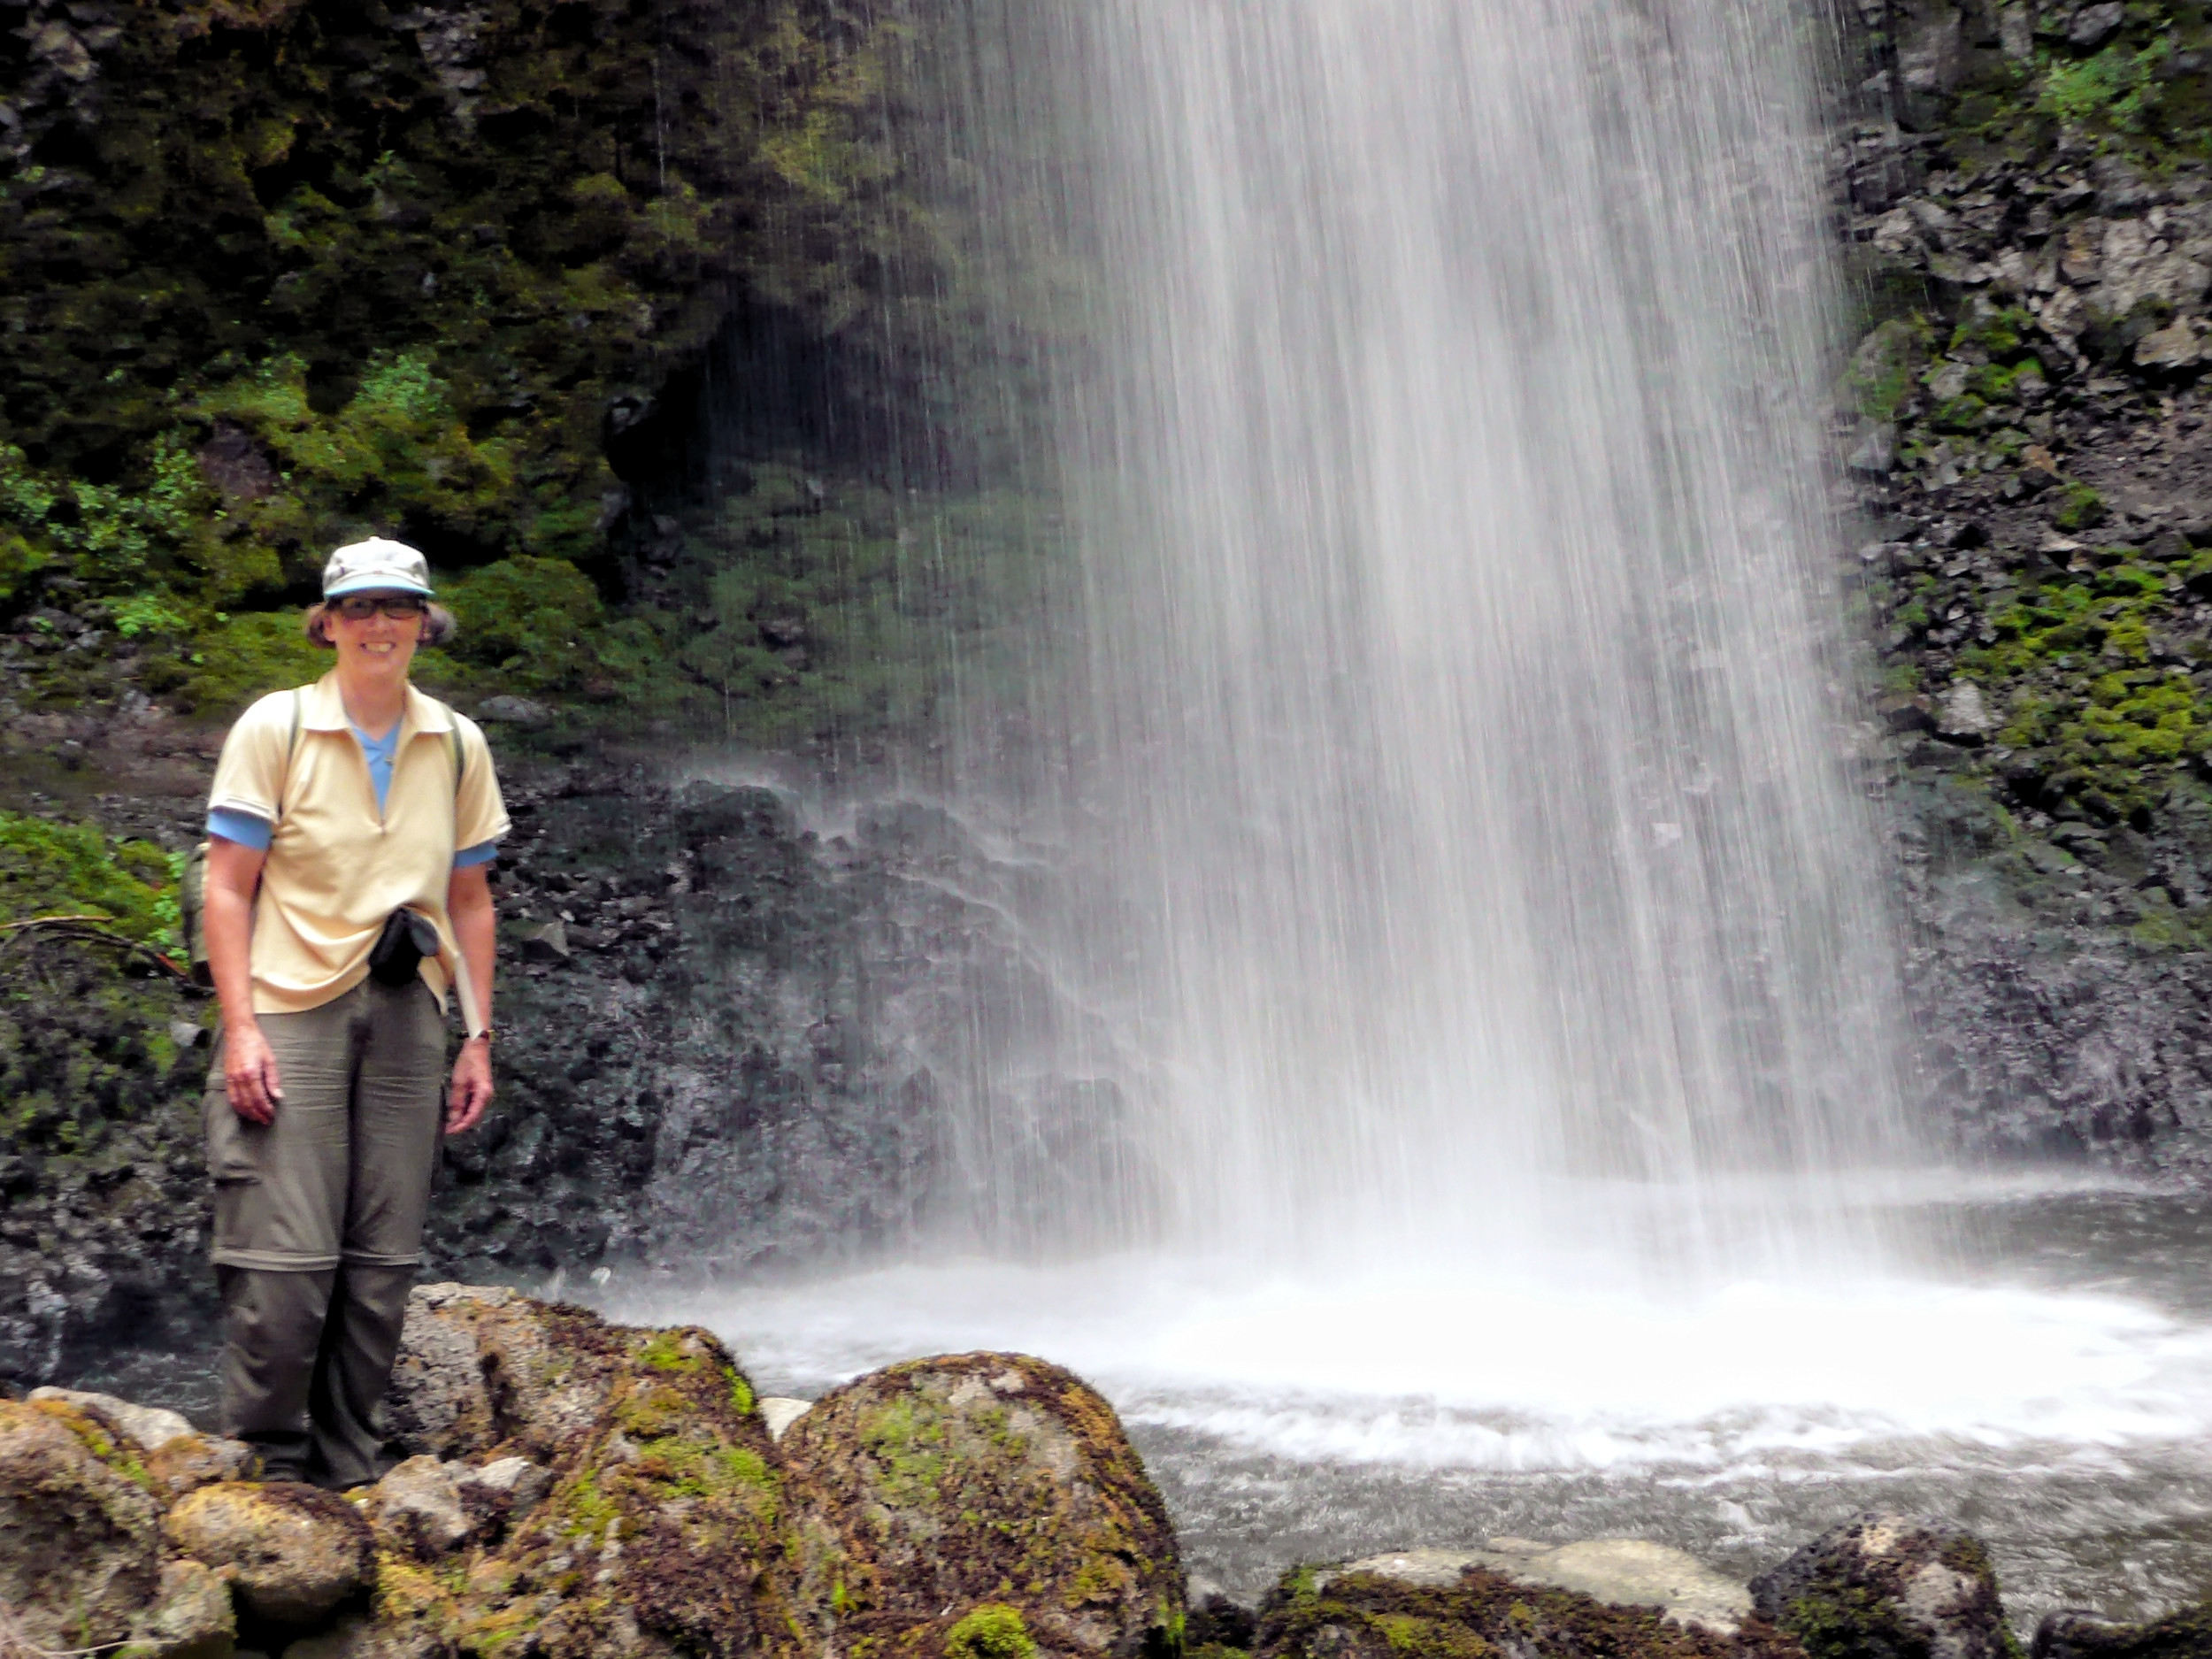
I scramble to the bottom of the falls. You can walk behind the falls if you don’t mind being sprayed.
A side track leads to Osprey Viewpoint which has a nice view of the Clearwater River, Goose Rock and a rapid named Surprise Eddy.
Osprey Viewpoint
Goose Rock
From here on, the trail climbs steadily towards the Clearwater Valley Road. Just before it emerges at the side of the road I take the steep and always slippery side trail to the Triple Decker Falls. In three tiers they fall 60 meters deep and are quite a sight.
Triple Decker Falls
Triple Decker Falls Close-up
I come out by the Clearwater Valley Road at kilometer 4.3. There is no official parking here, just a space behind the barrier with enough room for two or three vehicles. It would be a good idea to deposit another car or at least a bicycle here. Without, I have to hike a few kilometers along the road until I reach a small trail under some powerlines that brings me back down to the river. From there, I retrace my steps over the Clearwater River Trail back to my car.
The Clearwater River Trail in summer
Another time, in August, I hike here with a group of friends. We stage vehicles on both ends of the trail. We decide to hike downriver this time to save us some elevation gain. So we start out at the small parking area at kilometer 4.3 on the Park Road and end at Dutch Lake where we use one of the cars to drive back to the starting point.
This section of the Clearwater River Trail is not maintained any longer and has deteriorated substantially. The accesses are at kilometer 4.3 (Triple Decker Falls) and at kilometer 8.6 (Natural Bridge). The hike is 10 kilometers long and takes three to four hours.
The most recent information about this section dates from 2016 and is available here.
| Distance | 5.3 km |
| Time | 3 hrs |
| Min. Elev. | 389 m |
| Max. Elev. | 757 m |
| Ascent | 368 m |
| Cum. Ascent | 680 m |
| Cum. Descent | 660 m |
| Date | 21/6/2014 |
This is another section of the Clearwater River Trail that is not maintained any more. On our hike in 2014 it was already overgrown and hard to find, and in July 2020 it became impassable because the bridge over Spahats Creek was swept away. In all likelihood, the bridge will not be replaced. A visit to the spectacular point where Spahats Creek tumbles into the Clearwater River is still possible from the other end of the trail, from Spahats Canyon.
Waterfall but no sight of the Natural Bridge
The trail begins at kilometer 8.6 on the Clearwater Valley Road. We are immediately swallowed by thick forest and after only ten minutes reach a turnoff to the neighboring section of the Clearwater River Trail (see CRT II above). We keep straight and descend a rocky slope towards the Natural Bridge, a slender span between two basalt cliffs. According to an older guidebook there is still a faint trail to a good viewpoint. We did not find it, but supposedly with some more effort and scrambling it is still possible to spot the bridge.
From here the trail crisscrosses downhill and is easily lost in the rubble of lava rock. There used to be cairns to mark it, but they have fallen down or become overgrown. We hike through the trees until we reach the bottom of the canyon that is spanned by the Natural Bridge. It remains hidden from view by thick brush. Fallen trees block the trail frequently; there is a lot of uphill and downhill walking without any views to speak of. At the end of a small ridge we lose the trail once again. To our right tower 150-meter-high cliffs of volcanic rock and to our left the Clearwater River rages. The trail appears again, leads down to the water’s edge and then immediately back up. It is so steep here that they installed a rope to hold onto.
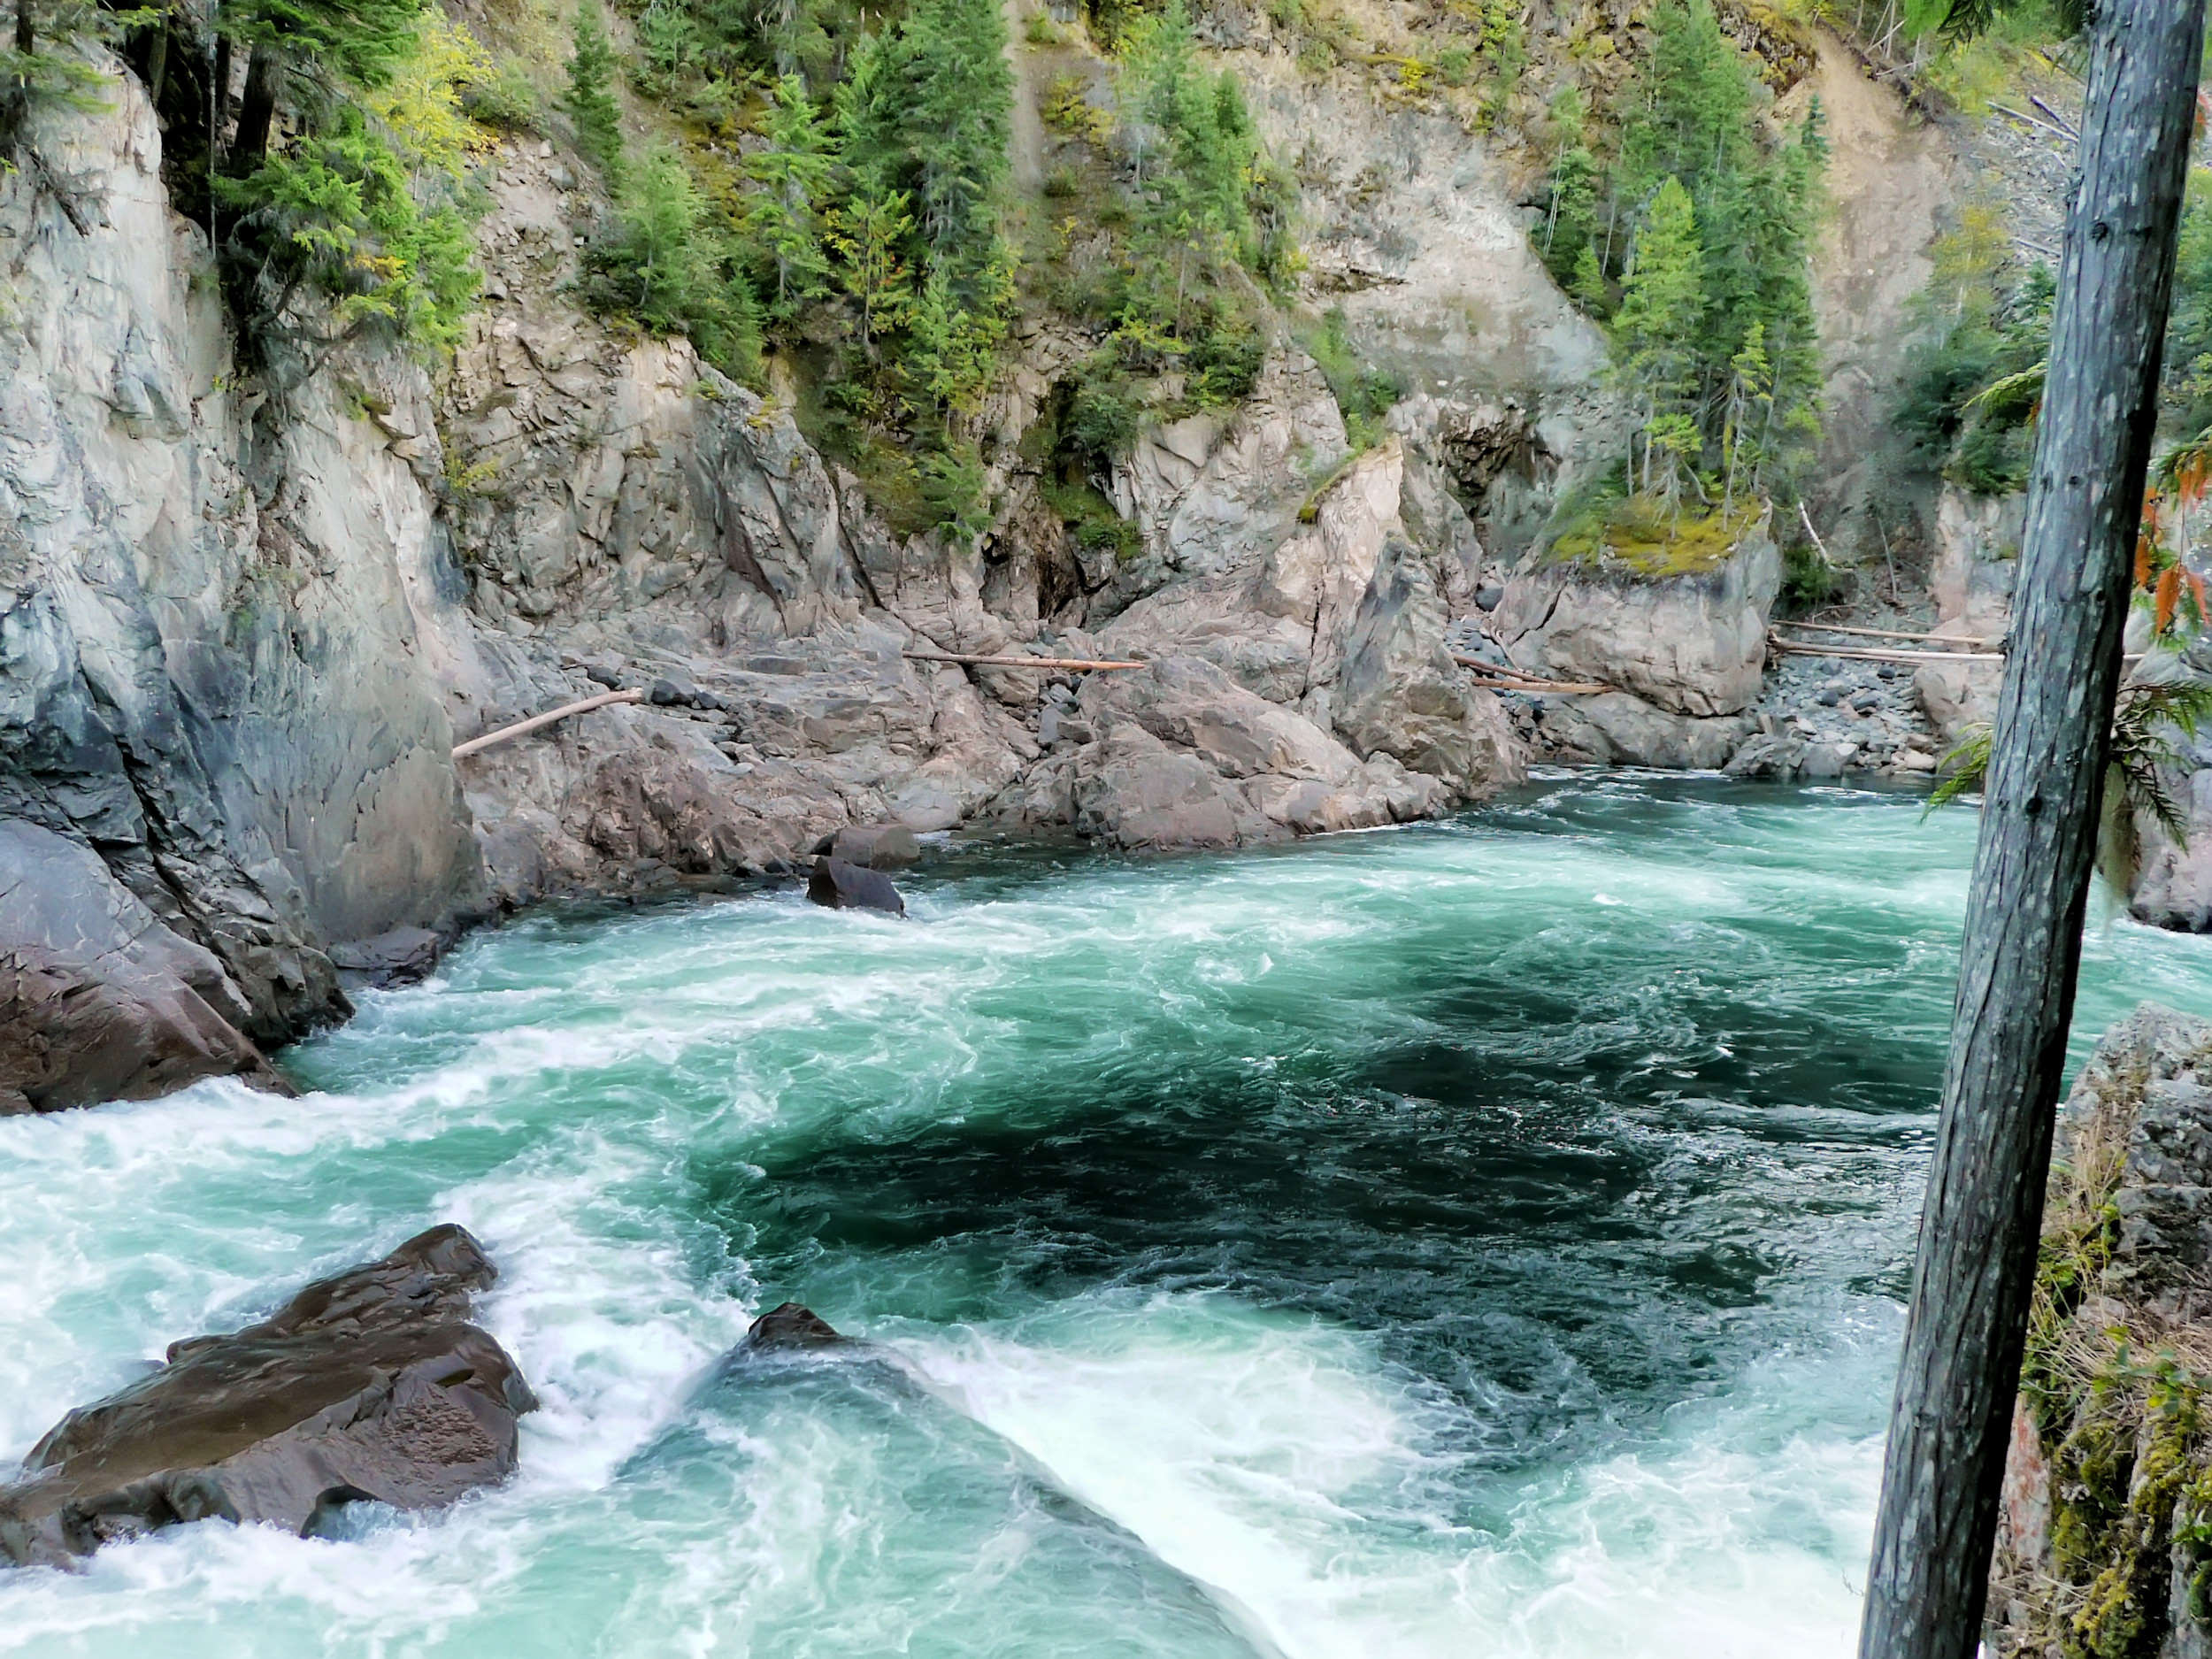
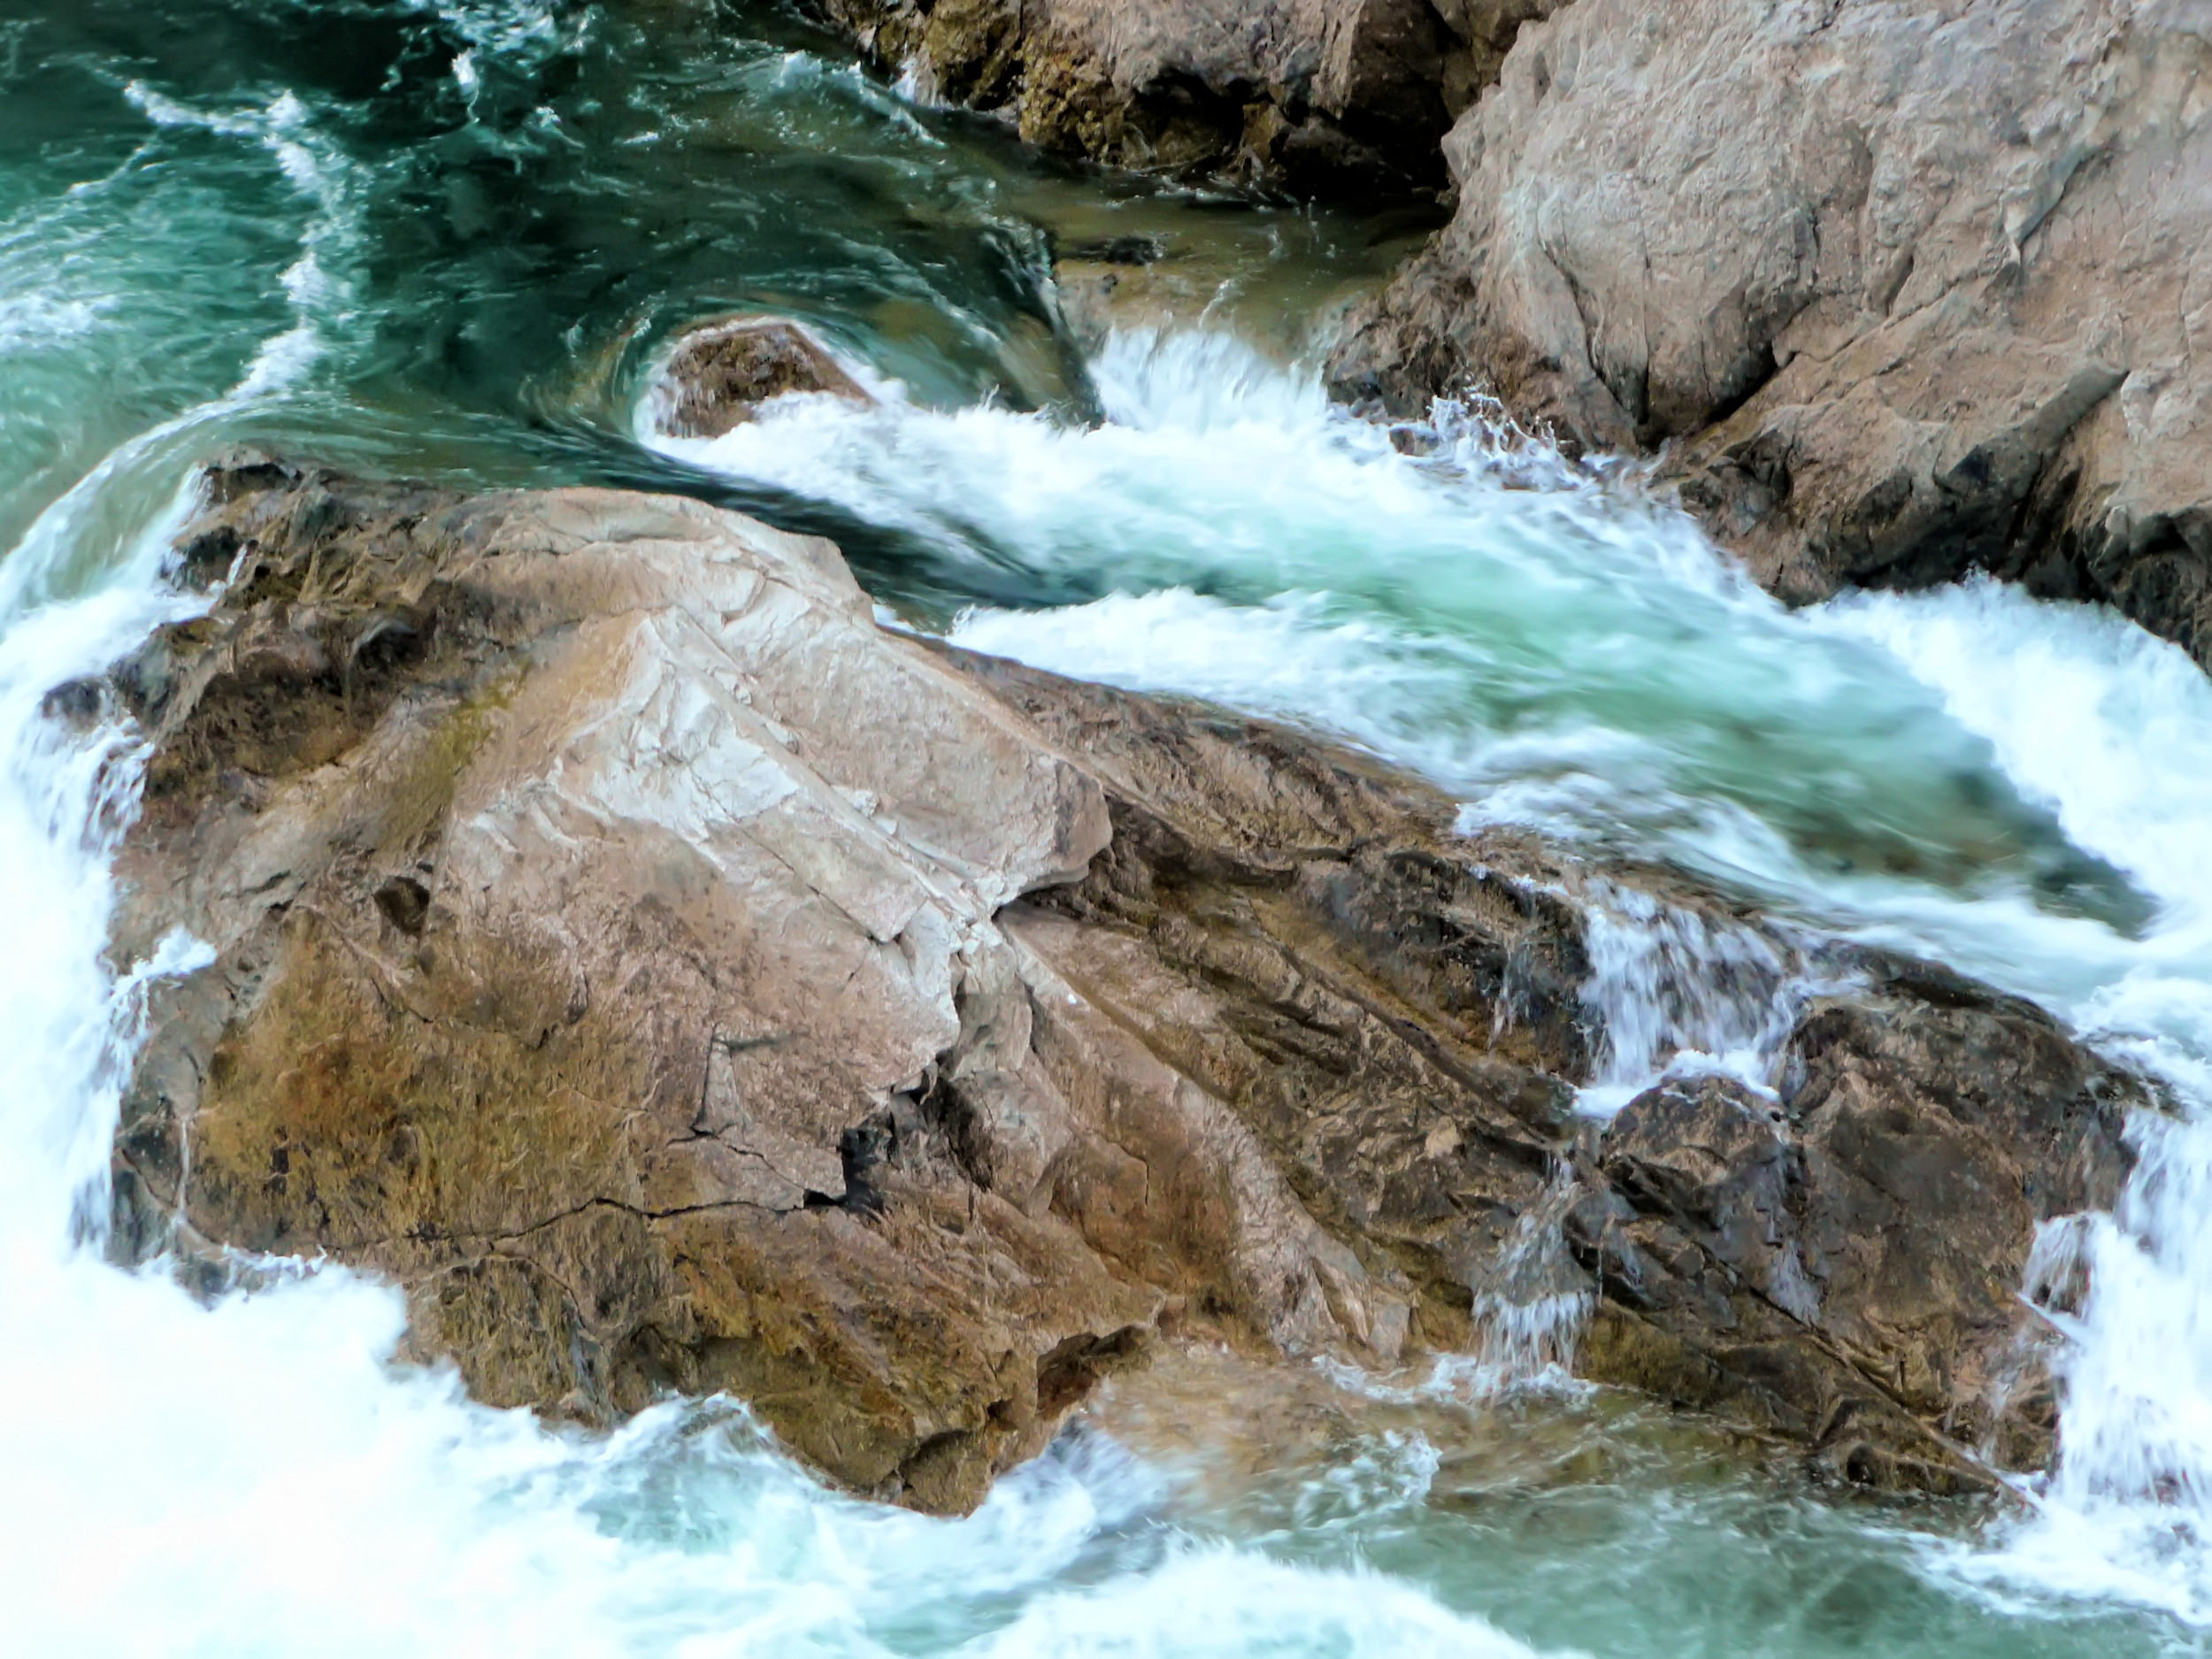
Clearwater River
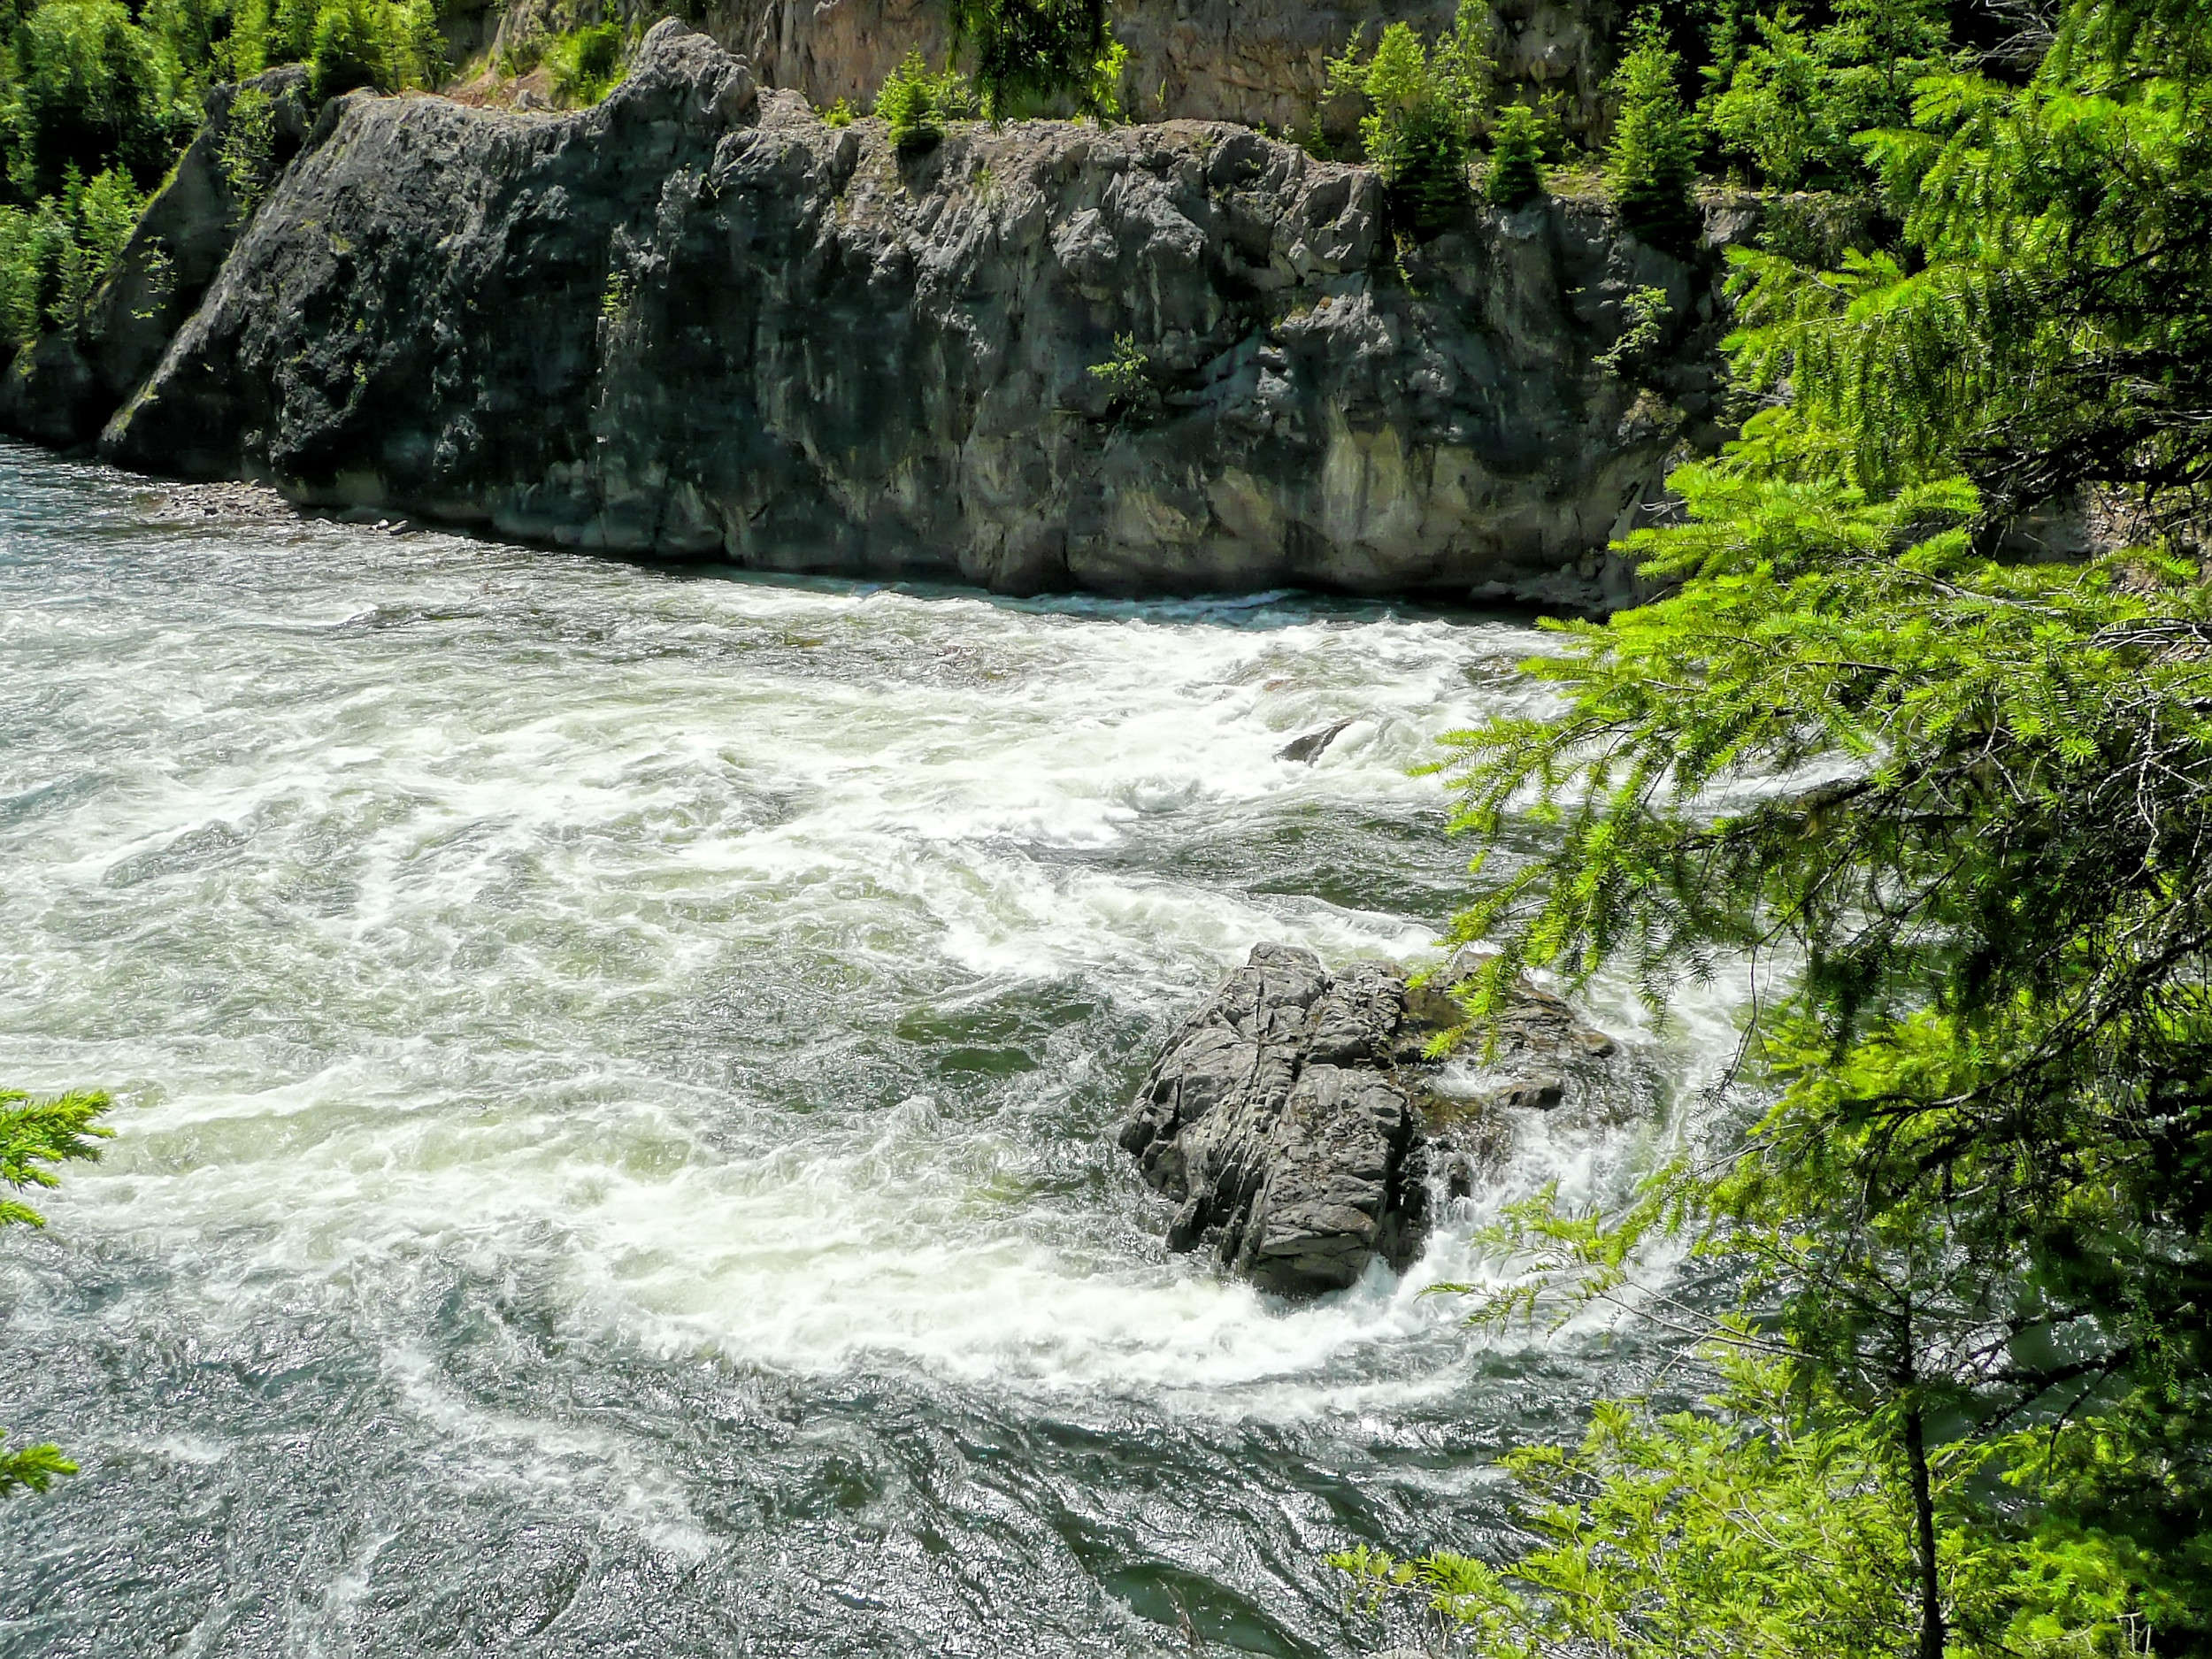
Rapid in the Clearwater River
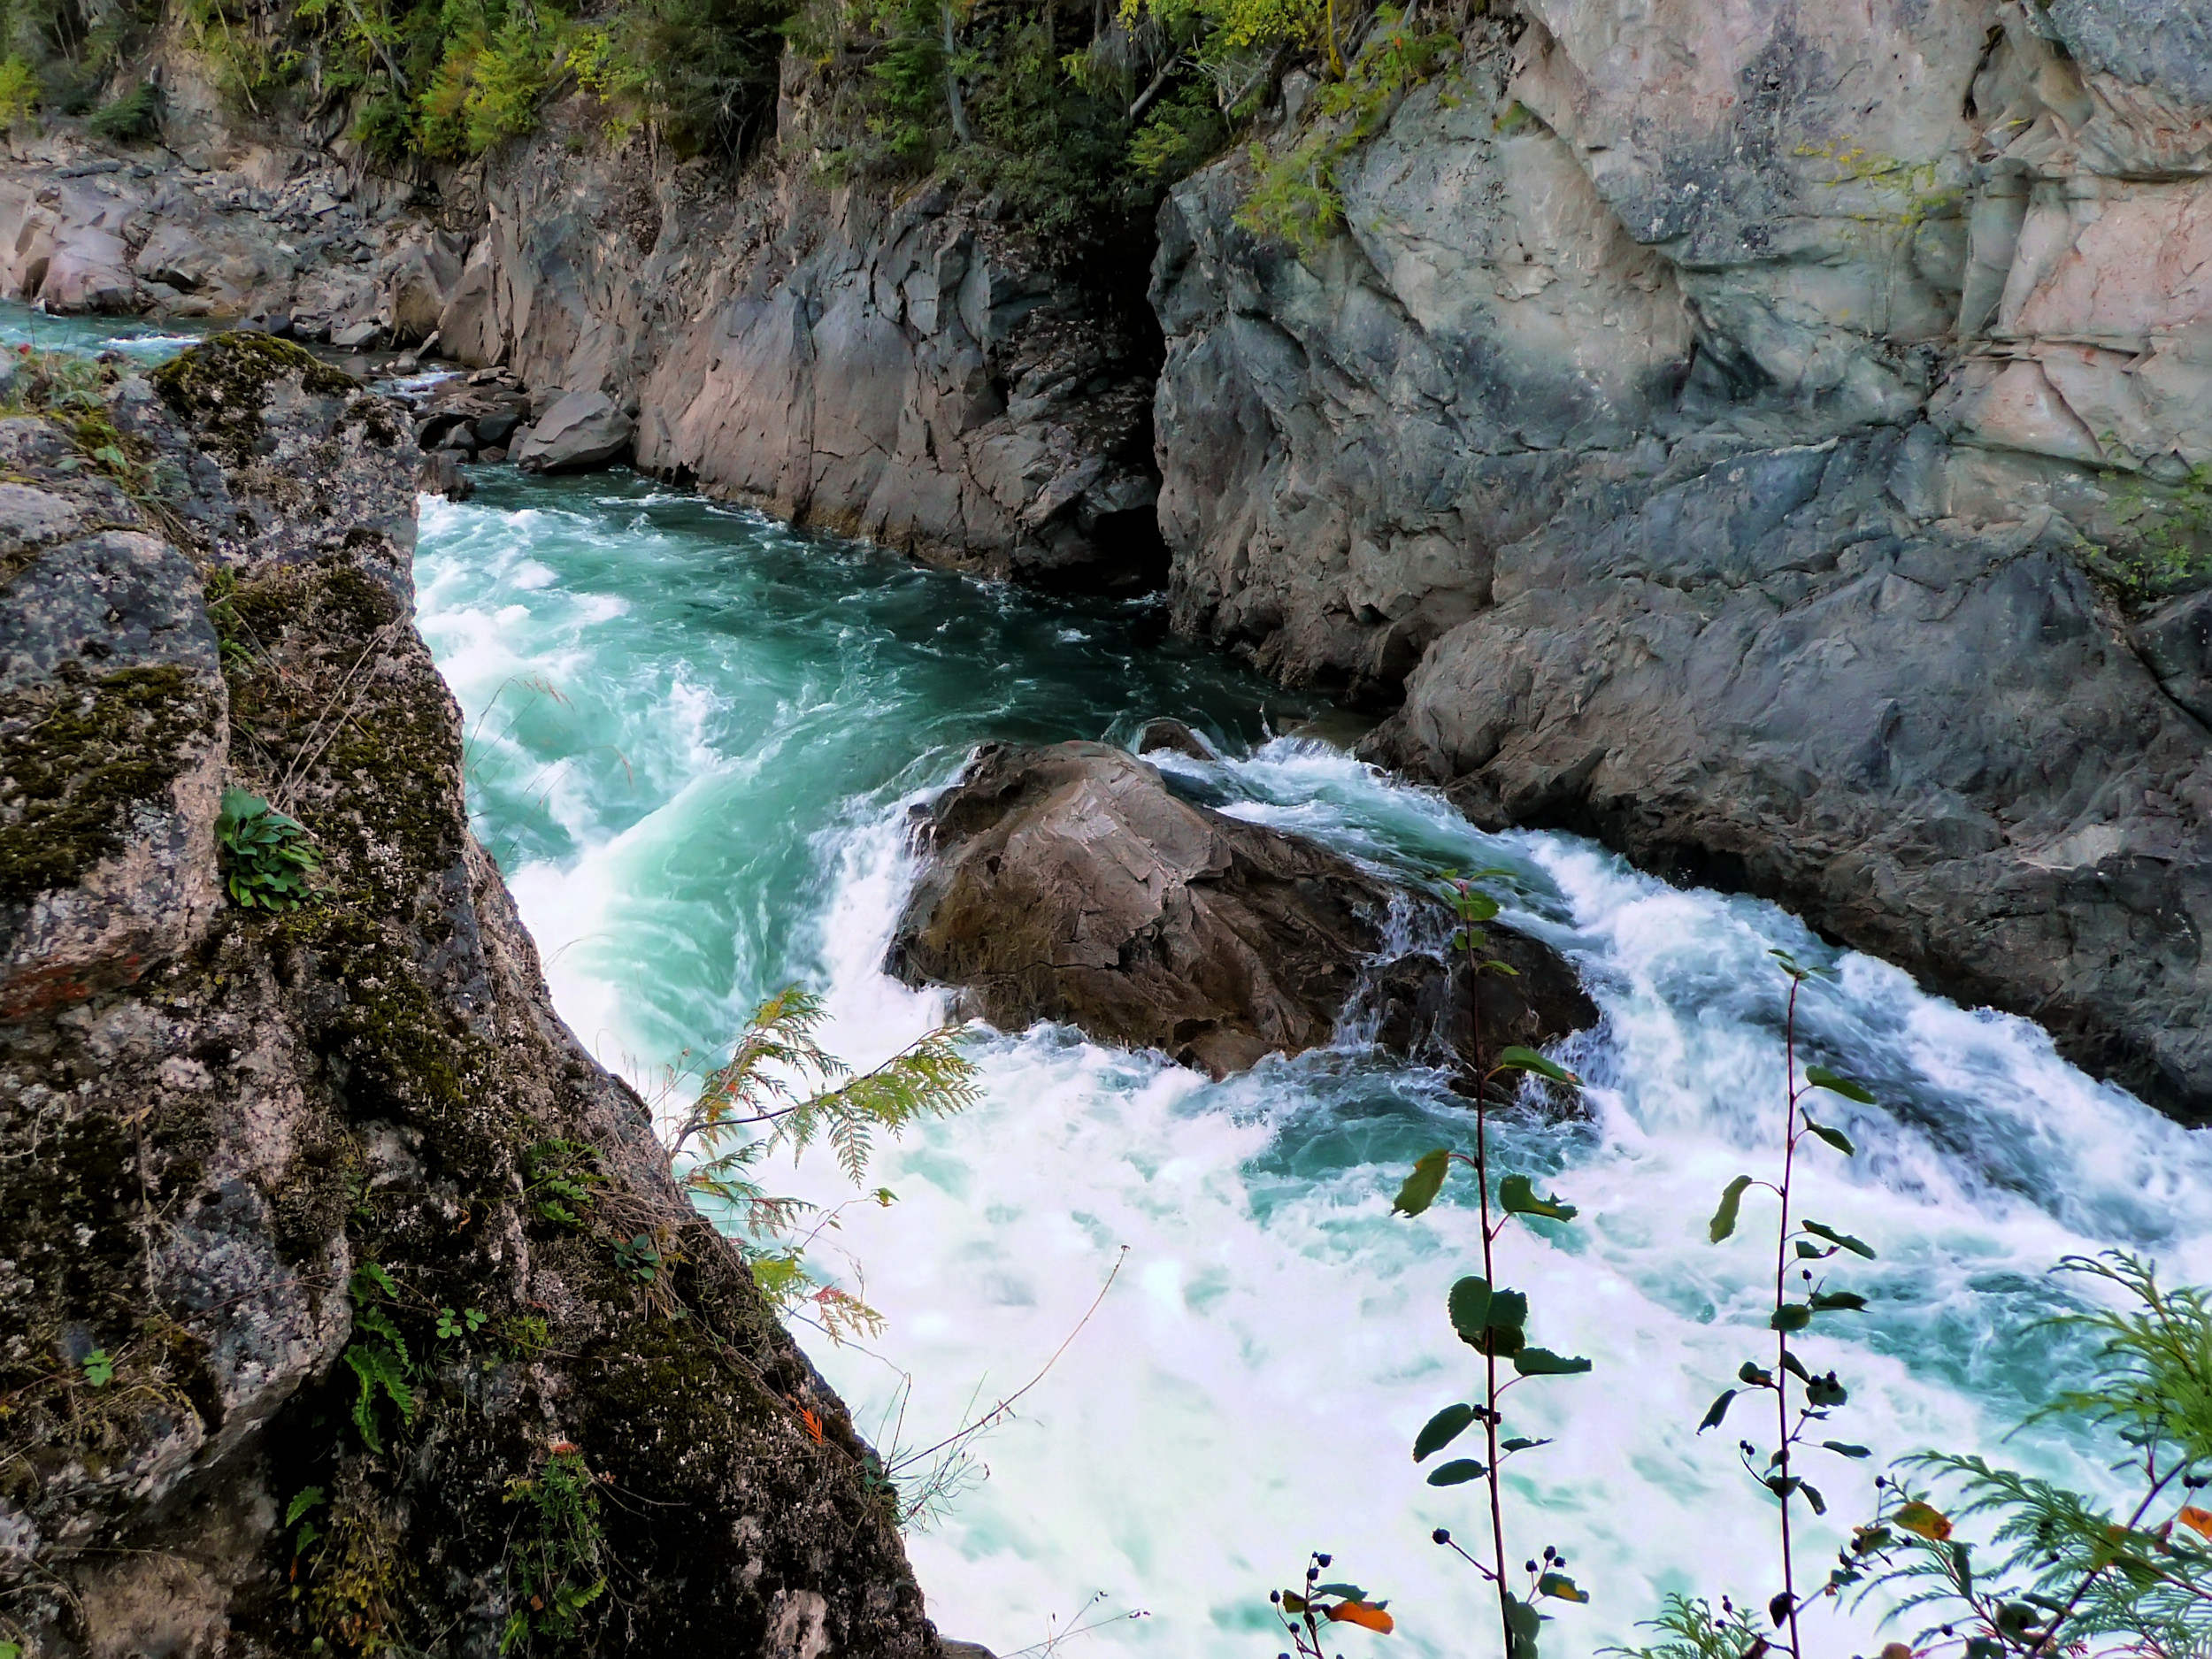
We arrive at a fork in the trail and keep right for the then still existing bridge over Spahats Creek. Spahats Creek’s torrential floods have caused frequent damage in the past.
Spahats Creek
Spahats Creek Bridge
In 2002 the old bridge was swept away and replaced by this one. In 2020 the new bridge suffered the same fate. Ever since, this section of the Clearwater River Trail cannot be hiked in its entirety any longer.
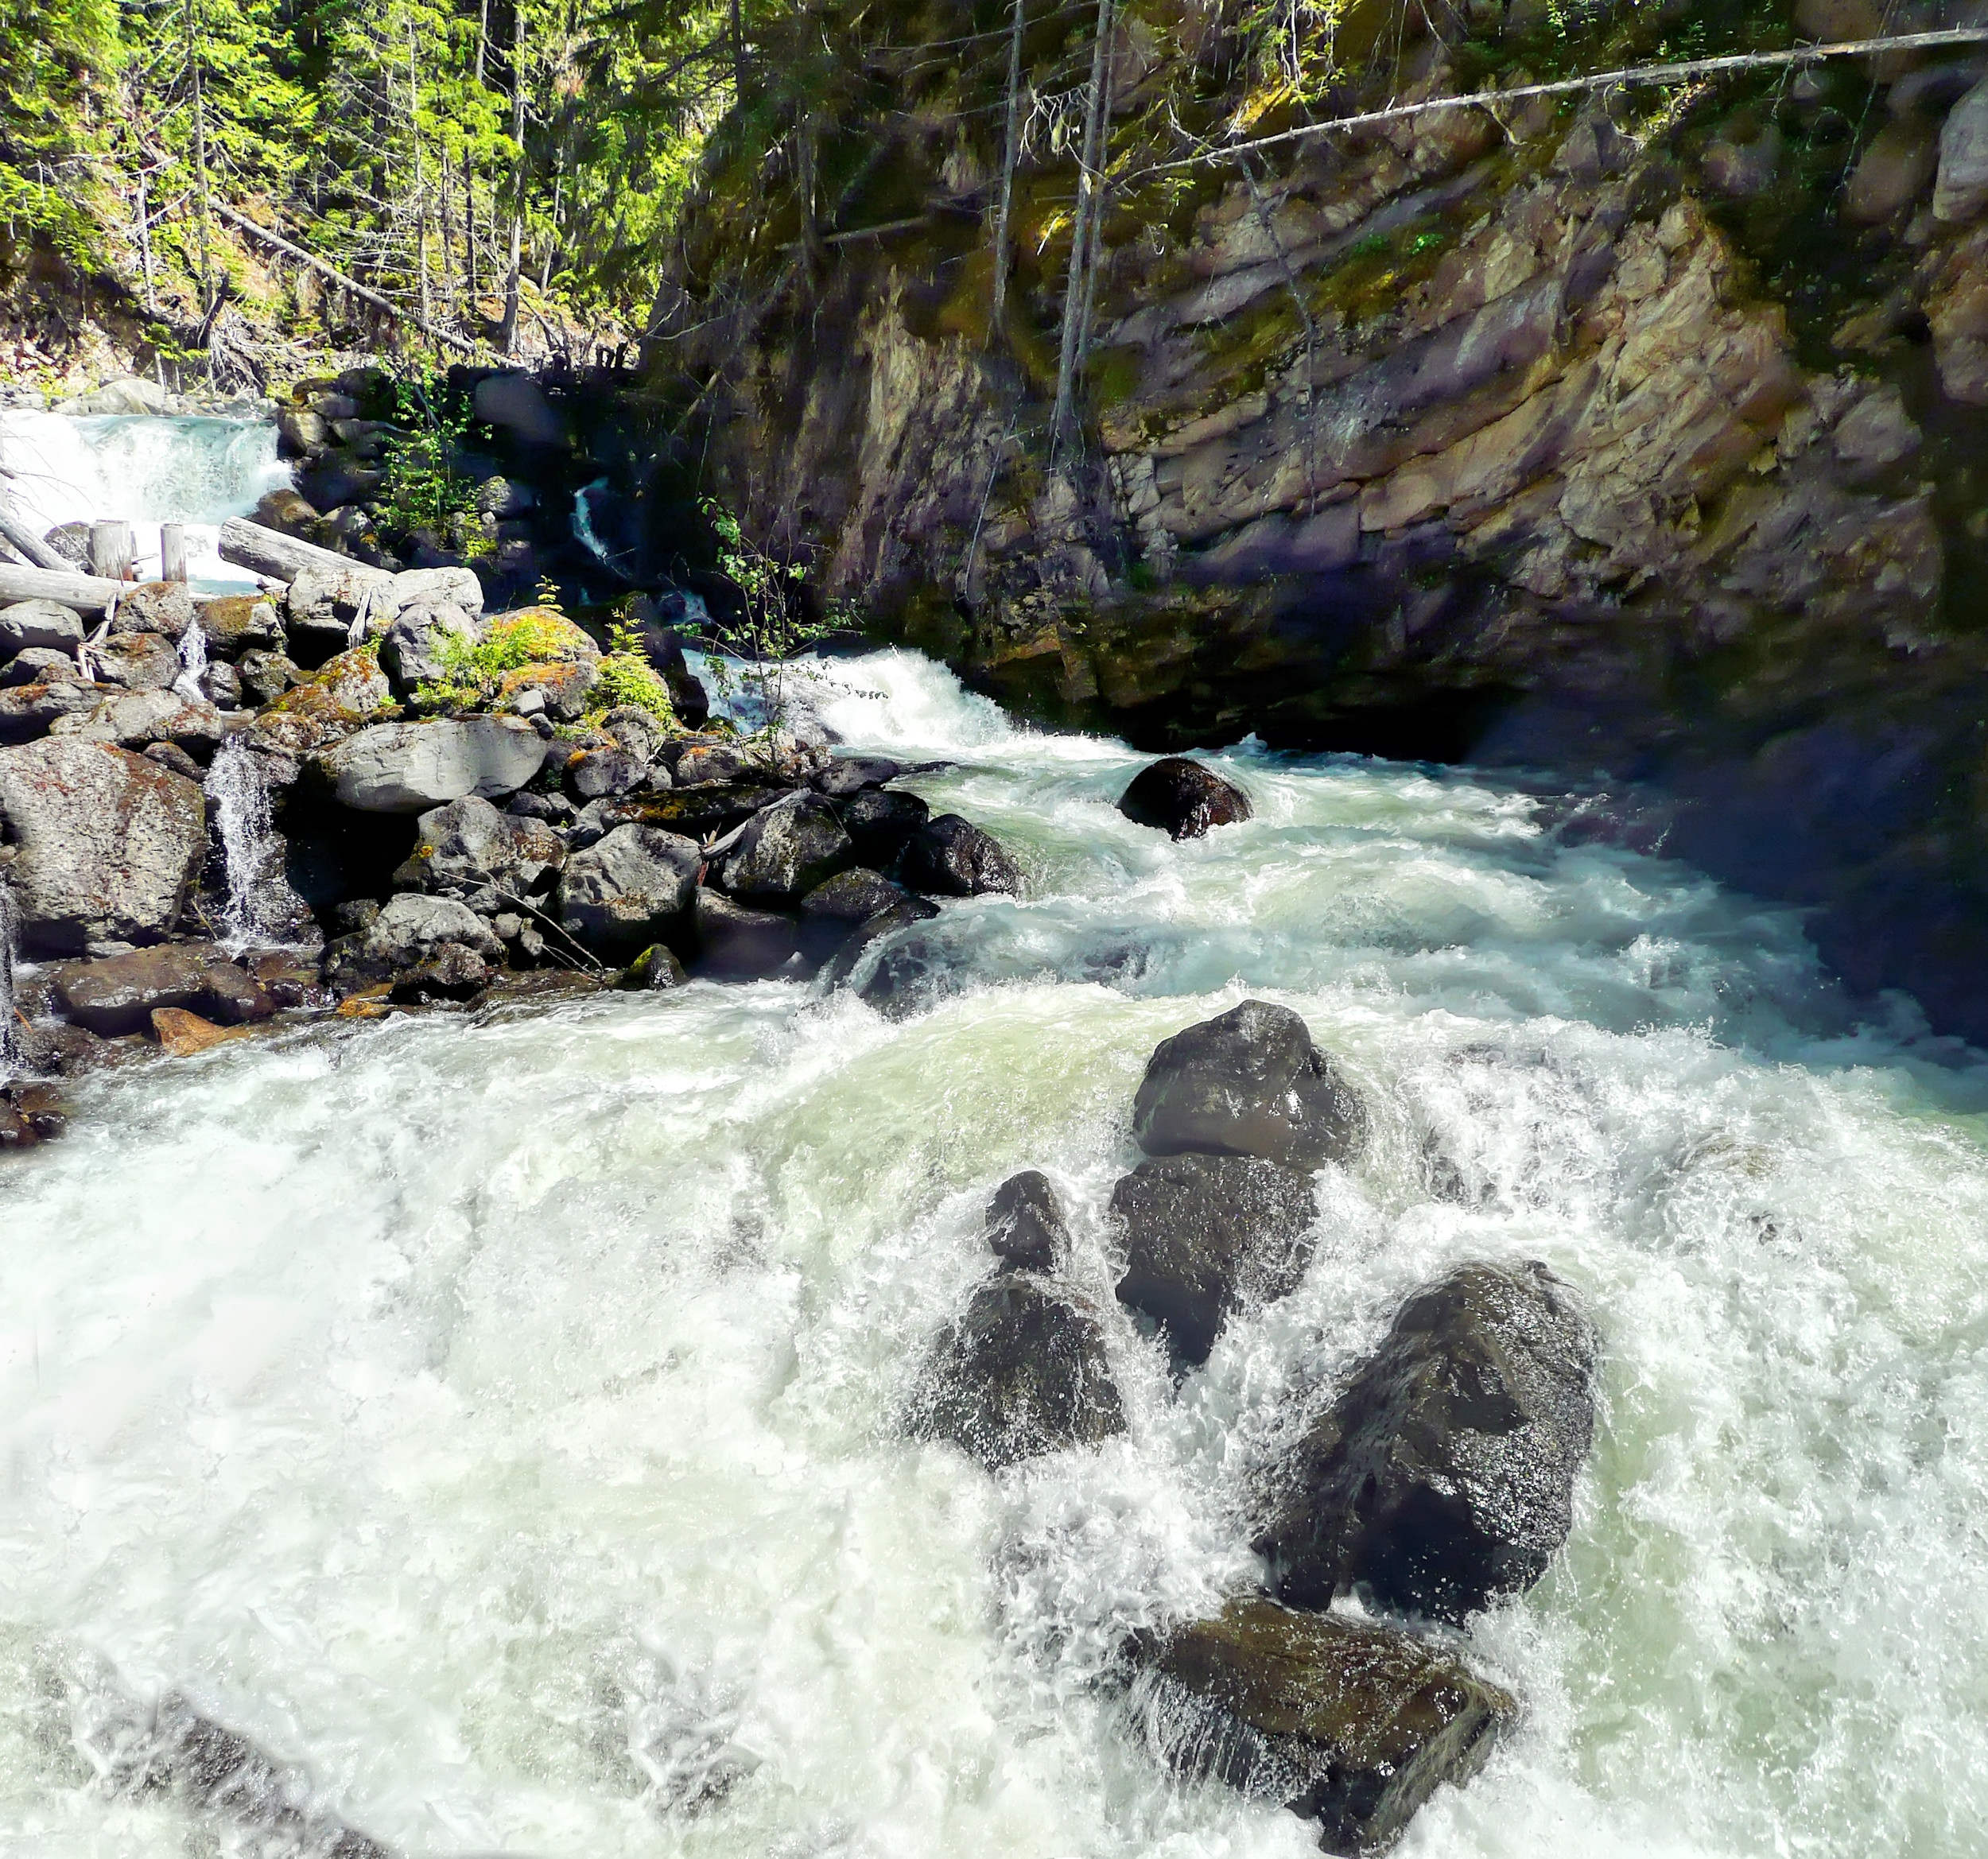
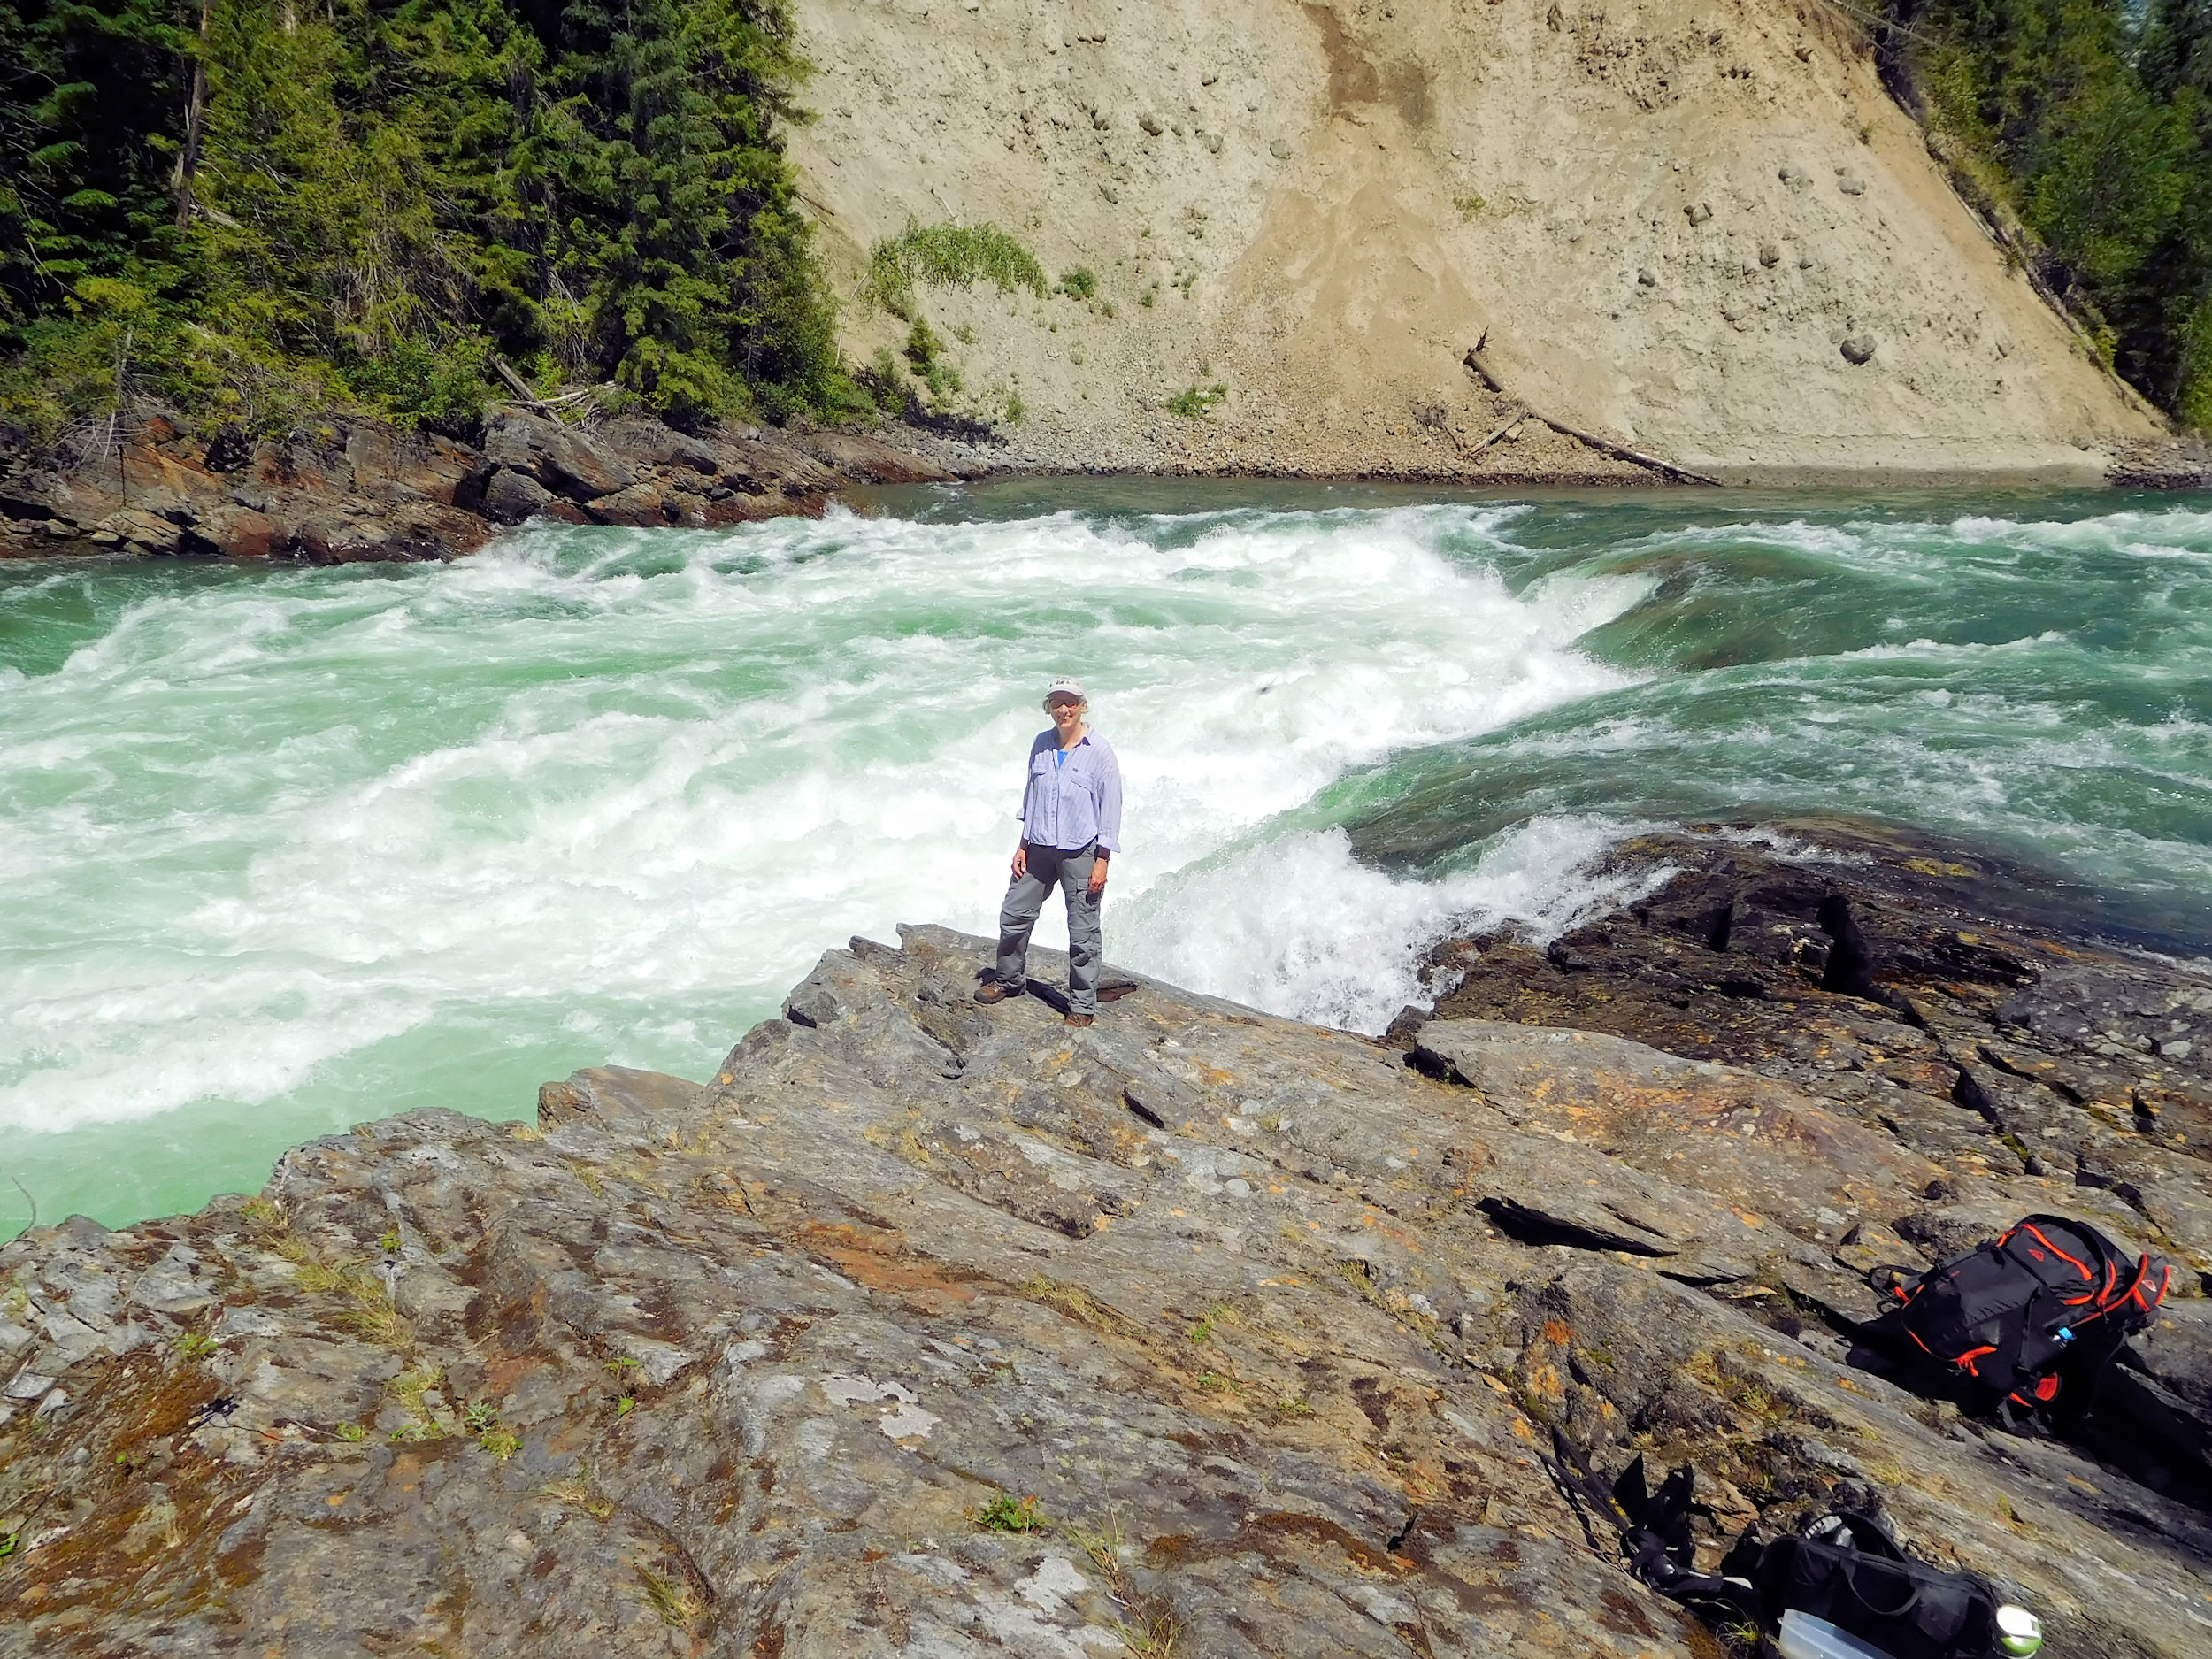
This spot at the far end of Spahats Canyon, where the raging creek drains into the Clearwater River, is special. Nature’s impressive and violent force is very present here. Fortunately it remains possible to access this place from the other side of the now destroyed bridge.
Spahats Creek and remainders of the destroyed bridge
Steep ascent to the Spahats Falls viewing platform
We cross the bridge, climb a small ladder and reach another fork in the trail. To the right you can access the bottom of Spahats Falls, a side trip for people with strong nerves, especially if you proceed all the way into the deep, narrow and always slippery-wet canyon.
We keep left and climb up the extremely steep hillside of the canyon. This is not an official trail and there are no switchbacks to help with the ascent, it is straight up. After half an hour of scrambling and panting, we emerge near the Spahats Falls viewing platform.
Spahats Falls
From here we gaze into the Spahats Canyon, looking back at the way we have come.
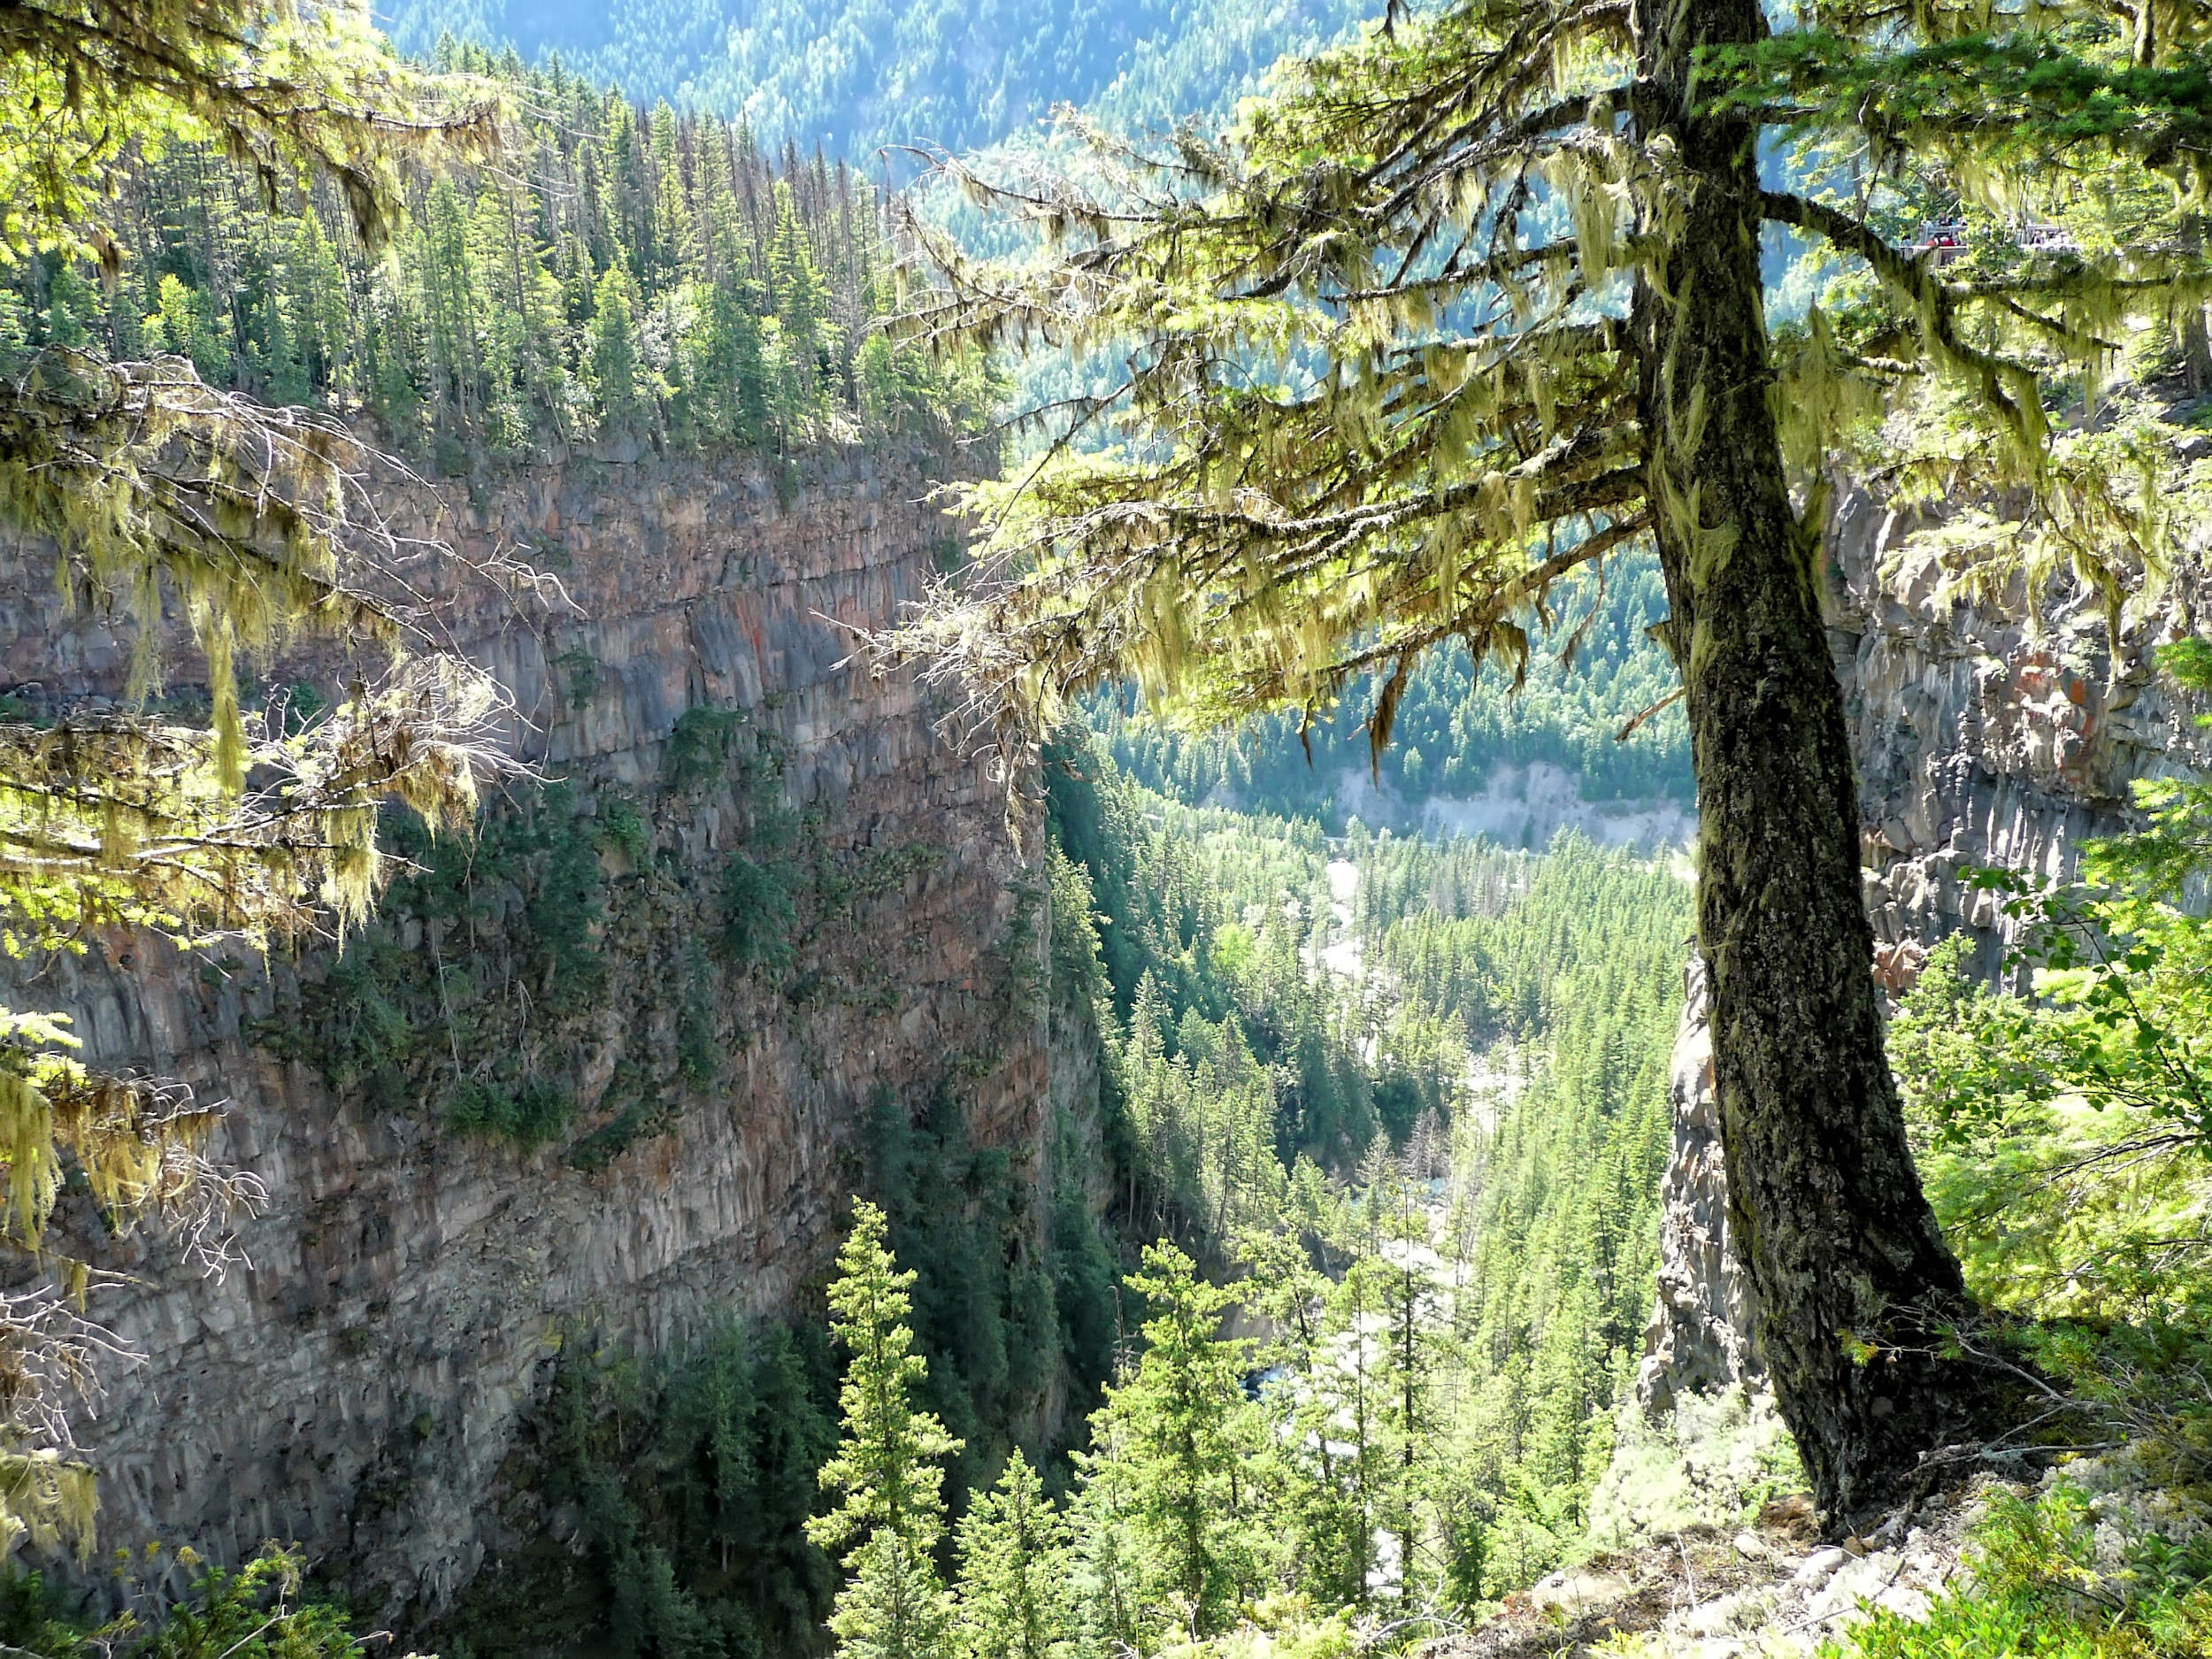
Spahats Canyon
“Coming Soon“
This section of the Clearwater River Trails is still on my To-Do-List.
“Coming Soon?“
Since August 2016 the access to Third Canyon is closed because of a damaged bridge.
| Distance | 7.4 km |
| Time | 2 ½ hrs |
| Min. Elev. | 534 m |
| Max. Elev. | 609 m |
| Ascent | 63 m |
| Date | 16/9/2012 |
Since July 2020 the Clearwater River Road is closed behind kilometer 9 because of substantial flood damage.
In 2012 we drive the entire 38 kilometers to the end of the Clearwater River Road, where the trail to Sylvia Falls starts. The road has many potholes and our vehicles get whipped by twigs and bushes that encroach from the forest’s edge, but at the time the road is drivable in a regular car.
We stop to visit „The Kettle“. This canyon with its 6+ rated rapids can only be negotiated during low water and by the most experienced white water rafters.
The road ends at the confluence of the Mahood and Clearwater rivers. The bridge over the Mahood River is gone, but there is a basic tent site here and the trailhead to Sylvia Falls.
The trail to Sylvia Falls leads along the west side of the Mahood River through a dense forest of cedars, firs and a tangle of Devils Club. We have to plod through a few wet sections. The boardwalks have partially rotted away and trees have fallen on the trail. Quite obviously the trail is not maintained.
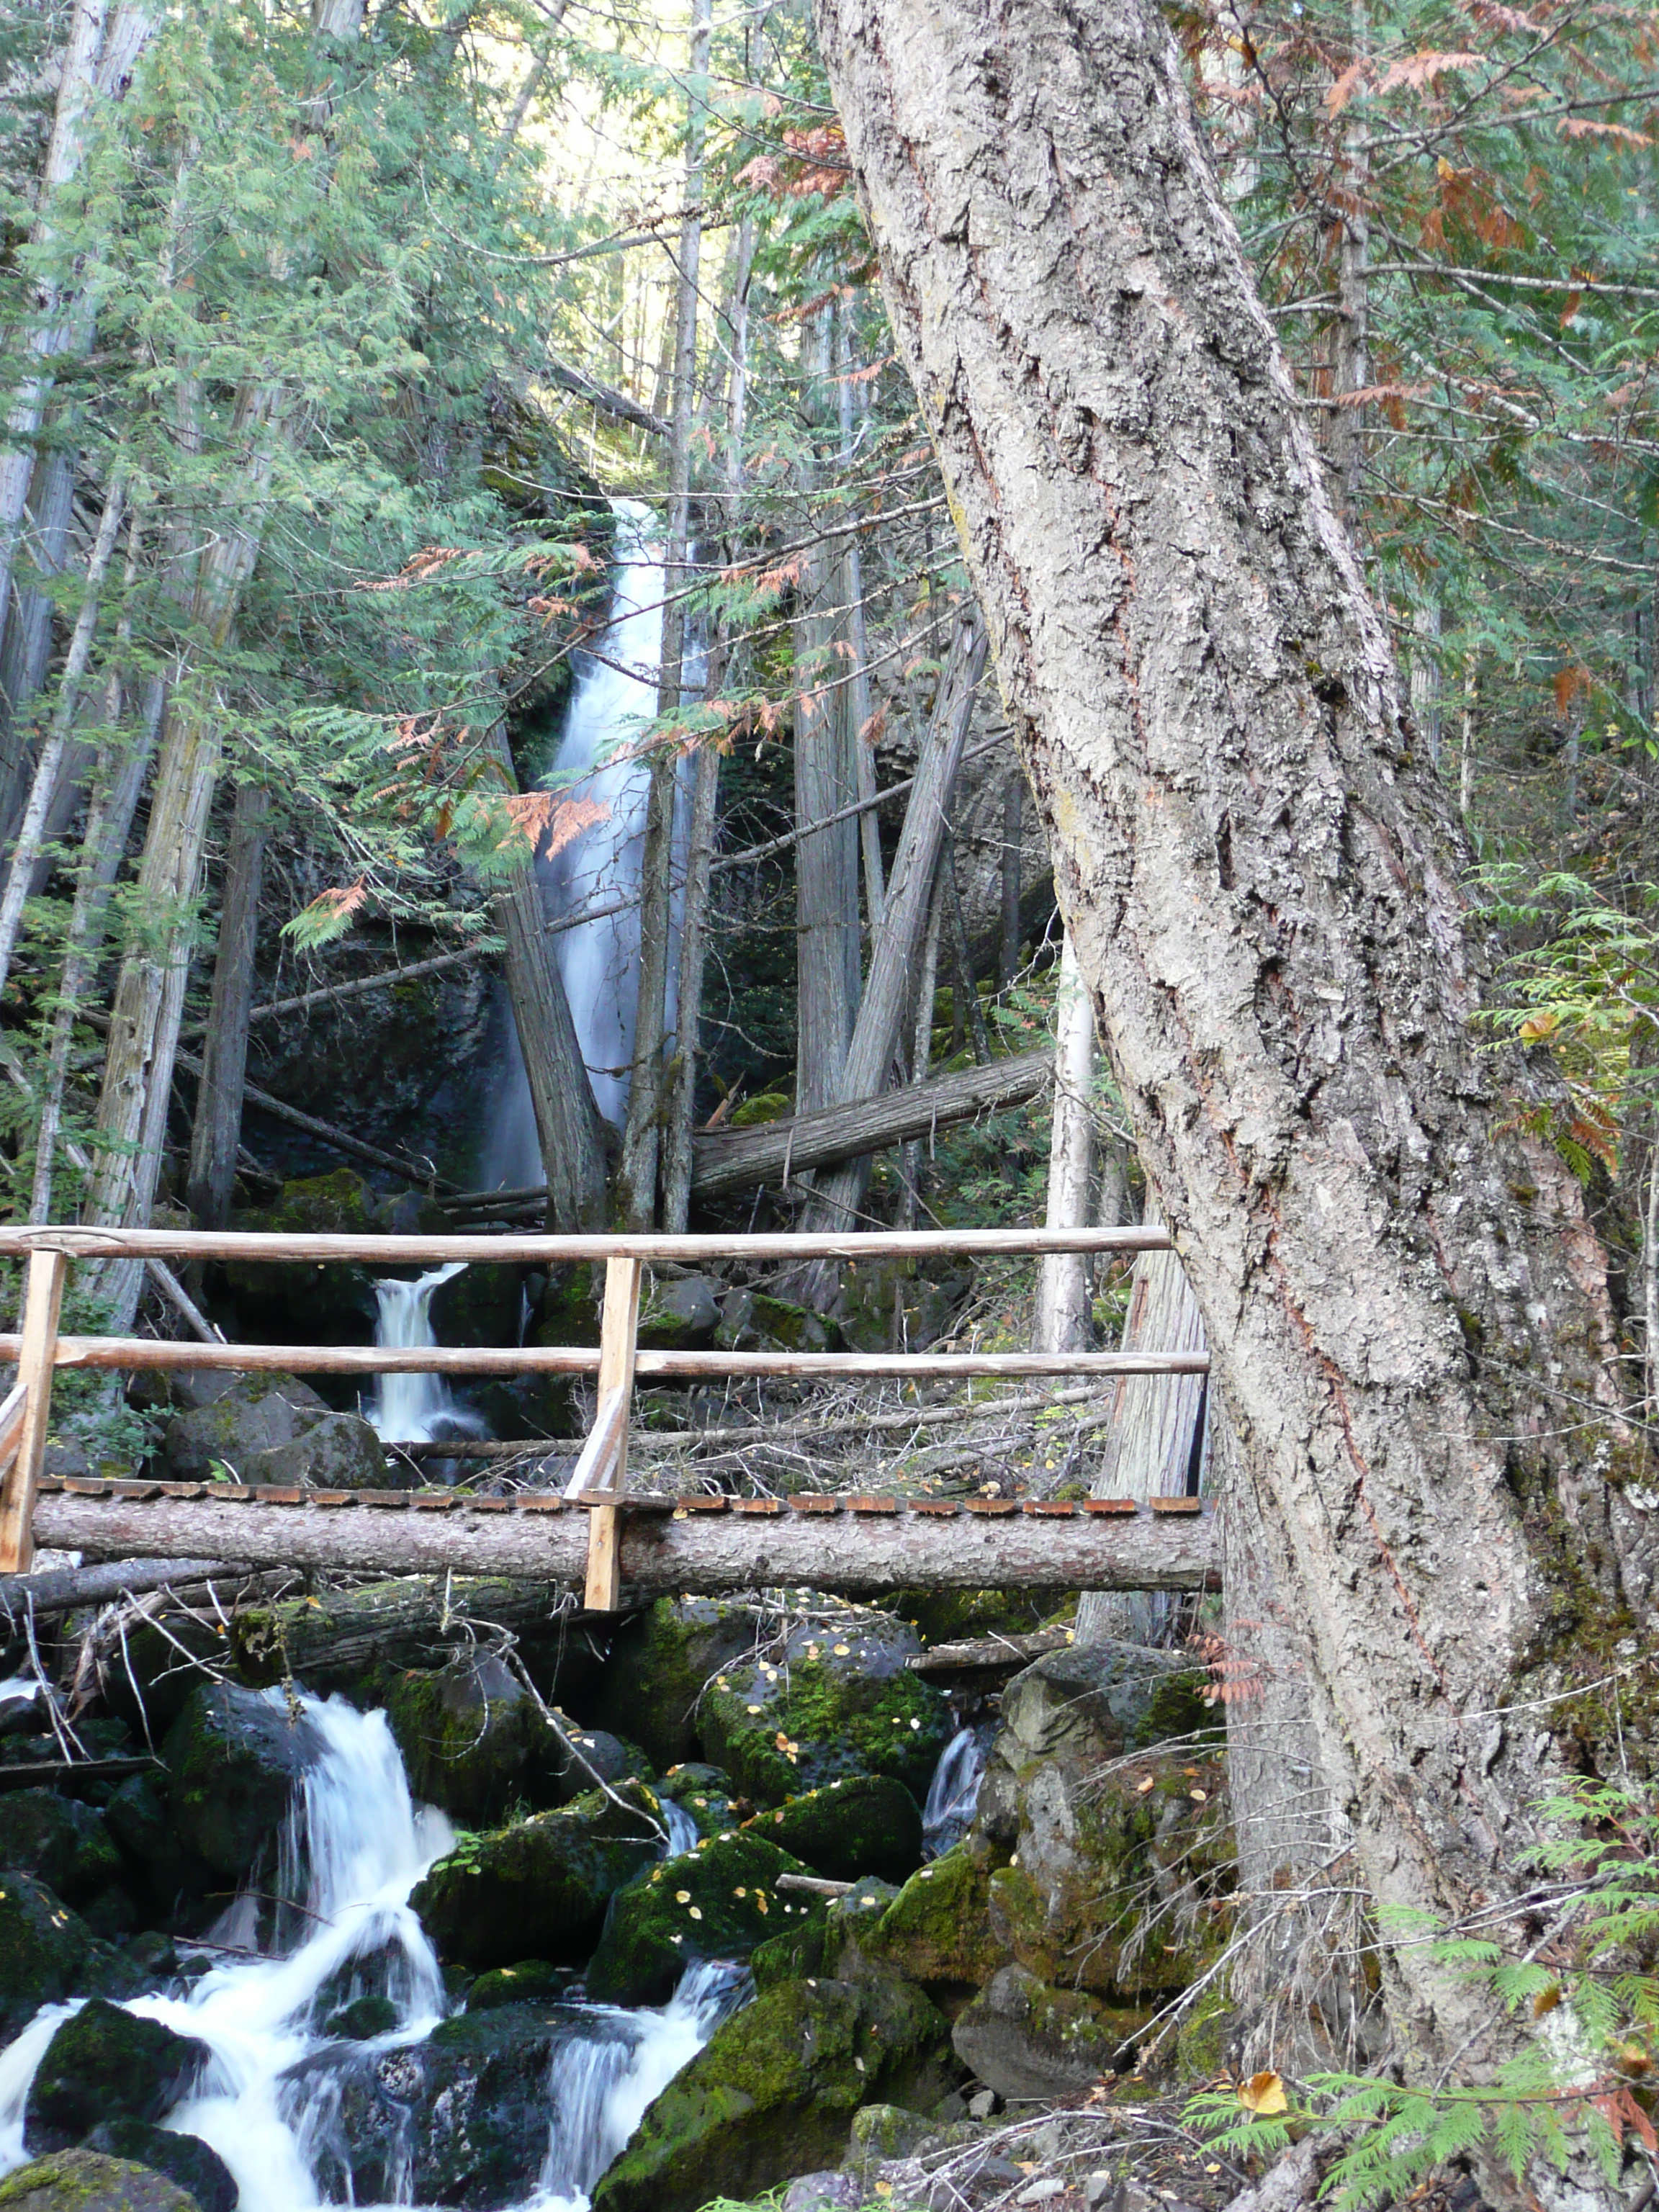
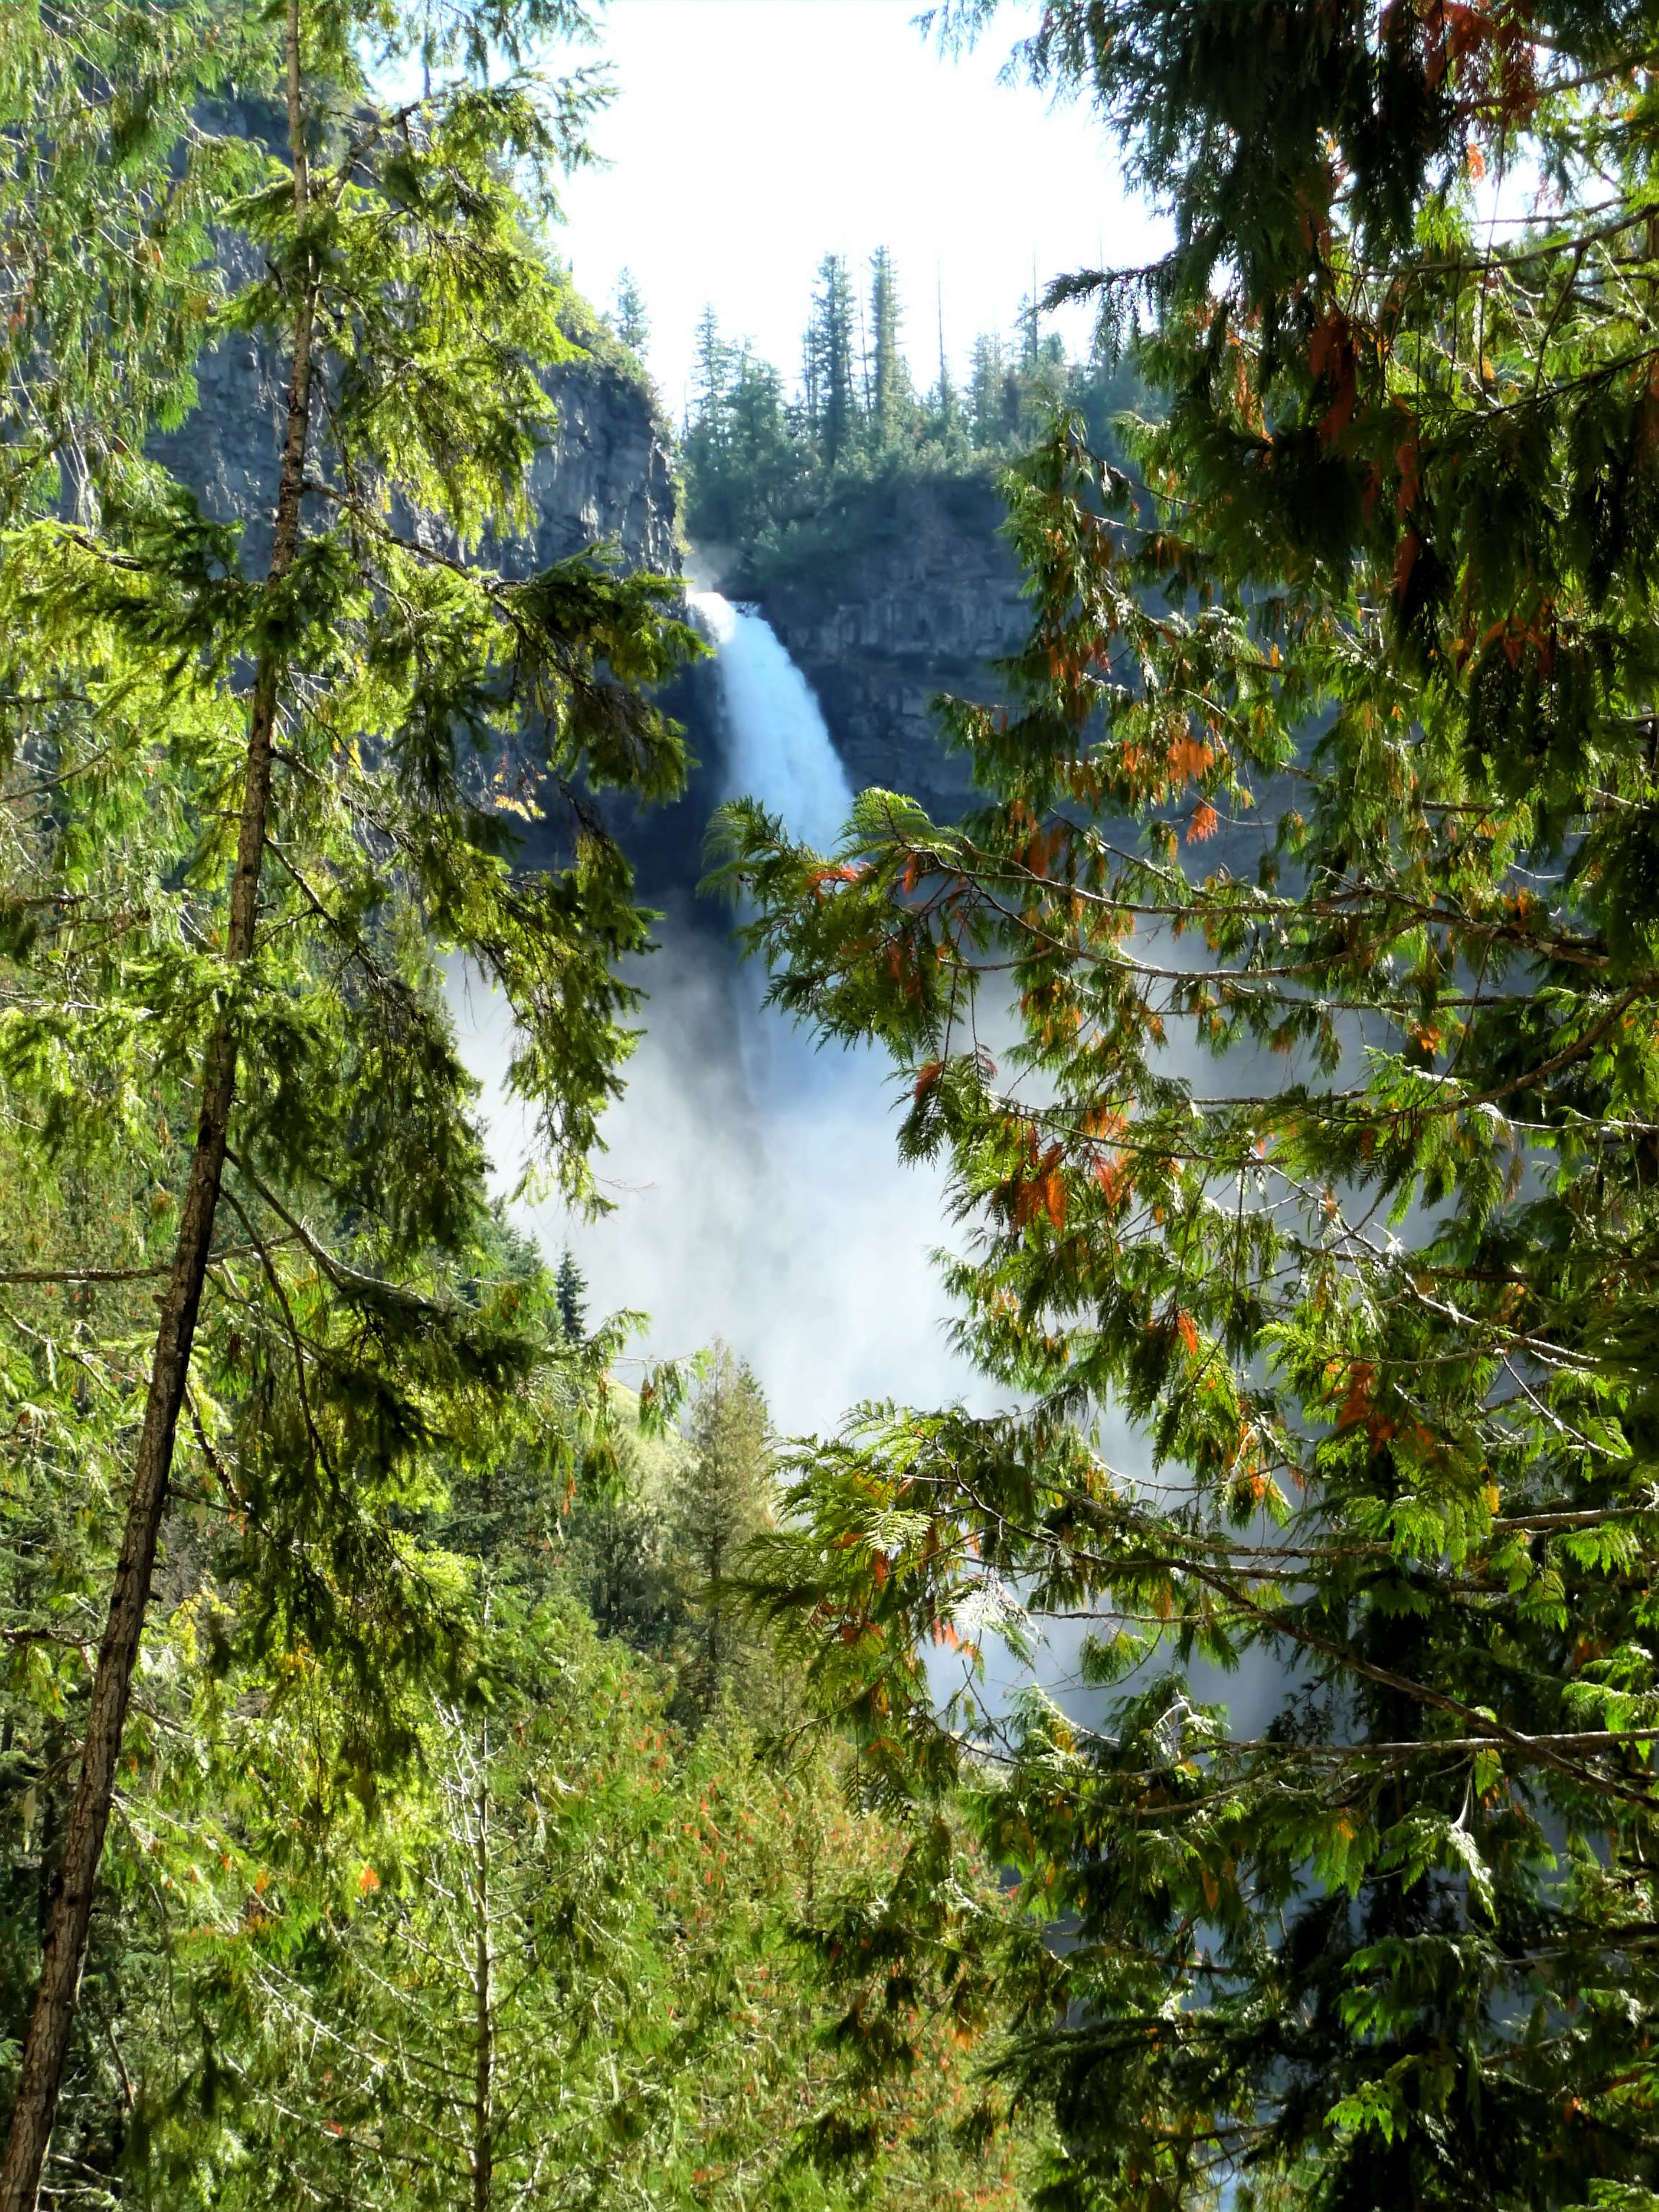
After 40 minutes the valley becomes steeper and there is a nice view of the Mahood River. In the distance we get a glimpse of Goodwin Falls, but we can hear them better than we can see them. We save the side trail for later and visit Sylvia Falls first. At 90 meters wide and 20 meters high they are a spectacular sight.
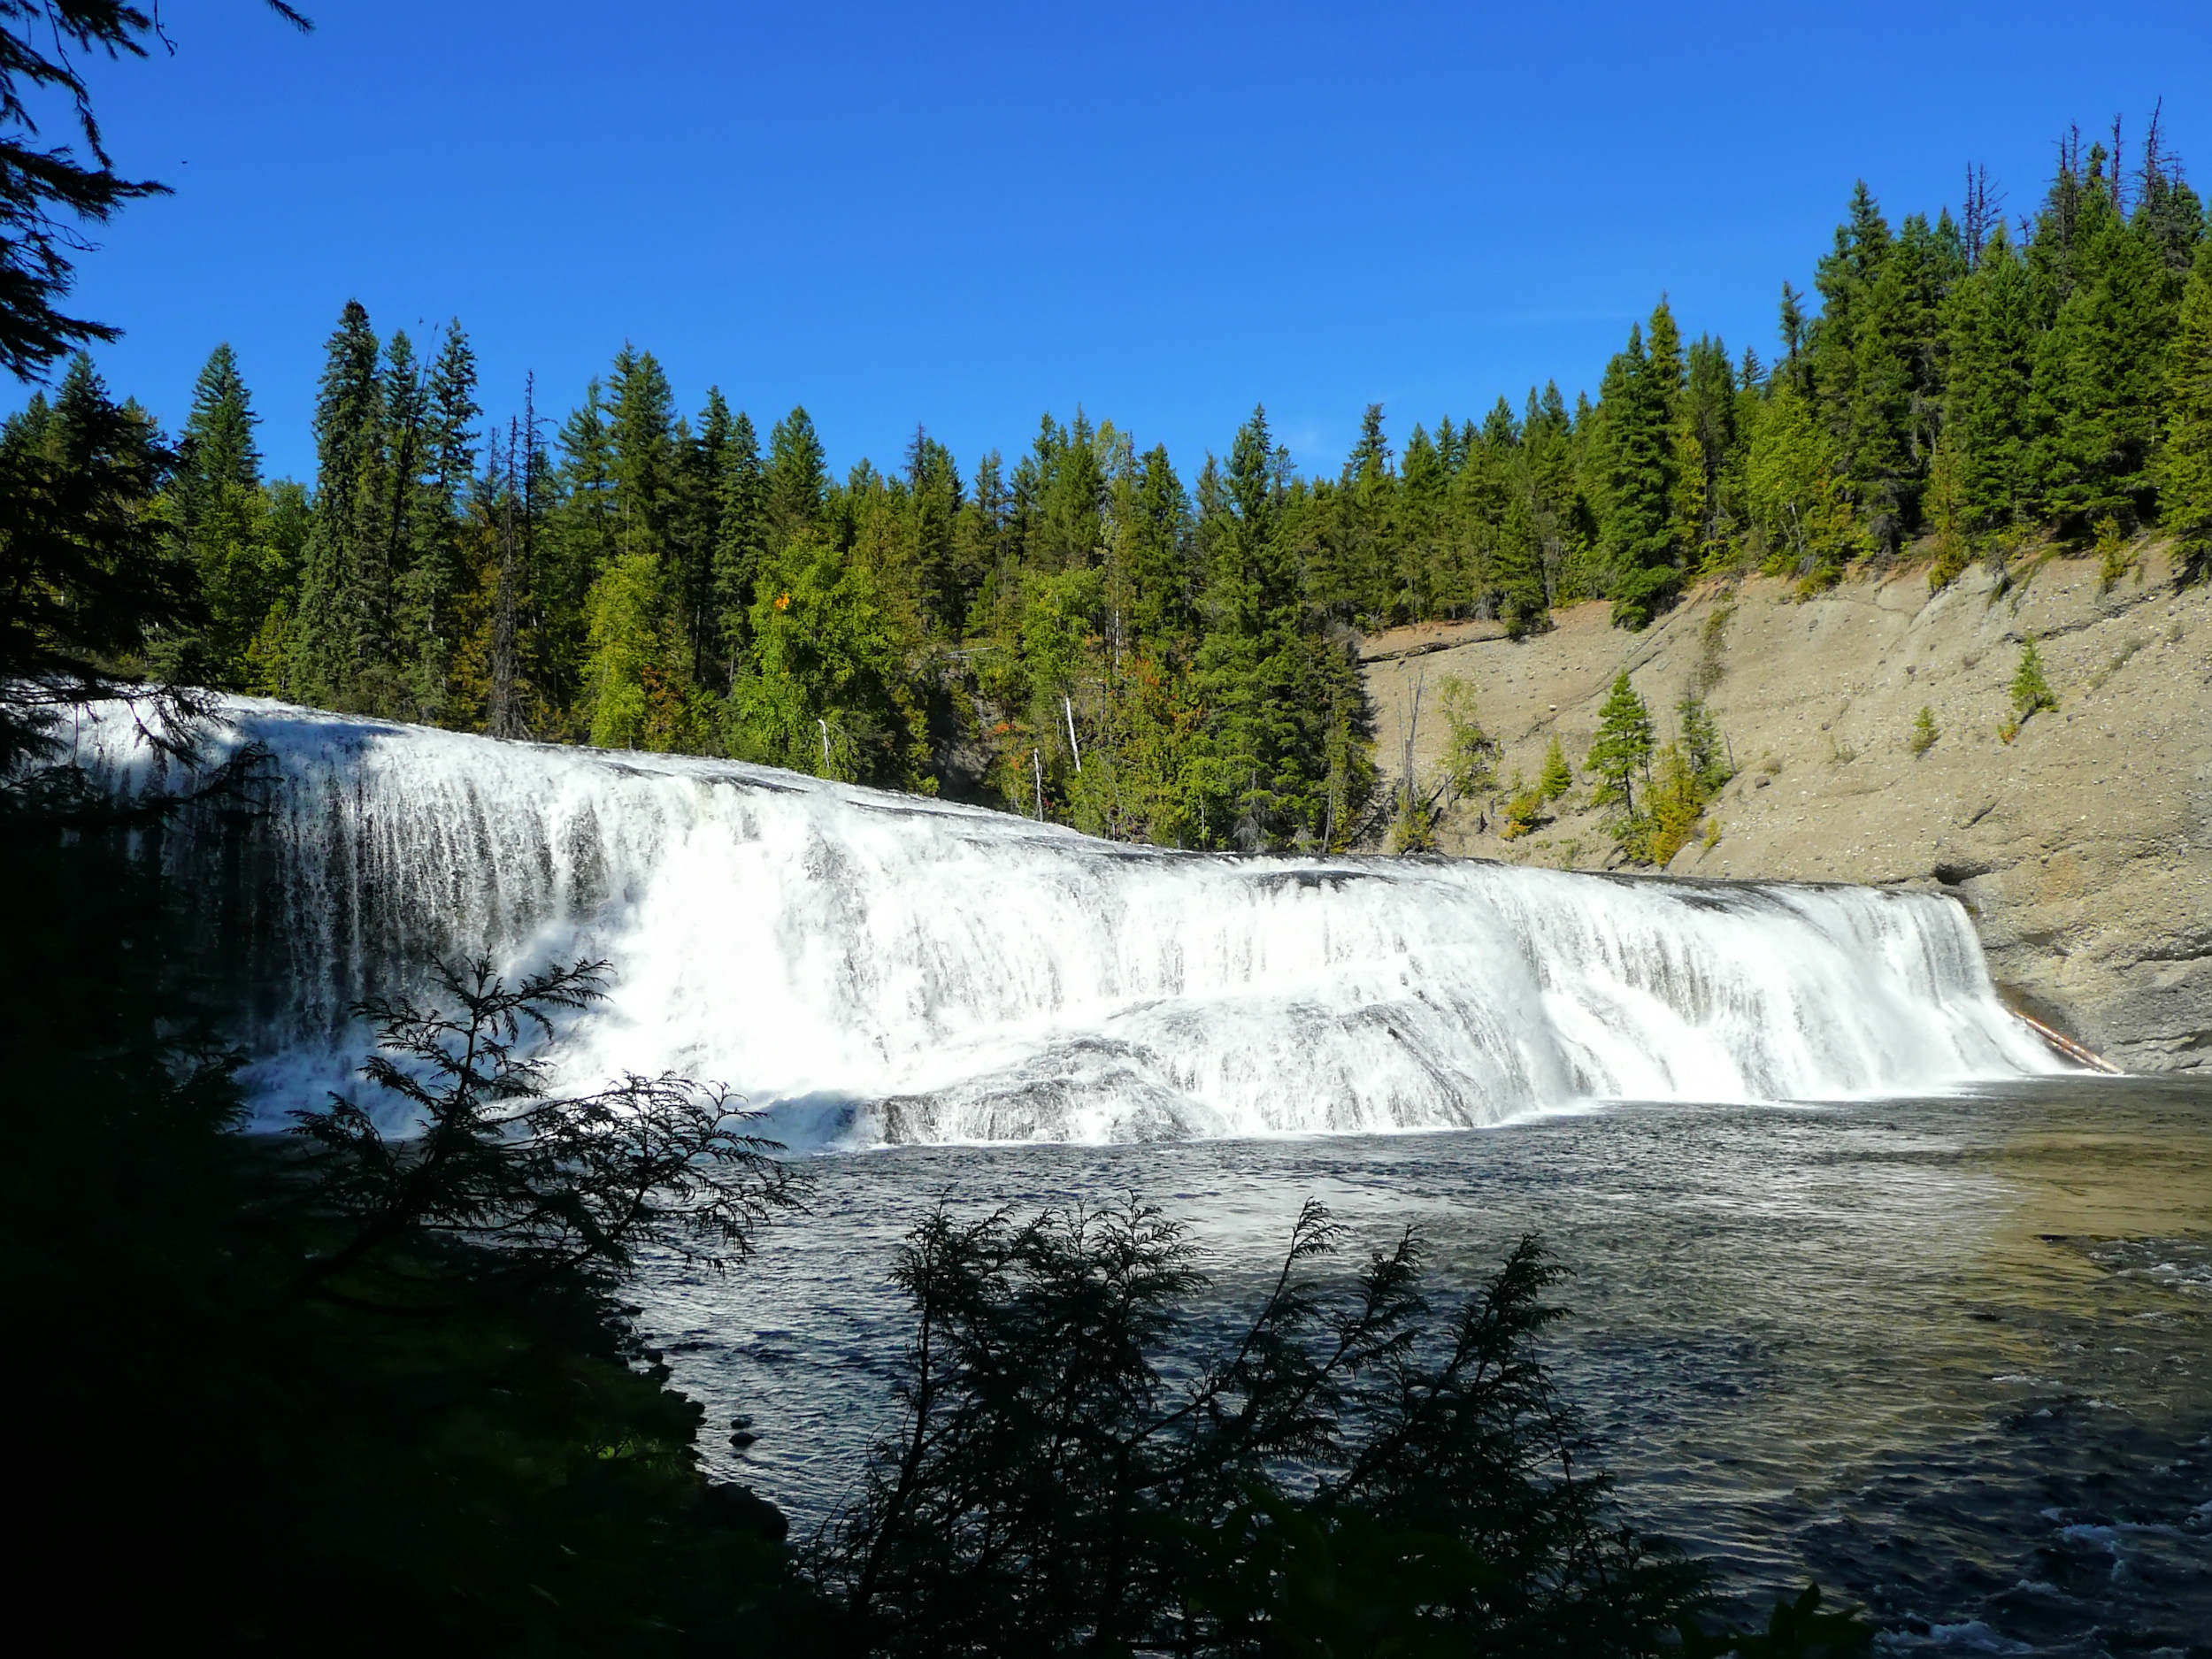
Sylvia Falls
We scramble down to the base of the falls. On a hot summer day the spray is very enjoyable.
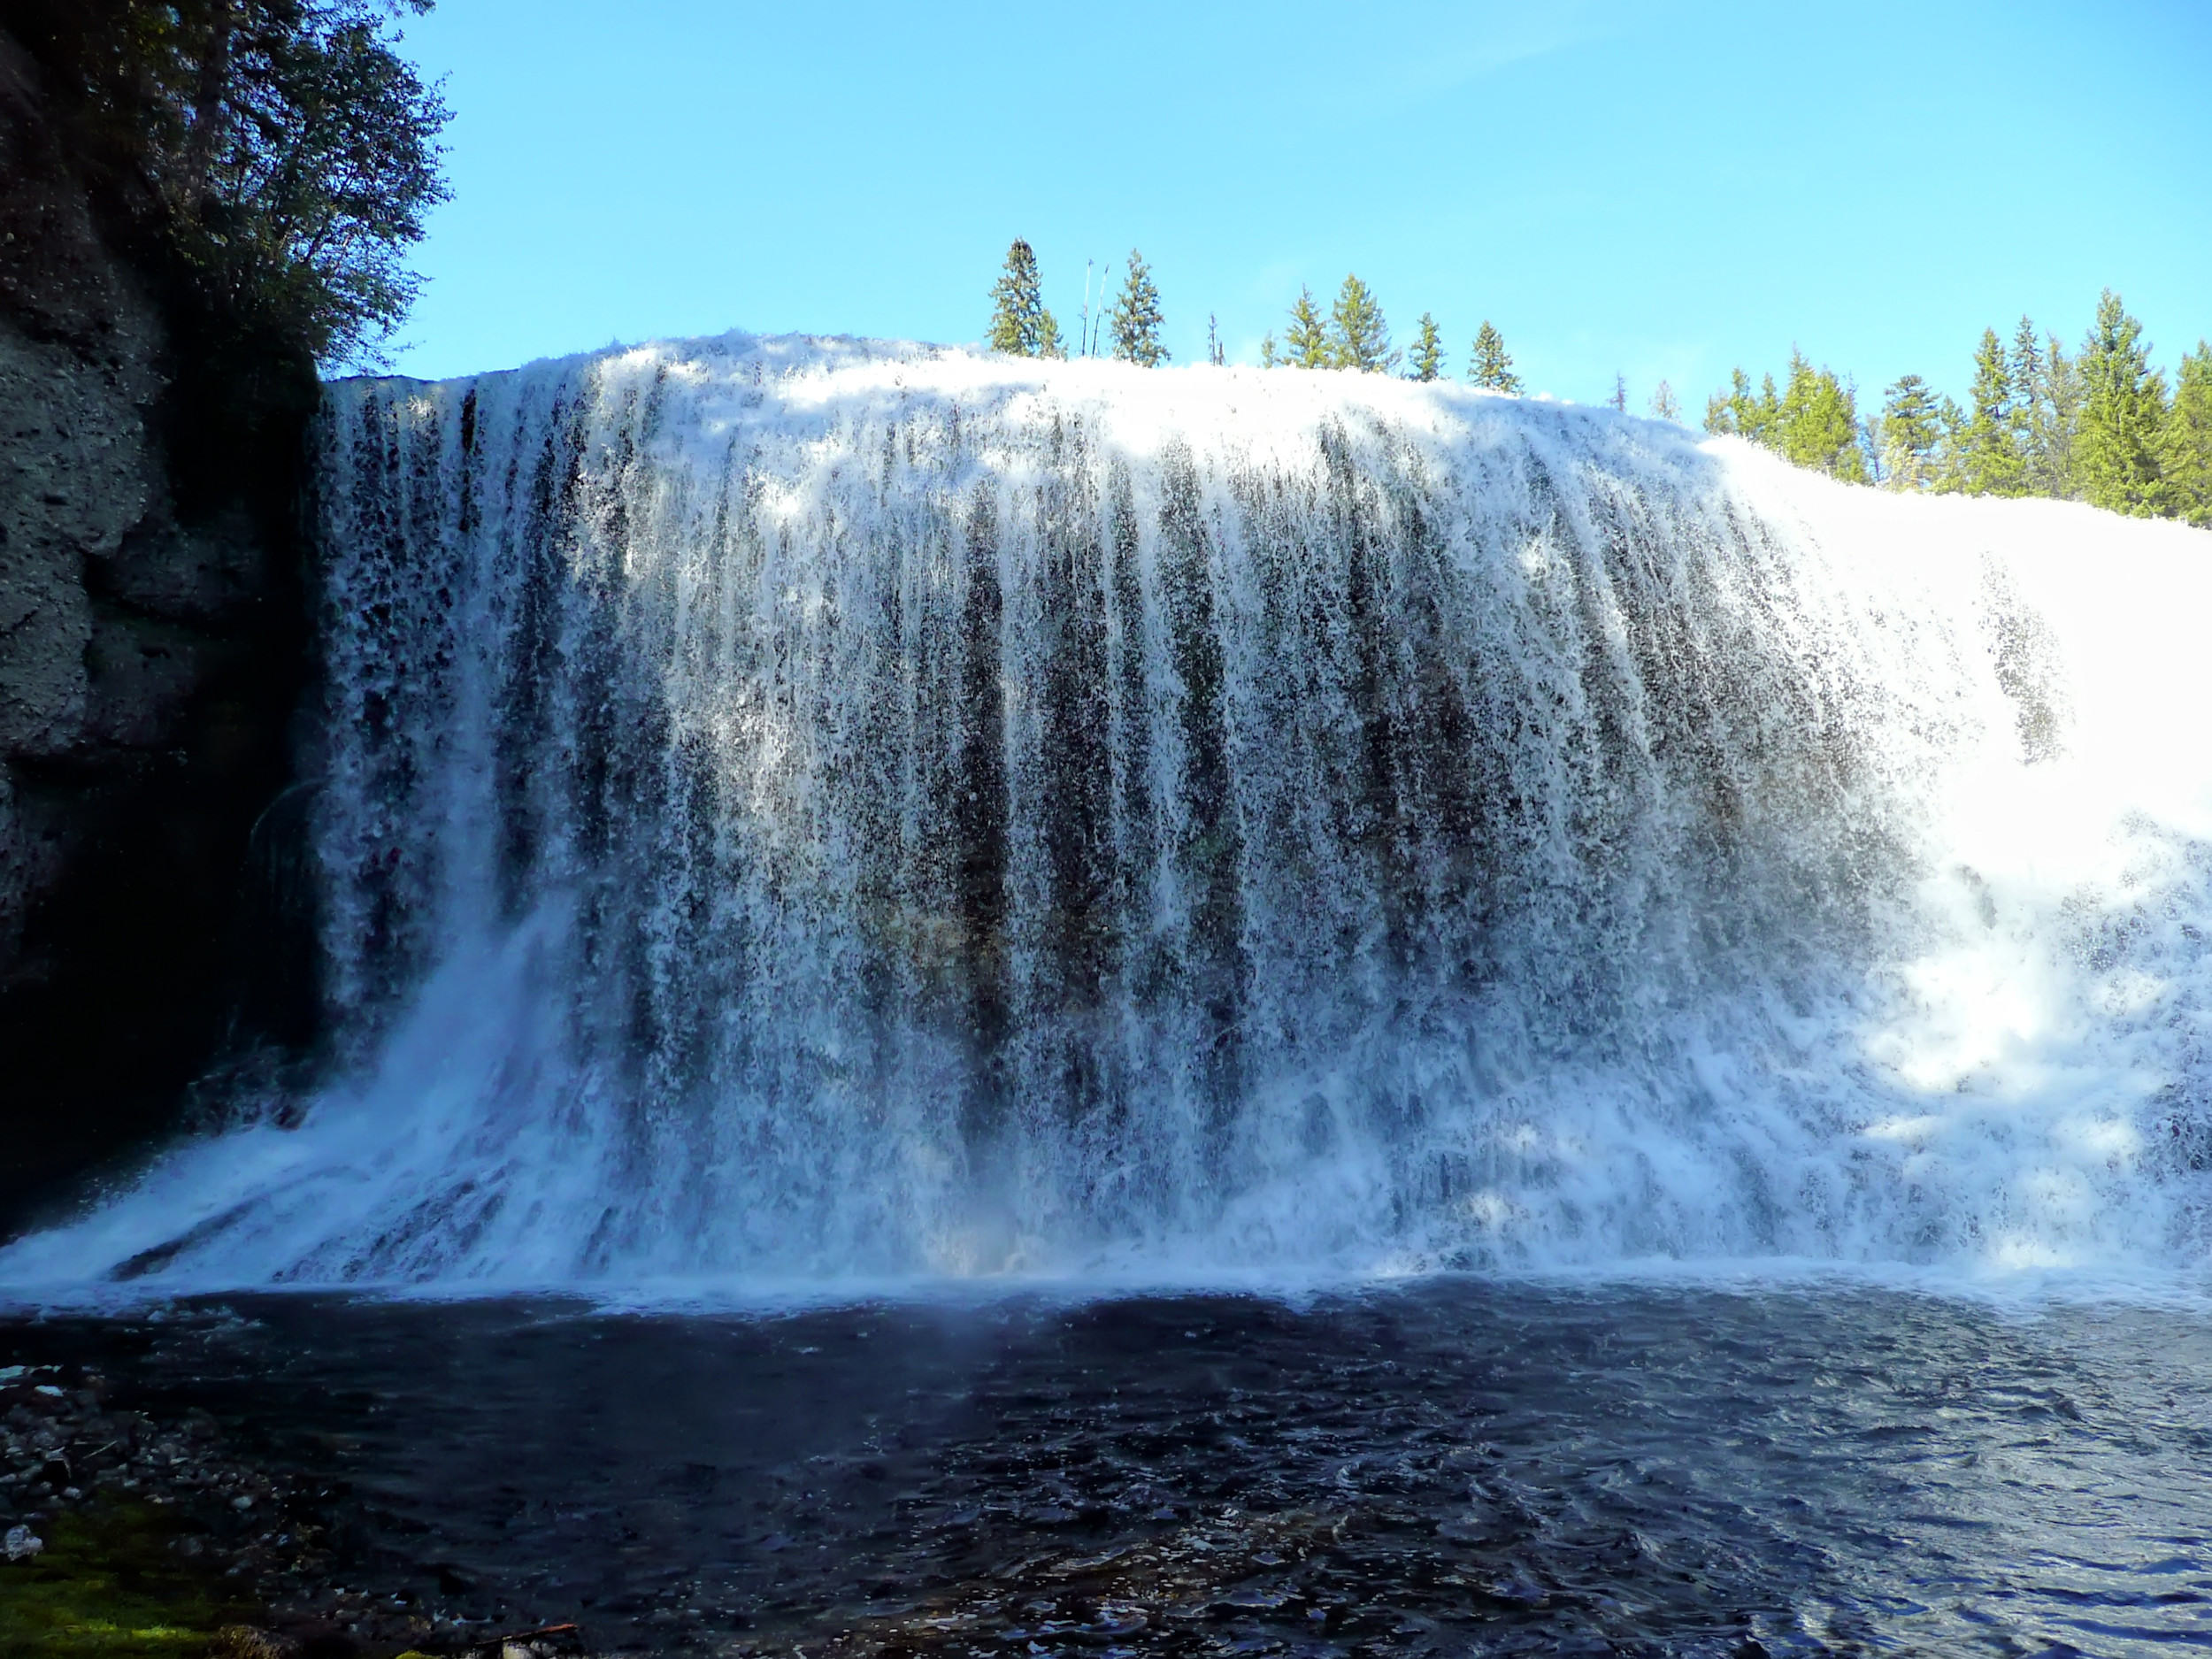
At the bottom of Sylvia Falls
The trail used to go all the way to Mahood Lake, but it is not maintained now. In 2014 it took 1 ½ hours to hike the last 2 ½ kilometers. We don’t even know if the trail is still passable.
We return and take the side track to Goodwin Falls. The path is extremely overgrown and muddy. We search for the viewpoint that shows Goodwin Falls and Sylvia Falls directly above one another. With the thick vegetation, the view is so obscured and distant, that I do not even try to take a picture.
As soon as the Clearwater River Road is repaired, I will definitely explore this area some more.
| Distance | 9.1 km |
| Time | 3 ½ hrs |
| Min. Elev. | 509 m |
| Max. Elev. | 748 m |
| Ascent | 236 m |
| Cum. Ascent | 604 m |
| Cum. Descent | 604 m |
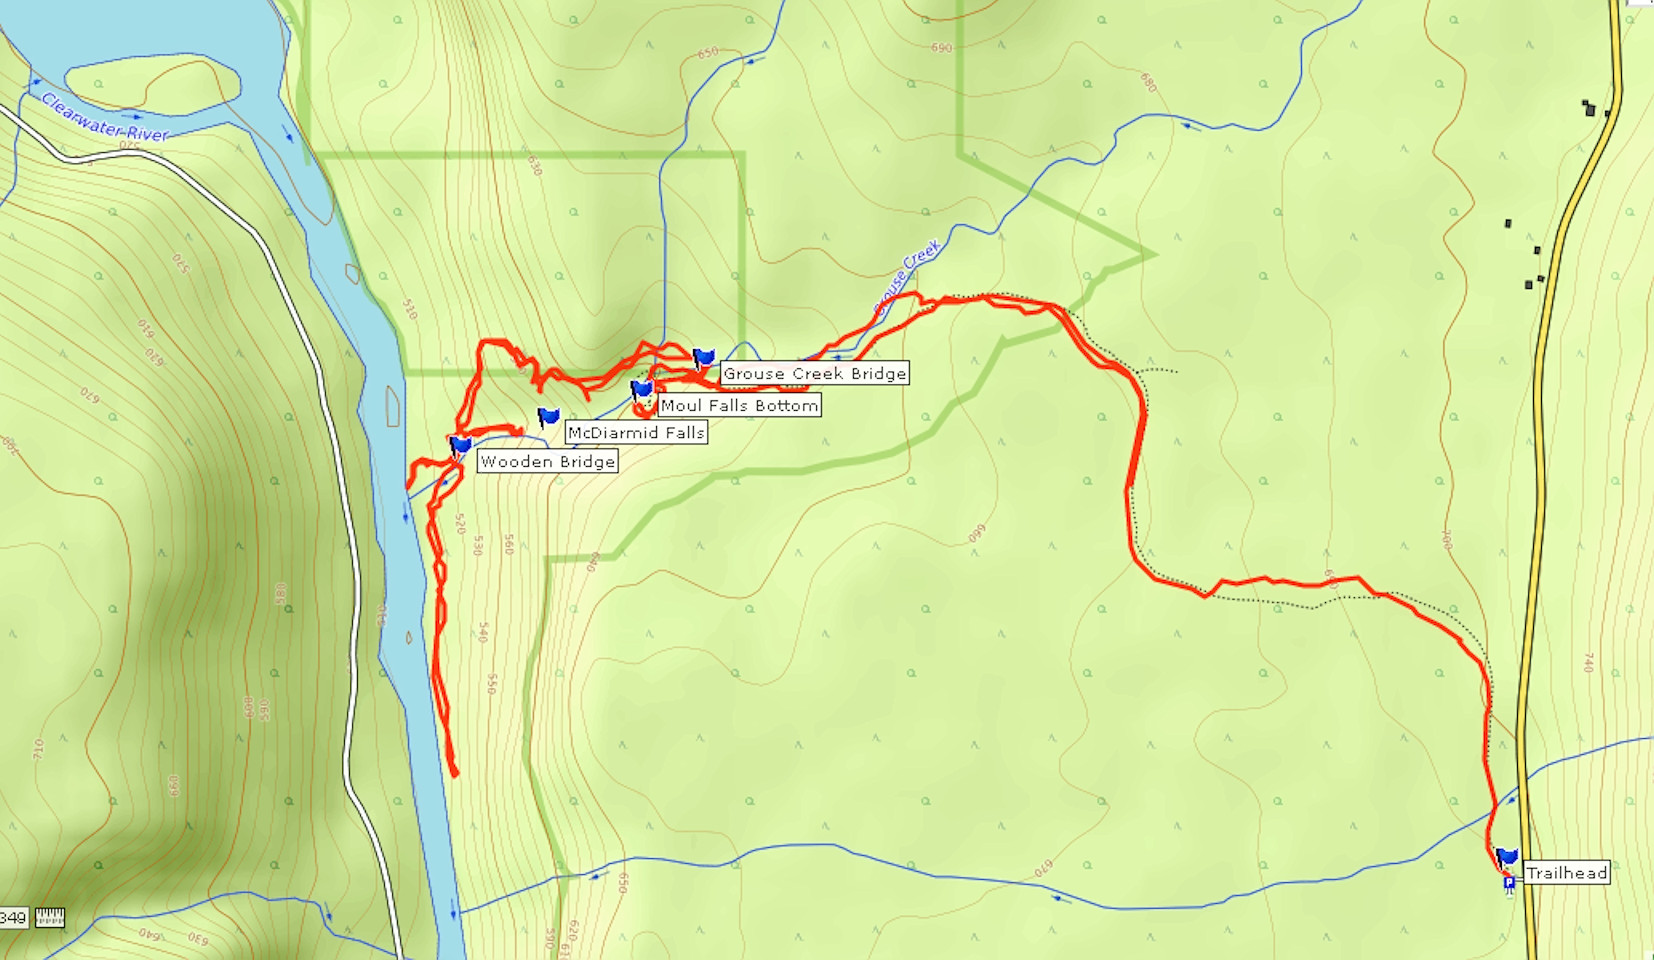
Moul Falls and McDiarmid Falls are another two of the spectacular waterfalls in Wells Gray Park. The early summer or the fall is a good time to visit. Moul Falls have become very popular and the trail can be very busy on week-ends and during the peak summer season.
The first 1.7 km of the trail are outside of the park. An old logging road runs parallel to the park road for half a kilometer and then turns west. After forty minutes a sign points left to Moul Falls. This is where the park begins and the road changes into a trail. It leads through a forest of birches and pines, which is particularly attractive during the fall after the colors have turned. On the right-hand side, Grouse Creek roars through its bed of old lava rock. The trail becomes steep and follows the creek to the beginning of a canyon that channels the water to the brink of the falls where it tumbles 35 meters deep.
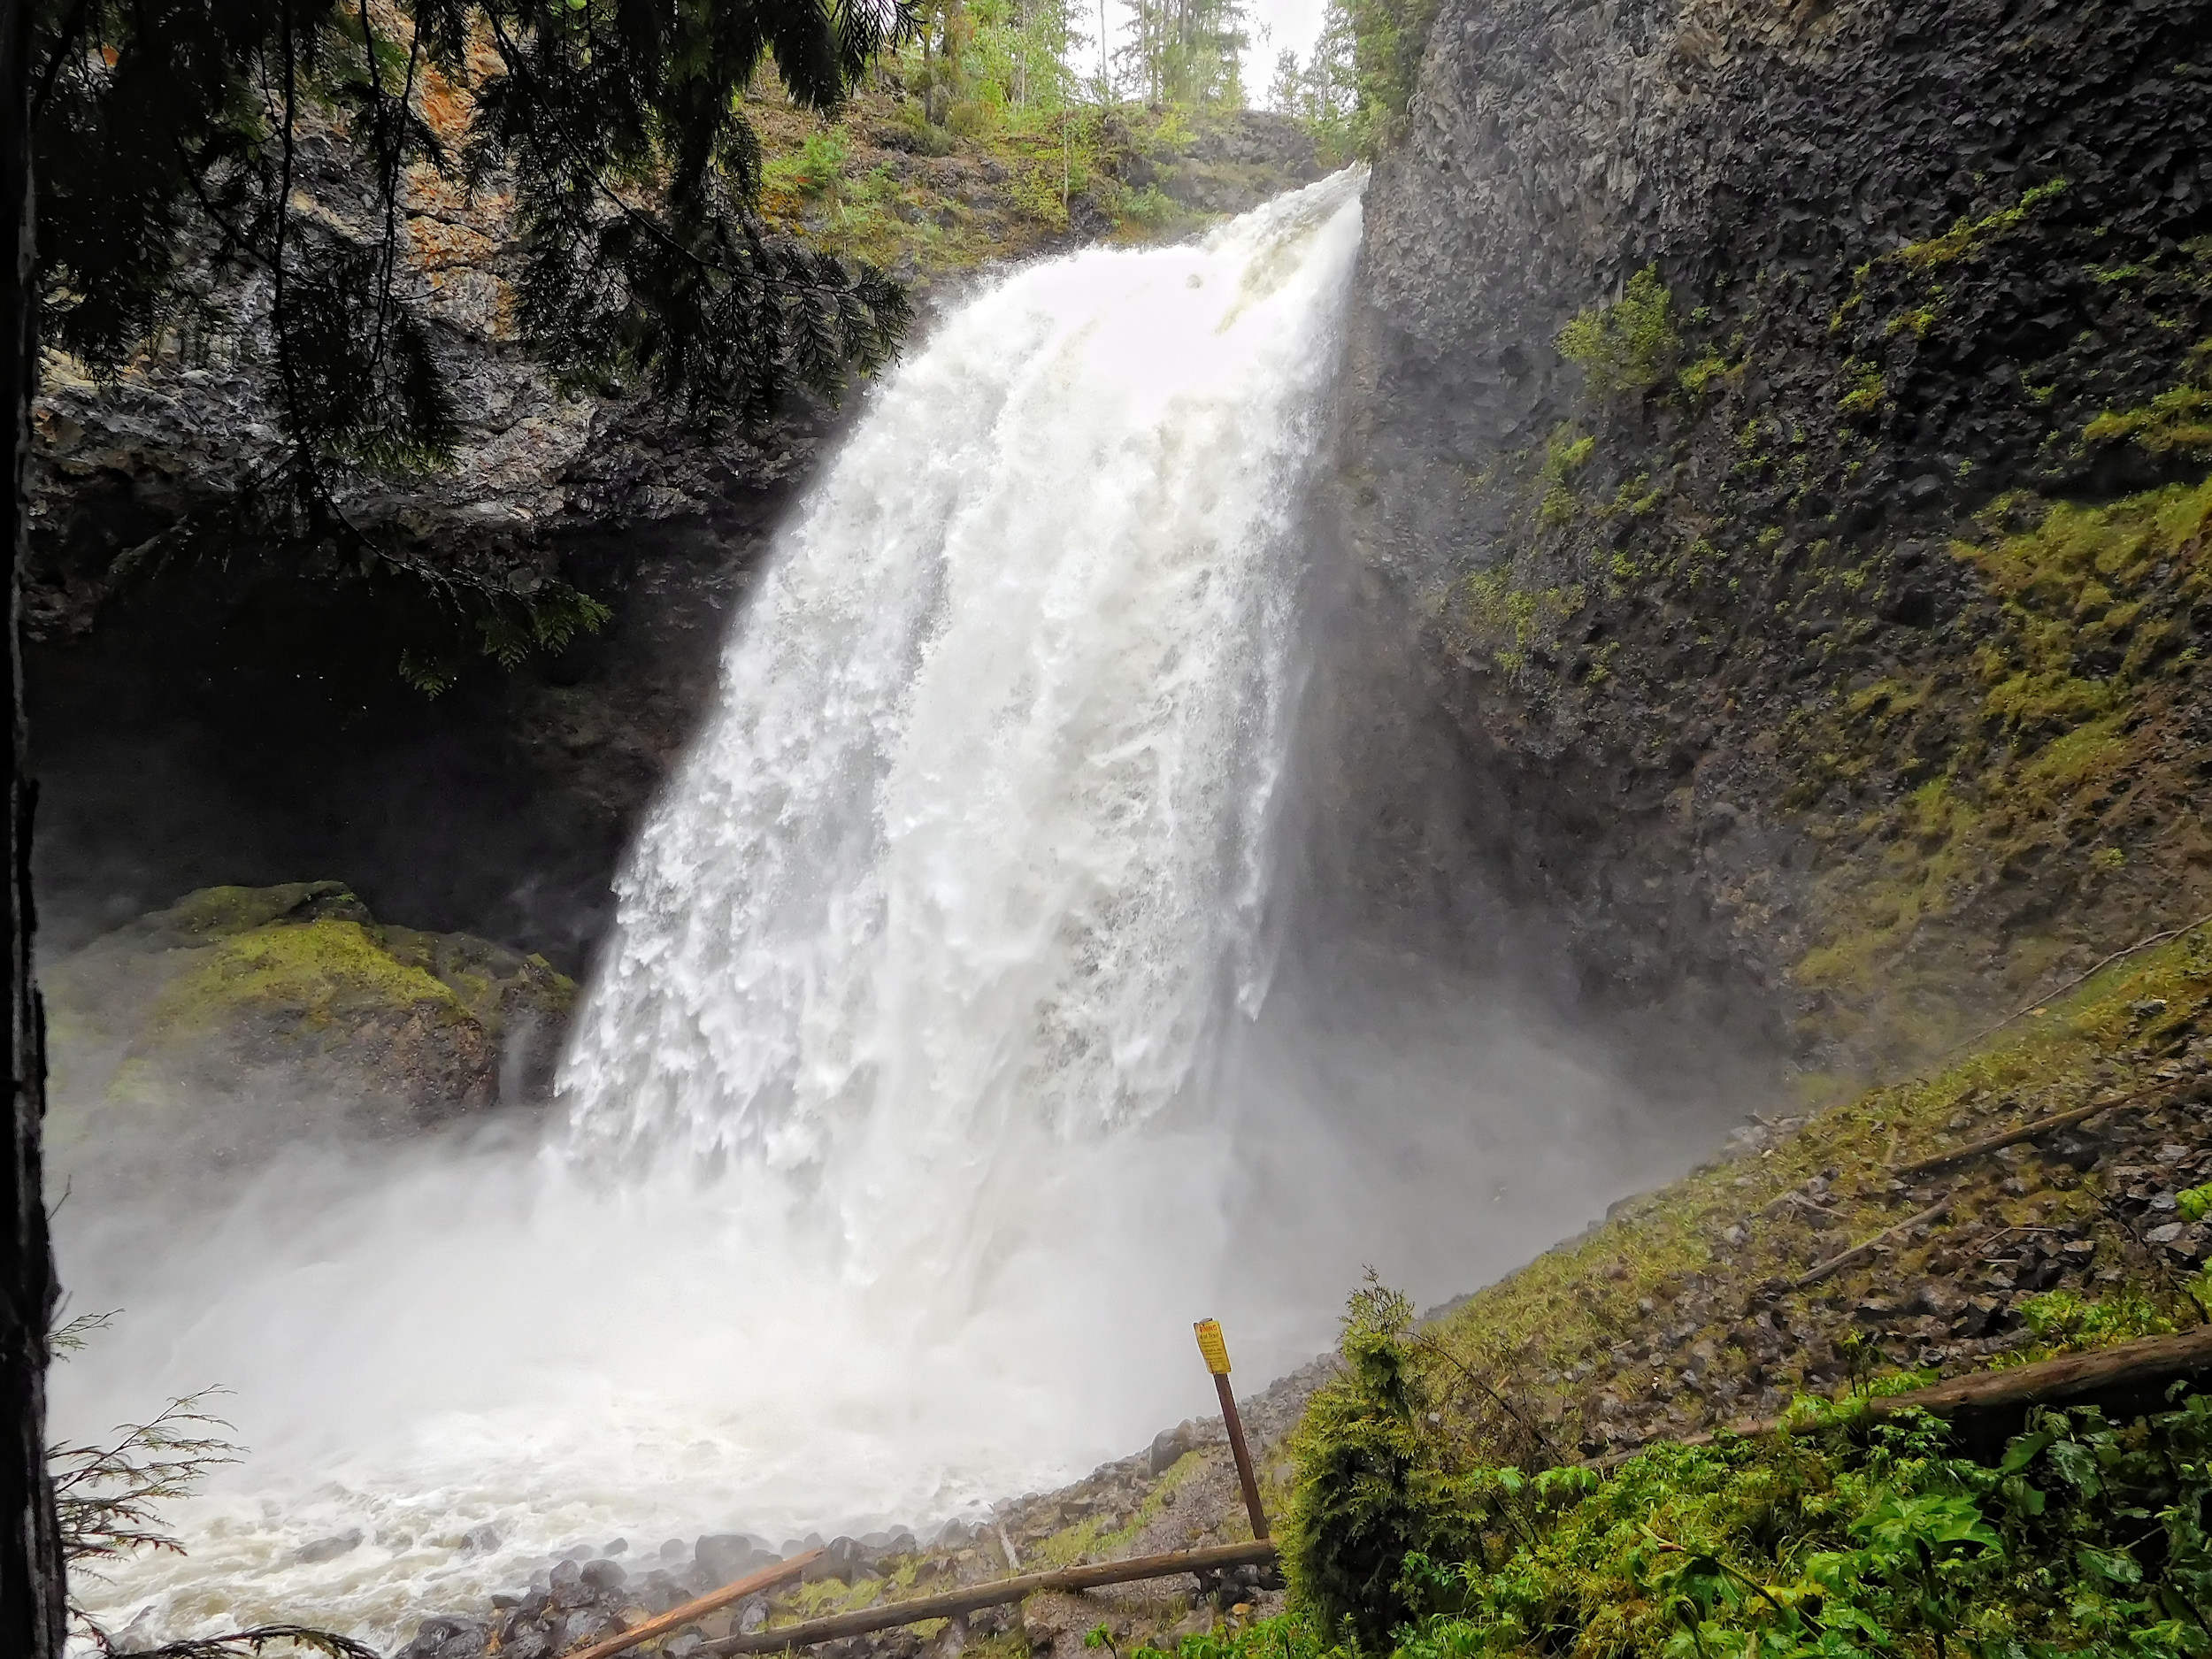
From the brink of the falls the trail leads steeply into the canyon and I have a first good look at the falls from the second switchback.
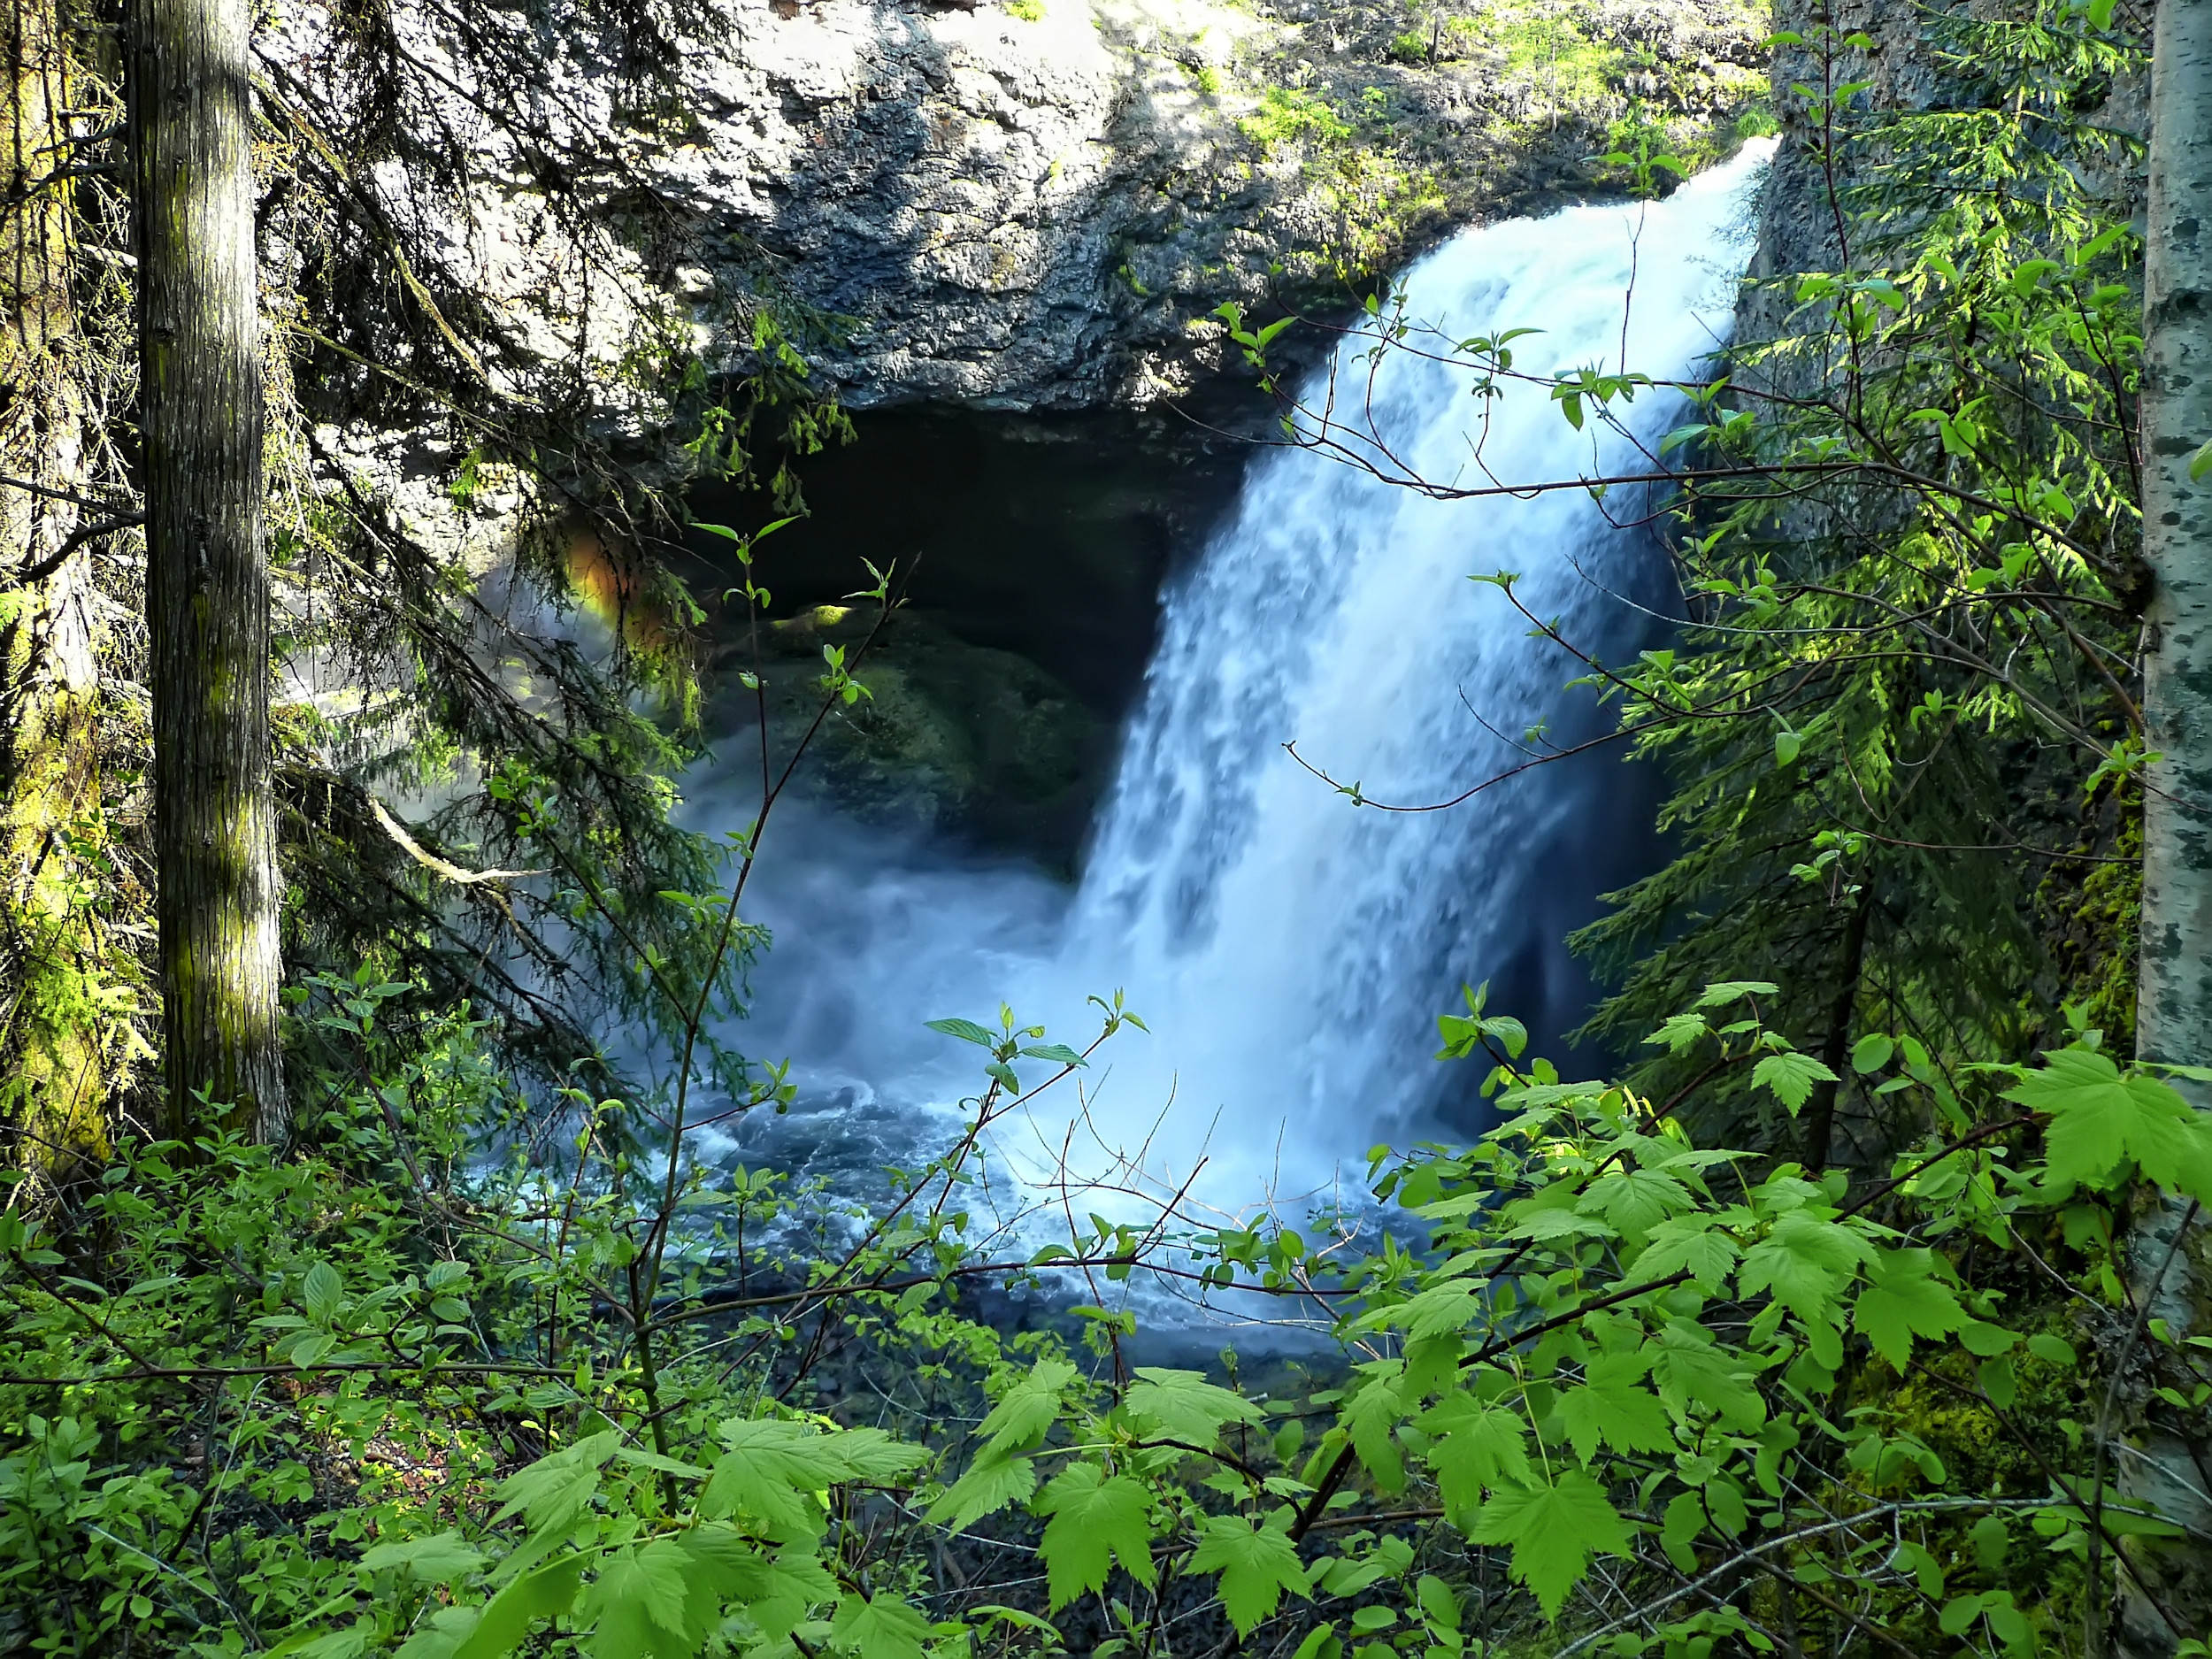
Moul Falls
The trail becomes so steep that it has been replaced by stairs. Today they are made of metal because the former wooden stairs could not withstand the constant spray of the falls long enough.
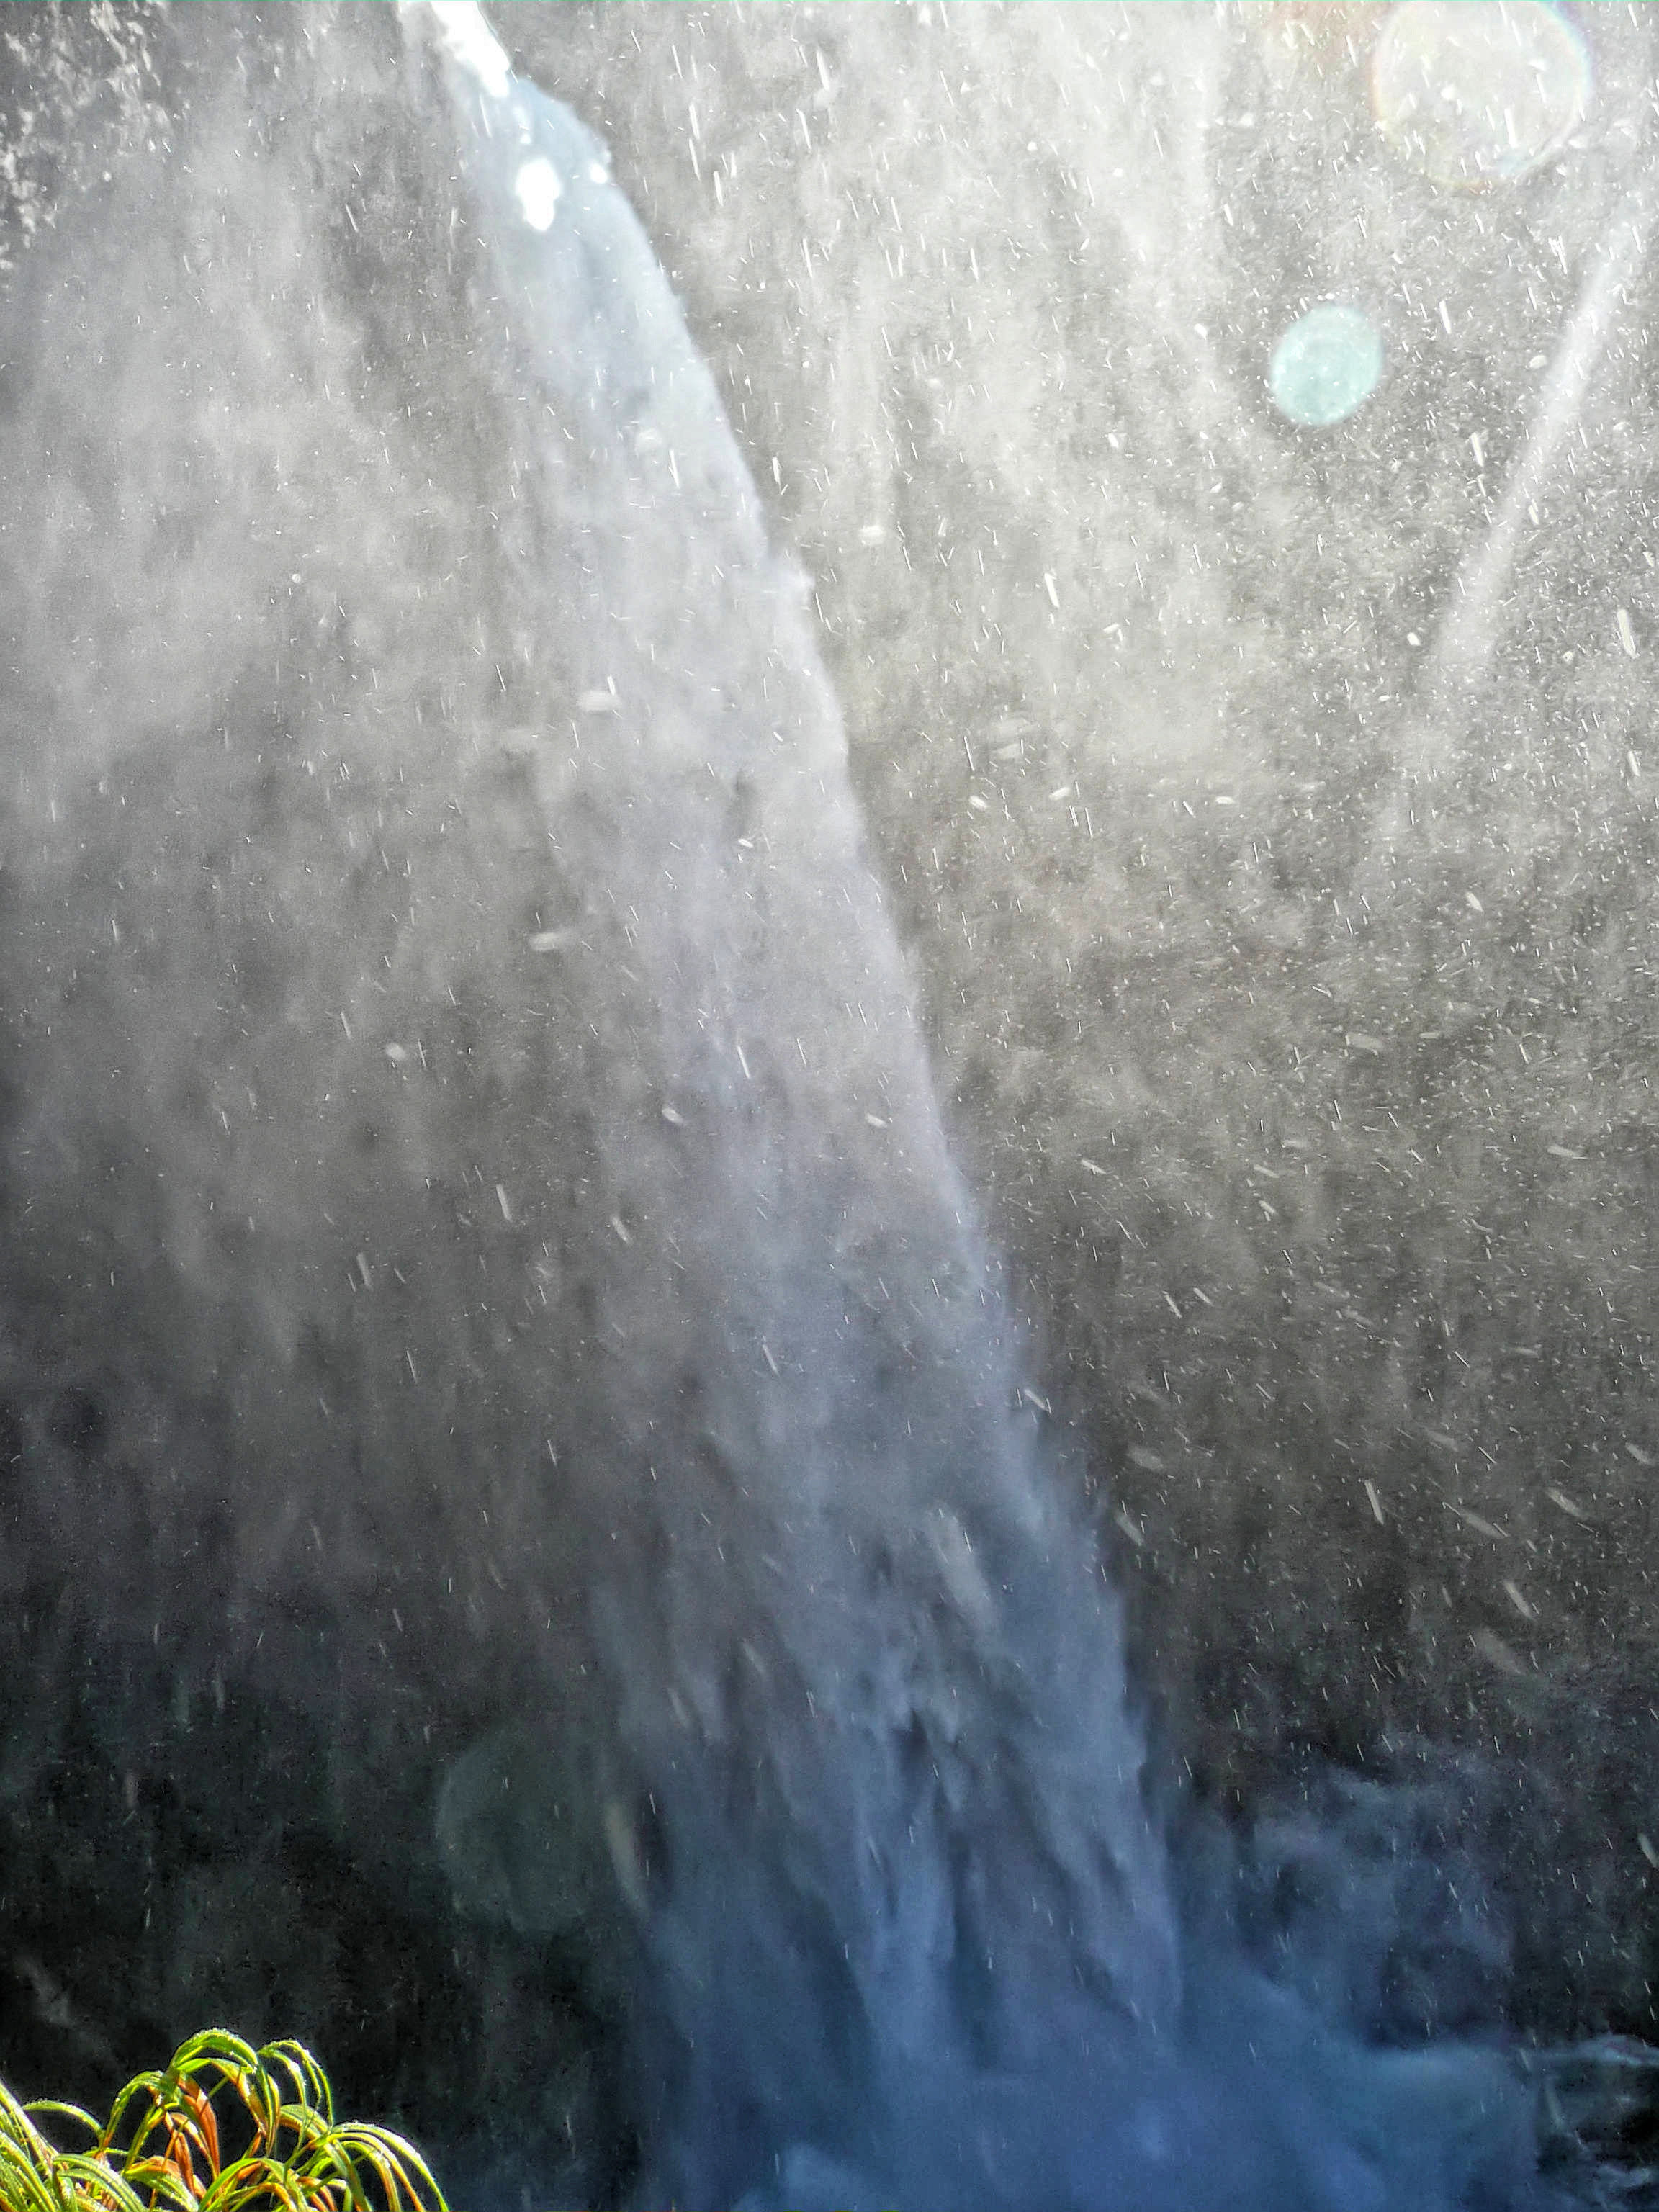
After the end of July it is possible to walk behind the falls and catch a unique perspective through the falling water. Earlier in the season the falls are too violent and access is not recommended. The spray reaches far and it is hard to protect oneself from it while taking a picture.
At the bottom of Moul Falls
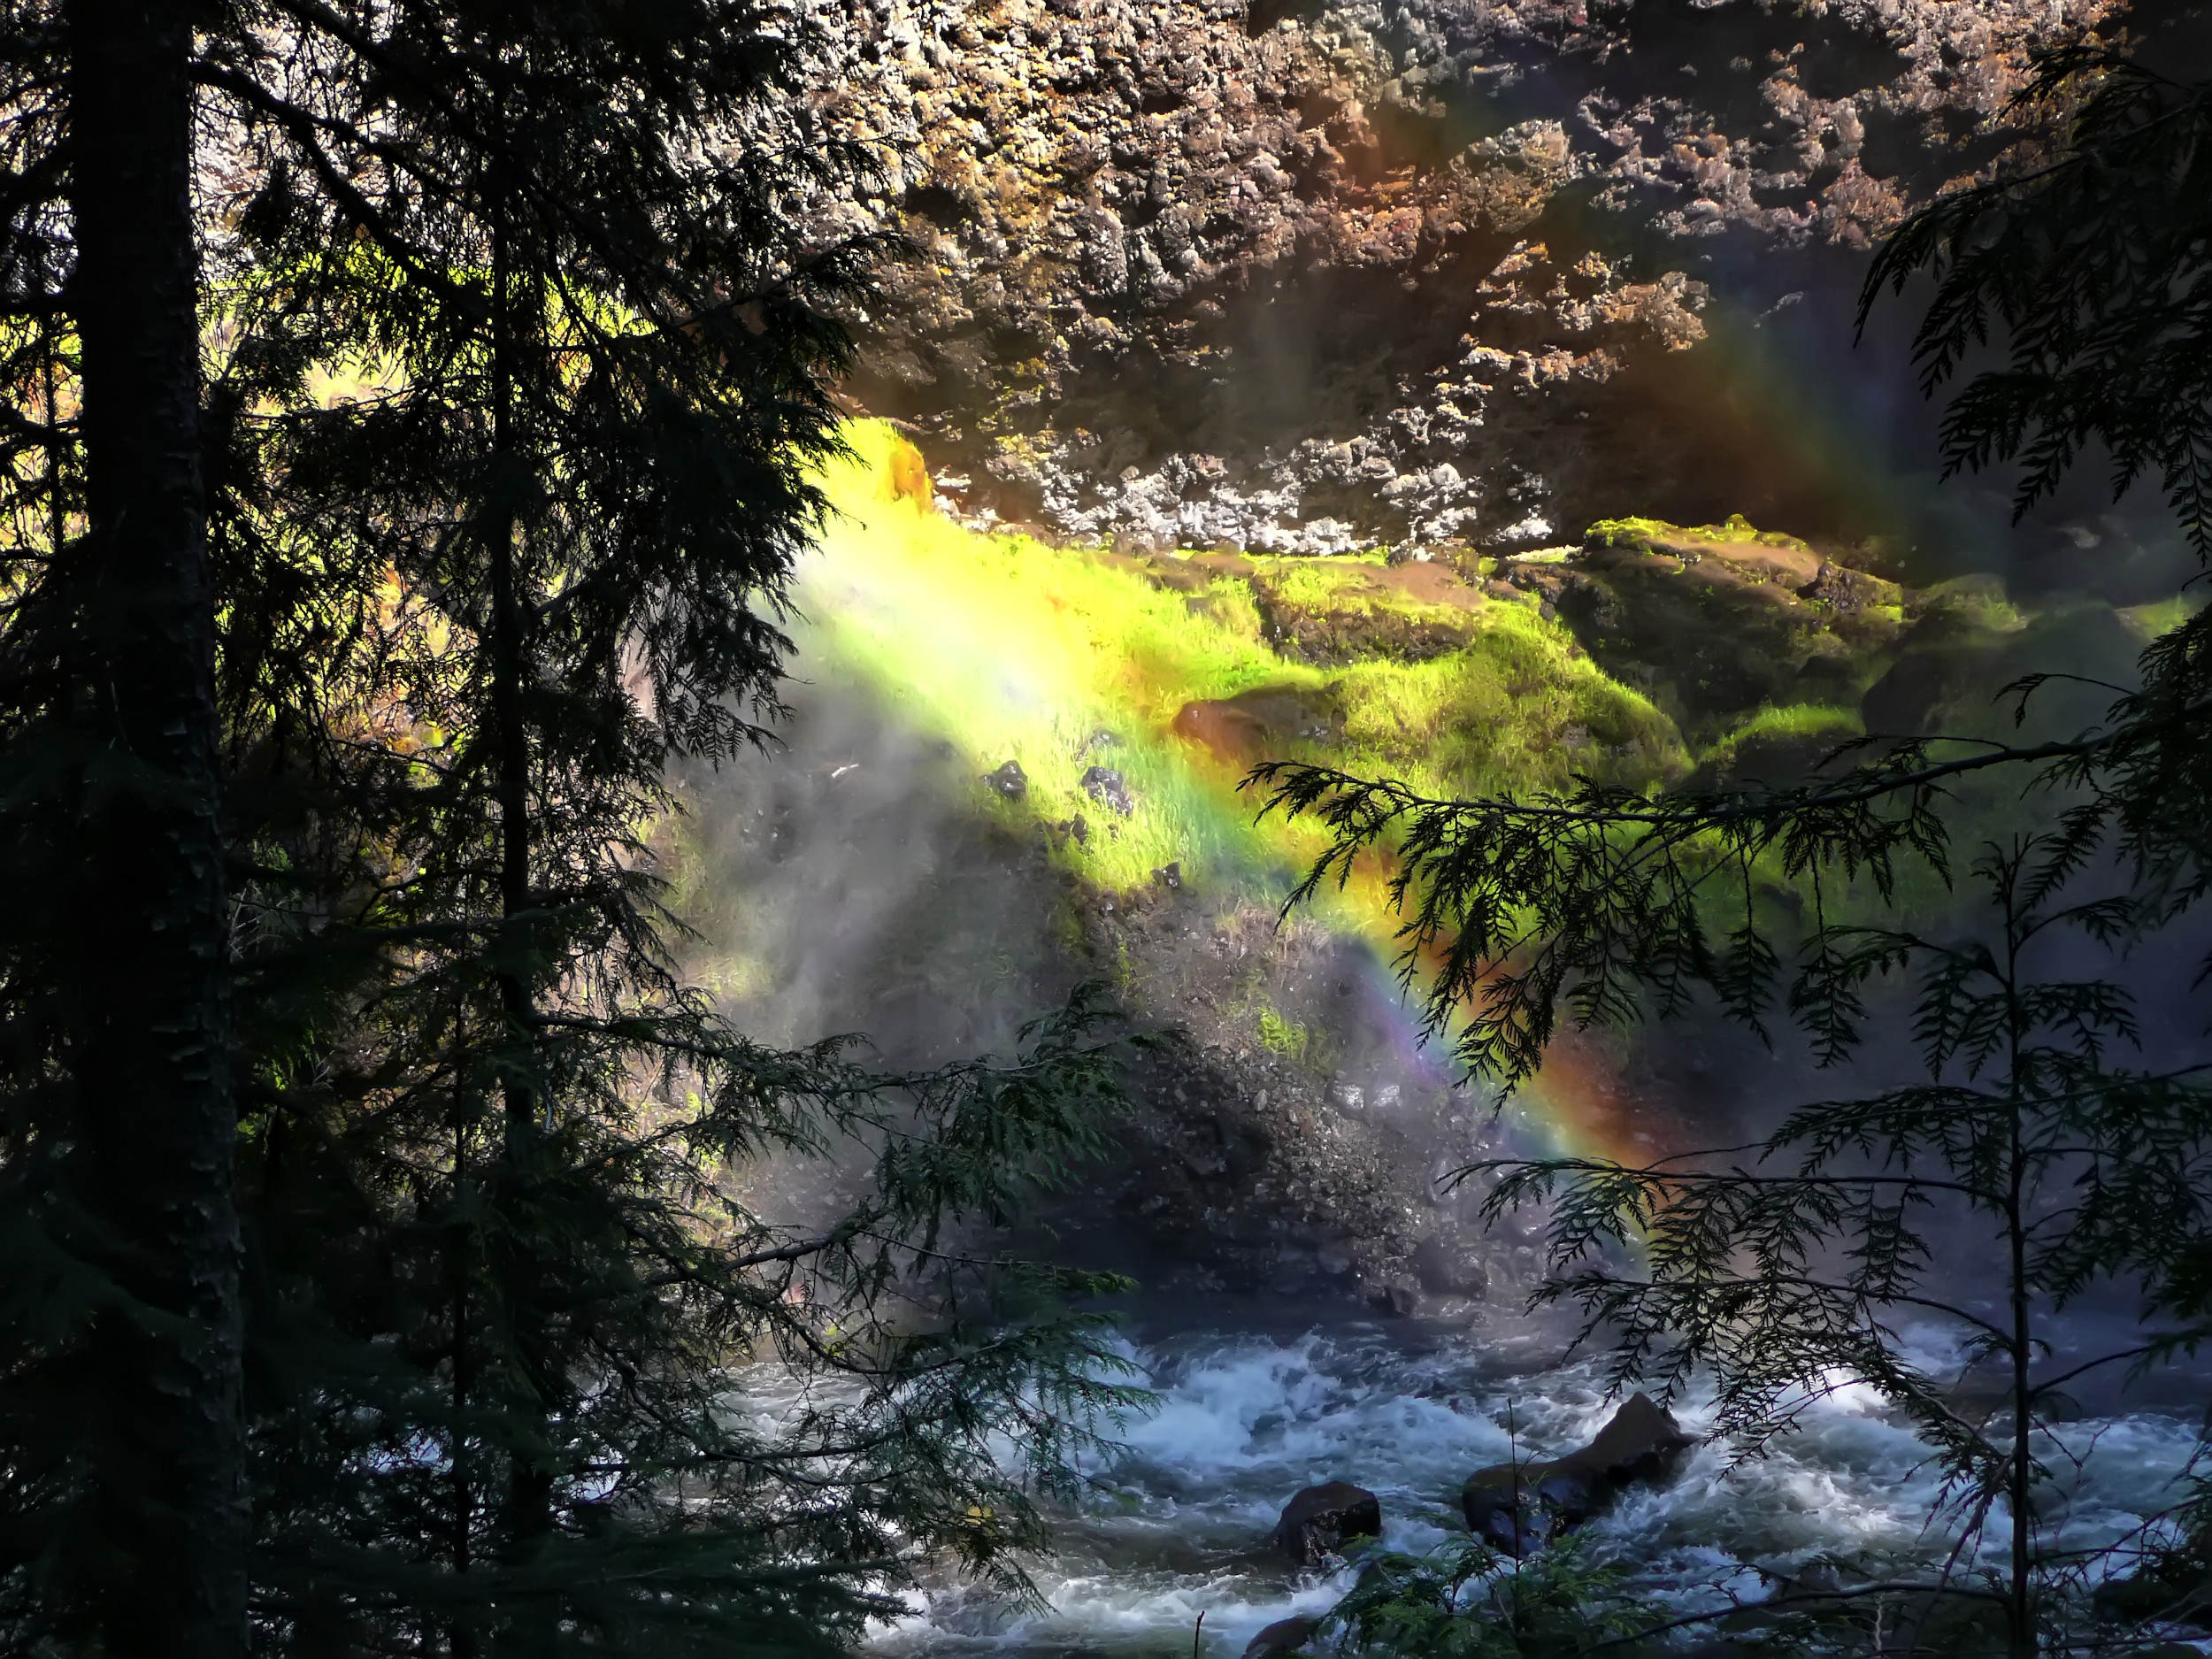
Rainbow in the Moul Falls Canyon
Below the falls, Grouse Creek continues to tumble into the valley. It drops over the 10-meter-high McDiarmid Falls before it finally drains into the Clearwater River. I climb back up to the main trail to hike to McDiarmid Falls.
I cross the bridge over Grouse Creek and thereby leave the park again. The bridge had to be replaced already three times because spring floods swept it away or damaged it. I follow the creek downriver and pass the turnoff to Birch Bluffs Rim, another interesting hike described further below.
Today I keep straight and follow the creek into the valley. There is a very humid microclimate here and the vegetation looks almost tropical. In 2012 a picturesque wooden bridge crosses Grouse Creek. In the meantime it has been swept away by one of the spring floods. On my most recent visit in 2020 only some rotten foundations remain.
Wooden bridge …

... over Grouse Creek (2012)
In 2012 I can cross the bridge and continue my hike on the other side of Grouse Creek where the trail merges with the Clearwater River Trail. I follow it south towards the Sabre Tooth Rapids. Even then the trail along the steep and crumbling slope above the river is eroding and soon becomes impassable.
Clearwater River Trail
I turn around, cross the wooden bridge a second time and hike all the way down to the mouth of Grouse Creek.
Confluence of Grouse Creek and Clearwater River
On my return, I take the side trail to the Lower McDiarmid Falls. At this time they carry a lot of water and are an impressive sight.
Lower McDiarmid Falls
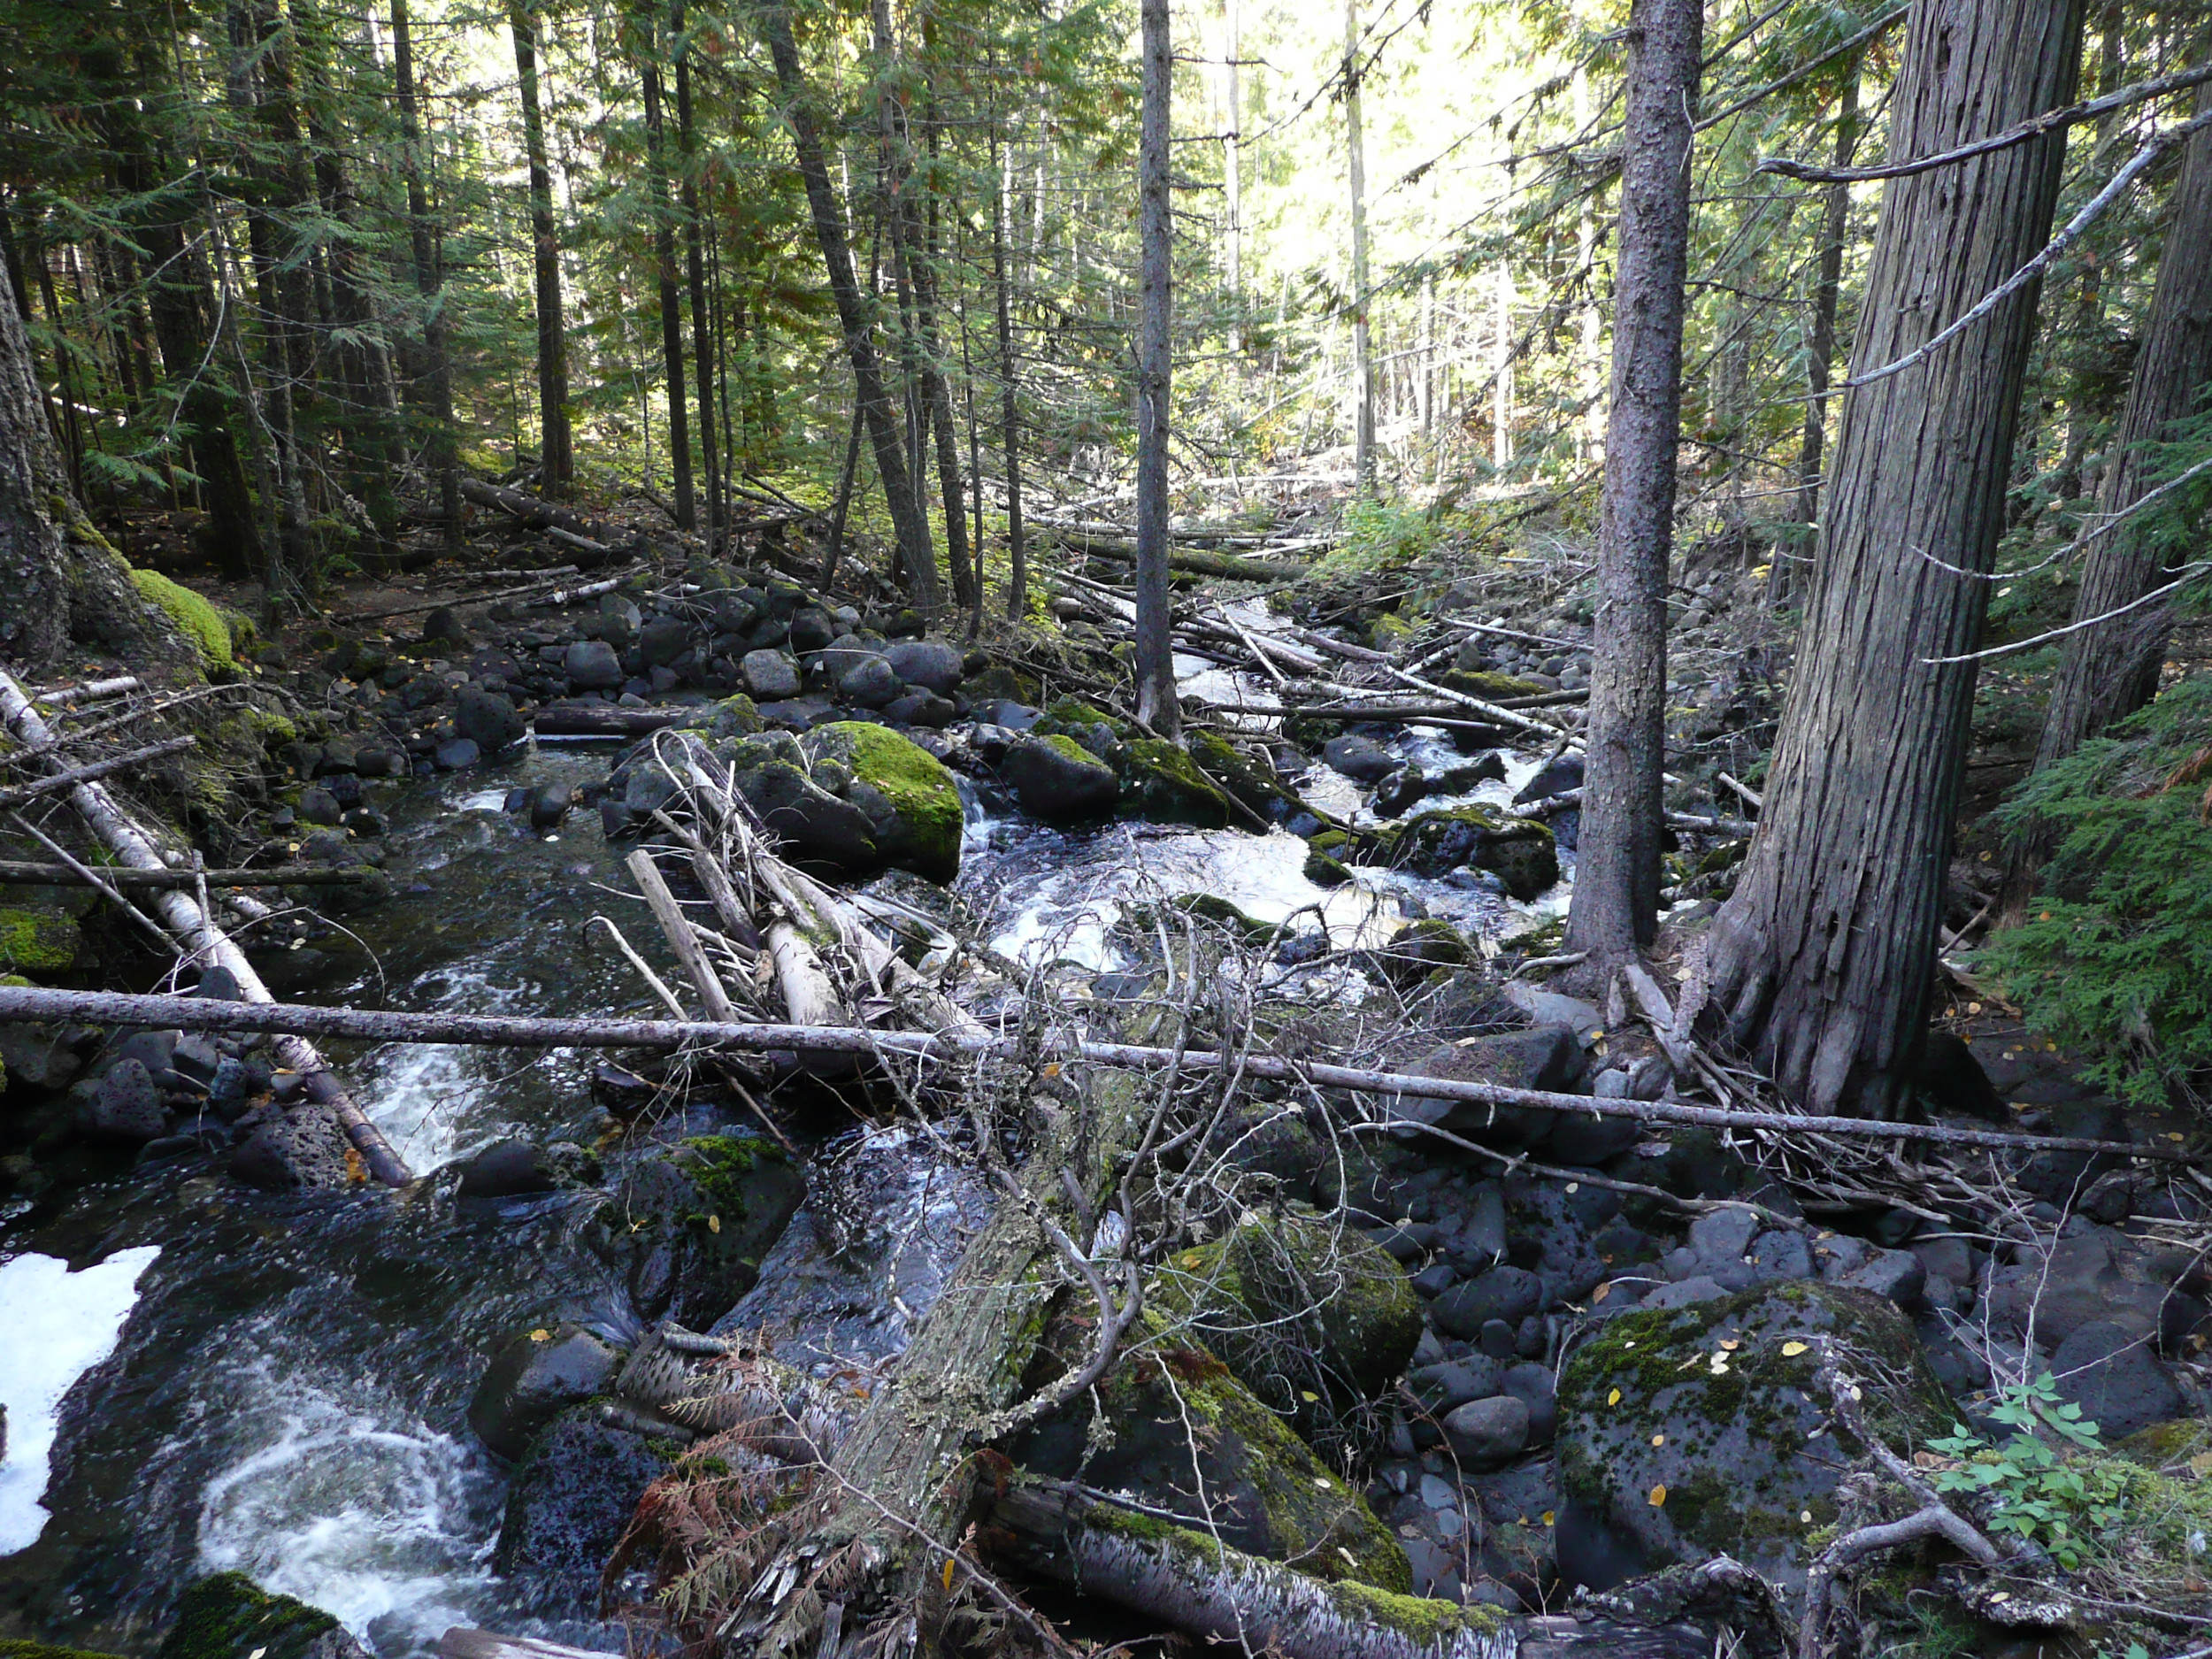
On the main trail I hike upriver, back towards the upper region of the Grouse Creek valley.
Grouse Creek
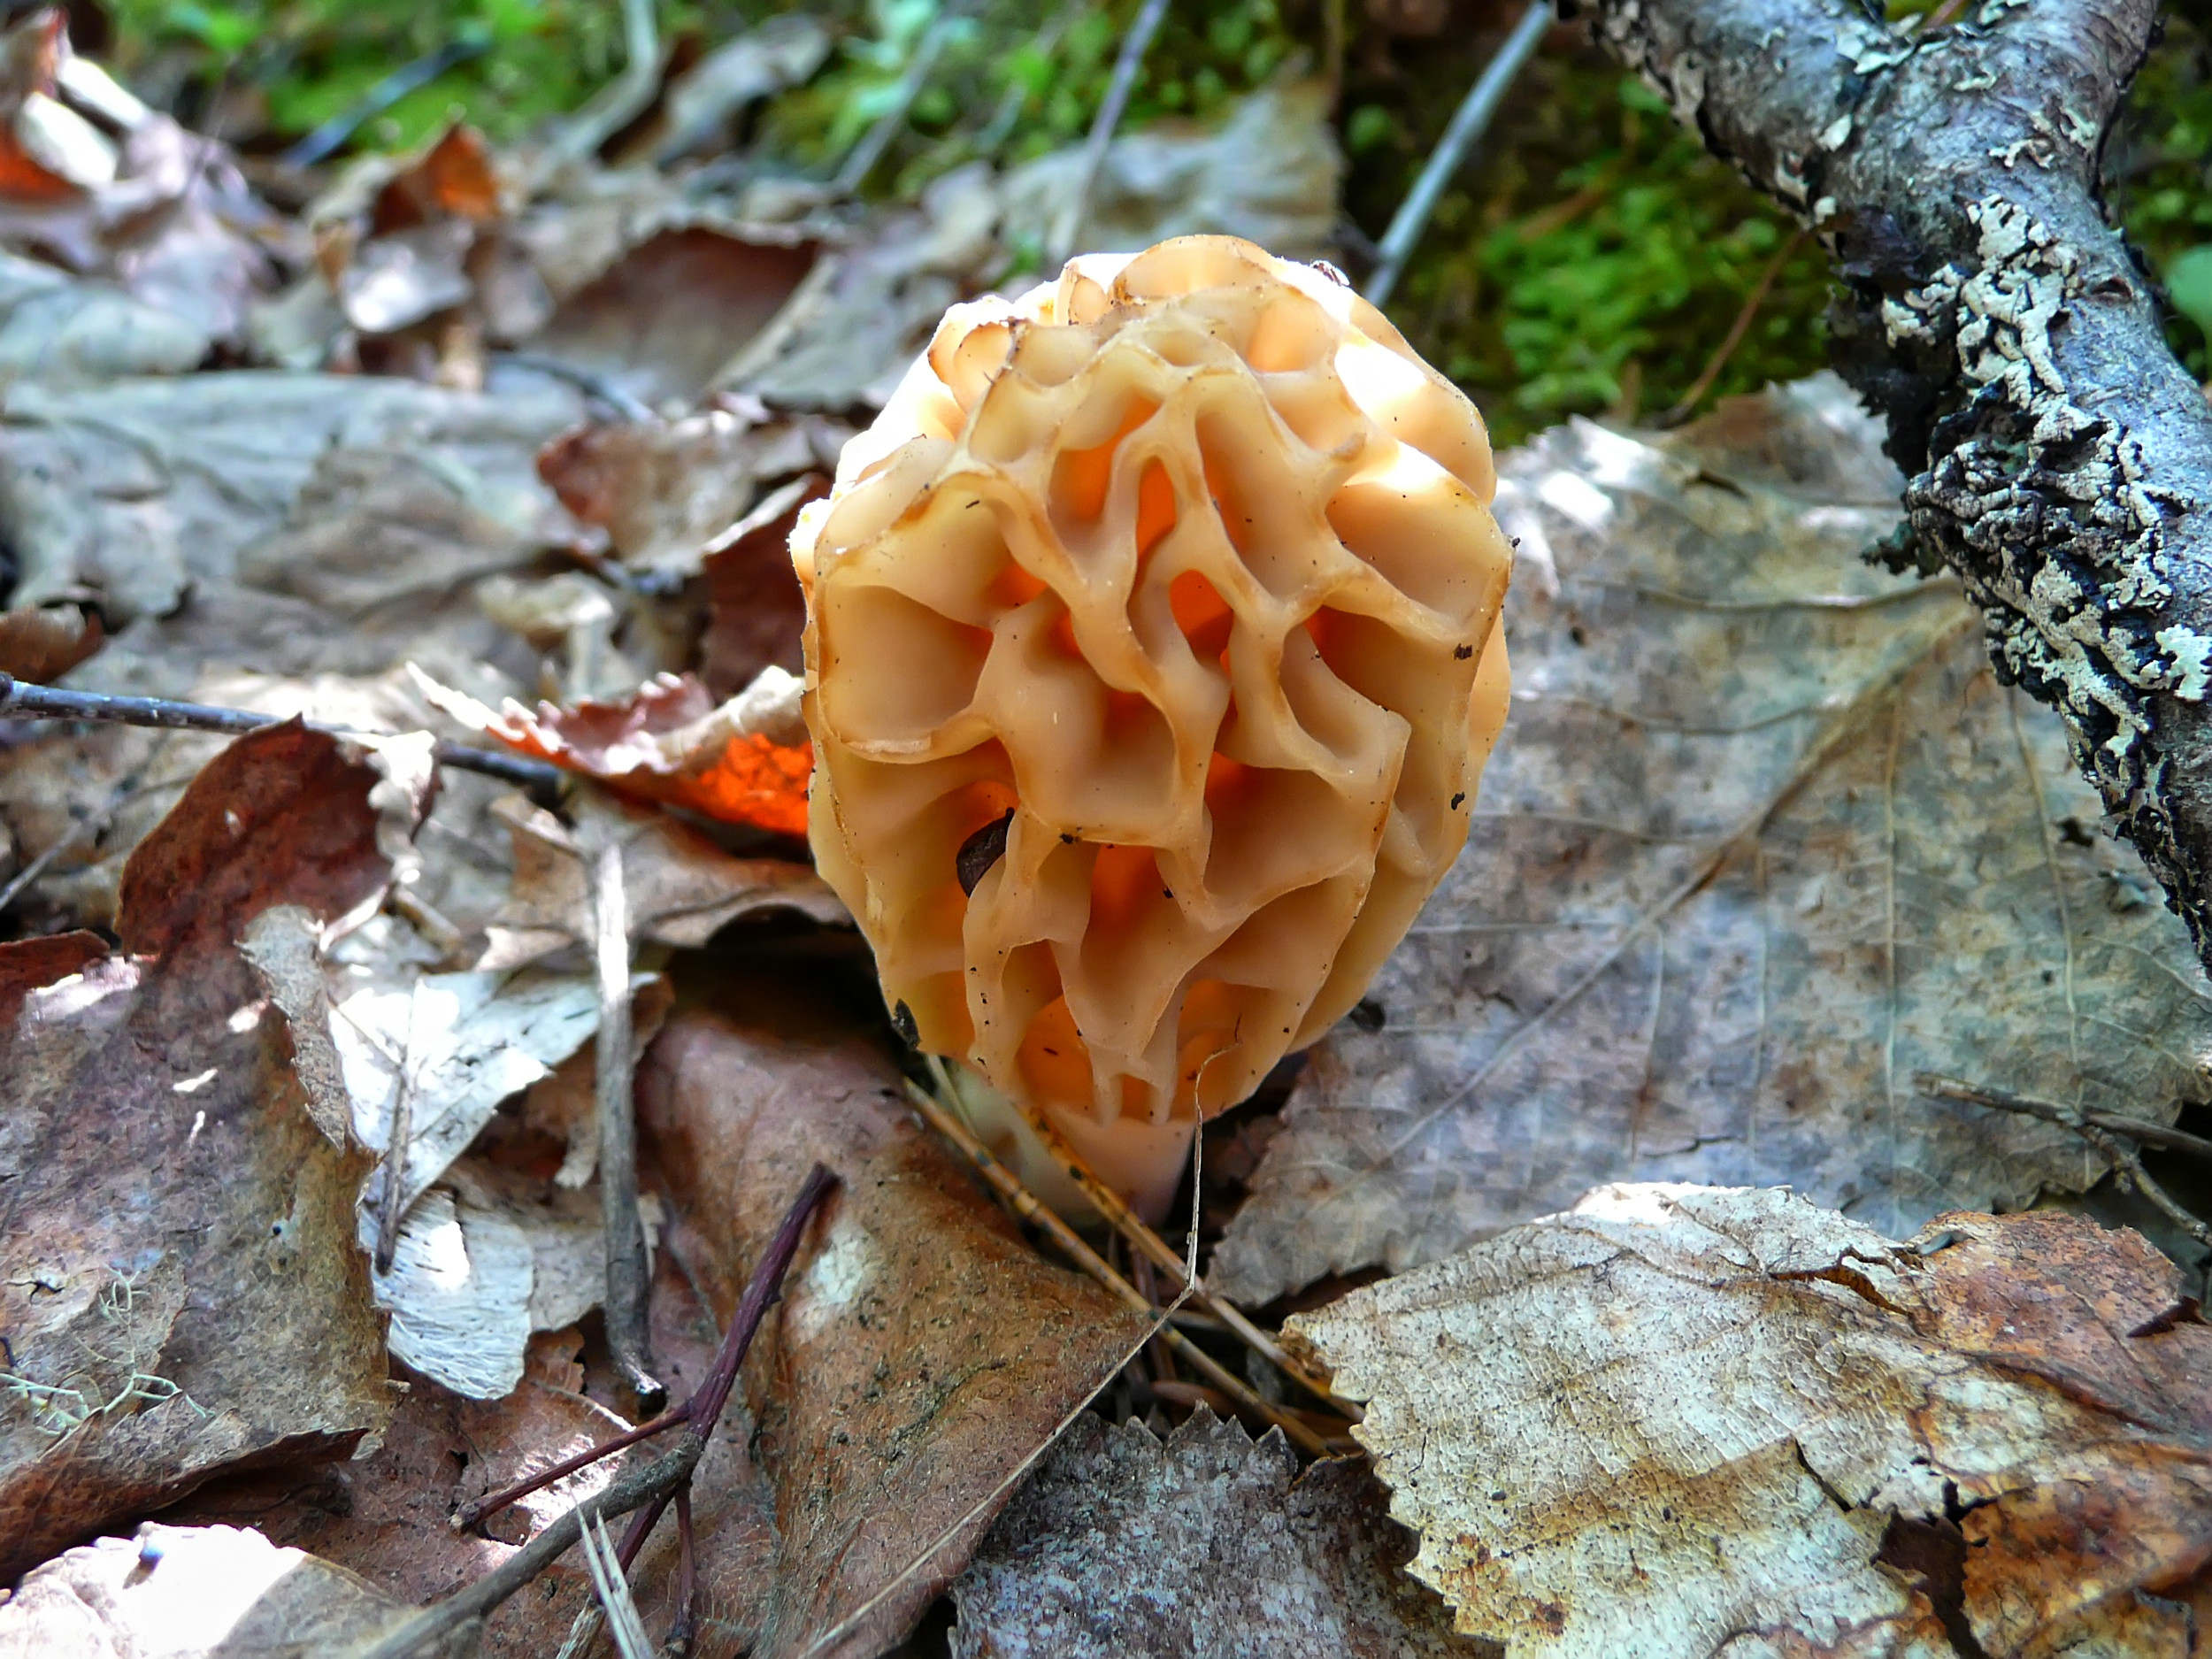
Morel
Late in May after a rain fall, morels sprout here. You have to pick them early in the morning before the insects find and spoil them.
A short side trip brings me to the Upper McDiarmid Falls.
Upper McDiarmid Falls
Soon I return to the intersection with the Birch Bluffs Rim Trail. I will explore it another time; today I cross back over the bridge and head for the parking lot.
| Distance | 10.6 km |
| Time | 4 hrs |
| Min. Elev. | 510 m |
| Max. Elev. | 684 m |
| Ascent | 174 m |
| Cum. Ascent | 781 m |
| Cum. Descent | 781 m |
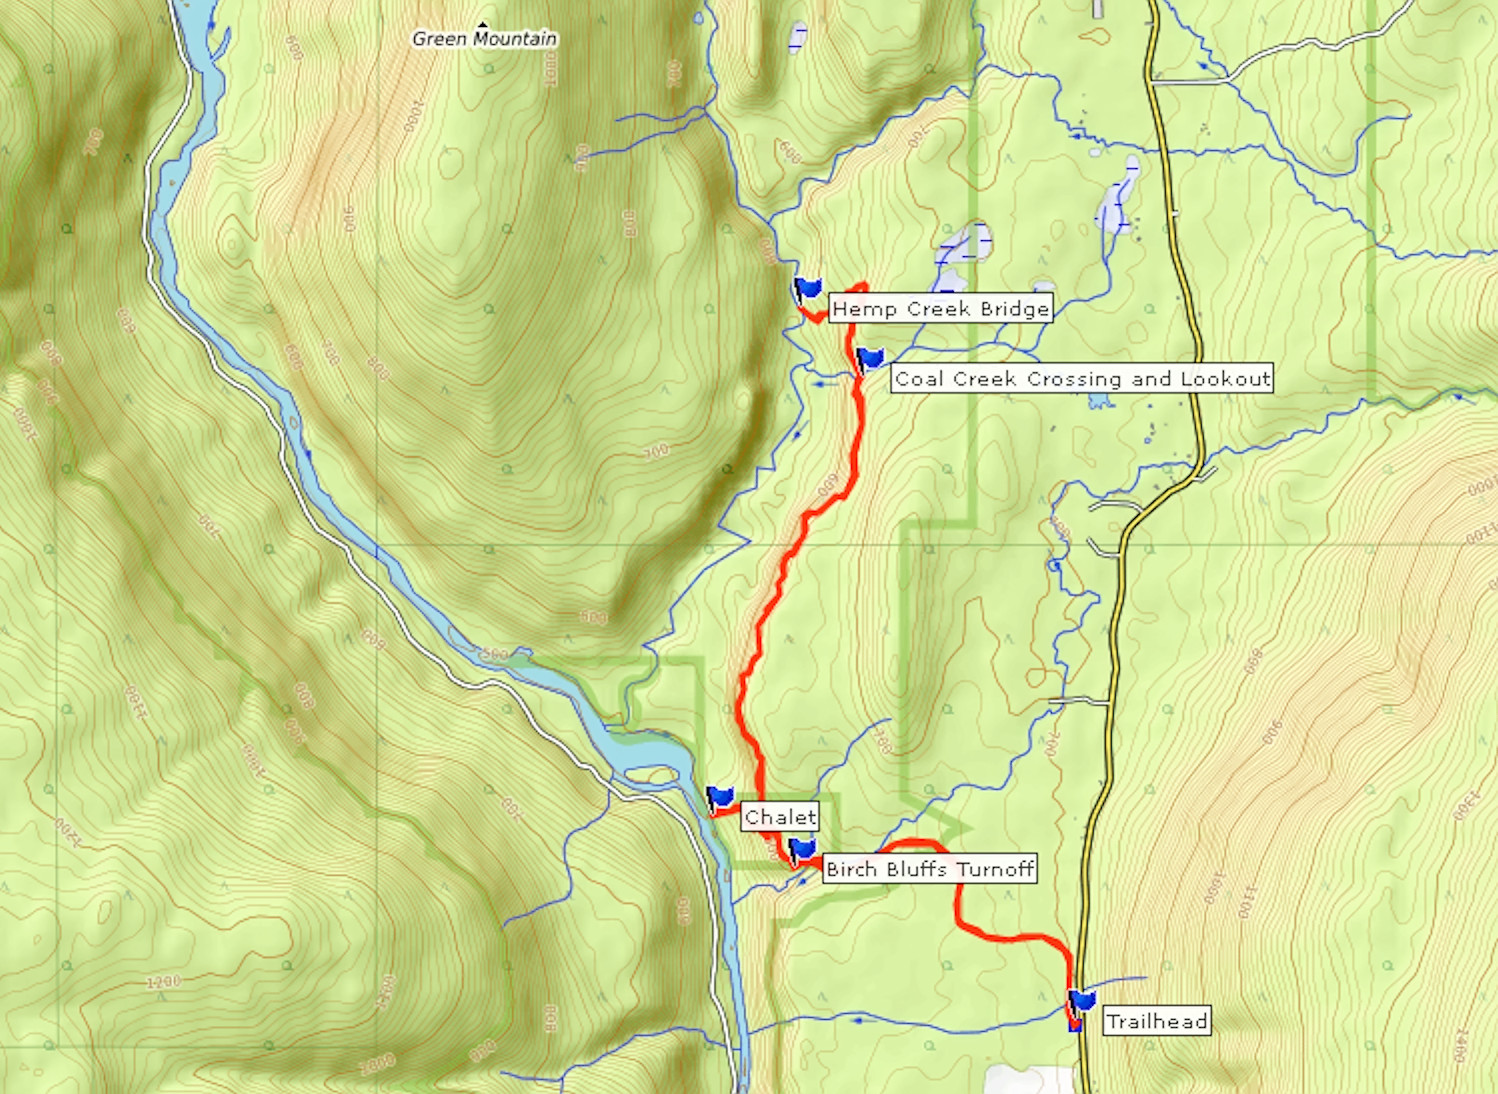
Moul Falls and the section of the Birch Bluffs Rim Trail to Coal Creek can easily be visited on the same trip. In July 2012 however, I set out to hike the entire rim trail to the Hemp Creek Bridge and then return over the East Hemp Creek Trail.
Before I reach Moul Falls, I leave the main trail and cross the bridge over Grouse Creek. Soon I reach the intersection with the Birch Bluffs Rim Trail. It does not take long to arrive at a beautiful viewpoint over the Clearwater River. A wooden bench is ideal for a short rest.
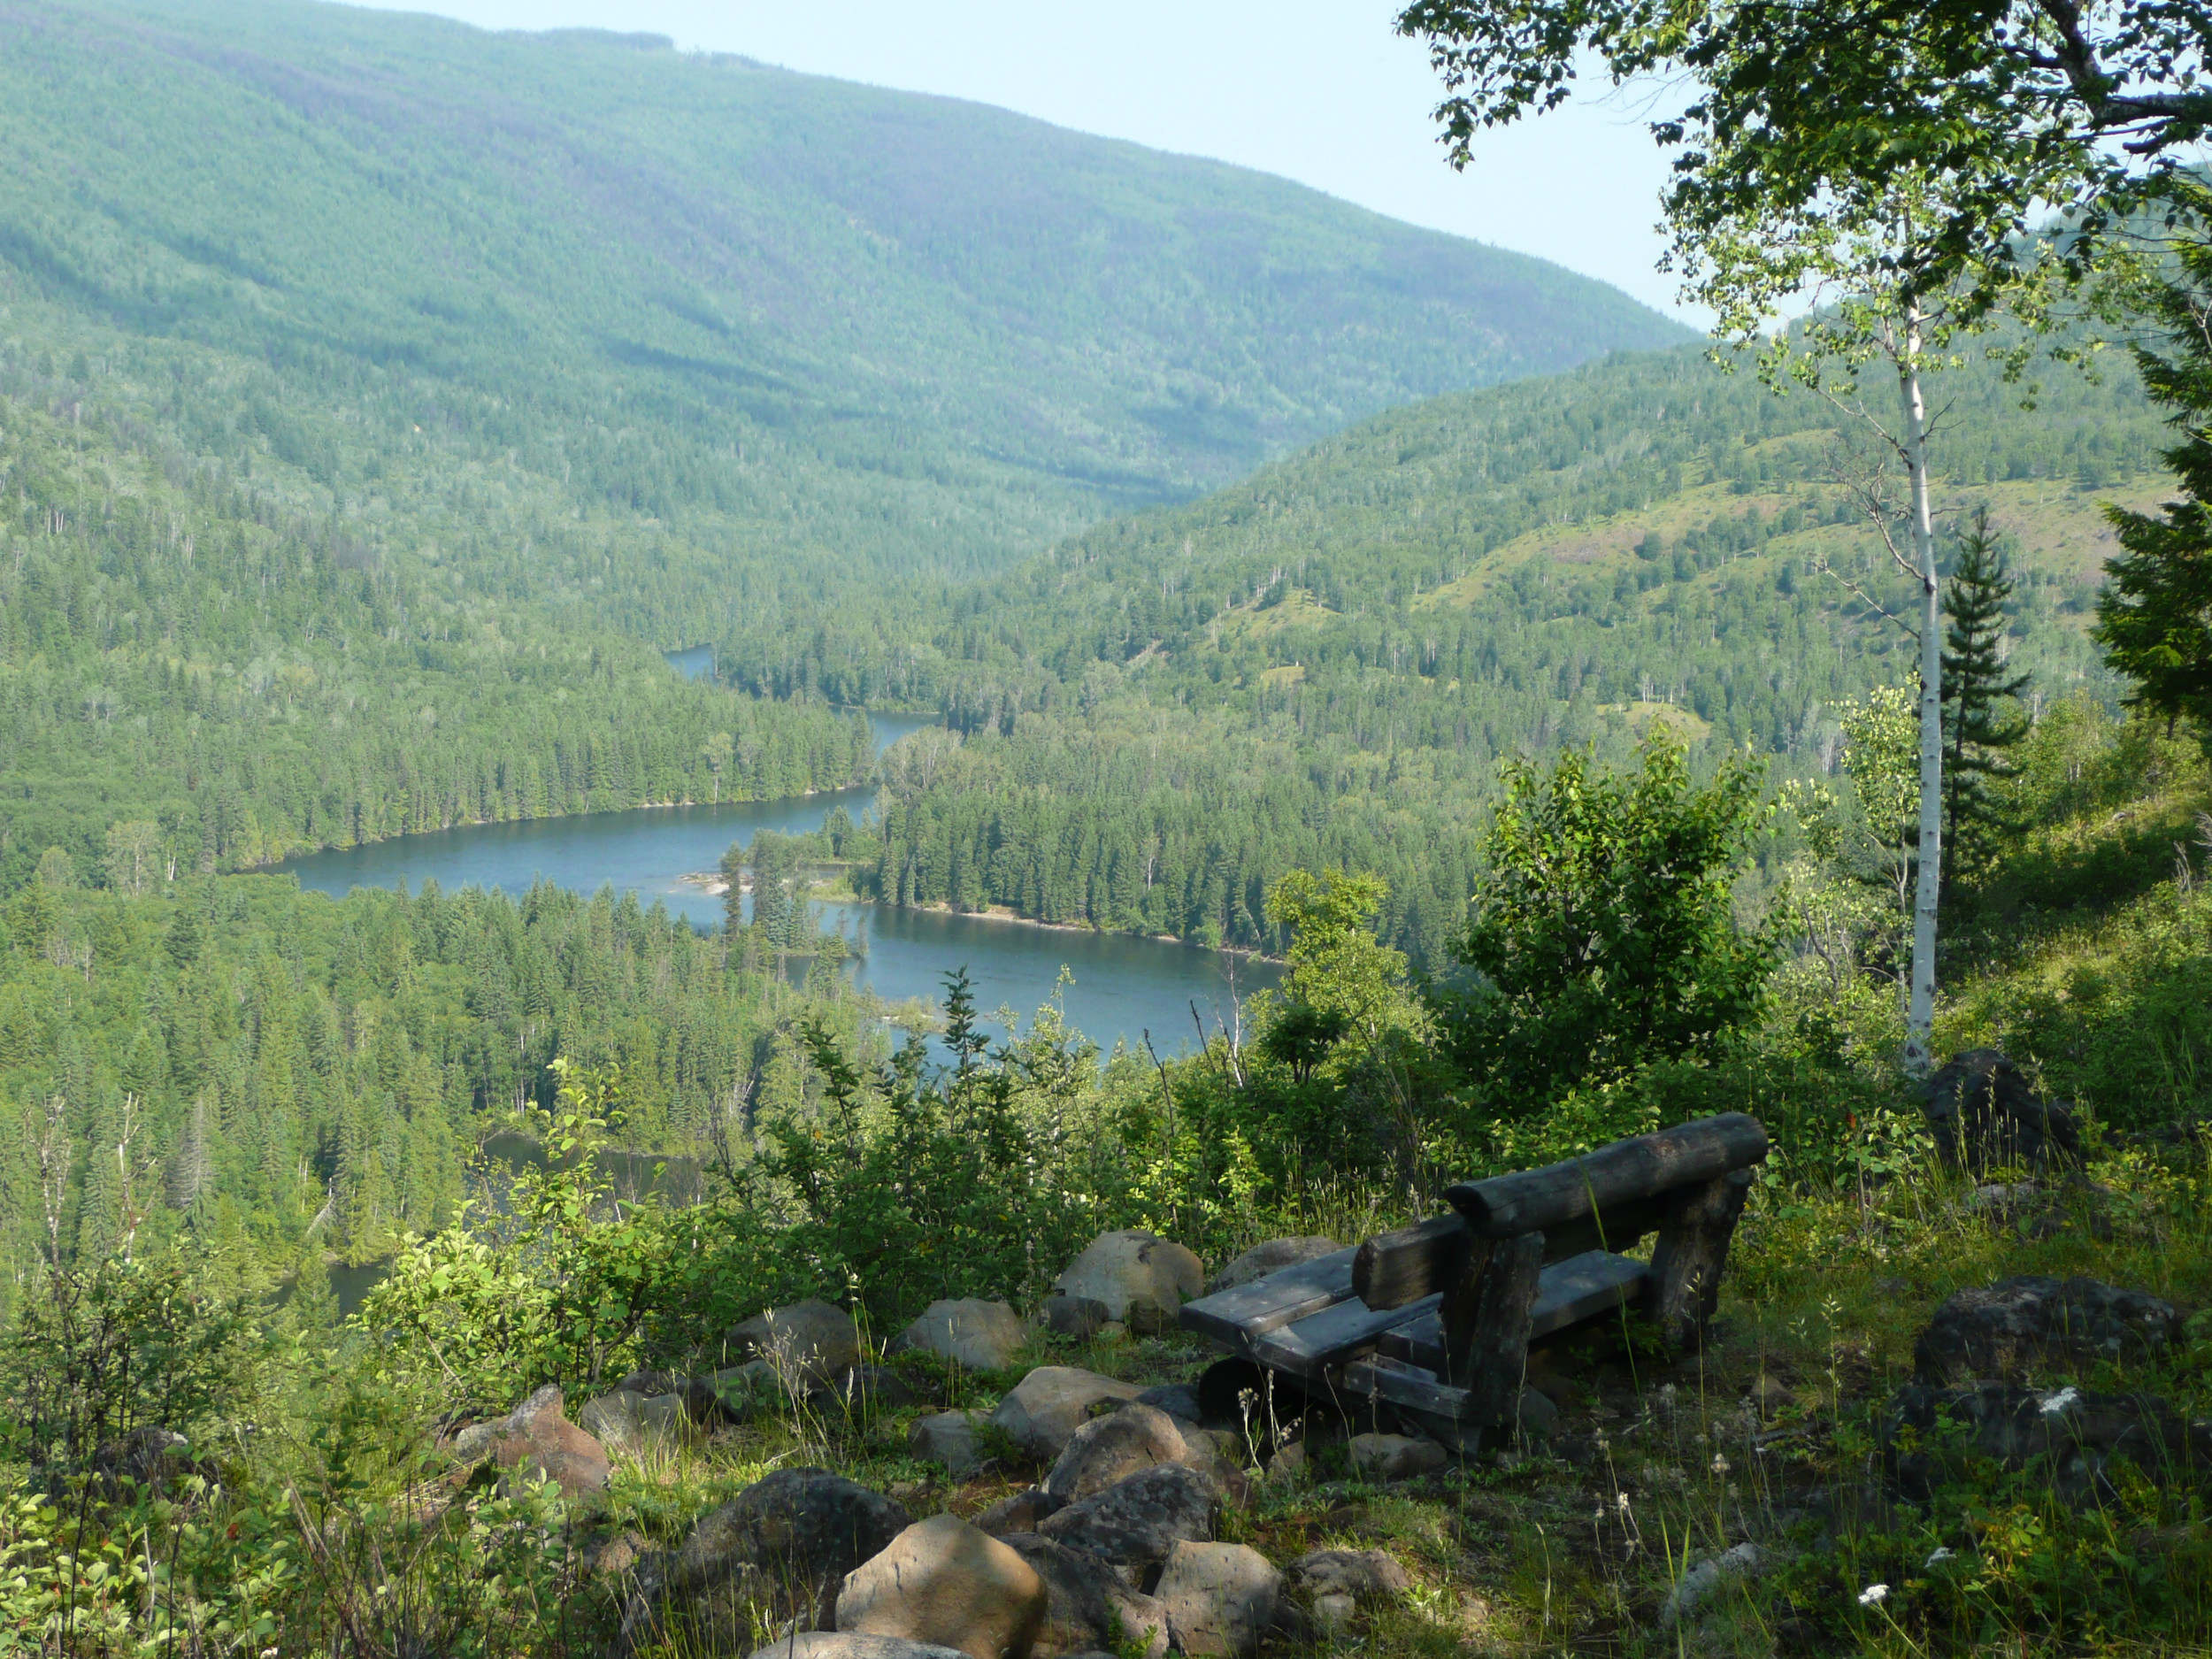
Bench above the Clearwater River
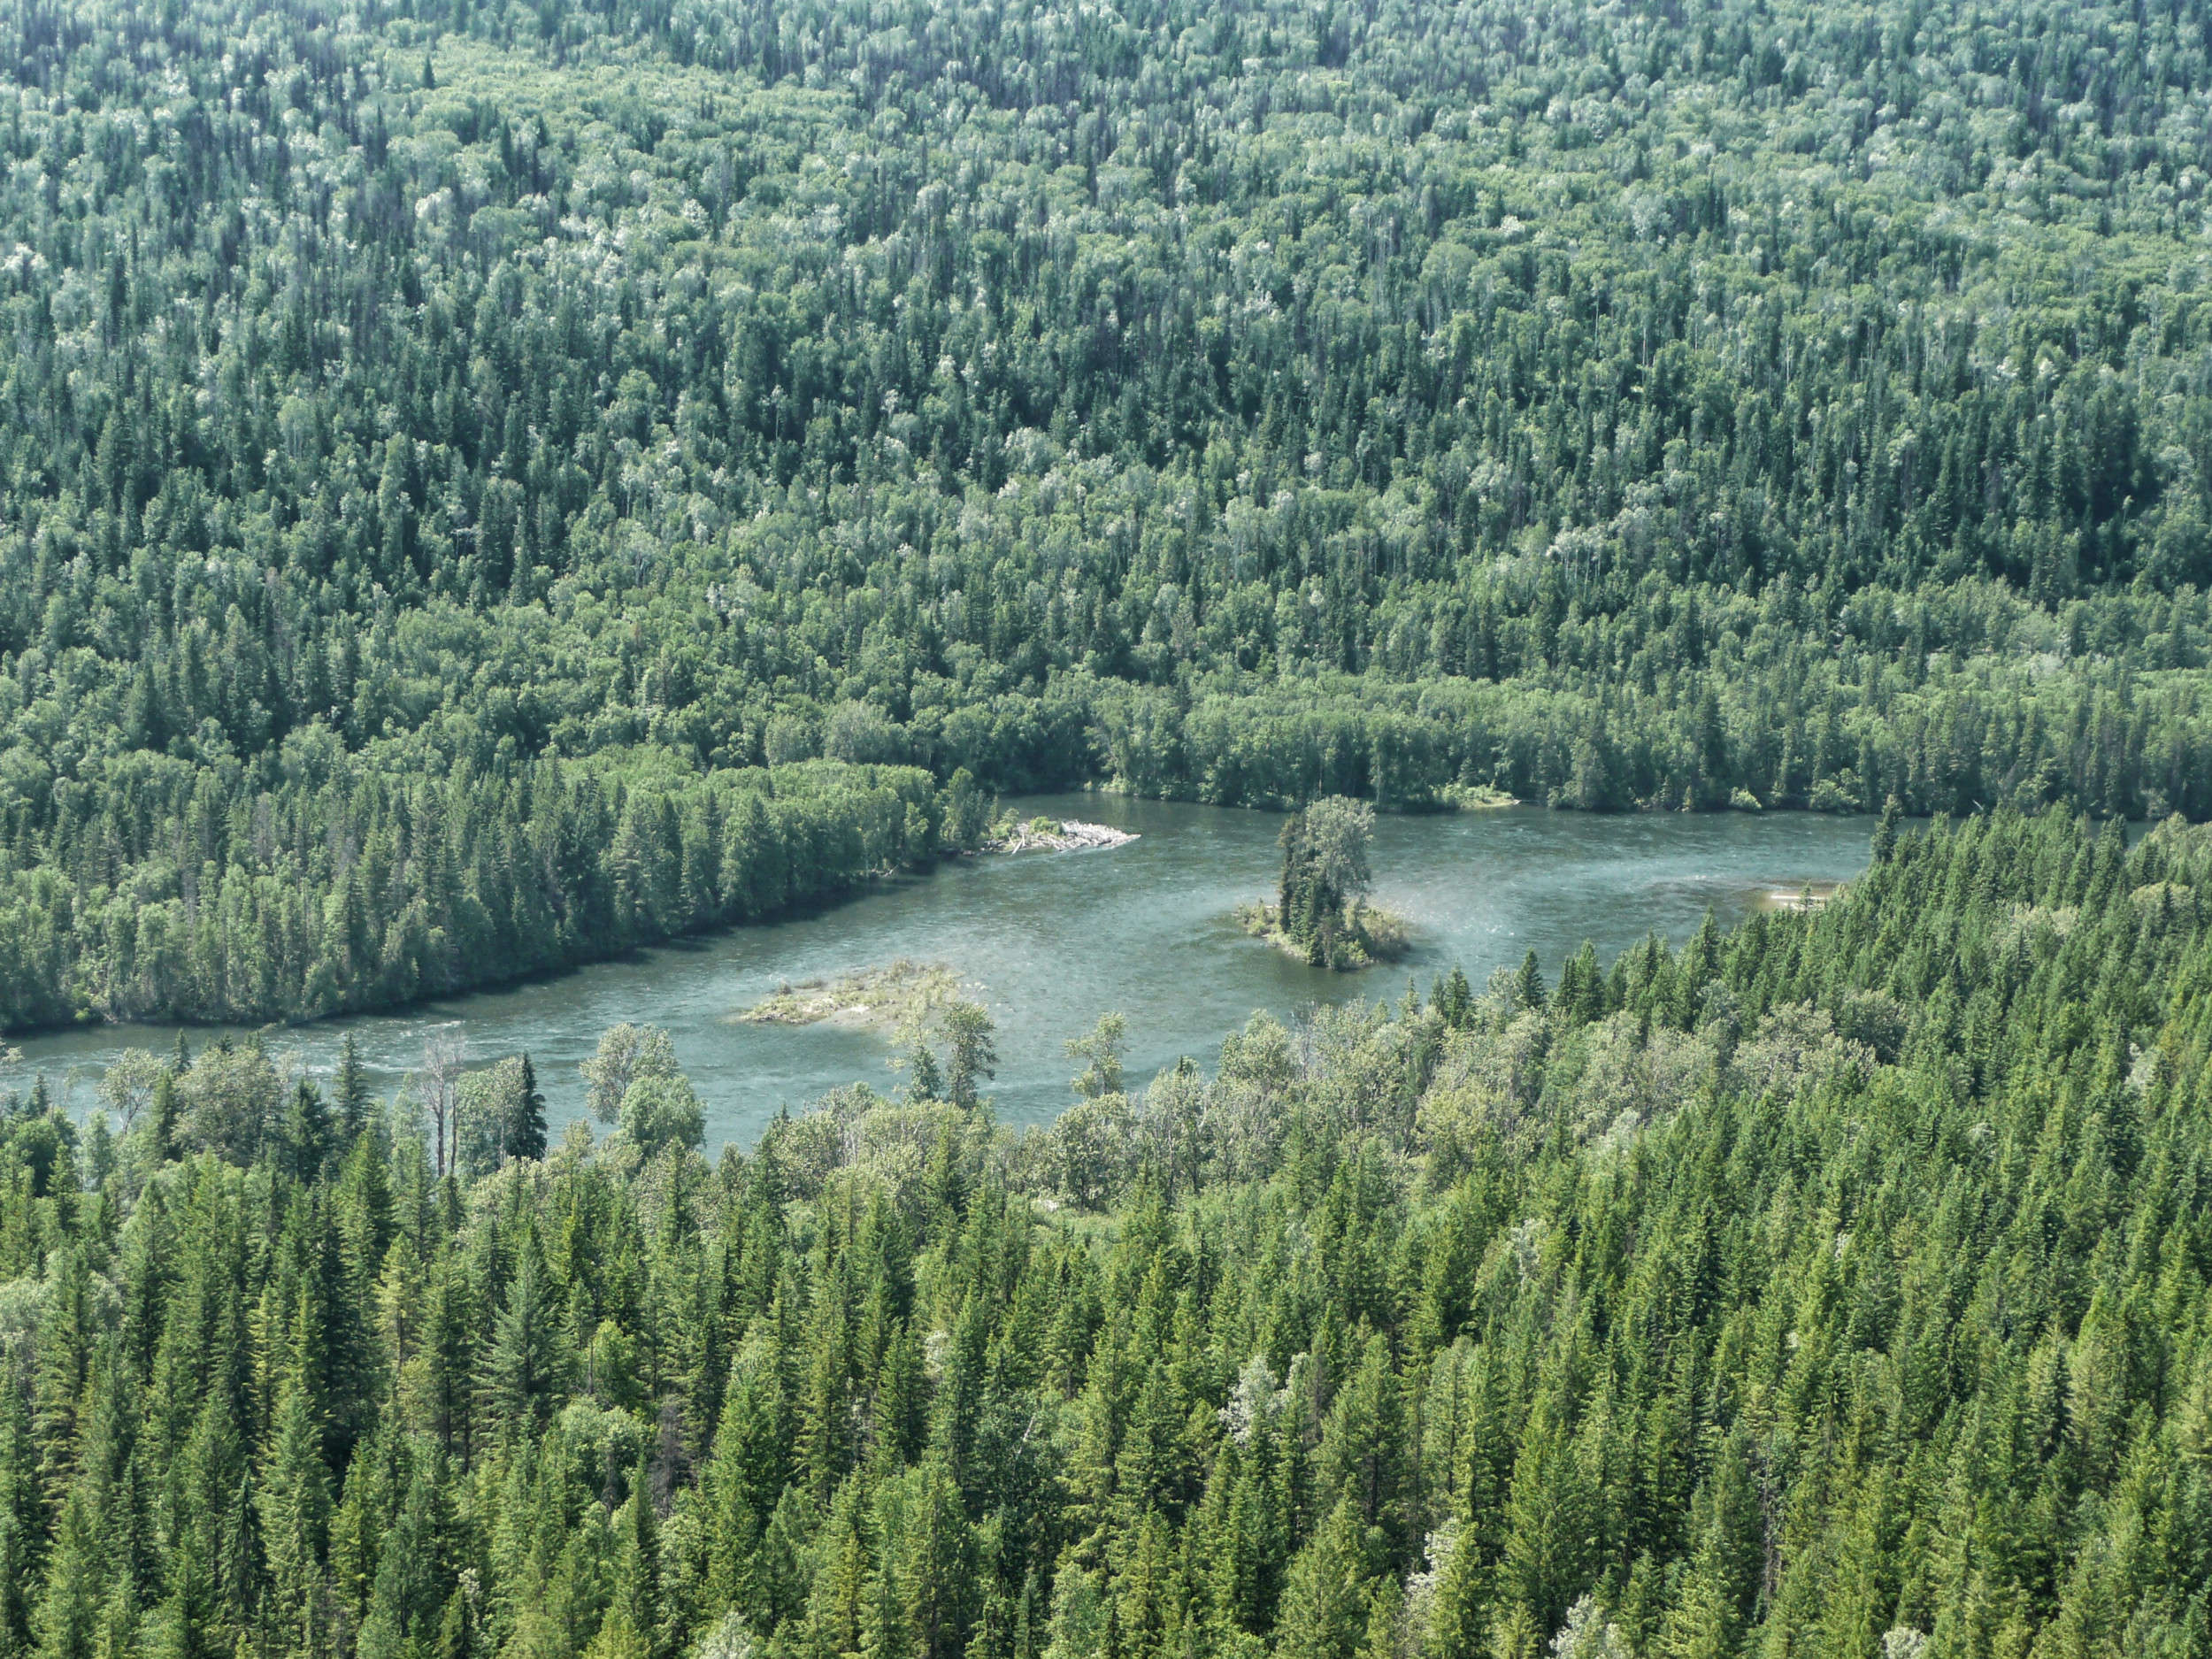
The rim trail follows a cliff and climbs steadily, while the views get even better.
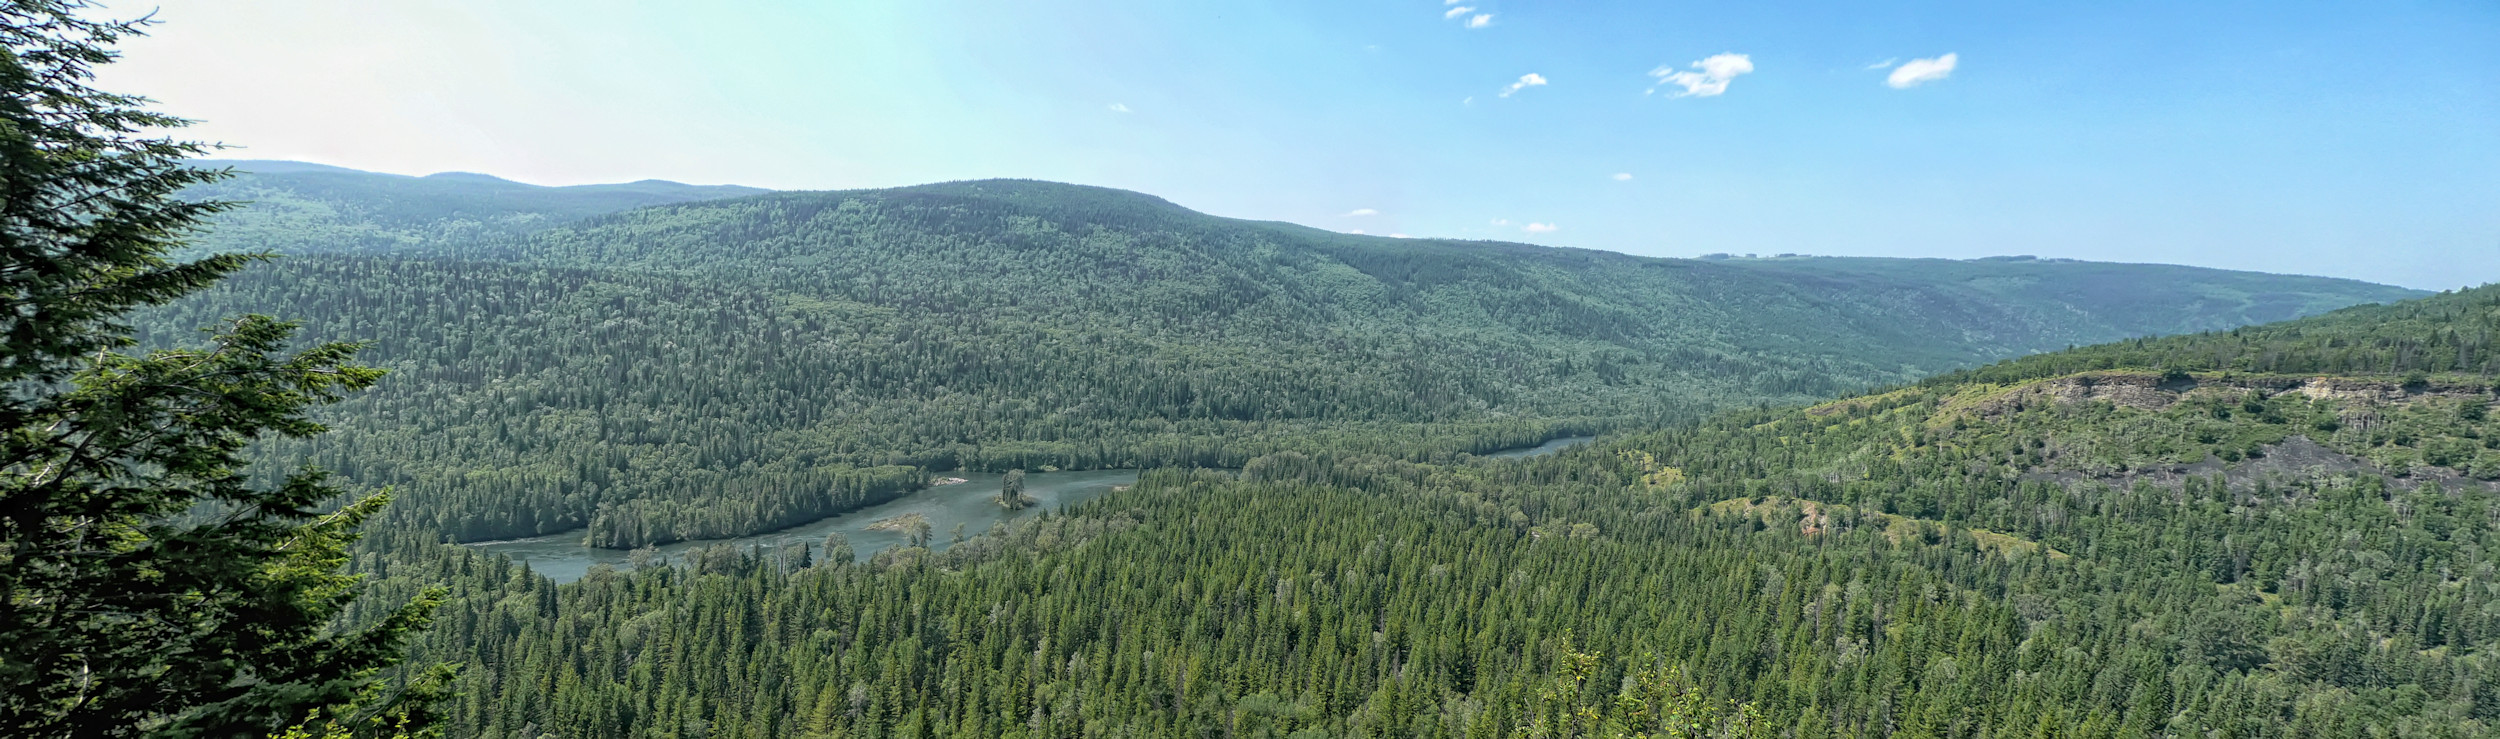
View from the rim
In the distance I can see the confluence of Clearwater River and Hemp Creek and the Hemp Creek Canyonlands, with Green Mountain in the background. The flat mound of volcanic rock is called Flatiron Mountain.
The Birch Bluffs Rim Trail mostly follows the edge of the cliff and time and again offers wide views. After another hour I arrive at Coal Creek. From here the trail descends through the forest. A lot of trees have blown down and make hiking difficult. The trail is not maintained on a regular basis.
At the intersection with the Flatiron Trail I keep left and arrive at the Hemp Creek Bridge. On its other side, West Hemp Creek Trail returns to the Clearwater River, but there is no bridge over the mouth of Hemp Creek to get back to the starting point. My original plan was to stay on this side of Hemp Creek and follow the East Hemp Creek Trail to the McMillan Cabin on the Clearwater River. From there I wanted to continue to the Clearwater River Chalet and back to the Birch Bluffs. But all the trails down here seem overgrown and there is a substantial risk that I cannot make it through. So I rather retrace my steps and go back the same way I came.
I approach the Clearwater River Chalet as a side trip from the Birch Bluffs Rim Trail. On the way down to the riverside the vegetation becomes very lush and looks quite different from the one surrounding the rim trail.
Just ahead of the chalet I come upon the other end of the East Hemp Creek trail. It looks even more indistinct here, and I feel confirmed in my decision to not have chanced it.
Chalet on the Clearwater River Trail
I have a last break by the riverside. From here I could take the Clearwater River Trail to the north and visit the McMillan Cabin or head south to the mouth of Grouse Creek. I forgo both, however, and return up to the rim trail to find my way back to the parking lot. As I did not hike the loop as planned, but walked down to the river and back up several times, there was a lot of elevation gain and loss on my 10-kilometer-hike.
As of 2020, the Hemp Creek Bridge is gone and has not been replaced. Some of the trails are not maintained and not signed.
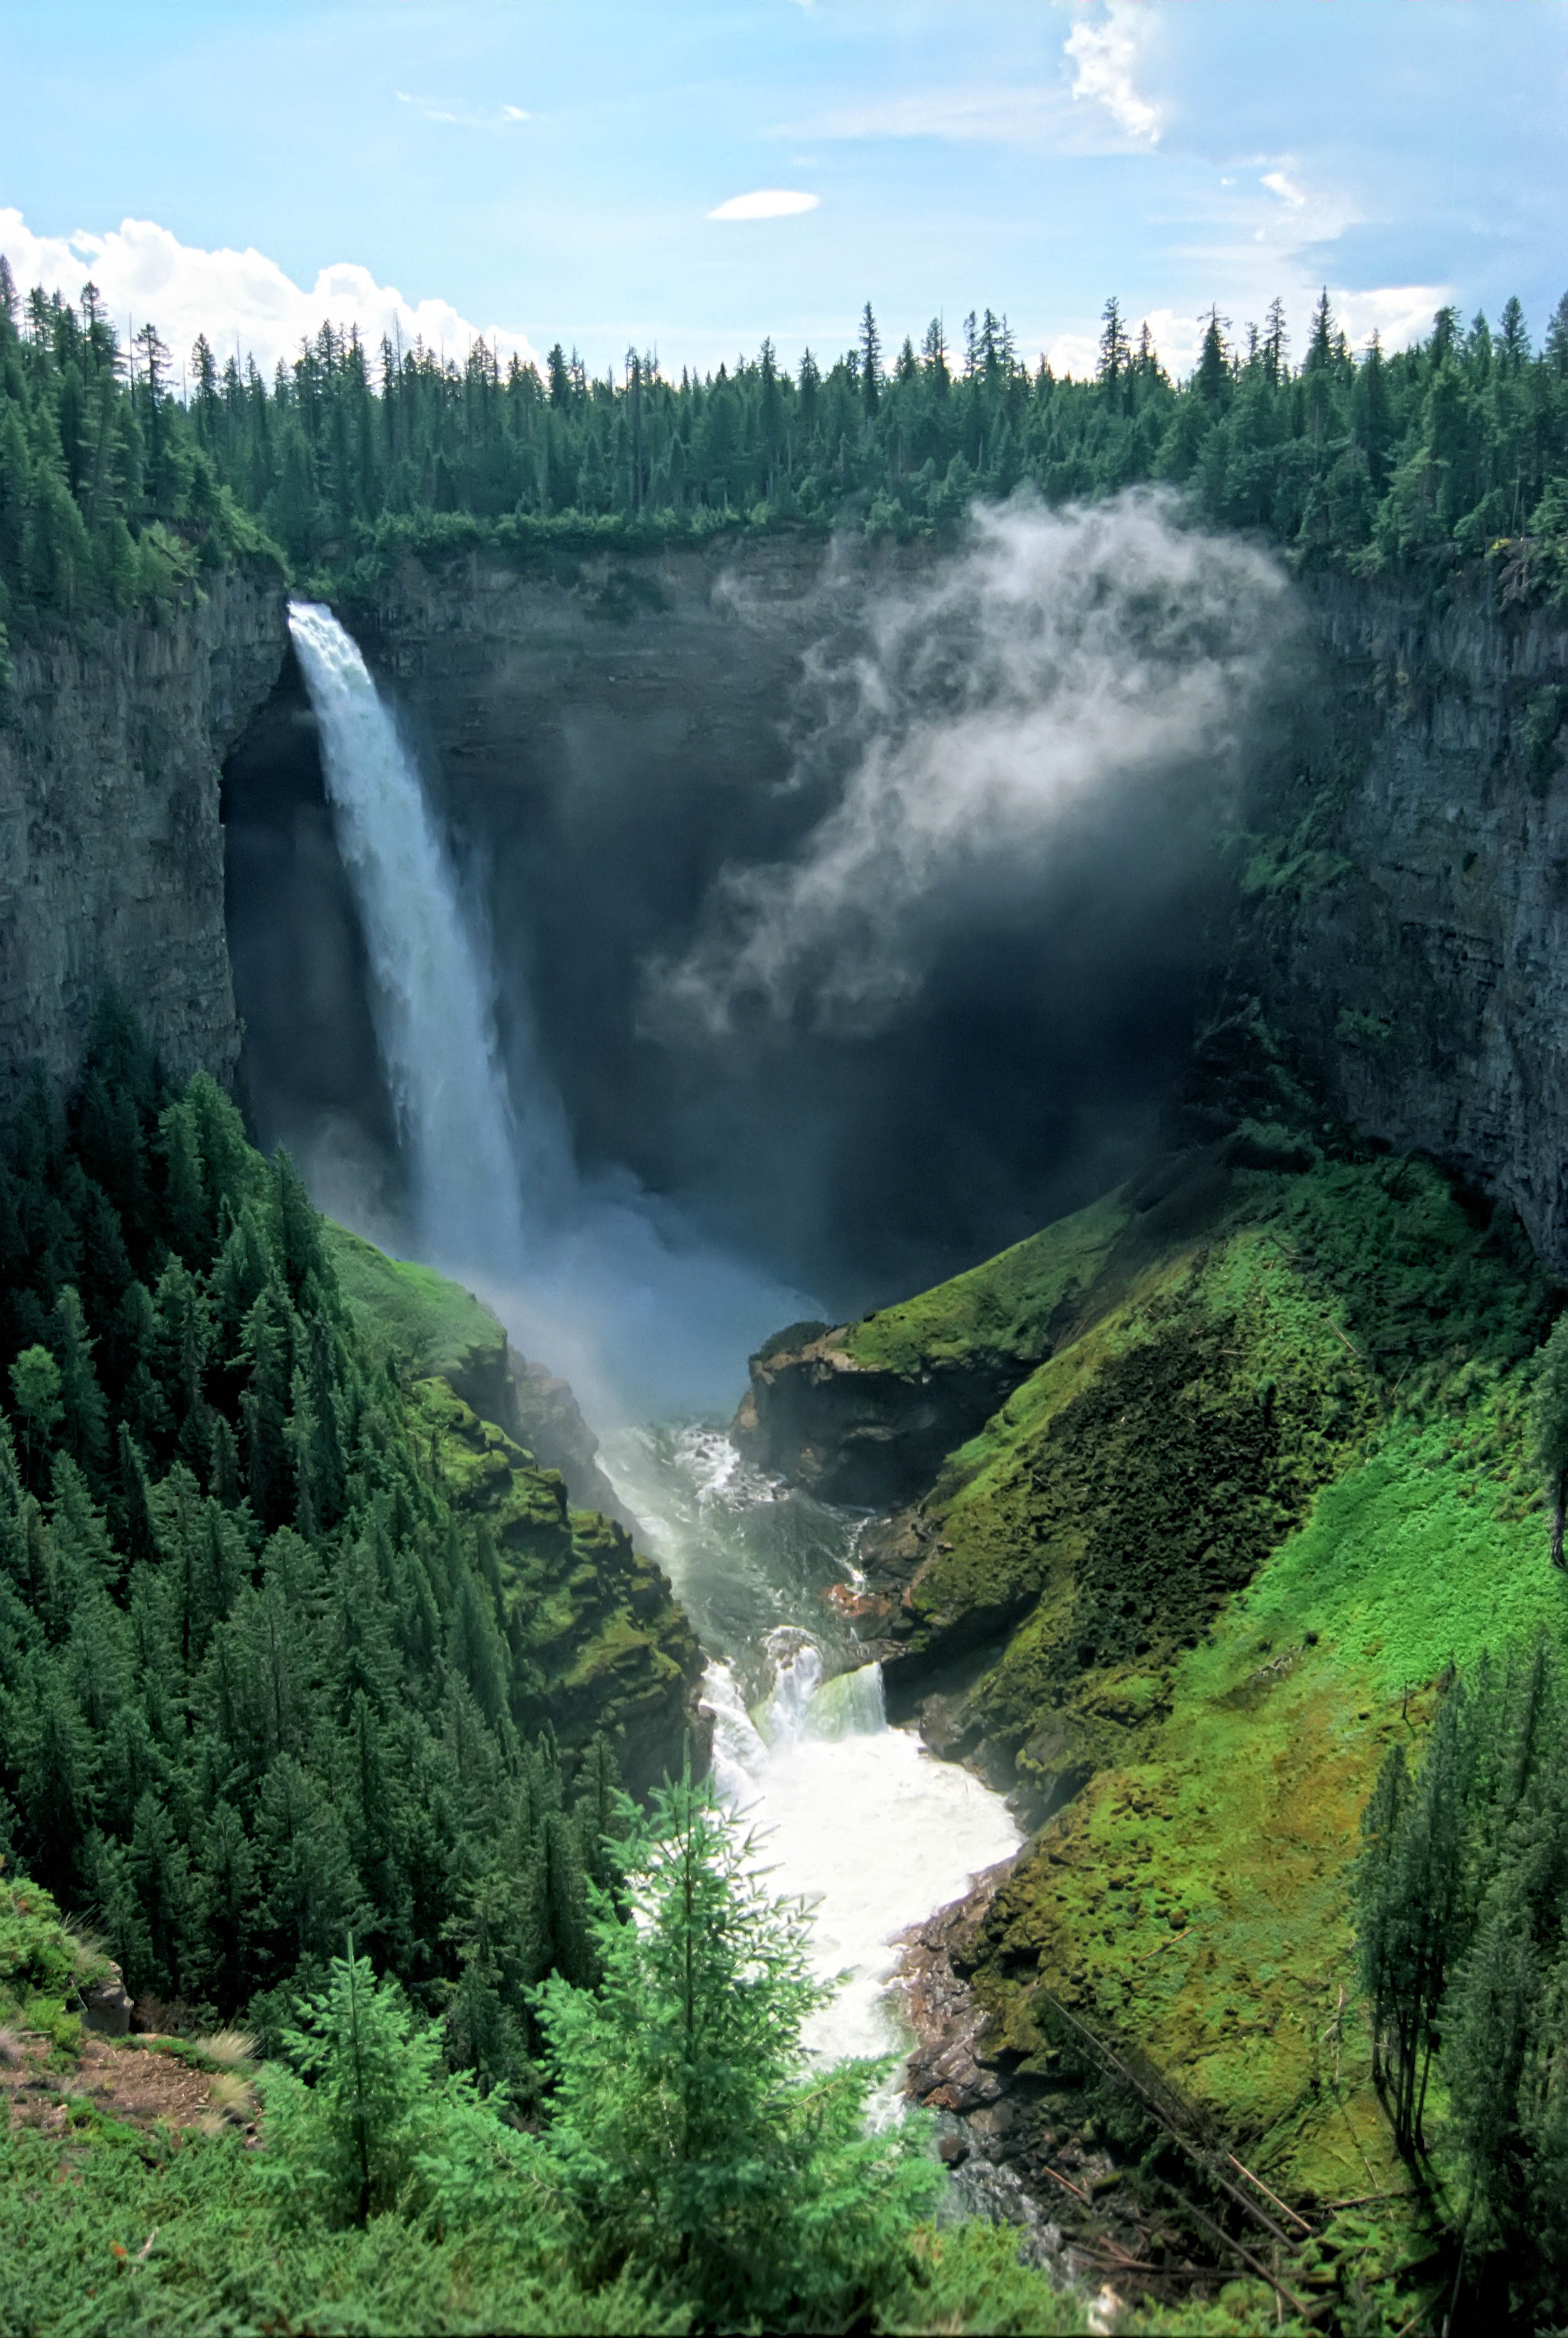
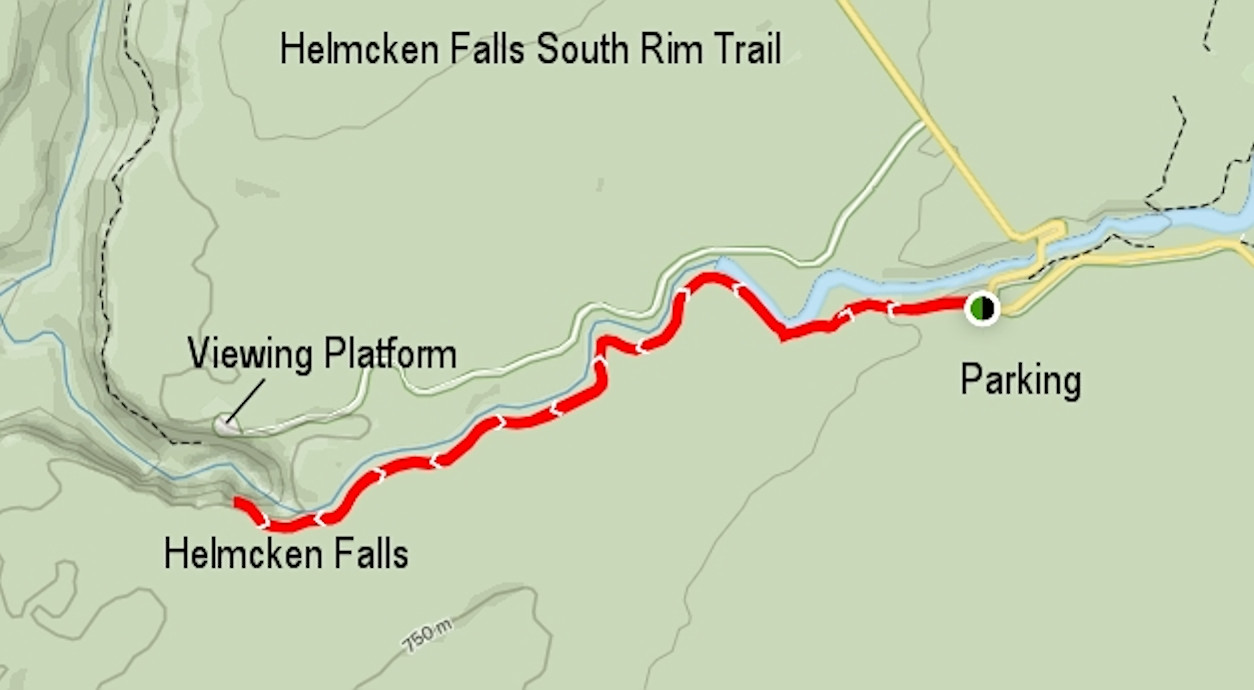
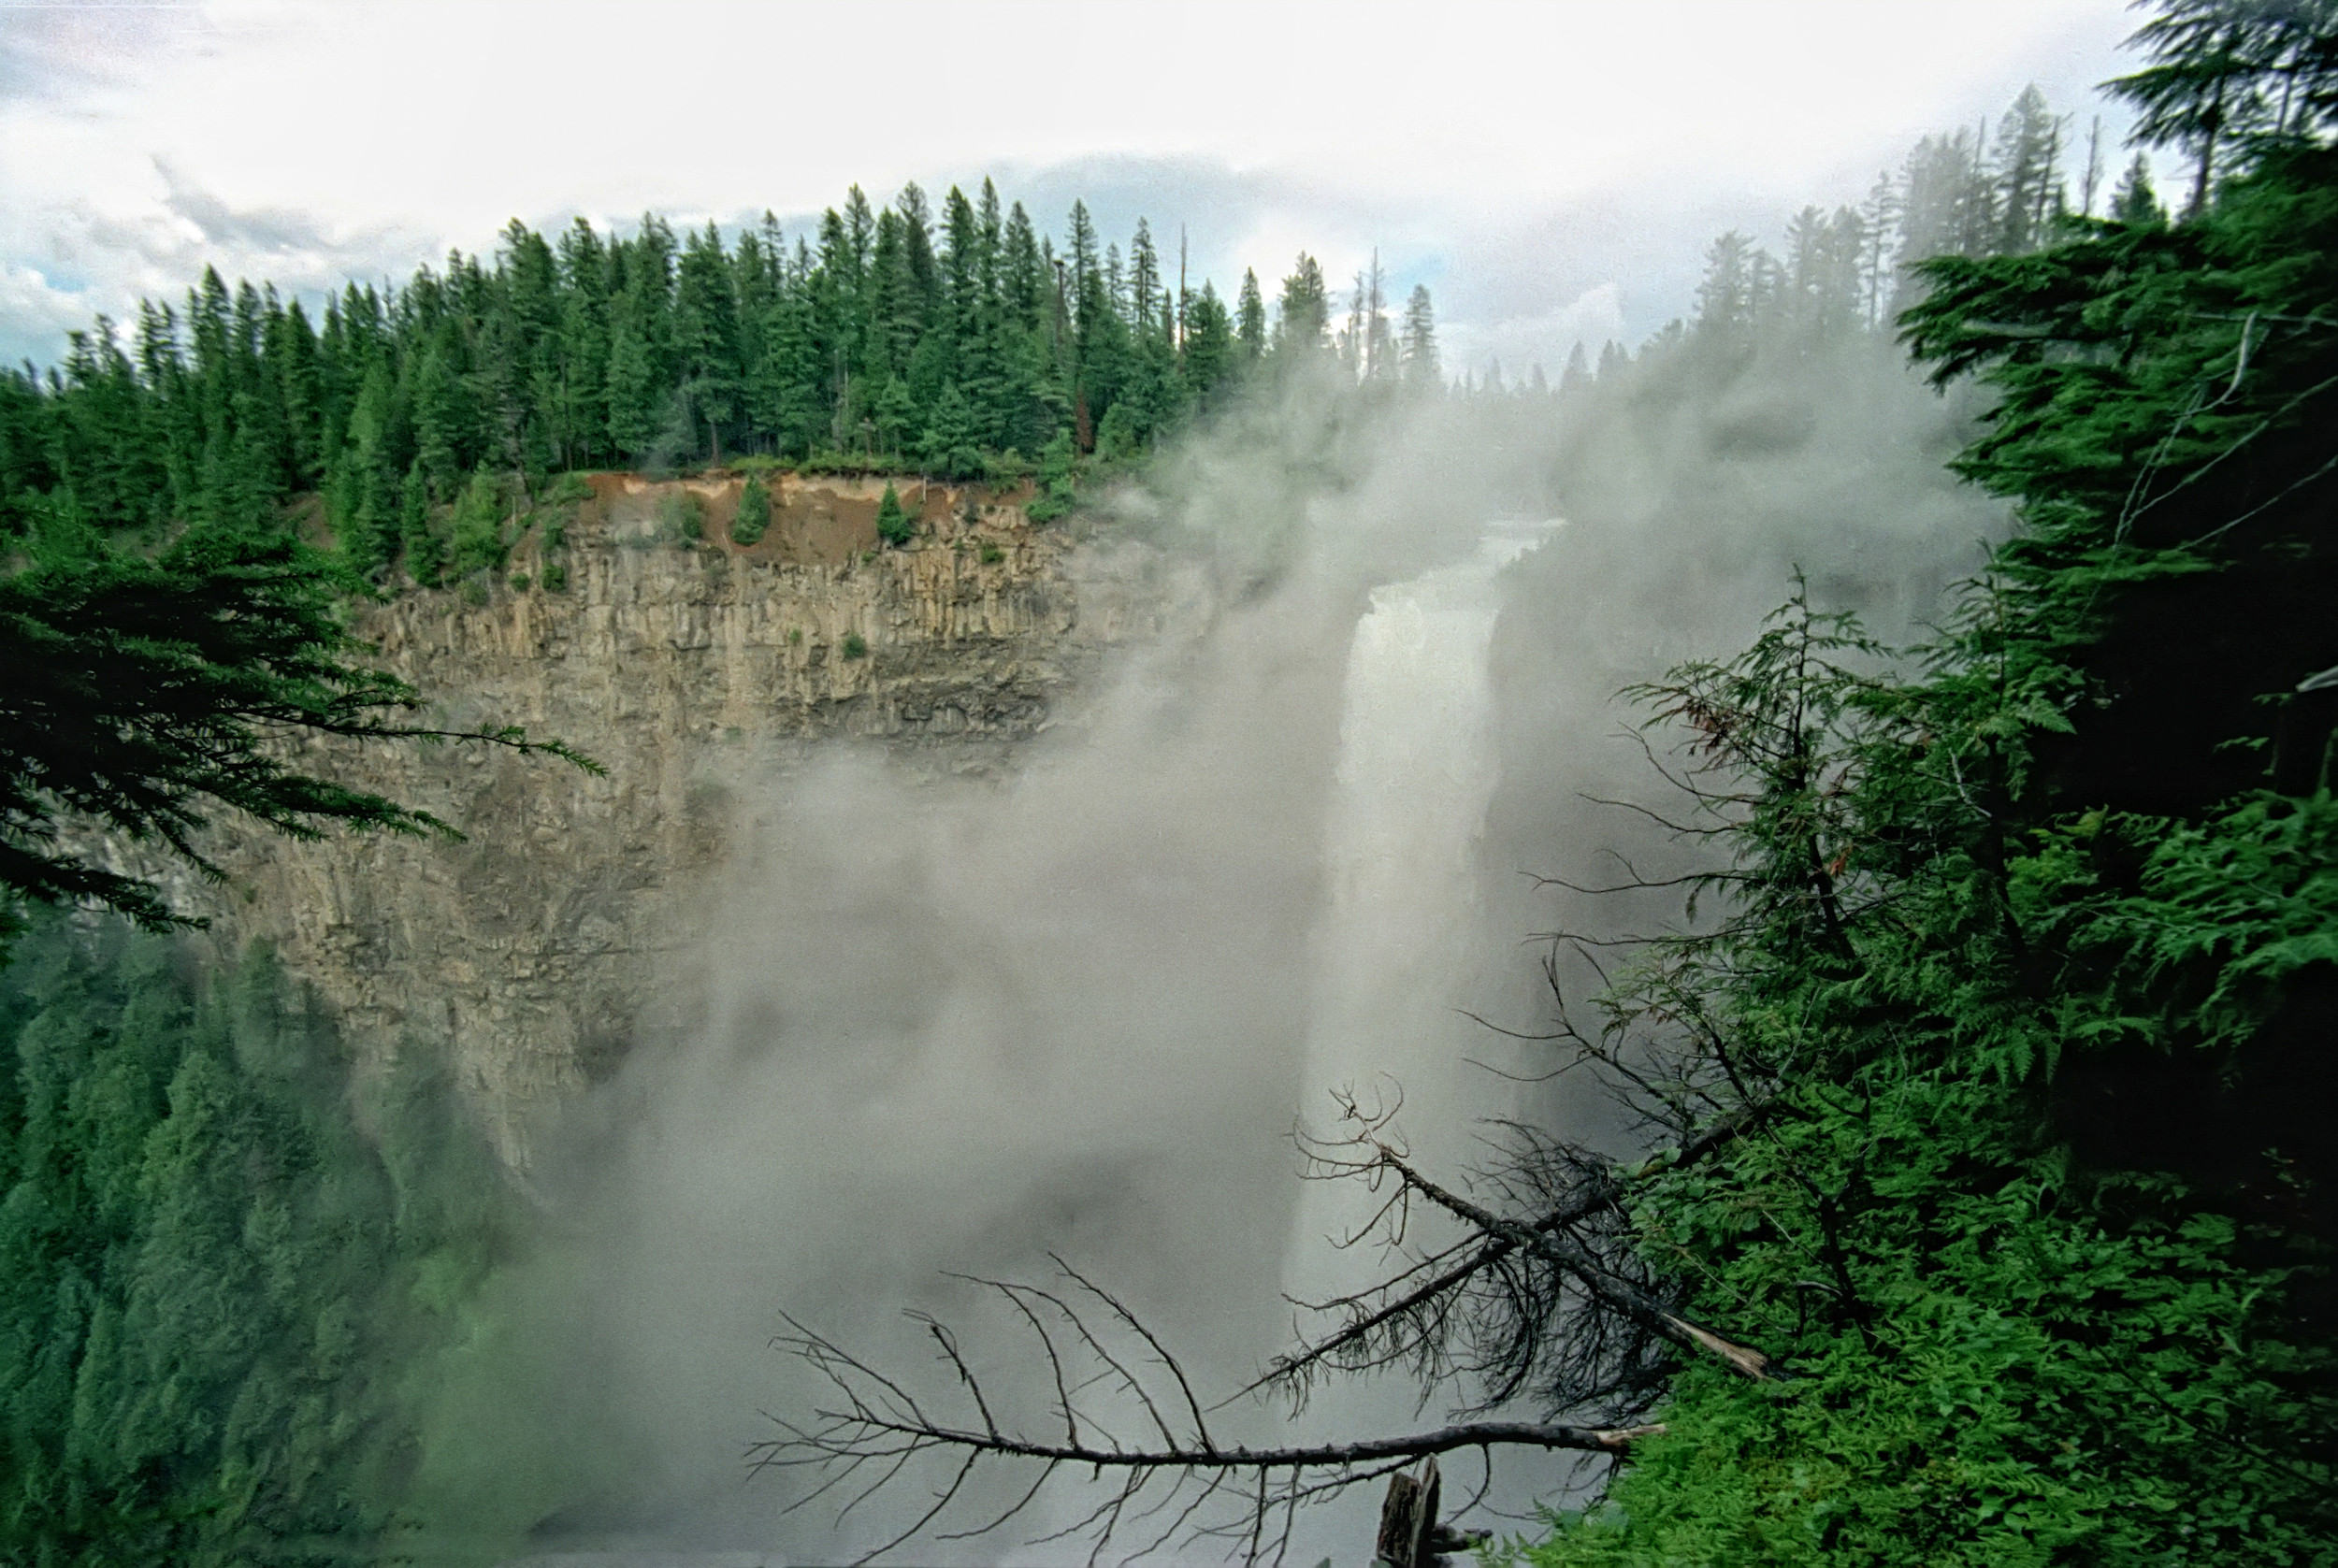
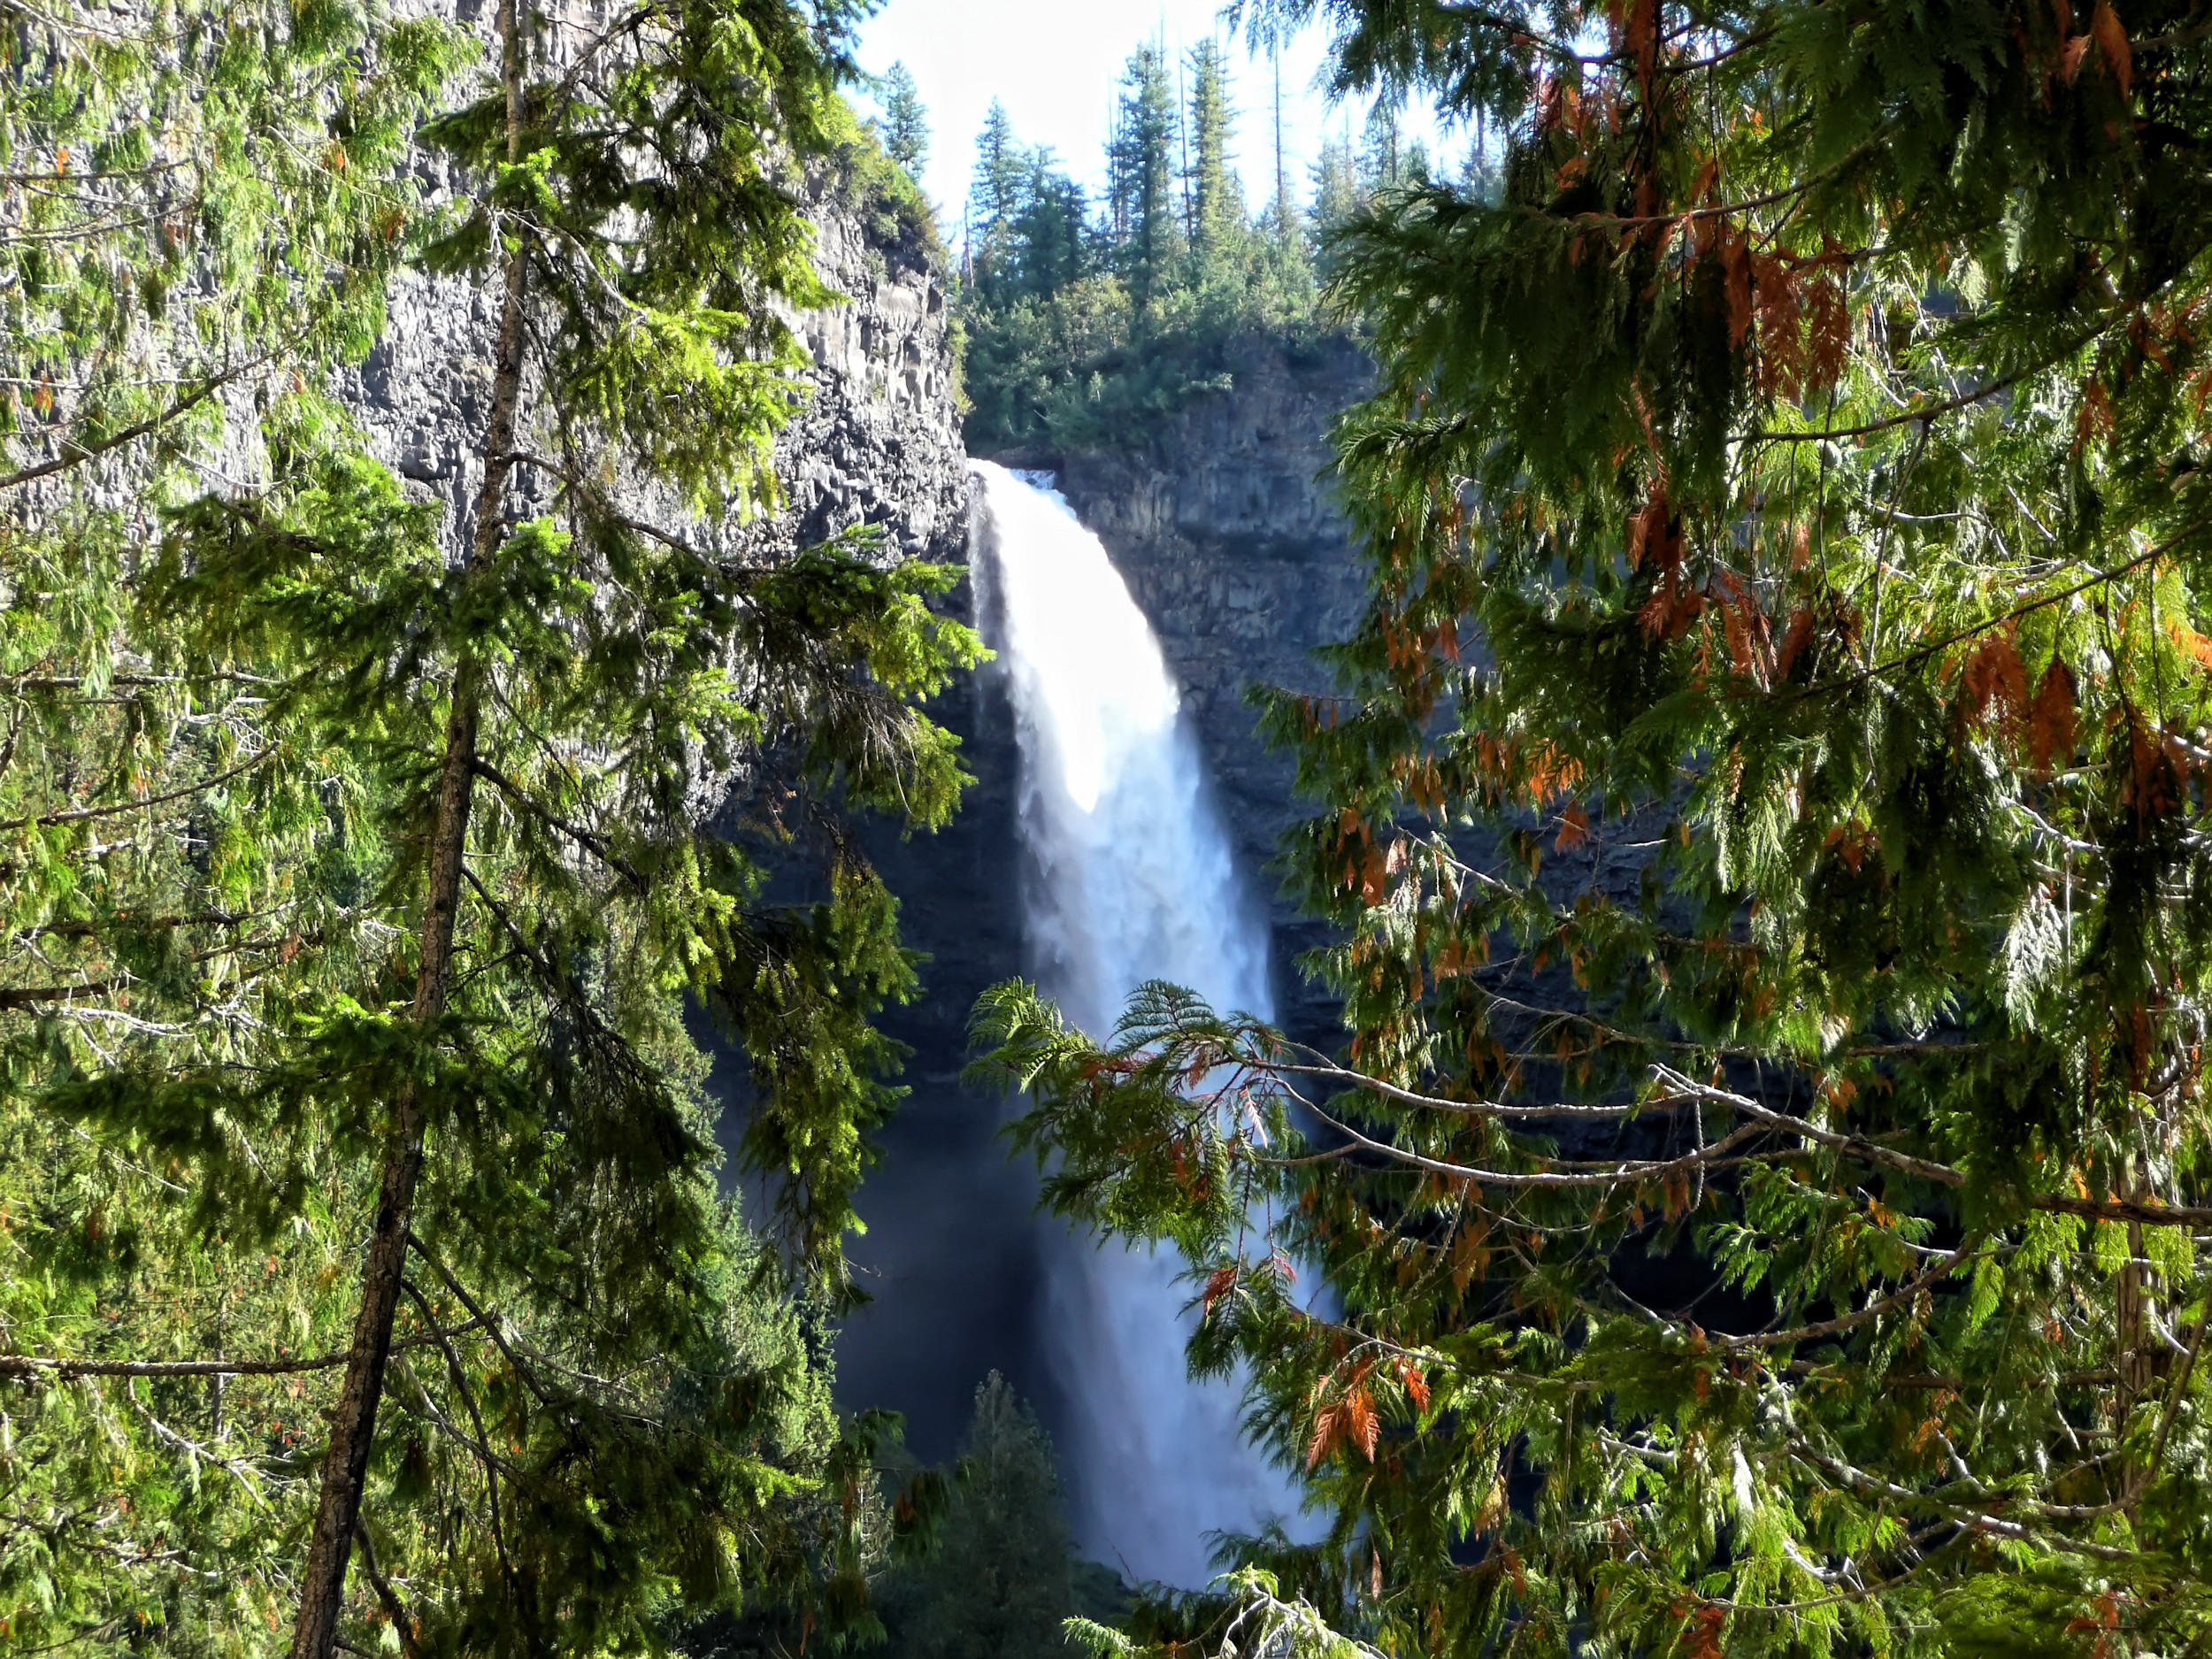
Helmcken Falls
One of the main attractions in Wells Gray Park is 141 meter high Helmcken Falls. It is the fourth-highest waterfall in Canada. From the viewing platform it looks as if Murtle River was poured into a wine glass.
There are a few hiking possibilities to escape the many people on the viewing platform and see the falls from unusual perspectives.
| Distance | 8 km |
| Time | 2 ½ hrs |
| Min. Elev. | 745 m |
| Max. Elev. | 807 m |
| Descent | 62 m |
| Date | 21/7/2001 |
Before the viewing platform on the north side of Helmcken Falls was built in 1964, the trail on the southern rim of the Murtle Canyon was the only way to visit the falls. It leads through a forest of fir, cedar and a few cottonwood following the winding Murtle River. When we hike it in 2001, there are many trees down and the mosquitos are plentiful.
After about an hour, the roaring of the waterfall becomes audible; now is the right time to keep the children close by and put the dog on a leash. All of a sudden the river changes into a raging white water and disappears over the brink of the falls.
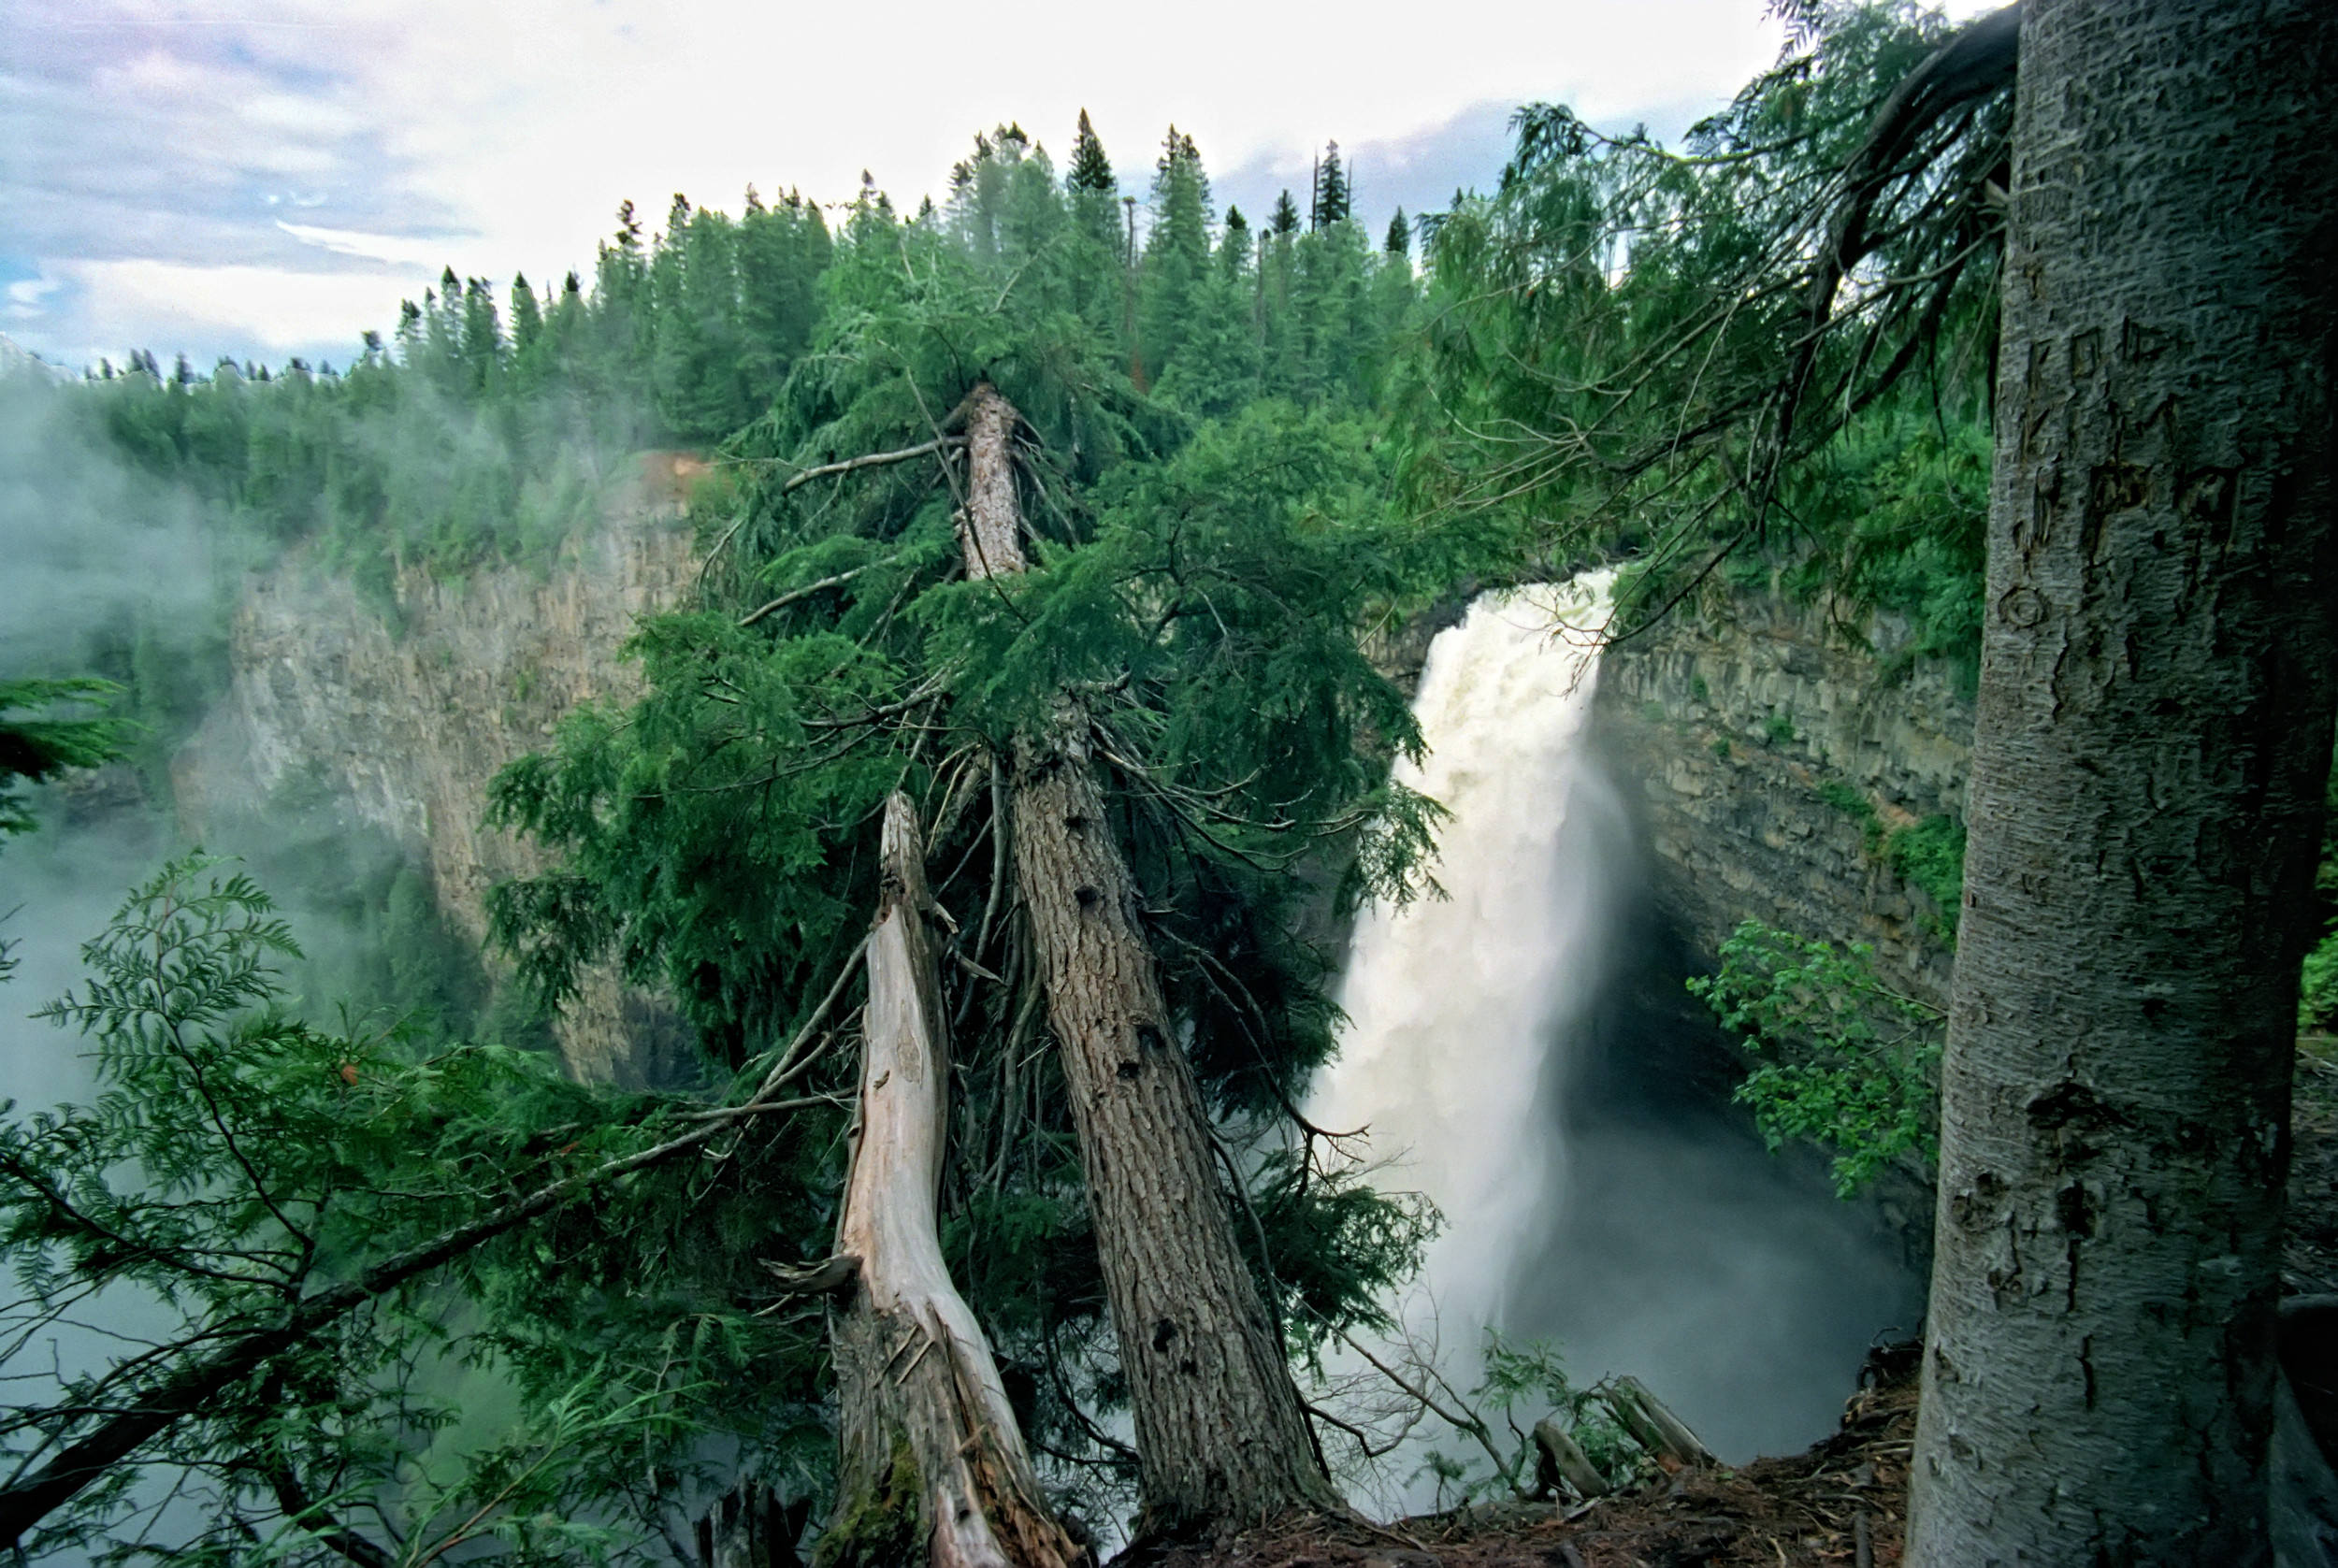
One is tempted to lean over the abyss to better see the falls, but beware of the edge of the path which is eroded and does not look stable.
Close-Up
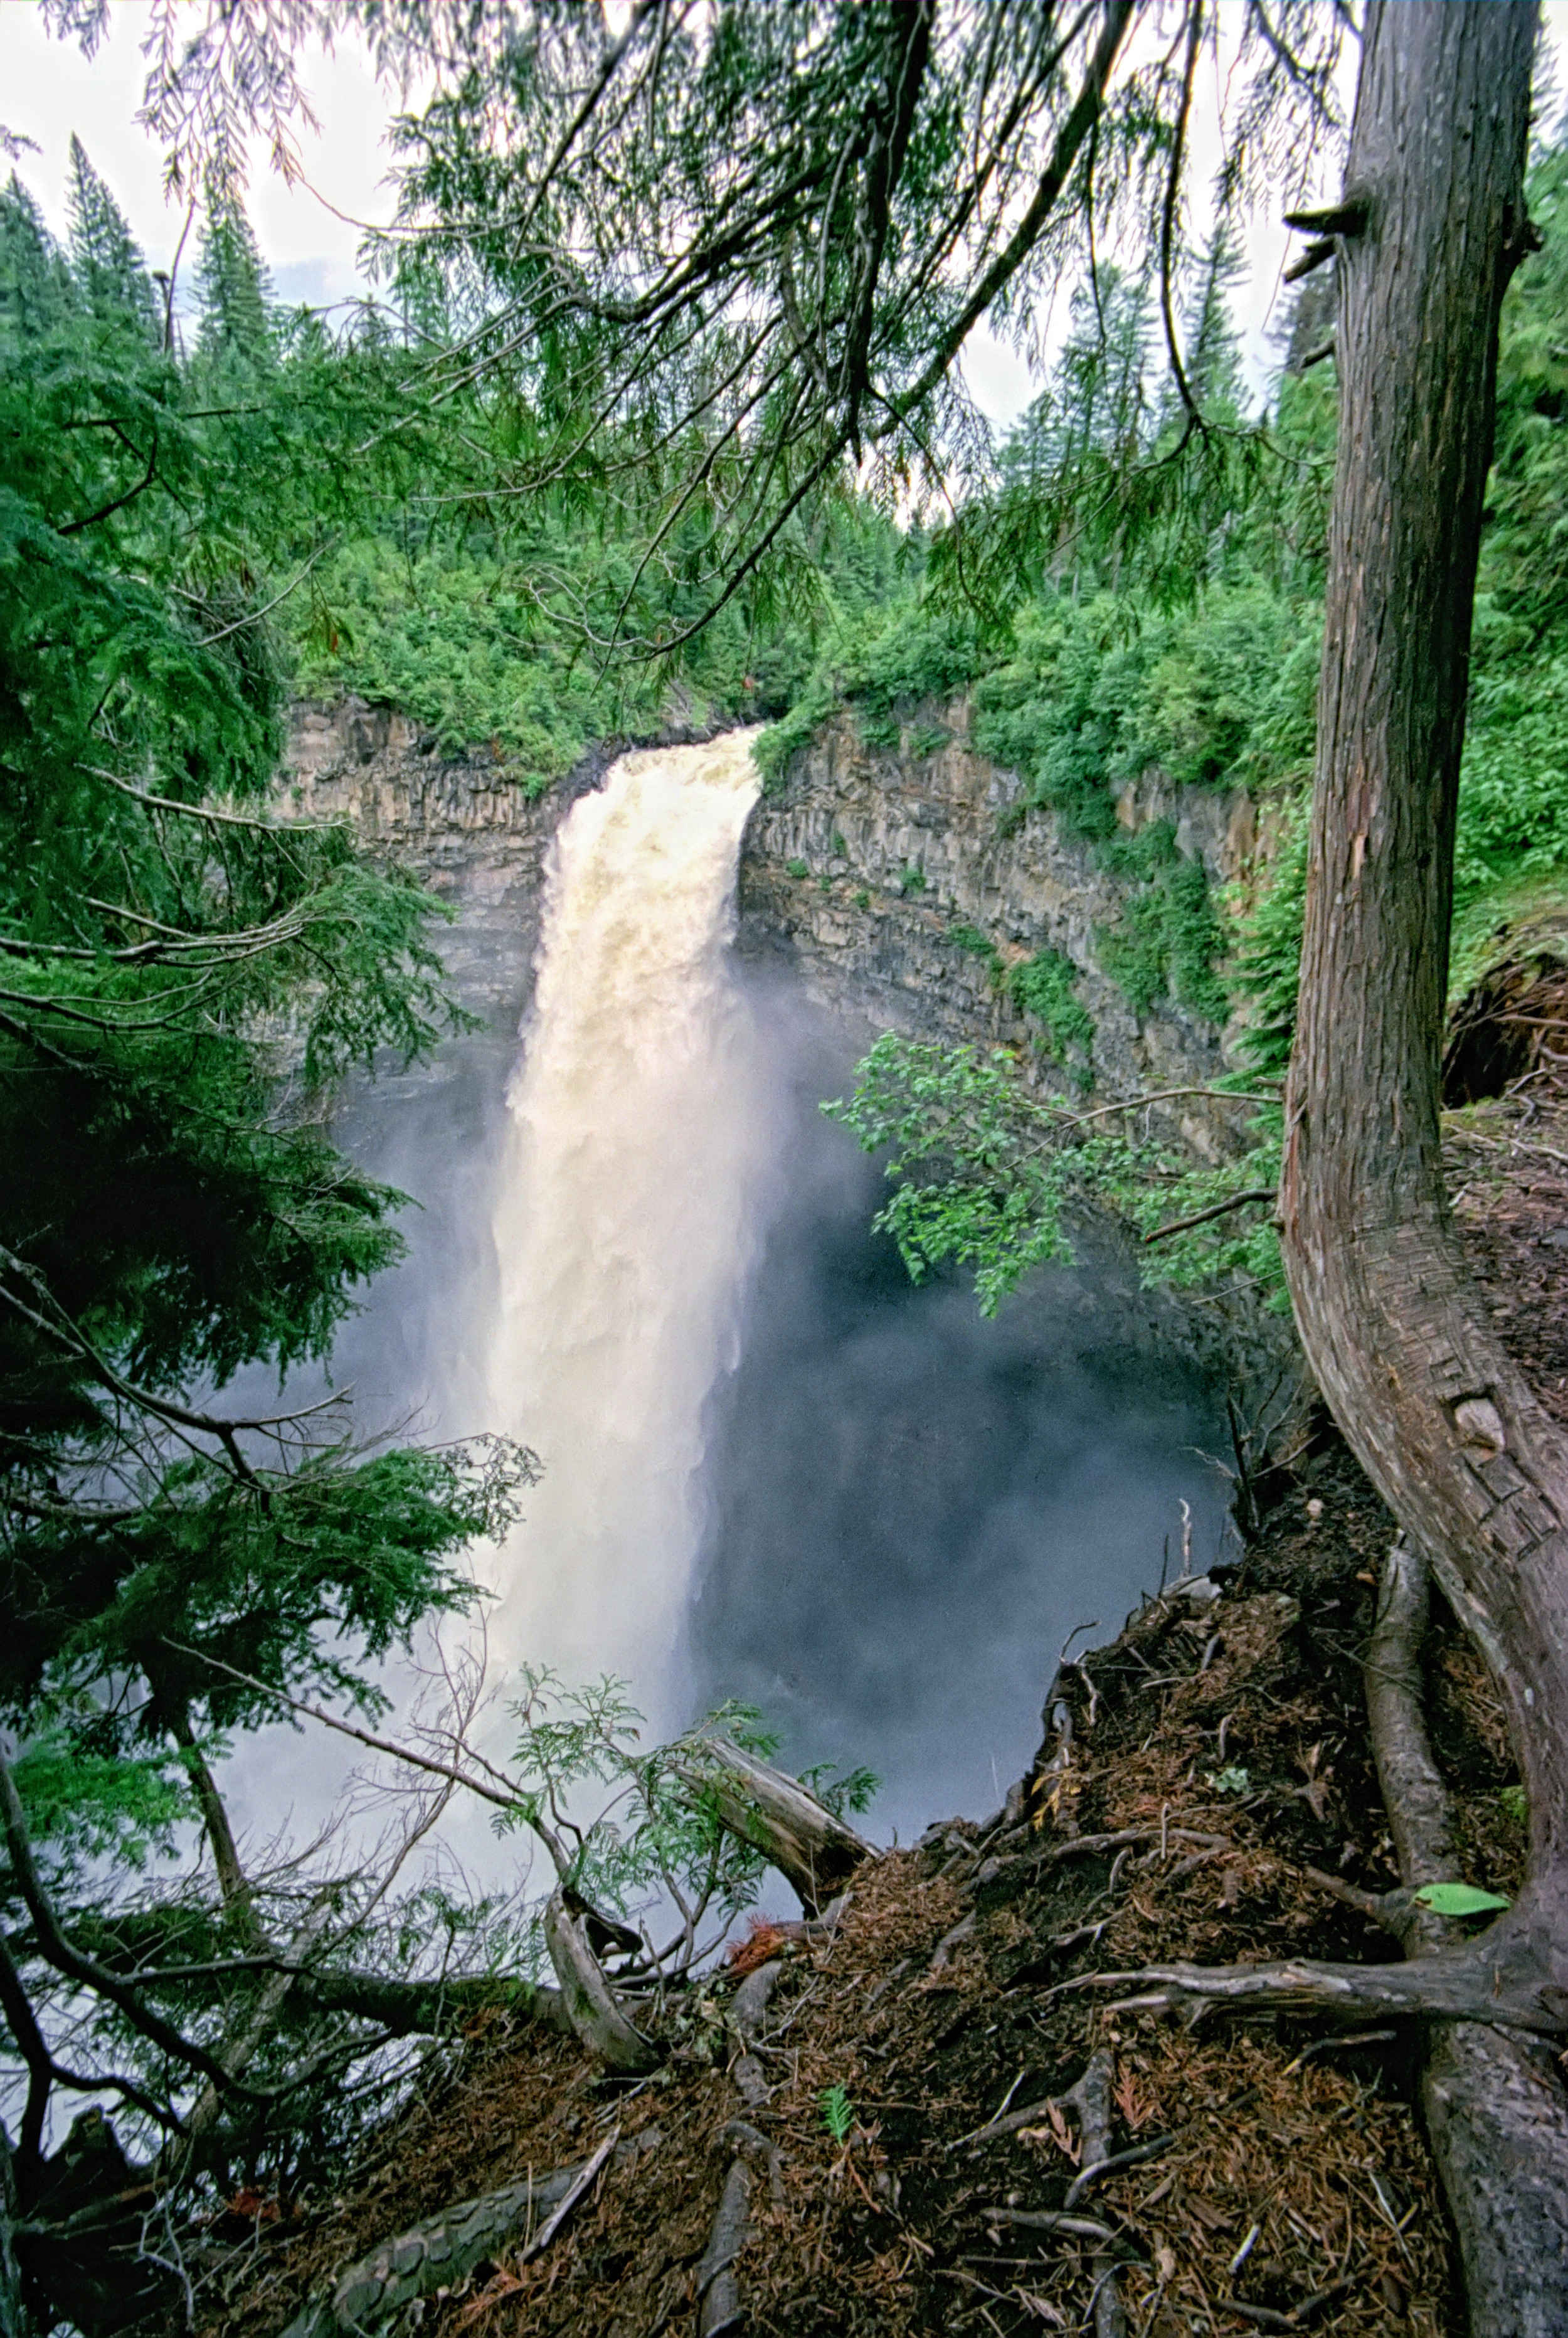
Here on the southern side we feel the exceptional force of the falls. We are so close that we get wet from the spray. The eternal roar and thunder of the water is overwhelming.
We look at the busy viewing platform across from us and enjoy the solitude over here, where we are the only visitors.
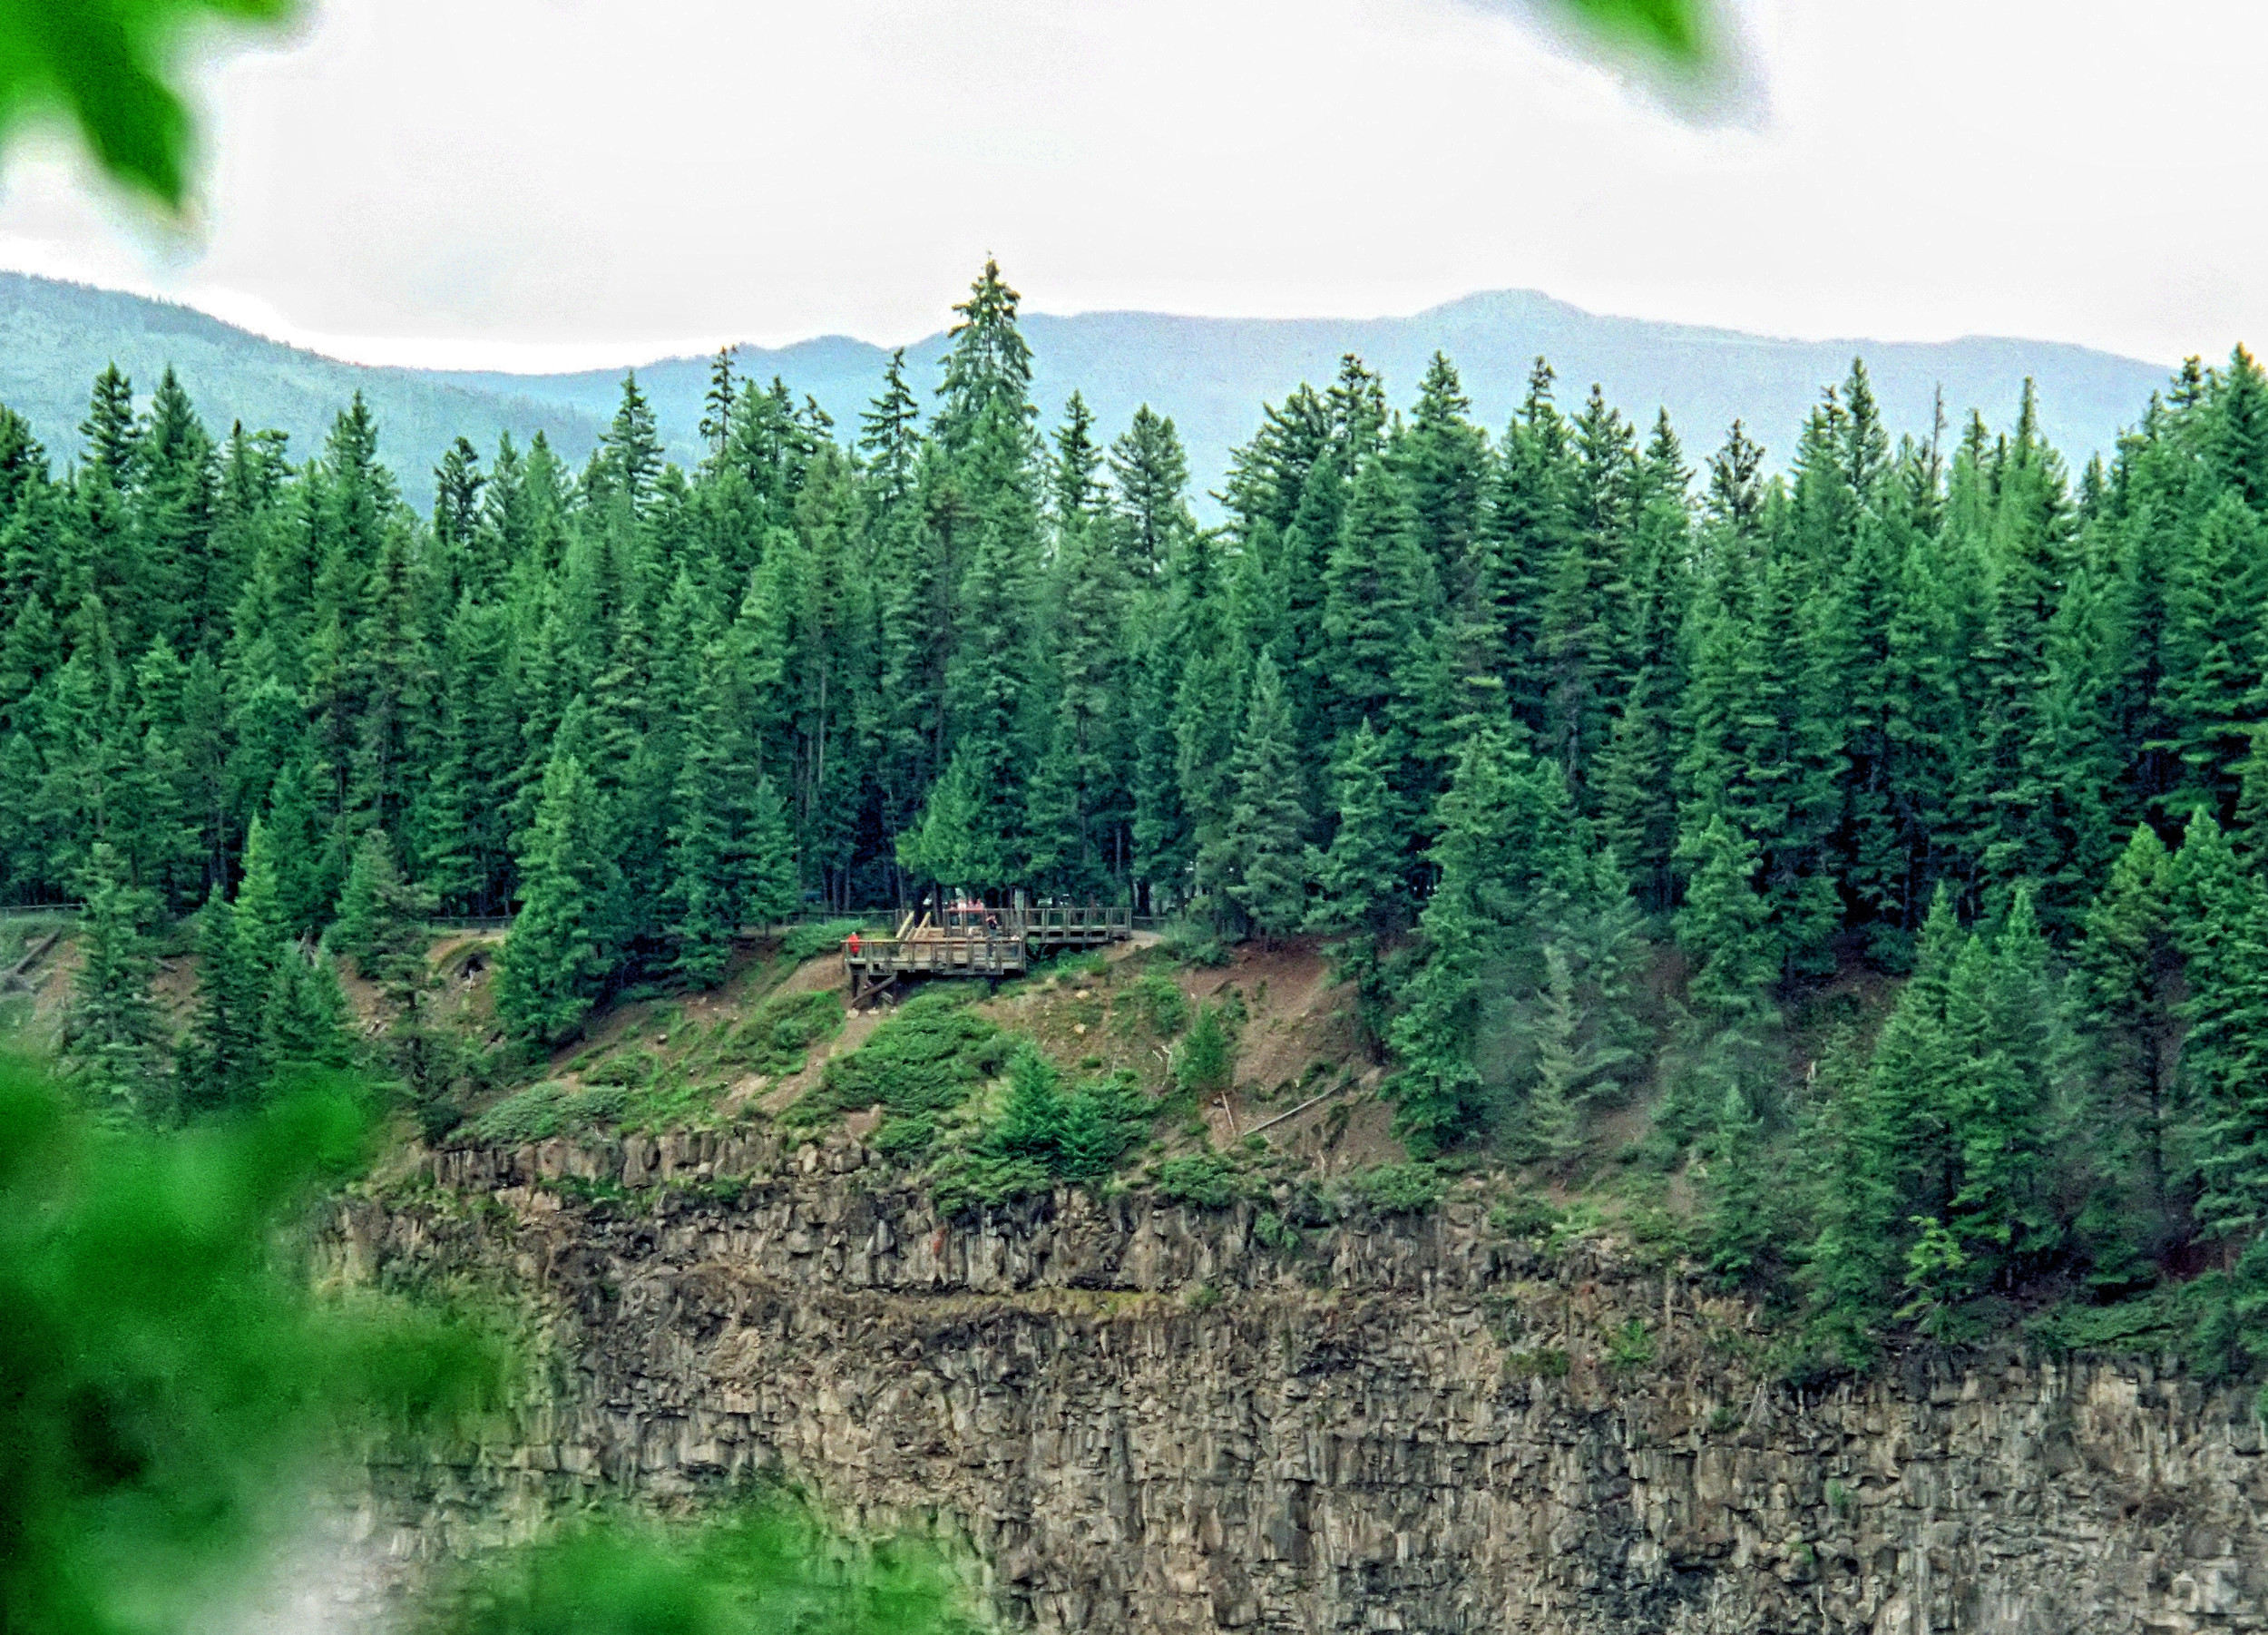
Viewing platform
View of the Canyon
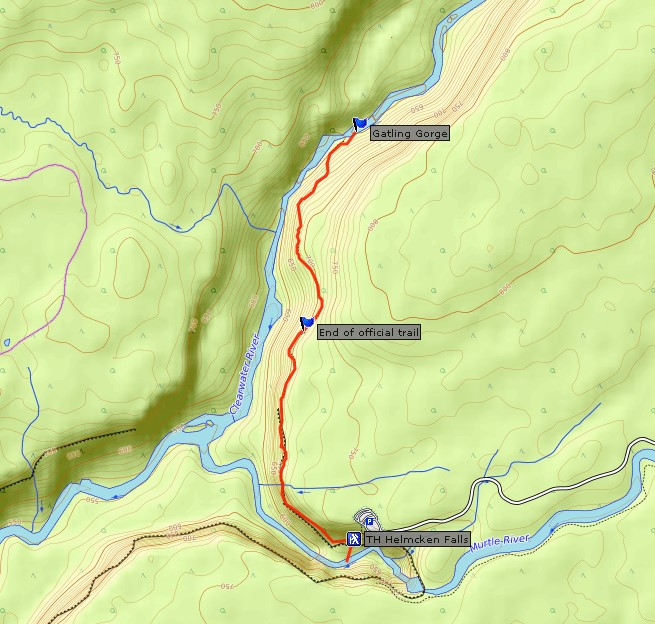
Gatling Gorge Trail
| Distance | 6.4 km |
| Time | 2 hrs |
| Incl. Breaks | 3 hrs |
| Min. Elev. | 592 m |
| Max. Elev. | 817 m |
| Descent | 225 m |
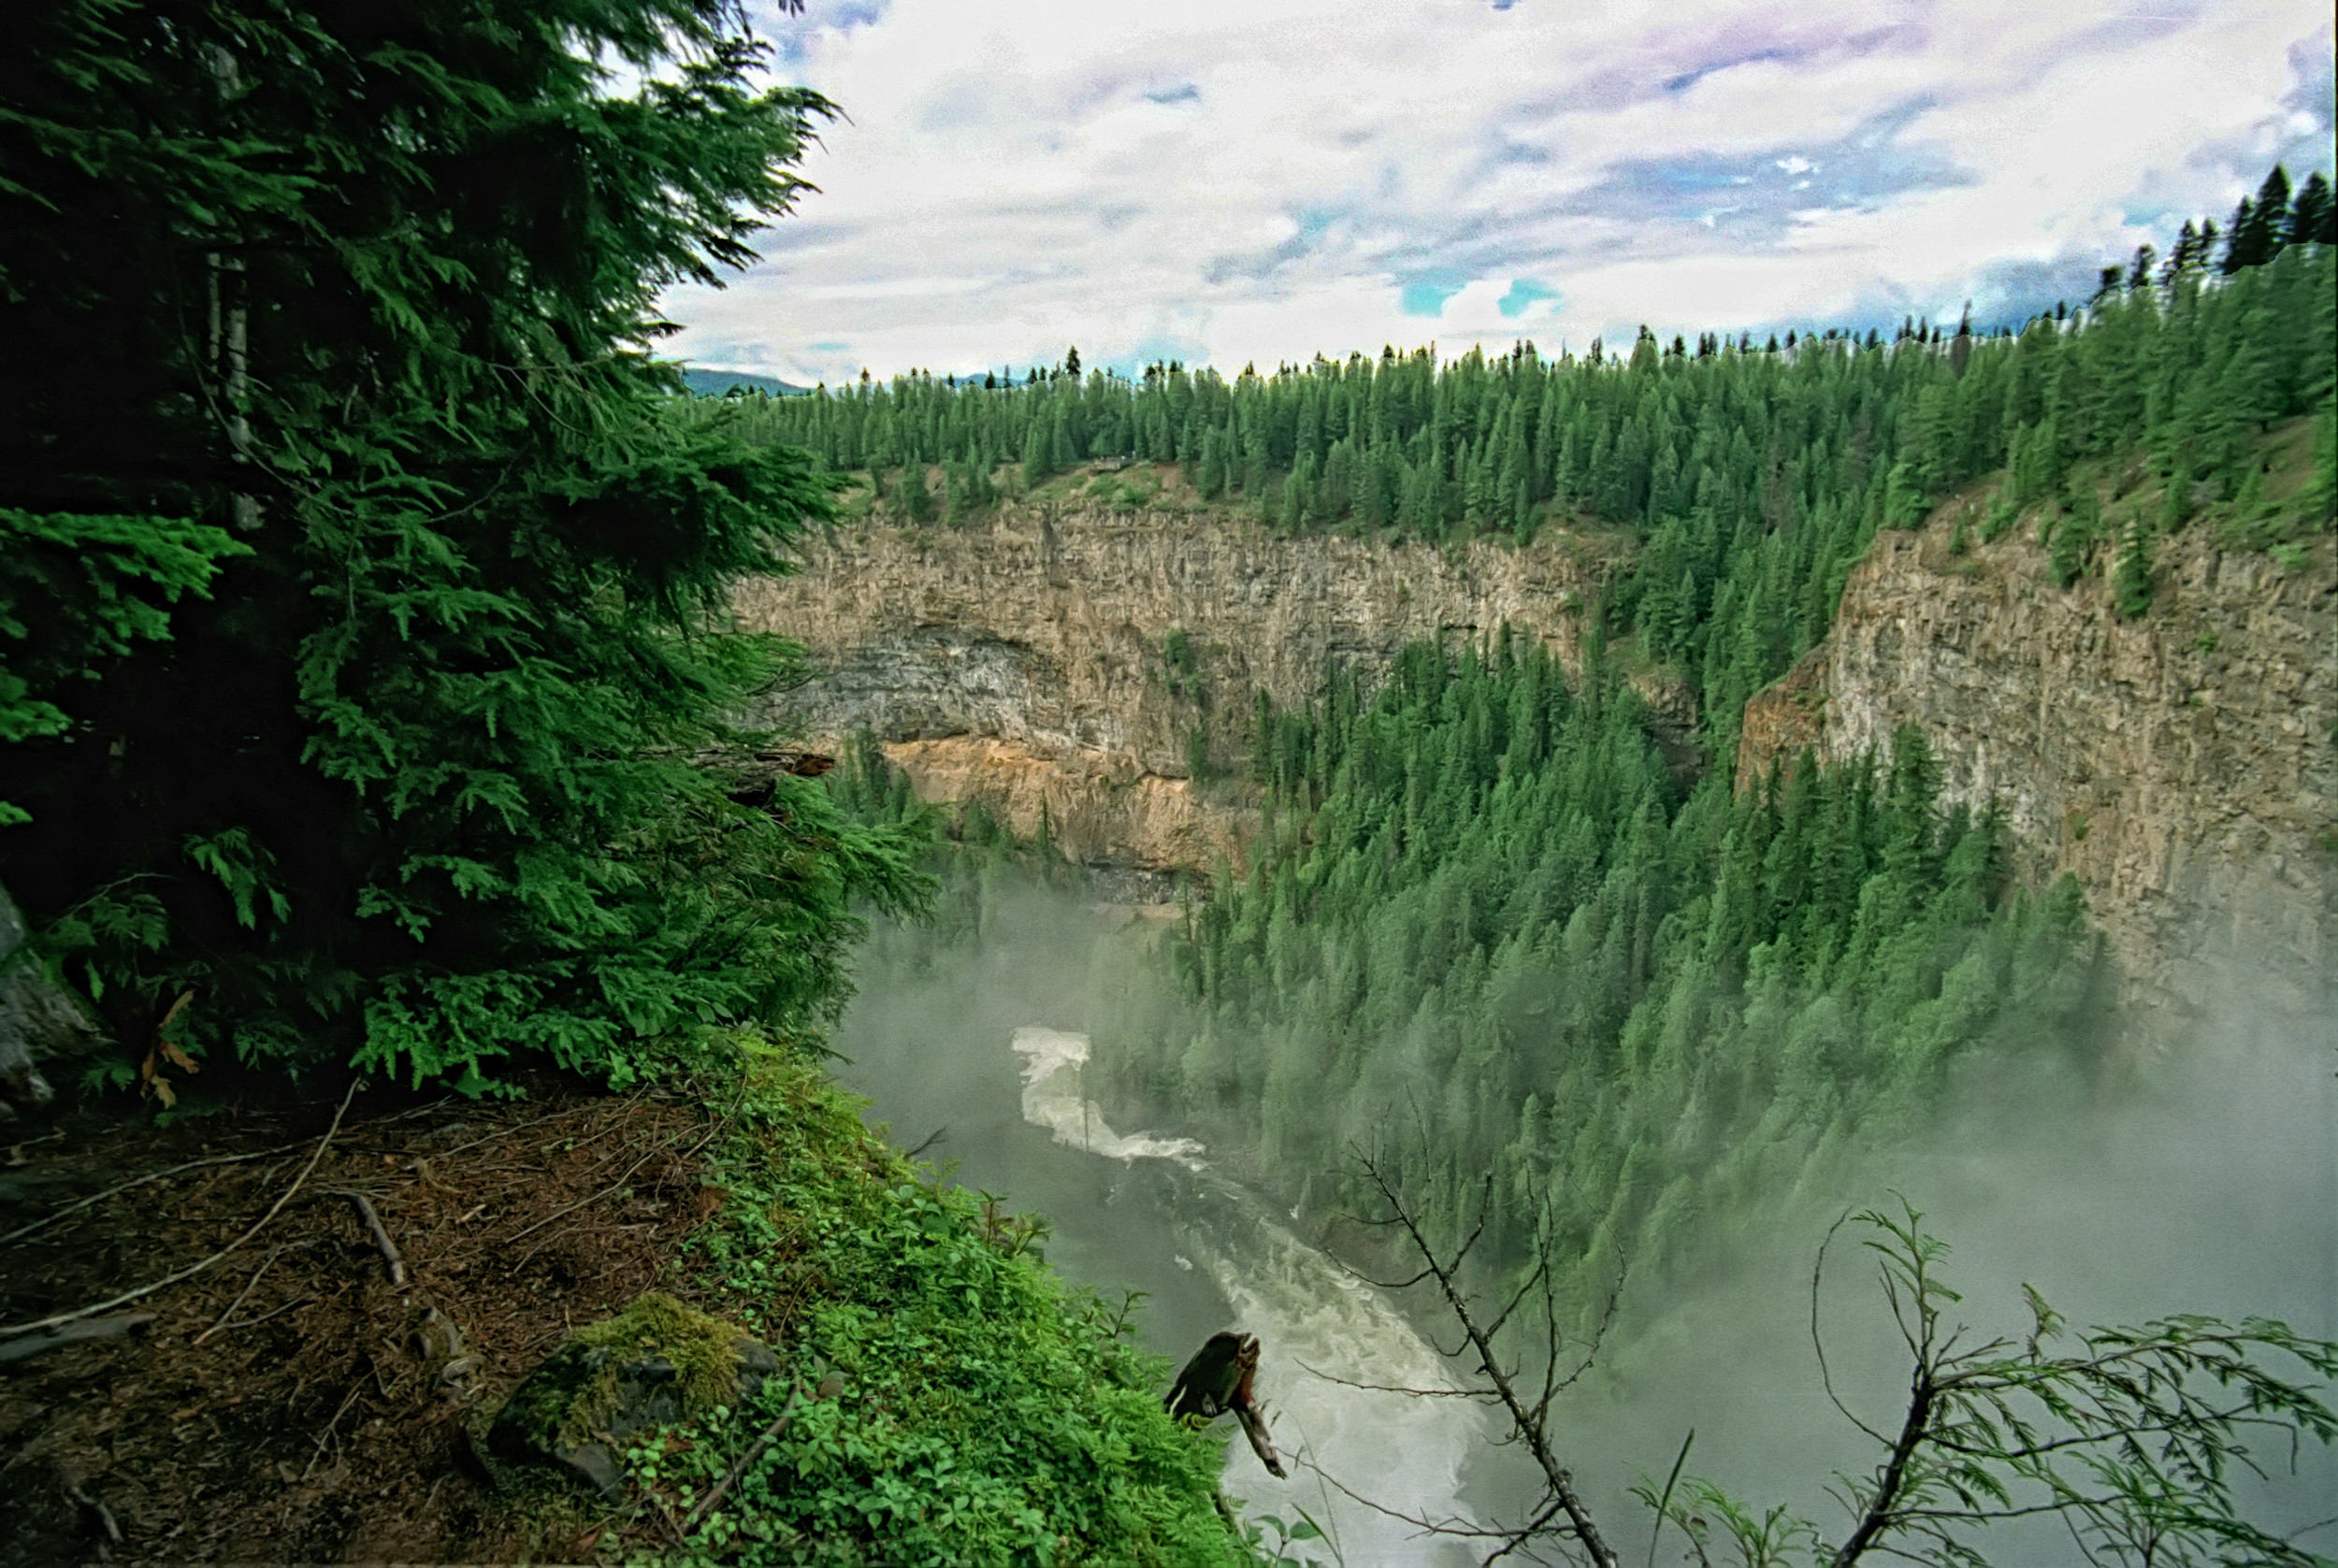
This hike into the lower Murtle River and Helmcken canyons starts at the Helmcken Falls viewpoint. It leads along the rim and past the confluence of the Murtle and Clearwater rivers. I hike it with a couple of friends in 2022.

Soon the fencing ends and the trail along the rim is quite exposed at times.
After only 1.1 Kilometers we reach a lookout over the confluence of the two rivers and some spectacular rapids in the Clearwater River, one of them the Flowerpot Rapids.
The Murtle River
The Flowerpot Rapids
From here on the trail becomes narrow and rough.
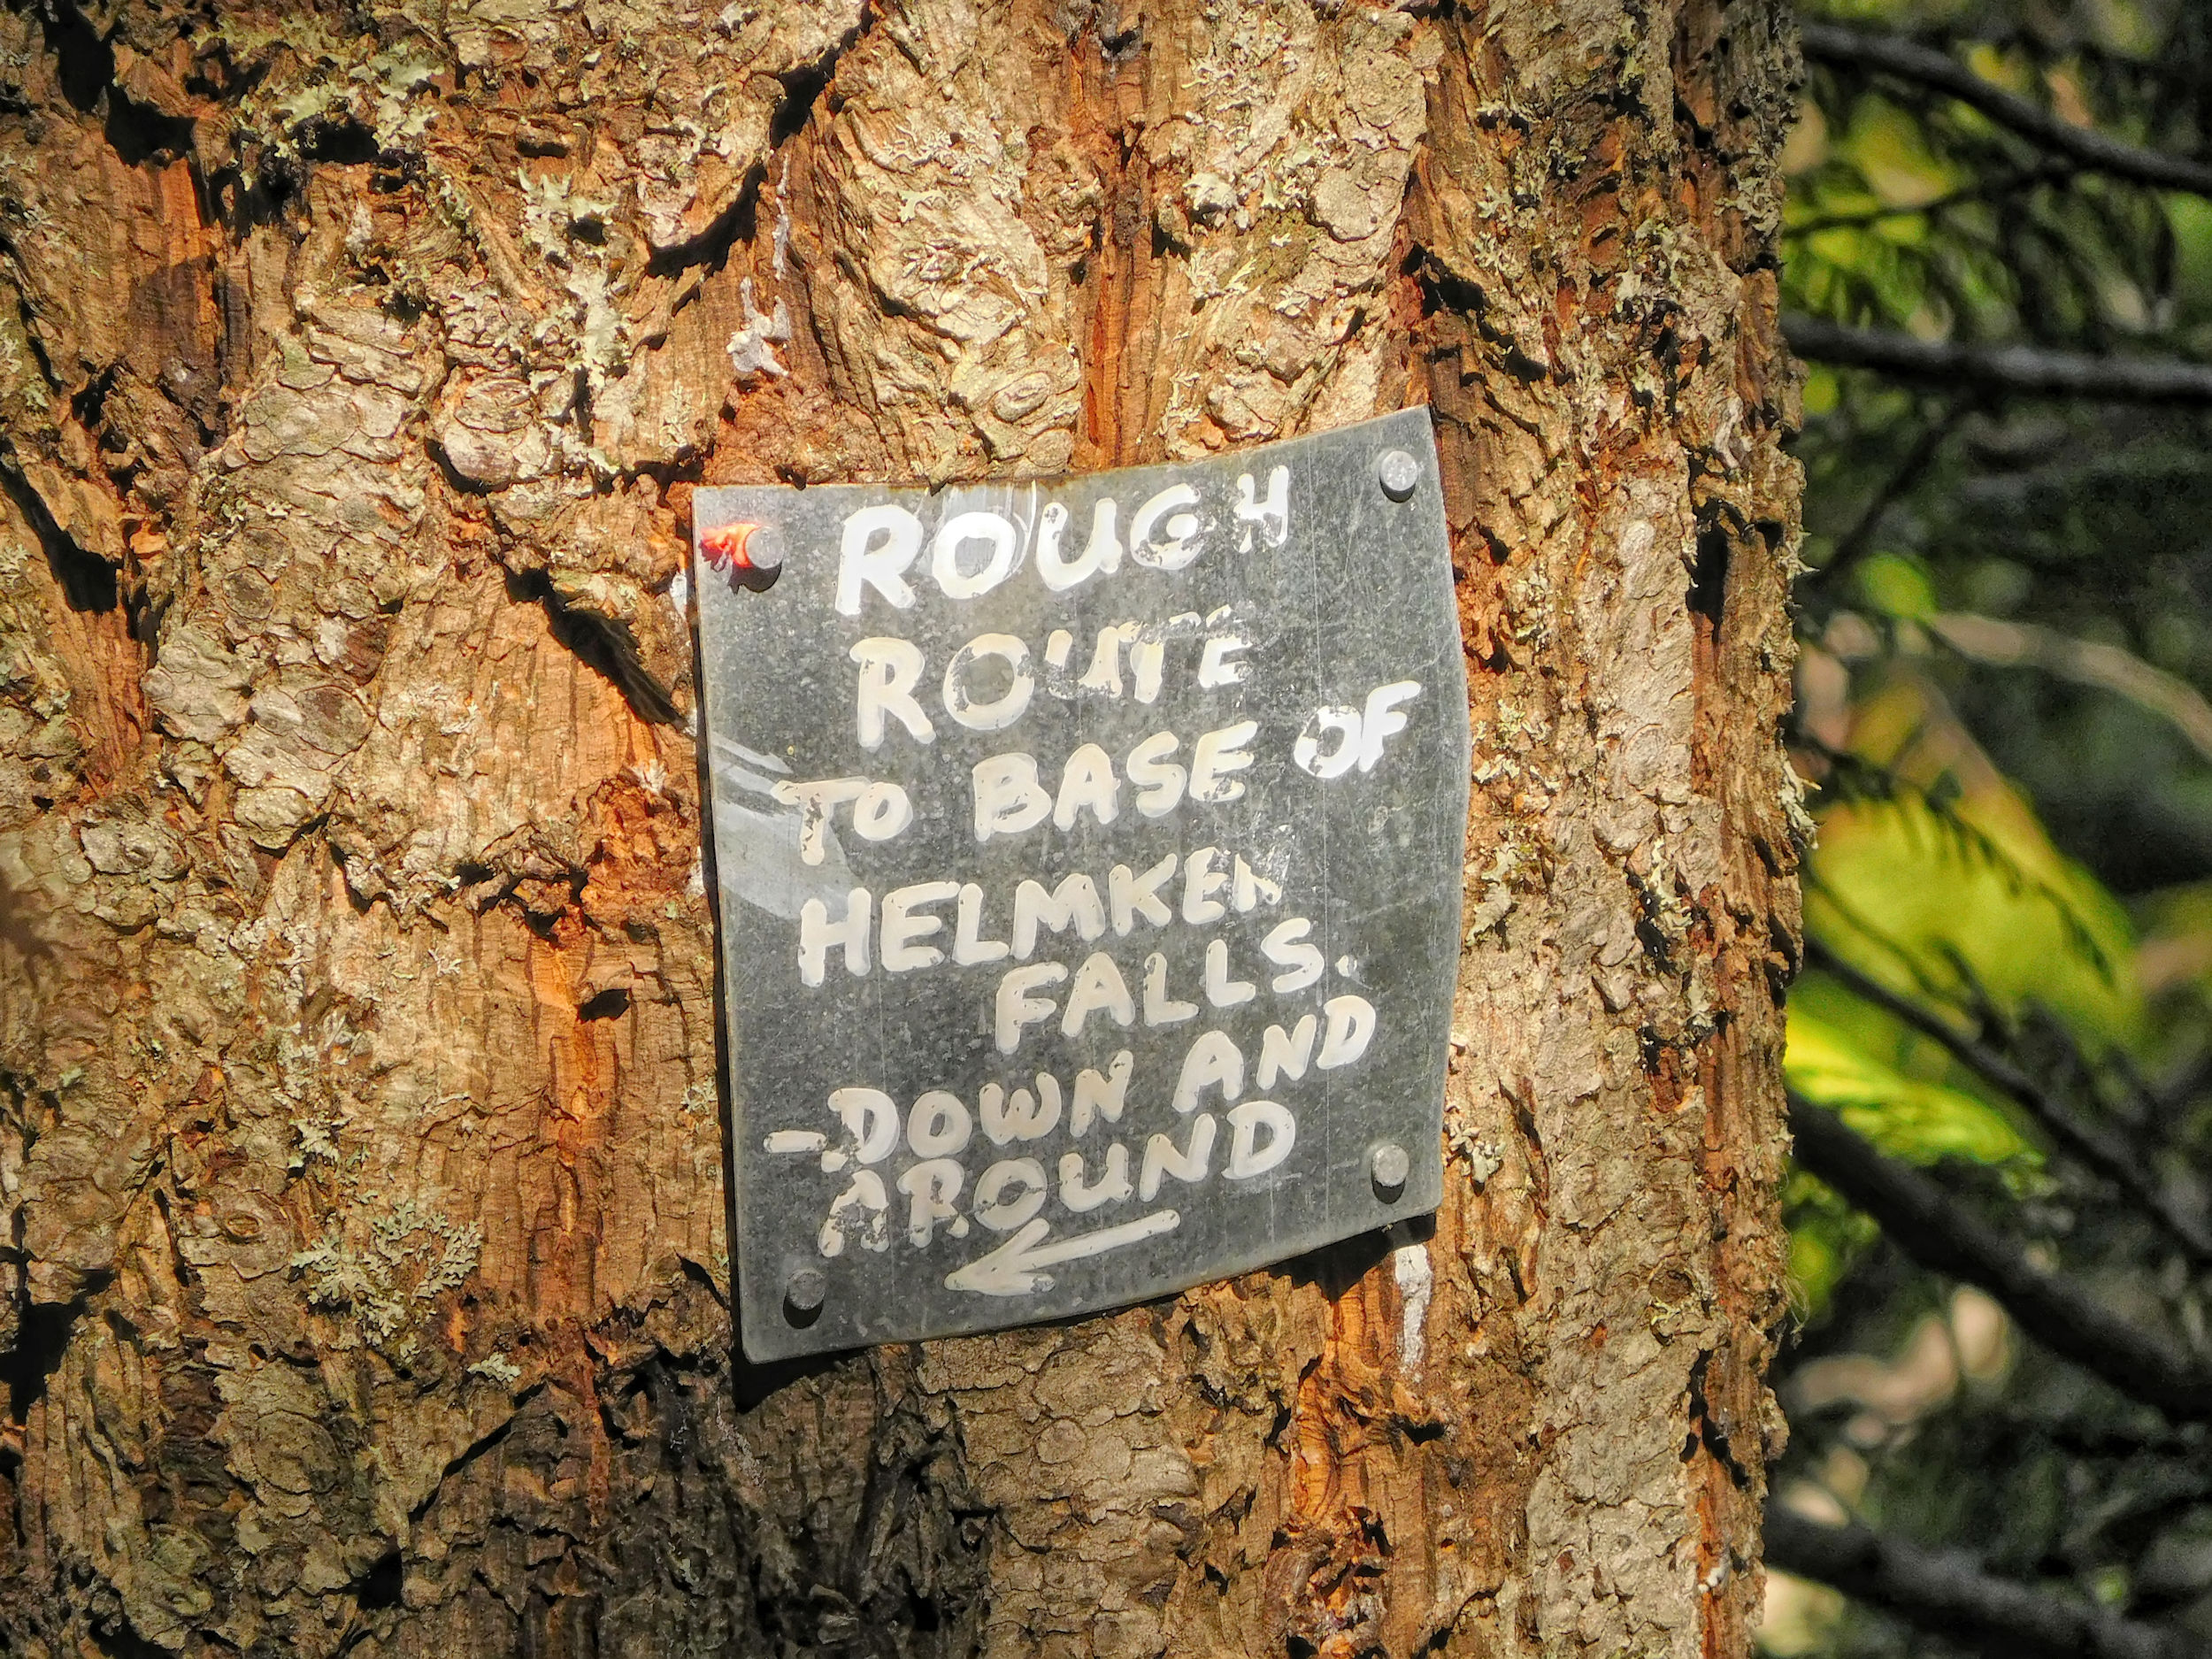
Side trail to the bottom of Helmcken Falls
A small side trail through a gap in the cliffs leads to the bottom of Helmcken Falls (see next section). Someone seems to have cleared and signed the track since we last tried it a long time ago in 2012.
Today we continue straight ahead and follow the blue circles sprayed on the trees on both sides of the trail. It becomes very steep now and soon emerges from the forest. The roaring of Gatling Gorge becomes louder.
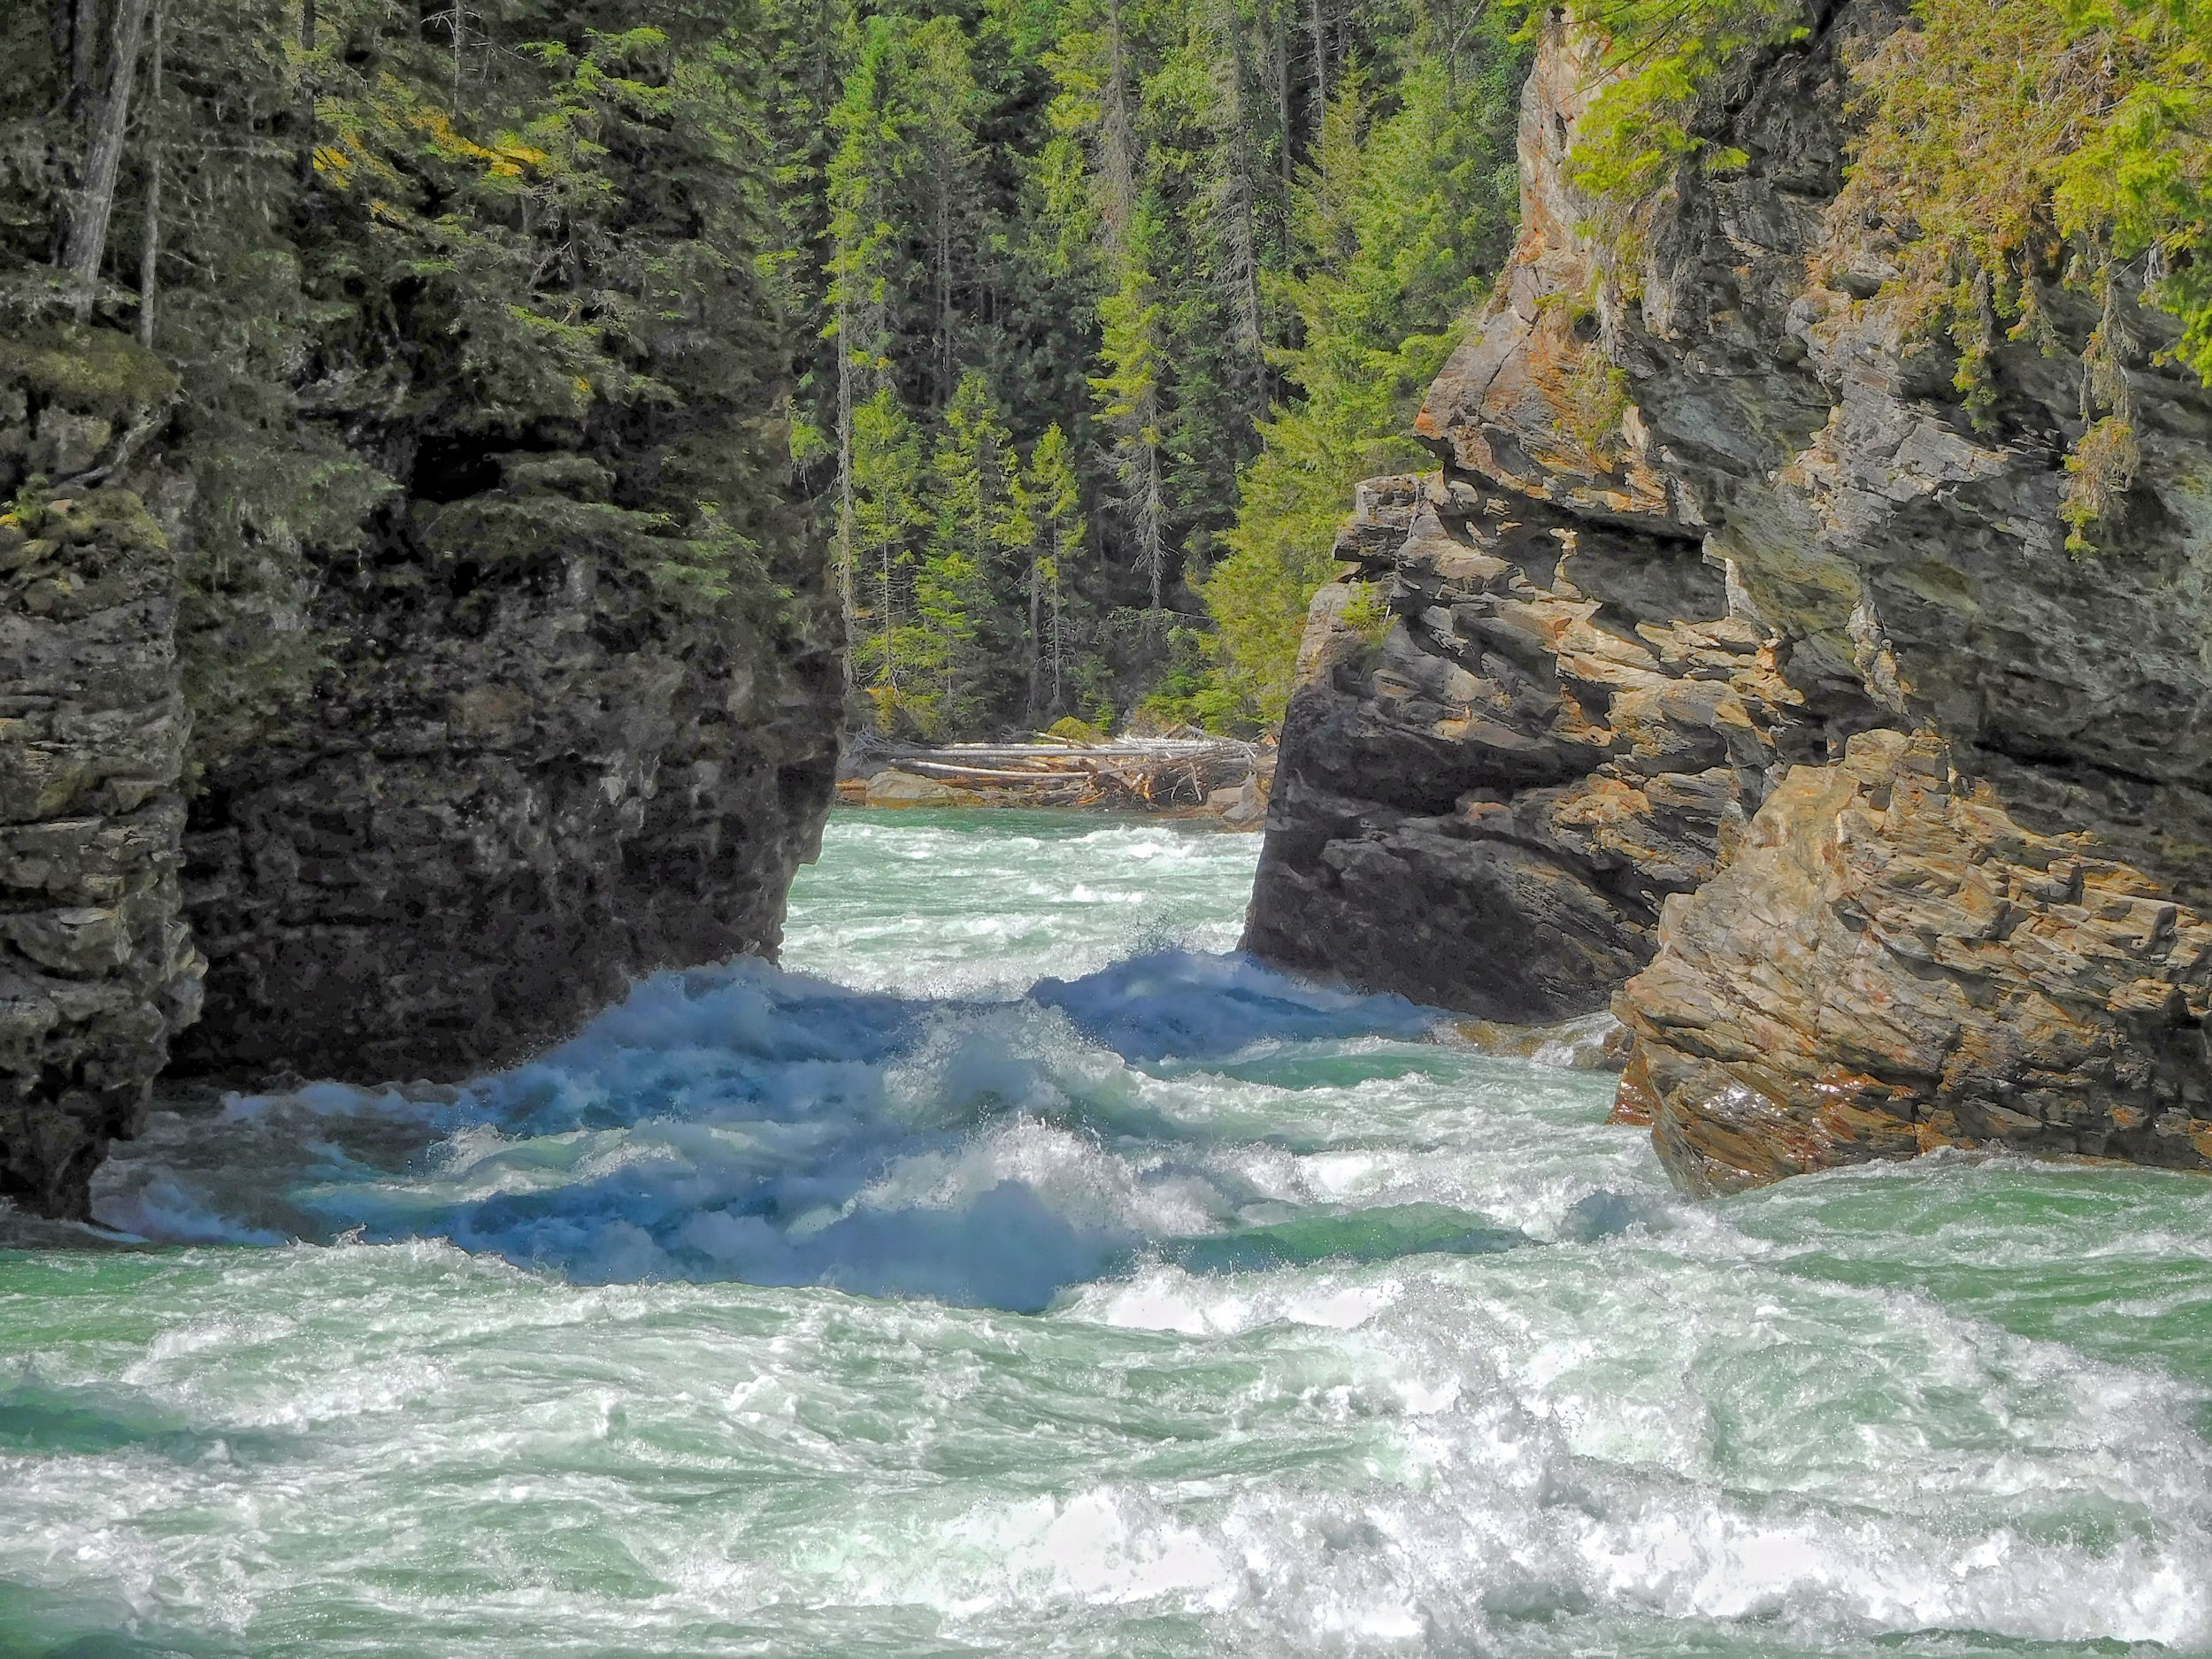
At the bottom of the canyon we scramble over a huge boulder and reach the banks of the Clearwater River. It squeezes between sheer cliffs through a barely 15 meter wide gap here and is a frenzy of white water. The Gatling Gorge is about 300 meters long and forms the uppermost rapid of Helmcken Canyon. White water enthusiasts do run this rapid, but it is considered dangerous and has even claimed lives in the past.
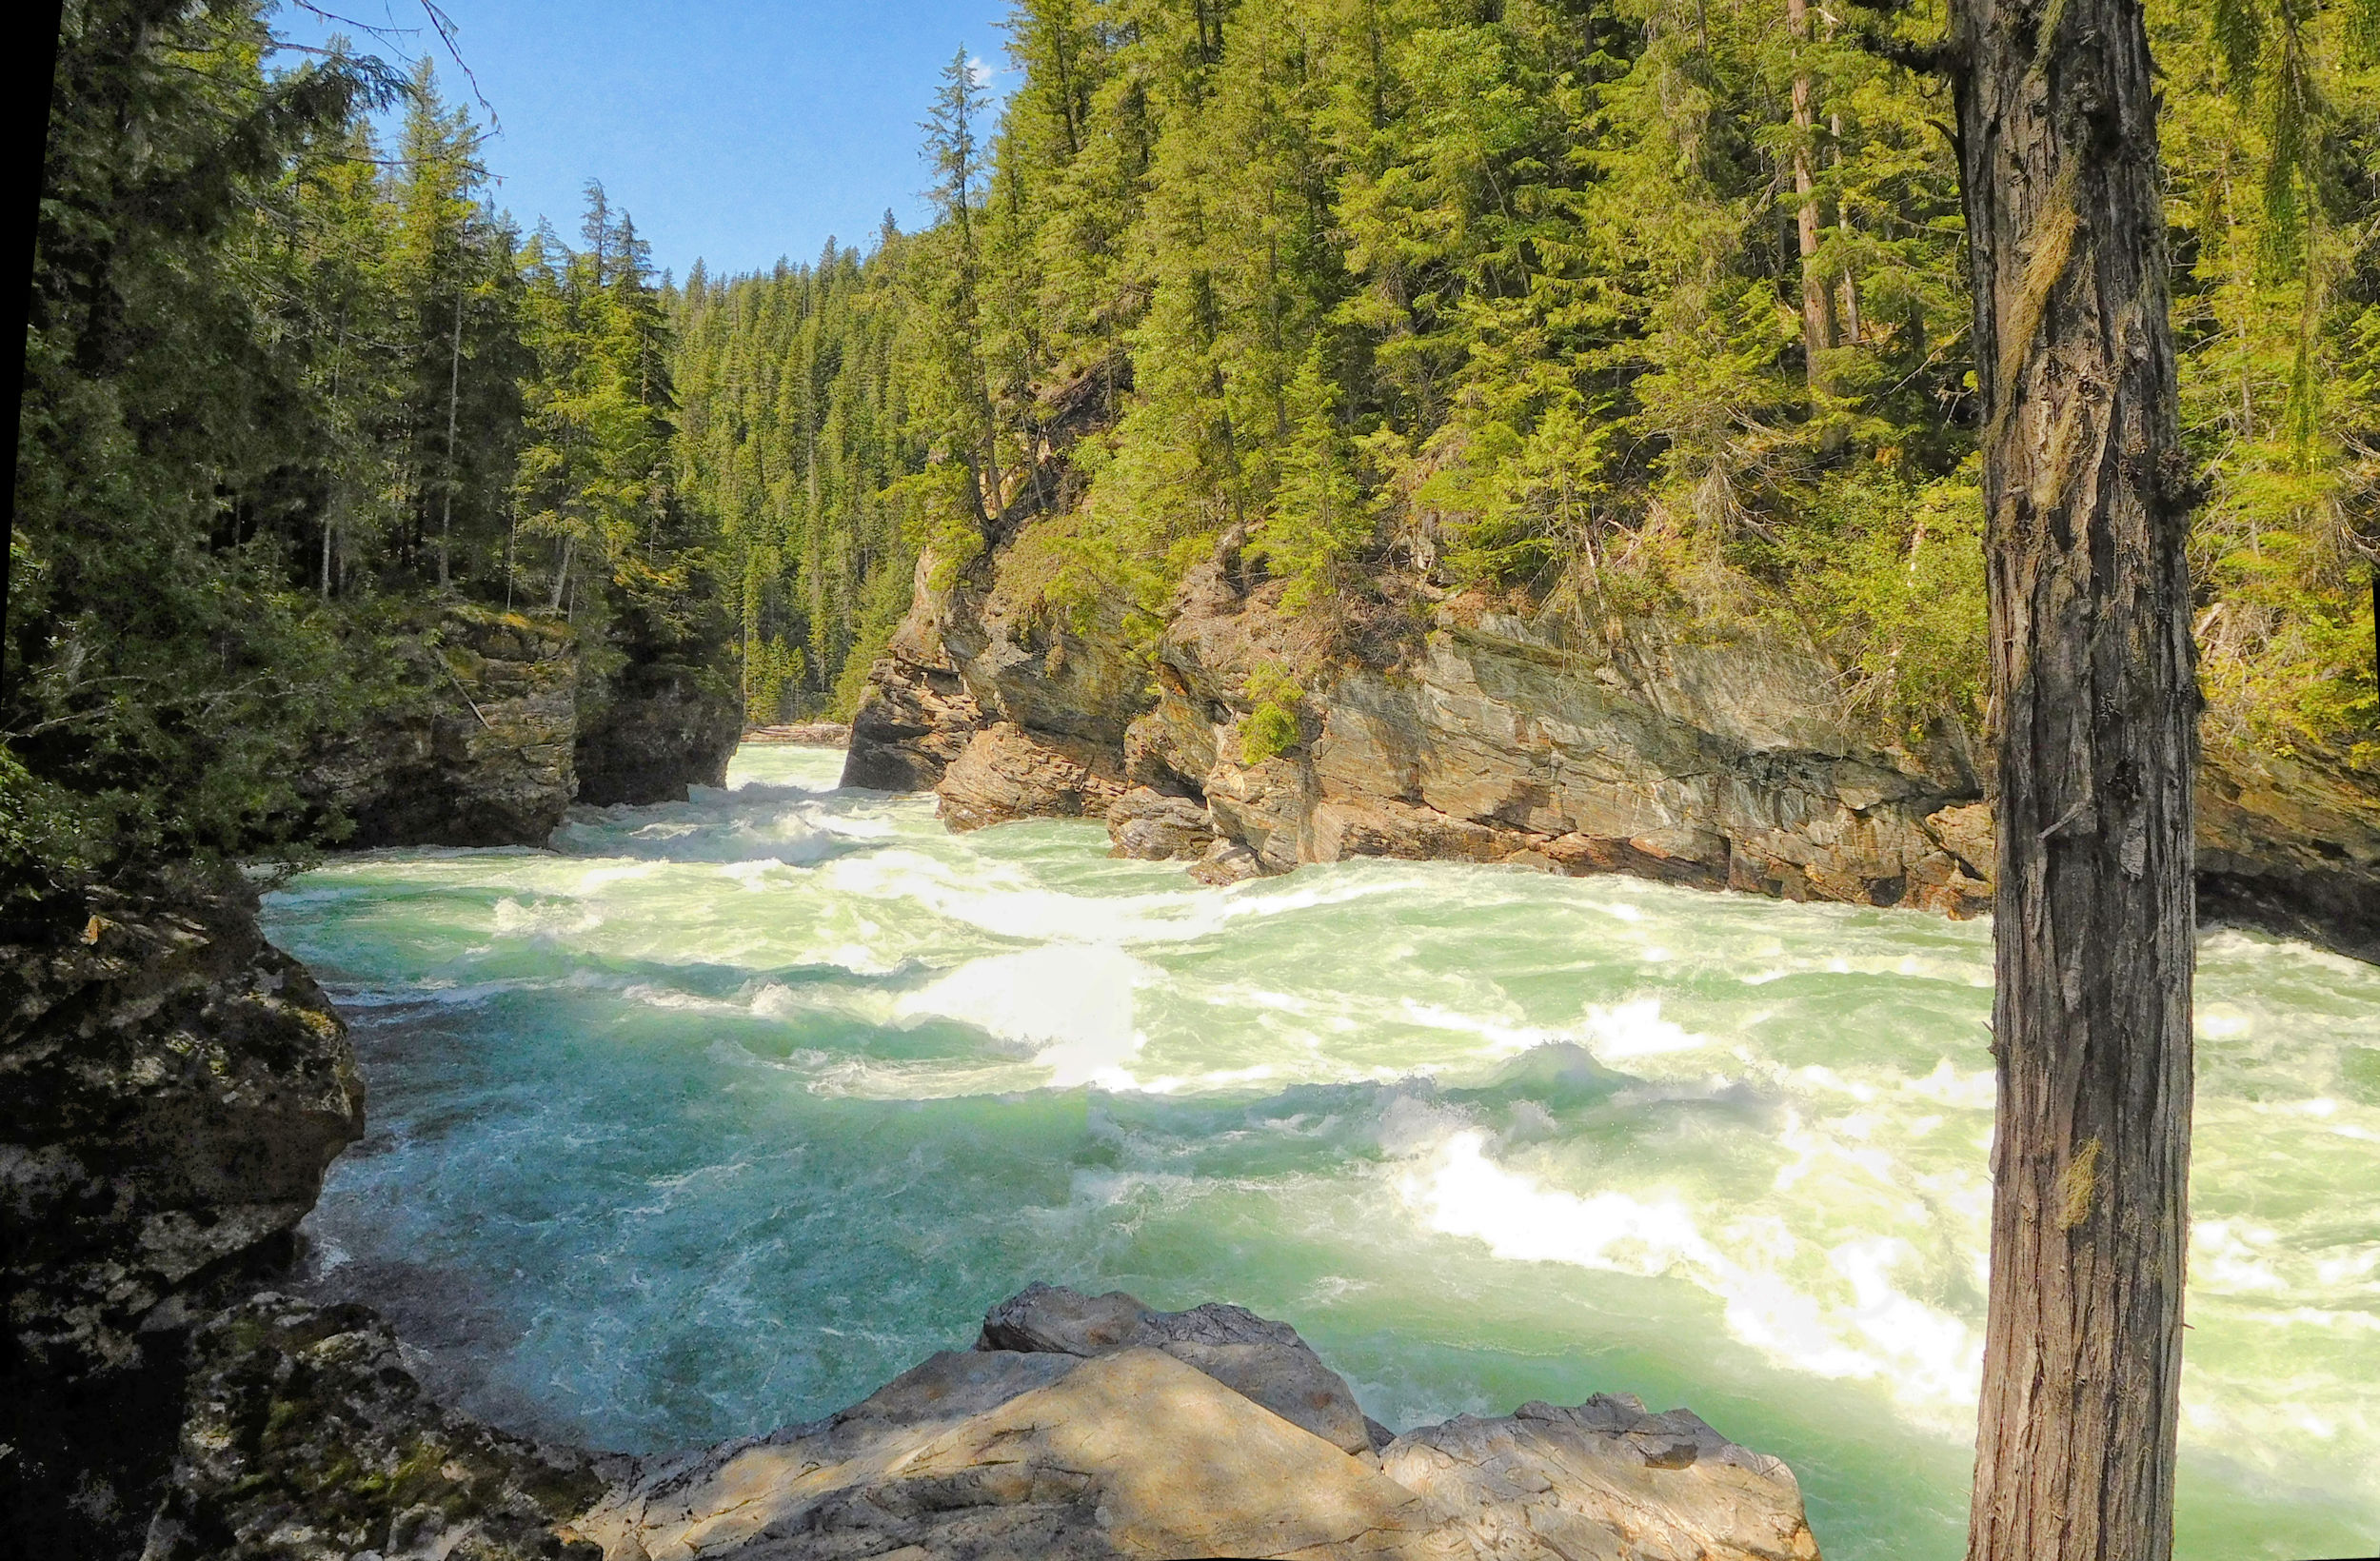
We take our time enjoying lunch next to the spectacular waters and cliff formations before retracing our steps back up to the rim.
To the bottom of Helmcken Falls
| Distance | 8.6 km |
| Time | 5 hrs |
| Incl. Breaks | 8 hrs |
| Min. Elev. | 640 m |
| Max. Elev. | 815 m |
| Descent | 175 m |
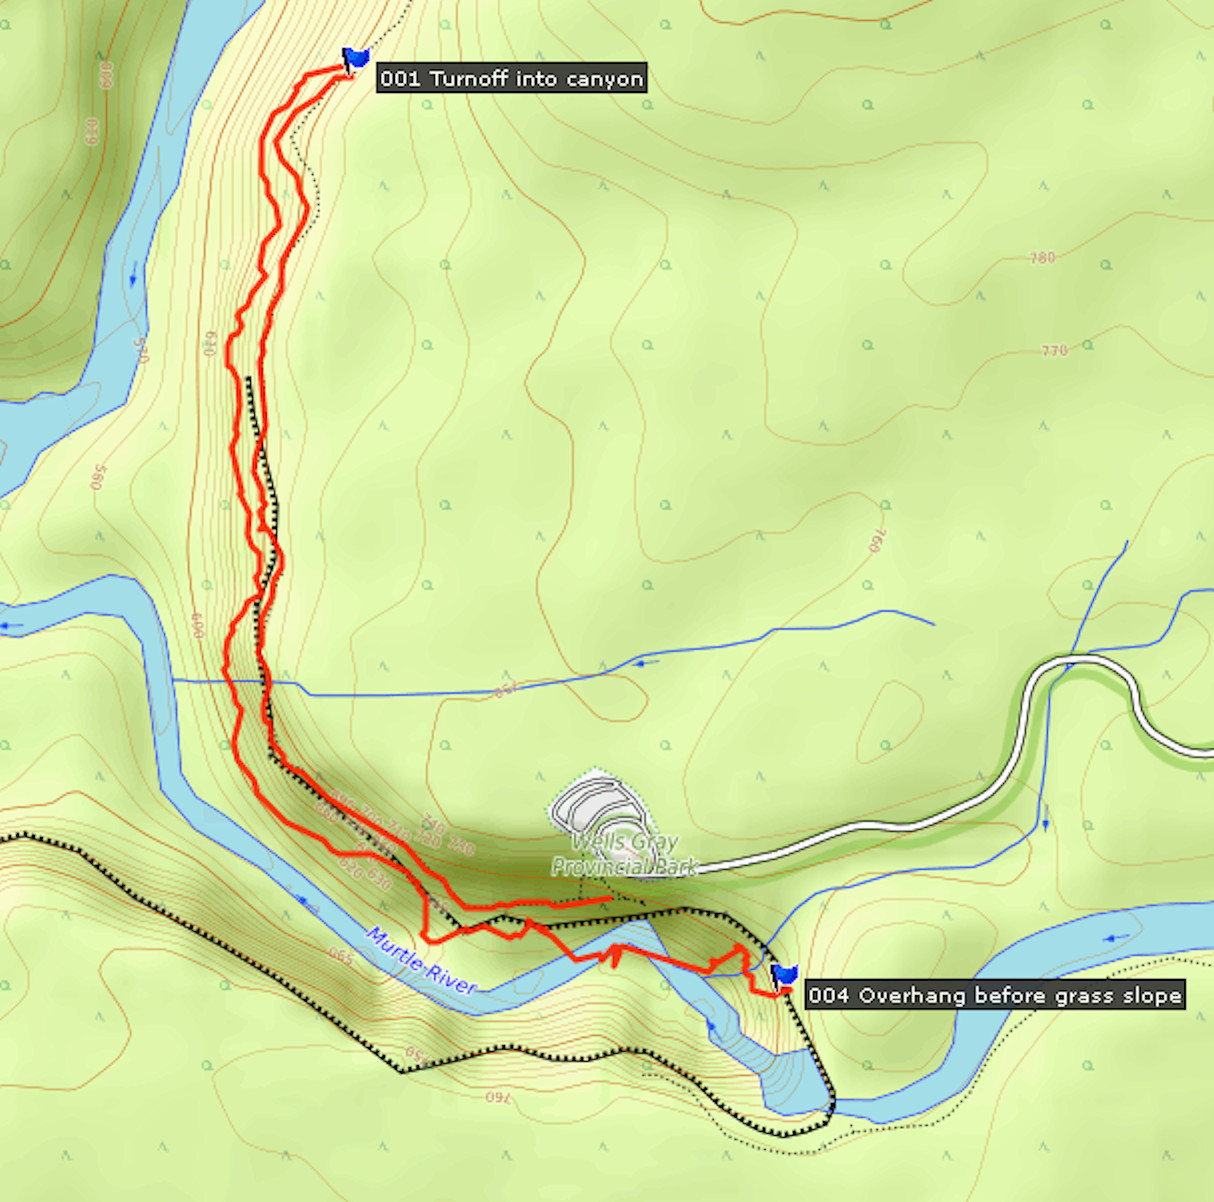
This hike is very difficult and there is no official trail. Bushwhacking through extremely steep terrain and a very slippery grassy slope for a viewpoint in the end, make this route risky. In 2012 we hike it as a group and are lucky to have Roland Neave, an experienced guide, with us. In Roland’s most recent guidebook this hike is not listed any more.
We leave the Helmcken Falls parking area and walk the trodden path along the rim of the canyon. We enjoy spectacular views of the Murtle River deep below us and its confluence with the Clearwater River further down the valley. The path peters out, and after 1.6 kilometers we turn to the left and descend steeply into the canyon. We only drop 10 meters and then follow a ledge below the cliffs that takes us back towards the waterfall and deeper into the canyon. The path is extremely narrow here and the treed slope down to the river steep. At one point the ledge is blocked and we have to reroute through the trees. We lose a lot of time climbing over blown trees and through thick brush until we find a passable route on the ledge again.
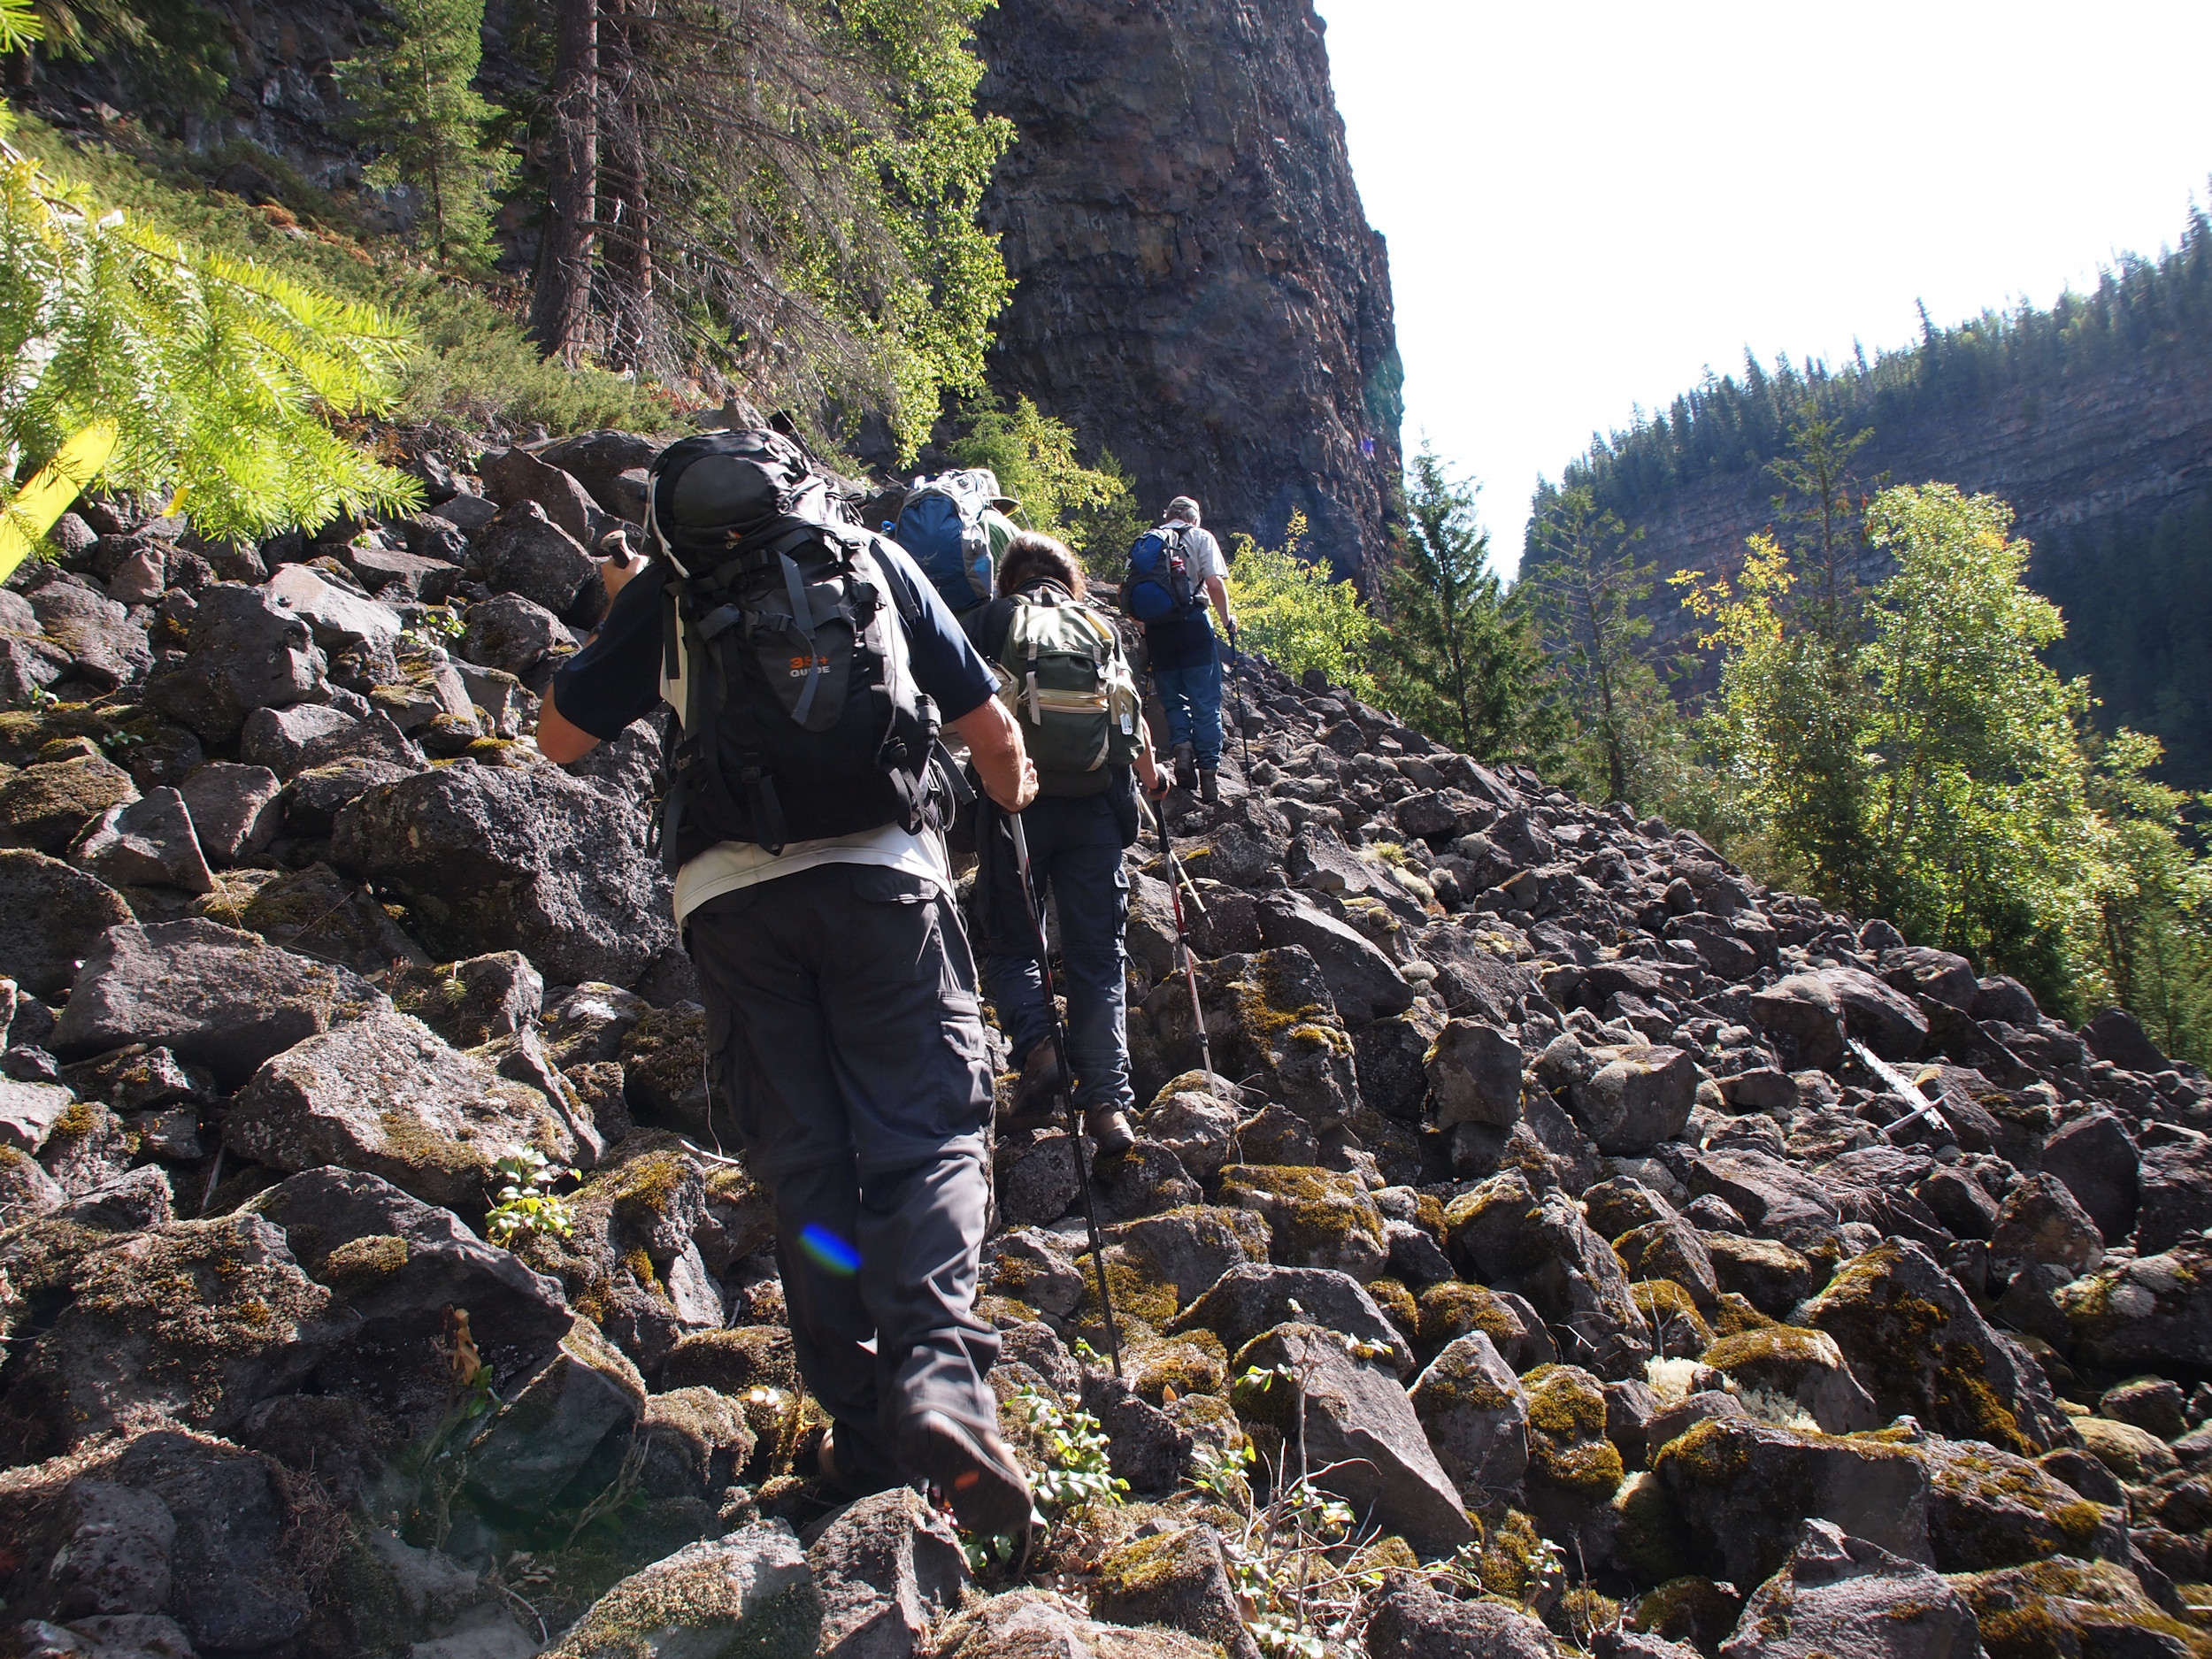
Descending to the ledge

On the narrow ledge
After a while we have an unobstructed view of the Murtle River deep below us.
Murtle River
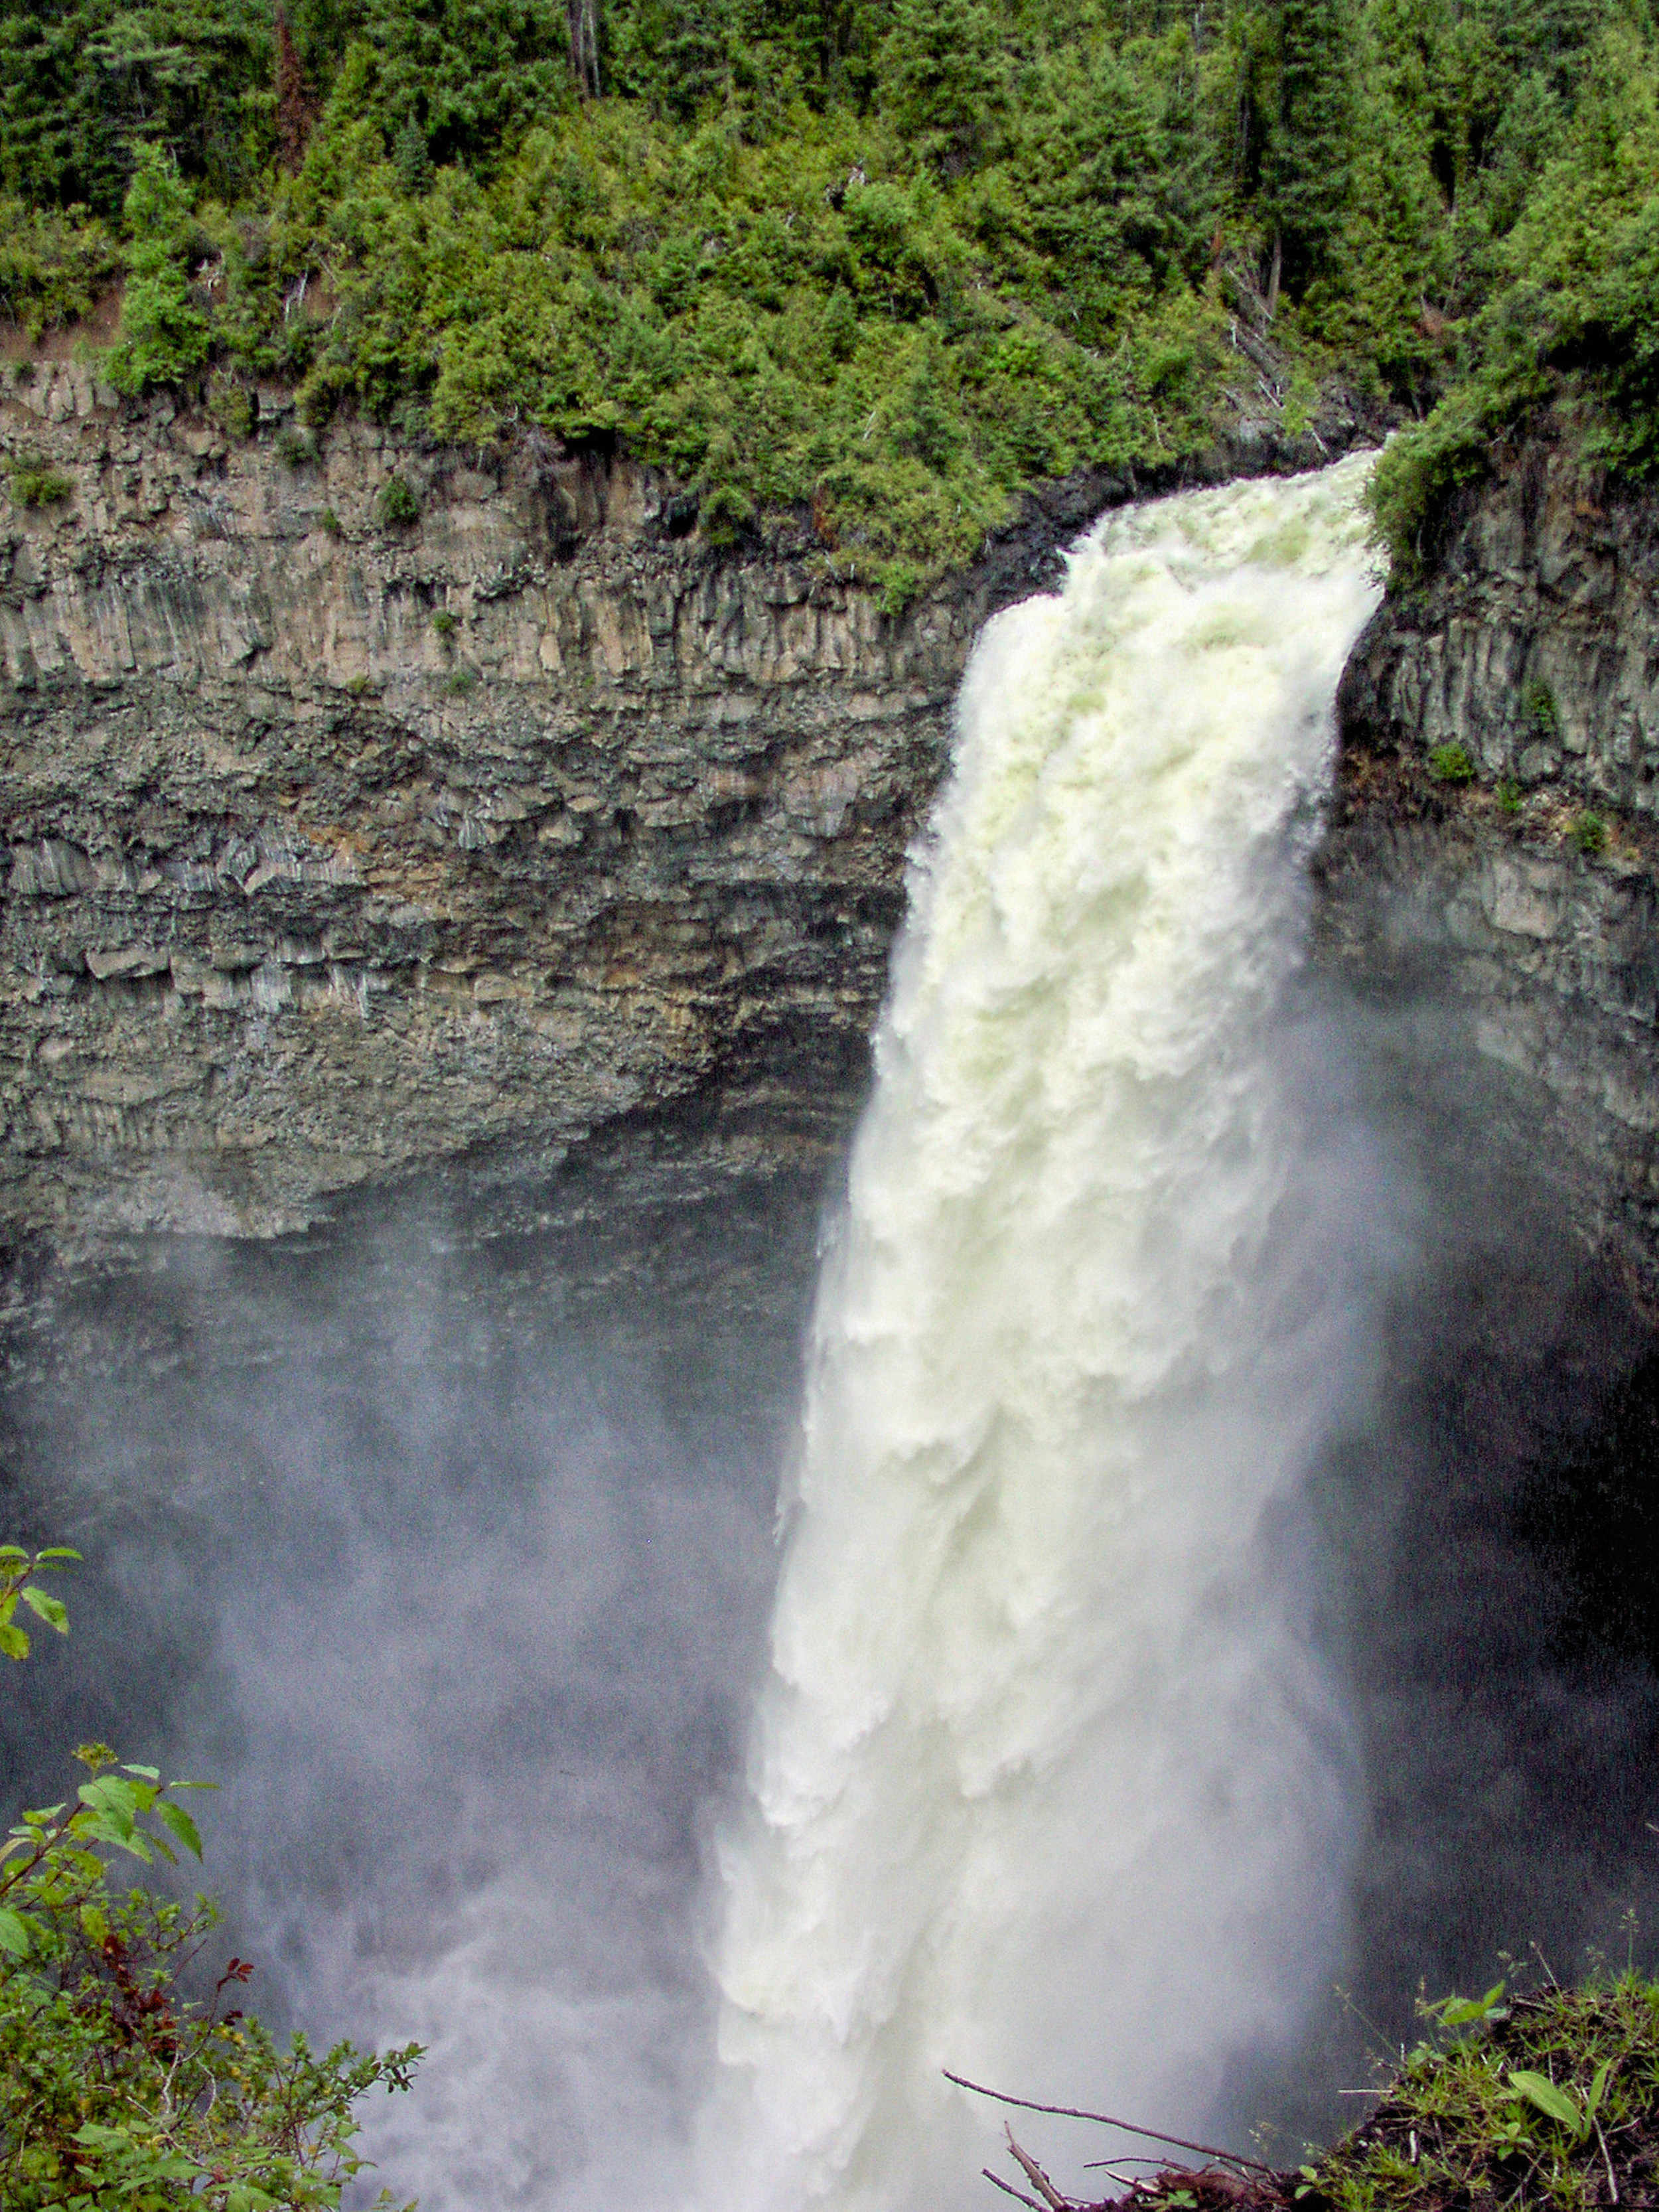
The roar of Helmcken Falls is getting more intense by the minute. We reach a cavern in the cliffs that is located directly and 150 meters below the Helmcken Falls viewing platform. Unfortunately over time a lot of garbage has been thrown off the platform and accumulated here.
From the cavern we have the first good view of the falls and it offers enough room for everyone to sit down for a break.
A first view of Helmcken Falls from inside the canyon
For the next little while, the ledge is easier to walk on. At its end we have to climb over some boulders one person at a time, before we reach the grassy slope right across from the falls. We have come as deep into the falls’ cauldron as we can safely get. From here on it is much too steep and risky to go any further.
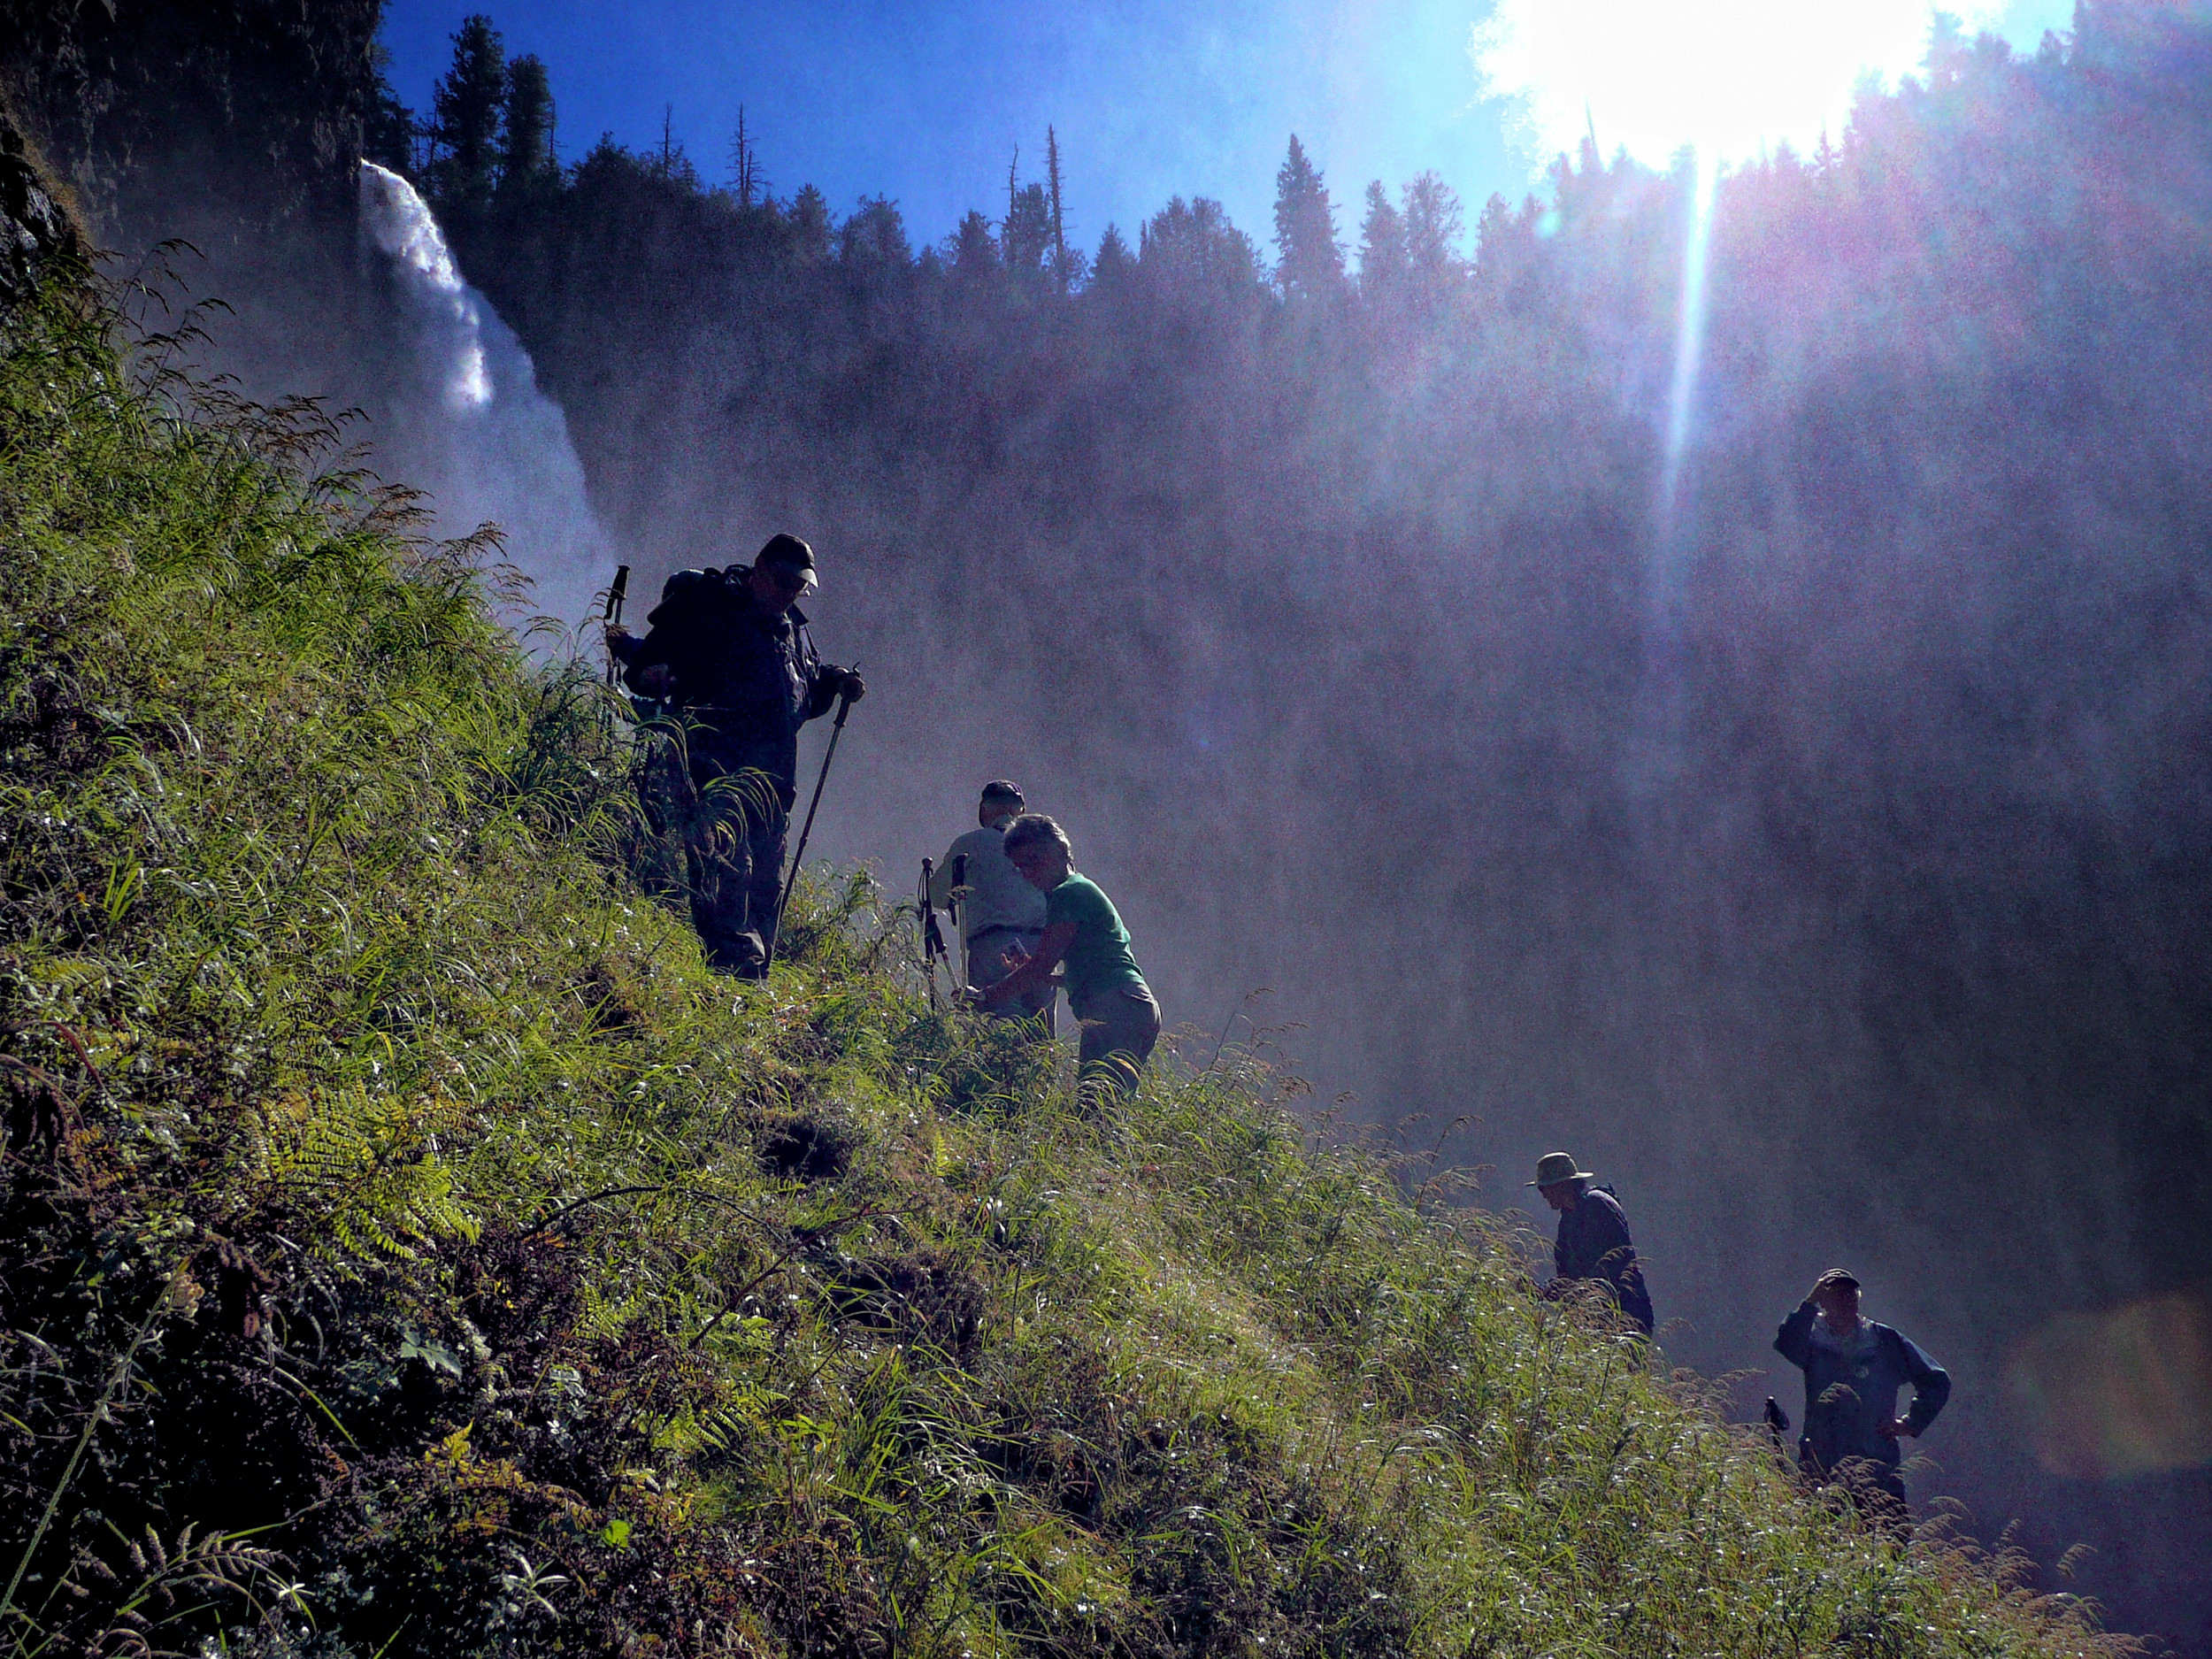
The roar of the waterfalls is indescribable and its spray immense. We have to watch our steps on the slippery ground. Soon we are soaked and have to leave this exposed spot.
The best view of the waterfalls is from a more distant and safer position, anyways.
Soon we begin the strenuous return trip. We have taken four hours for the hike in; all together it will be a seven-hour-trip. It is a very rewarding adventure, but I will not repeat it.
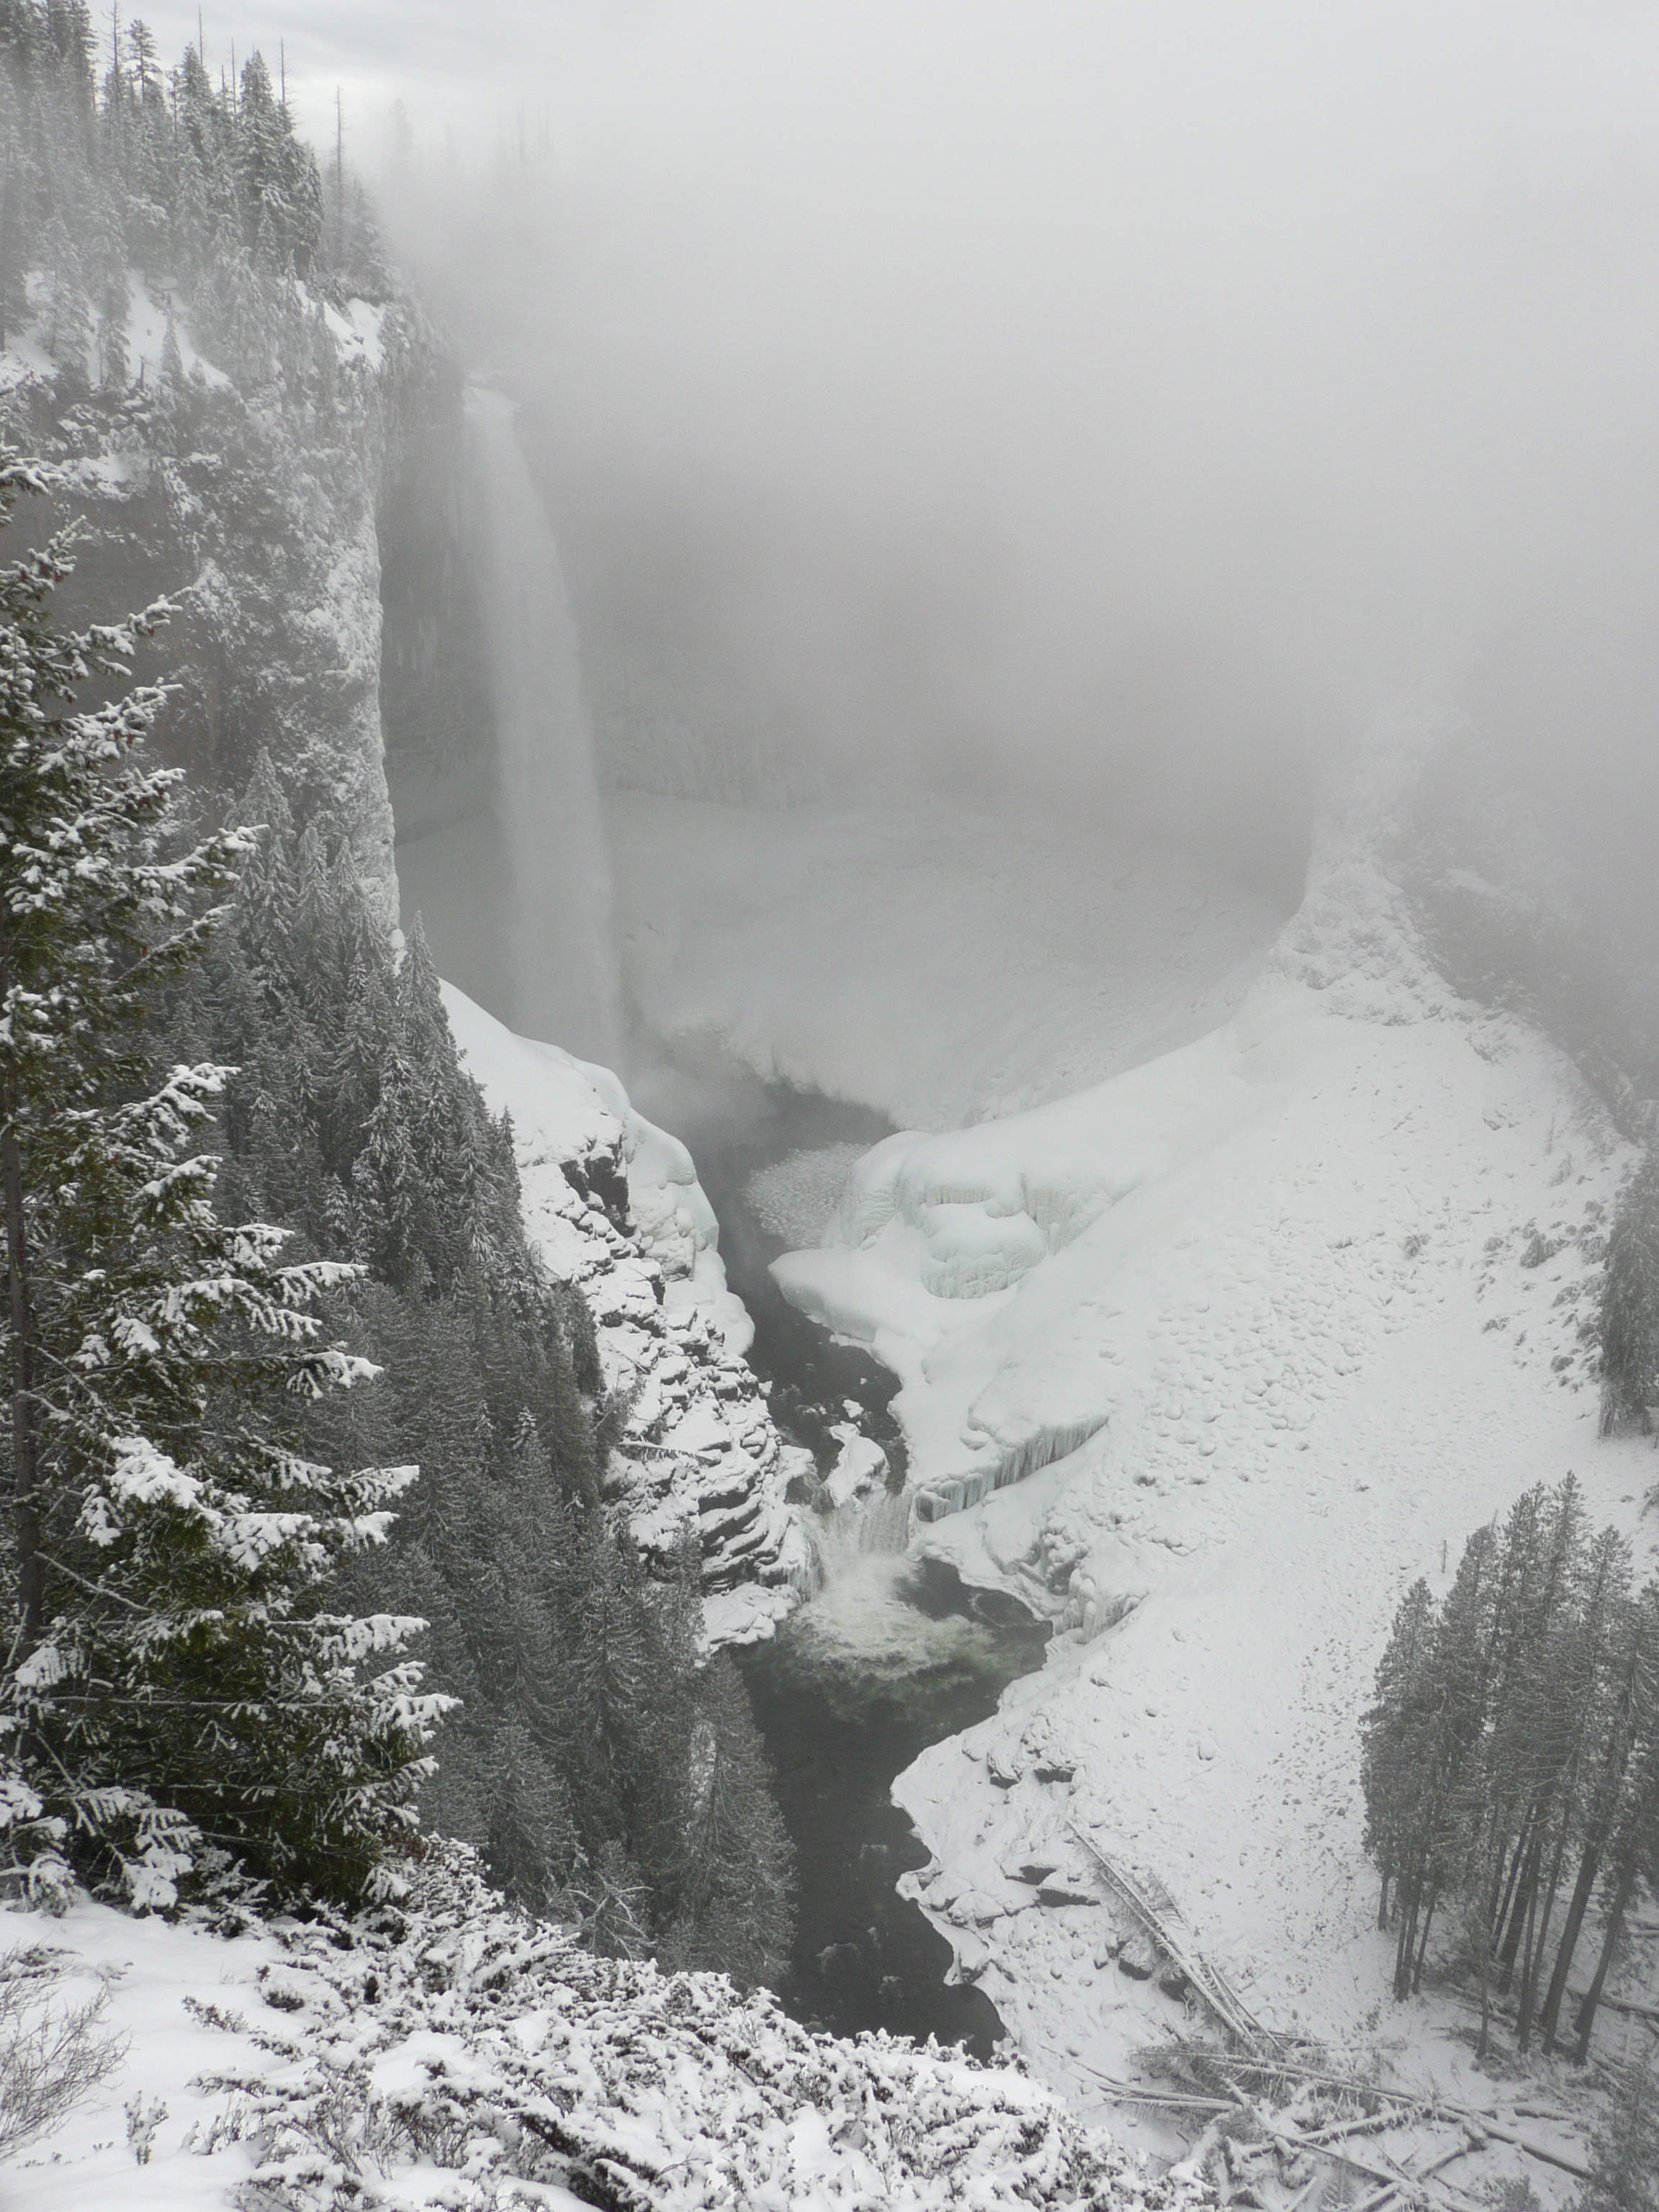
Helmcken Falls, December 2011
Some attractions in Wells Gray Park are well accessible in the wintertime and offer a unique appeal in ice and snow.
Among them are a visit of the Helmcken Falls viewing platform, snowshoeing on the Helmcken Falls South Rim and the Moul Falls trails, skiing along the Murtle River, a visit of the Dawson Falls viewpoint, the Mushbowl Falls from the bridge on the park road and the Spahats Creek Falls viewpoint.
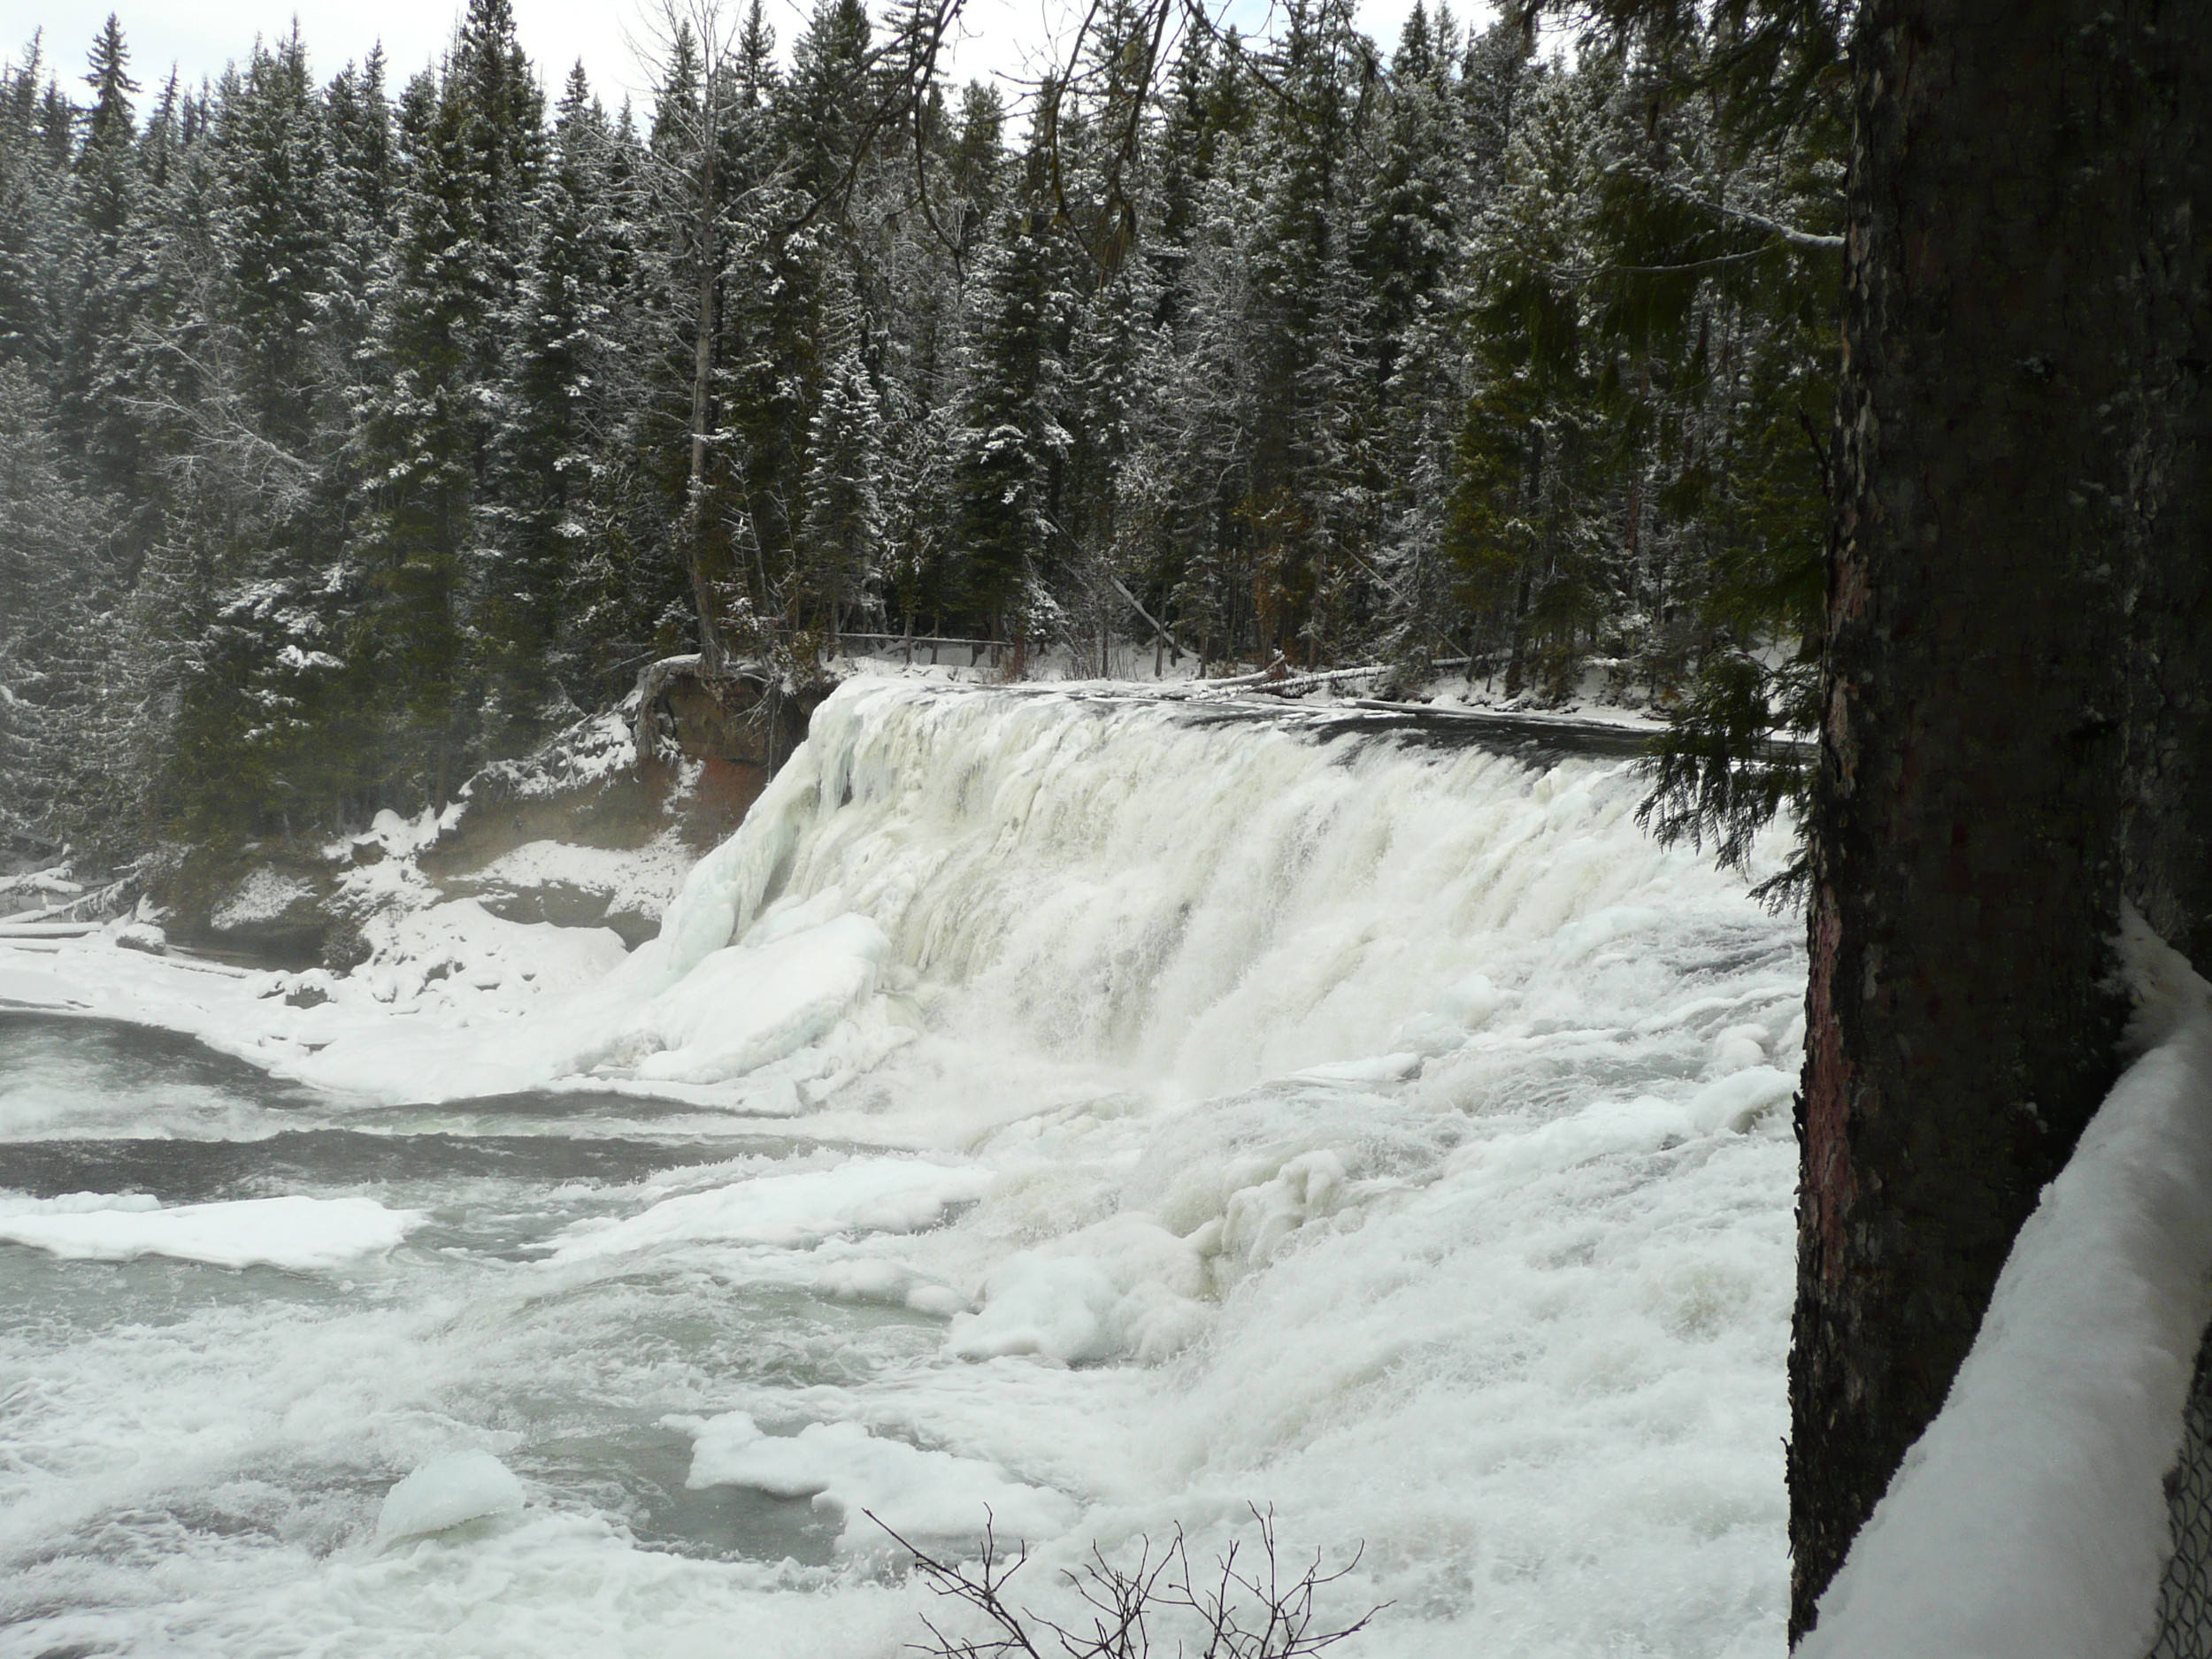
Dawson Falls
In January 2011, we snowshoe on the Moul Falls Trail to the brink of the falls. Soon after, we take off our snowshoes because the path gets steep and icy, and eventually changes into stairs.
Like most years, the falls have frozen into a beautiful sculpture and are a majestic sight.
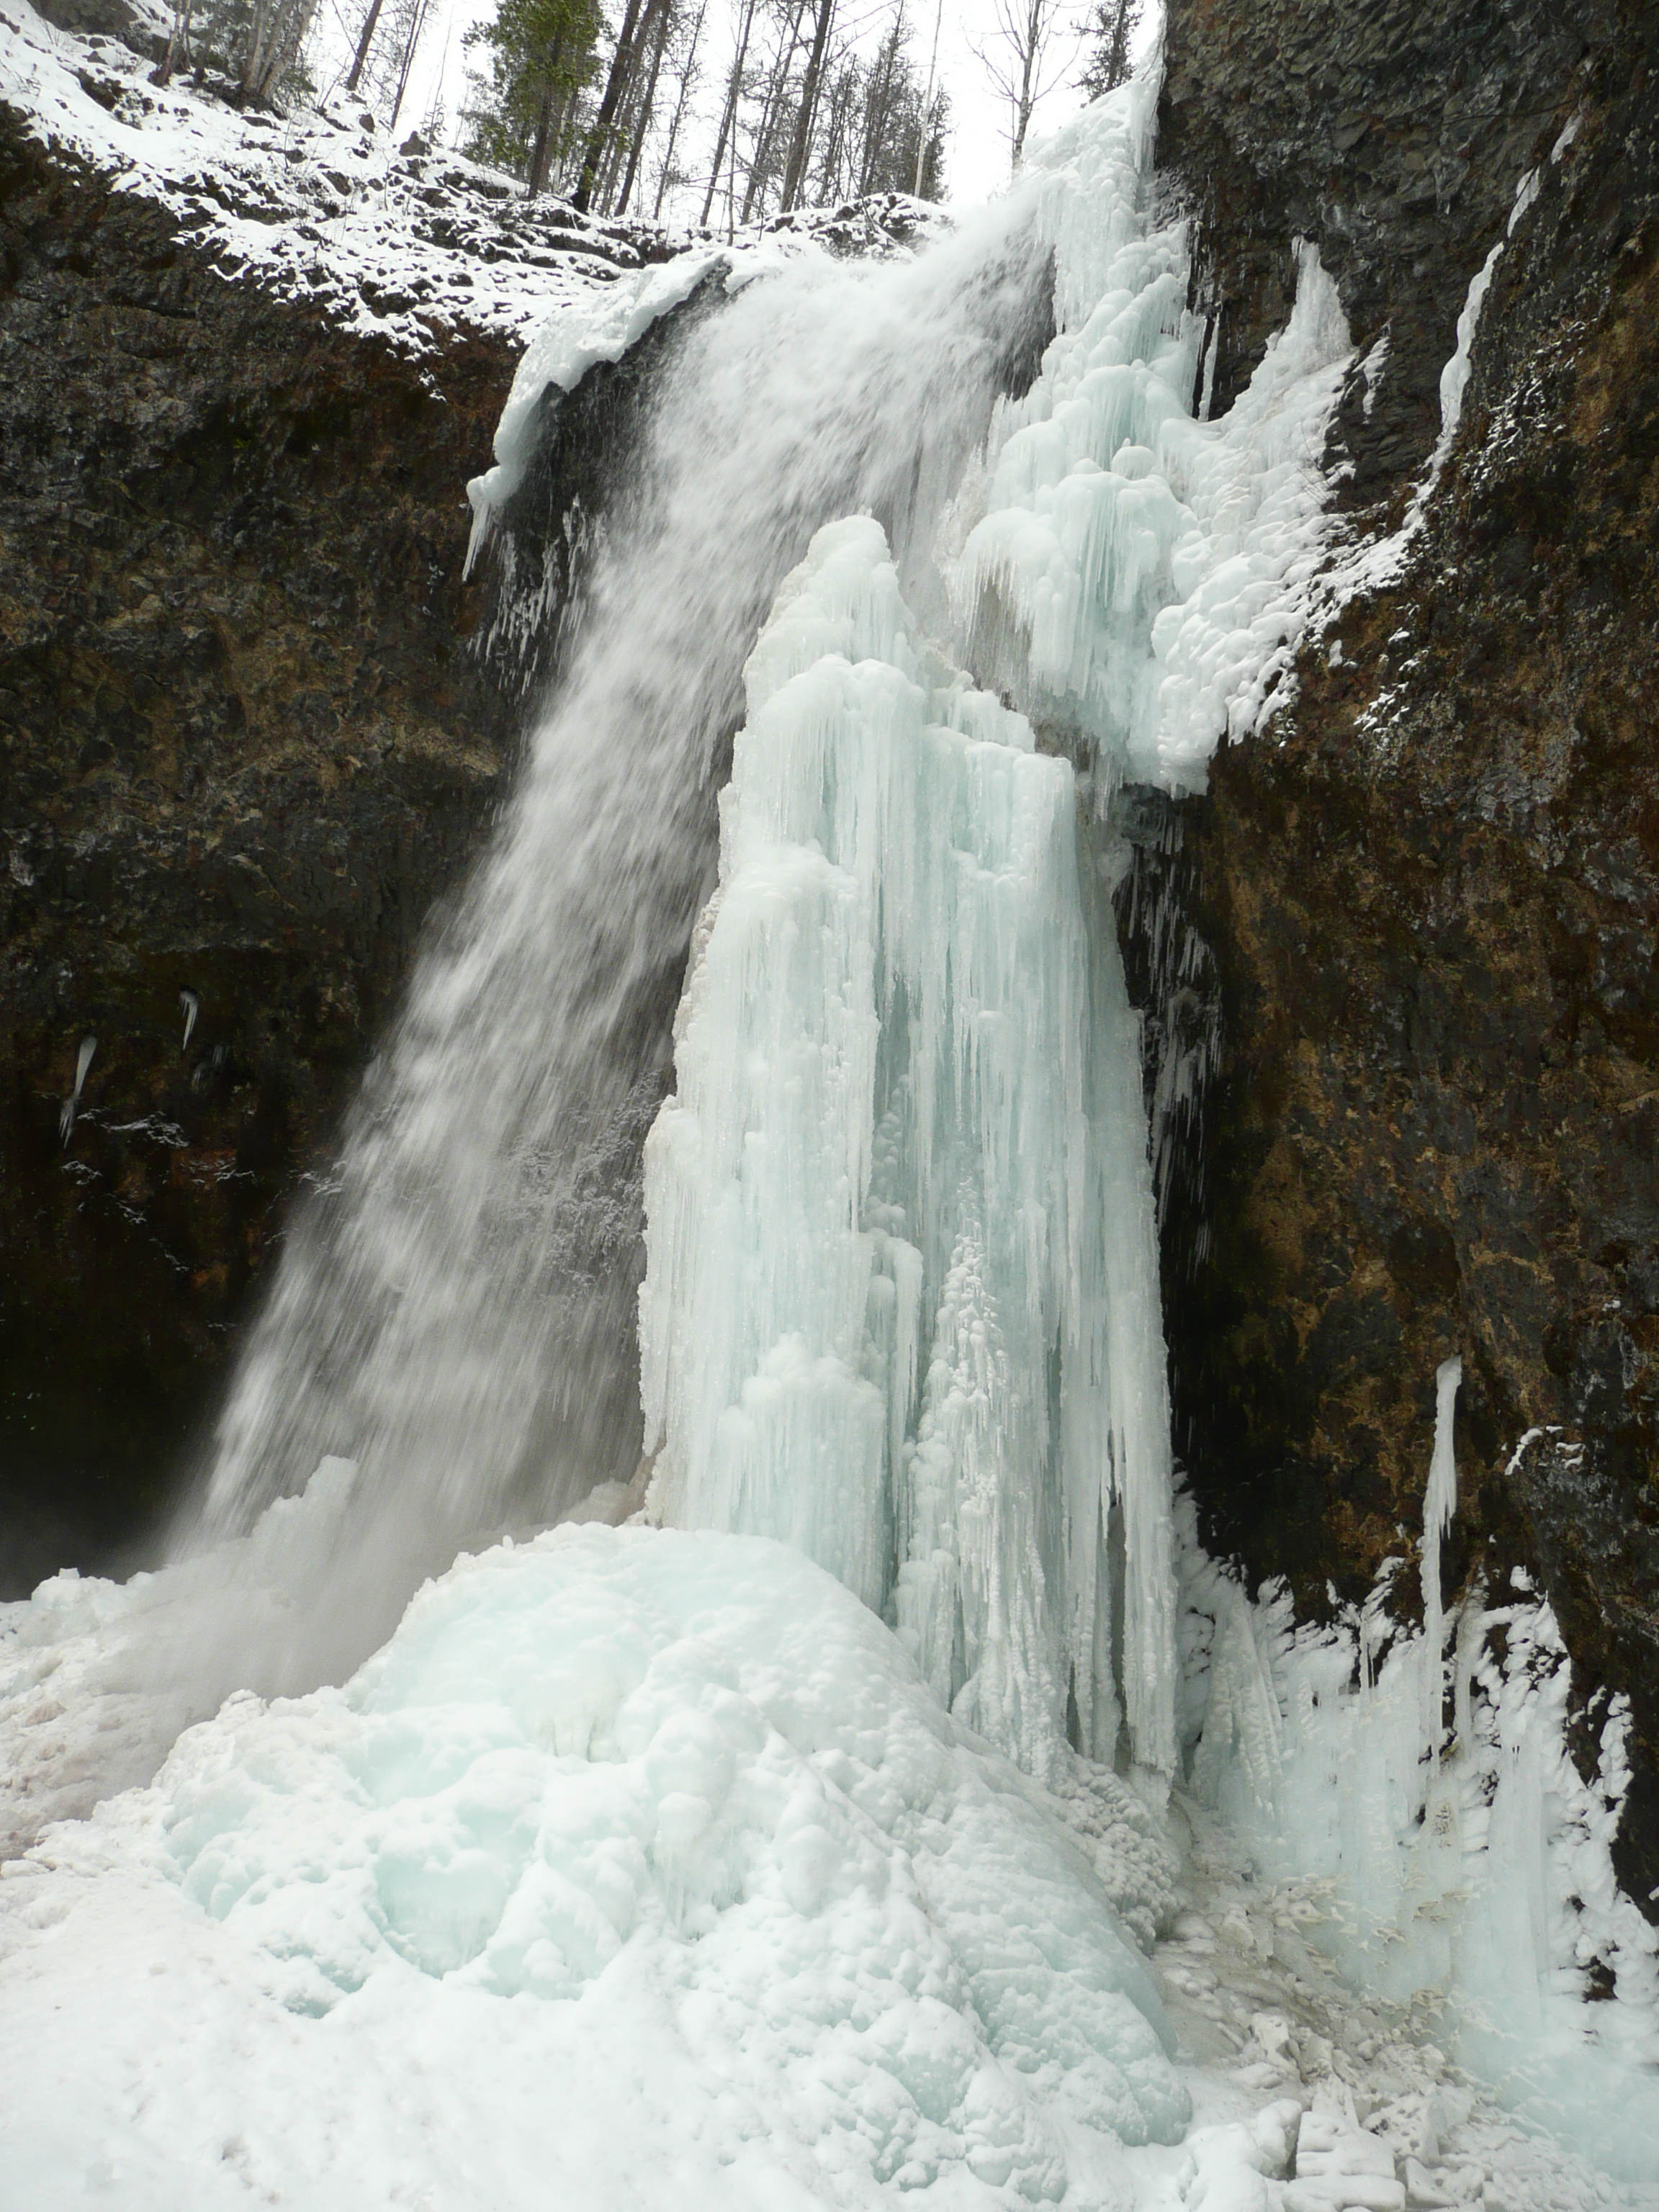
Moul Falls
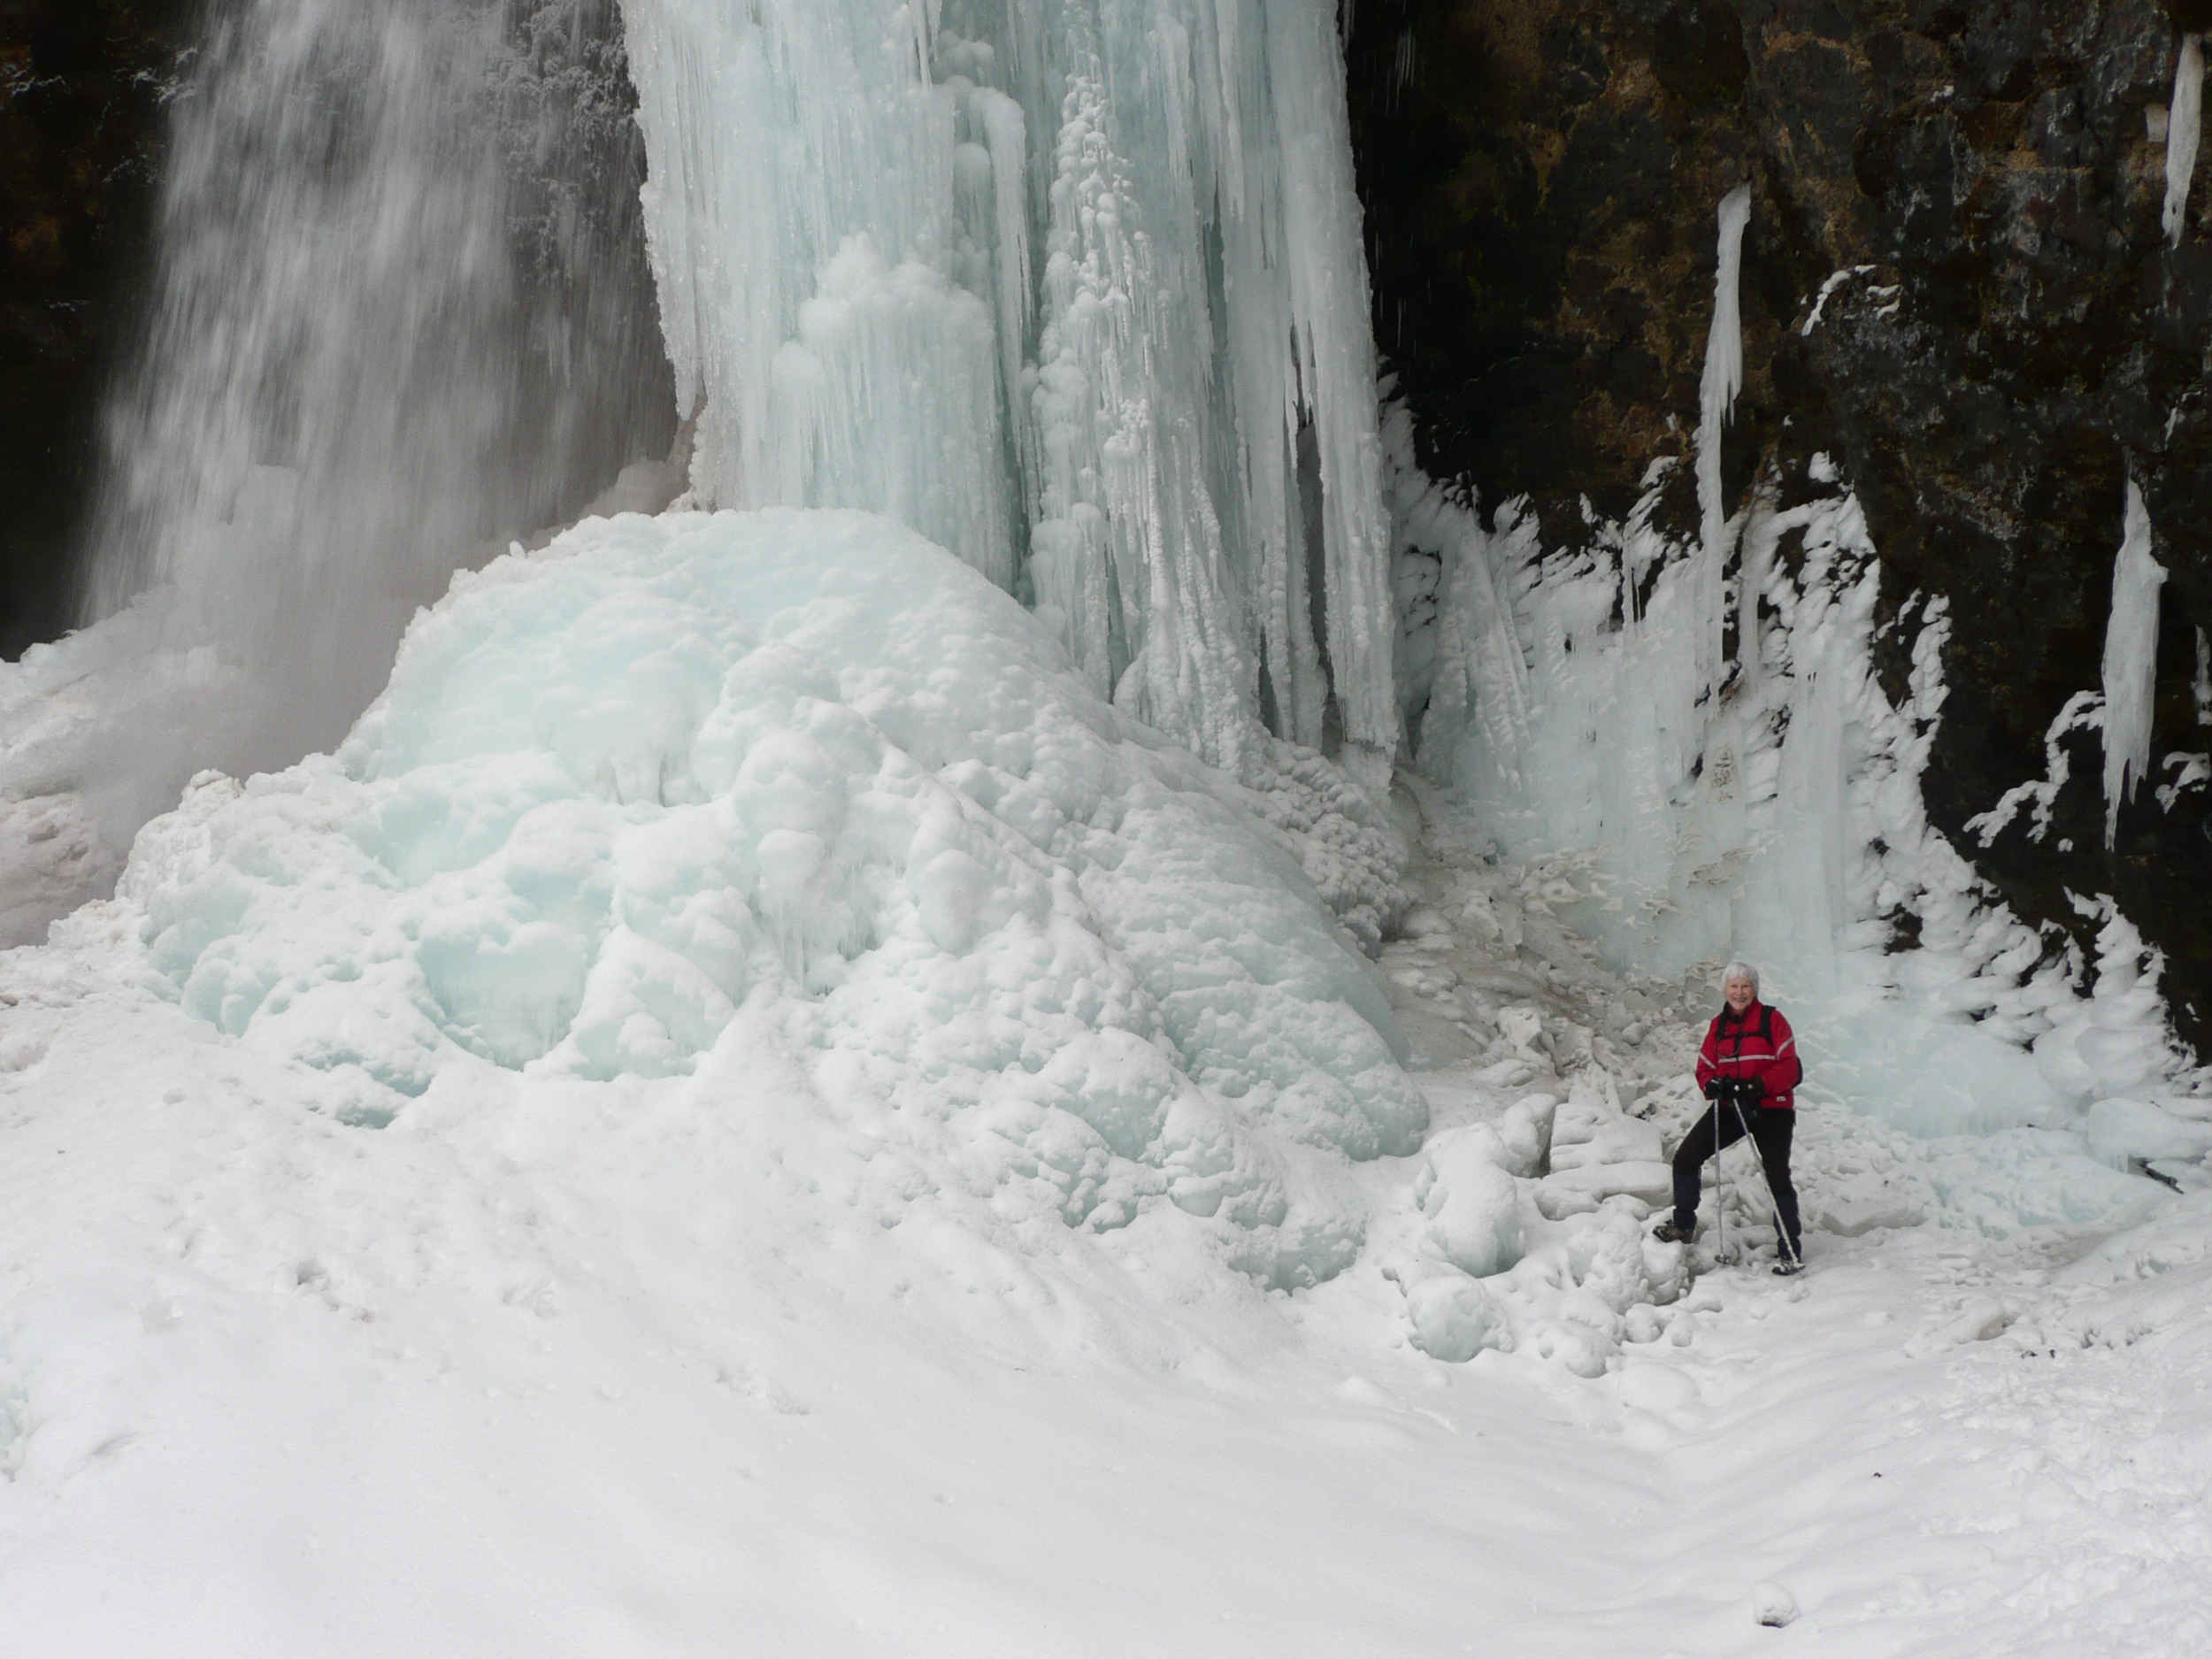
January 2011
Loppet Loop
| King Hut (return) | 14 km 2 hrs |
| Loppet | 25 km 3 hrs plus |
| Stillwater Trailhead | at km 35.5 |
| Murtle River Trailhead | at km 40 |
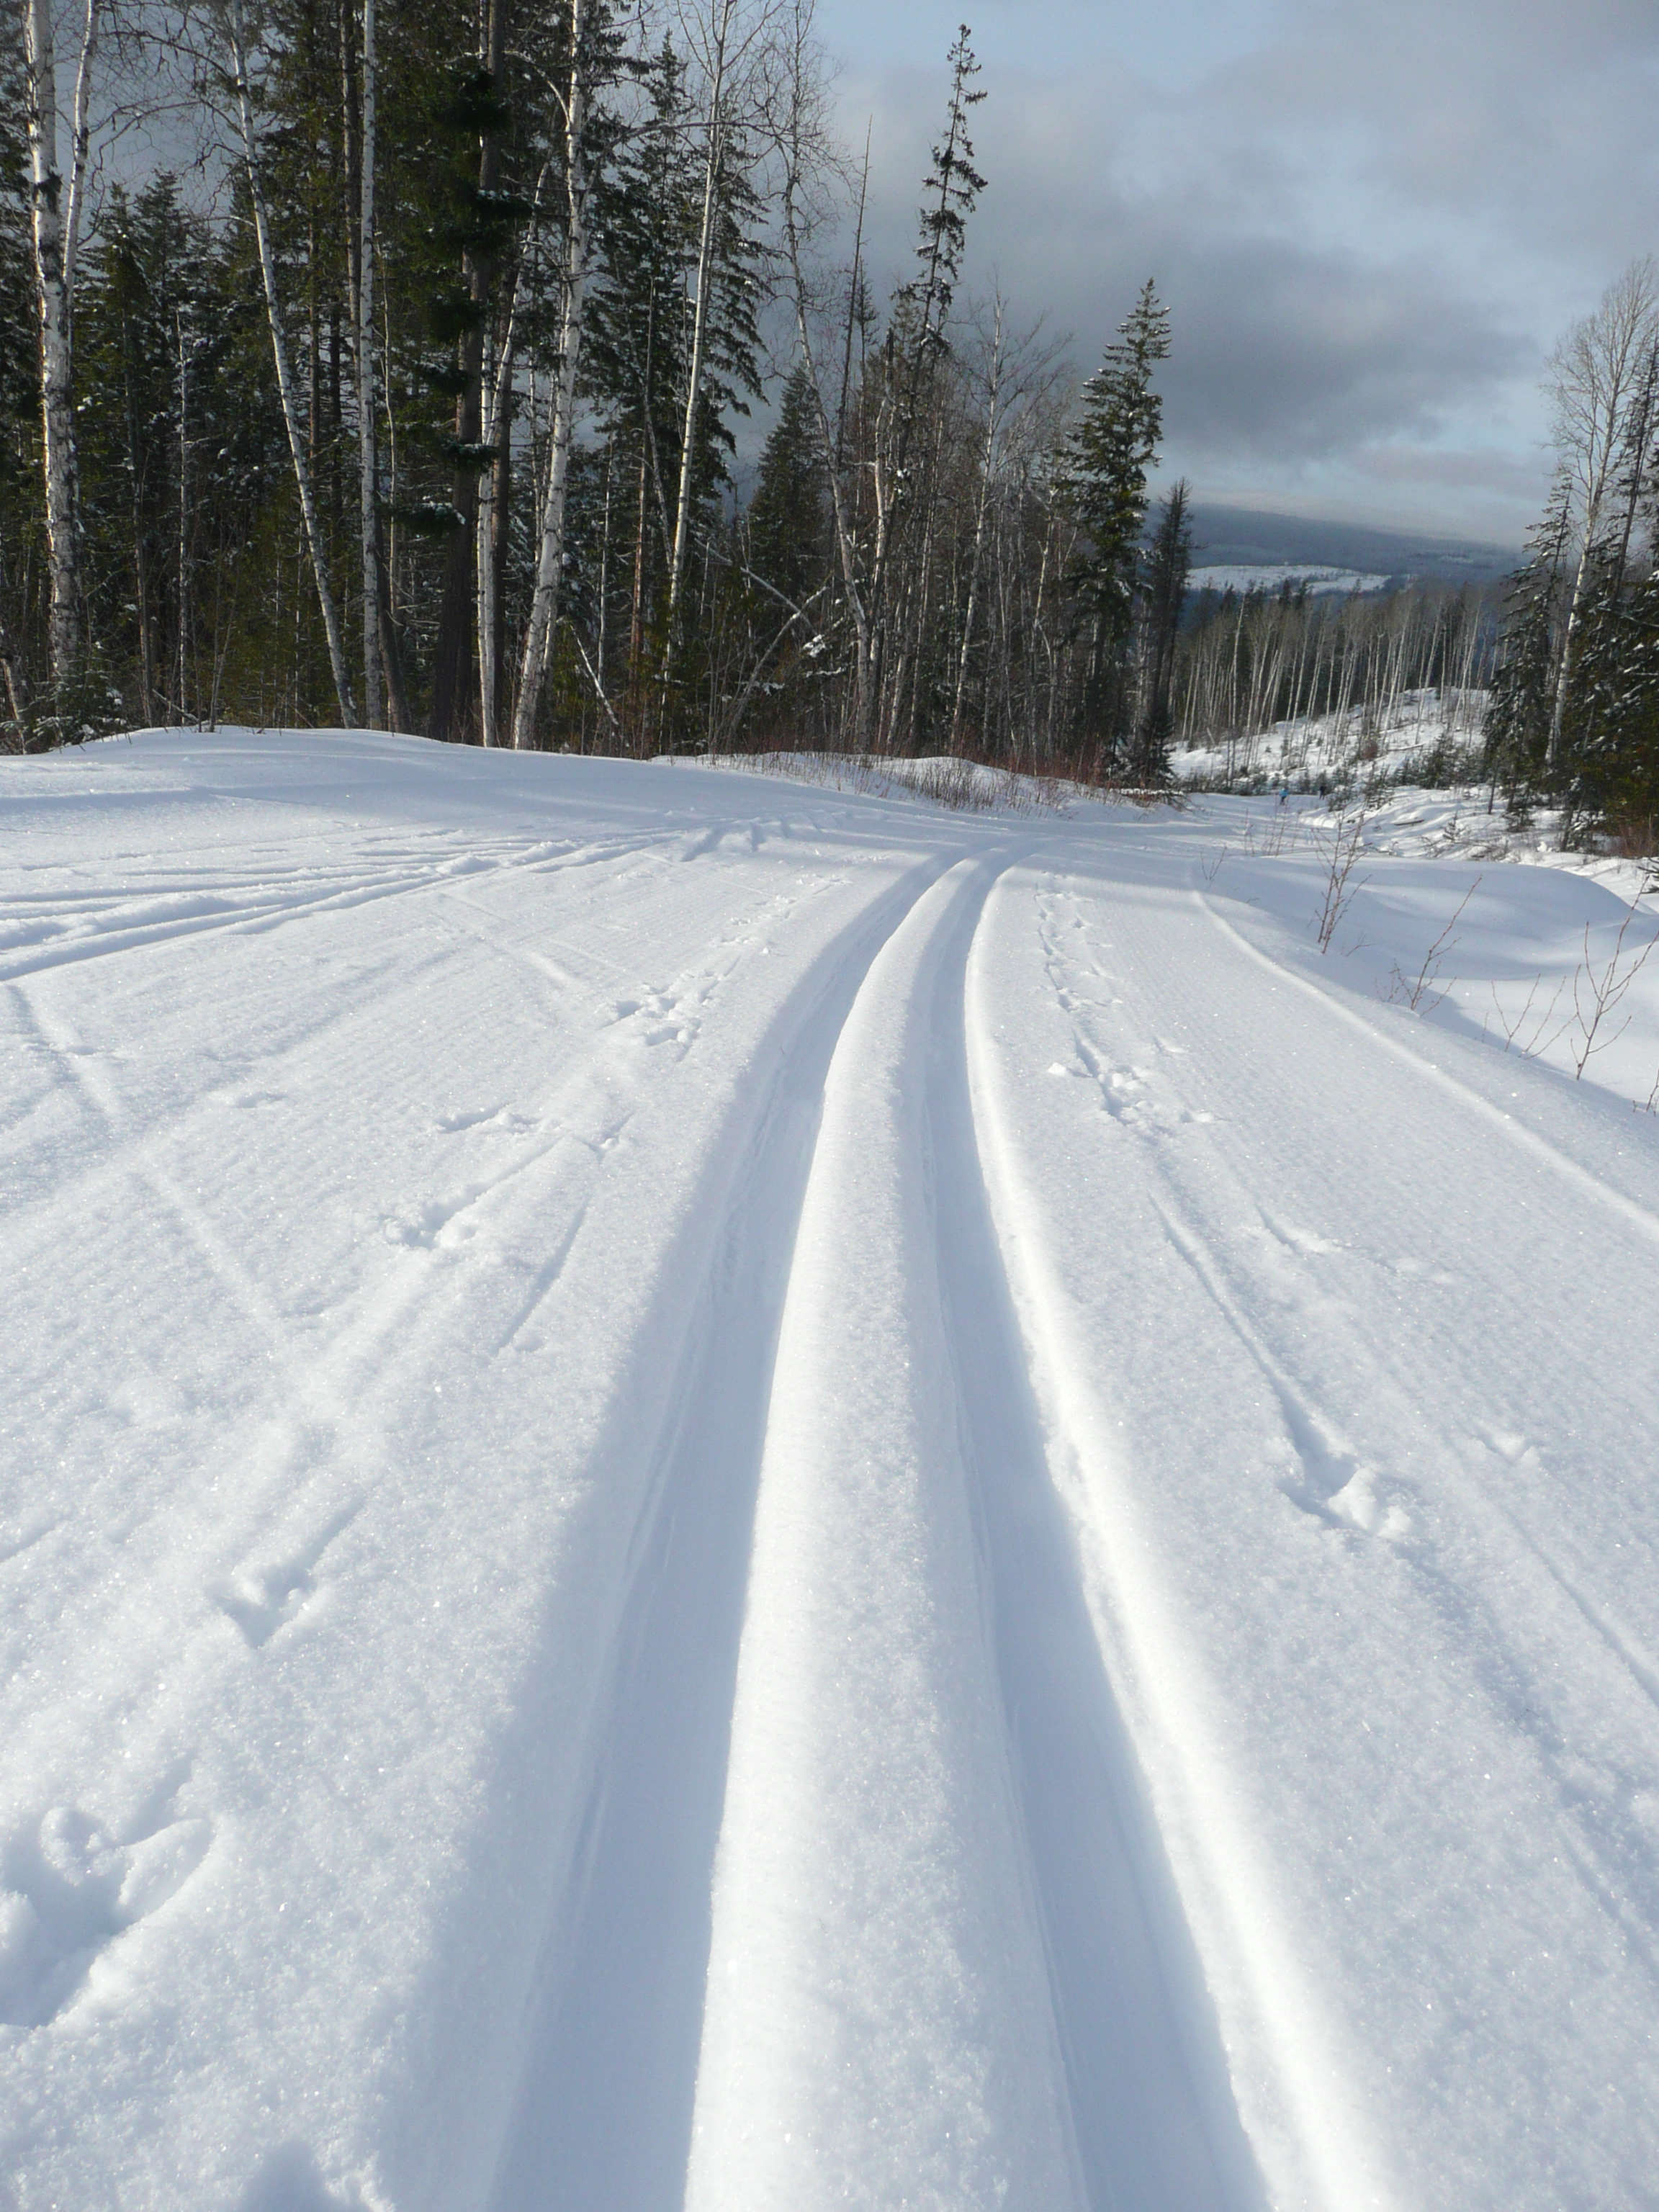
Murtle River Trail
Usually a track is set for cross country skiing along the Murtle River. Until 2012, the Wells Gray Birchleg Loppet used to take place here every winter, until it was relocated to the Candle Creek Trails in Clearwater. Participants of this skiing race dress up as Vikings to remember a 13th century Scandinavian legend.
Skiing along the Murtle River in the deep snow is a unique experience. The return trip to the King Hut is about 14 kilometers long.
Murtle River
Majerus Farm
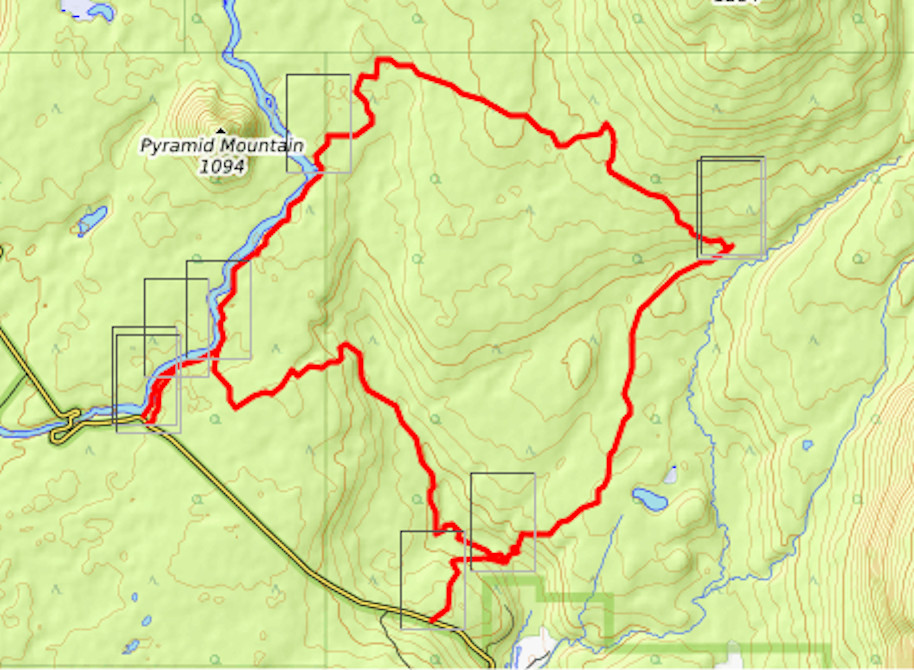
Pyramid Bay and Pyramid Mountain
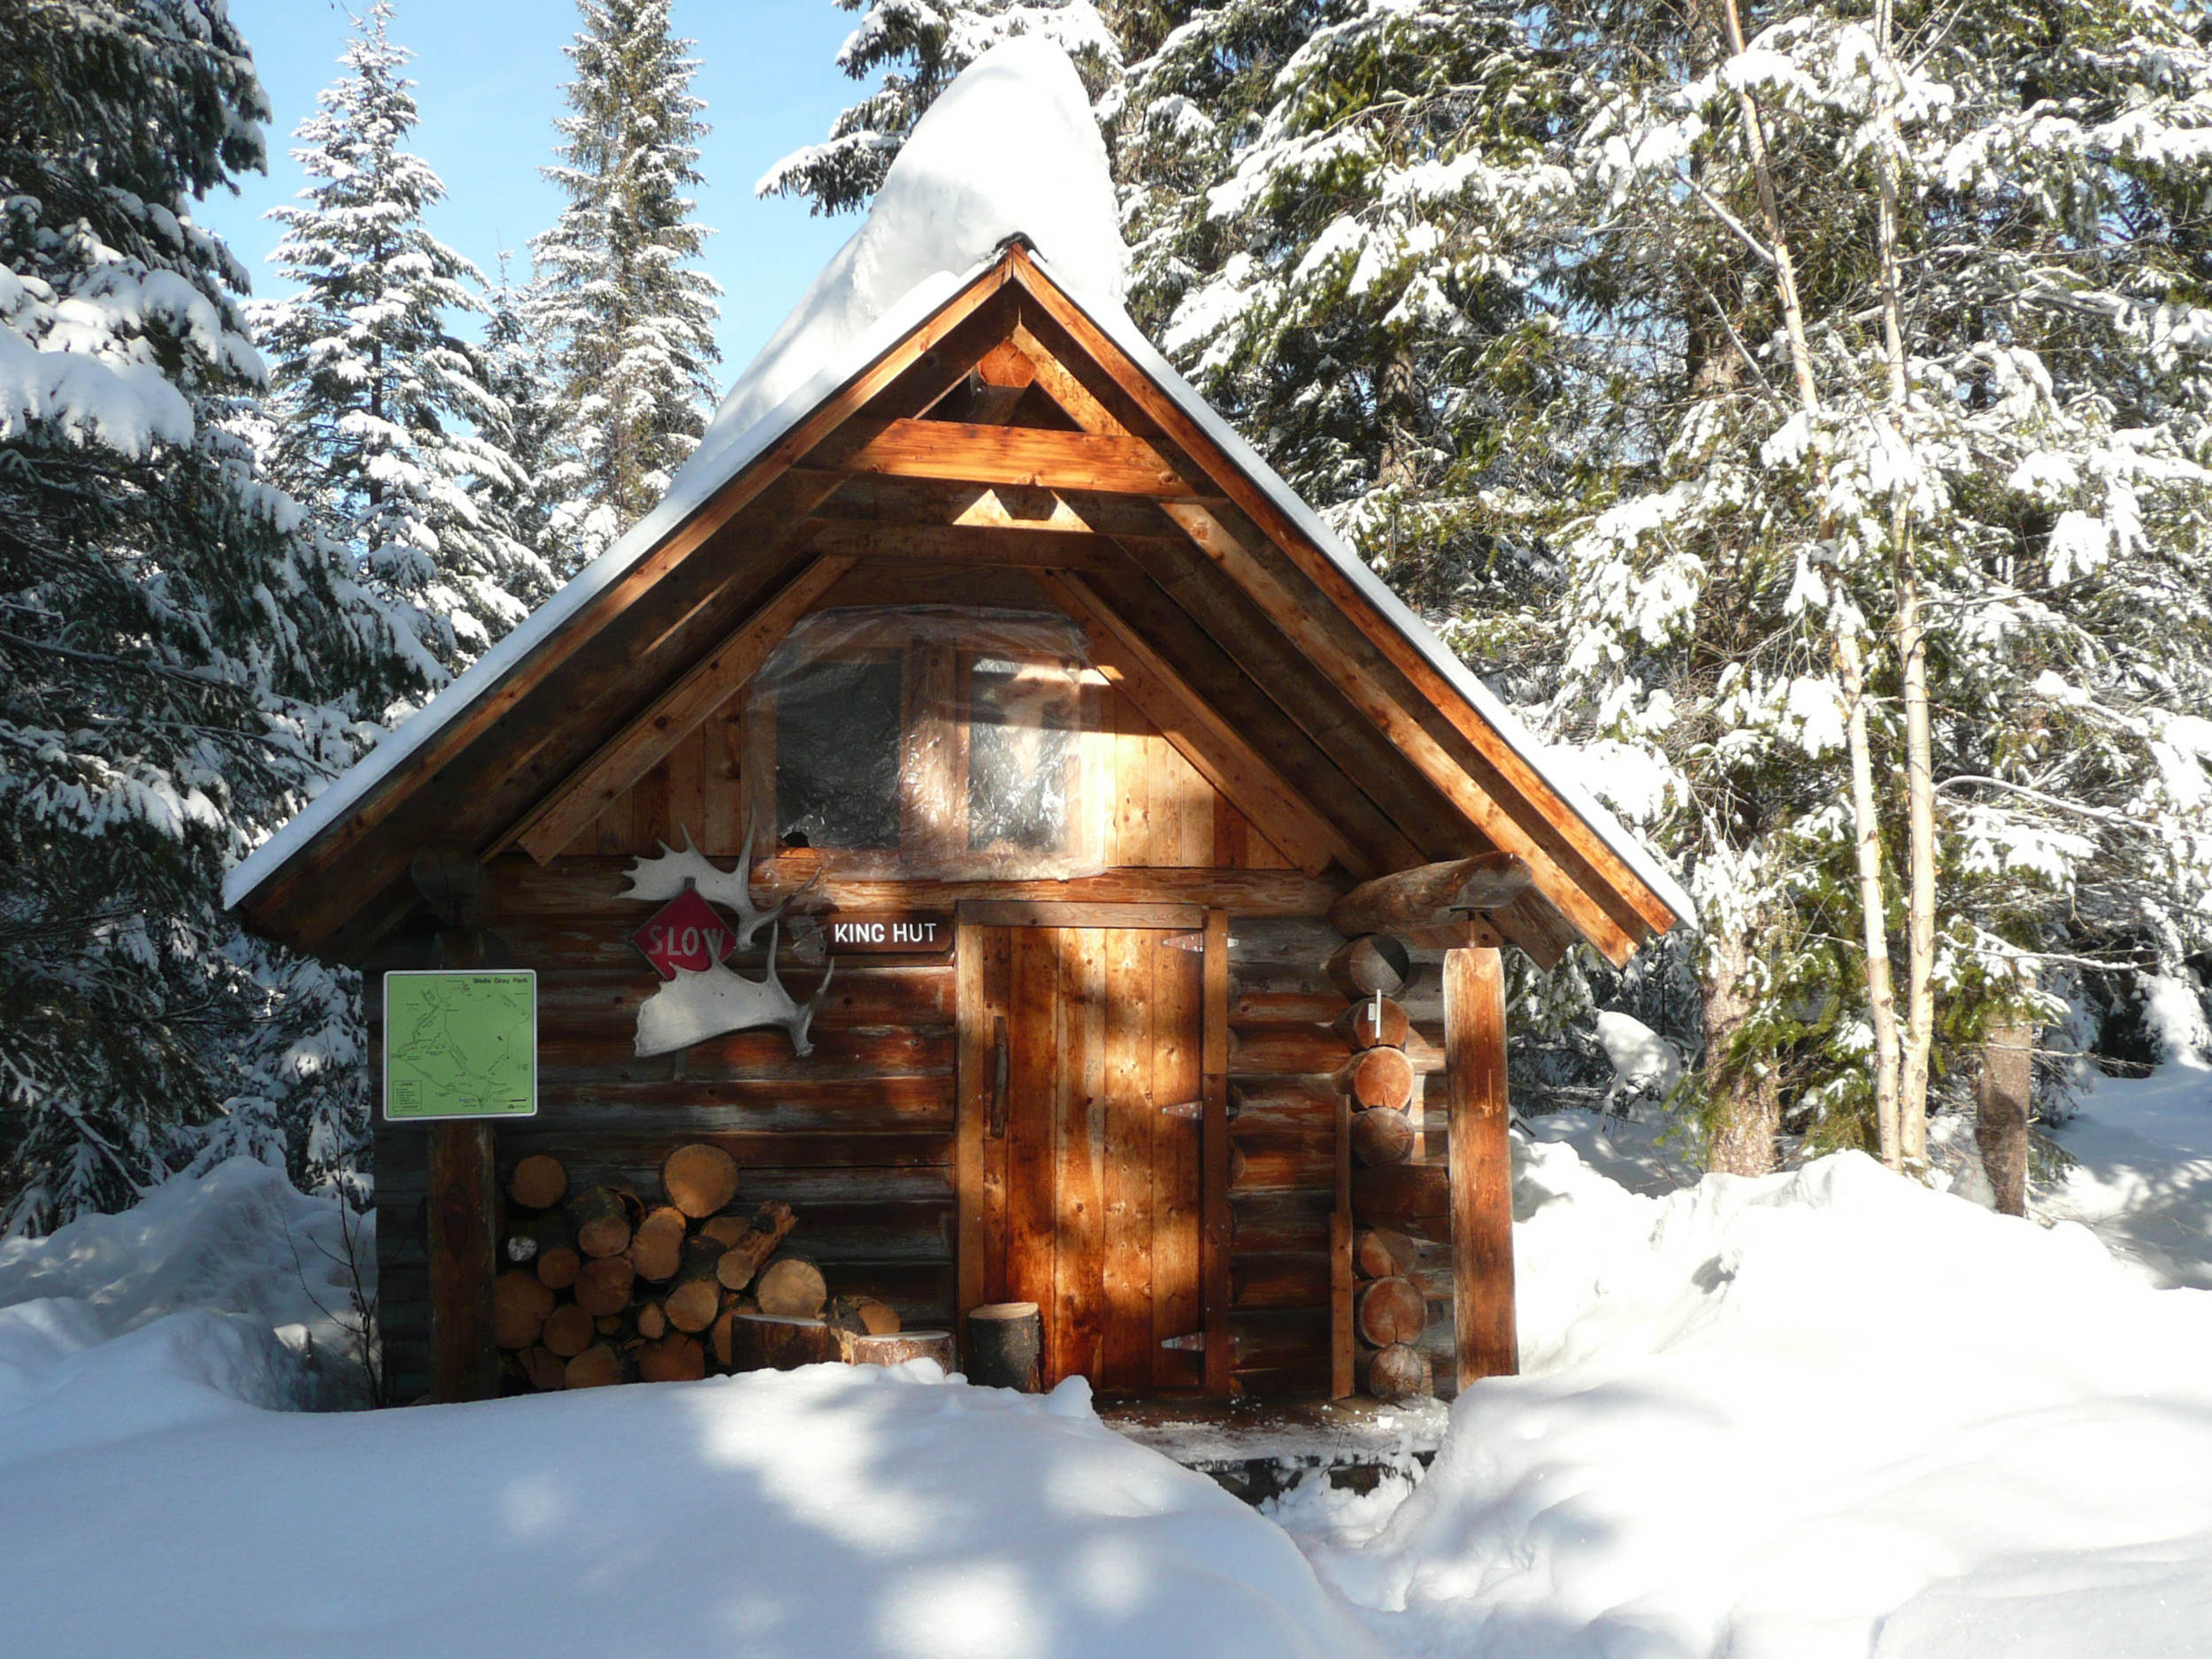
King Hut
Candle Creek Trails
The Candle Creek ski trails lie on the lower slopes of Raft Mountain and can be accessed from the village of Clearwater. Wells Gray Outdoor Club maintains and track-sets about 28 kilometers of cross-country-trails. In the summer they are used for Mountain Biking.